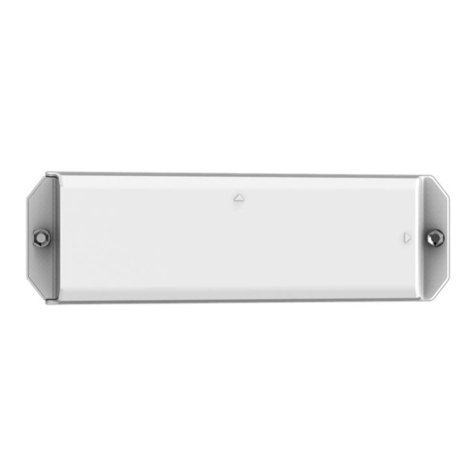
Blackbe;rry Radar H2 User manual

BLACKBERRY RADAR H2
ITC100 – 1
September 2018
Installation Guide

2
BLACKBERRY RADAR H2 ITC100-1 INSTALLATION GUIDE
Table of contents
1 Overview ...............................................................................................3
2 Get ready for installation ........................................................................4
2.1 Prerequisites ..............................................................................................4
2.2 Add available assets to the application.........................................................4
2.3 Download installation worksheet................................................................ 10
3 Installing BlackBerry Radar H2 Gateway modules ..................................11
3.1 Prepare to install ...................................................................................... 11
3.2 Installation tools ....................................................................................... 13
3.3 Matching a module identifier to an asset identifier .....................................14
3.4 Module installation ................................................................................... 16
3.4.1 Prepare module for installation--Battery connection .........................17
3.4.2 Installing module on an asset ...........................................................18
3.4.3 Cargo van installation procedure (doors without windows) .................19
3.4.4 Cargo van installation procedure (doors with windows) ......................25
3.4.5 Dry van/intermodal container installation procedure ......................... 29
3.4.6 Roll up door installation procedure...................................................35
3.4.7 Chassis/flatbed/heavy equipment installation procedure ................... 41
4 Activating BlackBerry Radar H2 modules ..............................................45
4.1 Prepare for activation................................................................................ 45
4.2 Verify presence of assets...........................................................................46
4.3 Verify presence of modules........................................................................48
4.4 Pair an asset with a module ....................................................................... 48
4.5 Locate the asset on the map ...................................................................... 49
4.6 Troubleshoot error conditions....................................................................50
5 Removing BlackBerry Radar-H2 modules ..............................................51
5.1 Removal tools ........................................................................................... 51
5.2 Module removal ........................................................................................ 52
5.3 Battery removal and replacement ..............................................................53
5.4 Door Repair .............................................................................................. 56
6 Support ..............................................................................................59
Legal notice ............................................................................................. 60
BLACKBERRY RADAR H2 ITC100-1 INSTALLATION GUIDE
3
1 Overview
This guide provides detailed instructions for installing and activating new BlackBerry Radar
H2 Gateway modules. It includes three main tasks:
Task 1: Get ready for installation (see Section 2)
•Enter assets into the BlackBerry Radar Dashboard
•Download the installation worksheet
Task 2: Install a BlackBerry Radar H2 Gateway module (see Section 3)
•Match the module identifier with the asset identifier on the installation worksheet
•Install the module onto the asset to be tracked.
Task 3: Activate the installed module (see Section 4)
•Associate the module identifier with the asset identifier in the BlackBerry Radar
Dashboard
•Track the asset on the Dashboard map
Complete BlackBerry Radar documentation is available online when you log in to
BlackBerry Radar Dashboard. For instructions on how to configure the BlackBerry Radar
Dashboard or how to modify your configurations, see the online Admin Guide. For
instructions on how to use the BlackBerry Radar Dashboard to view data, see the online
User’s Guide.

4
BLACKBERRY RADAR H2 ITC100-1 INSTALLATION GUIDE
2 Get ready for installation
To get ready for installation, you need to obtain a worksheet where you can record the
pairing of each Radar H2 module to its asset (that is, the asset that the module will be
installed on).
In this section you will:
•Add all assets you need to track to the Dashboard application user interface (UI)
•Download the installation worksheet
2.1 Prerequisites
To perform the tasks in this section, you must
•Have a computer with internet access
•Have an account to the BlackBerry Radar Dashboard with admin privilege
2.2 Add available assets to the application
You can add all the assets you need to track by uploading a CSV file that contains the
information about the assets.
2.2.1 Create a CSV file
CSV stands for comma-separated values. A CSV file is a text file that contains information
structured in tabular form. If you have an Excel spreadsheet that contains all the assets as
well as the required information about the assets (see list below), you can create a CSV file
simply by saving your Excel file as Comma Separated Values (CSV).
It’s important to note that your CSV file must contain all the information required for each
asset. This means that you must include the following columns in your CSV, and that each
column must contain the required information, as detailed below.
•Asset identifier
•Asset type
•Door type
•Mounting location
•Asset class
•Notes
•Labels
•Length of asset
•Width of asset
•Height of asset
You can give the columns any names in your CSV file, but the column names must be in the
first row and separated by commas (or another delimiter that you decide to use).

BLACKBERRY RADAR H2 ITC100-1 INSTALLATION GUIDE
5
The content of the Asset Type column must match the asset type names used in the
application; for example, if your asset type is Perishable Cargo, enter that exactly in your
CSV file.
The content of the Door Type, Mounting Location, and Asset Class columns must use only
lowercase letters. For any multiple-word type names, you must use underscores between
the words. The table below lists all the type names used in the Dashboard UI and their
expected values in a CSV file.
On Dashboard
In CSV
Asset Class
•Reefer Trailer
•Dry Trailer
•Heated Trailer
•Reefer Container
•Dry Container
•Heated Container
•Dry Bulk Tanker
•Liquid Tanker
•Chassis
•Flatbed
•Light Vehicle
•Heavy Equipment
•
Other
•reefer_trailer
•dry_trailer
•heated_trailer
•reefer_container
•dry_container
•heated_container
•dry_bulk_tanker
•liquid_tanker
•chassis
•flatbed
•light_vehicle
•heavy_equipment
•
other
Door Type
•Barn
•Rollup
•
None
•barn
•rollup
•
none
Mounting Location
•
Door
•
Chassis
•
door
•
chassis
Note: Door Type and Dimensions are not required for the following asset classes:
•Dry bulk tanker
•Liquid tanker
•Chassis
•Flatbed
•Light vehicle
•Heavy equipment
Below is an example of an Excel file saved as CSV, ready for upload:

6
BLACKBERRY RADAR H2 ITC100-1 INSTALLATION GUIDE
The "notes" column is required in the CSV file. You can enter any notes in the field or leave
it blank (see example above).
The "asset labels" column in the example above corresponds to the Labels field of the
Asset view. This field is required in the CSV file. Note that:
•To include one single label, enter the label as you want it to appear (see rows 2 and
4 in the example)
•To include multiple labels, separate the labels with a comma (see row 3 in the
example)
•If you don't need asset labels, leave the field blank (see row 5).
The asset labels added using a CSV file are searchable using the Asset Labels dropdown
list on the navigation bar.
Note: If you are creating a CSV file using a text editor, note that:
•If a label includes multiple words, enter it as you want it to appear. For example, in a
text editor, row 4 from the example above should appear as:
CX0030,default,barn,door,reefer_container,,north and east,20,10,10
•If you have multiple labels to enter, separate the labels with commas and wrap the
comma-separated labels with double quotes. For example, in a text editor, row 3
from the example above should appear as:
CX0020,default,barn,door,reefer_trailer,some notes,"north, east,
red",20,10,10
Note:A CSV file may contain no more than 1000 rows. A larger CSV file will cause the
import to fail.
Note: Importing a CSV file will block the application UI until the import is completed. Do not
close the browser while a CSV file is being processed.

BLACKBERRY RADAR H2 ITC100-1 INSTALLATION GUIDE
7
2.2.2 Log in to the BlackBerry Radar Dashboard
1. Open the BlackBerry Radar Dashboard webpage at
https://dashboard.radar.blackberry.com/.
2. Enter the email address you used to create the account.
3. Enter your password.
4. Click Sign In. A permission request page opens, requesting access to your profile and
other information.
5. On the permission request page, under Do you approve?, click Allow access.
Here is an example of the BlackBerry Radar Dashboard UI.

8
BLACKBERRY RADAR H2 ITC100-1 INSTALLATION GUIDE
2.2.3 Upload the CSV file
1. Click the menu button at the upper left corner to display the Dashboard main
menu.
2. Click Assets to open the Assets view.
3. Click CSV.
4. In the Upload CSV File of Assets view, change the delimiter to match the delimiter
used in your CSV file, if needed.
5. Click Choose File under CSV File.
6. Navigate to the location of the CSV file to upload, select the file, and click Open.
7. In the Configure Columns area, Data Field lists the data fields required for adding
assets, and CSV Field Header allows you to select the headers used in the CSV file
that match the data fields. In each dropdown list under CSV Field Header, select the
header name that matches the data field on the left.
The image below shows the CSV upload screen after the data fields have been matched
to the CSV field headers in the sample CSV file above.

BLACKBERRY RADAR H2 ITC100-1 INSTALLATION GUIDE
9
8. Click Process CSV File.
When processing is complete, a summary of the operation is displayed. The following
image shows the summary of a successful CSV operation.
Click Done to go back to the Assets view

10
BLACKBERRY RADAR H2 ITC100-1 INSTALLATION GUIDE
2.3 Download installation worksheet
The installation worksheet lists all the assets in the application that are not yet associated
with any module. If you have just added your assets to the application following Section 2.2,
those assets will appear on the installation worksheet. You can use this worksheet to match
asset identifiers to module identifiers.
The worksheet is available for your convenience; you can use any worksheet that works best
for you.
1. Open the Assets view.
2. Click Worksheet.
3. Click Print Worksheet to print the worksheet or click CSV Worksheet to download
the worksheet in CSV format.
4. Click Close.
5. Open the downloaded worksheet and print it.
6. Click at the upper right corner of the screen.
7. Click Sign Out to log out of the application.

BLACKBERRY RADAR H2 ITC100-1 INSTALLATION GUIDE
11
3 Installing BlackBerry Radar H2 Gateway modules
You may have a large number of BlackBerry Radar H2 modules to install. Follow the
instructions in this section to:
•Match each module identifier to its asset identifier
•Install the module to the asset you wish to track.
3.1 Prepare to install
To complete the installation of the module to your assets, you will need the following
components. The following components are contained in the module packaging.
Radar H2 Module Package Contents
Radar H2 Module
Drill Template
Lithium Metal Battery
Inner Housing Screws (x 2)
If you are missing any of the above components in your package, contact your BlackBerry
Sales Representative.

12
BLACKBERRY RADAR H2 ITC100-1 INSTALLATION GUIDE
To attach the module to the asset you wish to track, you will need to supply your own
fasteners. Depending on the construction of your mounting location, you may wish to use
the following types of fasteners. Please Note: Your choice of fastener will influence the size
of the tools required to create the mounting holes (i.e. drill bits) and install or remove the
fasteners (i.e. wrenches/sockets/drivers). An example of this provided below. The actual
length of the fasteners will be determined by the thickness of your mounting surface.
IMPORTANT: The maximum fastener thread
diameter supported by this product is ¼” or
M6 (6 mm).
For most secure fastening, we do not
recommend using fasteners with a diameter
less than that of a ¼” or M6 fastener.
•
Box Section
(+3mm wall thickness)
2 self-tapping screws and washers
(3/8” head, 1/4”-14 thread, 1-1/4” length)
Drill Bit
3/16” (5mm)
Nut Driver/Socket/Wrench
I-Beam / Panel Section
(with rear access)
•
2 bolts, nuts, and 4 washers
(7/16” head, 1/4”-20 thread, 1/4”-20 nut)
(11mm head, M6 thread, 25mm length, M6 nut)
Drill Bit
1/4” (6mm)
Nut Driver/Socket/Wrench
Panel doors
(plywood/MDF/foam cores)
2 bolts, nuts, and 4 washers
(7/16” head, 1/4"-20 thread, 2 1/2”-4” length, 1/4"-20
nut)
(11mm head, M6 thread, 57-100mm length, M6 nut)
Drill Bit
1/4” (6mm)
Nut Driver/Socket/Wrench
Cargo Van Doors
(with no rear access)
2 bolts, washers, and well nuts
Bolt: 7/16” head, 1/4”-20 thread, 1-1/2” length
Insert: 1/4”-20 thread
Drill Bit
1/2” (13mm)
Nut Driver/Socket/Wrench

BLACKBERRY RADAR H2 ITC100-1 INSTALLATION GUIDE
13
3.2 Installation tools
Required tools to complete the installation:
Phillips (PH2) Screwdriver or Bit
Drill and Drill Bits
Tape
Pencil or
Non-Permanent Marker
Nut Driver or
Socket Wrench with Socket*
*Nut Driver + Drill offers fastest installation.
If no Nut Driver is available, a socket wrench
and socket may be used as a substitute.
Safety Glasses
Large Screwdriver
(Flathead)
Wrench
*Required only if nuts and bolts
are used.
Recommended tools to complete the installation:
T-Square
Pocket Level
Towel
Hammer and
Punch
Ladder
*For more convenient installation
on taller vehicles and containers.
Small Step Ladder
*For more convenient installation
inside of containers or the exterior of
smaller vehicles.
Tape Measure
File
Cutting Lubricant*
(Recommended)
*Recommended for faster drilling speed
on thicker metals and longer drill bit life.

14
BLACKBERRY RADAR H2 ITC100-1 INSTALLATION GUIDE
3.3 Matching a module identifier to an asset identifier
In order to track an asset, the Radar H2 module that is installed on the asset must be
associated with the asset in the BlackBerry Radar Dashboard. It is, therefore, very
important to keep a clear record of which Radar H2 module is installed on which asset.
The Dashboard application tracks modules and assets using ‘identifiers’. The asset
identifier is the name or number of the asset you wish to track. The asset identifiers are
entered into the application when you add the assets, and will be listed on your installation
worksheet. The identifier for each Radar H2 module is printed on two labels—one attached
to the rear housing and the other in the battery compartment. The module identifier also
serves as the serial number (S/N) for the module.
To match a module identifier with an asset identifier:
1. Locate the module identifier for your device. The module identifier is shown in two
places.
1. Externally—temporary S/N label, attached to the front of the outer housing,
2. Internally—permanent main product label, in the battery compartment.

BLACKBERRY RADAR H2 ITC100-1 INSTALLATION GUIDE
15
2. Once you are ready to install the module to the asset, remove the partially attached
label from the front surface of the outer housing and place it on your worksheet, next
to the asset identifier the module will be paired with.
Tip: If you plan to frequently switch your Radar H2 module between assets, you may
wish to record the S/N on the rear housing using a permanent marker, or by creating
your own label. This will eliminate the need to remove the battery cover to find the
S/N when switching the module between assets.

16
BLACKBERRY RADAR H2 ITC100-1 INSTALLATION GUIDE
3.4 Module installation
You may install the module on any flat, vertical or horizontal surface that offers enough
mounting area for the module. When selecting a mounting location, carefully consider how
the asset will be used during its normal, day-to-day operation.
Do not place the module in a location where it is susceptible to damage from:
•Normal usage activities, such as loading or unloading cargo.
•Moving parts of the asset.
•Road debris.
This diagram illustrates the supported installation orientations for the BlackBerry Radar H2
module.
IMPORTANT:For accurate tracking, orientation matters.
1. You may install the device horizontally or vertically.
NOTE: Door open/close detection is only supported when device is
installed horizontally on the asset door.
2. When mounting on a vertical surface, always ensure the device is
installed with the triangle for your desired orientation, pointing up.
3. Full 360° rotation around vertical axis are supported. This allows you
to mount the device on the rear, front, and side surfaces of the asset.
4. You may also rotate the device 90 degrees along the horizontal axis,
and mount on an upward facing surface of the asset, with a clear view
to the sky. This is helpful for installing on roofs, fender surfaces, etc.
5. Do not install the device on the asset with the front of the device
facing the ground. This will result in reduced product performance.

BLACKBERRY RADAR H2 ITC100-1 INSTALLATION GUIDE
17
3.4.1 Prepare module for installation—Battery connection
1. Remove the module from the package and from the plastic bag.Detach the fastener
bag from the end of the module and keep nearby. You will require these screws to
complete the module assembly process.
2. Turning the module bottom side up, grasp the end of the module’s inner housing. Pull
to separate the inner housing from the outer housing.
3. Remove the battery connector from the connector recess and connect the battery
cable to the battery connector. The LED will blink to indicate the module is active.
NOTE: It can take between 10-15 seconds for the blink sequence to begin. Please be
patient. Once you see the LED blink, you may continue to the next step.
LED

18
BLACKBERRY RADAR H2 ITC100-1 INSTALLATION GUIDE
4. Insert the inner housing into the outer housing. Locate the fastener bag from Step 1.
Remove the two screws from the bag and use them to secure the housing.
The module is prepared for installation on the asset.
3.4.2 Installing the module on an asset
1. As indicated in Section 3.3 of this guide, record the module identifier and the asset
identifier the module will be paired with. For your convenience, you may quickly
create a record of the module and asset identifier pairings by removing the partially
attached label from the rear housing of the module and placing it on the installation
worksheet, next to the asset that will be tracked by the module.
Tip: For modules that have previously been transferred to new assets, the temporary
S/N label may no longer be in place. If this is the case, you will need to write the
module identifier (S/N) for each module on the installation worksheet.
The following sections of this guide will illustrate recommended installation
methods for various asset scenarios.

BLACKBERRY RADAR H2 ITC100-1 INSTALLATION GUIDE
19
3.4.3 Cargo van installation procedure (doors without windows)
If you wish to monitor door open/close events with your BlackBerry Radar-L module,
you will need to mount it on the door. Recommended module placement on cargo
van doors is determined by the door construction, and will differ among vans with
windows and vans without windows and single doors or double doors.
As you consider the best placement on your asset, consider the following:
•For vans with double doors, the module should be placed on the door with the latch
and as close to the inside edge of this door as the door construction allows.
Mounting the module on the door with the latch will ensure all door open/close
events are registered--even in instances where only one door is opened.
•The module should be placed as high on the door as possible for optimum antenna
performance. As some vans with windows may not have adequate space above the
windows for module placement, the door placement of the module will be lower.
•Often, when the module must be placed below the window, you will encounter a
“blind” mounting situation where the thickness of the door prevents you from
installing nuts on the rear of the bolts. Also, the sheet metal is too thin to support
secure mounting with self-tapping screws. To allow for secure device mounting in
these instances, threaded inserts (i.e., well nuts or rivet nuts) are recommended for
use with the selected mounting bolts.

20
BLACKBERRY RADAR H2 ITC100-1 INSTALLATION GUIDE
1. As indicated in Section 3.3 of this guide, record the module identifier and the asset
identifier the module will be paired with. For your convenience, you may quickly
create a record of the module and asset identifier pairings by removing the partially
attached label from the rear housing of the module and placing it on the installation
worksheet, next to the asset that will be tracked by this module.
2. After selecting the best installation location for your van, remove the adhesive from
the rear of the template and place the template in the desired installation location.
The adhesive at the back of the template ensures that it stays on the door surface for
accurate drilling of your holes.
Tip:For modules that have been previously transferred to new assets, the
temporary S/N label may no longer be in place. If this is the case, you will
need to write the module identifier (S/N) for each module on the installation
worksheet.
Other manuals for Radar H2
13
Table of contents
Other Blackbe;rry GPS manuals

Blackbe;rry
Blackbe;rry RADAR H2 ITC100-1 User manual

Blackbe;rry
Blackbe;rry RADAR H2 ITC100-1 User manual

Blackbe;rry
Blackbe;rry RADAR H2 ITC100-1 User manual

Blackbe;rry
Blackbe;rry Radar H2 User manual

Blackbe;rry
Blackbe;rry Radar H2 User manual

Blackbe;rry
Blackbe;rry RADAR-L User manual

Blackbe;rry
Blackbe;rry Radar H2 User manual