Bobot DEEP 830 User manual
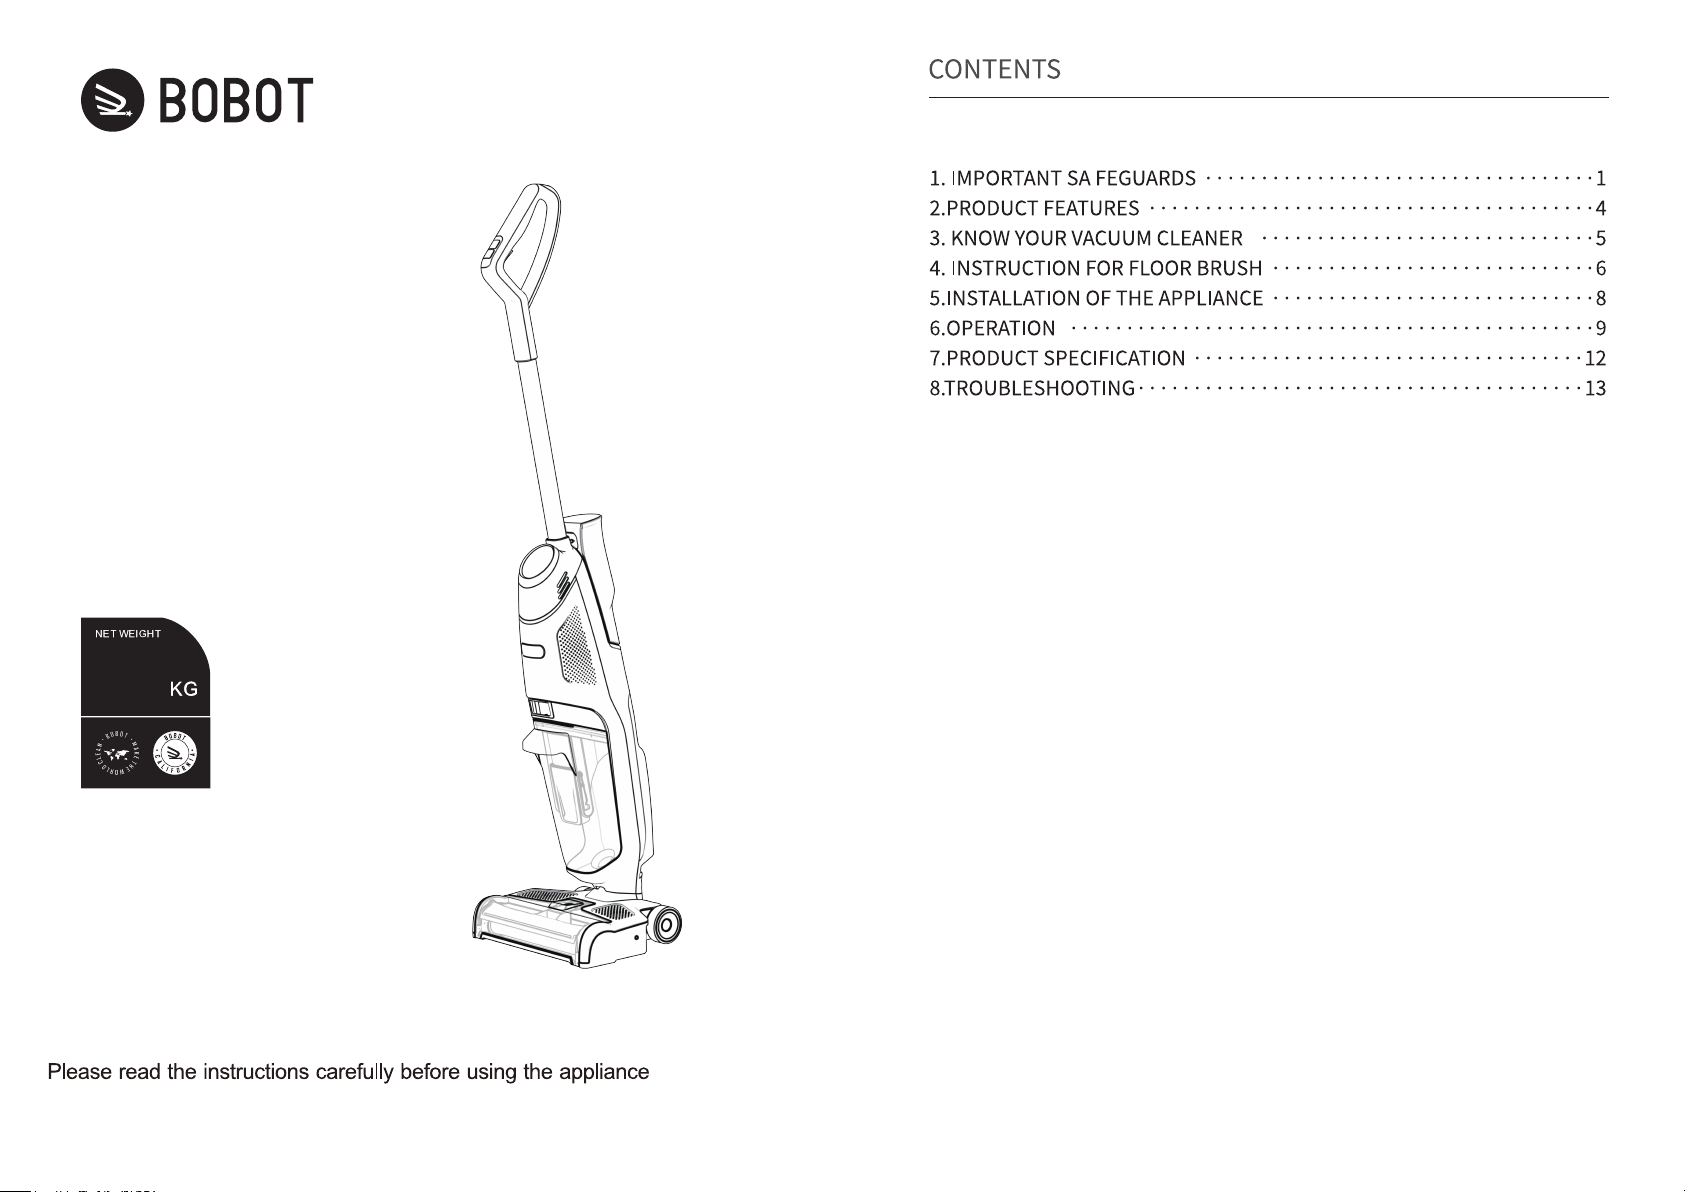
SMART ROBOT
DEEP 830
Cordless Wet And Dry Vacuum Floor Washer
4.4

IMPORTANT SAFEGUARDS IMPORTANT SAFEGUARDS
15. Do not use with damaged cable or charger. If appliance is not working as it should,
has beendropped, damaged, left outdoors, or droppedintowater, return it toaservice
center.
16. Turn OFF all controls before unplugging.
17. Use only the type andamount of liquids specified under the operations sectionof this
guide.
18. Liquidmust not be directed towards equipment containing electrical components.
19. Always connect to a properly earthed electrical socket. Do not modify earthed plug.
20. Do notpull or carry charger by cable, usecable as a handle, close door on cable, or
pull cable aroundsharpedges or corners.
21. Keepcharger cable away fromheatedsurfaces.
22. To unplug, grasp the charger plug, not the cable.
23. Do not handle charger plug or appliance with wet hands.
24. Battery pack and charger base output terminals are not to be short-circuited.
25. Do not charge the unit outdoors.
26. The appliance must be disconnected fromthe supply mains whenremoving the
battery.
27. Do not recharge, disassemble, heat above 60°C, or incinerate.
28. Keepbatteries outof reach of children.
29. Disposeof usedbatteries promptly.
30. Never put batteries inmouth. If swallowed, contact your physician or local poison
control.
31. Prevent unintentional starting. Ensure the switch is in the OFF-position before picking
upor carrying theappliance. Carrying the appliancewith your finger on the switch or
energizing appliance that havethe switch on invites accidents.
32. Do not use appliance that is damaged or modified. Damaged or modified batteries
may exhibit unpredictable behavior resulting in fire, explosion or risk of injury.
33. Do not expose appliance to fire or excessive temperature. Exposure to fire or
temperatureabove130°C may cause explosion.
34. Follow all charging instructions and do not charge the appliance outside of the
IMPORTANT SAFEGUARDS
1. This appliance can be usedby childrenagedfrom8 years andaboveif they havebeen
givensupervision or instructionconcerning use of theappliance in safe way and if they
understand the hazards involved.Cleaning anduser maintenance shall not be made by
children unless they are older than8 andsupervised. Keepthe appliance andits cord out of
reach of childrenagedless than 8 years.
2. Children shall not play with the appliance.
3. Unplug fromelectrical socket when not use, before cleaning, maintaining or servicing
the appliance, and if your appliance has an accessory tool with amoving brush, before
connecting or disconnecting thetool.
4. Do not immerse in water or liquid.
5. Keepair, loose clothing, fingers, andall parts of body away fromopenings and moving
parts of the applianceandits accessories.
6. Do not use with damaged cable or plug.
7. If the supply cord is damaged, it must be replacedby themanufacturer, its service agent
or similarly qualified persons in order to avoidahazard.
8. Do not incineratethe appliance even if it is severely damaged. The batteries can
explode in afire.
9. Thebattery is to be disposed of safely.
10. This appliance contains batteries that areonly replaceable by skilled persons.
11. Under abusiveconditions, liquid may beejected fromthe battery; avoid contact. If
contact accidentally occurs, flush with water. If liquid contacts eyes, additionally seek
medical help. Liquid ejected fromthebattery may causeirritationor burns.
12. Rechargeonly with thecharger specifiedby themanufacturer. A charger that is
suitablefor one type of battery pack may createarisk of fire when usedwith another
battery pack.
13. Unplug charger fromelectrical socket when not in use, before cleaning, maintaining
or servicing the appliance, andif your appliance has an accessory tool with amoving
brush, beforeconnecting or disconnecting the tool.
14. The battery must be removed fromthe appliance before it is scrapped.
1 2

IMPORTANT SAFEGUARDS PRODUCT FEATURES
temperaturerange specifiedinthe battery andincreasethe risk of fire.
35. Haveservicing performedby aqualified repair person using only identical
replacement parts. This will ensure that the safety of the product is maintained.
36. Do not modify or attempt to repair the appliance except as indicated in the instructions
for useandcare.
37. Keepthe temperature rangeof between4-40°C when charging battery, storing unit or
during use.
38. Plastic filmcanbe dangerous. To avoiddanger of suffocation, keepaway from
children.
39. Use only as described inthis user guide.
40. Use only manufacturer’s recommended attachments.
41. If appliance is not working as it should, has been dropped, damaged, left outdoors, or
dropped into water; do not attempt to operate it and haveit repairedat an authorized
servicecenter.
42. Do not put any object into openings.
43. Do not use with any opening blocked; keepfree of dust, lint, hair, and anything that
may reduceair flow.
44. Use extracare when cleaning onstairs.
45. Do not use to pick up flammable or combustible liquids, such as petroleum, or use in
areas wherethey may be present.
46. Do notpick uptoxic material (chlorinebleach, ammonia, drain cleaner, etc).
47. Do not use appliance in an enclosed space filled with vapours given off by oil-based
paint, paint thinner, some moth-proofing substances, flammable dust, or other explosiveor
toxic vapours.
48. Do not pick uphardor sharpobjects such as glass, nails, screws, coins, etc.
49. Do not pick upanything that is burning or smoking, such as cigarettes, matches or hot
ashes.
50. Do not use without filters in place.
51. Use indoors only.
52. Do not store the appliance at the places where icing may occur.
53. Do not use the appliance at the same position if the appliance is equippedwith a brush
roller andthe handle is not completely upright.
54. Ensure that the appliance is placed on ahorizontal surface.
PRODUCT FEATURES
This is amultifunctional vacuumcleaner including three functions of UV sterilization,
surface cleaning andvacuuming.
UV sterilization
Withcold cathodeUV germicidal lamp for using ultraviolet radiation to clean the surface
to achieveasterilizing function.
Surfacecleaning
The appliance isequippedwith aclean water tank, adirty water tank, aroller brush, a
suction motor andaroller brush motor. The pumpis used to pumpwater to thesurfaceof
theroller brush. At the same time, theroller brush is usedtodrivetheroller brush to rotate
at a high speed. A fter cleaning, the dirty water and small particles are collected into the
dirty water tank by a suctionmotor torealizethe cleaning functionof the floor surface.
Powerful vacuum cleaning
The appliancecanbe usedfor vacuuming thecorners of the house, andthe dry andwet
functions can be switched at will according to the degree of dirt on the floor surface.
3 4
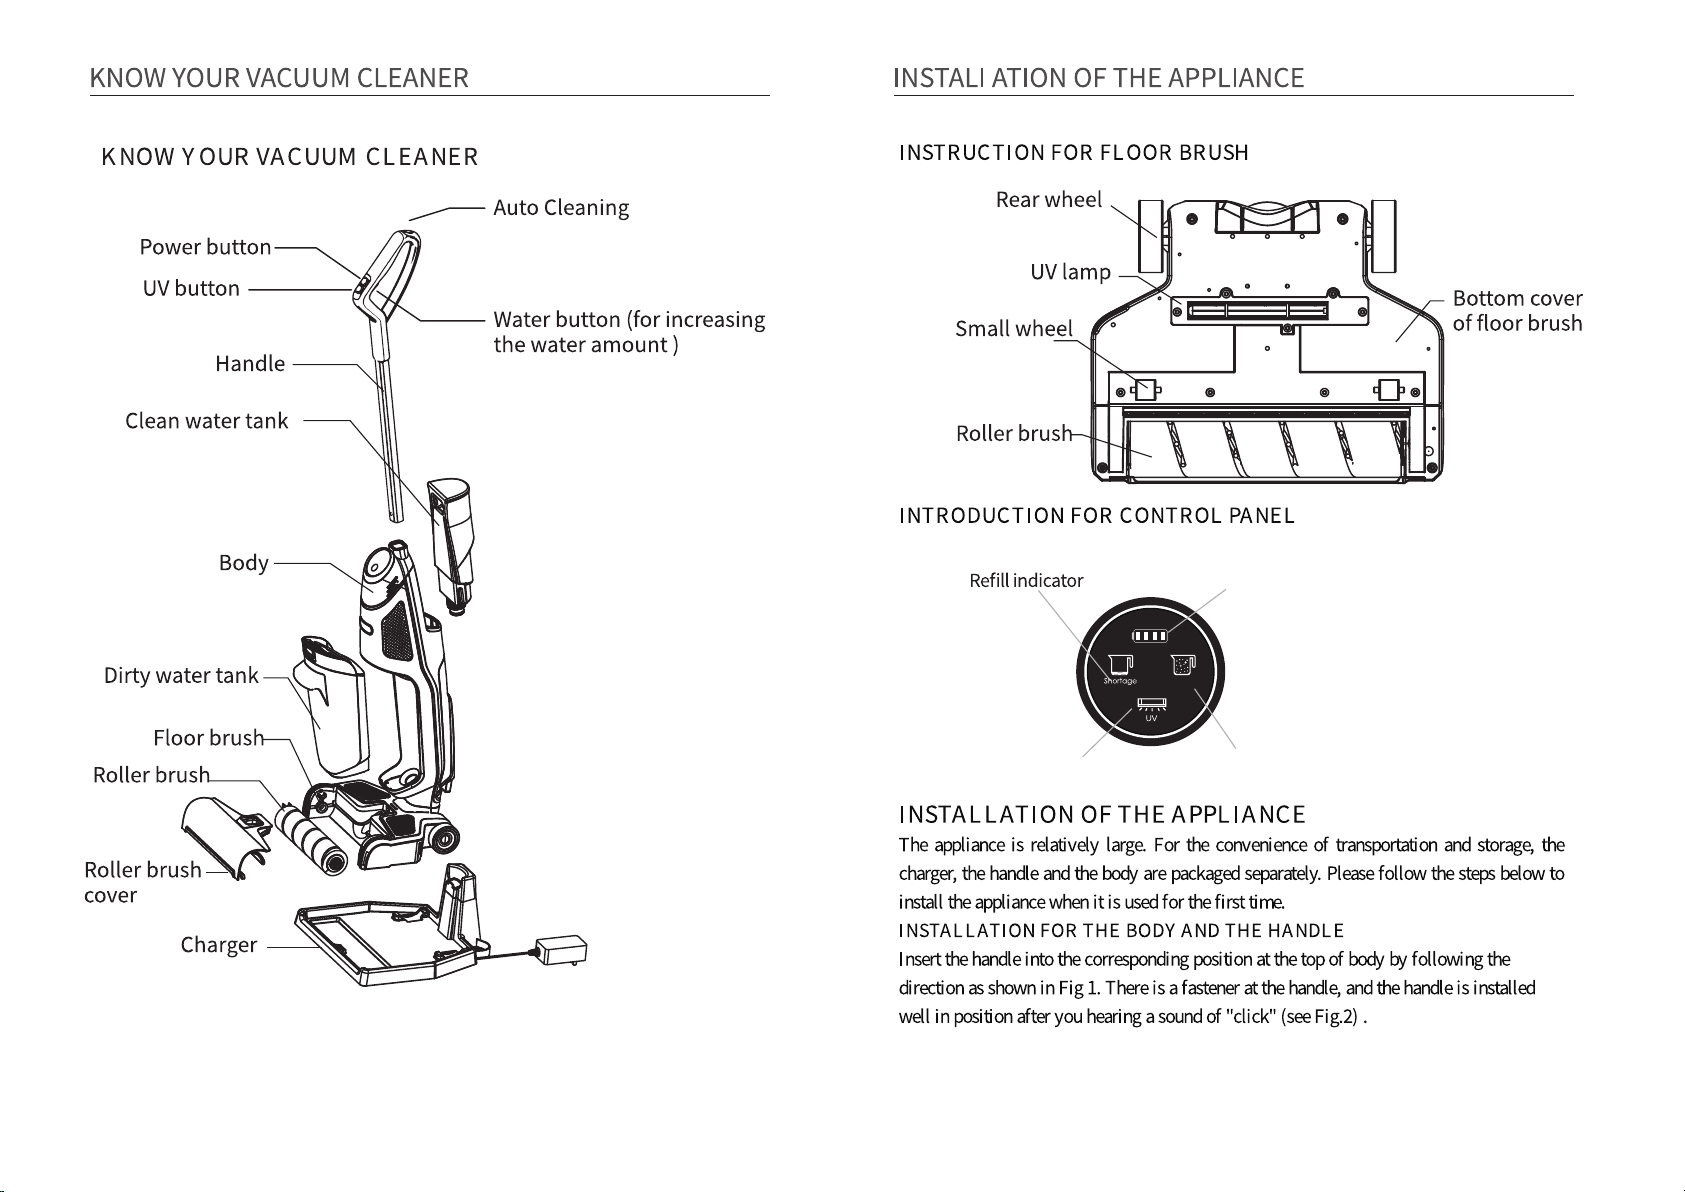
Battery indicator
Clean indicator
UV sterilizer light
3 4
Clean

Fig.1 Fig.2
INSTALL ATION FOR THE BODY AND THE CL EAN WATER TANK
Turn the lidof cleanwater tank counterclockwise as showninFig.3, andthenfill the clean
water tank with purewater as showninFig.4. The water level must not exceedthe
maximumwater level markedon thecleanwater tank. And then turn thelidof cleanwater
tank clockwise as shown inFig.5 totighten it. After finish filling water, makethe tank lid
downwards and then insert the clean water tank into the corresponding positionof the
body as shown in Fig.6. There is afastener inside the body, and the cleanwater tank is
installed well in positionafter youhearing asoundof "click" (see Fig.7) .
Fig.3 Fig.4 Fig.5 Fig.6 Fig.7
INSTALL ATION FOR THE BODY AND THE DIRTY WATER TANK
Insert the dirty water tank into the corresponding position of the body as shown in Fig.8.
There is afastener at thedirty water tank, andthe dirty water tank is installed well in
positionafter youhearing asoundof "click" (see Fig.9) .
Fig.8 Fig.9
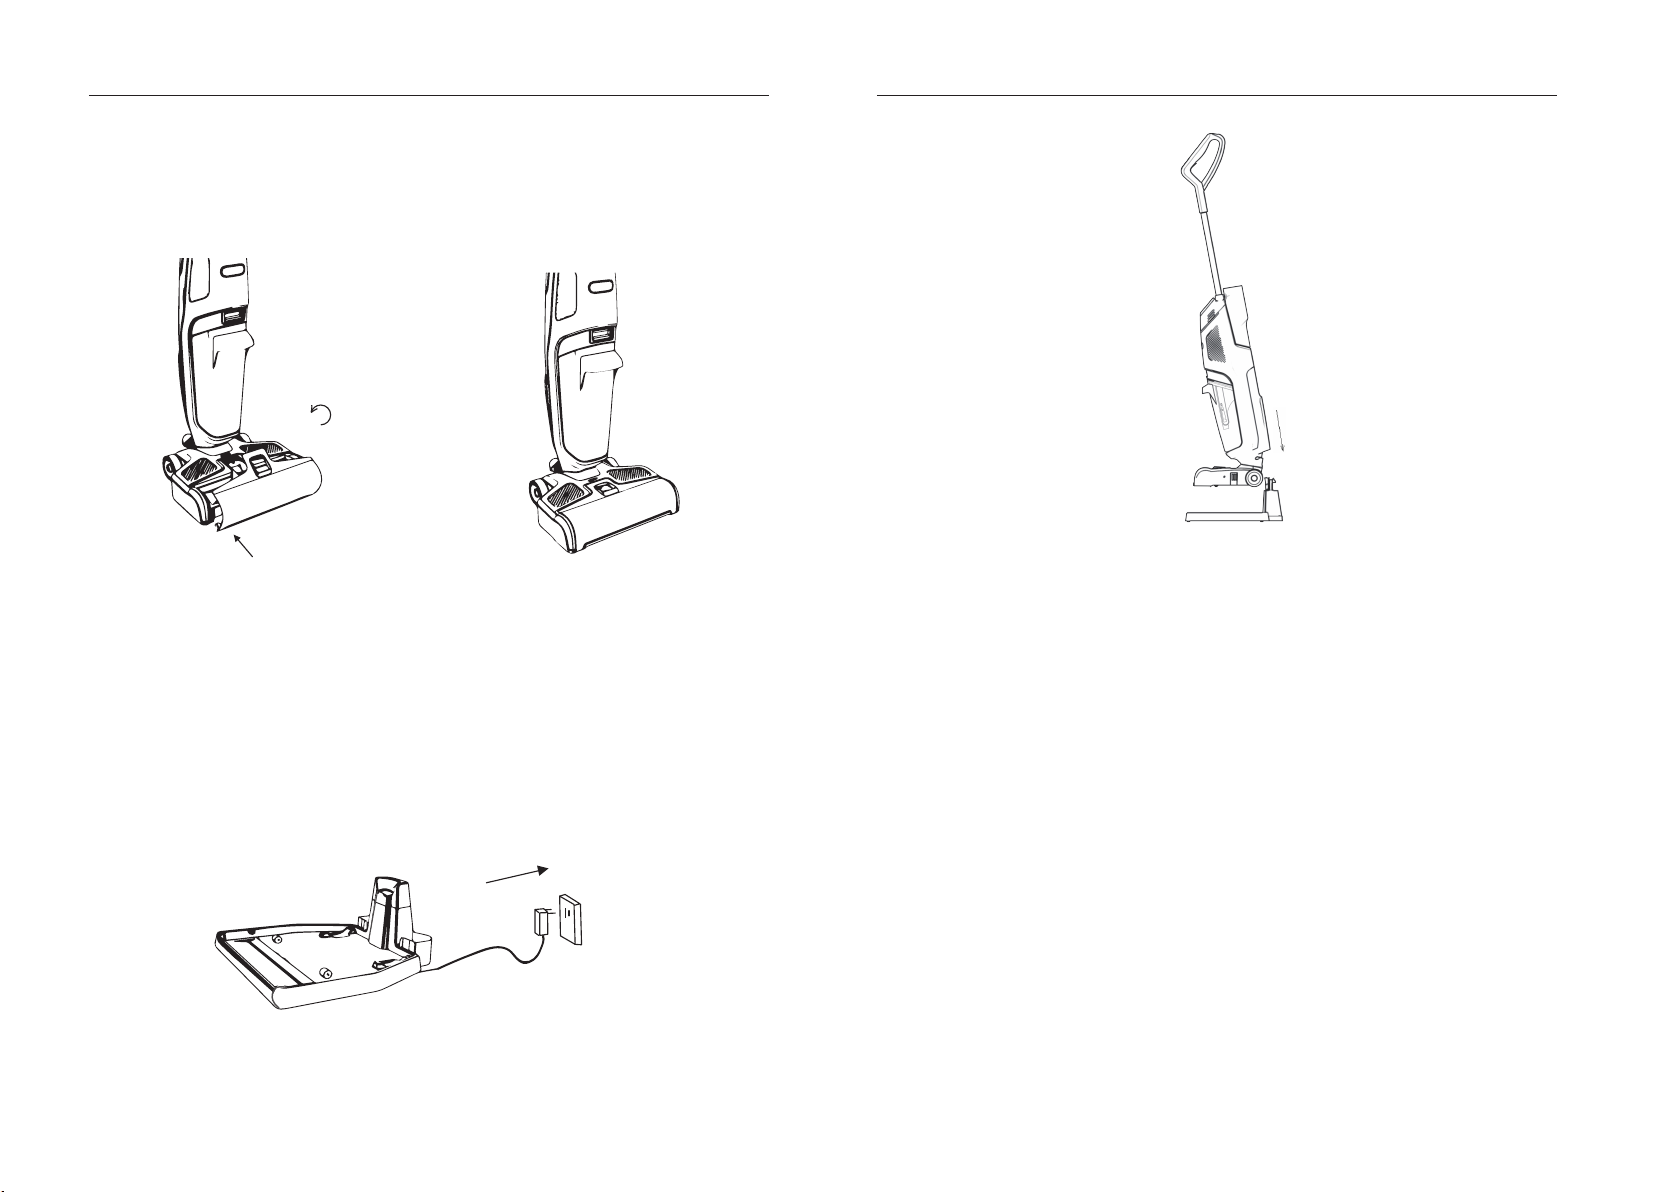
INSTALL ATION FOR THE ROLLER BRUSH
Insert the roller brush into the corresponding position at the floor brush as shown in Fig.10.
There is a fastener at the floor brush, andthe roller brush is installed well in position after
you hearing asoundof "click" (seeFig.11) .
Fig.10 Fig.11
7 8
INSTALI ATION OF THE APPLIANCE INSTALLATION FOR THE ROLLER BRUSH
Counterclockwise Clockwise
INSTALL ATION FOR THE ROLLER BRUSH COV ER
Insert the roller brush cover into the corresponding position at the floor brush as shown in
Fig.12. There is a fastener at the roller brush cover, and the roller brush cover is installed
well inpositionafter you hearing asoundof "click" (see Fig.13) .
Fig.12 Fig.13
OPERATION
CHARGE THE APPLIANCE
1. Inserttheadapter of charger intothepower outlet (see Fig.14).
2. Put the appliance onto the charger, and the battery indicator turns on and the appliance
enters into the charging condition. And the charging is finished after the battery indicator
turns off (see Fig.15).
3. After finishcharging, unplug the adapter.
Fig.14
Fig.15
OPERATING THE APPLIANCE
Before using the appliance, makesurethe appliance is chargedwell.
1. Remove the appliance from the charger and adjust the appliance to the normal working
condition fromtheupright position.
NOTE: The appliance can not work when it is placed upright.
2. Press the Power button, the indicators andthe light ring onthe control panel illuminate
for awhile, thenonly the Battery indicator illuminates, andtheappliance starts to work
and there is water spraying out fromthe appliance. If you want to activate the UV
sterilization function, press the UV button, then the UV indicator turns on.
3. If you want to increase the water amount, press the Water button, andmore water will
be sprayed out fromthe appliance, and then you can clean the place where needs more
water for cleaning.
4. TheRefill indicator will blink in redif the clean water tank is lack of water, please
refill the clean water tank withpure water in time.
5. The Full indicator will blink in red if the dirty water tank is full, pleaseempty thedirty
water tank intime.
9 10
OPERATION OPERATION
11
12
6. If you want to activate the auto-clean function to clean the appliance, follow the
operation as below. Firstly, put the applianceonto the charger toperformcharging, and
then press the Auto clean button to perform auto cleaning for 30 seconds.And the
light ringwill keep illuminating during the auto-clean process.
PRODUCT SPECIFICATION
Product name:
Model:
Specificationof battery pack:
DC36V / Lithium
Power:
256W
VC1901A
2600mAhBattery Capacity
BOBOT DEEP830
NOTE: The auto-clean function can be only activated when the appliance is
being charged.
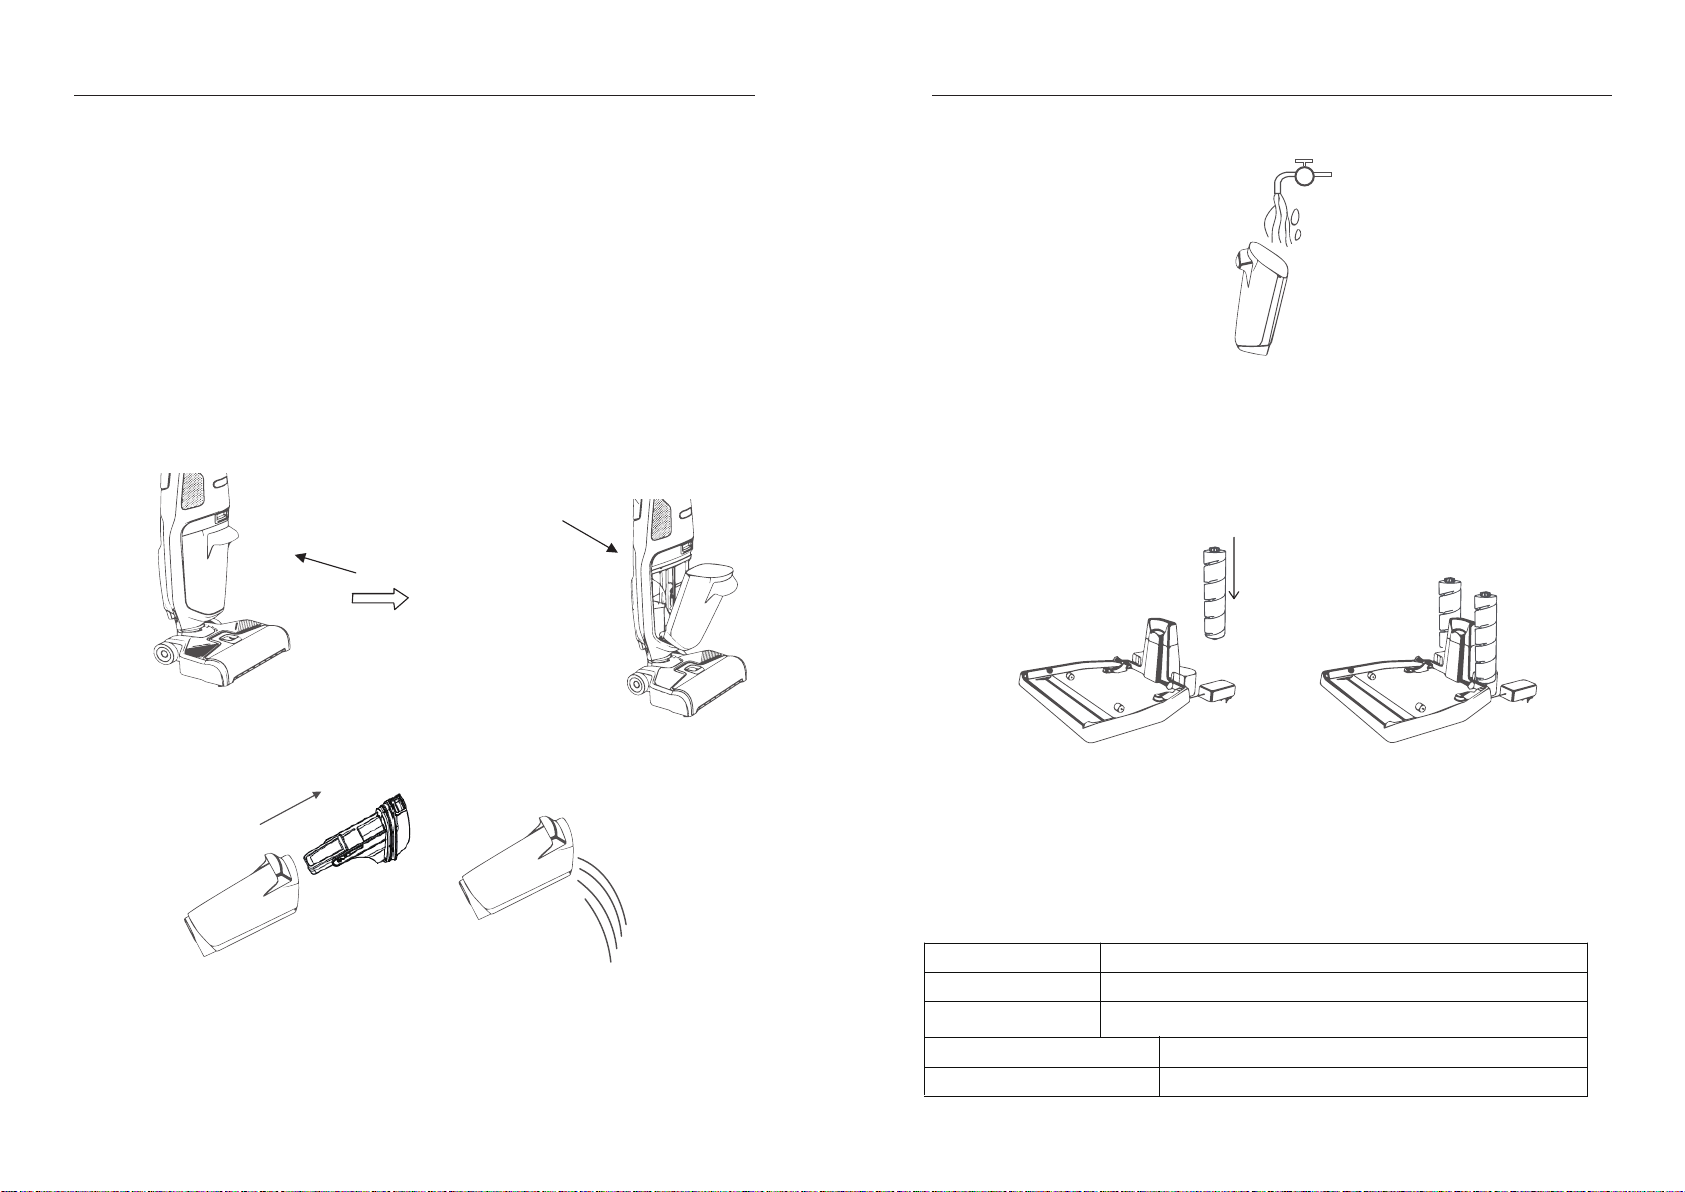
3. Rinse the dirty water tank with clean water(see Fig.18).
4.Activate the uto clean"function by following the operation as above to clean
theroller brush, then remove the roller brush by following the reverse operation
mentioned inthe section of fNSTALLATION FOR THE ROLLER BRUSH”.And then
store theroller brush at the corresponding position of the charger(see Fig.19).
The appliance shouldbe stored at a place with good draft and without exposure
to the direct sunlight.
CLEANING THE DIRTY WATER TANK AND THE ROLLER BRUSH1. Grasp the fastener of
dirty water tank and then press the button of the dirty water tank downwards to
remove the dirty water tank (see Fig.16).
2.Remove the lid of dirty water tank and then empty the drty water tank (see Fig.17).
The roller brush should be replaced every 6 months, which may vary depending on
theoperating environment and the running time.
Fig.16
Fig.18
Fig.17
Fig.19
OPERATION PRODUCT SPECIFICATION
REPLACEMENT OF THE ROLLER BRUSH

Specification of adapter
42V 850mA
Capacity of dirty water tank
450ml
Capacit
y of clean
water tank
750ml
Net Weight
4.4 Kg (
the weight of body )
Gross Weight
7.3 Kg
Product Size
282 (L) * 325 (W) * 1160 (
H) mm
Giftbox
Size
695 * 328* 288mm
Packing
Size
710 * 338 * 298 mm
This manual suits for next models
1
Table of contents


