5
Manufacturer aOperating instructions
0810 / 9000440474
*440474*
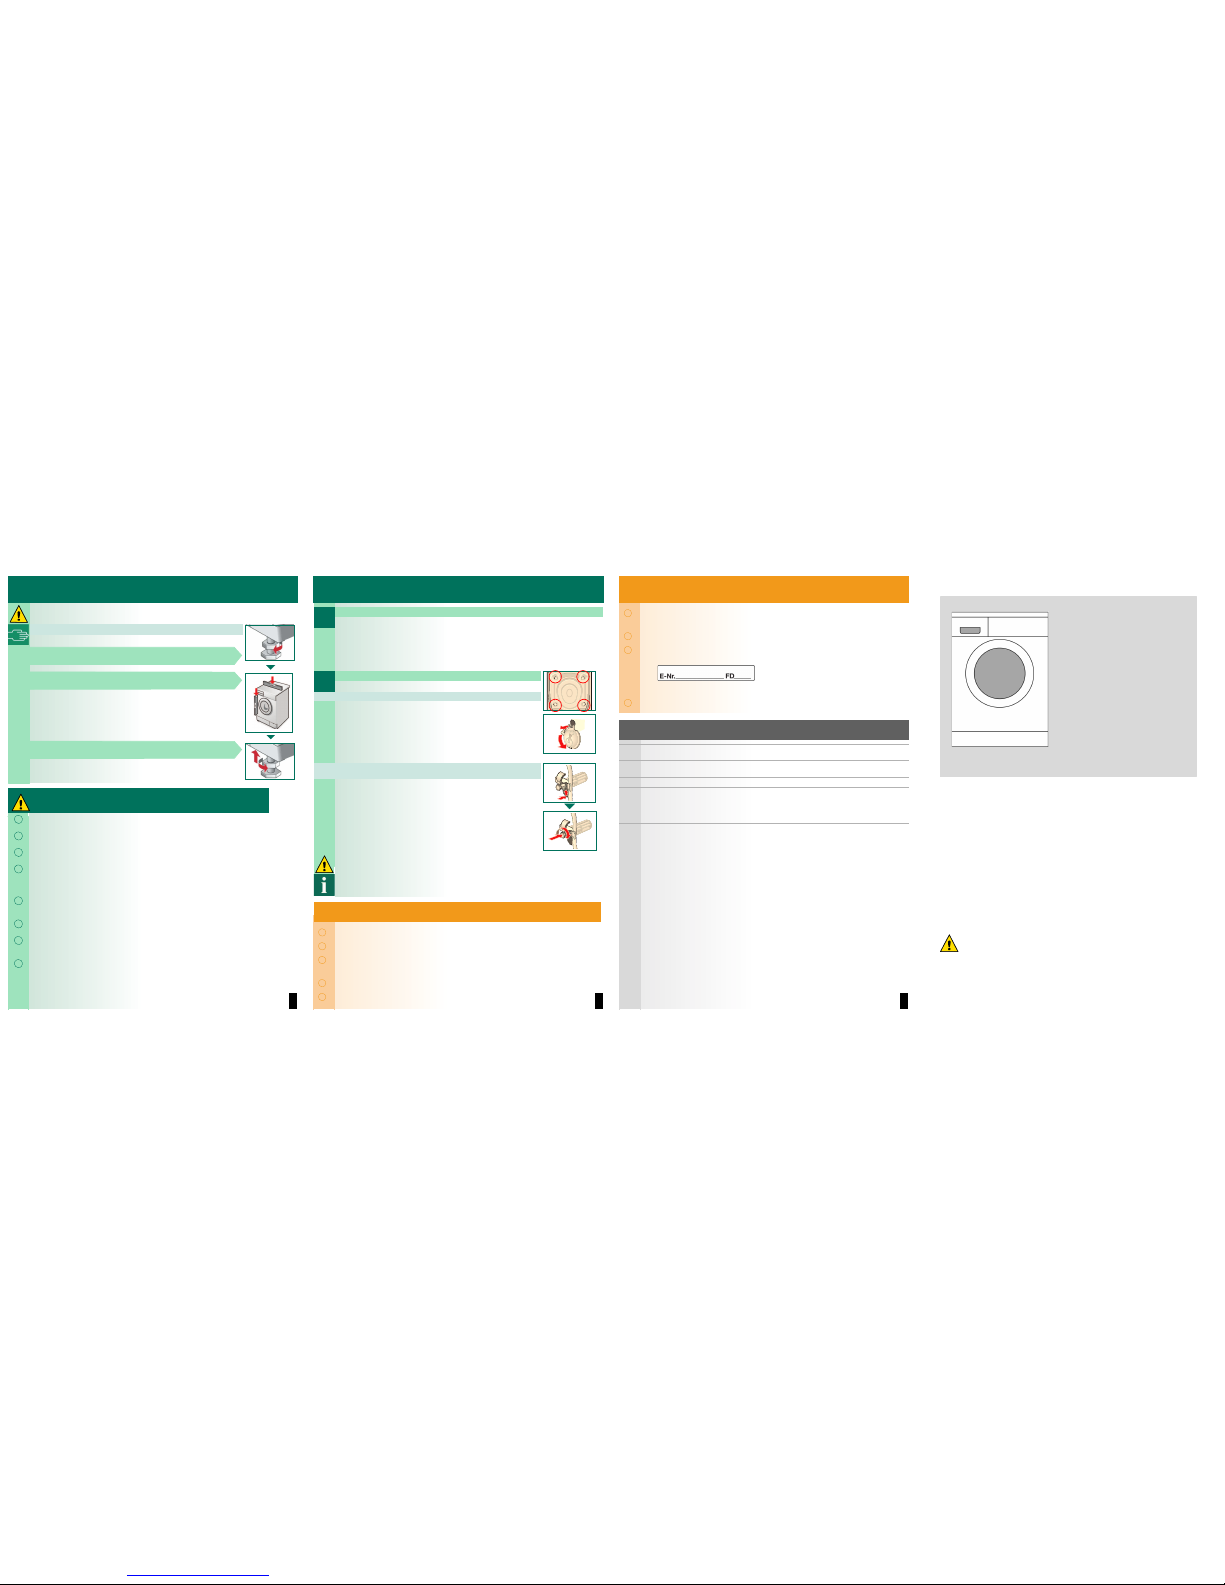
Alignment
Intense noise formation, vibrations and “wandering” may be the result of incorrect
alignment.
Aligning the washing machine with a spirit level
1. Loosen the lock nut using a wrench, by turning it in a clockwise direction.
2. Change the height by turning the appliance feet.
Caution: all four appliance feet must be firmly on the ground.
The washing machine must not wobble.
Check the alignment of the washing machine with a spirit level and adjust
if necessary.
3. Tighten the lock nut against the housing.
In doing so, hold the foot tight and do not adjust its height.
Caution: the lock nuts on all four appliance feet must be screwed tightly
against the housing.
Electrical connection
ʑThe washing machine must only be connected to an alternating current via a
properly installed earthed socket.
ʑThe power supply and voltage indicated on the washing machine (rating plate)
must be the same.
ʑThe connected load and fuse required are specified on the rating plate.
ʑMake sure that:
– the mains plug fits the socket,
– the cable cross-section is adequate,
– the earthing system is properly installed.
ʑ(If this is necessary), the mains cable may only be replaced by a qualified
electrician.
Replacement mains cables are available from the after-sales service.
ʑDo not use multiple plugs/couplings or extension cables.
ʑIf a residual current circuit breaker is used, only use a type which displays this
symbol: ‚.
Only this symbol guarantees compliance with the currently applicable regulations.
ʑDo not plug in or unplug the mains plug with wet hands.
Pull the appliance plug out of the socket at the plug only, not by the cable.
6
Transportation, e.g. when moving home
Before transporting the washing machine:
1. Turn off the tap.
2. Release the water pressure in the inlet hose aOperating instructions; Maintenance - filter
in water inlet.
3. Drain residual water aOperating instructions; Maintenance - drain pump.
4. Disconnect the washing machine from the power supply.
5. Dismantle the hoses.
Preparing and installing transport braces:
1. Remove the covers.
2. Insert all 4 transportation protection devices and clamp the mains cable
to the holders. Tighten the bolts.
After transportation, the transport braces must be removed apage 3.
To prevent unused detergent from flowing straight into the drain during the next wash: Pour
1 litre of water into compartment II and start the Empty programme.
Technical specifications
ʑDimensions (width x depth x height) 60 x 59 x 84.2 cm
ʑWeight 69 - 83 kg depending on model
ʑMains connection Nominal voltage 220-240 V, 50 Hz
Nominal current 10 A
Nominal power 2000 - 2300 W
ʑWater pressure 100ä1000 kPa (1ä10 bar)
ʑTest programmes According to currently valid IEC 60 456
7
After-sales service
ʑBefore you call the after-sales service, please make sure that you cannot remedy the fault
yourself aOperating instructions; What to do if...
ʑYou will be charged if a technician is called out, even during the warranty period.
ʑYou can find your nearest after-sales service in the enclosed list. Please give the after-sales
service the product number (E no.) and the production number (FD) of the appliance.
Product number Production number
You will find the identification plate containing
this information on the frame of the loading door
when the door is open, and in the thickly-
bordered area of the rating plate on the back of
the appliance.
ʑPlease help us to avoid unnecessary call-outs by quoting the product and production
numbers. This will also save you the associated additional costs.
Aqua-Stop warranty only for appliances with Aqua-Stop
In addition to warranty claims against the vendor from the purchase agreement and to our
appliance warranty, we will pay damages under the following conditions:
1. If a fault in our Aqua-Stop system causes water damage, we will reimburse damages caused
to private customers.
2. The liability guarantee is valid for the service life of the appliance.
3. It is a prerequisite of all warranty claims that the appliance with Aqua-Stop must have been
set up and connected correctly in accordance with our instructions; this also includes a
correctly fitted Aqua-Stop extension (original accessories).
Our warranty goes not cover defective power cables or fittings between the Aqua-Stop
connection and the tap.
4. Appliances with Aqua-Stop do not need to be supervised during operation, nor secured
afterwards by turning off the tap.
The tap only needs to be turned off if you are away from home for a long period, e.g. for
several weeks' holiday.
Washing machine
Contents Page
ʋSafety instructions . . . . . . . . . . . . . . . . . . . . 1
ʋInstallation surface. . . . . . . . . . . . . . . . . . . . 1
ʋInstalling the appliance . . . . . . . . . . . . . . . . 1
ʋScope of delivery . . . . . . . . . . . . . . . . . . . . . 2
ʋHose and cable lengths . . . . . . . . . . . . . . . 2
ʋRemoving the transport braces . . . . . . . . . . 3
ʋWater connection . . . . . . . . . . . . . . . . . . . . 4
ʋAlignment . . . . . . . . . . . . . . . . . . . . . . . . . . 5
ʋElectrical connection . . . . . . . . . . . . . . . . . . 5
ʋTransportation, e.g. when moving home . . . 6
ʋTechnical specifications. . . . . . . . . . . . . . . . 6
ʋAfter-sales service . . . . . . . . . . . . . . . . . . . . 7
ʋAqua-Stop warranty . . . . . . . . . . . . . . . . . . . 7
Installation
instructions
Read these instructions before switching on the washing machine.
Also observe the separate Instruction manual.
Keep all documents for use in the future or for the subsequent owner.
en


