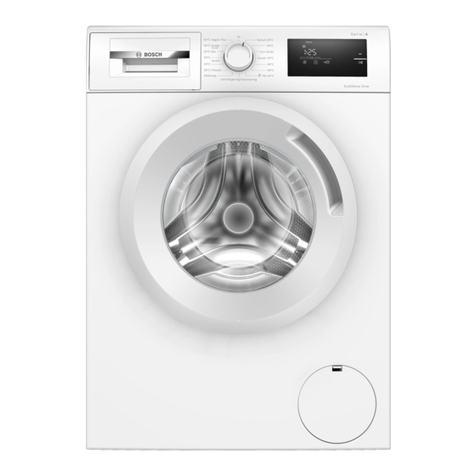
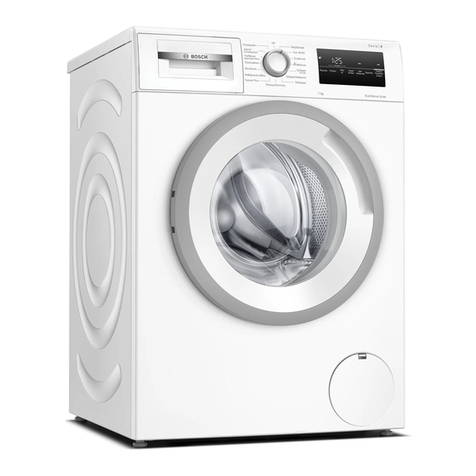
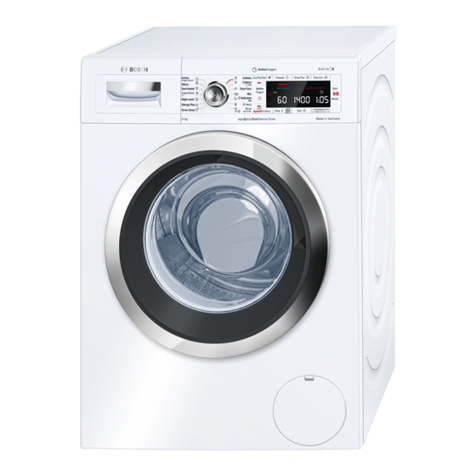
Bosch WAL28PH7NL User manual

NL
Table of contents
1 Safety................................................ 4 9 Programs ................................ 27
10 Accessories................................ 31
11 Laundry................................................ 31
1.1 General instructions .................. 4
1.2 Destination of the device
rate .................................. 4
1.3 Restriction of users ...... 4
1.4 Safe installation................................. 5
1.5 Safer use ................................... 7
11.1 Preparing the laundry.......... 31
12 Detergent and care
ginger.................................. 31
1.6 Safe cleaning and maintenance
hold ........................................... 9 13 The Ministry in Essence.. 32
2 Avoiding material damage ...... 11 13.1 Switching on the appliance .... 32
13.2 Set program .................. 32
3 Environmental protection and
saving................................................... .. 12 13.3 Adjust program
settings................................................ 32
3.1 Disposing of the packaging .... 12 13.4 Saving program
settings ................................................ 32
3.2 Saving energy and
resources ................................................... 12 13.5 Filling the drum with detergent
good ................................... 33
3.3 Energy Saving Mode ........ 13
4 Set-up and connection.......... 13 13.6 Dosing detergent and care
agent ........... 33
4.1 Unpacking the device .................. 13
4.2 Package contents.......... 13 13.7 Starting the program ... 33
13.8 Adding laundry .................. 33
13.9 Program cancel.................. 33
13.10 Taking out the laundry ............... 34
13.11 Switching off the appliance ........ 34
4.3 Installation site
requirements ................................... 13
4.4 Removing transport
locks ................................... 14
4.5 Connecting the device .................. 15
4.6 Adjusting the device .......... 16 14 Child Lock .................................. 34
14.1 Activating child lock ........... 34
14.2 Deactivating the child lock.......... 34
4.7 Connecting the appliance
electrically................................................... 17
15 Intelligent dosing system ....... 34
5 Getting to know your device.......... 18 15.1 Starting the program with the
intelligent dosing system ........... 34
5.1 Device ................................... 18
5.2 Detergent drawer ................................ 19
5.3 Control panel..................... 19
5.4 Operating logic................................ 19
15.2 Filling the dosing container ........... 35
15.3 Contents of the dosing
container................................................ 36
6 Before first use .................. 20 15.4 Basic dosing amount ........ 36
6.1 Starting a wash cycle without
laundry................................... 20 16 Home Connect ......................... 37
16.1 Device with WLAN home
network (WiFi) with WPS
connect function.................. 37
7 Display ................................... 21
8 Buttons .................................. 24
2

NL
16.2 Connecting a device to a WLAN
home network (WiFi) without
WPS function............. 38
16.3 Device with the Ho-
connect me Connect app ... 38
16.4 Activating WiFi on the
device................................................. 39
16.5 Deactivating WiFi on the
device................................................. 39
16.6 Resetting the device's network
settings ................... 39
16.7 Remote start.......................... 39
16.8 Protection of personal
data ................................... 40
17 Basic settings .................. 40
18 Cleaning and maintenance.......... 40
18.1 Cleaning the drum ................... 41
18.2 Cleaning the detergent
drawer ................................ 41
18.3 Cleaning the drain pump................ 42
19 Troubleshooting ................... 45
19.1 Emergency release ............... 57
20 Transport, store and
drain................................................. 57
20.1 Disassembling the device ............... 57
20.2 Installing transport
locks................................. 57
20.3 Device reset
use ................................. 57
20.4 Disposal of your old
appliance ....................................... 58
21 Customer Service............................ 58
21.1 Product number (E no.) and
production number (FD) ........... 59
21.2 AQUA-STOP guarantee ............... 59
22 Consumption values.................. 60
23 Technical data.............. 60
24 Declaration of Conformity........... 61
3

NL Safety
1 Safety
Observe the following safety instructions.
1.1 General instructions
s Read this manual carefully.
s Keep the operating instructions and product information for
later use or for subsequent owners.
s Do not connect the device in case of transport damage.
1.2 Destination of the device
Only use the device:
s to wash machine washable textiles and wool for hand washing
according to the care label.
s with tap water and commercially available detergents and care
products suitable for the washing machine.
s for domestic use and in enclosed spaces within the domestic
environment.
s to an altitude of 4000 m above sea level.
1.3 Restriction of users
This appliance can be used by children aged from 8 years and
above and persons with reduced physical, sensory or mental
capabilities or lack of experience and/or knowledge if they are
supervised or have been instructed in the safe use of the appliance.
and have understood the resulting dangers. Children must not play
with the appliance.
Cleaning and user maintenance shall not be made by children
unless they are supervised.
Make sure that children up to 3 years old and pets cannot reach
the appliance.
4

Safety NL
1.4 Secure installation
Observe the safety regulations when installing the device.
WARNING ‒ Risk of electric shock!
Improper installations are dangerous.
▶ Only connect and use the device in accordance with the
information on the type plate.
▶ Only connect the device to a mains supply with alternating
current via a properly installed earthing socket.
▶ The protective earth system of the electrical house installation must be
installed in accordance with the electrical engineering regulations. The
installation must have a sufficiently large conductor diameter.
▶ When using an earth leakage circuit breaker, only use a type
marked with .
▶ Never power the device via an external switching device, e.g. a
time switch or remote control.
▶ When the device is installed, the mains plug of the mains
connection cable must be freely accessible, or if free access is not
possible, an all-pole disconnecting device must be installed in the
permanently installed electrical system in accordance with the
installation instructions.
▶ When setting up the device, make sure that the power cord is
not pinched or damaged.
Damaged power cord insulation is dangerous.
▶ Never bring the connecting cable into contact with hot
appliance parts or heat sources.
▶ Never bring the power cable into contact with sharp points or
edges.
▶ Never kink, pinch or alter the power cord.
WARNING ‒ Risk of fire!
Using an extended power cord and unauthorized adapters is
dangerous.
▶ Do not use extension cords or multiple sockets.
5

NL Safety
▶ If the power cord is too short, contact customer service.
▶ Only use adapters approved by the manufacturer.
WARNING ‒ Risk of injury!
The high weight of the device can cause injuries when lifted.
▶ Do not lift the device alone.
If this appliance is installed improperly in a washer-dryer column,
the installed appliance may fall down.
▶ Stack the dryer on top of a washing machine only with the
connection kit from the dryer manufacturer. No other method of
installation is permitted.
▶ Do not install the appliance in a washer-dryer column if the dryer
manufacturer does not offer a suitable connection set.
▶ Do not install appliances from different manufacturers and with
different depths and widths in a washer-dryer column.
▶ Do not set up a washer-dryer column on a platform, the
devices can tilt.
WARNING ‒ Risk of suffocation!
Children can pull packing material over their head and become
entangled and suffocate.
▶ Keep packaging material away from children.
▶ Do not let children play with packaging material.
CAUTION ‒ Risk of injury!
The device may vibrate or move during operation.
▶ Set up the device on a clean, flat and solid surface.
▶ Level the appliance using the appliance feet and a spirit level.
There is a tripping hazard with incorrectly laid hoses and mains
connection cables.
▶ Lay the hoses and connection cables in such a way that they cannot
be tripped over.
6

Safety NL
If the appliance is moved by protruding parts, such as the loading
door, the parts can break off.
▶ Do not move the appliance by protruding parts.
CAUTION ‒ Risk of cutting!
Sharp edges on the device can lead to cuts if touched.
▶ Do not touch the device on sharp edges.
▶ Use protective gloves when installing and transporting the
device.
1.5 Safer use
WARNING ‒ Risk of electric shock!
A damaged appliance or a damaged power cord is dangerous.
▶ Never use a damaged device.
▶ Never pull on the mains cable to disconnect the device from the
mains. Always pull the plug on the power cord.
▶ If the appliance or the mains cable is damaged, immediately
unplug the mains cable from the socket or switch off the fuse in
the fuse box and close the tap.
▶ Contact customer service. →
Page 58
Penetrating moisture can cause an electric shock.
▶ Only use the device in closed rooms.
▶ Never expose the device to excessive heat and humidity.
▶ Do not use a steam cleaner, high-pressure cleaner, hoses or
nozzles to clean the appliance.
WARNING ‒ Risk of health hazard!
Children can lock themselves in the appliance and endanger
their lives.
▶ Do not install the appliance behind a door that blocks or
prevents the opening of the appliance door.
7

NL Safety
▶ In the case of discarded appliances, remove the plug of the
mains cable from the socket, then cut the mains cable and
damage the lock of the appliance door so that the appliance
door no longer closes.
WARNING ‒ Risk of suffocation!
Children can inhale or swallow small parts and choke.
▶ Keep small parts away from children.
▶ Do not allow children to play with small parts.
WARNING ‒ Risk of poisoning!
Detergents and care products can lead to poisoning if ingested.
▶ Consult a doctor in case of accidental ingestion.
▶ Keep detergents and care products out of the reach of children.
WARNING ‒ Risk of explosion!
If laundry has been pretreated with cleaning agents containing
solvents, this can lead to an explosion in the appliance.
▶ Rinse pre-treated laundry thoroughly with water before
washing.
CAUTION ‒ Risk of injury!
The cover plate may break when climbing or clambering on the
device.
▶ Do not climb or scramble on the device.
The appliance may tip over when sitting or leaning on the open
door.
▶ Do not sit or lean on the appliance door.
▶ Do not place any objects on the appliance door.
Reaching into the rotating drum can cause injury to hands.
▶ Wait for the drum to come to a complete stop before reaching inside the
drum with your hand.
8

Safety NL
CAUTION ‒ Risk of burns!
The soap gets hot when washing at high temperatures.
▶ Do not touch the hot soapy water.
CAUTION ‒ Risk of chemical burns!
When opening the detergent drawer, detergent and care agent
may splash out of the appliance. Contact with eyes or skin may
cause irritation.
▶ In case of contact with detergents or care products, rinse eyes
or skin thoroughly with clean water.
▶ Consult a doctor in case of accidental ingestion.
▶ Keep detergents and care products out of the reach of children.
1.6 Safe cleaning and maintenance
Observe the safety regulations when cleaning and maintaining the
device.
WARNING ‒ Risk of electric shock!
Improper repairs are dangerous.
▶ Only trained specialist personnel may carry out repairs on the
device.
▶ Only original spare parts may be used for repair of the device.
▶ If the power cord of this appliance is damaged, it must be
replaced by the manufacturer, its service agent or a similarly
qualified person in order to avoid a hazard. Penetrating
moisture can cause a shock.
▶ Do not use a steam cleaner, high-pressure cleaner, hoses or
nozzles to clean the appliance.
WARNING ‒ Risk of injury!
The use of non-original spare parts and non-original accessories
is dangerous.
▶ Only use original spare parts and accessories from the
manufacturer.
9

NL Safety
WARNING ‒ Risk of poisoning!
Toxic fumes can be generated when cleaning agents containing
solvents are used.
▶ Do not use solvent-based cleaning agents.
10

Avoid material damage NL
2
Avoid material damage
Material damage
avoid
▶ Make sure that the inner diameter
of the water tap is at least 17
mm.
▶ Make sure that the length of the
thread on the connection to the
water tap is at least 10 mm.
Water pressure that is too low or too high can
interfere with the appliance function.
▶ Make sure the water pressure is on
the water supply system is at
least 100 kPa (1 bar) and at most
1000 kPa (10 bar).
▶ When the water pressure reaches the
exceed the maximum value, a
pressure reducing valve must be
installed between the drinking
water connection and the hose
set of the unit.
▶ Do not place the appliance on the mixing
Connect the tap of a pressureless water
heater or boiler.
Modified or damaged water hoses
can lead to material damage and
damage to the device.
▶ Never kink water hoses, pinch
lend, modify or intersect.
▶ Only supplied water hoses
or use original spare hoses.
▶ Never used water hoses
to use.
Operation with contaminated or too
hot water can cause material damage
and damage to the appliance.
▶ Only use the appliance with cold
use tap water. Unsuitable cleaning
agents can damage the surfaces of
the device.
▶ No sharp or abrasive cleaning
using chemicals.
▶ No strong alcoholic cleaning agents
using chemicals.
▶ No harsh scouring or dishwashing
use sponges.
mhuhavoid material damage
observe this instruction to avoid
property damage and damage to the
device.
PAY ATTENTION!
Incorrect dosing of fabric softeners,
detergents, care products and
cleaning agents can affect the
function of the appliance.
▶ The dosage recommendations of the
keep the manufacturer.
Exceeding the maximum load
quantity affects the operation of the
appliance.
▶ The maximum load
adhere to and do not exceed for
each programme.
→
"Programs", Page 27
The device is secured for transport
with transport locks. Transport locks
that have not been removed can lead
to material damage and damage to
the device.
▶ Before commissioning, all transport
remove and retain protections
completely.
▶ For each transport, all transport
Install safety devices completely in
order to avoid transport damage.
Improper connection of the water
inlet hose can lead to material
damage.
▶ The screw connections on the
water supply hand tight.
▶ The water inlet hose is best
directly without additional
connecting elements such as
adapter, extension, valve or
similar to the water tap.
▶ Make sure that the valve housing
of the water inlet hose is installed
contact-free with the environment
and is not exposed to external
forces.
11

NL Environmental protection and saving
▶ Only clean the appliance
with water and a soft, damp cloth.
▶ Direct contact with the device
remove all detergent residue,
spray mist or residue.
Dose detergent according to the
degree of soiling of the laundry.
a For a light to normal degree
of contamination, a small amount
of detergent is sufficient. Follow
the detergent manufacturer's
dosing recommendations.
m3environmental protection and saving
Environmental protection and
savings Reduce washing temperature for
lightly and normally soiled laundry.
Environmental protection and saving a At low temperatures, it consumes
low energy device. For light to
normal soiling, lower temperatures
than those stated on the care label
are also sufficient.
3.1 Disposal of the packaging
The packaging materials are
environmentally friendly and can be
reused.
▶ The individual components on
kind of separate disposal.
Set the maximum speed if the
laundry is subsequently to be dried
in the tumble dryer.
3.2 Energy- and resource-
efficient
a Dryer laundry shortens the pro-
gramme time during drying and
reduces energy consumption. A
higher spin speed reduces the
residual moisture in the laundry
and increases the spin volume.
If you follow these instructions, your
appliance will use less electricity and
water.
Use programs with low temperatures
and longer washing times and use
the maximum load capacity.
Wash laundry without prewash.
a Washing with prewash extends
program duration and increases
energy and water consumption.
a The energy consumption and water
consumption are the most efficient. The appliance has an automatic
loading machine.
Use economical program setting.
a The loading machine fits it
water consumption and program
duration optimally according to the
type of fabric and the load capacity.
a When you set the program
For a programme, the display
shows the expected consumption.
12

Set up and connect NL
The device has an aqua sensor. 4. Remove the accessories from
the drum.
a The aquasensor monitors during
the flush adjusts the turbidity of the
flush water and adjusts the duration
and number of flushing cycles
accordingly.
5. Close the appliance door.
4.2 Package contents
After unpacking, check all parts for
transport damage and for
completeness of the delivery.
3.3 Energy Saving Mode PAY ATTENTION!
If you do not operate the device for a
longer period of time, the device
automatically switches to energy-
saving mode. All prompts disappear
and flash.
Energy-saving mode is exited when
you operate the appliance again, e.g.
open or close the door.
Use with incomplete or defective
accessories can impair the function
of the device or cause material
damage and damage to the device.
▶ Do not operate the appliance with incomplete or
use defective accessories.
▶ The accessories before use
of the device.
→
"Accessories", Page 31
O4set up and connect
Set up and connect Remark: The device has been checked
at the factory for correct operation.
Water stains may remain in the
device. The stains disappear after the
first wash.
Set up and connect
4.1 Unpacking device
PAY ATTENTION!
Objects that remain in the drum and
that are not intended for use with the
device can lead to material and device
damage.
▶ For use all these items
and remove the supplied
accessories from the drum.
The delivery consists of:
s Washing machine
s Accompanying documents
s Transport protections
→
"Remove transport locks
run", Page 14
s cover caps
4.3 Installation site
requirements
1. Completely remove packaging
material and protection from the
device.
→
"Disposal of the packaging",
Page 12.
WARNING
Risk of electric shock!
2. Check the device for visible
damage.
The device contains live parts.
Touching live parts is dangerous.
▶ Do not use the appliance without
cover plate.
3. Open the appliance door.
→
"Ministry in Essence",
Page 32
13

NL Set up and connect
WARNING
Risk of injury!
installation site To demand
on a wall no snakes
between wall and
device clamping
man.
When used on a plinth, the device can
tip over.
▶ The device feet for commissioning
rack on a plinth absolutely with
the fixings
→
Page 31
from the manufacturer
settle.
PAY ATTENTION!
PAY ATTENTION! Residual water can freeze. Freezing
residual water can damage the
appliance and frozen hoses can burst.
▶ Do not place the appliance in frost
sensitive areas or outdoors.
The appliance may contain residual
water. If you tilt the appliance more
than 40°, residual water can leak out.
▶ Carefully tilt the device.
installation site To demand 4.4 Removing transport locks
Plinth The device with
locking lips
→
Page 31
confirm.
The device is secured for transport
with transport locks at the rear of the
device.
Remark: Keep the screws of the
transport locks and the sleeves for
later transport
→
Page 57.
Floor with wooden
beams
Place the device
guess at a wa-
resistant
wooden plate (thick-
too minimal
30mm) which
screwed to the
floor.
1. Pull the hoses out of the holders.
kitchen The device al-
borrow under a
continuous work
place sheet,
that fixed with the
adjacent
cabinet is connected
Pine tree. Required
niche width:
60 cm.
14

Set up and connect NL
2. Loosen and remove all bolts of the
4 transport locks with a SW13
open-end wrench
.
5. Install the 4 cover caps.
6. Push the 4 cover caps down.
3. Pull the mains connection cable out of the
holder.
4.5 Connecting device
4. Remove the 4 sleeves. Connect water supply hose
WARNING
Risk of electric shock!
The device contains live parts.
Touching live parts is dangerous.
▶ The electric Aquastop valve
do not immerse in water.
15

NL Set up and connect
1. Connect the water inlet hose to the
tap (26.4 mm = 3/4"). plastic stand
pipe with rubber
run muff or a
floor drain
the water drainage
feeding hose with
a bend
→
Page 31
fixate and
gene.
4.6 Adjusting the device
To reduce noises and vibrations and
to prevent the device from walking,
adjust the device horizontally.
1. Loosen the lock nuts with a SW17
open-end wrench.
2. Open the tap carefully and check
that the connections are tight.
Water drainage connection types
The information will help you connect this
appliance to the water outlet.
PAY ATTENTION!
When draining, the water drain hose is
under pressure and can come loose
from the installed connection position.
▶ The water drain hose against un-
intended to secure loosening.
Remark: Observe the pumping
heights.
The maximum pumping height
d
The connection position
tie with a
hose clamp
(24-40 mm) bore
gene.
washbasin the water drainage
feeding hose with
a bend
→
Page 31
fixate and
gene.
16

Set up and connect NL
2. To adjust the appliance, turn the
appliance feet. Check the horizontal
adjustment of the appliance with a
spirit level.
2. Check the mains plug for tightness.
All appliance feet must be firmly
planted on the floor.
3. Tighten the lock nuts against the
housing with an open-end
wrench SW17 hand-tight.
Hold the appliance foot while
doing so and do not adjust the
height.
4.7 Connecting the appliance
electrically
1. Insert the mains plug of the
appliance's mains cable into a
mains socket in the vicinity of
the appliance.
The connection data of the device
can be found in the technical data
→
Page 60.
17

NL Getting to know your device
YOU5 Getting to know your deviceget to know your device
Getting to know your device
5.1 Device
Here you will find an overview of the components of your device.
3 4 5 6
277
18
Depending on the device type, details in the picture may differ,
e.g. the color and the shape.
1Service valve and pump
→
Page 42
7
8
Transport protections
→
Page 14
2
3
4
Door
Detergent drawer →
Page 19
Water supply hose
→
Page 15
Control panel
→
Page 19
5
6
Water drain hose
→
Page 16
Mains connection cable →
Page 17
18

Getting to know your device NL
5.2 Detergent drawer 1
2
3
Manual dosing compartment
/ : Dosing container for
fabric softener or detergent
: Detergent dispenser
1 2 3
5.3 Control panel
You can set all functions of your device and obtain information about the
operating status via the control panel.
1 1
2 3
1
2
Programs 5.4 Operating logic
Program selector
→
Page 32
PAY ATTENTION!
Violent action on the display can cause
damage.
▶ No strong pressure on the display
exercise.
▶ Do not use pointed or sharp front
cast on the display.
3Keys →
Page 24
and display
→
Page 21
19

NL Before first use
5. Pour the powder detergent into
the compartment for manual
dosing.
1 2
V6for the first use
Before first use To avoid foaming, use only half the
amount recommended by the
detergent manufacturer for light
soiling. Do not use wool or delicate
detergent.
VPrepare the device for use.for the first use
6.1 Start the wash cycle
without laundry 6. Slide in the detergent drawer.
Your device has been thoroughly
checked before leaving the factory.
To remove any residual water, wash
the first time without any laundry.
1. Press .
7. Press to start the program
start.
aThe display shows the remaining
program duration.
8. Start the first wash cycle or press
to switch off the appliance.
→
"Ministry in Essence",
Page 32
The power-on process takes a few
seconds.
2. The program drum cleaning
gene Set up.
3. Close the door.
4. Pull out the detergent drawer.
20
Table of contents
Other Bosch Washer manuals

Bosch
Bosch wlx24164gb User manual

Bosch
Bosch WAE24280MY Specification sheet

Bosch
Bosch WAL28PH1ES User manual

Bosch
Bosch WIW28501GB Specification sheet

Bosch
Bosch WLT Series Specification sheet

Bosch
Bosch WAV28G44 User manual

Bosch
Bosch WGG2440R10 User manual

Bosch
Bosch WGG256M1GB User manual

Bosch
Bosch WGB254A0BY User manual

Bosch
Bosch WUU24T62ES User manual

Bosch
Bosch WAQ283S1GB Setup guide

Bosch
Bosch WAL28RH1GR User manual

Bosch
Bosch Washing Machine User manual

Bosch
Bosch WUU24T63ES User manual

Bosch
Bosch WAB28162GB User manual

Bosch
Bosch WAN28289IL User manual

Bosch
Bosch WAX32KH2BY User manual

Bosch
Bosch WAE28369GB Series Specification sheet

Bosch
Bosch WGG254F0GB User manual

Bosch
Bosch WGB256A90 User manual