bredent ecovac User manual
DE Betriebs- und Wartungsanleitung Seite 1
EN Operation and maintenance manual page 11
FR Manuel d‘utilisation et d‘entretien page 20
IT Manuale di funzionamento e manutenzione pagina 30
ES Manual de funcionamiento y mantenimiento paginá 40
RU Руководство по эксплуатации и
техническому обслуживанию страница 50
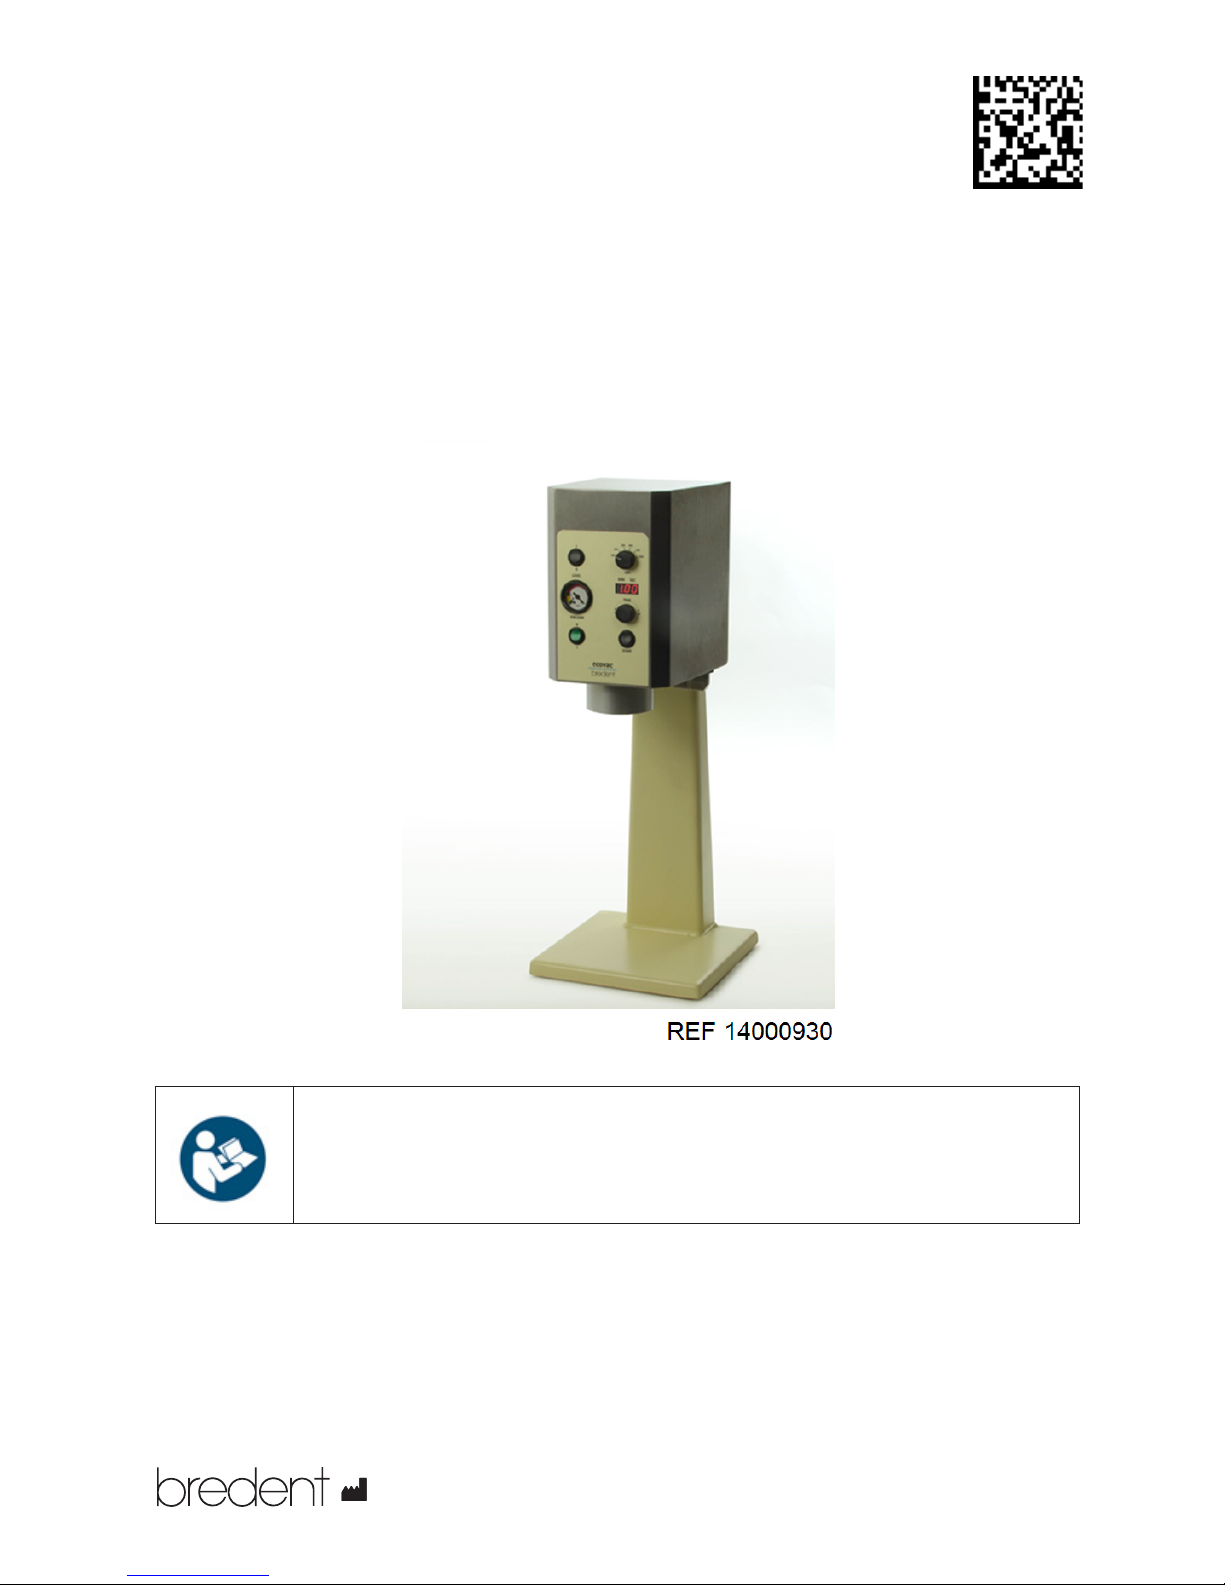
ecovac
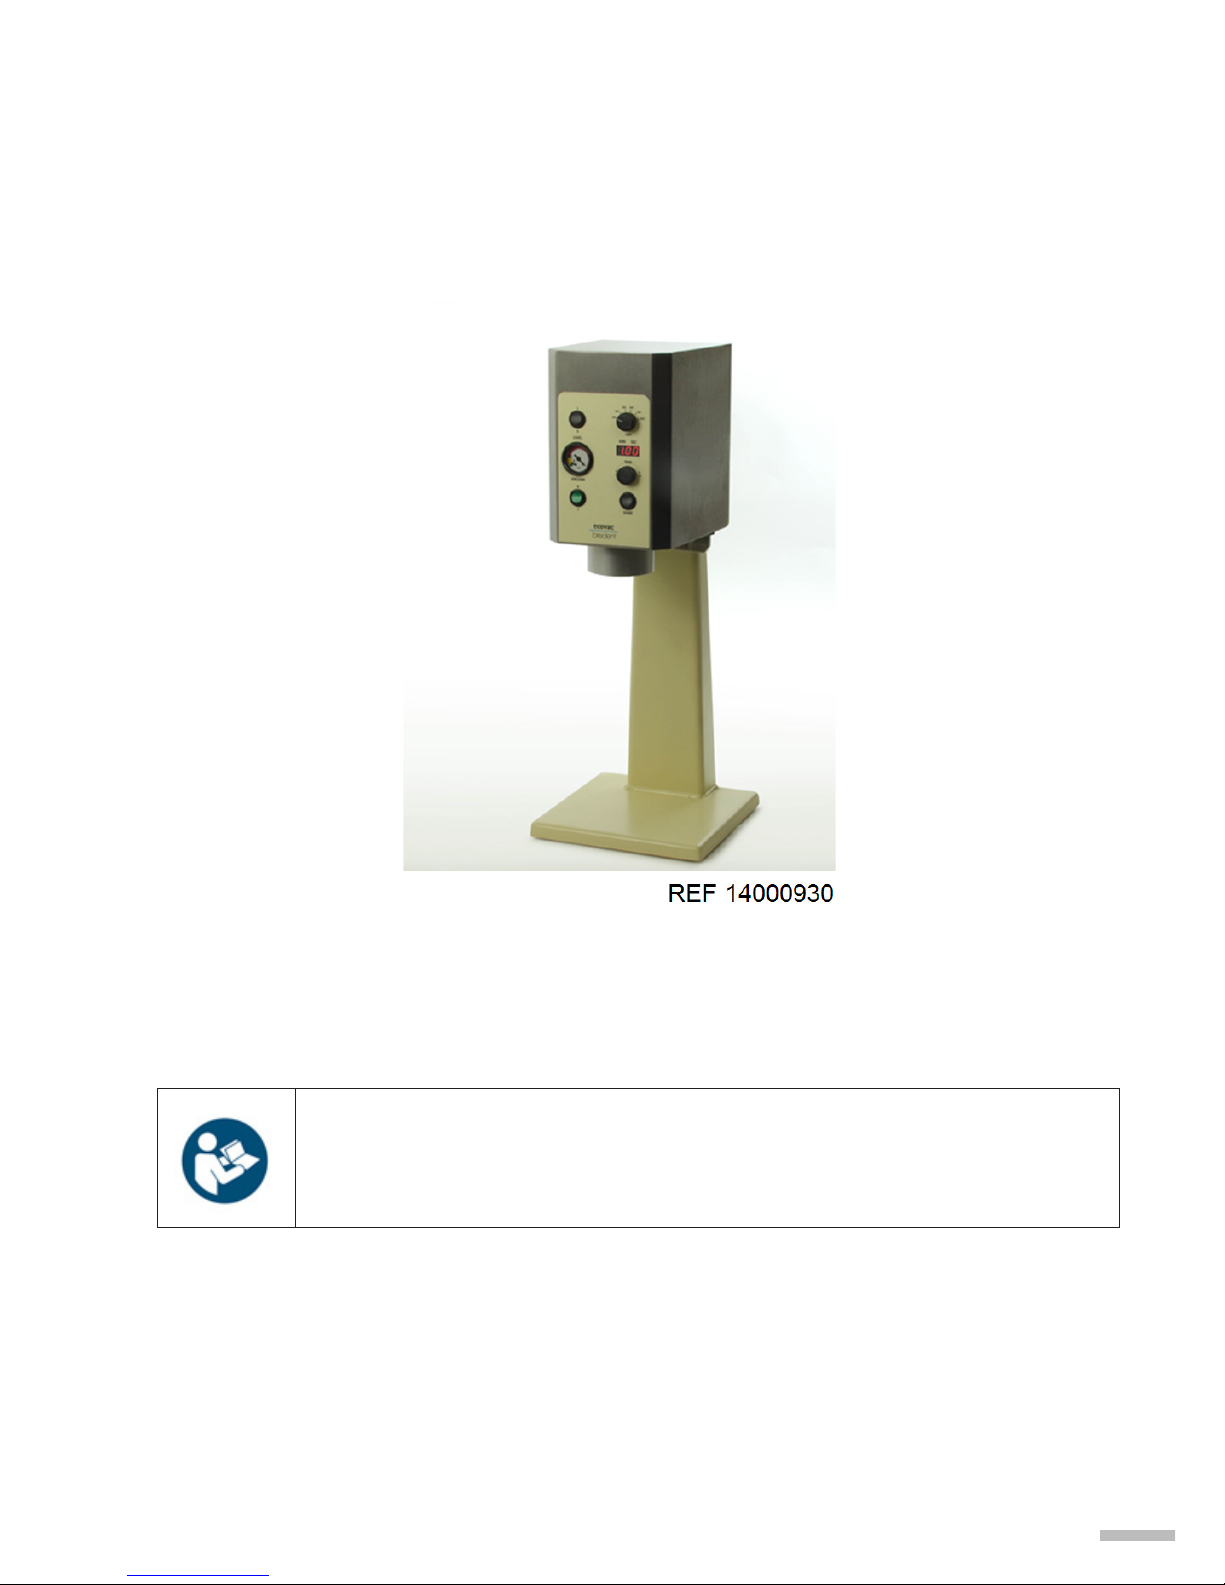
(Vakuumanrührsystem)
Bitte diese Betriebs- und Wartungsanleitung vor dem Produkteinsatz ausführlich
lesen!
Für Schäden, die durch Nichtbeachten dieser Betriebs- und Wartungsanleitung
entstehen lehnt der Hersteller jede Haftung ab!
bredent GmbH &Co.KG · Weissenhorner Str. 2 · 89250 Senden · Germany · Tel. +49 7309 872-22 · Fax +49 7309 872-24
009035EX-20180425

2
Inhaltsverzeichnis Seite
1. Produktbeschreibung 2
1.1 Einsatz und Gebrauch 2
1.2 Indikationen 2
1.3 Kontraindikationen 2
1.4 Technische Daten 3
1.5 Produktvarianten und Ausführungen 3
2. Gefahren- und Sicherheitshinweise 4
2.1 Warnung 4
2.2 Achtung 4
3. Lagerungs- und Transporthinweise 5
4. Entsorgung 5
5. Inbetriebnahme 6
5.1 Montage 6
5.2 Auflistungen der Gerätefunktionen und Bauteile 6
5.3 Arbeitsvorbereitung 7
5.4 Anrührbecher 8
5.5 Füllmenge der Anrührbecher 8
6. Reinigung und Wartung 8
6.1 Reinigung 8
6.2 Wartung 8
7. Fehlerbehebungen 9
8. Konformitätserklärung 9
9. Garantie 9
10. Verwendete Symbole 10
11. Sonstige Hinweise 10
1. Produktbeschreibung
1.1 Einsatz und Gebrauch
Das ecovac Anrührsystem bietet durch die aufeinander abgestimmten Systemkomponenten und deren aus-
gefeilte Technik gleichbleibende Ergebnisse bei der Verarbeitung von Einbettmassen, Gipsen und Silikonen.
Dies wird durch die besondere Geometrie des Ankerwendel-Rührers, in Abstimmung zum Anrührbecher und
den individuell einstellbaren Gerätefunktionen erreicht. Als Standard wird das Gerät zur Wandmontage
ausgeliefert. Die Schalter und Armaturen sind übersichtlich und bedienfreundlich angeordnet. Zwei Einstel-
lungsparameter für ein gezieltes Vakuum ermöglichen beste Nutzung der zu rührenden Materialien. Die leis-
tungsstarke und wartungsfreie Vakuumpumpe erzeugt innerhalb von kurzer Zeit das gewählte Vakuum. Der
Anrührbecher wird angesaugt und dadurch selbstständig am Gerät gehalten. Sechs unterschiedliche Rührge-
schwindigkeiten gestalten das Gerät effizient.
1.2 Indikationen
Homogenes, blasenfreies Anmischen von dentalen Gipsen, Einbettmassen und Silikonen unter Vakuum.
Bitte die Angaben zu U/min., Rührzeiten und Vakuumeinstellungen der Materialhersteller beachten und für
jeden Werkstoff einen separaten Anmischbecher verwenden – sonst stimmen die Mischergebnisse nicht mehr!
1.3 Kontraindikationen
Nach gegenwärtigem Kenntnisstand sind keine Kontraindikationen bekannt.
bredent GmbH &Co.KG · Weissenhorner Str. 2 · 89250 Senden · Germany · Tel. +49 7309 872-22 · Fax +49 7309 872-24

3
+
1.4 Technische Daten
Maße in mm [T/B/H]: 250 x 200 x 290 (Wandmontage)
250 x 250 x 650 bzw. 590 (inkl. Standfuß)
Gewicht [kg]: 13 (Wandmontage)
25 (inkl. Standfuß)
Drehzahl [U/min]: 250 / 320 / 390 / 460 / 530 / 600
U [VAC]: 200 - 240 (Input)
P [W]: 220 W
f [Hz]: 50 - 60
Sicherung [A]: T 2,0 A
1.5 Produktvarianten und Ausführungen
Ecovac Vakuum Anrührsystem 230 Volt 7-tlg. (Lieferumfang) REF 14000930
1x Vakuumanmischgerät ecovac für die Wandmontage
1x Netzkabel mit 2 m Länge
1x Ersatzfilter
1x Schalldämpfer
1x Bohrschablone
3x Schrauben mit Dübel für die Wandmontage
1 Schraube mit Bodenwinkel
1 Gebrauchsanweisung
Optionales Zubehör
Standfuß für Vakuum Anrührsystem ecovac REF 21000450
Ecovac Anrührbecher 50 ccm REF 1400B945
Ecovac Anrührbecher 250 ccm REF 1400B940
Ecovac Anrührbecher, 750 ccm REF 1400B942
Ecovac Anrührbecher, 1000 ccm REF 1400B943
Ecovac Anker-Wendel-Rührer für Anrührbecher 50 ccm REF 1400R945
Ecovac Anker-Wendel-Rührer für Anrührbecher 250 ccm REF 1400R940
Ecovac Anker-Wendel-Rührer für Anrührbecher 750 ccm REF 1400R942
Ecovac Anker-Wendel-Rührer für Anrührbecher 1000 ccm REF 1400R943
Ersatzteile
Ecovac Vorfilter (2 Stück) REF 73000180
Ecovac - O-Ring für Ankerwendel-Rührer, 50 ccm REF 99300007
bredent GmbH &Co.KG · Weissenhorner Str. 2 · 89250 Senden · Germany · Tel. +49 7309 872-22 · Fax +49 7309 872-24

4
Ecovac - O-Ring für Ankerwendel-Rührer, 250 ccm REF 99300008
Ecovac - O-Ring für Ankerwendel-Rührer, 750-1000 ccm REF 99300013
Ecovac - O-Ring für Rühr-/Ansaugstutzen REF 99300014
Ecovac Gerät Schalldämpfer für 14000930 REF 99300015
2. Gefahren und Sicherheitshinweise
Signalwort:
Unter Punkt 2.1 Warnung und 2.2 Achtung beschrieben.
Wichtige Hinweise werden als „Warnung“ oder „Achtung“ gekennzeichnet.
Warnung
Weist auf potentielle Gefährdungen hin, die bei Nichtbeachtung zu ernsthaften Verletzungen oder zum
Tode führen können.
Achtung
Weist auf potentielle Gefährdungen hin, die bei Nichtbeachtung zu Verletzungen oder zu Beschädi-
gungen am Gerät führen können.
2.1 Warnung
Beschädigtes Gerät
Verwenden Sie kein beschädigtes Gerät, wenn Gehäuseteile, Anrührbecher, Anker-wendel-Rührer,
Standfuß, Kabel oder der Netzstecker beschädigt sind.
Nicht bestimmungsgemäßer Gebrauch
Keine brennbaren explosiven Stoffe mit dem Gerät aufheizen!
• Nicht in Bereichen mit brennbaren und explosiven Stoffen betreiben oder aufheizen!
• Nicht in direkter Umgebung mit extremer Luftfeuchtigkeit betreiben (Bsp.: Dampfstrahler,
Waschbecken)
• Keine Anwendung an Patienten oder Tieren (kein Medizinprodukt!)
• Nicht in das Geräteinnere mit den Fingern fassen. Immer Netzstecker vorher ziehen!
• Nicht mit feuchten Fingern an den Netzstecker fassen, das kann zu einem Stromschlag führen!
• Nicht ohne Arbeitskleidung und geeigneter Schutzbrille betreiben. Es gelten die relevanten
Bestimmungen der Berufsgenossenschaft.
Das Gerät nur von bredent autorisiertem Servicepersonal öffnen und reparieren lassen – vorher
Netzstecker ziehen!
2.2 Achtung
Positionierung des Gerätes
• Immer für ausreichende Be- und Entlüftung des Gerätes sorgen, sonst kann es zur Überhitzung des
Gerätes führen und die Lebensdauer beeinträchtigen!
• Anwendung nur in geschlossenen, trockenen Räumen und auf einer stabilen ebenen Unterlage
(Tischarbeitsplatz) mit einer Mindestabstellfläche von 50 x 50 cm!
• Nur Geräteteile die in einwandfreiem Zustand sind gewährleisten die Funktionstüchtigkeit des Ge-
rätes. Vor jeder Inbetriebnahme sind die Geräte- und deren Anbauteile gründlich zu prüfen!
• Werkzeugwechsel nur bei ausgeschaltetem Gerät vornehmen!
• Bevor das Gerät in Betrieb genommen wird, bitte kontrollieren ob das ecovac am Standfuß oder an
der Wand richtig montiert wurde und ob der Anrührbecher richtig angekoppelt und/oder das Rühr-
werk nicht beschädigt ist (Verletzungsgefahr!).
bredent GmbH &Co.KG · Weissenhorner Str. 2 · 89250 Senden · Germany · Tel. +49 7309 872-22 · Fax +49 7309 872-24

5
• Nie ohne Ankerwendel-Rührer und Anmischbecher betreiben!
• Vakuumpumpe nie ohne angesaugte Rührbecher laufen lassen!
• Nicht in den laufenden Rühr-/Ansaugstutzen (6) fassen!
• Nach Beenden/Absinken des Vakuums den Anmischbecher festhalten!
Funktionsprüfung/Netzanschluss
Darauf achten, dass…
• alle Gerätekomponenten unbeschädigt sind,
• keine Rückstände oder Verschmutzungen am/im Gerät oder Zubehör vorhanden sind,
• schadhaftes Zubehör oder Komponenten ausgetauscht wurden,
• keine Schäden am Stecker und Isolierung des Netzkabels vorhanden sind,
• Netzstecker zur Steckdose passt und die Netzdaten (Energieversorgung) mit den Angaben auf dem
Typenschild übereinstimmen,
• das Gerät immer auf eine geeignete flache, stabile Ebene in Arbeitshöhe fest montiert am Standfuß
aufgestellt oder an der Wand fest aufgehängt ist,
• sich die Umgebungstemperaturen in einem Bereich von 10 – 40 °C [ 50 -104 °F] bewegen,
• die relative Luftfeuchtigkeit von 80% nicht übersteigt,
• Herstellerangaben der rotierenden Werkzeuge beachten,
• das ecovac nach Gebrauch ausgeschaltet wird
Gerätesicherung – Feinsicherung wechseln
Im Falle, dass das Gerät nicht mehr einzuschalten geht, bitte Sicherung auf Funktionsfähigkeit prüfen.
Gerät zuerst ausschalten und Stromkabel vom Netz ziehen!
Nicht die Schrauben des Netzsteckers lösen!
Das Einsteckfach der Sicherungen befindet sich in der Mitte des Netzsteckers zwischen Hauptschalter
(5) und Kabelanschluss des Gerätes und kann bei ausgeschaltetem Gerät und gezogenem Stecker an
der Nase der Sicherungslade herausgezogen werden (mittels Instrument - erleichtert den Vorgang).
Bei der entnommenen Sicherung prüfen, ob der Metallfaden gerissen ist. Anschließend die
Sicherungslade mit der neuen Sicherung wieder vollständig in das Gerät zurücksetzen. Gerät einschal-
ten und auf Funktionalität prüfen – wenn Tasten, Anzeige nicht leuchten und / oder die Vakuumpumpe
oder Motor nicht läuft, das Gerät bitte zu bredent oder autorisierten Händler einschicken.
Materialien und Flüssigkeiten
• Wasser und andere Flüssigkeiten dürfen nicht in das Geräteinnere gelangen, da hierdurch Kurz-
schlüsse und Korrosion hervorgerufen werden können.
• Verwenden Sie nur handelsübliche dentale Materialien die mit dem ecovac bearbeitet werden.
• Keine brennbaren, oder explosiven Flüssigkeiten oder Gemische verwenden!
• Keine scharfen, ätzenden, oder schleifpartikelhaltige Putzmittel zur Reinigung der Oberflächen
benutzen.
• Das Gerät nur von A nach B mit Sicherhheitsschuhen tragen!
3. Lagerungs- und Transporthinweise
Das ecovac Anrührgerät muss in der Originalverpackung und in trockenen Räumen gelagert werden. Die Ver-
sendung erfolgt ebenfalls in der Originalverpackung, da sonst auftretende Beschädigungen zu Lasten des
Versenders gehen.
4. Entsorgung
Das Gerät sollte gemäß den üblichen gesetzlichen Verordnungen für Entsorgung elektronische Altgeräte,
länderbezogen entsorgt werden (Beispiel: Werkstoffhof oder Recyclingbetriebe).
bredent GmbH &Co.KG · Weissenhorner Str. 2 · 89250 Senden · Germany · Tel. +49 7309 872-22 · Fax +49 7309 872-24
6
5. Inbetriebnahme
Sofort nach Entnahme aus der Verpackung das Gerät auf eventuelle Transportschäden überprüfen. Transport-
schäden umgehend bei bredent oder einem autorisierten Händler melden. Das ecovac Anrührgerät darf nur
von Fachpersonal, wie Zahntechnikern und Zahnärzten bedient werden, sowie durch diese Berufsgruppe an-
geleitete und beaufsichtigte Personen.
5.1 Montage
Wandmontage
Die mitgelieferte Bohrschablone erleichtert die exakte Montage. Die Bohrschablone muss mit Hilfe einer
Wasserwaage horizontal ausgerichtet werden. Zwischen Rühr-/Ansaugstutzen (6) und einer Tischplatte
sollten mindestens 30 cm Platz vorhanden sein (Rührbecheraufnahme). Nach dem Bohren der drei Löcher
(Durchmesser 8 mm) die Dübel eindrücken und die oberen 2 Schrauben ca. 6 mm ausstehend einschrauben.
Der Bodenwinkel wird in der unteren Aufnahme „Loch“ (10) am Gerät fest mit der Schraube angezogen.
Danach kann das Gerät an der Wand eingerastet und der Bodenwinkel mit der Wand verschraubt werden.
Darauf achten, dass das Gerät einen sicheren Halt hat. Gegebenenfalls die oberen 2 Schrauben korrigieren.
Bitte beachten, dass die Wand stabil ist und eine Befestigung des Gerätes zulässt.
Montage als Standgerät (optional)
Der Standfuß REF 21000450 wird mit den mitgelieferten Schrauben an der Geräterückseite befestigt. Es sind
zwei unterschiedliche Montagehöhen wählbar. Das Gerät auf eine ebene Fläche stellen und auf sicheren
Stand achten.
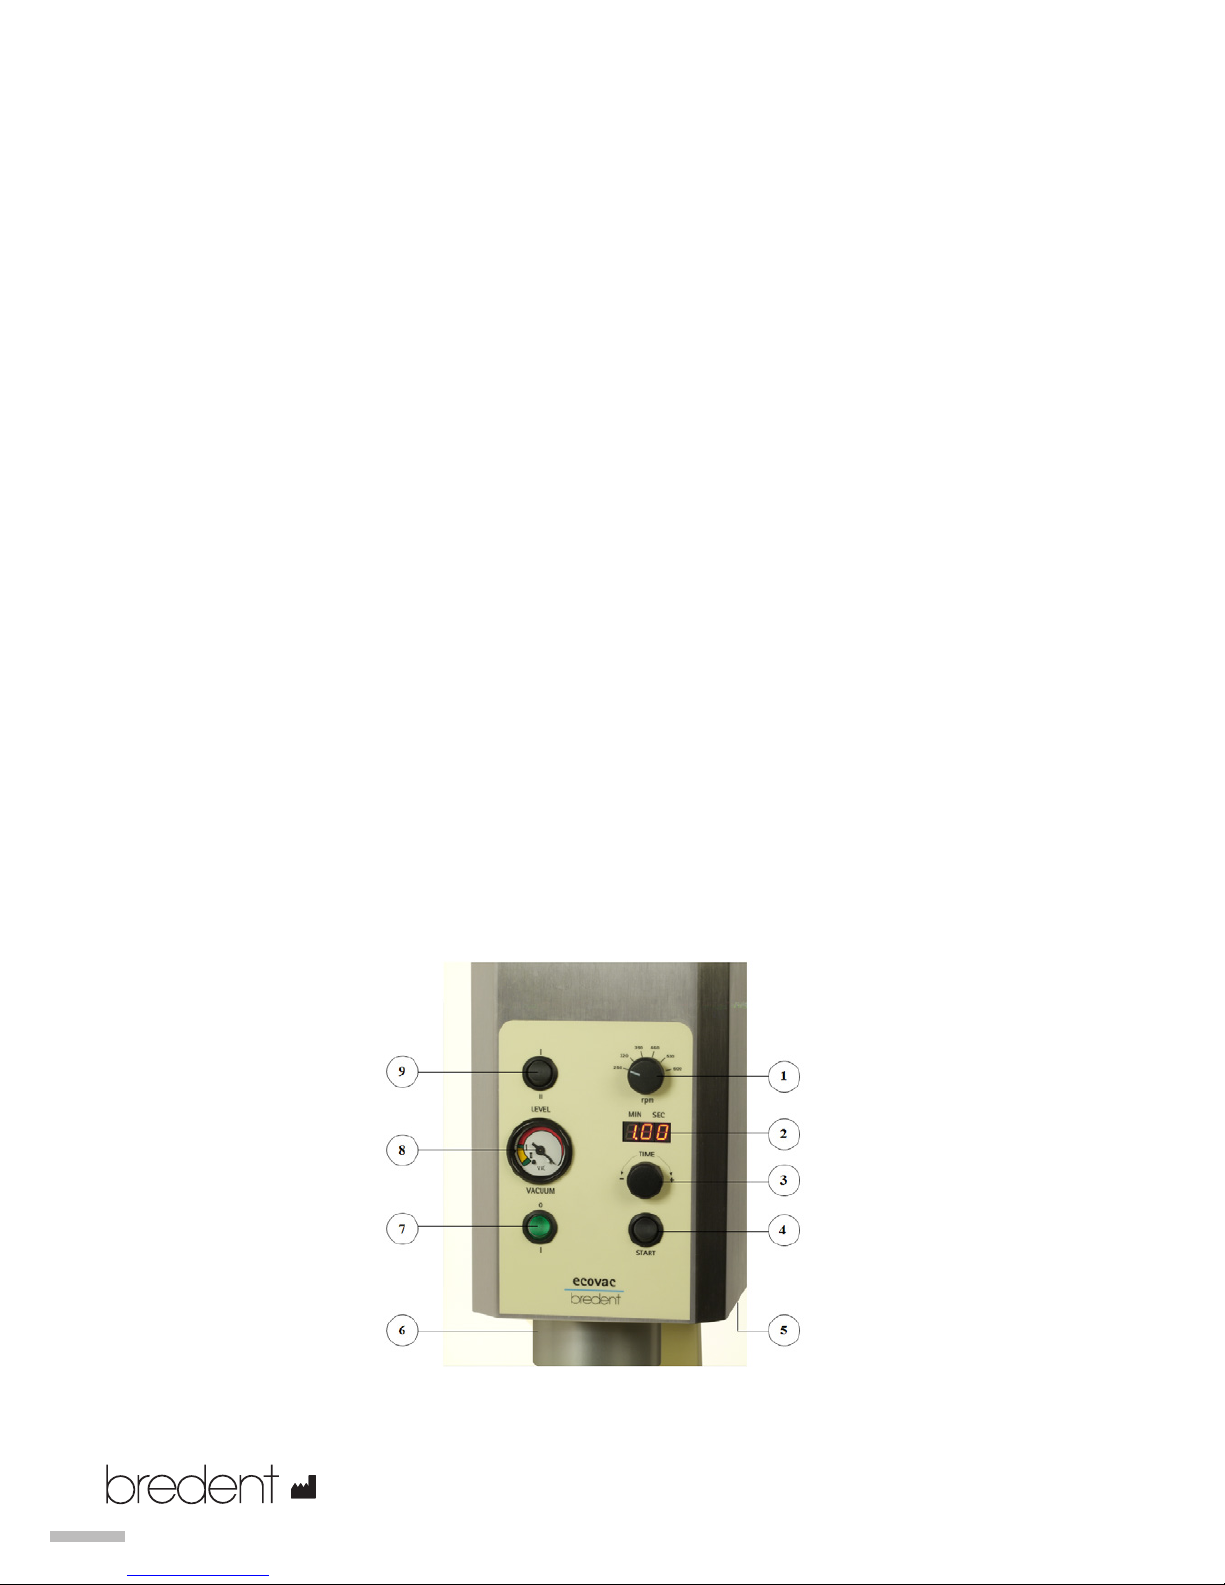
5.2 Auflistungen der Gerätefunktionen und Bauteile
(1) Drehzahl - Regler (Abstufungen: 290 – 600U/min.)
(2) Zeit - Anzeige (min./sec; 0.00 – 9:50)
(3) Zeit - Einstellung (-/senken und +/erhöhen)
(4) Rührfunktion START/STOPP (Programmablauf)
(5) EIN/AUS (Netzstecker, rechts unten am Gerät)
(6) Rühr-/Ansaugstutzen (Rührwerk-Becheraufnahme)
(7) Vakuum I = START / O = STOPP (Vakuumpumpe)
(8) Vakuum - Anzeige (I=Teilvakuum / II=volles Vakuum)
(9) Vakuum - Wechselschalter (Wechsel der Position I oder II
(10) Untere Aufnahme „Loch“ für Bodenwinkel
(11) Schalldämpfer
(12) Typenschild
bredent GmbH &Co.KG · Weissenhorner Str. 2 · 89250 Senden · Germany · Tel. +49 7309 872-22 · Fax +49 7309 872-24

7
Prüfen Sie, ob die Netzdaten mit den Angaben auf dem Typenschild (12) übereinstimmen. Lesen Sie sich vor
dem Anschließen ans Netz die Betriebs- und Wartungsanleitung sowie im Speziellen die darin aufgeführten
Gefahren- und Sicherheitshinweise, Montage, Auflistung der Gerätefunktionen und Bauteile genau durch! Aus
Transportsicherheit ist der Schalldämpfer (11) am Gerät demontiert. Diesen vor der ersten Inbetriebnahme mon-
tieren.
5.3 Arbeitsvorbereitung
Den entsprechenden Anrührbecher bezüglich der Füllmenge (siehe 5.5) für die zu rührende Masse auswählen.
Die Füllmenge darf nicht überschritten werden, da sonst die Gefahr besteht, dass die Masse durch das Vakuum
zu hoch angesaugt wird – Verschmutzungsgefahr des Vorfilters. Die zu rührende Masse entsprechend der Her-
stellerangaben aus der Gebrauchsanweisung anmischen. Darauf achten, dass der Becherrand frei von Verschmut-
zungen ist, da der Deckel des Ankerwendel-Rührers sonst nicht dicht abschließt und somit kein Vakuum auf-
gebaut wird. Den Hauptschalter (5) des Gerätes rechts an der Unterseite einschalten. Durch Drehen an dem
Einstellknopf (3) wird die Zeit für den Rührvorgang eingegeben und an der digitalen Zeitanzeige (2) angezeigt.
Die gewünschte Drehzahl wird am Drehzahl–Regler (1) eingestellt.
Bitte beachten:
Die Expansion der Einbettmasse verändert sich je nach Höhe der eingestellten Drehzahl. Als Basiswert werden
390 U/min. empfohlen. Das Vakuum I oder II wird am Wechselschalter (9) gewählt. Den geschlossenen Becher
in den Rühr-/Ansaugstutzen (6) durch Drehen einpassen. Das Vakuum wird durch den Kippschalter (7) auf Positi-
on „I“ gestartet, den Becher noch ca. 5 Sekunden halten. Anschließend wenn das Vakuum aufgebaut wurde, hält
der Becher selbstständig. Ein Wechsel der Vakuumeinstellung von I auf II (9) ist während des Aufbaus des Va-
kuums möglich. Ist das Vakuum auf I eingestellt, so wird nach Erreichen des Vakuums die Pumpe ausgeschaltet,
das Vakuum bleibt erhalten. Jetzt kann nicht mehr auf Vakuum II umgestellt werden. Ein Zurückstellen von
Stufe II auf I ist ebenfalls nicht möglich, wenn die Stufe I überschritten ist. Das Betätigen des Schalters (9) lässt
das Vakuum dann zwischen der Stufe I und II, aber nicht genau im vorgegebenen Bereich anhalten. Der Rührvor-
gang wird erst bei Betätigen der Start-Taste (4) ausgelöst. Das Ende der Rührzeit wird auf der digitalen Zeitan-
zeige durch „0.00“ angezeigt und zusätzlich durch ein akustisches Signal unterstützt. Der Anrührbecher wird
nach dem Ende der Rührzeit weiterhin durch das Vakuum gehalten, bis der Vakuumschalter (7) in Stellung 0
gebracht wird. Beim Absinken des Vakuums löst sich der Anrührbecher vom Rühr-/Ansaugstutzen (6) und muss
festgehalten werden. Die eingegebenen Parameter – Vakuum, Drehzahlgeschwindigkeit und Rührzeit – bleiben
bis zu einer neuen Einstellung gespeichert, auch wenn der Hauptschalter (5) aus- und wieder eingeschaltet wird.
Digitale Zeitanzeige
Die gewünschte Zeit-Einstellung des Mischvorganges wird am Drehregler (3) eingestellt. Bis zu einer Minute ist
eine 1-60s, über einer Minute eine bis max. 9 min./50s genaue Einstellung möglich. Bei Betätigung des Schalters
(4) startet der Rührvorgang und die Zeit läuft rückwärts auf Null. Wird während des Rührvorganges der Schalter
(4) nochmals betätigt, so wird der Rührvorgang unterbrochen und die Anzeige wird automatisch wieder auf die
eingestellte Zeit zurückgesetzt. Bei Beendigung der eingestellten Zeit erscheint im Display (2) „0.00“, zusätzlich
ertönt ein Warnsignal.
bredent GmbH &Co.KG · Weissenhorner Str. 2 · 89250 Senden · Germany · Tel. +49 7309 872-22 · Fax +49 7309 872-24
8
5.4 Anrührbecher
Die konische Form des Anrührbechers aus Edelstahl gewährleistet eine konstante Durchmischung der Kompo-
nenten. Der Zwischenraum von Ankerwendel-Rührer (Rührwerk) zur Becherwand ist sehr gering und dadurch ist
die optimale Durchmischung der Masse vorgegeben. Die Anmischspirale des Ankerwendel-Rührers hat eine
Linkssteigung, das Gerät hat einen rechtsdrehenden Motor. Somit wird die zu rührende Masse beim Anmischvor-
gang außen nach unten gedrückt und in der Mitte nach oben transportiert, wodurch eine blasenfreie, homogene
Masse im Anrührbecher entsteht. Flüssigkeitsreste oder feste Materialrückstände werden durch die glatte In-
nenfläche des Anrührbechers verhindert, da keine tiefen Rillen, wie in Kunststoffbechern, entstehen können. Die
Reinigung von Anrührbecher und Ankerwendel-Rührer erfolgt nur mit klarem Wasser und einer handelsüblichen
Bürste bei noch nicht ausgehärtetem Material. Sollten sich dennoch feste Gips- oder Einbettmassereste an der
Becherinnenwand oder an dem Ankerwendel-Rührer befinden, so können diese mit dem Gipslöser speed
REF 52001010 entfernt werden.
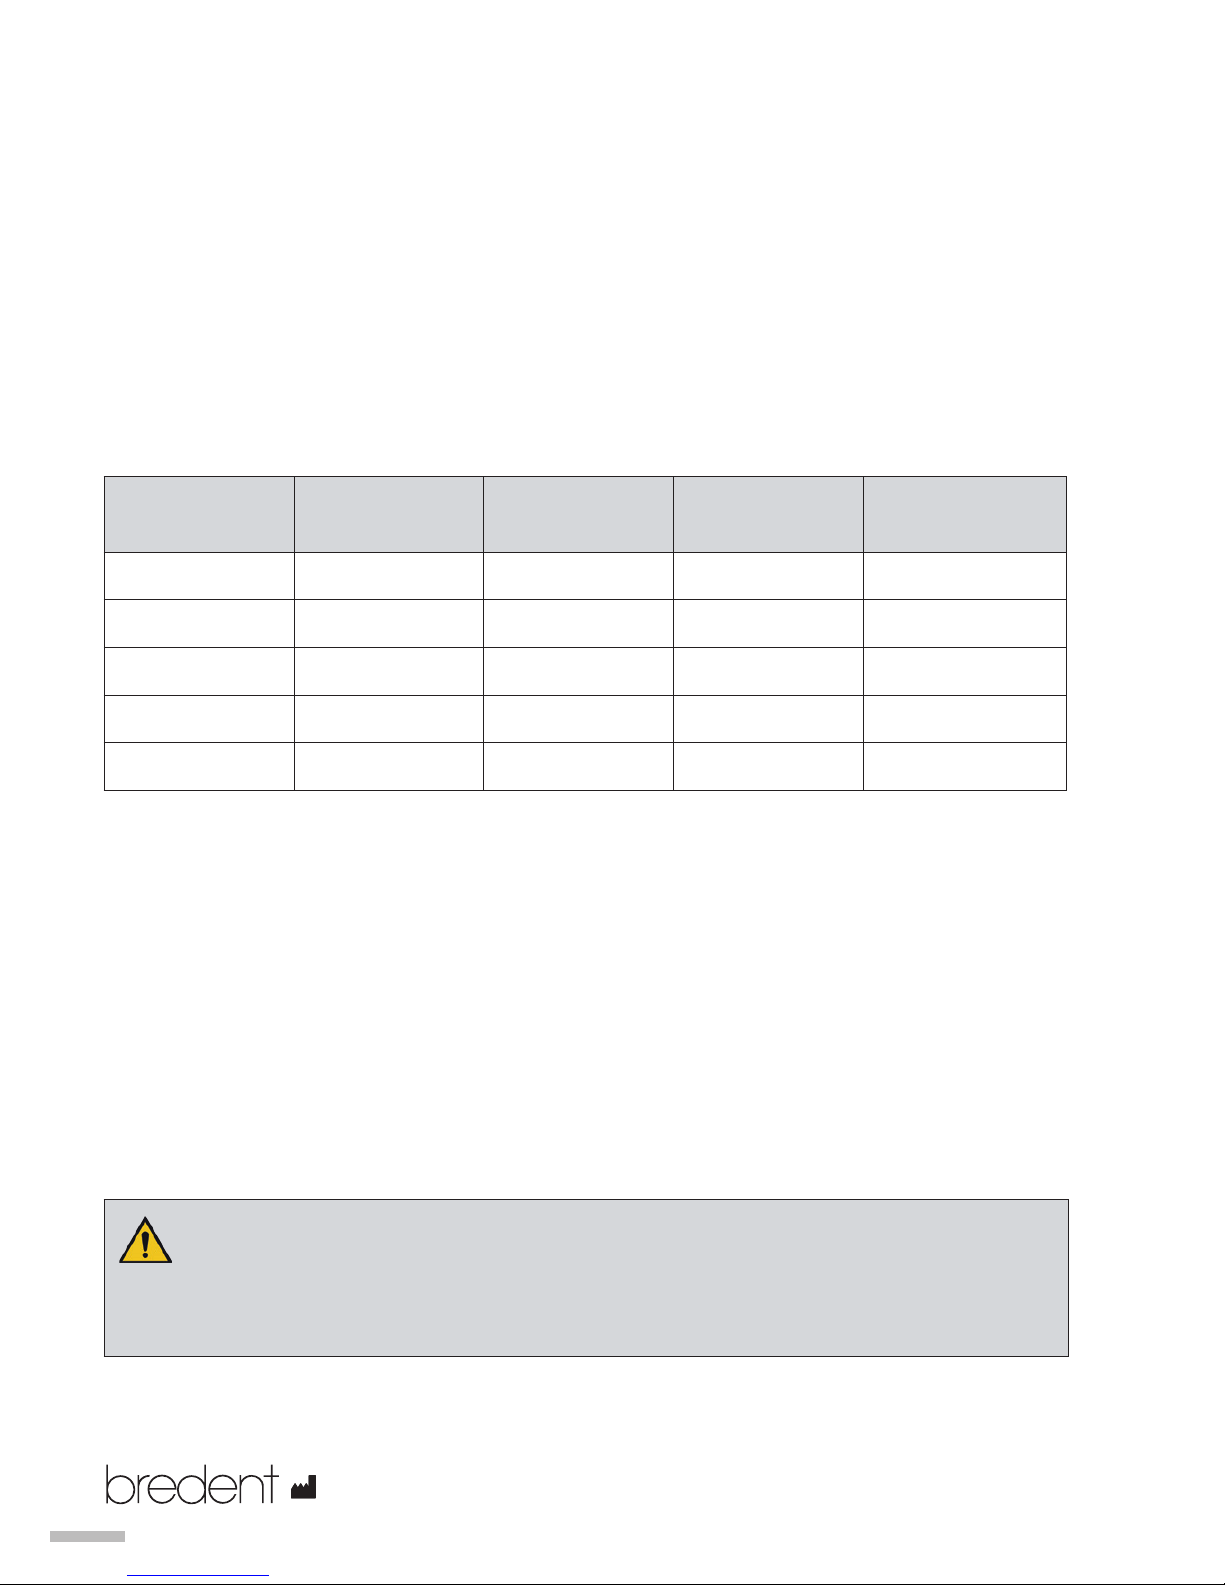
5.5 Füllmenge der Anrührbecher
Die Anrührbecher sind in unterschiedlichen Größen erhältlich.
Je nach Material sind diese unterschiedlich zu befüllen.
Bechergröße in
ccm
max. Füllmenge
in g
Einbettmasse Gips Silikon
50 50
250 200
750 600
1000 900
600
6. Reinigung und Wartung
6.1 Reinigung
Gerät nicht mit Druckluft reinigen!
Von außen nur mit einem leicht angefeuchteten Tuch bei gezogenem Netzstecker reinigen. Aufpassen, dass
keine elektronischen Teile mit Feuchtigkeit in Kontakt kommen. Keine lösungsmittelhaltigen Reinigungsmittel
verwenden!
6.2 Wartung
Aufnahme für Anmischbecher am Gerät, diejenige am Becher und dessen Dichtung sowie den Vorfilter je nach
Verschmutzungsgrad reinigen. Der Vorfilter befindet sich im Rühr-/Ansaugstutzen (6). Vor dem Wechseln des
Vorfilters Gerät ausschalten und Netzstecker entfernen. Der Vorfilter wird mit Hilfe eines Gabelschlüssels Größe
15 mit einer Linksdrehung gelöst und im Ultraschallbad gereinigt. Anschließend wird er wieder mit einer Rechts-
drehung handfest eingedreht. Es wird empfohlen, den Vorfilter alle 1 bis 2 Jahre auszutauschen. Die Reinigung
des Vorfilters sollte nicht erst bei verlangsamtem Vakuumaufbau erfolgen, sondern in regelmäßigen Abständen,
abhängig von der Nutzung des Gerätes.
ACHTUNG
Das Gerät nie ohne Vorfilter betreiben.
Die Dichtungsringe am Rühr-/Ansaugstutzen (5) und am Ankerwendel-Rührer sind sauber zu halten, um
ein optimales Vakuum zu gewährleisten. Die Vakuumpumpe ist wartungsfrei.
bredent GmbH &Co.KG · Weissenhorner Str. 2 · 89250 Senden · Germany · Tel. +49 7309 872-22 · Fax +49 7309 872-24

9
7. Fehlerbehebung
Fehler Ursache Fehlerbehebung
Gerät schaltet aus! Motor ist überlastet Neustart!
Gerät „Aus“ – und wieder „Ein“- schalten.
Gerät startet/arbeitet
nicht!
LED-Anzeige leuchtet
Nicht!
Netzdaten und/oder Anschlüsse,
Parameter stimmen nicht
- Daten mit Typenschild abgleichen
- Netzstecker einstecken
- Netzschalter (5) auf „on“ stellen
- Drehregler (3) auf empfohlene Anmischzeit
stellen ( > 0 s)
Feinsicherung defekt Feinsicherung T 2,0 [A] erneuern
Kein Vakuumaufbau
Vakuumpumpe defekt Mit bredent in Verbindung setzen und
gegebenenfalls einschicken
Dichtungen sind verschmutzt
oder porös
- Dichtungen am
Ankerwendelrührer und am Rühr-/Ansaug-
stutzen sauber halten
- poröse Dichtungen austauschen
Vakuumaufbau aber
Anrührbecher hält
nicht
Bohrung im Deckel des Anker-
wendelrührer ist verstopft
Reinigen des Kunststoffeinsatzes
Vorfilter verstopft Vorfilter ausbauen und reinigen
Gerät ist zu laut Schalldämpfer ist abgebrochen
oder fehlt gänzlich
Schalldämpferreste entfernen / fehlenden
Schalldämpfer einbauen
Ankerwendelrührer
läuft ruckartig oder
Mischergebnis
stimmt nicht!
Elektronische Regelung Mit bredent in Verbindung setzen und
gegebenenfalls einschicken
Ankerwendel ist verbogen
oder verschmutzt
Reinigen oder erneuern!
8. Konformitätserklärung
Hiermit erklären wir, bredent GmbH &Co.KG, Weissenhorner Str. 2, 89250 Senden, Deutschland, dass das ecovac
Anrührsystem aufgrund seiner Konzipierung und Bauart sowie der von uns in Verkehr gebrachten Ausführung
den einschlägigen Bestimmungen, europäischen Richtlinien und den nach den dafür zuständigen harmonisierten
Normen entwickelt worden ist. Die Konformitätserklärung kann bei Bedarf angefordert werden.
9. Garantie
Das ecovac Anrührgerät hat 1 Jahre Garantie.
Voraussetzung für die Inanspruchnahme der Garantieleistung ist das Vorhandensein der Originalrechnung des
Fachhandels. Garantieleistungen bewirken keine Verlängerung der Garantie! Von der Garantie ausgeschlossen
sind Defekte und Folgen die auf unsachgemäße Behandlung, Reinigung, Wartung und auf natürliche Abnutzung
zurückzuführen sind. Änderungen und Reparaturen am Gerät und dessen Komponenten dürfen nur von der
Firma bredent oder Dritten die hierzu ausdrücklich autorisiert (zertifiziert) wurden, ausgeführt werden und
müssen den rechtlichen Regeln der Technik entsprechen. Andernfalls erlischt der Garantieanspruch! Das Produkt
darf nur von geschultem Fachpersonal verwendet werden. Für die Verarbeitung sind nur Originalwerkzeuge und
-teile zu verwenden.
bredent GmbH &Co.KG · Weissenhorner Str. 2 · 89250 Senden · Germany · Tel. +49 7309 872-22 · Fax +49 7309 872-24
10
Die Seriennummern aller verwendeten Teile müssen zur Gewährleistung der Rückverfolgbarkeit und Reklamati-
onsansprüchen dokumentiert werden. Die Betriebs- und Wartungsanleitung entspricht dem aktuellen Stand der
Technik und unseren eigenen Erfahrungen. Das Produkt darf nur unter dem Punkt 1.2 beschriebenen Indikationen
verwendet werden.
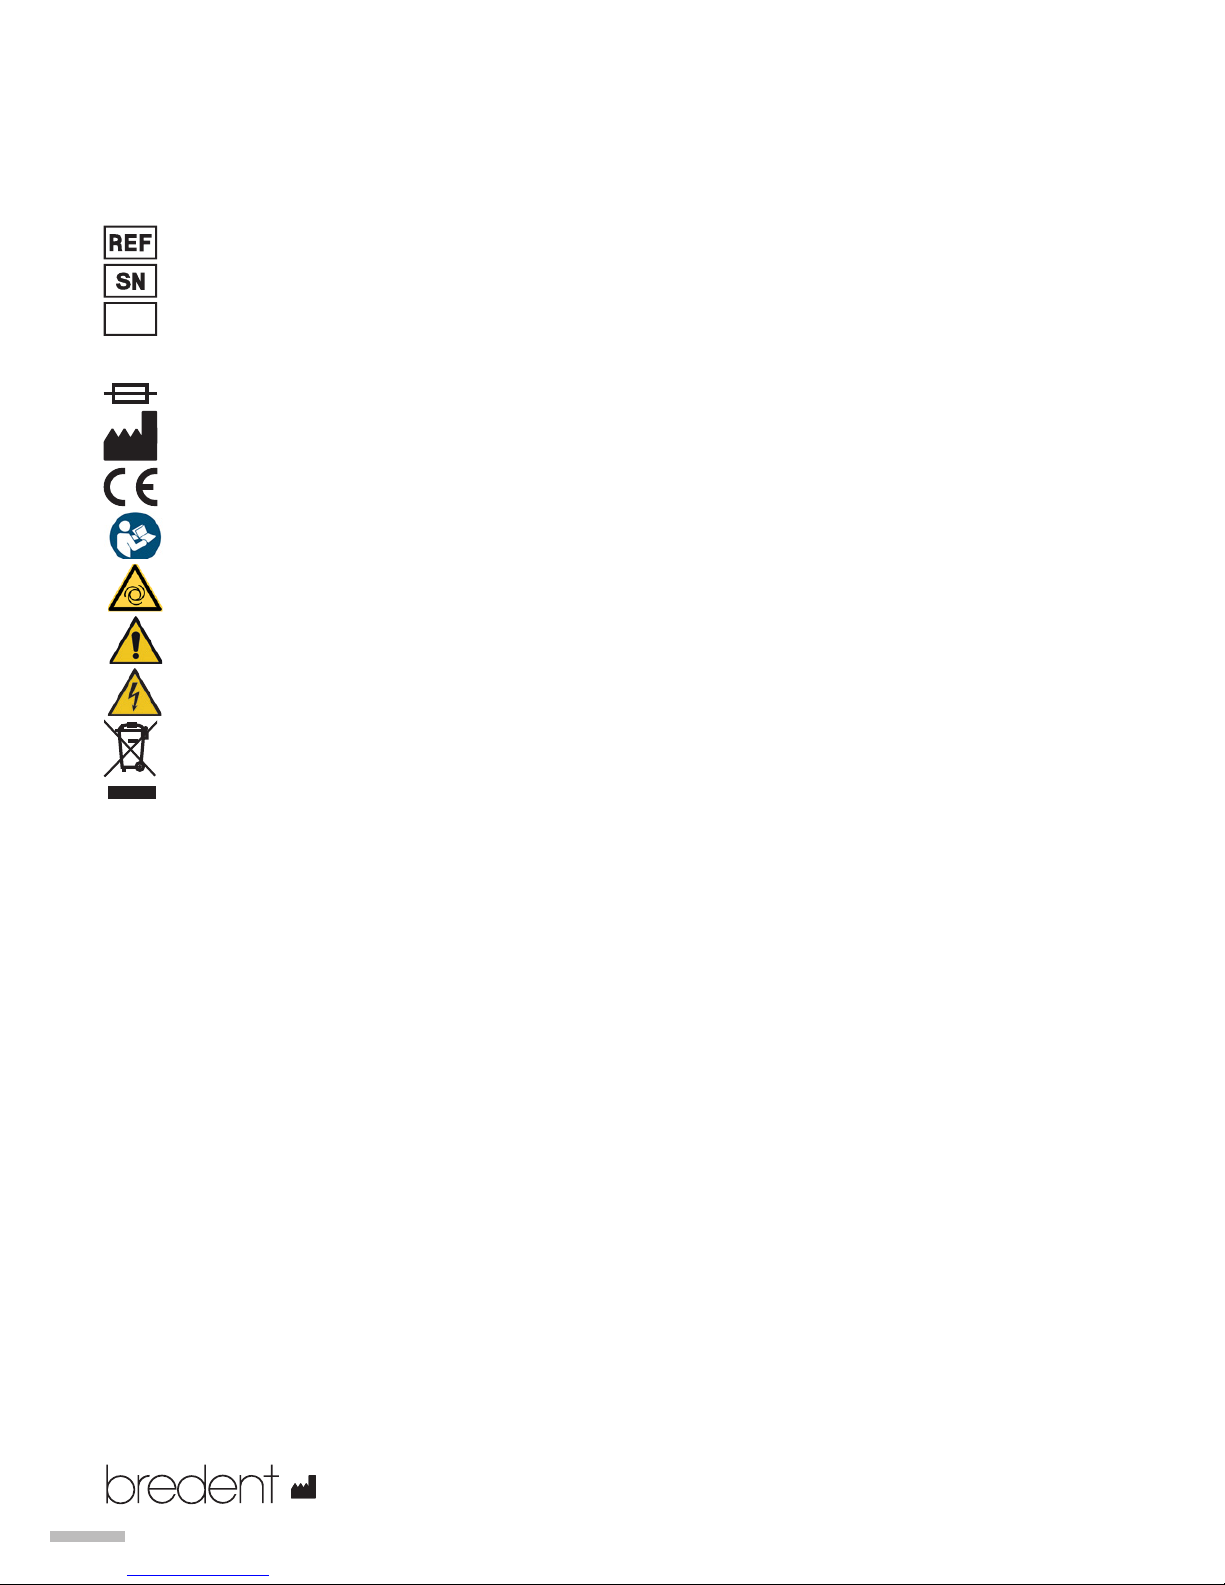
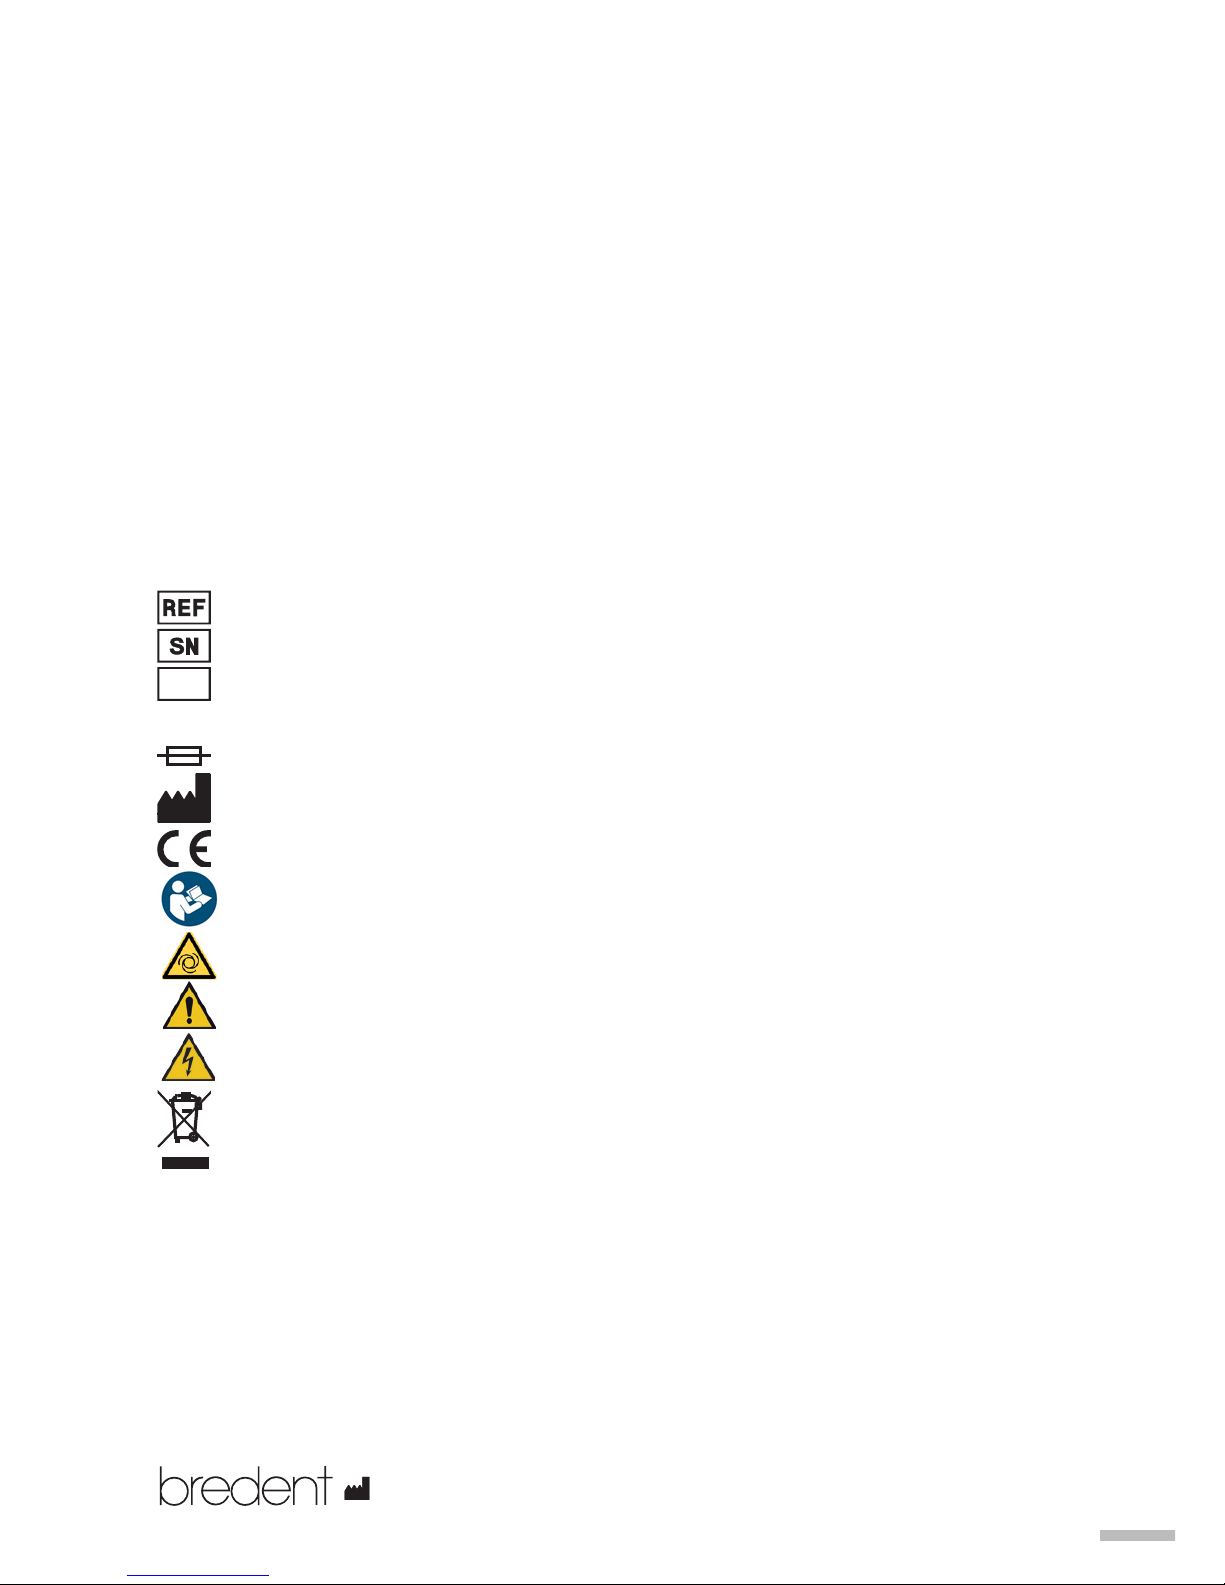
10. Verwendete Symbole
Typ ecovac
Artikelnummer
Seriennummer
BJ Baujahr
U/min Drehzahl pro Minute
Sicherung T 2,0 [A]
Hersteller
Symbol für „Europäische Konformität“
Anleitung beachten!
Automatischer Anlauf - Drehteile!
Achtung
Vor dem Öffnen des Gerätes Netzstecker ziehen!
Nicht in den Hausmüll entsorgen
11. Sonstige Hinweise
Die Angaben dieser Gebrauchsanweisung werden stets den aktuellsten Ergebnissen und Erfahrungen an-
gepasst. Wir empfehlen daher, vor Benutzung eines neuen Gerätes die Gebrauchsanweisung zu lesen. Der
Benutzer ist für die Anwendung des Produktes selbst verantwortlich. Für fehlerhafte Ergebnisse wird nicht
gehaftet, da bredent keinen Einfluss auf die Weiterverarbeitung hat. Eventuell dennoch auftretende Schaden-
ersatzansprüche beziehen sich ausschließlich auf den Warenwert unserer Produkte.
bredent GmbH &Co.KG · Weissenhorner Str. 2 · 89250 Senden · Germany · Tel. +49 7309 872-22 · Fax +49 7309 872-24
11
EN Operation and maintenance manual page 11
Please read these instructions for use carefully before using the product!
The manufacturer cannot be held liable for any loss or damage sustained as a result
of failing to comply with these instructions for use and maintenance!
ecovac
(Vacuum mixing system)

12
Table of contents Page
1. Product description 12
1.1 Application and use 12
1.2 Indications 12
1.3 Contraindications 12
1.4 Technical data 12
1.5 Product variants and designs 13
2. Risks and safety information 14
2.1 Warning 14
2.2 Caution 14
3. Storage and transportation guidelines 15
4. Waste disposal 15
5. Start-up 15
5.1 Assembly 15
5.2 Lists of device functions and components 16
5.3 Preparatory work 17
5.4 Mixing cups 17
5.5 Filling level of the mixing cups 18
6. Cleaning and maintenance 18
6.1 Cleaning 18
6.2 Maintenance 18
7. Troubleshooting 18
8. Declaration of conformity 19
9. Warranty 19
10. Symbols used 19
11. Other information 19
1. Product description
1.1 Application and use
Thanks to the matched system components and the sophisticated technology, the ecovac mixing system
ensures consistent results when processing investment materials, plasters and silicones. Consistent results
are achieved by the special geometry of the mixing spiral in combinatiion with the mixing cup and the unit
functions that can be adjusted individually. In the standard version, the device is suitable for wall mounting.
The switches and panels are clearly arranged to enable user-friendliness. Two setting parameters for a specific
vacuum allow perfect use of the materials to be mixed. The high-performance and maintenance-free pump
generates the selected vacuum very quickly. The mixing cup is drawn in and held automatically at the device.
The device is efficient due to the fact that it can be operated using six different mixing speeds.
1.2 Indications
Homogeneous, bubble-free mixing of dental plasters, investment materials and silicones under vacuum.
Please observe the information regarding rpm, mixing times and vacuum settings of the material manufactu-
rer and use a separate mixing cup for each material - to avoid obtaining incorrect mixing results!
1.3 Contraindications
Based on the current state of knowledge there are no known contraindications.
1.4 Technical data
Dimensions in mm [D/W/H]: 250 x 200 x 290 (wall mounting)
250 x 250 x 650 or 590 (incl. stand)
Weight [kg]: 13 (wall mounting)
25 (incl. stand)
Speed [rpm]: 250 / 320 / 390 / 460 / 530 / 600
U [VAC]: 200 - 240 (Input)
bredent GmbH &Co.KG · Weissenhorner Str. 2 · 89250 Senden · Germany · Tel. +49 7309 872-22 · Fax +49 7309 872-24

13
P [W]: 220 W
f [Hz]: 50 - 60
Fuse [A]: T 2.0 A
1.5.Product variants and designs
Ecovac vacuum mixing system 230 V 7 Parts (scope of delivery) REF 14000930
1x ecovac vacuum mixing device for wall mounting
1x mains cable, 2 m in length
1x replacement filter
1x sound absorber
1x drilling template
3x screws with dowels for wall mounting
1x screw with floor bracket
1x instructions for use
Optional accessories
Base for ecovac vacuum mixing system REF 21000450
Ecovac mixing cups 50 ccm REF 1400B945
Ecovac mixing cups 250 ccm REF 1400B940
Ecovac mixing cups 750 ccm REF 1400B942
Ecovac mixing cups 1000 ccm REF 1400B943
Ecovac mixing spiral 50 ccm REF 1400R945
Ecovac mixing spiral 250 ccm REF 1400R940
Ecovac mixing spiral 750 ccm REF 1400R942
Ecovac mixing spiral 1000 ccm REF 1400R943
Spare parts
Prefilter (2 pieces) REF 73000180
Ecovac - O-ring for mixing spiral, 50 ccm REF 99300007
Ecovac - O-ring for mixing spiral, 250 ccm REF 99300008
Ecovac - O-ring for mixing spiral, 750 - 1000 ccm REF 99300013
Ecovac - O-ring for mixing/suction connection REF 99300014
Ecovac unit silencer for 14000930 REF 99300015
bredent GmbH &Co.KG · Weissenhorner Str. 2 · 89250 Senden · Germany · Tel. +49 7309 872-22 · Fax +49 7309 872-24

14
2. Risks and safety information
Signal word:
Described under Points 2.1 Warning and 2.2 Caution.
Important information is highlighted using the words „Warning“ or „Caution“.
Warning
Provides information concerning potential dangers, which could result in severe injuries or death if
ignored.
Caution
Provides information concerning potential dangers, which could result in injuries or damage to the
device if ignored.
2.1 Warning
Damaged device
Do not use a damaged device if the housing components, mixing cup, mixing spiral, stand, cable or the
mains plug are damaged.
Improper use
Do not heat flammable, explosive substances with the device!
• Do not operate or heat in the vicinity of flammable and explosive substances!
• Do not operate directly in areas with extreme air humidity (e.g.: steam jet, sink)
• Do not use on patients or animals (not a medical device!)
• Do not insert fingers into the device. Always unplug the mains plug first!
• Do not touch the mains plug with wet fingers, as this can lead to electric shock!
• Do not operate without work clothing and suitable protective goggles. The relevant regulations of
the German employer‘s liability insurance association apply.
The device must only be opened and repaired by authorised bredent service personnel - remove
mains plug beforehand!
2.2 Caution
Positioning of the device
• Always ensure that the device has sufficient ventilation, otherwise it may become overheated and
the service life may be impaired!
• Only use in closed, dry rooms and on a stable, level surface (workstation) with a minimum storage
area of 50 x 50 cm!
• The functioning of the device can only be guaranteed if the components used are in perfect condi-
tion. The device and its attachments are to be thoroughly checked each time, before it is started up!
• Tools must only be changed once the device has been switched off!
• Never operate without the mixing spiral and the mixing cup!
• Never operate the vacuum pump without the suctioned mixing cup!
• Do not touch the running mixing/suction connections (6)!
• Hold the mixing cup firmly after ending/reducing the vacuum!
Functional check/mains connection
Please ensure that:
• none of the components belonging to the device are damaged
• there are no residues or contaminants on or in the device or the accessories
• damaged accessories or components have been replaced
• the mains plug and the insulation of the power cable are not damaged in any way
• the plug of the device cable is compatible with the socket and the mains data (power supply) are in
compliance with the information specified on the type plate
• the device is always positioned on a suitable flat and stable surface at work height and set up on the
stand or securely mounted on the wall
bredent GmbH &Co.KG · Weissenhorner Str. 2 · 89250 Senden · Germany · Tel. +49 7309 872-22 · Fax +49 7309 872-24

15
• the ambient temperatures are in a range of 10-40°C [50-104°F]
• a relative humidity of 80% is not exceeded
• you observe the manufacturer‘s information relating to rotating tools
• the ecovac is switched off after use
Device fuse – changing the microfuse
In the event that it is no longer possible to switch on the device, please check that the fuse is working
correctly. Switch the device off first and remove the power cable from the mains!
Do not loosen the screws of the mains plug!
The compartment for the fuses is located in the middle between the mains plug (5) and the cable
connection of the and can be removed if the device is switched off and unplugged (use an instrument/
tool for easier removal). Check whether the metal filament of the removed fuse is broken. Then reinsert
the fuse holder (with the new fuse) into the unit. Switch the device on and check proper function – if
keys or display are not lit and/or the vacuum pump or the motor are not running, please send the unit
to bredent or an authorized dealer.
Materials and liquids
• Water and other liquids must not be allowed to penetrate the inside of the device, as this can lead
to short circuits and corrosion.
• Only use commercially-available dental materials that are processed with the ecovac.
• Do not use any inflammable or explosive liquids or mixtures!
• Do not use any strong, corrosive or abrasive cleaning agents to clean surfaces.
• Only carry the device from A to B when wearing safety shoes!
3. Storage and transportation guidelines
The ecovac mixing device must be stored in a dry area and in its original packaging. The device is also shipped
in the original packaging since damage to the device caused by a different packaging (box) will be at the
expense of the shipper.
4. Waste disposal
The device should be disposed of in accordance with the usual legal regulations for the disposal of waste
electronic equipment in the country in question (e.g.: recycling centre, Recycling plant).
5. Start-up
Check the device for any transport damage as soon as it is removed from the packaging. Report any transport
damage to bredent or an authorised dealer immediately. The ecovac mixing device may only be used by qua-
lified personnel, such as dental technicians and dentists, or by persons being instructed and supervised by
such qualified personnel.
5.1 Assembly
Wall mounting
The drilling template also supplied makes it easier to carry out accurate assembly. The drilling template must
be horizontally aligned using a spirit level. The mixing/suction connections (6) should be positioned at least
30 cm from the tabletop (mixing cup slot). After drilling the three holes (diameter of 8 mm), press the dowels
in and screw in the top two screws so that they protrude by approx. 6 mm. The bottom bracket is fastened
with the screw in the lower „hole“ (10) at the device. Then the device can be attached to the wall and the
bottom bracket is screwed to the wall. Safe hold of the device must be ensured. Also correct the top two
screws, if necessary. Please ensure that the wall is stable and allows for the device to be mounted.
Assembly as a floor-mounted appliance (optional)
The stand REF 21000450 is attached to the rear of the device using the screws provided. There are two
different assembly heights available. Place the device on a level surface and ensure it has a secure position.
bredent GmbH &Co.KG · Weissenhorner Str. 2 · 89250 Senden · Germany · Tel. +49 7309 872-22 · Fax +49 7309 872-24

16
5.2 Lists of device functions and components
(1) Speed regulator (increments: 290 – 600 rpm)
(2) Time display (min./sec; 0:00 – 9:50)
(3) Time setting (-/to reduce+/to increase)
(4) Mixing function START/STOP (Programme sequence)
(5) ON/OFF (mains plug, bottom right of the device)
(6) Mixing/suction connections (stirrer-cup slot)
(7) Vacuum I = START / O = STOP (vacuum pump)
(8) Vacuum display (I=partial vacuum / II=full vacuum)
(9) Vacuum changeover switch (change of position I or II
(10) Lower „hole“ for bottom bracket
(11) Schalldämpfer
(12) Typenschild
Check whether the mains data are identical with the information specified on the type plate (12). Before con-
necting the device to the mains supply, read the operation and maintenance instructions carefully, in particular
the safety and hazard information, information on assembly and list of device functions and components pro-
vided in the instructions! The silencer (11) is not assembled to the device for reasons of transport safety. It is
assembled to the unit before initial operation.
5.3 Preparatory work
Select the mixing cup with the appropriate filling quantity (see 5.5) for the material to be mixed. The filling
quantity must not be exceeded, as otherwise there is the risk that the material will be sucked in too high by the
vacuum. This could result in contamination of the prefilter. Mix the material that requires mixing in accordance
with the manufacturer‘s information in the instructions for use. Ensure that the edge of the cup is free of
contaminants, as the lid of the mixing spiral will otherwise not close fully and a vacuum will therefore not be
generated. Switch on the main switch (5) on the bottom right of the device. The time for the mixing process will
be stated by turning the adjustment knob (3) and will be displayed on the digital time display (2). The desired
speed is set on the speed regulator (1).
bredent GmbH &Co.KG · Weissenhorner Str. 2 · 89250 Senden · Germany · Tel. +49 7309 872-22 · Fax +49 7309 872-24

17
Please note:
The expansion of the investment material varies depending on the speed set. 390 rpm is recommended as a
base value. Vacuum I or II is selected on the changeover switch (9). Fit the closed cup in the mixing/suction
connections (6) by turning it. The vacuum is commenced by moving the toggle switch (7) to the „I“ position; you
should continue to hold the cup for around 5 more seconds. Once the vacuum has built up, the cup will remain
in place by itself. The vacuum setting can be changed from I to II (9) whilst the vacuum is building up. If the
vacuum has been set to I, the pump will switch off once the vacuum has been reached; the vacuum remains
unchanged. A switch to vacuum II is now no longer possible. It is also not possible to switch down from level II
to level I if step I has been completed. Pressing the switch (9) then allows the vacuum to stop between level I
and II, but not exactly in the defined area. The mixing process is only triggered when the start button (4) is
pressed. The end of the mixing time is shown on the digital time display as „0:00“ and is also accompanied by an
audible signal. The mixing cup continues to be held by the vacuum once the mixing time ends, until the vacuum
switch (7) is brought to the 0 position. When the vacuum reduces, the mixing cup comes loose from the mixing/
suction connections (6) and must be held in place. The parameters entered - vacuum, rotational speed and
mixing time - remain saved until a new setting is entered, even if the main switch (5) is turned off and on again.
Digital time display
The required time setting for the mixing process is adjusted using the knob (3). An accurate setting of 1-60 s is
possible up to one minute, an accurate setting of up to 9 min/50 s max. is possible over one minute. When the
switch (4) is pressed, the mixing process commences and the time runs backwards to zero. If the switch (4) is
pressed again during the mixing process, the mixing process is interrupted and the display is automatically set
back to the time set. When the time set lapses, „0:00“ appears on the display (2) and a warning signal also
sounds.
5.4 Mixing cups
The conical shape of the stainless steel mixing cup ensures that the components are constantly mixed. The
intermediate space between the mixing spiral (stirrer) and the cup wall is very small, thereby ensuring that the
material is mixed to an optimum extent. The mixing coil of the mixing spiral has a left-hand thread, the device
has a motor that runs in a clockwise direction. The material to be mixed is therefore pressed down and outwards
during the mixing process and transported in the centre to the top, where a bubble-free, homogeneous material
is formed in the mixing cup. Fluid residues or solid material residues are prevented due to the smooth inside
surface of the mixing cup, as deep grooves, such as those which are present in plastic cups, cannot occur. Mixing
cups and mixing spirals should only be cleaned out with clear water and using a commercially-available brush
on material that has not yet hardened. However, if solid plaster or investment material residues are still found
on the inside wall of the cup or on the mixing spiral despite this, these can be removed using the plaster disso-
lution speed REF 52001010.
5.5 Filling level of the mixing cups
The mixing cups are available in various sizes.
These can be filled to varying levels depending on the material.
Cup size in ccm max. filling level
in g
Investment
material
Plaster Silicone
50 50
250 200
750 600
1000
900
600
bredent GmbH &Co.KG · Weissenhorner Str. 2 · 89250 Senden · Germany · Tel. +49 7309 872-22 · Fax +49 7309 872-24
18
6. Cleaning and maintenance
6.1 Cleaning
Do not clean the device with compressed air!
Only clean from the outside using a lightly dampened cloth with the mains plug unplugged. Ensure that elec-
tronic parts do not come into contact with moisture. Do not use any cleaning products containing solvents!
6.2 Maintenance
Clean the holder for the mixing cup at the unit, the holder of the cup and the seal as well as the prefilter accor-
ding to the level of contamination. The prefilter is located in the mixing/suction connections (6). Switch the
device off and remove the mains plug before changing the prefilter. The prefilter is unfastened by turning it in
an anti-clockwise direction with the help of a size 15 fork wrench and is then cleaned in an ultrasonic bath.
It is then screwed tight again by turning it in a clockwise direction. We recommend changing the prefilter every
1 to 2 years. The prefilter should not just be cleaned once the vacuum takes longer to build up, but at regular
intervals, depending on how much the device is used.
CAUTION
Never operate the device without a prefilter.
The O-ring on the mixing/suction connections (6) and on the mixing spiral should be kept clean in order to
guarantee an optimum vacuum. The vacuum pump does not require maintenance.
7. Troubleshooting
Fault Cause Troubleshooting
Device switches off! Motor is overloaded Restart!
Turn device „off“ and „on“ again.
Device does not start/
work!
LED display does not
illuminate!
Network data and/or
connections, parameters do
not match
- Compare data with type-plate
- Insert mains plug
- Switch mains switch (5) to „on“
- Set knob (3) to the recommended mixing
time (> 0 s)
Microfuse faulty Replace microfuse T 2.0 [A]
No vacuum build up
Vacuum pump defective Contact bredent and send device in if necessary
Seals are contaminated or
porous
- Keep seals on the mixing spiral and mixing/
suction connections clean
- Exchange porous seals
Vacuum builds up
but mixing cup does
not stay in place
Drilled hole in the lid of the
mixing spiral is blocked
Clean the plastic insert
Prefilter blocked Disassemble and clean prefilter
Device is too loud Sound absorber is broken or
missing entirely
Remove sound absorber residues/install
missing sound absorber
Mixing spiral is jerky
or mixing results are
not correct!
Electronic control Contact bredent and send device in if necessary
Mixing spiral is bent or
contaminated
Clean or replace!
bredent GmbH &Co.KG · Weissenhorner Str. 2 · 89250 Senden · Germany · Tel. +49 7309 872-22 · Fax +49 7309 872-24
19
8. Declaration of conformity
bredent GmbH &Co.KG, Weissenhorner Str. 2, 89250 Senden, Germany, hereby declares that the ecovac mixing
system has been developed in accordance with the relevant provisions, European directives and harmonised
standards in view of the design and construction of the product in the form brought to the market by us. The
declaration of conformity can be requested if required.
9. Warranty
The ecovac mixing device has a 1-year warranty.
In case of any claims for warranty the original dealer‘s invoice is required. Warranty services do not result in an
extension of the warranty! Faults and consequences that can be attributed to improper treatment, cleaning,
maintenance and natural wear are excluded from the warranty. Any modifications or repairs to the device and
its components must only be carried out by bredent or by third parties with express authorisation (certification)
to carry out such work, and those modifications or repairs must be carried out in line with legal engineering
practice. Failure to comply with the above will result in the invalidation of the warranty! The product may only
be used by trained dental staff. Only original tools and components may be used for processing. The serial
number of all components in use must be documented to ensure traceability and to handle complaints. These
operation and maintenance instructions are based on state-of-the-art methods and equipment and our own
experience. The product may only be used for the indications described under item 1.2.
10. Verwendete Symbole
Typ ecovac
Batch code
Serial number
BJ Year of manufacture
U/min Speed per minute
Fuse T 2.0 [A]
Manufacturer
Symbol for „European Conformity“
Follow the instructions!
Automatic start up - moving parts!
Caution
Electrical voltage warning
Do not dispose of with household waste
11. Other information
The information contained in these instructions for use is always updated in line with the latest results and
experiences. We therefore recommend reading the instructions for use prior to using a new machine. The
user is responsible for how the product is used. No liability is accepted for defective results, since bredent
has no influence on subsequent workmanship. Any claims for compensation may only be based on the value
of our products.
bredent GmbH &Co.KG · Weissenhorner Str. 2 · 89250 Senden · Germany · Tel. +49 7309 872-22 · Fax +49 7309 872-24

20
FR Manuel d‘utilisation et d‘entretien page 20
Veuillez lire attentivement ce mode d’emploi avant d’utiliser le produit.
Le fabricant décline toute responsabilité pour tout dommage qui résulterait de la non
observation de ce mode d’emploi
ecovac
(Appareil de malaxage sous vide)
Table of contents
Languages:
Popular Music Mixer manuals by other brands

Photon Systems Instruments
Photon Systems Instruments GMS 150 Instruction guide

Yamaha
Yamaha MC2410M operating manual

Equipe
Equipe Cosmos Installation and maintenance guide

Behringer
Behringer Eurodesk SL3242FX-Pro user manual

YORKVILLE
YORKVILLE MP10DS owner's manual

Yamaha Audio
Yamaha Audio MC32/12 Service manual


