Breedlove American Series C25/CRe Herringbone User manual

2
B r e e d l o v e O w n e r ’ s M a n u a l
Owner’s Manual

3
Contents
Humidity, Temperature, and Solid Wood Instruments....................................................4
Neck Truss Rod Adjustment.....................................................................................6
Truss Rod Adjustments for U.S. Custom Shop Guitars (except Revival)..............................7
Truss Rod Adjustments for U.S. Custom Shop Revival Series Guitars ................................8
Breedlove Steel-String Bracing & the JLD® Bridge Truss ................................................9
Steel-String Acoustic Guitar Set Up Specifications .....................................................12
Changing Strings on your Breedlove Acoustic Guitar.................................................13
Breedlove Nylon String Guitars .............................................................................13
Electronics Configurations for Acoustic Guitars .........................................................16
Breedlove Synergy System Electronics.....................................................................17
Cleaning Your Breedlove Instrument........................................................................18
Breedlove Factory String Specifications...................................................................19

4
Thank You
Thank you for purchasing your new Breedlove instrument. You are now the caretaker
of a fine stringed instrument. Every instrument we produce is special to us and we
hope it will bring you many years of enjoyment. To preserve the remarkable tone
and playability of your Breedlove we have some simple suggestions to help ensure
that your instrument will be making beautiful music for years to come.
Should you ever have questions or concerns please feel-free to send us an email at:
info@breedloveguitars.com.
Sincerely,
Kim Breedlove
Breedlove Guitars

5
Welcome to the Breedlove family where you are about to experience
the highest quality craftsmanship, customer service and an un-matched
passion for music and fine instruments.
HOW TO: Experience Breedlove
We invite you to Experience Breedlove in one of the following ways:
Visit BreedloVeGuitars.com
Go online to get the most current information on your instruments,
upcoming Breedlove events and techincal support or warranty
information.
ExpEriEncE ThE BrEEdlovE, Two old hippiEs FEsTival
Join us in Bend Oregon and enjoy hands-on factory tours, extraordinary
instruments and an incredible line-up of grammy award winning
entertainment.

6
BrEEdlovE ExTraordinary ExpEriEncE
Share your passion for music as we share our spirit for creating fine
instruments. Breedlove luthiers will divulge design principles and help
you create your ideal instrument. Contemplate the perfect combination
of tonewoods while you allow Oregon’s natural wonders to inspire the
creation of your acoustic masterpiece.
BrEEdlovE UlTimaTE ExpEriEncE
Enjoy all the magic of the Extraordinary Experience on your own schedule
and spend one-on-one time with Breedlove Luthiers and Breedlove artists
while you create the instruments of your dream.

7
Humidity, Temperature, and Solid Wood Instruments
As with any high-quality solid wood instrument, humidity and temperature
are very important factors affecting the health and longevity of your guitar,
mandolin or ukulele. Humidity and temperature are easily monitored and
regulated with the right accessories - specifically, a thermometer and a
hygrometer.
You can take an in-the-case approach to humidity control, or you can treat
the entire room in which your instrument will be kept. Measure the relative
humidity (RH) and temperature of your storage environment to determine if
it is suitable. Measuring daily for a week or two will help you determine
whether conditions are stable. Your Breedlove guitar was built in a
controlled environment with an RH of approximately 45% at a temperature
of 70° Fahrenheit (F). An RH of between 40% and 50% at this same
temperature will ensure a suitable environment for your Breedlove. Note that
RH is temperature-dependent. Air with 45% RH at 60° F does not have the
same water content as air at 70° F with 45% RH.
If your storage environment is below 40% RH, invest in a humidifier with
variable controls to establish proper RH. If the environment is above 50%
RH, a variable-control dehumidifier will be needed to achieve optimal RH.
Humidifiers and dehumidifiers are available at many department stores.
The transfer of water vapor between the wood of your guitar, mandolin or
ukulele and the atmosphere is actually a relatively slow process, and this
works in your favor. When an instrument is kept in its case, the process is
slowed even further. By keeping your instrument in suitable conditions most
of the time, you can take it on short trips to places with less desirable RH
conditions without causing problems. If you are taking a longer trip (more
than several days) you will want to use some sort of in-case humidity control
and measurement.
Before you take any steps to control humidity, you should be sure you can
accurately measure the humidity conditions inside your room or guitar case.

8
You will probably notice the symptoms of
an RH problem before it poses a serious threat. Some
telltale signs of improper humidification are listed above. If your Breedlove
shows symptoms of being over or under humidified, take the instrument to a
qualified guitar repair person immediately, or call our service department.
Avoid exposing your instrument to extreme temperatures (such as a car trunk
on a hot day, or when possible, the cargo hold of an airplane). Avoid
prolonged exposure to temperatures below 60° F or above 80° F.
When selecting an in-case humidifier, avoid designs that completely block the
sound hole - they can cause over-humidification of the instrument body, while
doing little to maintain proper humidity for the neck.
We recommend the Oasis Guitar Humidifier. It has
a unique design that maintains proper humidity
without risk of leaks or dripping inside
your guitar.
Over-Humidified Under-Humidified
Raised action Lowered action
Sluggish tone, low volume Fret buzzing
“Bellying” up of top Fret ends protruding
Lateral finish cracks Dips in top

9
Neck Truss Rod Adjustment
The truss rod in your Breedlove guitar serves
to counteract the effect of string tension on
the neck of your instrument. String tension
pulls the neck forward and up, while the
truss rod pulls the neck down and back. A
properly adjusted truss rod equalizes the
tension on the neck. Adjustment of truss rod
tension changes the amount of bow in the
plane of the fingerboard. Let your instrument
adjust to its new environment before
changing truss rod tension.
Generally, a properly adjusted truss rod results in a neck with a slight
forward relief. To check for proper neck relief, push down on the low
“E” string at the 1st and 14th frets simultaneously. There should be about
0.010” of space between the bottom of the string and the top of the 6th
fret - about the thickness of a business card. You may want a larger or
smaller amount of relief depending on your playing style.
When making truss rod adjustments, turn a little at a time - an eighth or
quarter turn - and check the results before turning again. Allow some
time for the neck to ‘settle in’ to an adjustment before turning again. Use
extreme caution when making adjustments, and if you are uncomfortable
with this procedure, consult a trained Breedlove Service Technician before
attempting. To tighten the truss rod, turn the nut clockwise (as seen from
above). This causes the neck to bow backward, lowering the string height.
If you go too far, the strings will buzz. To loosen the truss rod, turn the
nut counterclockwise. This causes the neck to bow forward, raising the
string height. Go too far, and the guitar will be hard to play. Always make
adjustments with your guitar tuned correctly.
The Truss Rod should only
be adjusted in order to
establish proper neck relief
and to counteract/balance
the effect of string tension.
Do not use the Truss Rod
adjustment feature to try to
correct larger set-up issues or
other problems that are not
related to neck relief.

10
Truss Rod Adjustments for Guitars (Pre-2000)
To adjust the single-action truss rod on a U.S.
Custom Shop Breedlove that was built prior
to 2000, remove the truss rod cover (on the
headstock face, just above the nut). Then, using
a ¼” nut driver, turn the brass nut on the end
of the truss rod (clockwise to tighten rod and
pull the neck back, counterclockwise to loosen
the rod and allow the strings to pull the neck
up. Use a driver extender to ensure that the
driver is well clear of the headstock as the
tool is turned.
Truss Rod Adjustments for Breedlove Atlas, Passport and
Cascade Series Guitars
To adjust the double-action truss rod on a
Atlas or Passport Series instrument, you will
need a 4mm Allen wrench (included). The
truss rod adjustment nut is located inside
the soundhole, just under the end of the
fingerboard, and accessible via a hole
in the brace at that location. Make
adjustments by turning the wrench in the
appropriate direction. Keep the wrench
between 10 and 2 o’clock, and reposition the
wrench as necessary. You may find it helpful to spread the D
and G strings apart while turning the wrench.
11
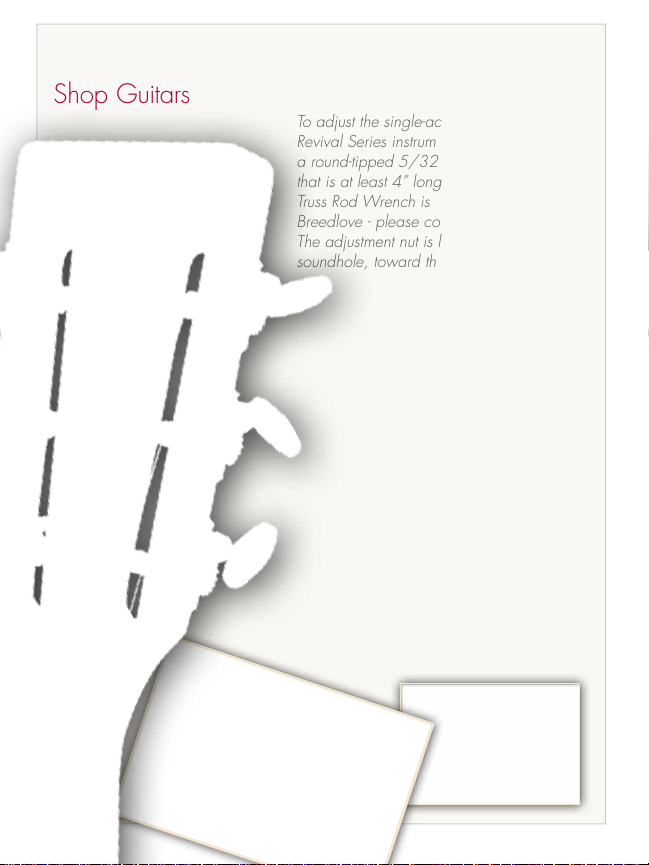
Truss Rod Adjustments for U.S. Custom
Shop Guitars
To adjust the single-action truss rod on a
Revival Series instrument, you will need
a round-tipped 5/32” Allen wrench
that is at least 4” long (a special Revival
Truss Rod Wrench is available from
Breedlove - please contact us for details).
The adjustment nut is located inside the
soundhole, toward the neck. It is very
close to the top of the guitar, and
right underneath the fingerboard.
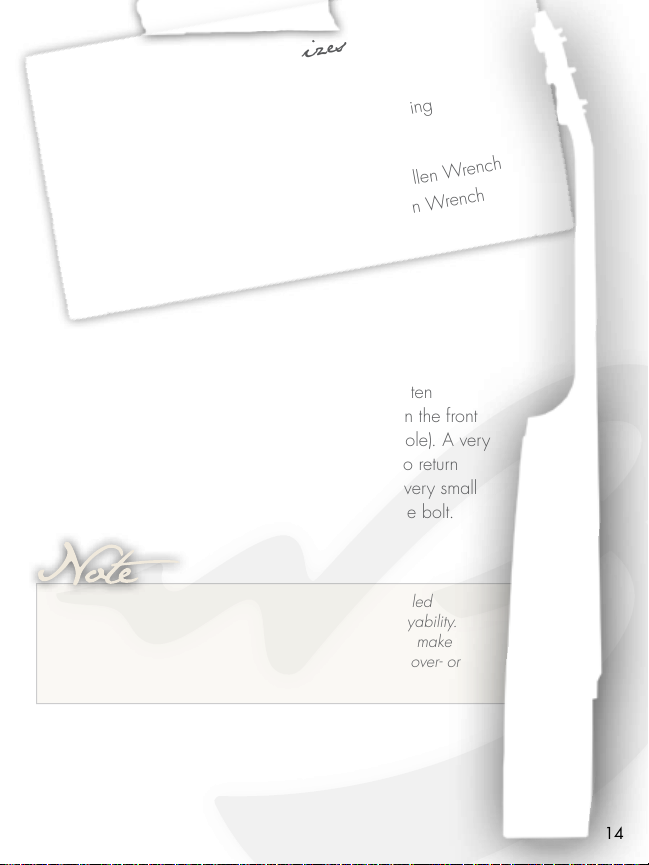
Newer Revival instruments have an
access hole through the top soundhole
brace, while older instruments do not. If
you do not have an access hole, note
that one of the two neck bolts is also in
this general area. The top neck bolt can
be seen through the soundhole, while
the truss rod nut is not visible unless you
have the access hole. If you can see
your wrench going into a large bolt,
you’re in the wrong place! To access
the adjustment nut, insert the wrench
into the soundhole between the D and
G strings (holding them apart can be
helpful) and point it up toward the area
described above to find the nut. Turn
clockwise to tighten the truss rod, or
counterclockwise to loosen it.

12
Breedlove Steel-String Bracing & the JLD®Bridge Truss
All Breedlove Custom Shop steel-string guitars (except for the Revival Series),
Pro Series and Atlas Series guitars use the JLD Bridge Truss system. This
device is a cantilevered truss that helps to counterbalance string tension at the
bridge, creating a relaxed top and improved structural integrity. This allows
us to brace our tops in a very progressive way, with a focus on realizing the
full acoustic potential of the top. A relaxed top provides maximal wavelength
response, and a synergy is created by the use of a graduated top thickness,
balanced scalloped bracing, and a pinless bridge in combination with the
bridge truss system. This gives our guitars the distinctive and highly dynamic
“Breedlove Sound”, with a well-balanced tone suitable for a broad variety of
musical styles.
The bridge truss in your Breedlove guitar is adjusted before leaving the
factory, and should require very little attention from that point on. However,
the system should be checked periodically for proper adjustment.
Cut away of a Breedlove guit ar,
showing JLD bridge t russ
Nylon guitars, Revival, American and Passport Series instruments do not have
a bridge truss.

13
Checking Your Bridge Truss for Proper Adjustment
1. With the strings completely slackened or removed, reach into the body,
toward the underside of the bridge. Just behind the wood block directly under
the bridge, you will feel a wooden dowel extending to the tail block.
2. Grasp the dowel between your thumb and forefinger, and make sure there
is no play along the lateral axis (running the length of the guitar). If there is
any movement here, the bridge truss will need to be tightened (see step 4). If
there is no movement, move on to step 3.
3. Roll the dowel gently between your thumb and forefinger a few degrees
counterclockwise, then return it to the original position. The dowel should feel
snug, yet spin with some effort. If the dowel offers excessive resistance, i.e.,
the dowel won’t turn, the bridge truss needs to be loosened (see step 4). If
the dowel spins with just a touch of resistance, your bridge truss is perfectly
adjusted. Restring the instrument and play on.
14
4. If your bridge truss is in need of adjustment, tighten
(clockwise) or loosen (counterclockwise) the bolt on the front
of the wood block (it is visible through the sound-hole). A very
small turn of the bridge truss bolt can be enough to return
the rod to proper tension, so make adjustments in very small
increments, and check tension after each turn of the bolt.
You’ll discover that the bridge truss system offers unrivaled
body stability and preserves consistent action and playability.
Note, however, that the bridge truss is not designed to make
adjustments to instrument action, or to compensate for over- or
under-humidification.
Adjust ment Bolt Sizes for
Breedlove Inst rument s
Use the following allen wrench sizes when making
bridge truss adjustments:
• Custom Shop Instruments - use a 3/16” Allen Wrench
• Atlas Series Instruments - use a 4mm Allen Wrench

15
Steel-String Acoustic Guitar Set Up Specifications
Our specifications for proper action are for 3/32” on the bass side and
1/16” on the treble side, as measured at the 14th fret. You may wish to
set your instrument for higher or lower action than this, depending on your
playing technique.
For instruments equipped with undersaddle pickup transducer, we recommend
that you restring your instrument starting with the two middle strings, and work
your way outward. This ensures that the saddle will reseat firmly and squarely
over the transducer.
16
Changing Strings on your Breedlove Acoustic Guitar
It is always wise to put a polishing cloth over the body of an instrument
while changing strings to protect the finish from scratches. With pinless
bridges, use the provided string guard for removing and replacing strings.
If no string guard is available, use a business card with Scotch tape to
prevent damage to your finish when pulling the strings through the bridge.
Remember to change strings often for best tone.
Breedlove Nylon String Guitars
Breedlove Nylon string guitars are designed with the playability of a
modern steel string, and the warm tone of a nylon string guitar. A steel-string
neck profile, and low string height over a radiused fingerboard allow for
fast fretting and chording, and great playing comfort. Special consideration
has been given to the classical player seeking modern comfort, and to the
steel string player seeking seamless technique transfer. Breedlove Nylon-
string guitars are fan-braced, and have the signature Breedlove graduated
top thickness for balance and sweet tone. We use high-tension Nylon
strings, balanced with a neck truss rod. Breedlove Custom Shop Nylon
string guitars are available with 1-3/4” or 1-7/8” nut widths.
For Breedlove Custom Shop Nylon String guitars, follow care and maintenance
instructions provided for Custom Shop Steel String instruments. For Atlas Series
Nylon guitars, follow instructions provided for other Atlas Series instruments.

17
Breedlove Mandolins
Breedlove mandolin bodies are slightly deeper than
conventional mandolins, with higher arches in the top and
back. Tonewoods resonate freely thanks to a free-floating
fingerboard extension, smaller neck and tail blocks, and a
bolt-on neck. Breedlove mandolins are well-known for their
easy playability. A radiused fretboard, low string height,
ample string set separation, and a 1-3/16” nut width make
them extremely comfortable. Breedlove mandolins are
optimized for use with medium-light gauge strings, but you
may also use light or heavy strings.
Changing Strings on your Mandolin
When changing strings, pay close attention to the location
and orientation of bridge on the body. When strings are
removed, the bridge may move. If you remove all the
strings at once, it will be unsupported and will fall off. It
is a good idea to mark the location of the bridge prior to
changing strings. Place small pieces of masking tape on
the top of the mandolin at each point of the bridge
base to mark the location. Also note the orientation of
the bridge, and mark one side with tape if you are
not sure you know which way it goes. To ensure
proper instrument intonation, the bridge must be
in the correct location. It is also a good idea
to protect the finish of the instrument with a
soft cloth while changing strings. String ends
can scratch the finish, as can any movement
of the bridge. Please call Breedlove if we
may be of assistance during your first string
change.

18
Electronic Pickups for Mandolins
For minimum acoustic impact and a rich, naturally balanced tone,
Breedlove recommends the Schertler C-DYN-M, an electrodynamic contact
microphone co-designed by Schertler and Breedlove. This pickup is a
full-bodied electrodynamic contact microphone which can also be coupled
with a condenser microphone. It requires no phantom power.
Mandolin Set-Up Specifications
Breedlove mandolins have an adjustable bridge. Our factory setup is
approximately .065” on the bass strings and .050” on the treble strings as
measured at the 12th fret. A Breedlove Service Technician can recommend
the right set-up for your style of play and desired tone.
Float ing Fingerboard Ext ension
A djust able Bridge

19
Breedlove Ukuleles
Years ago Kim Breedlove began making ukuleles in his garage.
Breedlove ukulele have a radiused fingerboard for ultra-high performance.
Changing Strings on your Ukulele
It is always wise to put a polishing cloth over the body of an instrument
while changing strings to protect the finish from scratches. hange the strings
every three to six months. The more you play, the more you need to change
the strings. Remove the old strings by twisting the tuning pegs at the top of
the neck. Pull the strings from the bridge of the ukulele. Then insert the new
strings through each hole in the bridge. Then insert the strings into the holes
on the tuning pegs and turn each peg so the string wraps around it several
times.

20
Additional Care Instructions
As with all Breedlove instruments it is important to clean your ukulele using
a soft cloth. Breedlove gloss finishes are very hard and durable. They
can be waxed with a variety of non-abrasive waxes. Most liquid furniture
waxes or automotive waxes will do the job. Do not use oils on Breedlove
gloss finishes. Refer to Cleaning Your Breedlove Instrument on page 22 for
additional information.
Store your Ukulele in its case to ensrure it is properly protected and refer
to Humidity, Temperature, and Solid Wood Instruments on page 6 for
additional information on proper storage.

21
Electronics Configurations for Acoustic Guitars
A variety of electronics options are offered on your Breedlove Guitar. If you
have any of the following electronics installed on your instrument please refer
to the User’s Guide for these electronics that was included with your guitar.
Manuals can also be downloaded from the L.R. Baggs website:
lrbaggs.com.
L.R. Baggs Dual Element System
The Dual Element pickup system is custom-made for Breedlove by L.R. Baggs.
It features an Active Element undersaddle pickup, an internal condenser
microphone, and an onboard Dual Source preamp. The Dual Source offers
flexible routing options for mono or stereo use.
L.R. Baggs I-Mix M1
Designed for excellent sound reproduction in feedback-prone, high-SPL
applications, the L.R. Baggs I-Mix/M1 combines the Active Element piezo
pickup with an M1 magnetic soundhole pickup, and routes the signal through
an I-Mix onboard preamp.
L.R. Baggs Element Active
The award-winning Element Active system from L.R. Baggs pairs the Element
undersaddle transducer with an all-discrete class A preamp. To that, we add
soundhole-mounted controls for tone and volume. The tone control is not
simply a passive high-end roll-off - it is actually a tone-shaping circuit, giving
you a much wider tonal palette than a conventional tone control.
L.R. Baggs Stage Pro Element Pickup (All Atlas Series Instruments)
LR Bagg’s Stage Pro Element pickup with chromatic tuner, tone control, volume
control and Fast battery access.
Breedlove Passport Tuner-VTC pickup (All Passport Series Instruments)
This pickup has built-in deluxe backlit chromatic tuner for accurate tuning and
high visibility. Easy battery access at end pin.
This manual suits for next models
47
Table of contents
Other Breedlove Guitar manuals


