BRICK HOUSE Mini IR Recorder User manual

Mini IR Recorder

Mini IR Recorder
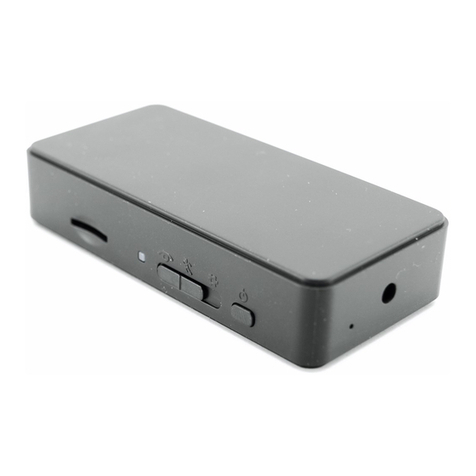
The Mini IR Recorder is a tiny HD 1080P camera, small enough to fit on
the width of your finger. Carry it with you anywhere and always
be ready to record high-quality audio and video with the push
of a button.
This Mini IR recorder is equipt with invisible IR’s, with minimal lighting you
can capture high quality video. The Mini IR records Video, captures Photo and
Audio.
All video is recorded to a micro SD card. (Upto 32GB) Not Included.

In the Box
In the box you will find the Mini IR Recorder, a USB cable, a clip mount, a fixed
mount, a waterproof case, and a lanyard.

Mini IR Recorder Button Functions

Getting Started
The first step in using your device is charging it. Connect the
device to a USB port on your PC or plug it into AC power via adapter.
While charging, the LED indicator will
flash red and will turn off when the battery is full. Before first
use, we suggest charging the device for 4 hours.
This device does not have internal memory and relies on a
micro SD card for storing recorded files. The Mini IR Recorder is
compatible with micro SD cards up to 32GB capacity.
To format your SD card please see instructions here: http://l.bhs.net/sd-
format.

To Power On and O
To Power On the Mini IR Recorder,- push and hold the power button for 3
seconds.- Replace with Switch to the On position. When the device is turned on,
the LED light will glow and stay steady.
To Power Off the Mini IR Recorder, push and hold the power button until the
blue LED light disappears.

Changing the Date and Time
Connect the Mini IR Recorder to your computer using the USB
cable. Most computers will automatically recognize the device
and a window may pop up with options.
Choose the optionto “Open Folder to View Files.”This will take you to the root
directory of the device. Within the root directory, you need to create a new
text file. To do this, right click on an open area within the root directory
window to bring up the context menu.
Then select “New” and choose “Text Document”. This
will generate a new text file in the root directory. Right click on
the new text file and select “Rename”. Change the filename
to “time” and hit enter.
Now double‐click on the time text file and it will open up a text window. In
the text window, type in the following: Enter Y to enable Time/Date or N to
disable .
YYYY/MM/DD HH:MM:SS Y

Replace the YYYY with the 4 digit year, MM with the 2 digit month, and DD
with the 2 digit date, HH with the 2 digit hour, MM with the 2 digit minute,
and SS with 2 digit second. When done, click on “File” on the menu bar and
select “Save”. Now you can safely disconnect your Mini IR Recorder from your
computer. Power On the device and it will save the text file you create and
adjust the time/date stamp on the future recording
To Record Video:
Select the Mode button and switch to Video then gently press the Power
button. Press the OK button to begin recording. When the device is recording,
the LED will illuminate Red. To stop recording press the OK button once.

Enable Sound-Activated Recording
When the Mini Recorder is powered on, push the mode button
to VXO Sound Activation Recording will be enabled.
When device detects sounds higher than 60 decibels, it will begin recording.
The RED LED light will glow and stay steady with a flashing BLUE LED light.
To stop recording, push the OK button. The device is now in Standby mode.
Taking an Image
With the Device powered on, Select the mode button and push it to Photo.
BLUE indicator light will glow solid \. Press the OK button to take an Image.
The BLUE LED inidcator will flash blue. Repeat function to take another
image.
Enabling IR’s
image Gently press the OK button for 3 Seconds. The Yellow LED Indicator will
Glow solid. Press the OK button again for 3 Seconds to disable IR’s.

Auto Power Off
When the Mini IR Recorder is recording and runs out of power it
will automatically save the recording before it powers off.
When the micro sd card is filled to capacity, the device will
automatically save the recording before it powers off.
If the device stays in standby without operation, it will automatically
power off after 45 seconds to preserve battery
Viewing Recorded Files
To view recorded files, connect the Mini IR Recorder to your
computer using the USB cable. Most computers will automatically
recognize the device and a window may pop up with options.

Choose the option to “Open Folder to View Files”. This
will take you to the root directory of the device. Within the root
directory, double click on the “DCIM” folder. Your recorded
files are stored within the folder.
You can also go to “MY COMPUTER” or “COMPUTER” on your Desktop or Start
Menu. From there, your device will show as a “Removable Disk Drive”. Once
you’re in the root directory of the device, follow the above steps.
NOTE: It is best to transfer the recorded files to your computer
before viewing. Playing the recorded files through the Mini
Recorder while it’s connected to the computer might cause the
video to display as delayed or choppy.
You can view your recorded files using your PC’s media player.
If you are having problems viewing your recorded files, we recommend
downloading VLC Media Player at www.videolan.org.

Table of contents

