BRITEQ®4/13 LDP-COLORSTRIP 12FC/24FC
OVERHEAD RIGGING
•Important: The installation must be carried out by qualified service personal only. Improper
installation can result in serious injuries and/or damage to property. Overhead rigging requires
extensive experience! Working load limits should be respected, certified installation materials
should be used, the installed device should be inspected regularly for safety.
•Make sure the area below the installation place is free from unwanted persons during rigging, de-rigging
and servicing.
•Locate the fixture in a well ventilated spot, far away from any flammable materials and/or liquids. The fixture
must be fixed at least 50cm from surrounding walls.
•The device should be installed out of reach of people and outside areas where persons may walk by or be
seated.
•Before rigging make sure that the installation area can hold a minimum point load of 10times the device’s
weight.
•Always use a certified safety cable that can hold 12times the weight of the device when
installing the unit. This secondary safety attachment should be installed in a way that
no part of the installation can drop more than 20cm if the main attachment fails.
•The device should be well fixed; a free-swinging mounting is dangerous and may not
be considered!
•Don’t cover any ventilation openings as this may result in overheating.
•The operator has to make sure that the safety-relating and machine-technical
installations are approved by an expert before using them for the first time. The installations should be
inspected every year by a skilled person to be sure that safety is still optimal.
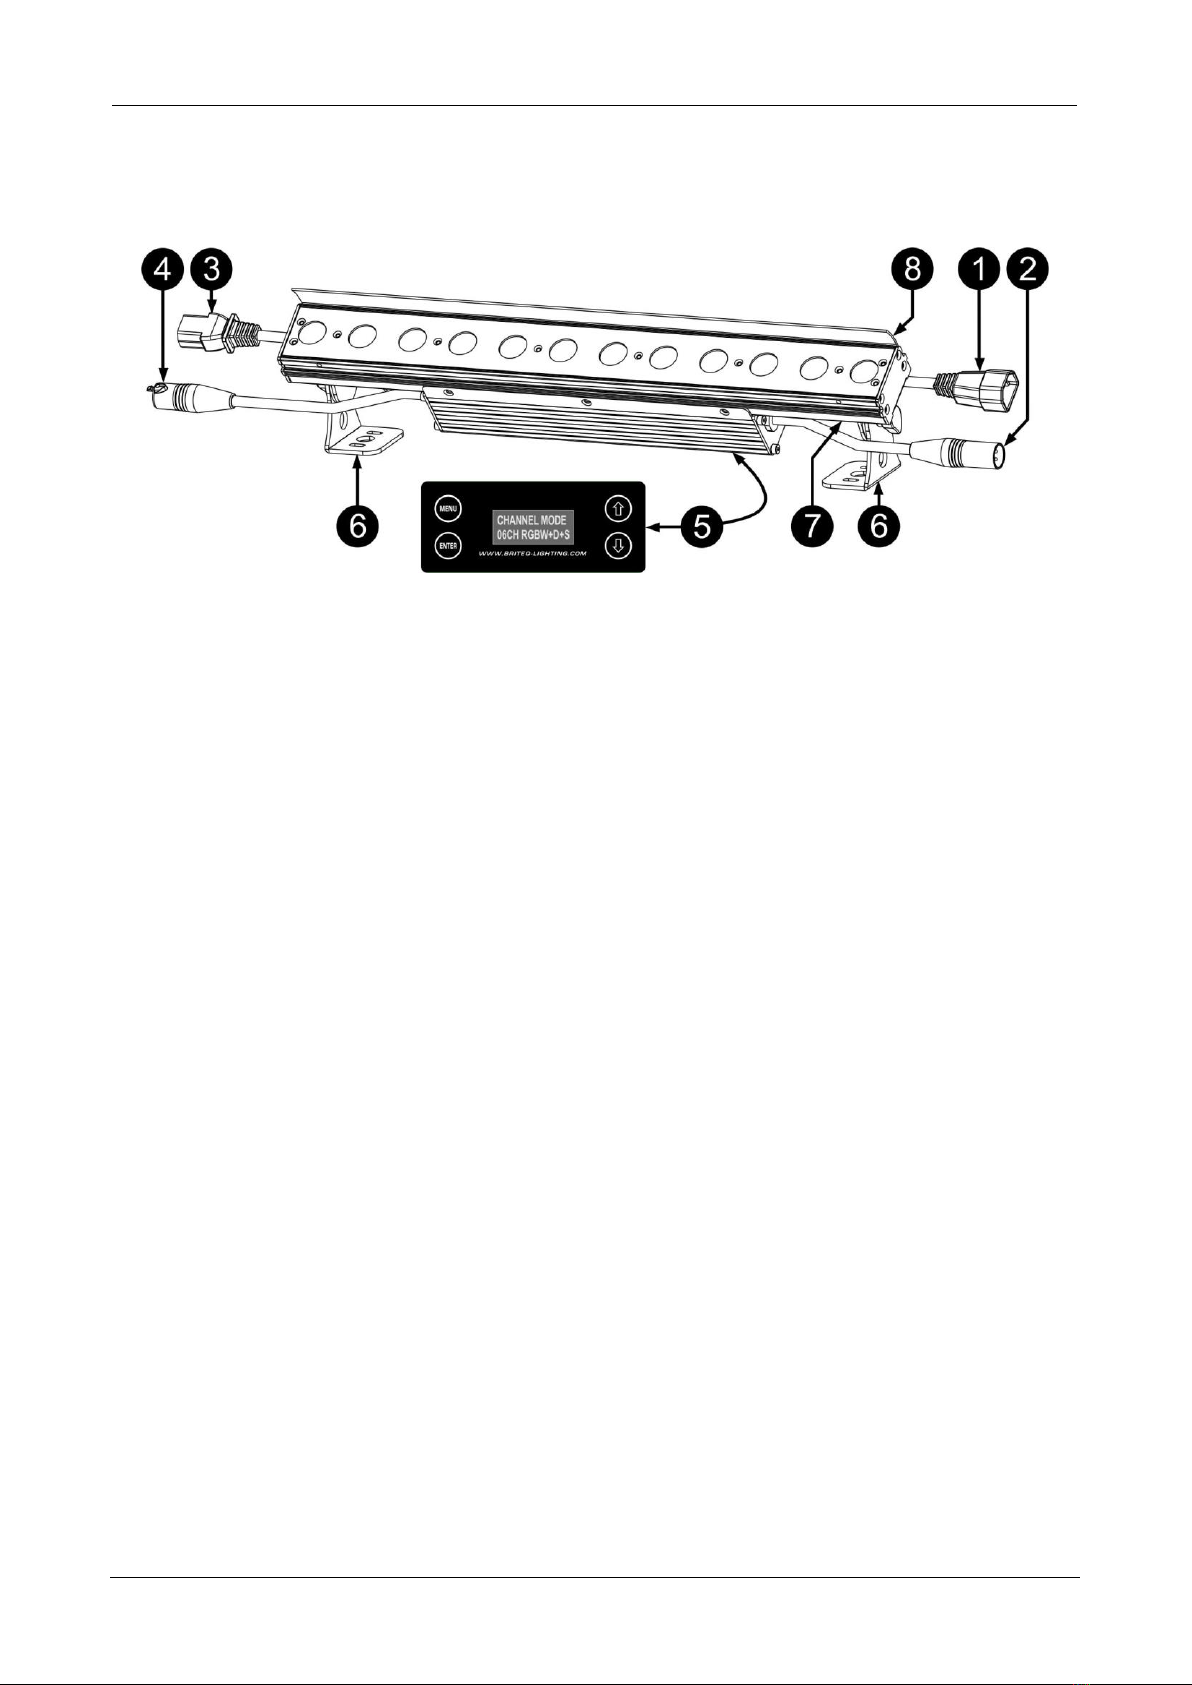
SETUP MENU:
For both models all points are identical, except for the display messages: displays are shown on the left side.
•To select any of the functions, press the [MENU] button until the required function is shown on the display
or use the ▼/▲ buttons to browse the menu.
•Select the function with the [ENTER] button.
•Use ▼/▲ buttons to change the values.
•Once the required value is selected, press the [ENTER] button to confirm.
[DMX ADDR]
Used to set the desired DMX-address.
•Press the [MENU] or ▼/▲ buttons until the desired function is showing on the display.
•Press the [ENTER] button: the values can be changed
•Use ▼/▲ buttons to select the desired DMX512 address. The last occupied DMX-address is also shown:
makes it easier to set the address of the next unit in the chain.
•Once the correct address shows on the display, press the [ENTER] button to save it.
Note: on RDM-compatible controllers this option can also be remotely set.
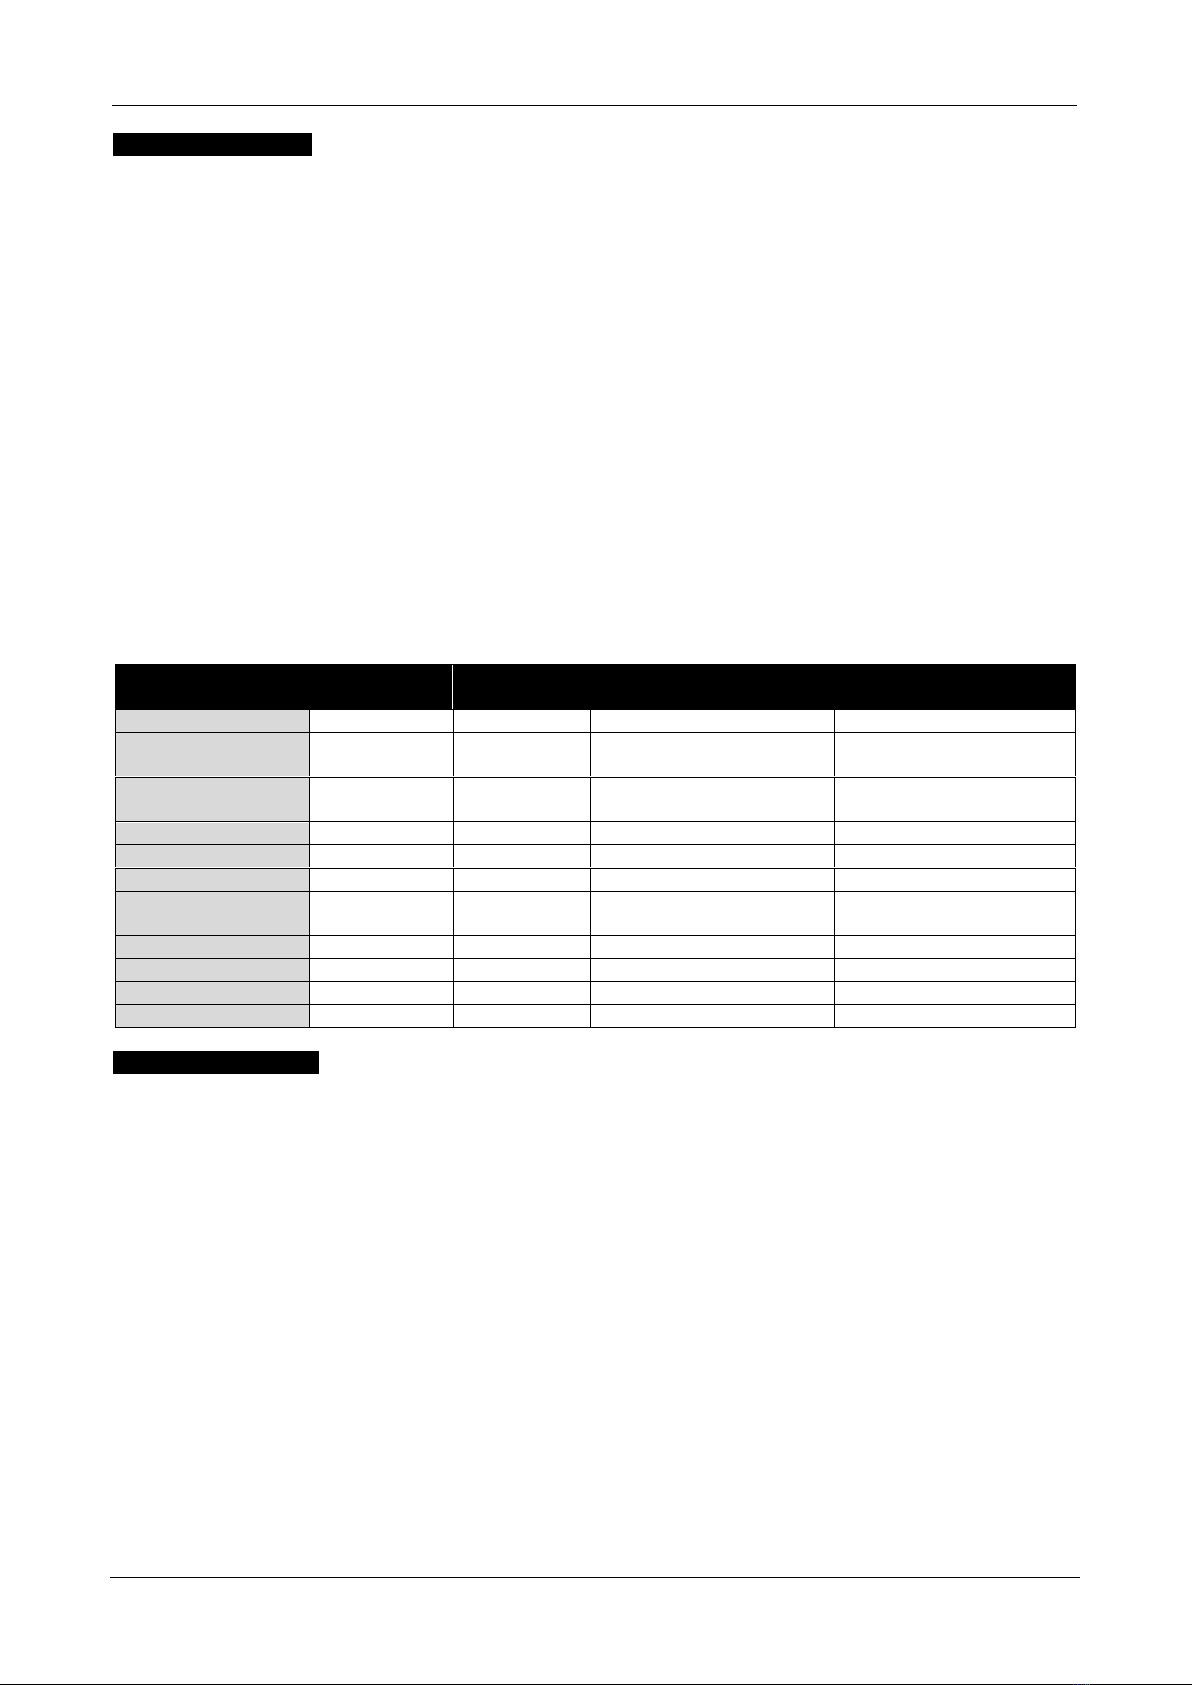
[CHANNEL MODE]
Used to set the desired channel mode.
•Press the [MENU] or ▼/▲ buttons until the desired function is showing on the display.
•Press the [ENTER] button: the values can be changed
•Use ▼/▲ buttons to select the desired mode:
•03CH FX-Mode Easy mode with preprogrammed colors + effects
•04CH RGBW The 4 colors can be set separately, no master dimmer.
•06CH RGBW+D+S The 4 colors can be set separately, with combined strobe + master dimmer.
•08CH (2xRGBW) The 4 colors can be set separately on 2 sections, no master dimmer.
•10CH (2xRGBW+D)The 4 colors + master dimmer can be set separately on 2 sections.
Only available on LDP-COLORSTRIP 24FC:
•16CH (4xRGBW) The 4 colors can be set separately on 4 sections, no master dimmer.
•20CH (4xRGBW+D)The 4 colors + master dimmer can be set separately on 4 sections.
•Once the correct option shows on the display, press the [ENTER] button to save it.
Remark: on RDM-compatible controllers this option can also be remotely set.