manuals.online logo
Brands
  1. Home
  2. •
  3. Brands
  4. •
  5. Bryant
  6. •
  7. Air Conditioner
  8. •
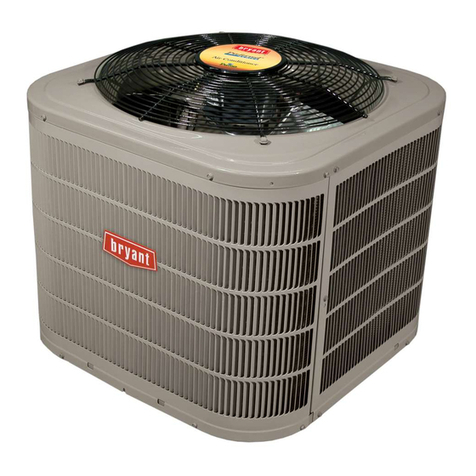
  9. Bryant 619PHA Series User manual

Bryant 619PHA Series User manual

Other manuals for 619PHA Series

1

Other Bryant Air Conditioner manuals

Bryant 581J-17-28 Installation and user guide

Bryant

Bryant 581J-17-28 Installation and user guide

Bryant 582A Series Instructions and recipes

Bryant

Bryant 582A Series Instructions and recipes

Bryant Legacy 569J 16-28 User manual

Bryant

Bryant Legacy 569J 16-28 User manual

Bryant 452W User manual

Bryant

Bryant 452W User manual

Bryant 90-452 User manual

Bryant

Bryant 90-452 User manual

Bryant 577C--A User manual

Bryant

Bryant 577C--A User manual

Bryant 558D User manual

Bryant

Bryant 558D User manual

Bryant 582J Series User manual

Bryant

Bryant 582J Series User manual

Bryant AIR CONDITIONER WITH PURON 113A Operation manual

Bryant

Bryant AIR CONDITIONER WITH PURON 113A Operation manual

Bryant 559C User manual

Bryant

Bryant 559C User manual

Bryant 619ENF Dimensions and installation guide

Bryant

Bryant 619ENF Dimensions and installation guide

Bryant Preferred Series User manual

Bryant

Bryant Preferred Series User manual

Bryant 577E Series Instruction Manual

Bryant

Bryant 577E Series Instruction Manual

Bryant LEGACY 569J Operation manual

Bryant

Bryant LEGACY 569J Operation manual

Bryant PURON 583B User manual

Bryant

Bryant PURON 583B User manual

Bryant Preferred Series User manual

Bryant

Bryant Preferred Series User manual

Bryant 591B Instructions and recipes

Bryant

Bryant 591B Instructions and recipes

Bryant 619CNF Dimensions and installation guide

Bryant

Bryant 619CNF Dimensions and installation guide

Bryant 581B Guide

Bryant

Bryant 581B Guide

Bryant LEGACY PURON 704D Series Guide

Bryant

Bryant LEGACY PURON 704D Series Guide

Bryant 538PAQ012RBMA User manual

Bryant

Bryant 538PAQ012RBMA User manual

Bryant 581J User manual

Bryant

Bryant 581J User manual

Bryant R-22 561G Instructions and recipes

Bryant

Bryant R-22 561G Instructions and recipes

Bryant 580J*04A User manual

Bryant

Bryant 580J*04A User manual

Popular Air Conditioner manuals by other brands

Fujitsu ASYG 09 LLCA installation manual

Fujitsu

Fujitsu ASYG 09 LLCA installation manual

York HVHC 07-12DS Installation & owner's manual

York

York HVHC 07-12DS Installation & owner's manual

Carrier Fan Coil 42B Installation, operation and maintenance manual

Carrier

Carrier Fan Coil 42B Installation, operation and maintenance manual

intensity IDUFCI60KC-3 installation manual

intensity

intensity IDUFCI60KC-3 installation manual

Frigidaire FAC064K7A2 Factory parts catalog

Frigidaire

Frigidaire FAC064K7A2 Factory parts catalog

Sanyo KS2432 instruction manual

Sanyo

Sanyo KS2432 instruction manual

LG MultiV Series installation manual

LG

LG MultiV Series installation manual

CLIMAVENETA a-CHD U-2T 606+2209 OPERATING AND INSTALLATION Manual

CLIMAVENETA

CLIMAVENETA a-CHD U-2T 606+2209 OPERATING AND INSTALLATION Manual

Midea EWK06CW5 user manual

Midea

Midea EWK06CW5 user manual

Pioneer FAB Series installation manual

Pioneer

Pioneer FAB Series installation manual

SPT WA-1511S user manual

SPT

SPT WA-1511S user manual

Mitsubishi Electric Mr.Slim MSZ-A24NA operating instructions

Mitsubishi Electric

Mitsubishi Electric Mr.Slim MSZ-A24NA operating instructions

Mitsubishi Electric PUHZ-RP50VHA4 Service manual

Mitsubishi Electric

Mitsubishi Electric PUHZ-RP50VHA4 Service manual

Panasonic CS-S18HKQ Service manual

Panasonic

Panasonic CS-S18HKQ Service manual

Panasonic CS-E15NKE3 operating instructions

Panasonic

Panasonic CS-E15NKE3 operating instructions

Gree GWH18TC-K3DNA1B/I Service manual

Gree

Gree GWH18TC-K3DNA1B/I Service manual

Friedrich ZoneAire Compact P08SA owner's manual

Friedrich

Friedrich ZoneAire Compact P08SA owner's manual

Daikin R32 Split Series installation manual

Daikin

Daikin R32 Split Series installation manual

manuals.online logo
manuals.online logoBrands
  • About & Mission
  • Contact us
  • Privacy Policy
  • Terms and Conditions

Copyright 2025 Manuals.Online. All Rights Reserved.

619PHA
High Wall Ductless System
Sizes 09 to 12
Owner’s Manual
TABLE OF CONTENTS PAGE
A NOTE ABOUT SAFETY 2...................................................................................
GENERAL 2.................................................................................................
PART NAMES 3..............................................................................................
INDOOR UNIT DISPLAY INDICATOR 3..........................................................................
WIRELESS REMOTE CONTROL 4..............................................................................
REMOTE CONTROL FUNCTIONS 7.............................................................................
CLEANING, MAINTENANCE AND TROUBLESHOOTING 12 − 15...................................................
NOTE TO EQUIPMENT OWNER:
Please read this Owner’s Information Manual carefully before installing and using this appliance
and keep this manual for future reference.
For your convenience, please record the model and serial numbers of your new equipment in the
spaces provided. This information, along with the installation data and dealer contact information,
will be helpful should your system require maintenance or service.
UNIT INFORMATION
Model # ___________________________________
Serial # ___________________________________
INSTALLATION INFORMATION
Date Installed _____________________________
DEALERSHIP CONTACT INFORMATION
Company Name: _________________________________
Address:_________________________________________
________________________________________________
Phone Number:__________________________________
Technician Name:_________________________________
________________________________________________
2
A NOTE ABOUT SAFETY
Any time you see this symbol in manuals, instructions and on
the unit, be aware of the potential for personal injury. There are
three levels of precaution:
DANGER identifies the most serious hazards which will result in
severepersonal injury or death.
WARNING signifies hazards that could result in personal injury or
death.
CAUTION is used to identify unsafe practices which could result
in minor personal injury or product and property damage.
NOTE is used to highlight suggestions which will result in
enhanced installation, reliability, or operation.
PERSONAL INJURY, DEATH AND / OR PROPERTY
DAMAGE HAZARD
Failure to follow this warning could result in personal injury,
death or property damage.
Improper installation, adjustment, alteration, service,
maintenance, or use can cause explosion, fire, electrical shock,
or other conditions which may cause personal injury or
property damage. Consult a qualified installer, service agency,
or your distributor or branch for information or assistance. The
qualified installer or service agency must use
factory−authorized kits or accessories when modifying this
product.
Read and follow all instructions and warnings, including labels
shipped with or attached to unit before operating your new air
conditioner.
!WARNING
GENERAL
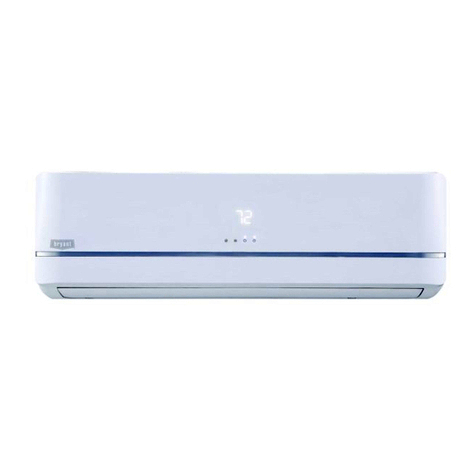
The high wall fan coil unit provides quiet, maximum comfort. In
addition to cooling and/or heating, the high wall fan coil unit
matched with an outdoor condensing unit filters and dehumidifies
the air in the room to provide maximum comfort.
IMPORTANT: The high wall fan coil unit should be installed by
authorized personnel only; using approved tubing and accessories.
If technical assistance, service or repair is needed, contact the
installer.
The high wall fan coil unit can be set up and operated from the
remote control (provided). If the remote is misplaced, the system
can be operated from the “Auto” setting on the unit.
Operating Modes:
The high wall fan coil unit has five operating modes:
SFan only
SAuto
SHeating (heat pump models only)
SCooling
SDehumidification (DRY)
Fan Only
In the FAN ONLY mode, the system filters and circulates the room
air without changing room air temperature.
Auto
In the AUTO mode, the system automatically cools or heats the
room according to the user−selected set point.
Heating
In the HEATING mode, the system heats and filters the room air.
Cooling
In the COOLING mode, the system cools, dries and filters the
room air.
Dehumidification (DRY)
In the DEHUMIDIFICATION mode, the system dries, filters and
slightly cools the room air temperature. This mode prioritizes air
dehumidification however it does not take the place of a
dehumidifier(unit designer specifically for dehumidification only).
Wireless Remote Control
The remote control transmits commands to set up and operate the
system. The control has a window display panel that displays the
current system status. The control can be secured to a surface when
used with the mounting bracket provided.
Wired Remote Control (Optional)
Refer to the Wired Controller manual.
24V Interface (Optional)
Allows the control of the Ductless System with a third party
thermostat.
3
PART NAMES
Remote Control
Intelligent Eye
(some units)
Remote Control Holder
Air Freshening Filter
(On back of Main Filter)
Louver
Front Panel
Display window
The unit has a built-in light sensor to
detect ambient brightness. When the
light is turned o, the display dims
gradually conserving energy.
Fig. 1 Indoor Unit
INDOOR UNIT DISPLAY INDICATOR
“ ” when 46°F(8°C) or 54°F(12°C) heating mode is turned
on
“ ” for 3 seconds when:
“ ” Displays temperature, operation feature and error codes:
“ ” for 3 seconds when:
• TIMER ON is set
• FRESH, SWING, TURBO, or SILENCE features are turned on
• TIMER OFF is set
“ ” when defrosting
“ ” when unit is self-cleaning
“ ” when the fresh feature is turned on (Not available on these systems)
“ ” when the ECO feature is activated
“ ” when the Wi-Fi® wireless control feature is activated
“ ” indicates the current operation power (Not available on these systems)
Display Code
Legend
In Fan mode, the unit displays the room temperature.
In other modes, the unit displays your temperature setting.
kW
Press LED on the remote control 7 times continuously within 3 minutes until AP appears on the
display of the indoor unit to turn ON the Wi-Fi® signal.
Refer to the Wi-Fi® installation and operation instructions for details on how to activate and use
the integrated Wi-Fi® functionality.
Fig. 2 Indoor Unit Display Indicator
4
WIRELESS REMOTE CONTROL
Before you begin using your new air conditioner, make sure to familiarize yourself with the remote control. The following is a brief
introduction to the remote control.
Mode Fan
TimerTimer
Follow
Me
LED
RH
Turbo
ON/OFF
FAN
ON/OFF
MODE
Scrolls through operation
modes as follows:
AUT O
COOL
DR Y
HEA T
FAN
ECO/SLEEP
TURBO
Enables unit to reach preset
temperature in shortest time
possible. If held down for more
than 2 seconds, the Self Clean
feature activates.
TEMP
TEMP
TIMER
(see How to Use Basic
Functions for instructions).
SWING
SWING
Starts and stops the up-down
louver movement.
Detects movement
in the room.
LED
Turns the indoor unit’s LED
FOLLOW ME
RH
Adjusts the room humidity
during the Dry operation in a
range of 35%~85%. Press to
increase the humidity in 5%
increments.
Note:
After setting, the humidity
settings appear on the screen.
Temperature sensing and room
temperature display button.
Starts and stops the right-left
louver movement.
Increases temp. in 1°F(0.5°C)
increments. Hold down to
increase temp. in 1°F(0.5°C)
increments. Max. temp. is
86°F (30°C).
Decreases temp. in 1°F(0.5°C)
decrements. Hold down to
decrease temp. 1°F(0.5°C)
increments. Min. temp. is
60°F(16°C)
INTELLIGENT EYE
Selects fan speeds in
the following order:
AU% 20%
60%
40%
80% F%(100%).
Press the Adjust
button to increase/decrease
the fan speed in 1%
increments.
Starts and stops the energy
more than 2 seconds, the sleep
feature activates.
or
Fig. 3 Remote Controller
NOTE: For advanced functions, refer to the Remote Controller’s Service Manual.
5
Remote LCD Screen Indicators
( )
Remote LCD Screen Indicators
Information appears when the remote controller powers up.
Transmission Indicator
Horizontal louver auto swing display
Vertical louver auto swing display
Not available for
this unit
Sleep mode display
Turbo mode display
LOCK feature display
Not available for
this unit
Follow me feature
display
Not available for
this unit
Not available for
this unit
Silence feature
display
Lights up when remote
sends a signal to the indoor
unit
ON/OFF display
Appears when the unit
is turned on, and disappears
when it is turned off
TIMER ON display
( )
Battery display
Fan speed display
Displays selected fan speed:
Temperature/Timer/Fan
speed display
Displays the set temperature
by default, fan speed or
timer setting when using
TIMER ON/OFF functions
Temperature range:
O
60-86 F/
o
16-30 C
Timer setting range:
0-24 hours
Fan speed setting range:
AU -F%
Humidity setting range:
35% -85%
This display is blank when
operating in FAN mode.
Displays when ECO
feature is activated
Low battery detection
MODE display
Displays the current
mode, including:
Displays when TIMER
ON is set
TIMER OFF display
Displays when TIMER
OFF is set
11%-20%
1%-10%
21%-30%
F%(100%)
AUTO
.................
This fan speed can not be
adjusted in AUTO or DRY mode.
Fig. 4 Unit Display
6
EQUIPMENT DAMAGE HAZARD
Failure to follow this caution may result in equipment
damage.
Handle the control with care and avoid getting the remote
control wet.
CAUTION
!
IMPORTANT: The remote control can operate the unit from a
distanceof up to 26 ft. (8 m) as long as there are no obstructions.
When the timer function is used, the remote control should be kept
in the vicinity of the fan coil (within 26 ft. / 8 m).
The remote control can perform the following basic functions:
STurn the system ON and OFF
SSelect the operating mode
SAdjust the room air temperature set point and fan speed
SAdjust the airflow direction
Refer to the Remote Control Function section for a detailed
description of all the capabilities of the remote control.
Battery Installation
Two AAA 1.5v alkaline batteries (included) are required for
operation of the remote control.
To install or replace batteries:
1. Slide the back cover off the control to open the battery
compartment.
2. Insert batteries. Follow the polarity markings inside the
battery compartment.
3. Replace the battery compartment cover.
NOTE:
1. When replacing batteries, do not use old batteries or a
different type of battery. This may cause the remote control
to malfunction.
2. If the remote is not going to be used for several weeks,
remove the batteries. Otherwise battery leakage may
damage the remote control.
3. The average battery life under normal use is about 6
months.
4. Replace the batteries when there is no audible beep from the
indoor unit or if the Transmission Indicator fails to light.
5. When the batteries are removed, the remote control erases
all programmed settings. The control must be
reprogrammed after insertion of the new batteries.
Remote Control Operation − Quick Start
NOTE: When transmitting a command from the remote control to
the unit, be sure to point the control toward the right side of the
unit. The unit confirms receipt of a command by sounding an
audible beep.
1. Turn the unit on by pressing ON/OFF.
2. If there is a preference for _C rather than _F (default), press
and hold the increase +and decrease −temperature set point
buttons together for approximately 3 seconds.
3. Select the desired mode by pressing MODE.
AUTO
COOL
DRY
HEAT
FAN
Fig. 5 Modes
4. Select the temperature set point by pointing the control
toward the unit and pressing the increase/decrease
temperature set point buttons until the desired temperature
appears on screen.
5. Press FAN to select the desired fan speed.
NOTE: If the unit is operating in the DRY or AUTO mode, the
fan speed will be automatically set.
6. Set the airflow direction. When the unit is turned on, the
louvers default to the cooling or heating position. The user
can adjust the louver position or initiate continuous louver
movement by pressing Up-Down Louver SWING (see
Fig. 3).
Manual Operation
If the remote control is lost, damaged, or the batteries are
exhausted, MANUAL CONTROL can be used to run the unit.
When MANUAL CONTROL is pressed once, the AUTO mode
takes affect (heat or cool). When this button is pressed twice, the
system enters the TEST mode and runs for 30 minutes in the
COOLING mode (it will run in the AUTO mode afterward).
When pressed three times, the system turns off.
Manual control button
AUTO/COOL
Fig. 6 Manual Button
The set conditions of manual operation are as follows:
SPresetset point: 76_F (24_C)
SFan speed: AUTO
SDischarge air direction: Pre−set position based on operation in
the “COOL”or “HEAT” mode.
MANUAL CONTROL is intended for testing purposes
and emergency operation only. Do not use this function
unless the remote controller is lost.
To restore regular operation, use the remote controller to
activatethe unit.
CAUTION
!
7
REMOTE CONTROL FUNCTIONS
Press On/Off
When the air conditioner is not in operation, the remote control
displays the last set point and mode.
SPress ON/OFF to start the unit.
− The unit starts in the last operating mode and set point.
The ON/OFF indicator appears.
SPress ON/OFF to stop the unit.
− All the indicator lights on the unit go out, and the remote
control displays the set point and mode.
NOTE: If ON/OFF is pressed too soon after a stop, the
compressor will not start for 3 to 4 minutes due to the inherent
protection against frequent compressor cycling. The unit only
emits an audible beep when the signals are received correctly.
Select an Operating Mode
Press MODE to select one of the available modes.
Fig. 7 Operating Modes
AUTO Mode
In AUTO mode, the unit automatically selects the COOL, FAN,
HEAT or DRY mode based on the set temperature.
7. Press MODE to select AUTO mode.
8. Set your desired temperature using Temp + or Temp −.
9. Press ON/OFF to start the unit.
NOTE: FAN SPEED can not be set in AUTO mode.
Mode F an
ON/OFF
3
12
TimerTimer
RH
Follow
m e
LED
Turbo
Fig. 8 Auto Operation
COOL Mode
1. Press MODE to select the COOL mode.
2. Set your desired temperature using Temp + or Temp −.
3. Press FAN to select the fan speed in a range of Au%−F%
(Auto to Full speed), in conjunction with Temp + or Temp
−.
4. Press ON/OFF to start the unit.
Mode F an
ON/OFF
4
1
3
2
RH
TimerTimer
Follow
m e
LED
Turbo
Fig. 9 Cool Operation
DRY Mode (Dehumidifying)
1. Press MODE to select the DRY mode.
2. Set your desired temperature using Temp + or Temp −.
3. Set the desired room humidity using RH in a range of
35%~85%.
4. Press ON/OFF to start the unit.
NOTE: FAN SPEED can not be set in DRY mode.
3
12
Mode F an
ON/OFF
TimerTimer
Follow
me
LED
Turbo RH
Fig. 10 DRY Operation
8
HEAT Mode
1. Press MODE to select the HEAT mode.
2. Set your desired temperature using Temp + or Temp −.
3. Press FAN to select a fan speed in a range of Au%−F% (Auto
to Full speed), in conjunction with Temp + or Temp −.
4. Press ON/OFF to start the unit.
NOTE: As the outdoor temperature drops, the unit’s HEAT
function performance may be affected. In such instances, we
recommend using this air conditioner in conjunction with an
additional heating appliance.
4
1
3
2
Mode F an
ON/OFF
TimerTimer
Follow
m e
LED
Turbo RH
Fig. 11 Heat Operation
FAN Mode
1. Press MODE to select the FAN mode.
2. Press FAN to select a fan speed in a range of Au%−F% (Auto
to Full speed), in conjunction with Temp + or Temp −.
3. Press ON/OFF to start the unit.
NOTE: The temperature cannot be set while in FAN mode. As
a result, the remote controls LCD screen will not display the
temperature.
3
12
Mode F an
ON/OFF
TimerTimer
Follow
me
LED
Turbo RH
Fig. 12 Fan Operation
NOTE: Do not move the louver by hand. This will set the
louver out of sync. If this occurs, turn off the unit and unplug it
for a few seconds, then restart the unit. This resets the louver.
Setting the Room Temperature Set Point
Press the increase temperature set point +and decrease -buttons
to raise or lower the temperature.
The unit confirms the signal receipt with a beep and the value of
the set temperature appears on the display and changes
accordingly. The temperature can be set between 62_F (17_C) and
86_F (30_C) in increments of 1_F or 1_C.
NOTE: In the COOLING mode, if the temperature selected is
higher than the room temperature, the unit will not start. The same
applies for the HEATING mode if the selected temperature is
lower than the room temperature.
Selecting the Fan Speed
AUTO
20%
60%
FULL
40%
80%
Fig. 13 Fan Speeds
The fan speed can be selected by pressing the FAN button. Press
Adjust + or −to increase/decrease the fan speed in 1% increments.
NOTE: When the unit is on, the fan runs continuously in cooling
or heating. When in heating, there may be conditions where the fan
will slow down or shut off to prevent cold blow.
Up−Down Louver Position
While the unit is on, use SWING (up−down airflow) to set the
airflow direction.
1. Press SWING (up−down airflow) on the remote control
once to activate the louver. Each time you press SWING ,
the louver adjusts by 6 degrees. Press SWING until the
preferred direction is reached (see Fig. 14).
Fig. 14 Up−Down Louver Position
2. To swing the louver up and down continuously, press and
hold SWING (up−down airflow) for 2 seconds. Press
SWING again to stop the automatic function.
Right − Left Louver Position
While the unit is on, press SWING (right−left airflow) to set
the airflow direction.
1. Press SWING (right−left airflow) on the remote
control once to activate the louver. Every time you press
SWING (right−left airflow), the louver adjusts by 6
degrees. Press SWING until the preferred direction is
reached (see Fig. 15).
Fig. 15 Right − Left Louver Position
2. To swing the louver left and right continuously, press and
hold SWING (right−left airflow) for 2 seconds. Press
again to stop the automatic function.
9
INJURY HAZARD
DO NOT place fingers in or near the blower or suction side
of the unit. The high−speed fan, inside the unit, may cause
injury.
CAUTION
!
Timer Function
TIMER ON (to start the unit) and TIMER OFF (to stop the unit)
can be used separately or together.
Timer ON only
This function allows the unit to start automatically at the set time.
The TIMER ON can be set while the unit is on or off.
1. Press TIMER and the TIMER ON indicator appears
and flashes. By default, the last user set time period along
with the letter “h” (indicating HOURS) appears on the
display.
NOTE: This number indicates the amount of time after the
current time that you want the unit to turn on. For example, if
you set TIMER ON for 2.5 hours, “2.5h” appears on the
display, and the unit turns on after 2.5 hours.
2. Press TEMP + or TEMP − repeatedly to set the time when
you want the unit to turn on.
3. Wait 3 seconds and the TIMER ON function activates. The
digital display on your remote controller reverts to the
temperature display. The indicator remains on and the
function activates.
Timer OFF only
This function allows the unit to stop automatically at the set time.
The timer can be set while the unit is on or while it is off.
1. Press TIMER, the TIMER OFF indicator appears
and flashes. By default, the last user set time period and an
“h” (indicating HOURS) appears on the display.
NOTE: This number indicates the amount of time after the
current time that you want the unit to turn off. For example, if
you set TIMER OFF for 5 hours, “5.0” appears on the display,
and the unit turns off after 5 hours.
2. Press Temp + or Temp −repeatedly to set the time when
you want the unit to turn on.
3. Wait 3 seconds and the TIMER OFF function activates.
The digital display on the remote controller reverts to the
temperaturedisplay. The indicator remains on and the
function activates.
Timer ON and Timer OFF
Use both functions to program the unit to turn on and shut off at
specified times.
a. Set TIMER ON as previously described.
b. Set TIMER OFF as previously described. The unit starts
automatically at the set TIME ON and turns off at the set
TIME OFF.
EXAMPLE: Setting the unit to turn after 6 hours, operate for 2
hours then turn off (see Fig. 16).
&XUUHQW
WLPH30
2PM 3PM 4PM 5PM 6PM 7PM 8PM 9PM
Timer starts
Unit turns
Unit turns
ON OFF
6 hours later
8 hours later
Timer is set To turn ON
6 hours from current time
Timer is set to turn OFF
8 hours from current time
Fig. 16 Set both Timer ON and Timer OFF
10
ECO Mode
NOTE: This function is only available under the COOL mode.
Use to enter the ENERGY EFFICIENT mode. Under the
COOLING mode, press ECO and the remote controller adjusts
the temperature automatically to 75_F (24_) and selects the
AUTO fan speed to conserve energy (only if the set temperature
is less than 75_F (24_). If the set temperature is above 75_F
(24_), press ECO, the fan speed switches to AUTO, and the set
temperature remains the same.
Sleep Mode
SLEEP mode is used to conserve energy while sleeping (and do
not need the same temperature settings to stay comfortable) Sleep
mode can be used when the unit is in the COOL, HEAT or AUTO
mode only.
SCool Mode − Press ECO for 2 seconds. After 1 hour the
set point raises by 2_F (1_C). After another hour, the set
point raises by another 2_F (1_C) and the fan runs in a
low speed. The unit shuts off 6 hours after setting the
SLEEP mode. The SLEEP mode cancels if either
“Mode”, “Fan”, or “On/Off” on the remote control is
pressed.
SHeat Mode − Same as COOLING mode however set
points are lowered by 2_F (1_C).
FOLLOW ME Mode
The Follow ME function enables the remote controller to measure
the temperature at its current location and send this signal to the
air conditioner every 3 minutes. When using the AUTO, COOL,
or HEAT modes, measuring ambient temperature from the remote
control (instead of from the indoor unit itself) enables the air
conditioner to optimize the temperature around the user and ensure
maximum comfort.
NOTE: This function is not available for DRY or FAN modes.
Turbo Mode
Use the TURBO mode to cool or heat the room rapidly.
SPress TURBO. An audible “beep” is heard if the indoor
unit supports this function. The fan runs on super high
speed. TURBO mode terminates automatically 20
minutes after pressing TURBO. The mode can be
terminated immediately by pressing TURBO again.
When the TURBO mode is terminated, the unit reverts
to the original setting.
Relative Humidity
The relative humidity can be adjusted in 5% increments in a range
of 35%~85% during DRY Mode by pressing RH on the remote
controller.
Intelligent Eye
The system may be controlled intelligently under INTELLIGENT
EYE mode. The INTELLIGENT EYE can detect activity in the
room and adjust the horizontal angle of airflow to implement the
Wind Flow Follow People feature and Wind Flow Away from
People feature.
In COOLING mode, when the INTELLIGENT EYE does not
detect movement for 30 minutes, the unit automatically lowers the
frequency to save energy. However, this function is disabled when
the light sensor detects the light is turned off. When the room
temperature is between 90_F to 104_F (32_C to 40_C), the Wind
Flow Follow People feature is disabled.
While the unit is on, press INTELLIGENT EYE on the remote
control to select the Wind Flow Follow People feature or Wind
Flow Away from People feature and the AUTO SWING feature
activates.
NOTE: The Wind Flow Follow People feature is only available
for a single person area. The INTELLIGENT EYE function
will stop if the ON/OFF, Mode, and Swing buttons are pressed
while under the 46_F(8_C) HEATING mode or SELF CLEAN
mode.
Wall
3.2ft(1m)
26.2ft(8m)
Air conditioner
Intelligent eye
Detectable area
Fig. 17 Intelligent Eye
Left(75 +10 )
Middle
(30 +10 )
-
-
-
Right(75 +10 )
Fig. 18 Intelligent Eye
NOTE: The detectable range varies according to the room
temperature.
NOTE: Pressing ECO, or modifying the mode or adjusting
the set temperature to less than 75_F (24_) stops the
ECO function.
Under the ECO function, the set temperature should
be 75_F (24_) or higher (which may result in
insufficient cooling). If you feel uncomfortable, press
ECO again to end the operation.