1
2
34
Alimenter la caméra vidéo sous une tension de 230V c.a.
Régler le foyer de l'objectif et le diaphragme (en cas d'utilisation d'objectifs à diaphragme manuel) pour optimiser l'image.
Objectifs
Utiliser des objectifs à raccord CS. On peut aussi utiliser des optiques de pas C par l'intermédiaire d'un adaptateur approprié.
Brancher le connecteur de l'objectif au terminal IRIS sur le côté.
Nota: Si l'on utilise des objectifs avec zoom motorisé dans le coffret pour extérieur réf. 391803, il faut fixer à la bride interne du support, en plus de
l'objectif, la caméra vidéo au moyen de l'entretoise livrée avec l'appareil, en la vissant au corps de la caméra.
La caméra vidéo est fournie en position de back focus standard. Cependant, pour certains types d'objectifs avec zoom, un réglage peut s'avérer
nécessaire.
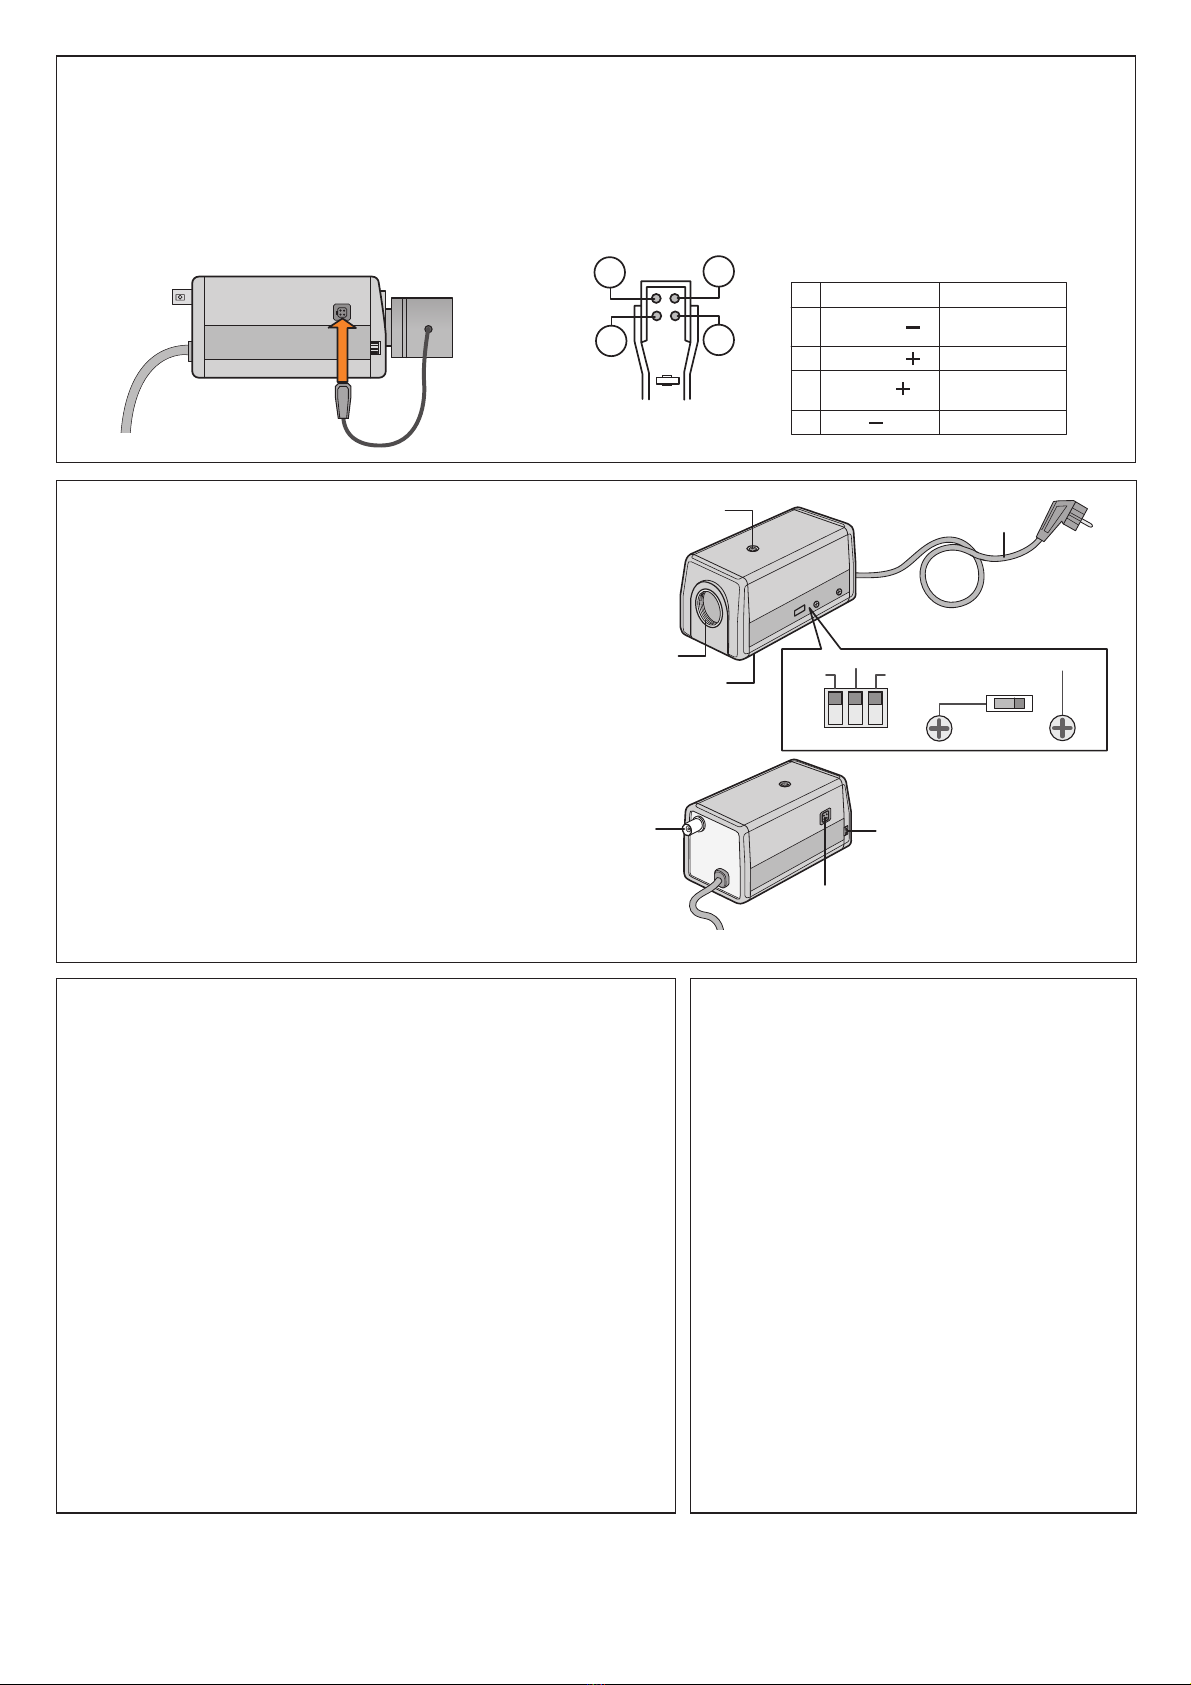
Description
1 Raccords des objectifs: raccord CS
2Vis de fixation caméra vidéo: mural, en coffret, etc.
3 Réglage du back focus de l'objectif.
4Terminal IRIS: à brancher au cas où on utilise un objectif à diaphragme
automatique.
5 Connecteur pour sortie vidéo (BNC)
6 Câble d'alimentation: à brancher sur le réseau 230V c.a.
7Interrupteur AES (Obturateur électronique automatique): pour activer
la fonction AES avec des objectifs à diaphragme manuel, placer
l'interrupteur sur ON (MARCHE). Placer sur OFF (ARRET) au cas où
on utilise des objectifs à diaphragme automatique.
8 Interrupteur SENS UP: pour augmenter la sensibilité, placer cet
interrupteur sur ON (MARCHE)
9 Interrupteur BLC pour compenser le contre-jour: pour des prises de
vue à contre-jour placer cet interrupteur sur ON (MARCHE).
10 Niveau ALC: potentiomètre de réglage du niveau de la sortie vidéo,
si l'on utilise des objectifs avec IRIS automatique.
11 PHASE V : potentiomètre de réglage du synchronisme vertical pour
installations avec plusieurs caméras vidéo.
12 Interrupteur AUTO IRIS: sélectionner VIDEO pour objectifs avec
amplificateur; sélectionner DC VIDEO pour objectifs sans amplificateur.
SENS UP BLCAES
ON
OFF
789
ALC
LEVEL
V-PHASE
10 11
2
2
1
6
DC VIDEO
4
3
5
12
Note: Les dessins et les caractéristiques techniques sont sujets à modifications sans
préavis.
Caractéristiques
Alimentation 230V c.a. ±10% / 50 ±1Hz
Absorption 30mA
Capteur 1/3" Blanc et noir CCD
Système de balayage 2:1 entrelacé
Eléments de l'image 512 (H) x 582 (V) mm
Zone de balayage 4,92 (H) x 3,67 (V) mm
Fréquence de balayage 15.625 kHz (H) / 50Hz (V)
Résolution 380 lignes TV (H) / 400 lignes TV (V)
Système de synchronisation Line Lock
Eclairage minimal 0,09 lx F1,2 (avec SENS UP ON)
AGC (Contrôle Automatique de Gain) Présent
Signal de sortie 1Vpp 75ΩCCIR compatible
Correction gamma 0,45
Rapport signal/bruit ≥46dB
AES
(Obturateur Electronique Automatique) 1/50 ÷1/50000 sec./OFF
Sortie vidéo 1 BNC
Diaphragme automatique connecteur 4P (c.c./vidéo)
Température de fonctionnement 10°C ÷50°C
Humidité de fonctionnement 30% ÷90%
Dimensions (L x H x P) 60 x 60 x 120mm
Poids 680 g
Avertissements
- Ne pas orienter la caméra vers le soleil.
- Ne pas diriger la caméra vers le soleil même si elle n'est
pas en fonctionnement.
- Ne pas filmer en présence de lumière excessive.
- Ne pas laisser tomber la caméra ou la soumettre à des
chocs ou des vibrations.
- Ne pas toucher les parties internes.
- Installer la caméra à un endroit où elle ne puisse pas
recevoir d'eau.
En cas de contact avec l'eau, couper immédiatement
l'alimentation et contacter le service après vente.
-Installer la caméra loin de sources de perturbations vidéo.
Lorsque les câbles de la caméra vidéo sont placés à
proximité de câbles électriques ou d'antennes d'appareils
de télévision, des perturbations de l'image peuvent se
produire. S'il en était ainsi, changer les câbles de position
ou modifier la disposition de l'appareil.
- Contrôler la température ambiante et l'humidité.
La qualité de l'image peut être détériorée ou certaines parties
internes de la caméra vidéo peuvent subir des dommages,
si la température ambiante est supérieure ou inférieure à
celle indiquée dans les caractéristiques.
Il vaut mieux éviter d'utiliser la caméra dans ce cas.
Il convient de prendre des précautions également en présence
d'un taux d'humidité élevé.
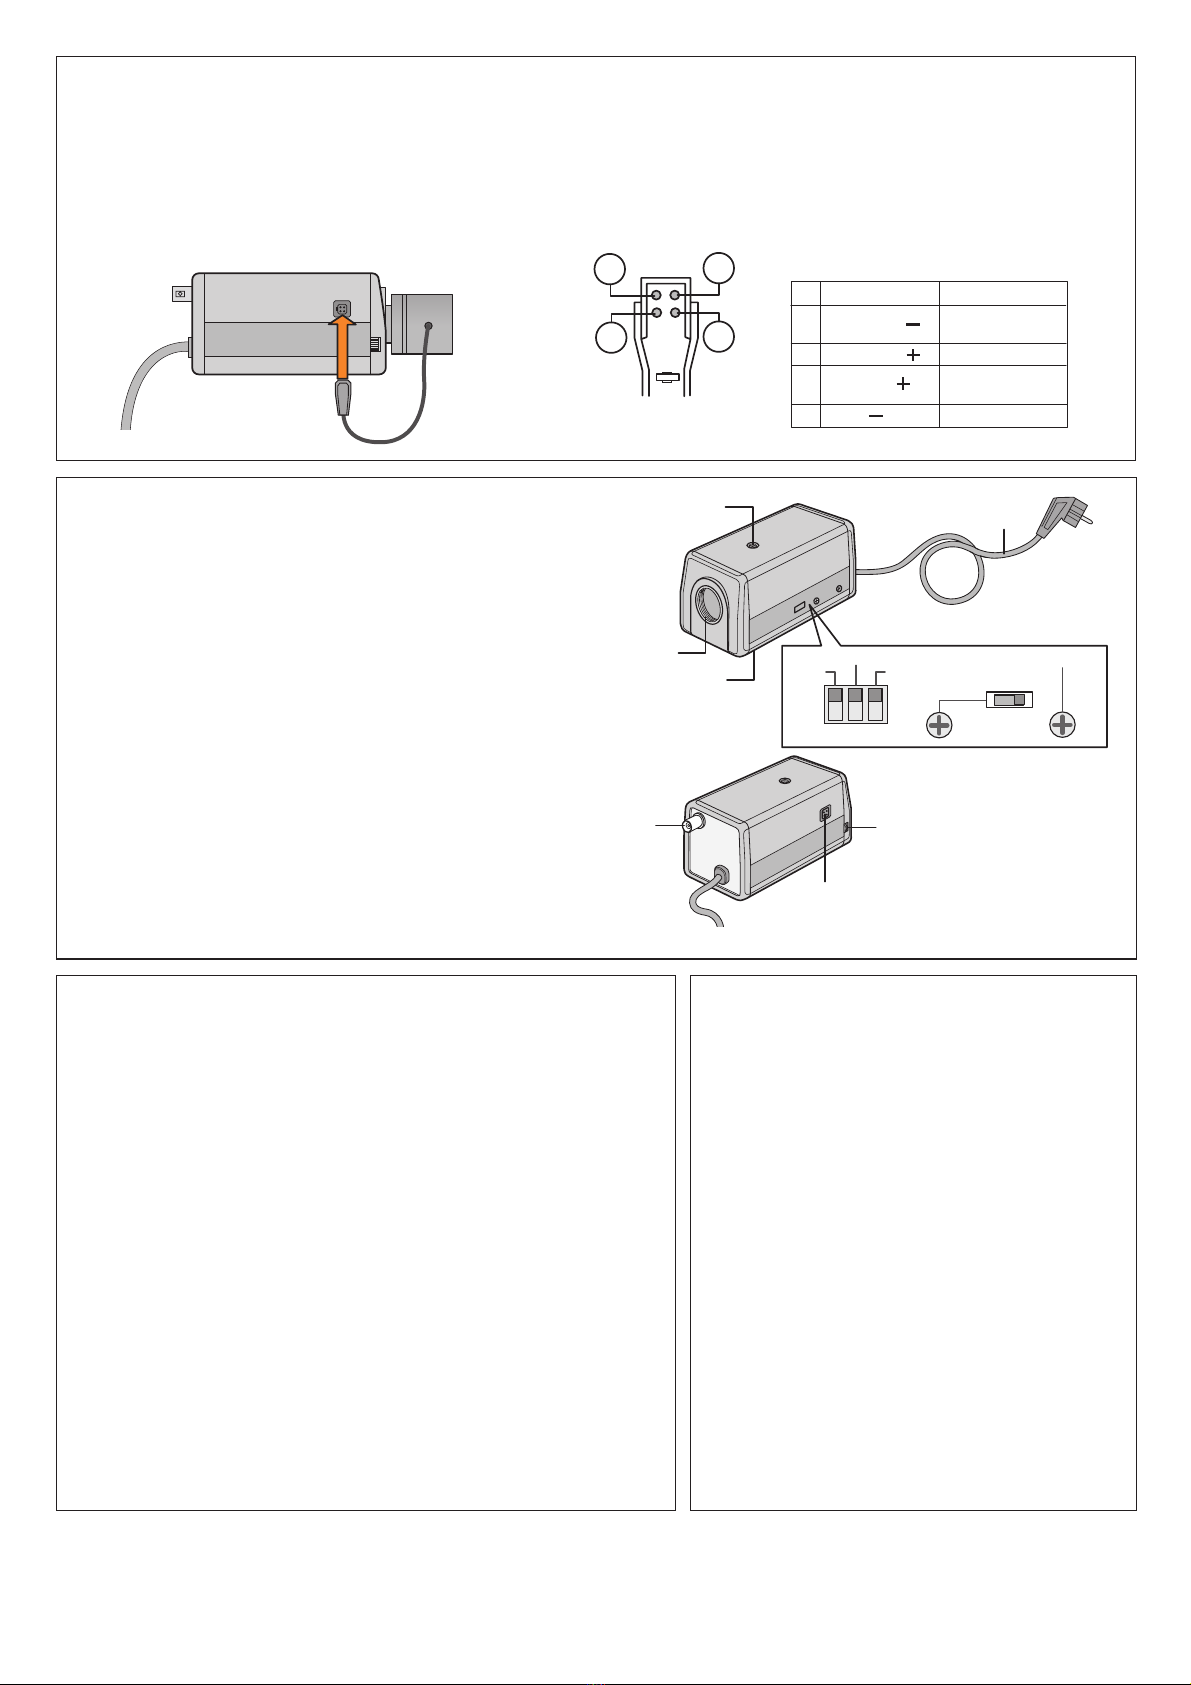
Terminal
IRIS
Caméra vidéo Objectif 1
3
2
4
Côté soudure
TERMINAL IRIS
Position DC
Contrôle
1
Contrôle
2
Commande
3
Commande
4(GND: Terre)
Position VIDEO
9V alim. IRIS
(50mA max)
0,8Vpp
Signal vidéo
GND (Terre)
GND (Terre)