Table of Contents
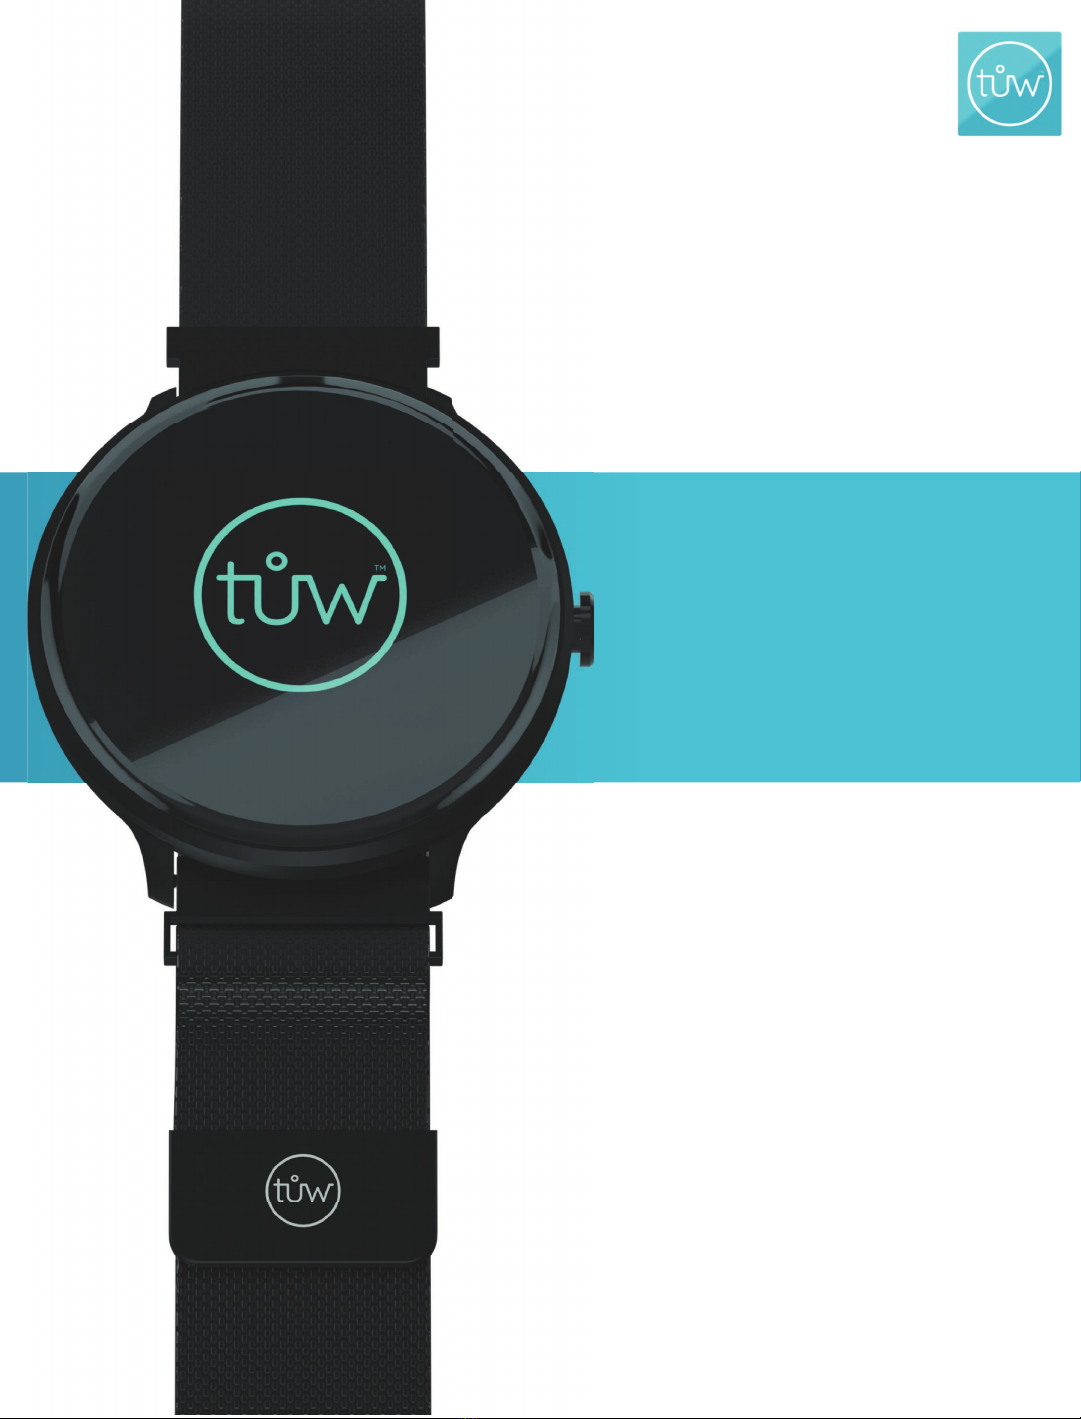
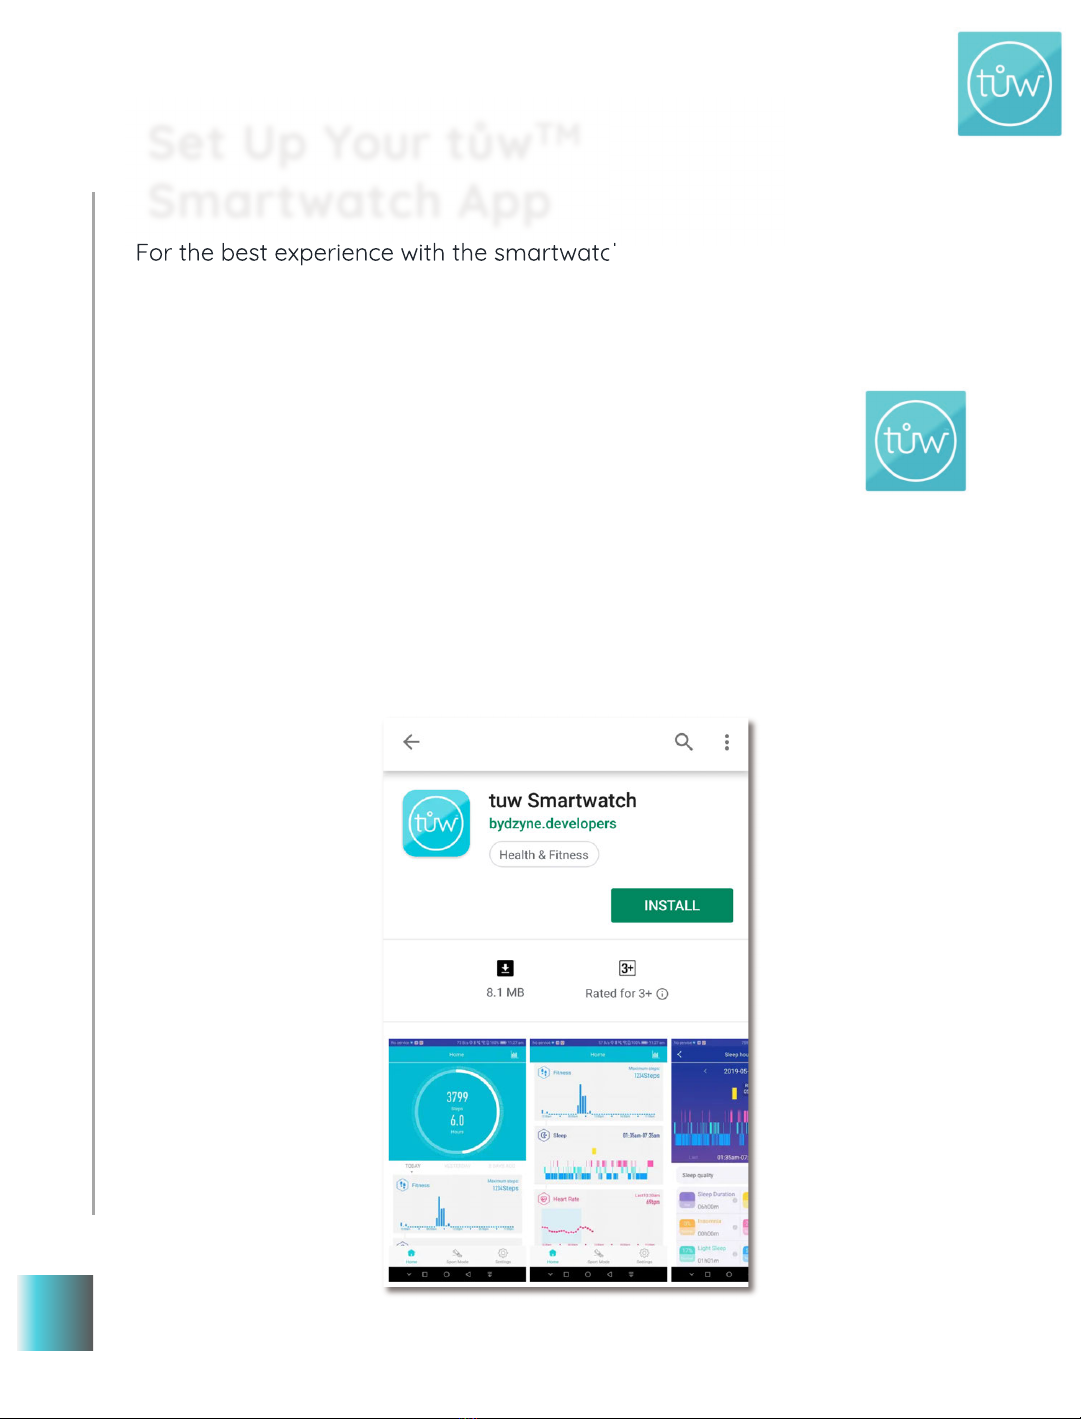
This smartwatch is designed to be utilized with the t!w™ Smartwatch App (Available on iOS
and Google Play Store). For instructions on connecting your smartwatch via Bluetooth and how
to use the App please continue to read through this user guide.
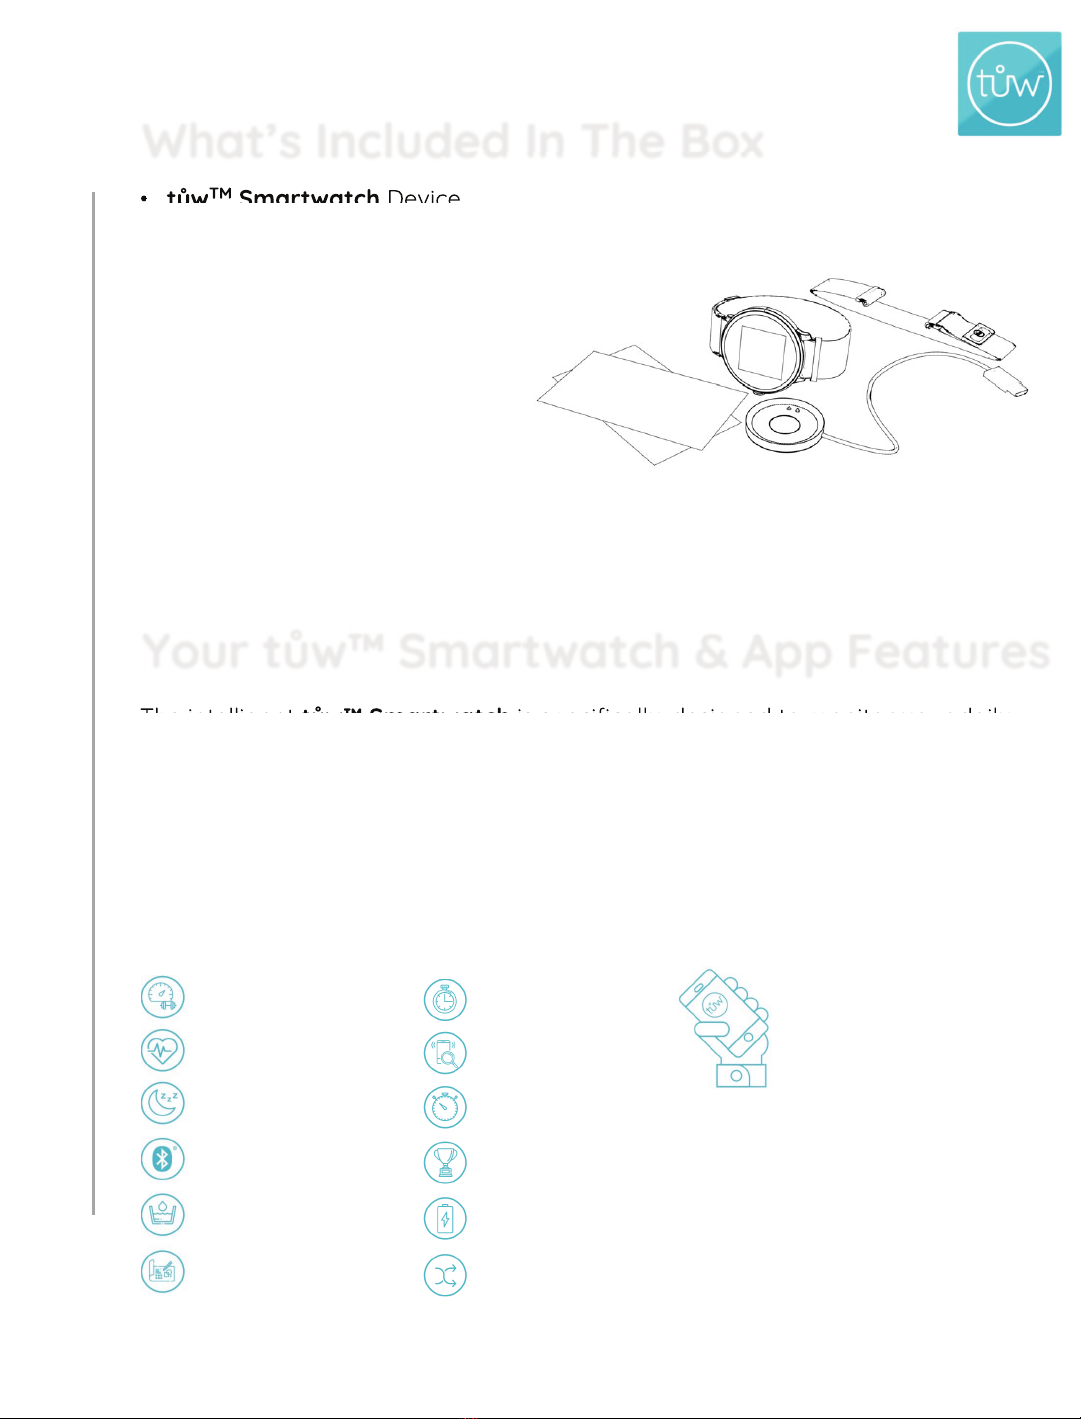
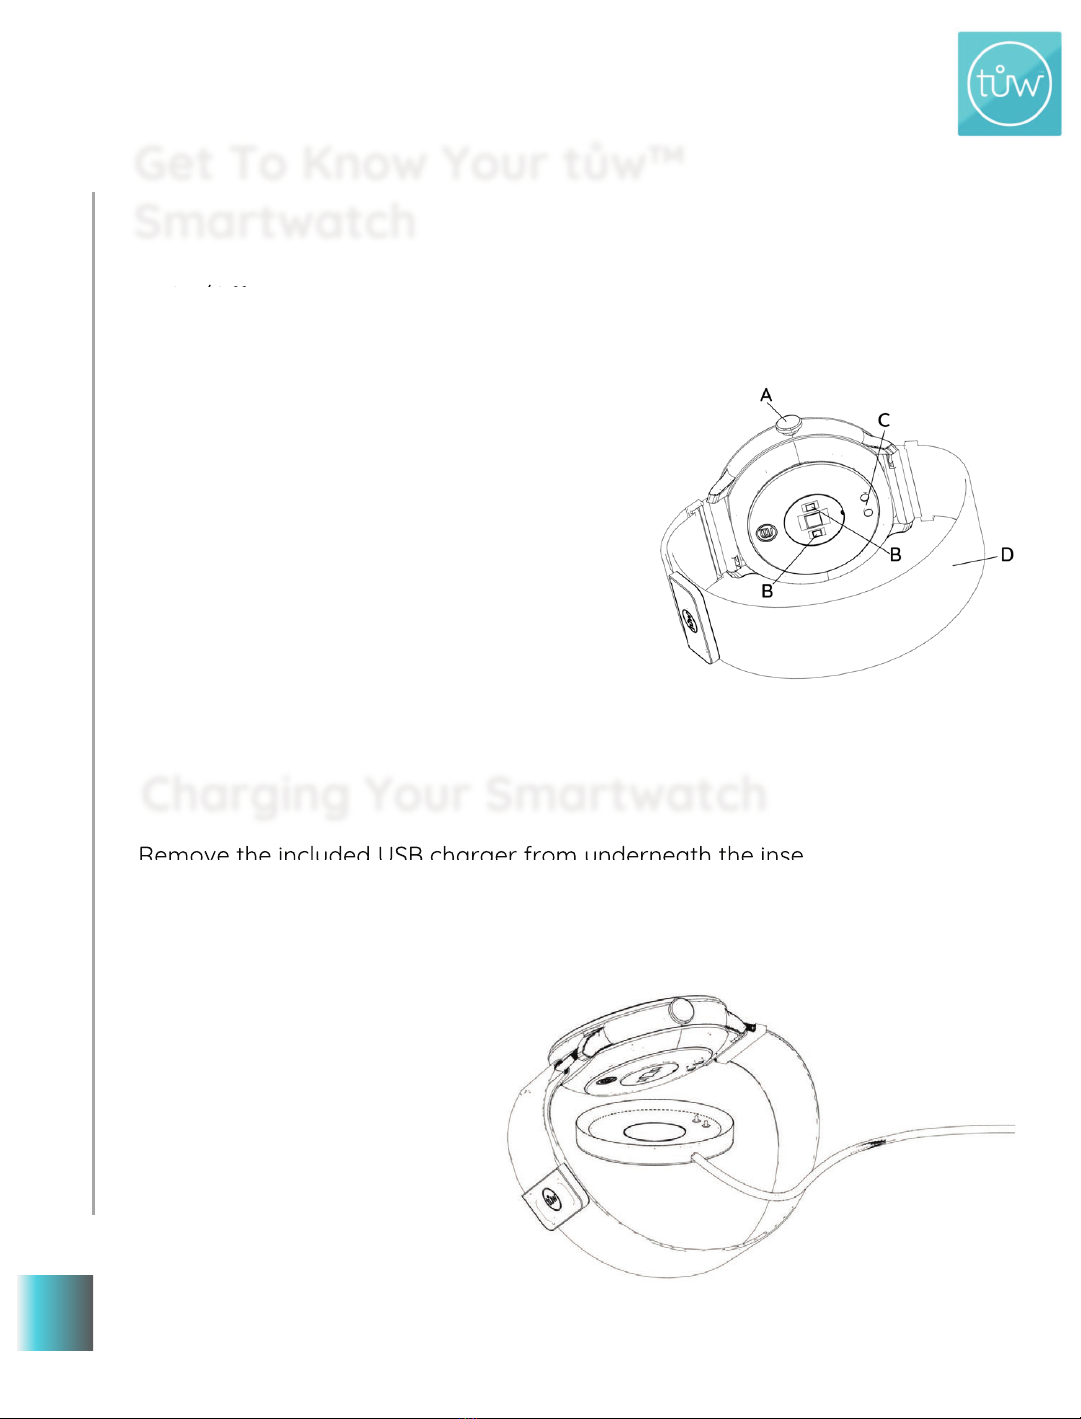
Get to know Your t!w™ Smartwatch
Charging Your Smartwatch
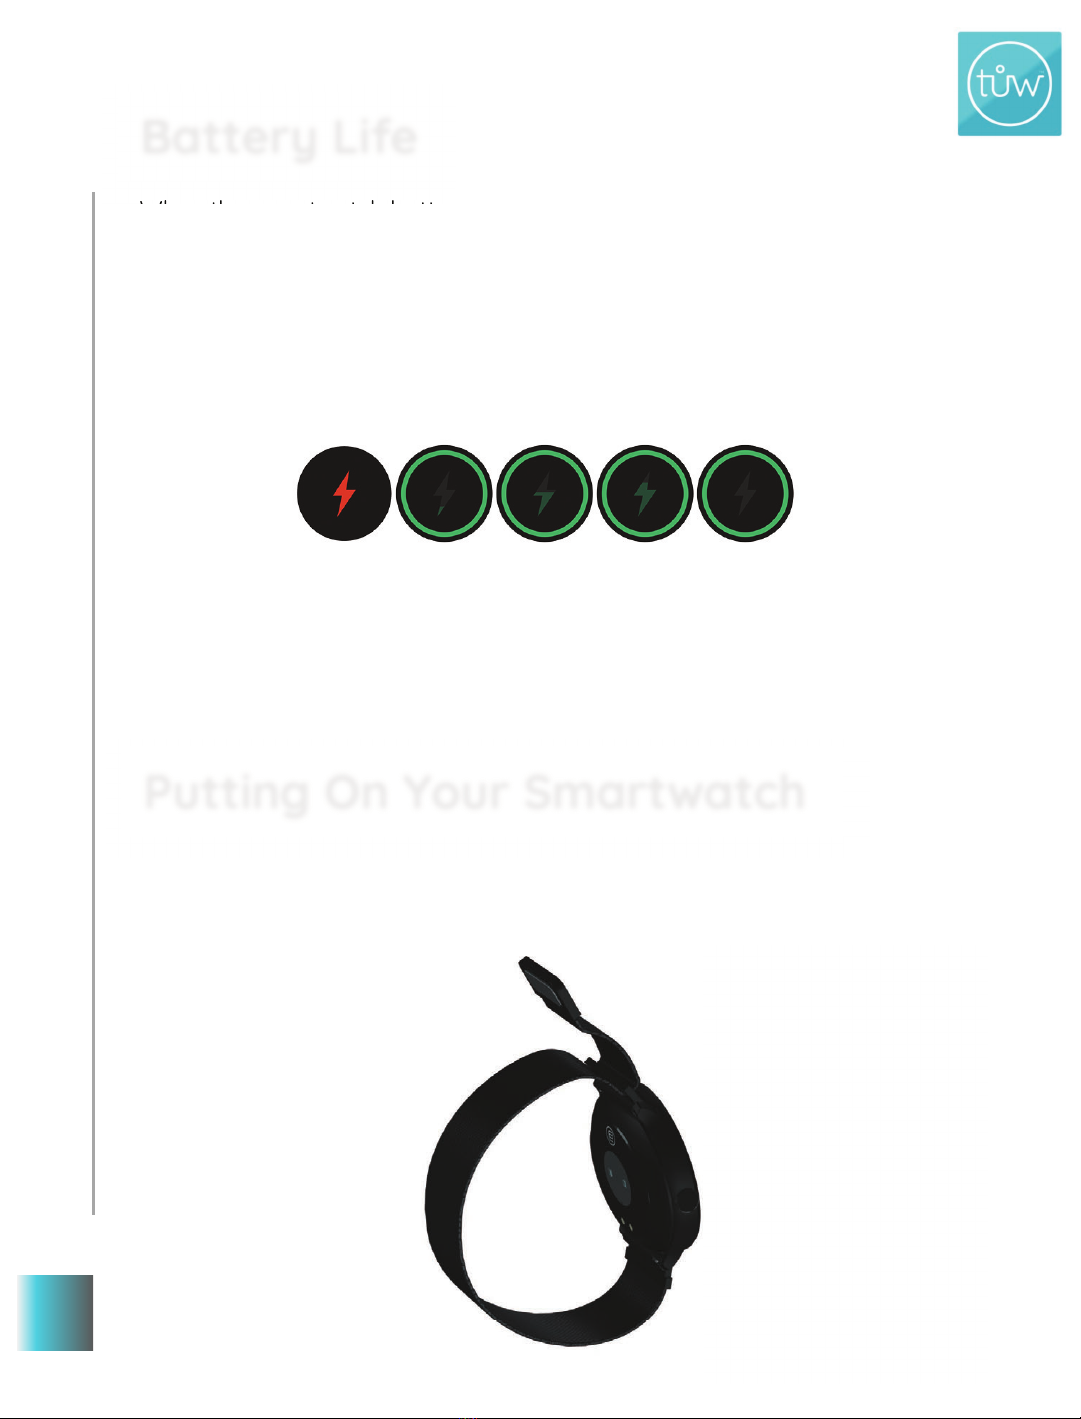
Battery Life
Putting on Your Smartwatch
Changing the Band
On/Off/ Wake Up
Setting Up Your t!w™ Smartwatch App
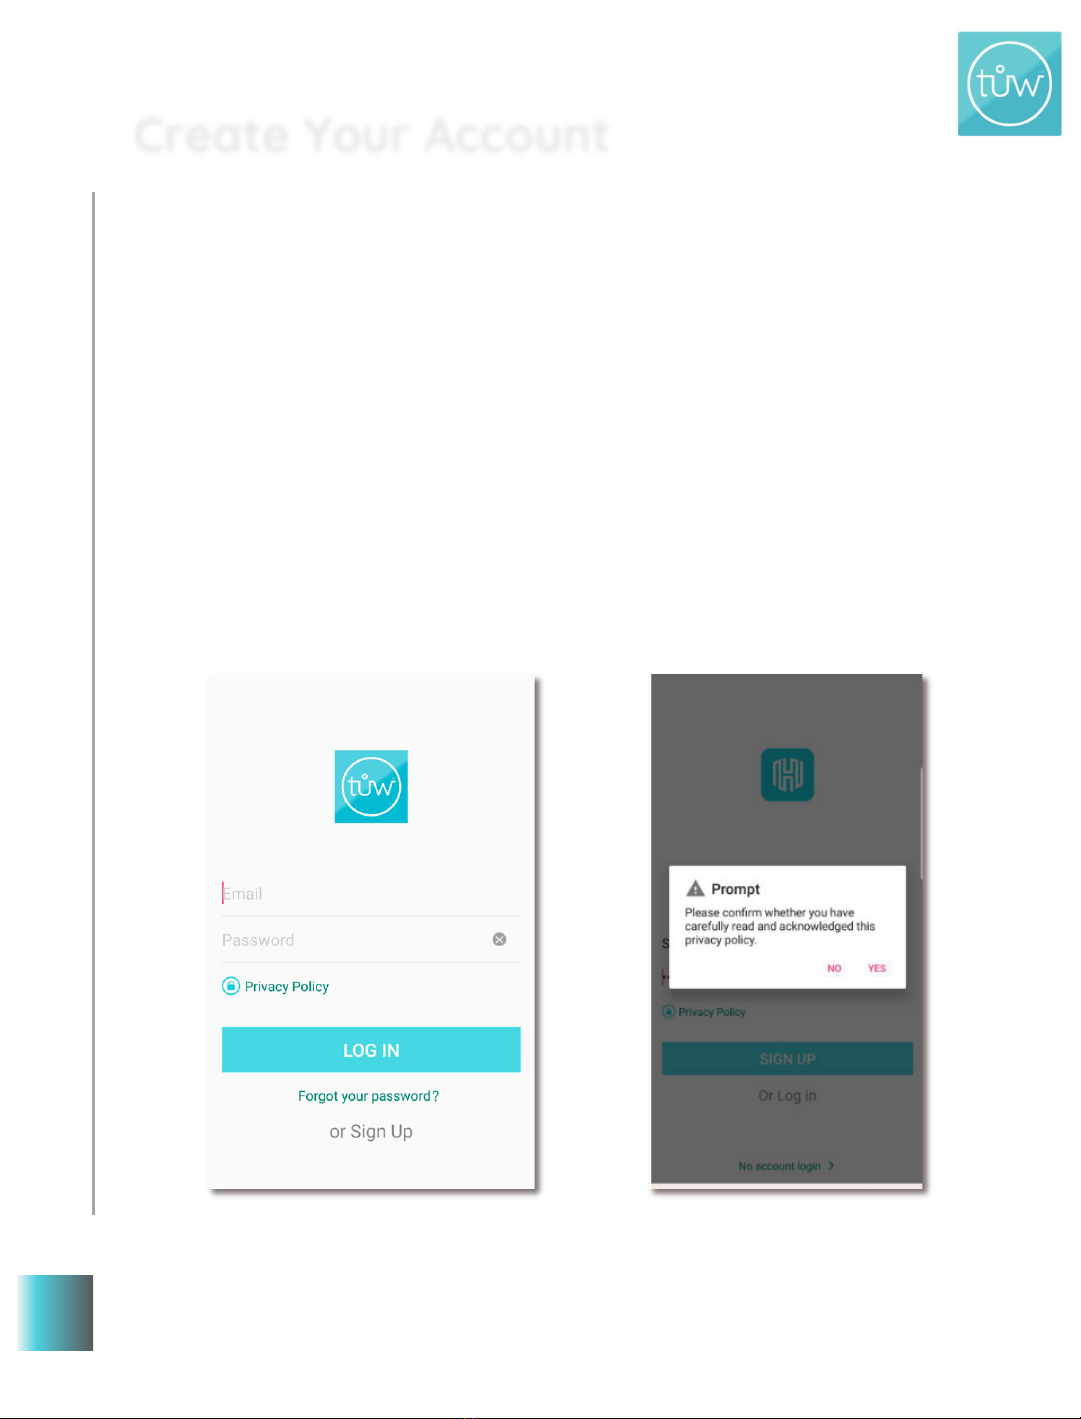
Create Your Account
Pairing App to Your Smartwatch
Syncing Your App to the Cloud
Clock/Home
The Home Dashboard
Fitness Dashboard
Sleep Data Monitor
Heart Rate Monitor
Ovulation Monitor
Sport Mode Feature
Message Notification
Alarm Feature
Inactivity Reminder
Take a Photo
Screen On Time
Countdown Timer
Find Phone
Stopwatch
Answer Call /Mute/ Reject Call
Wear Detection
Change Information on Your Profile
Reset Password
Unit Settings
Clear Data
Specifications & Material
Care & Cleaning
Product Disclaimer
One-Year Warranty
FCC Compliance Statement
…………………………………………….. 6
…………………………………………………………….. 6
…………………………………………………………………………………….. 7
…………………………………………………………….. 7
………………………………………………………………………….. 8
………………………………………………………………………….. 8
……………………………………………….. 9
…………………………………………………………………….. 10
…………………………………………………….. 12
…………………………………………………….. 12
……………………………………..……………………………………….. 13
…………………………………………………………………….. 14
…………………………………………………………………….. 15
…………………………………………………………………….. 16
…………………………………………………………………….. 17
…………………………………………………………………….. 19
…………………………………………………………………….. 22
…………………………………………………………………….. 24
…………………………………………………………………….. 24
…………………………………………………………………….. 25
……………………………………………………………………………….. 25
………………………………………………………………………….. 26
………………………………………………………………………….. 26
…………………………………………………………………………………….. 27
…………………………………………………………………………………….. 27
……………………………………………………….. 28
…………………………………………………………………………….. 28
…………………………………………………….. 29
…………………………………………………………………………….. 29
…………………………………………………………………………….. 30
…………………………………………………………………………….. 30
……………………………………………………………….. 30
…………………………………………………………………….. 30
…………………………………………………………………….. 31
…………………………………………………………………….. 31
…………………………………………………………….. 31