C. B. Gitty Crafter Supply Cigar Box Ukulele Kit User manual

Copyright 2015 © C. B. GiƩy CraŌer Supply 1
Maybe you’d like to play a little love song for the apple of your eye, or possibly plink your way over
the island rainbow like the late, great IZ. Maybe you’re looking to build your first instrument by hand.
No matter what your motivation, you too can play soft, mellow tones on your very own hand-built ci-
gar box ukulele in no time.
This guide will walk you through the assembly of the C. B. Gitty Cigar Box Ukulele kit. Using just a few basic
tools you will construct a fully playable, great-sounding and awesome-looking concert (also known as alto)
cigar box ukulele, sure to be the envy of friends and
neighbors alike. The ukulele is a very fun and easy-to-
play instrument with a unique, happy sound, and your
cigar box uke will provide many hours of musical enjoy-
ment.
Kit Inventory
Refer to the labeled photo above to identify each of the parts in your kit. Verify that everything is present and
that you are familiar with what’s what.
A. Plain Wooden Craft Box
B. Hardwood ukulele neck blank
C. Rosewood ukulele fret board
D. Set of nylon ukulele strings
E. Rosewood ukulele bridge
CigarBoxUkulele
KitAssembly
Instructions
Product Number 36‐009‐01
View this guide in full color online:
www.CBGiy.com/CBUkeKit
Need Parts?
Visit www.CBGiy.com/ukulele‐parts/ for
our full line of uke parts and hardware!

Copyright 2015 © C. B. GiƩy CraŌer Supply 2
F. Bone ukulele saddle
G. Bone ukulele nut
H. (4) washer-head screws
I. (3) drywall screws (two longer, one shorter)
J. Bridge/tail bracing block
K. (4) Ukulele tuners
Tools Needed
The following tools are what we recommend for completing this kit—they are the same ones we used when
making this guide. You may be able to substitute other tools and methods, but please before using any tool
(hand or power) make sure you follow all safety recommendations!
Drill (hand drill or press)
Wood File or Rasp
Wood glue
Clamps (at least 2 or 3)
1/8” drill bit
A Phillips screwdriver
A ruler or measuring tape
A pencil
Small wood saw (optional)
Hole saw/Forstner bit/Spade bit for sound hole (optional)
Sandpaper (recommended)
Scratch awl (recommended)
Blue painter’s tape (recommended)
A digital chromatic tuner
The diagram below shows a completed cigar box ukulele built from this kit, with all of the key components la-
beled. Refer to this diagram throughout the rest of these instructions, if you are not sure of where we’re head-
ed.
P1—A
Step 1—Install the Neck Brace
To start building your C. B. Gitty Ukulele Kit, take the neck bracing block and fit it against the inside of the box
on which you’ll be mounting the neck. The block should not extend above the rim of the box edge, but if it
does, use a file or rasp to make it flush.
Usually the shorter ends of the cigar box are chosen for the ends of the instrument (as shown above), so that
it will have a horizontal orientation and be more comfortable to hold.

Copyright 2015 © C. B. GiƩy CraŌer Supply 3
Step 1—Marking for the Neck
Now it’s time to mark the box for the location of
the neck. As an overview, you will want the
neck to be mounted to the cigar box exactly in
the center of the side you glued the neck brace
to.
The top surface of the neck should end up flush
with, or slightly above (1/16” or so) the top of
the cigar box. Having the surface of the neck
be just a bit higher than the top of the box can
help keep the string action lower, which makes
for a better-playing instrument.
It can be helpful at this point to put some blue
painter’s tape (removable masking tape) on the
box end you’re marking for the neck. The pre-
vents you from having to make marks directly
onto the box’s surface.
The tape should be able to be carefully re-
moved later, before mounting the neck, without
damaging the box surface.
Find and mark the center point on the neck
side of the box, as shown in Figure 1. Also
mark the center of the neck that will be joined
to your cigar box. Line these two marks up together (Figure
2).
With the top of the neck brought even to the top of the lid,
trace the heel of the neck onto the box.
Be careful to hold the neck firmly in place without letting it
move, while tracing the outline onto the box surface/
masking tape. Figures 3 and 4 show how we did this. If
the neck heel extends below the bottom edge of the box,
mark it for cutting/filing off later.
Step 2—Drilling the Neck Mounting Holes
in the Box
You can now set aside your neck. On the box, you should
have an outline of where the neck will be mounted.
In this step, you will be marking out where the mounting screw holes will be placed, and then carefully drilling
both the box and the ukulele neck. Be sure to use all appropriate safety precautions when drilling, being es-
pecially careful to never have your hand or fingers over the point where the drill bit will emerge.
Using your awl, or a fine-tipped Phillips screwdriver, mark three points that can serve as starter holes for the
mounting screws, as shown in Figure 4.
Position two holes towards the top by the wider part of the neck heel, and one towards the narrow bottom por-
tion (see Figure 9 below for a visual).
Now, as shown in Figure 5, use your ⅛” (3mm) bit to drill the three holes you’ve marked. Be careful to not
drill into your fingers, if you decide to hold it like the person in the photo above. Drill through the box.
Figure 1
Figure 2

Copyright 2015 © C. B. GiƩy CraŌer Supply 4
Step 3—Drilling the Neck Mounting Holes in the Neck
Now, line the neck back up to the box, in position where it will be mounted, and make a mark through each
the holes you just drilled onto the flat part of the neck heel. The scratch awl or a small nail is very handy for
this. The result of the first mark is shown in Figure 6.
With all three holes marked on the neck heel, once again use the 1/8” drill but to pre-drill the heel for the
mounting screws. Be very careful at this point not to drill too deep - wrapping some painter’s tape around the
drill bit as a visual depth stop is a good idea.
Keep in mind that the two longer 2” neck mounting screws will go into the upper two holes, and the shorter 1
5/8” screw will go into the lower hole.
It can make things easier if you drill the first mounting
hole into the neck, and then insert a single screw to hold
the neck in place, and then mark the other two holes.
This will keep the neck from moving/shifting, and it is
very important that all of these holes line up properly—
you don’t want your neck to be crooked.
Now mark and drill the two remaining holes. When fin-
ished, your box and neck should be fully drilled with the
three neck-mounting holes. Do a “dry fit” of the neck to
make sure everything looks good.
This is a good time to remove the painter’s tape (if you
used any) from the box surface. Figure 8 shows what
the neck should look like when all 3 holes have been
drilled.
You can now test-mount your neck to the box using the 3
neck mounting screws. Remember that the two longer
ones go on top, the shorter one on bottom. Make sure
everything is lined up and looking good. A “stubby” Phil-
lips screwdriver is best for this.
Remember that you want the neck’s flat upper surface to
be as parallel as possible with the surface of the box.
Figure 3
Figure 5
Figure 4

Copyright 2015 © C. B. GiƩy CraŌer Supply 5
Figure 10 shows what the ukulele-to-be should
look like once you have finished test-mounting
the neck. If the neck heel extends below the bot-
tom of the cigar box, you can file/sand the over-
hang away.
Once you’re confirmed everything is good, you
can go ahead and remove the neck, in prepara-
tion for attaching the fretboard.
P2—GF-
In this section we will cover how to get the fret-
board glued onto the neck. The first thing to do is
decide whether you want the fretboard to extend out over the box. This is up to you, since having the fret-
board extend out over the body makes the build a little more complicated… but it does make the instrument
more versatile when played.
This guide shows the simpler method of cutting off the excess part of the fretboard so that it does not extend
out over the box.
Step 1—Dry Fit the Fretboard and Cut off Excess Length
Line up your fretboard on top of the neck, leaving about ⅛” (3mm) of room for the nut to be glued in place be-
low where the neck angles into the headstock, as shown in Figure 11.
Mark a line where the top edge of the fret board will be on the neck.
There are two options as to how the fret board can be mounted onto the neck. You can either have the fret-
This mark was made with a
scratch awl through the
holes drilled in the side of
the cigar box, with the neck
held in mounƟng posiƟon.
Figure 6
Figure 7 Figure 8

Copyright 2015 © C. B. GiƩy CraŌer Supply 6
board extend out over the box (which makes the instru-
ment more versatile when being played), or you can cut
off the bottom part off the fretboard so that it ends at the
box edge.
One benefit of the latter is that it lets you gain access to
the box interior after the ukulele has been built - this can
be handy if you want to install a pickup, or at least want
to leave yourself the option of doing so later.
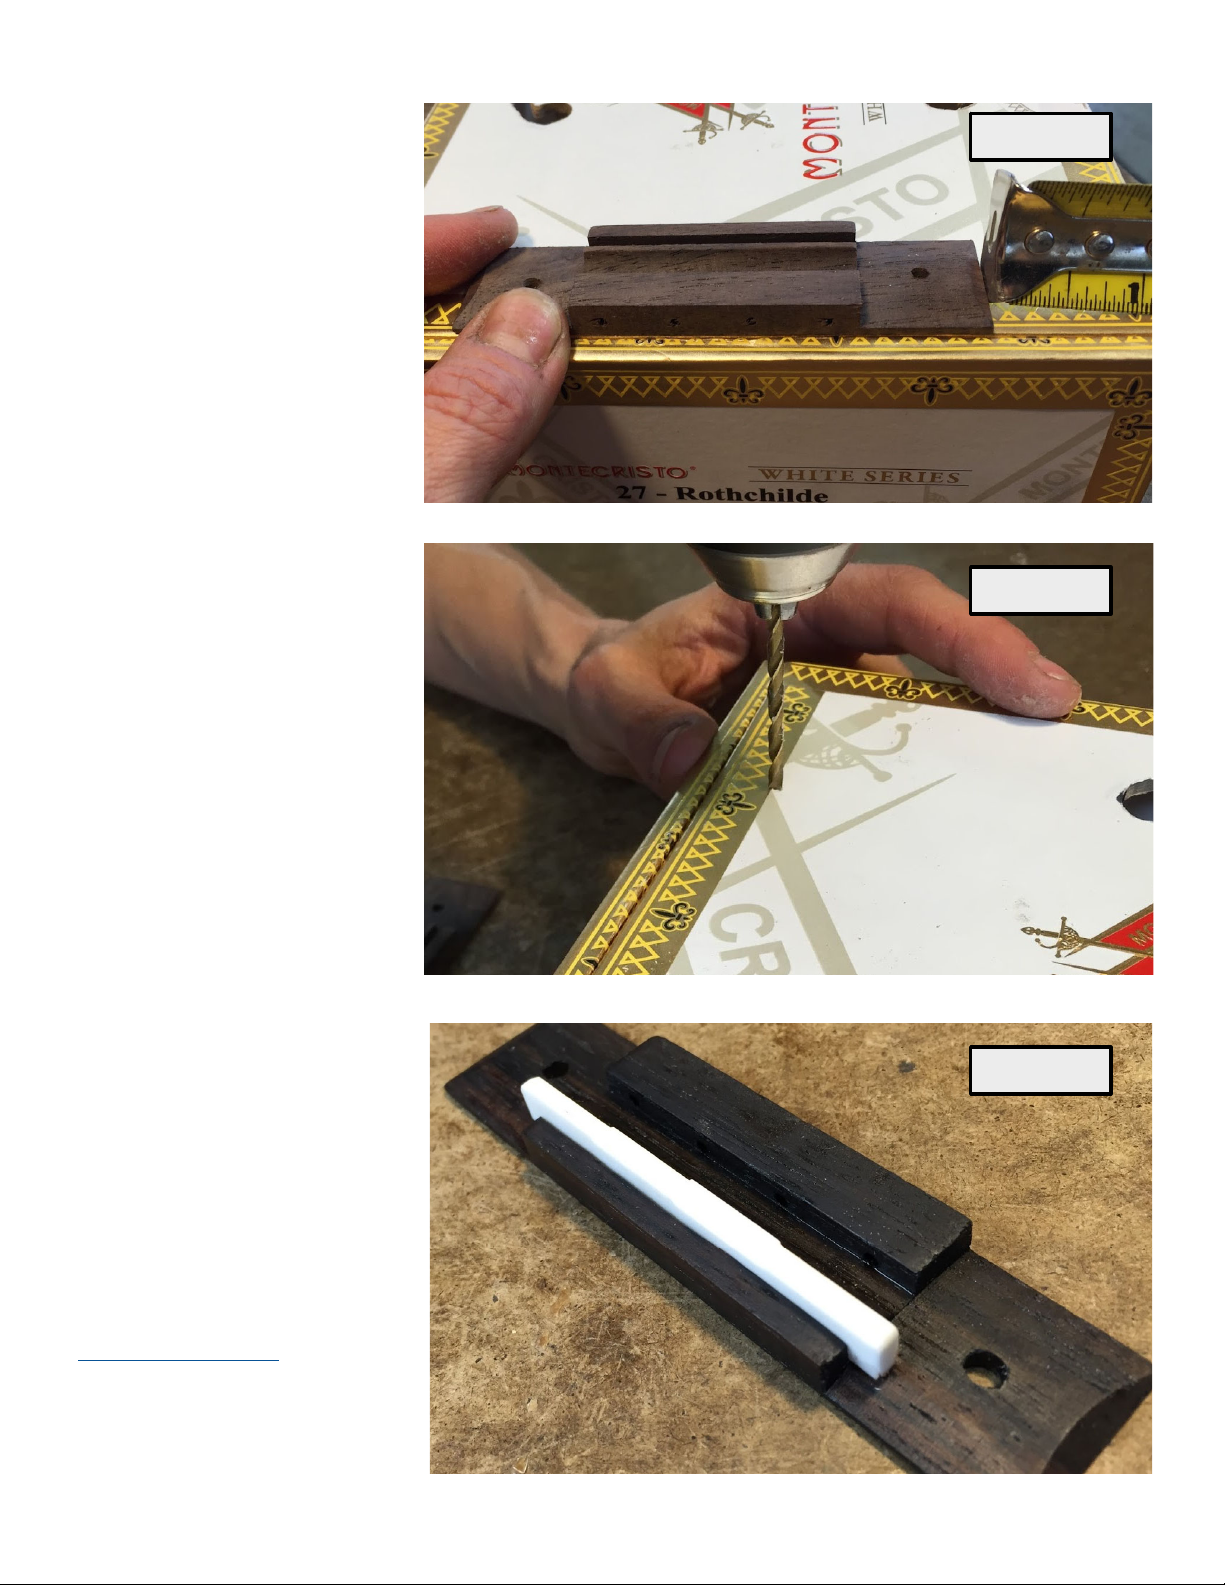
For the purposes of this guide, we’re going to cut off the
“excess” fretboard, so it’s time to mark the fretboard to
be cut.
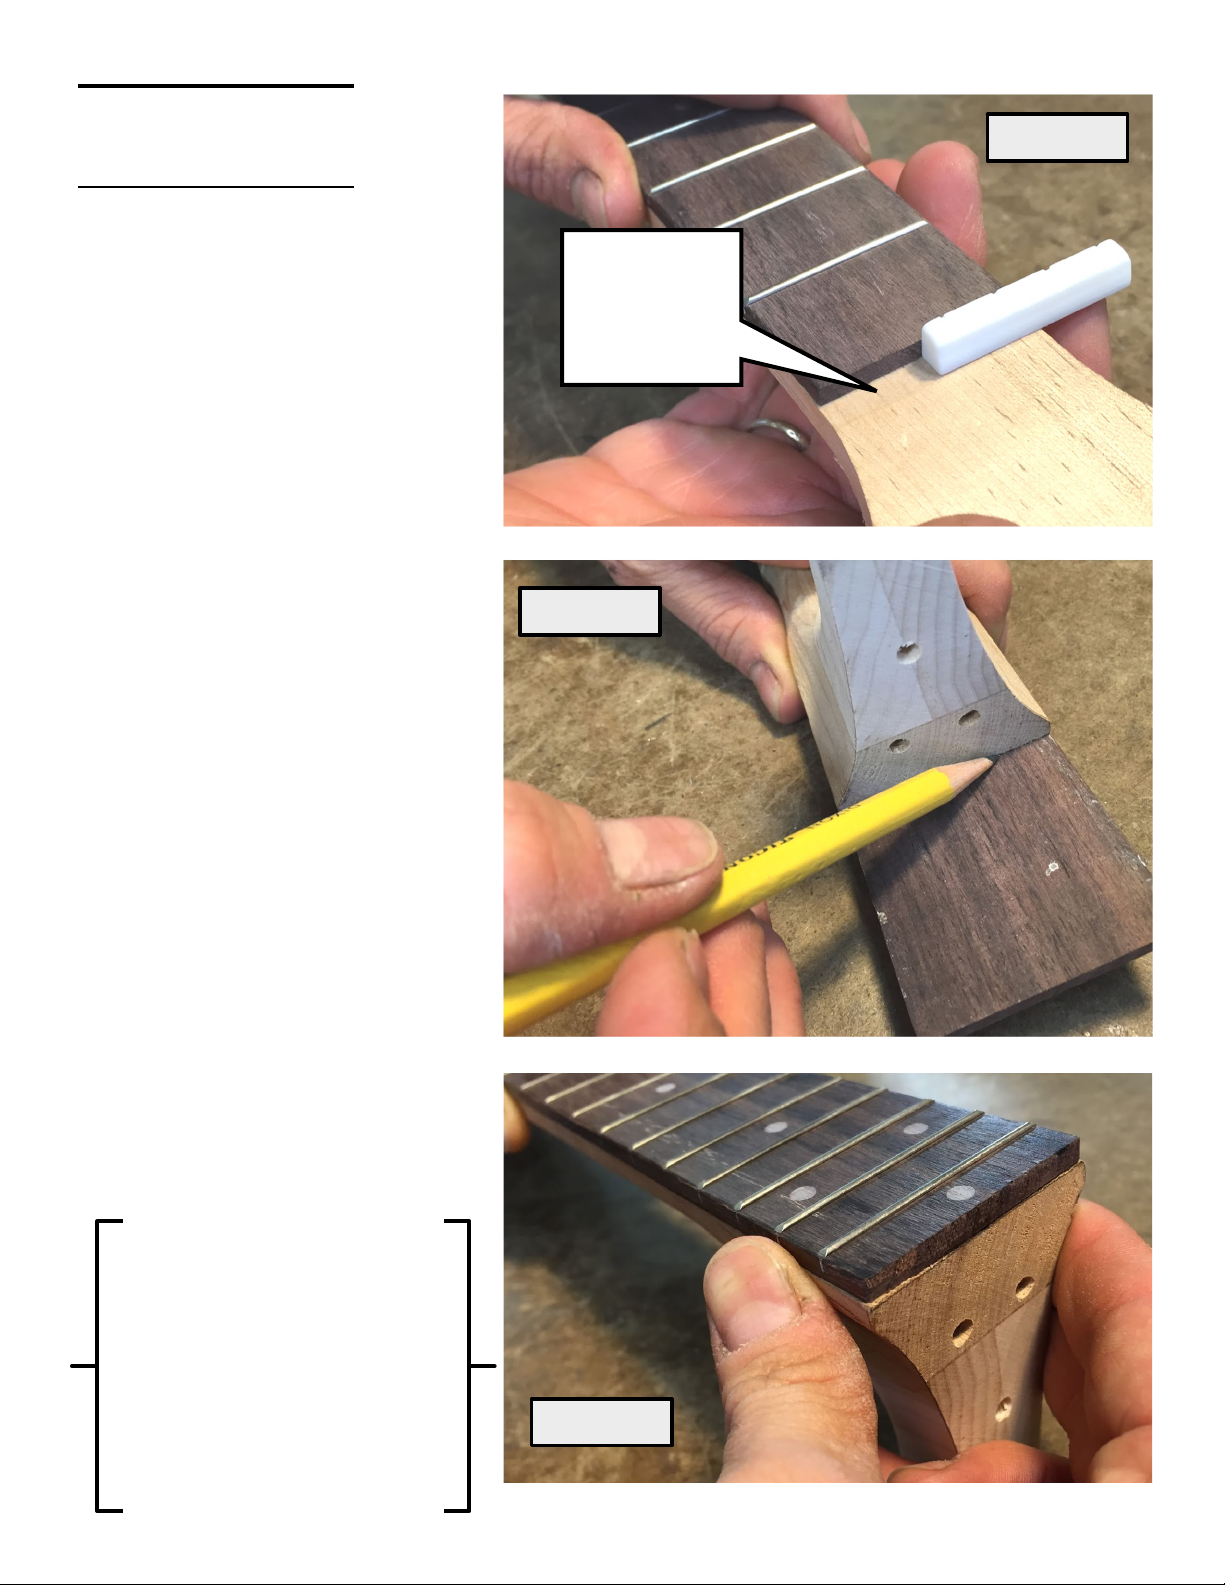
If you have decided to not cut the fretboard shorter, skip
this next step. With the fretboard held in position on the
neck, turn the neck over and make a pencil mark on the
back of the fretboard (Figure 12). Make sure you have
allowed the 1/8” for the nut up at the top!
Once cut, your fretboard should line up evenly with the
end of the neck, as shown in Figure 13. Sand and
smooth the cut edge to remove any sharp points.
Step 2—Gluing on the Fretboard
Please note: if you have decided to leave your
fretboard at full length, you should not glue it
onto the neck until the neck has been mount-
ed onto the box.
Once the fretboard is glued on, you won’t be
able to open the box any more, so it is best to
wait to do this until towards the end of the as-
sembly process. The rest of these instructions
assume that the fretboard has been cut short-
er.
Once you have your fretboard cut to length, it
is time to get it glued onto the neck. Apply
wood glue to both the back of the fret board
and the top of the neck, as shown in Figure
14. Make sure to spread the glue around over
the entire surface—you want to make sure this
is a good, strong joint.
Line the top edge of the fretboard up with the mark you’ve made at the top of the neck. Firmly clamp the fret-
board to the neck, wiping off any excess glue that may squeeze out from between the two surfaces. Use as
many clamps as necessary to get a nice tight glue joint.
You may find it beneficial to use a scrap block of wood between the clamps and the fret board, as shown in
Figure 15. The wood block will help to protect the fret board and will evenly apply pressure across the entire
surface while the glue dries.
Be sure to let the glue set up for as long as is recommended on the glue bottle. In the C. B. Gitty shop we use
Titebond II or III wood glue, which creates a very strong glue bond (often stronger than the wood itself), but
you can use any standard-purpose wood or carpenter’s glue with good results.
Once the glue has dried, remove the clamps and examine your handiwork. This is a good time to do any final
sanding of the neck and fretboard, smoothing of fret ends and other finishing work on the neck.
Figure 9
Figure 10

Copyright 2015 © C. B. GiƩy CraŌer Supply 7
P3—I
BS
In this section we’ll cover how to install the
bridge and saddle, as well as the bridge
bracing block that goes inside the box.
Step 1—Install the Bridge
Bracing Block
Now take the smaller block of wood includ-
ed with your kit that will serve as a mount-
ing brace for the ukulele bridge and glue
that wood block under the spot where the
bridge will be on top of the lid. If there is a
layer of paper on the inside of the box lid
here, you can use a file to remove it for a
better glue joint, if desired.
Your bridge, at the point where the bone
saddle will be seated, will need to be ex-
actly 15” (381mm) away from where the
nut meets the top of the fret board. Place
this bracing block so that it will be as close
to the edge of the box as possible, but
make sure the box lid will still close once it
is in place (Figure 16).
Step 2—Position and Drill the
Bridge
Now, center the bridge on the top of the
box (remember that the slot where the
saddle will rest should be towards the
front, and that the front edge of this slot
should be exactly 15 inches from where
the back side of the nut will be—see Fig-
ure 17). Placing the bridge/saddle cor-
rectly (15 inches from the nut) is VERY
important to ending up with a playable
ukulele!
Drill two holes in the center of the tabs on
both sides of the bridge. On top of the box
Figure 11
Figure 12
Figure 13
Leave about 1/8”
of space below
where the head‐
stock angle begins,
for the nut.
Pro tip: A water-dampened
cloth will help to wipe away
most wood glues before they
dry. Check the directions of
the product you are using to
be certain. Once the glue
dries it can be very hard to
remove excess, so do your
best to clean it up before it
sets.

Copyright 2015 © C. B. GiƩy CraŌer Supply 8
lid, center the bridge at the appropriate distance from the top of the fret board. Making certain that it is cen-
tered will properly align the bridge and saddle with the fret board.
Through the holes you’ve drilled, mark the box lid. Use a ⅛” bit to drill holes through the lid and into the brace
at the points you’ve marked, as shown in Figure 20.
If you are going to treat the bridge with any finishes, doing so now before it gets fastened to the box is a good
idea. Smoothing off the sharper edges
and points is also a good idea at this
point—you don’t want anything that will
dig into your strumming arm when play-
ing.
Step 3—Prepare and Install
the Saddle
This is also a good time to smooth and
round the ends of the bone saddle, espe-
cially the end that will be towards the top
of the instrument when it is held for play-
ing, for the same reason as above—a
sharp edge on the bone saddle can dig
into your strumming arm, and no musi-
cian likes that!
Carefully insert the bone saddle into the
bridge. Do not force it in. If need be, re-
move a tiny amount of material from the
slot for the saddle with a razor knife or
file. You want the saddle to fit snugly
Figure 14
Figure 15

Copyright 2015 © C. B. GiƩy CraŌer Supply 9
(Figure 21).
A few light taps with a small mallet or wood scrap may be required to seat it securely, but don’t overdo it or
the bone or wood may break. You should not need to glue the saddle in place, since the strings will hold it
down.
When installed, the bevels on the top edge of the saddle will be have the look of an ascending set of steps.
Take a close look at Figure 22 to see how the angled/beveled parts of the saddle should be placed. This will
help ensure good intonation once the instrument is strung up.
Step 4—Mount the Bridge
If you substitute the box, and the top is paper-covered, it can be a good idea to lightly mark the bridge’s out-
line on the top and use a file to rough up or remove the paper a little, to help the glue get a better hold.
Now, using two of the provided washer-head
screws (the heads are a little bigger in diameter
than the screws shown in the picture to the right),
carefully position, glue and screw the bridge to the
box, as shown in Figure 22.
If using a power driver, be mindful of how much
pressure you apply. Driving too hard and too fast
may split the tabs. Overtightening may also split the
thin wood of the bridge.
Step 5—Install the Bracing Screws
Using the two remaining washer-head screws, pre-
drill holes about ½” down from the box lid and
mount them into the box, as shown in Figure 23.
The goal here is to hit the center of the bridge bracing block inside the box. This will help the box lid stand up
to the tension of the strings once they are tuned up.
P4—FAS
In this section we’ll walk you through finalizing the neck portion of the instrument, from installing the nut and
tuners to getting your ukulele strung up.
Step 1—Install the Nut and Tuners
Figure 16
Figure 17

Copyright 2015 © C. B. GiƩy CraŌer Supply 10
After removing the clamps from
gluing the fretboard to the neck,
apply a small amount of wood
glue to the nut. Clamp it in place,
as shown in Figure 24, with the
flat edges butted up against the
top edge of the fret board and the
neck, as shown in the photo. Be
sure to wipe off any excess glue
with a cloth.
Once dried and the clamp re-
moved, any final sanding and
treatment of the neck can be done
(if desired).
Now it is time to install the tuners
into the headstock of the instru-
ment. Figure 25 shows a tuner
laid out (with its parts in the order
of assembly, as well as an assem-
bled tuner.
Install your tuners as shown in
Figure 26 and 27 with the bev-
eled and locking washers on the
back of the headstock and the
plastic washer and bushing on the
front. The tuning shaft will join all
the components with the tuner
button screwed into the end.
At this point, make certain to tight-
en the screws attaching each
white plastic button to the corre-
sponding tuner shaft. Tight screws
will help to prevent the pegs from
unwinding under the tension of
being strung up.
Step 2—Cut Sound
holes (Optional)
If you haven’t cut or drilled any
sound holes into the lid, now
would be a good time to do so
before you get too much further.
Sound holes are largely a matter
of personal preference as to
where, what, and how big. Just be
mindful of what you may visually
expose inside the box.
You can always search sites like
CigarBoxNation.com for any ideas
and examples. The box we used
in this guide had “F-hole”-style
sound holes cut into it before we
started, but a single round hole in
the center of the box, sized be-
tween 3/4 and 1 1/2 inches, also
Figure 18
Figure 19
Figure 20

Copyright 2015 © C. B. GiƩy CraŌer Supply 11
gives a very nice look. Several smaller holes in a
pattern can also work nicely.
Step 3—Re-attach the Neck
Now re-attach the neck using the three neck-
mounting screws, as shown in Part I above. Make
sure everything lines up correctly and make any
adjustments as necessary. Once the neck is at-
tached, you can hold the ukulele in playing posi-
tion and see if there are any sharp or rough parts
on the body or neck that need to be sanded and
smoothed.
Please note: If you chose to leave your fretboard
at full length, then it is at this stage, after re-
attaching the neck, that you should glue it on.
Note that once the fretboard is glued on, you won’t
be able to re-open the box, so make sure every-
thing is right and ready to go before you do this
step!
Step 4—String the Ukulele
Stringing your ukulele is a fairly straightforward
process. Basically, you will be tying the strings on-
to the bridge, then running them up the neck and
wrapping them around the tuner post, ending by
threading the string end through the hole on the
post.
Take a look at Figures 28 - 31 for a visual guide
of how to get your ukulele strung up. The packag-
ing for the strings will help you to determine which
strings go where.
The 4th and 1st strings are the same gauge
(thickness). The 4th string is placed above the
thickest string, closest to the top of the box when
in the playing position. The 3rd string is the thick-
est of the four. The second string goes below the
3rd and above the 1st, with the 1st as the bottom
most string when in the playing position.
Insert the strings, one at a time, through the holes
in the end of the saddle and over the bridge.
Stretch the length of the string out and leave a
good few inches to wrap the end securely onto the
saddle. Knot them as shown in Figure 30. Once
knotted onto the saddle, wind the string around
the appropriate tuning shaft a few times. Insert it
through the hole in the top end of the shaft and
pull it tight. Wind the string up to apply a little ten-
sion and move on to installing the rest of the
strings.
If the string action height (the distance between
the string and the fretboard) seems too high, you
can try filing down the saddle a little bit, or filing
deeper string grooves into the nut. A small-
diameter round “rat tail” file can be good for this.
Figure 21
Figure 22
Figure 23
Figure 24

Copyright 2015 © C. B. GiƩy CraŌer Supply 12
P5—TP-
Once your strings are installed, the construction
part of this kit is complete. Congratulations,
you have finished your ukulele! Now all that’s
left is to get it strung up and get busy playing!
Step 1—Get your Ukulele in Tune
This ukulele is tuned to G C E A, with G being the top string (when held in playing position) and A being the
bottom string.
If you have a digital chromatic tuner, you can easily use that to tune your ukulele, especially if it has a Ukulele
mode. For a good visual and audio reference, we recommend www.ukutuner.com, which gives you the pitch
of each string, as well as a nice representation of the headstock.
To help you get started playing your ukulele, above are some of the more common chords that you’ll want to
learn. In the diagrams, the vertical lines represent the four strings of the ukulele (the leftmost being the top
string when you are playing, the rightmost being the bottom string), and the circles tell you where to put your
fingers. The open circles at the top of the diagram indicates an open (unfretted) string.
Using just these chords, you can play a large number of both traditional and popular songs, from folk to coun-
try to rock and pop. You should be able to follow along with any printed or online sheet music or tablature that
shows the guitar chords. There are many sites online that present tablature and chords for popular songs,
such as www.ultimate-guitar.com and others.
Step 3—More How-to-Play Resources
There are many online resources for how to play the ukulele, including a growing library of video how-to les-
sons over at www.CigarBoxGuitar.com. C. B. Gitty also sells a How to Play the Ukulele book that includes
an audio CD. Find it at http://www.cbgitty.com/books. You can also search on YouTube for “ukulele les-
sons” and find a wealth of free how-to info.
C
We hope that you have enjoyed this process of building your ukulele from this kit, and that you will
Figure 25
Figure 26 Figure 27

Copyright 2015 © C. B. GiƩy CraŌer Supply 13
have many years of enjoyment playing this instrument. But your instrument-building career doesn’t
have to stop here! C. B. Gitty Crafter Supply offers a variety of musical instrument kits featuring cigar boxes
and other reclaimed materials, from the simplest one-string diddley-bows to 4-string cigar box guitars.
www.CBGitty.com/Kits
We also have a huge variety of parts and accessories that you can use to branch out and build your own cus-
tom instruments. www.CBGitty.com/CigarBoxGuitarParts
Figure 28 Figure 29
Figure 30
Figure 31
String #4
String #1
String #2
String #3

Copyright 2015 © C. B. GiƩy CraŌer Supply 14
www.CBGiy.com/PureAndSimple
Your Next Project...
This manual suits for next models
1
Other C. B. Gitty Crafter Supply Guitar manuals