8
DE Bedienungsanleitung Smart’Cooler Electric 25 l
Wir danken Ihnen für die Wahl eines CAMPINGAZ®-Produkts und sind überzeugt,
dass Sie mit unserer thermoelektrischen Kühlbox Smart’Cooler voll und ganz
zufrieden sein werden.
1. SICHERHEIT
Bitte lesen sie diese Bedienungsanleitung vor der Benutzung des Gerätes
sorgfältig durch.
Dieses Gerät ist nicht bestimmt, um von Personen (oder Kindern) mit
Eingeschränkten physischen, sensorischen oder mentalen fähigkeiten oder von
Personen, die nicht über ausreichend Erfahrung oder Wissen verfügen, benutzt
zu werden, ausser wenn sie von einer für ihre Sicherheit verantwortliche Person
beaufsichtigt oder in der Benutzung dieses Geräts geschult wurden.
Beaufsichtigen sie ihre Kinder, um sicherzustellen, dass sie nicht mit diesem
Gerät spielen.
VersuchenSieaufkeinenFall,dieKühlboxmitdem12VcSteckerdirektandie230V~
Netzspannung anzuschließen.
Niemals Flüssigkeiten in die Lüftungsschlitze (Zeichnung B1) geben und die
Lüftungsschlitze der Kühlbox nicht abdecken.
NIemals Ihre Kühlbox gleichzeitig mittels des 230 V~ Steckers und des 12 Vc
Steckers anschliessen
Schützen Sie die thermoelektrische Kühlbox vor feuchten Witterungsbedingungen,
wie z. B. Regen und Schnee.
Auf die Spannungsversorgung, den Lüftermotor oder andere Elektroteile
gelangendes Wasser kann Brand und Verletzungen verursachen bzw. das Gerät
eschädigen. Bringen Sie auf keinen Fall Eiswürfel, Kühlelemente o. ä. in die
Kühlbox. Durch das schmelzende Eis kann Wasser auf den Lüftermotor gelangen
und an den Kühlerlamellen anfrieren.
2. WARNHINWEISE
Die Smart’Cooler ist eine thermoelektrische Kühlbox und kein Kühlschrank.
Der Temperaturunterschied, Delta T genannt und „∆T" geschrieben, gibt die
Kühlleistung im Innenbereich der Kühlbox in Abhängigkeit zur Außentemperatur
für Umgebungstemperaturen zwischen 20 und 50 °C an.
Bei einer Außentemperatur von unter 20 °C reicht die Kühlleistung nicht aus, um
Tiefkühlware gefroren zu halten oder Eiswürfel herzustellen.
Die Kühlbox produziert Wärme. Für den einwandfreien Betrieb ist daher auf eine
gute Lüftung zu achten.
Die durch den äußeren und inneren Lüfter verursachte Luftzirkulation darf auf
keinen Fall verhindert werden.
Vermeiden Sie es, die thermoelektrische Kühlbox während ihres Betriebs im
Kofferraum Ihres Pkws abzustellen (außer bei einem Kombi oder Monospace,
Zeichnung A). Bleibt die Kühlbox auch in Betrieb, wenn der Wagen abgestellt ist,
so lassen Sie bitte die Fenster einen kleinen Spalt weit offen.
Je nach Luftfeuchtigkeit, je nach Art des gelagerten Nahrungsmittels und je nach
Betriebsdauer kann es zur Bildung von mehr oder weniger großen Mengen an
Kondenswasser im Inneren der Kühlbox kommen.
3. ANSCHLÜSSE
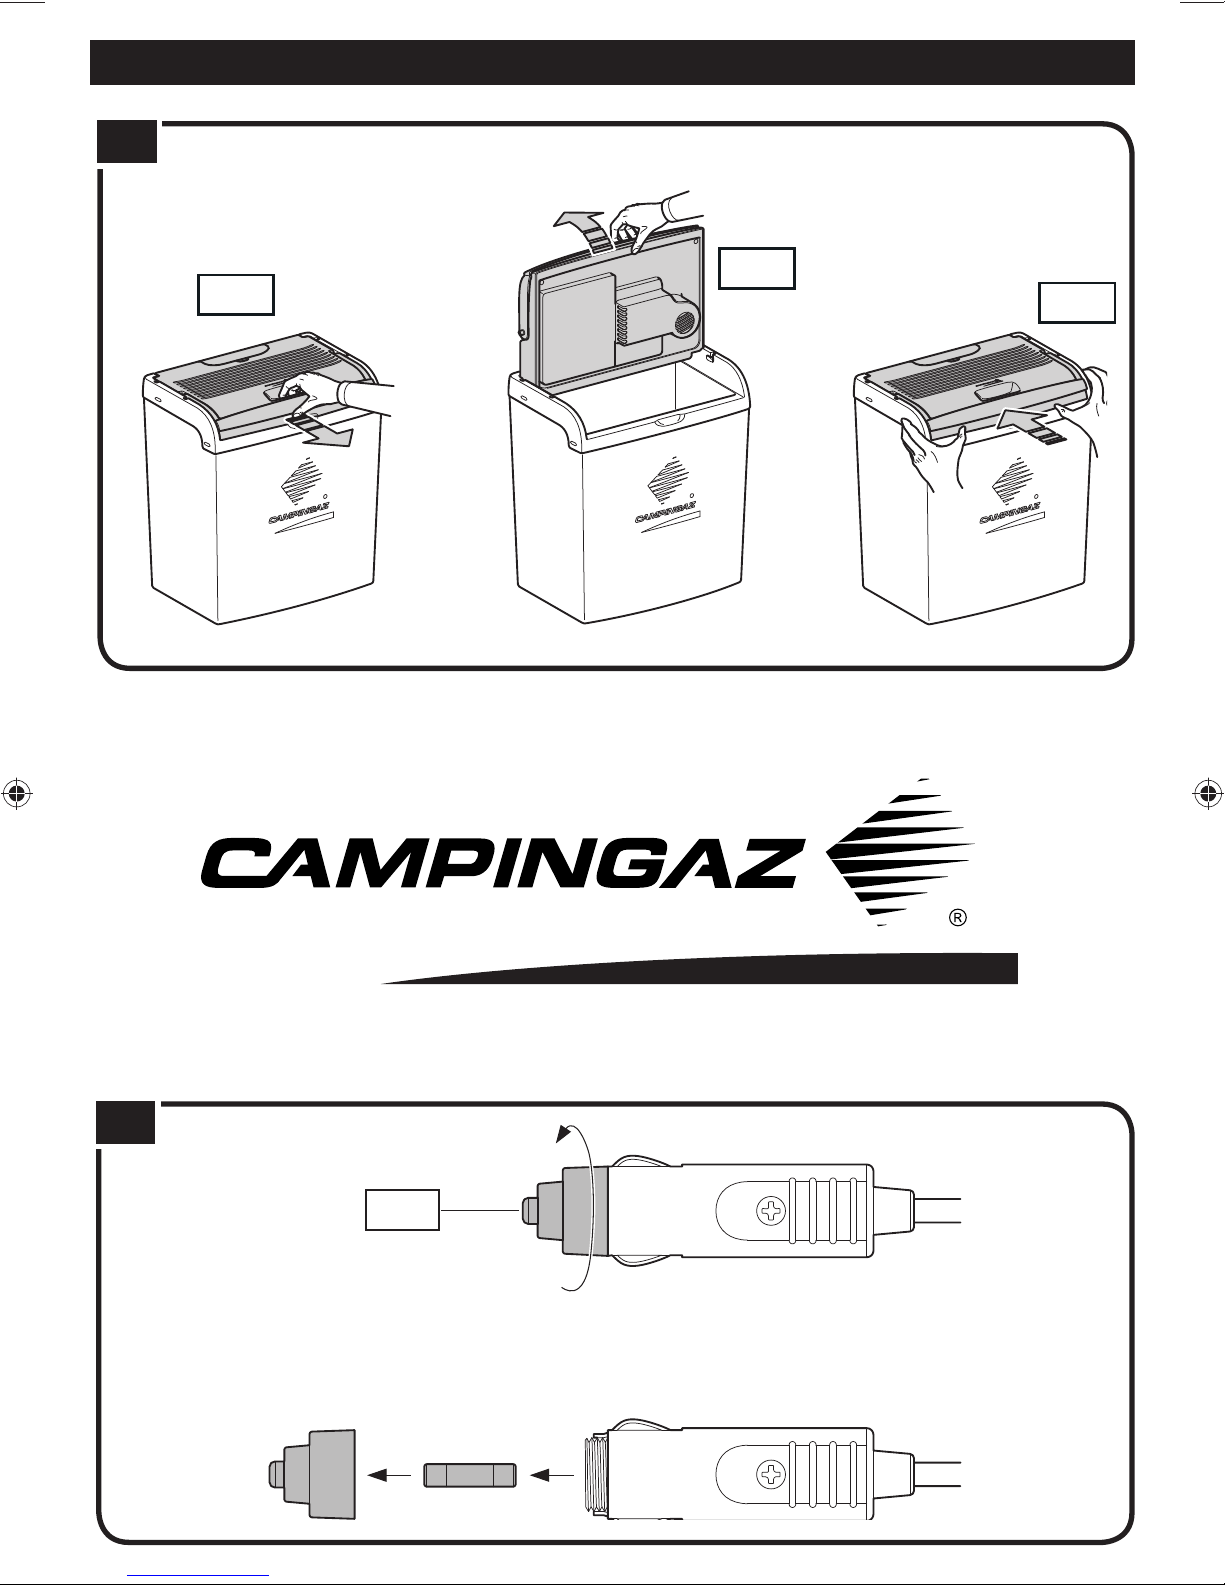
3.1. 12 VcAnschluss
Die Klappe des Staufachs öffnen (Schema B7), das Kabel außerhalb des Staufachs
ausrollen (Schema B2), und die Klappe wieder schließen wobei das Kabel in die
dafür vorgesehenen Aussparungen eingeführt werden muss (Schema B8). In dieser
Position behindert das Kabel normalerweise nicht das Schließen der Klappe und
schließen Sie das andere Ende des Kabels (Zeichnung B3) am Zigarettenanzünder
oder an einer anderen 12 Vc Stromversorgung (Zeichnung B4) an.
3.2. 24 VcAnschluss
Falls Sie über eine 24 V-Batterie verfügen (LKW, einige Allradantriebsfahrzeuge),
schließen Sie das Kabelende (Zeichnung B3) an einen separat erhältlichen
24 Vc/12 Vc – Konverter an.
3.3. 230 V~ Anschluss (Modell 12 Vcohne eingebauten Transformator)
Auf dem Campingplatz, im Hotel oder zu Hause kann das Stromkabel der
Kühlbox an einen Transformator 230 V~/12 Vc(Zeichnung B4) angeschlossen
werden, der separat erhältlich ist. Dies gilt nicht für die Produktversionen, in deren
Lieferumfang ein externer Transformator enthalten ist.
Für optimale Kompatibilität empfehlen wir die Benutzung des Campingaz®
Eurotransformer.
3.4. Anschluss 230 V~ (Modell 12 Vc/230 V~ continental
mit eingebautem Transformator)
Die Modelle 12 Vc/230 V~ verfügen über einen eingebauten Transformator
230 V~/12 Vc, damit Sie Ihre Kühlbox direkt ans Stromnetz anschließen können.
Die Klappe des Staufachs öffnen (Schema B7), das Kabel außerhalb des Staufachs
ausrollen (Schema B2), und die Klappe wieder schließen wobei das Kabel in die
dafür vorgesehenen Aussparungen eingeführt werden muss (Schema B8). In
dieser Position behindert das Kabel normalerweise nicht das Schließen der Klappe.
Danach das Kabelende an das Stromnetz 230 V~ anschließen (Schema B5).
3.5. Anschluss 230 V~ (Modell 12 Vc/230 V~ UK
mit eingebautem Transformator)
Die Modelle 12 Vc/230 V~ verfügen über einen eingebauten Transformator
230 V~/12 Vc, damit Sie Ihre Kühlbox direkt ans Stromnetz anschließen
können. Die Klappe des Staufachs öffnen (Schema B7), das Kabel außerhalb des
Staufachs ausrollen (Schema B2), und die Klappe wieder schließen wobei das
Kabel in die dafür vorgesehenen Aussparungen eingeführt werden muss (Schema
B8). In dieser Position behindert das Kabel normalerweise nicht das Schließen der
Klappe. Danach das Kabelende an das in der Kühlbox mitgelieferte 230 V~-Kabel
anschließen, und es an das Stromnetz 230 V~ anschließen (Schema B6).
4. BETRIEB
4.1. Öffnen und Schließen des Deckels
Öffnen: entriegeln Sie den Deckel, indem Sie ihn bis zum Anschlag zu sich her
ziehen und dann nach oben klappen (Zeichnung C1-C2).
Schließen: Klappen Sie den Deckel wieder nach unten und verriegeln Sie ihn
(Zeichnung C3).
4.2. Vorkühlen/Vorwärmen
Für eine optimale Kühlung in der thermoelektrischen Kühlbox Smart’Cooler
empfiehlt es sich, die betreffenden Speisen bzw. Getränke vorzukühlen.
Damit bleiben sie länger kalt.
Wichtig: um die Kühlleistung auf Reisen, auf dem Campingplatz, im Hotel oder zu
Hause zu erhöhen, empfehlen wir Ihnen dringend, Ihre Kühlbox vor der Abfahrt mit
einem externen Transformator 230 V~/12 Vcoder den eingebauten Transformator
verwenden (ausschließlich Modelle 12 Vc/230 V~) vorzukühlen.
4.3. Kühlbetrieb
Das thermoelektrische System schaltet sich ein, sobald es an eine Stromversorgung
12 Vc(oder 230 V~ für die Modelle mit eingebautem Transformator)
angeschlossen wird.
4.4. Stromeinsparung
Um den Stromverbrauch des Geräts zu reduzieren:
- sollte es vor direkter Sonneneinstrahlung geschützt werden und
- sollte vermieden werden, den Deckel offen zu lassen.
Für eine maximale Leistung sollte der Deckel so wenig und so kurz wie möglich
geöffnet werden.
5. WARTUNG UND PFLEGE
Bevor Sie Ihre Kühlbox reinigen, unterbrechen Sie die elektrische Versorgung.
Verwenden Sie zum Reinigen der Kühlbox keine scheuernden Mittel, sondern
vorzugsweise einen feuchten, ggf. mit etwas Spülmittel getränkten Lappen.
Soll die Kühlbox längere Zeit nicht benutzt werden, achten Sie bitte darauf, dass sie
vor dem Lagern einwandfrei trocken ist und an einem gut gelüfteten Ort aufbewahrt
wird, um Schimmelbildung zu vermeiden.
Dabei empfiehlt es sich auch, den Deckel leicht geöffnet zu lassen.
Sie können die thermoelektrische Kühlbox Smart’Cooler auch mehrere Tage lang
ununterbrochen in Betrieb lassen. Dabei kann es jedoch notwendig sein, das Gerät
von Zeit zu Zeit abzuschalten und zu enteisen.
6. STÖRUNGSBEHEBUNG
Wenn Sie Schwierigkeiten mit Ihrer thermoelektrischen Kühlbox haben, lesen Sie
bitte zuerst die nachfolgenden Hinweise durch.
6.1. Kabelproblem
Falls das Elektrokabel beschädigt sein sollte, darf die Reparatur nur durch einen
autorisierten Kundendienst durchgeführt werden.
6.2. Anschlussprobleme
Ihre Kühlbox und der äußere Lüfter funktionieren nicht.
Es liegt möglicherweise keine Spannung am Zigarettenanzünder des Fahrzeugs
an. In den meisten Fahrzeugen muss die Zündung eingeschaltet sein, damit
der Zigarettenanzünder funktioniert. Falls die Zündung eingeschaltet ist und die
Kühlbox nicht funktioniert, ziehen Sie sofort den Stecker heraus und führen Sie
folgende Kontrollen durch:
Zigarettenanzünder: Ist er verschmutzt? Bei häufiger Verwendung lagern• sich ggf. Tabakreste ab und verhindern den elektrischen Kontakt. Reinigen Sie
in diesem Fall den Zigarettenanzünder mit einer nichtmetallenen Bürste.
Wenn sich der Kabelstecker der Kühlbox am Zigarettenanzünder zu sehr• erwärmt, reinigen Sie den Zigarettenanzünder und prüfen Sie nach, ob der
Stecker einwandfrei angeschlossen ist.
12 V• cAnschluss: Steckersicherung: der Stecker des 12 VcAnschlusskabels
ist mit einer 7A-Schmelzsicherung geschützt. Schrauben Sie den 12 Vc
Kabelstecker der Kühlbox auf und prüfen Sie die Sicherung (Zeichnung D1).
6.3. Kühlprobleme
Ihre Kühlbox ist korrekt an eine Stromversorgung angeschlossen, kühlt jedoch• nicht richtig und der äußere Lüfter dreht sich nicht. Wahrscheinlich ist der
Lüftermotor defekt. Bitte wenden Sie sich an den Kundendienst.
Die Kühlbox kühlt nicht einwandfrei und der äußere Lüfter dreht sich. Öffnen Sie• den Deckel und prüfen Sie nach, ob der innere Lüfter funktioniert:
Läuft der innere Lüfter nicht, so ist wahrscheinlich der Lüftermotor defekt.- Bitte wenden Sie sich an den Kundendienst.
Läuft der innere Lüfter, so ist wahrscheinlich das Peltierelement defekt.- Bitte wenden Sie sich an den Kundendienst.
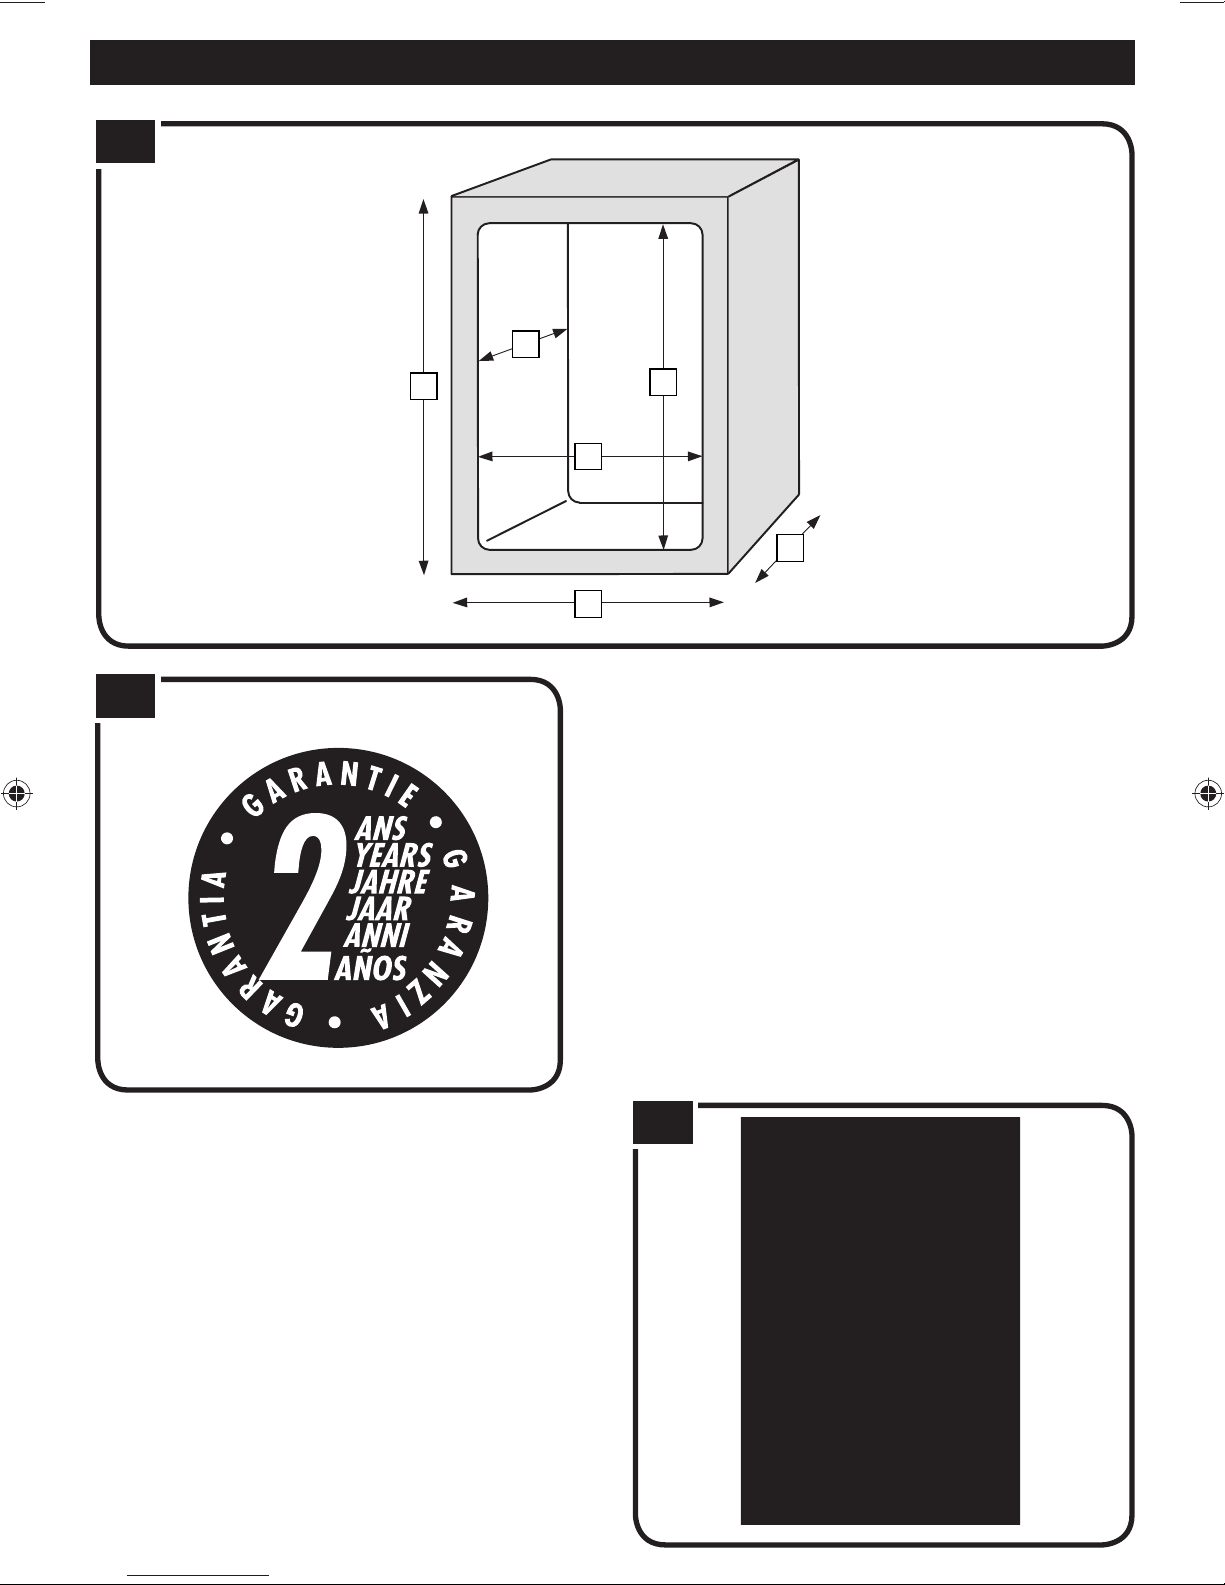
7. GARANTIE (ZEICHNUNG F)
- Für das Produkt gilt eine vollständige Garantie von 2 (zwei) Jahren ab
Kaufdatum für Teile und Produktion.
- Die Garantie kommt zur Anwendung, wenn das gelieferte Gerät nicht der
Bestellung entspricht oder fehlerhaft ist; dazu muss der Reklamation ein Nachweis
des Kaufdatums (z.B.: Rechnung, Kassenbeleg) und eine Beschreibung des fes-
tgestellten Problems beigelegt werden.
- Das Gerät wird entweder repariert, ersetzt oder erstattet - ganz oder teilweise.
- Die Garantie ist unwirksam und kommt nicht zur Anwendung, wenn der
Schaden verursacht wurde (i) durch falsche Bedienung oder Lagerung des Geräts,
(ii) durch einen Wartungsfehler oder nicht gemäß den Bedienungsanweisungen
durchgeführte Wartung des Geräts, (iii) durch Reparatur, Änderung, Wartung
des Geräts durch einen nicht zugelassenen Dritten, (iv) durch Verwendung von
nicht Original-Ersatzteilen. Sie deckt keine Löcher oder Abrieb durch normalen
Verschleiß.
- Ausgeschlossen sind alle weiteren Reklamationen einschließlich für Schäden aus
der Garantie, außer wenn die Haftung von ADG gesetzlich vorgeschrieben ist.
- Anmerkung: die gewerbliche Verwendung des Geräts ist von der Garantie
ausgeschlossen.
- Jede Übernahme während der Garantiezeit ist ohne Auswirkung auf das
Ablaufdatum der Garantie.
- Diese Garantie beeinträchtigt keinesfalls die gesetzlichen Ansprüche des
Verbrauchers.
- Für jede Reklamation wenden Sie sich bitte an unseren Verbraucher-Service.
8. ELEKTRO- UND ELEKTRONIKABFÄLLE (ZEICHNUNG G)
Dieses Recyclingsymbol bedeutet, dass dieses Gerät getrennt gesammelt
wird.
Dieses Produkt darf am Ende seiner Lebensdauer nicht über den normalen
Hausmüll entsorgt werden, sondern muss an einem Sammelpunkt für das
Recycling von elektrischen und elektronischen Geräten abgegeben werden. Bittte
erfragen Sie bei der Gemeindeverwaltung die zuständige Entsorgungsstelle.
Nicht in der freien Natur wegwerfen, nicht verbrennen: einige Gefahrstoffe in
elektrischen und elektronischen Geräten können für die Umwelt schädlich sein und
eventuelle Auswirkungen auf die Gesundheit haben.
nov2010 Smart'Cooler_25L-10.indd Sec1:8 07/12/2010 12:16:34