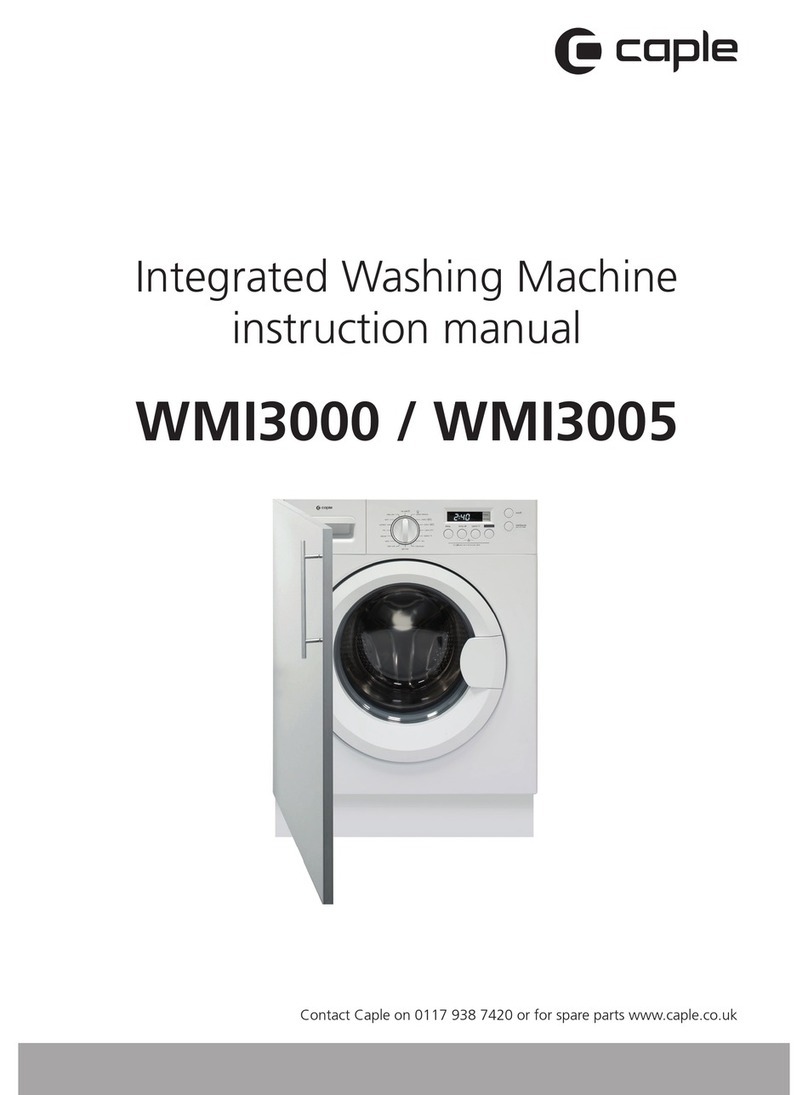
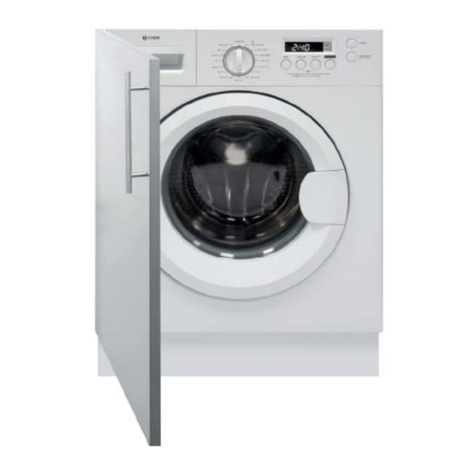
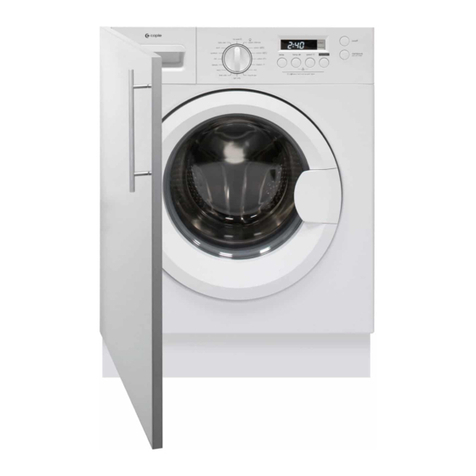
Caple WMI4001 User manual

Contact Caple on 0117 938 7420 for spare parts or www.caple.co.uk
Integrated Washing Machine
Instruction Manual
WMI4001

2Instruction manual WMi4001 Please keep this instruction manual for future reference
CONTENTS
Warnings 3
Environmental Protection 8
Warranty 8
Product Overview 9
Installation 10
Built In Installation 12
Operation 14
Quick User Guide 17
Control Panel 18
Washing Programmes 26
Table Of Programmes 28
Cleaning And Maintenance 30
Troubleshooting 32
Care Symbols 35
Caple Contact Details 36

3
Instruction manual WMi4001
Please keep this instruction manual for future reference
WARNINGS
-If the supply cord is damaged, it must be replaced by
the manufacturer, its service agent or similarly qualified
persons in order to avoid a hazard.
-The new hose-sets supplied with the appliance are to
be used and old hose-sets should not be reused.
-This washing machine is for indoor use only.
-This appliance can be used by children aged from 8
years and above and persons with reduced physical,
sensory or mental capabilities or lack of experience
and knowledge if they have been given supervision or
instruction concerning use of the appliance in a safe
way and understand the hazards involved.
-Children shall not play with the appliance. Cleaning
and user maintenance shall not be made by children
without supervision.
-Children should be supervised to ensure that they do
not play with the appliance.
-Children of less than 3 years should be kept away
unless continuously supervised.
-If the supply cord is damaged, it must be replaced
by a special cord or assembly available from the
manufacturer or its service agent.
-Only use the hose-sets supplied with the appliance for
the water supply connection (do not reuse old
hose-sets).

4Instruction manual WMi4001 Please keep this instruction manual for future reference
-Water pressure must be between 0.05 MPa and
0.8 MPa.
-Make sure carpets or rugs do not obstruct the base or
any of the ventilation openings.
-After installation, the appliance must be positioned so
that the plug is accessible.
-The maximum load capacity of dry clothes depends on
the model used (see control panel).
-To consult the product technical specification please
refer to the manufacturer website.
-This appliance is not intended for use by persons
(including children) with reduced physical, sensory
or mental capabilities, or lack of experience and
knowledge, unless they have been given supervision or
instruction concerning use of the appliance by a person
responsible for their safety.
-Pull out its plug from the power socket and turn off the
ater tap before cleaning or maintenance.
-Make sure that all pockets are emptied.
-Sharp and rigid items such as coins, nails, screws or
stone etc may cause serious damages to this machine.
-Pull out its plug and cut off water supply after
the operation.
-Please check whether the water inside the drum has
been drained before opening its door. Please do not
open the door if there is any water visible.

5
Instruction manual WMi4001
Please keep this instruction manual for future reference
-Pets and children may climb into the machine. Check
the machine before every operation.
-Take care that power voltage and frequency shall be
identical to those of washing machine.
-Do not use any socket with rated current less than that
of washing machine.
-Never pull out power plug with wet hands.
-Do not pull on the power cord or appliance to unplug
the machine.
-To ensure your safety, the power cord plug must be
inserted into an earthed three-pole socket. Check
carefully and make sure that your socket is properly
and reliably earthed.
-Packing materials may be dangerous to children.
Please keep all packing materials (plastic bags, foams
etc) far away.
-Washing machines shall not be installed in bathrooms
or wet rooms as well as in the rooms with explosive or
caustic gases.
-The water and electrical connections must be
connected by a qualified engineer in accordance
with the manufacturer’s instructions and local safety
regulations.
-Before operating this machine, all packages and
transport bolts must be removed. Otherwise the
washing machine may be seriously damaged while
washing the clothes.

6Instruction manual WMi4001 Please keep this instruction manual for future reference
-This appliance is intended to be used in household and
similar applications such as:
› Staff kitchen areas in shops, offices and other
working environments.
› Farm Houses.
› By clients in hotels, motels and other residential type
environments.
› Bed and breakfast type environments.
-Before using the machine for the first time, the
washing machine shall be operated in one round of the
whole procedures without clothes inside.
-Your washing machine is only for home use and is only
designed for the textiles suitable for machine washing.
-Flammable and explosive or toxic solvents are
forbidden. Gasoline and alcohol etc shall not be
used as detergents. Please only select the detergents
suitable for machine washing.
-Do not wash carpets in this washing machine.
-Be careful of burning when washing machine drains
hot washing water.
-Never refill the water by hand during washing.
-Please remember to disconnect water and power
supply immediately after the clothes are washed.
-Do not climb up and sit on top cover of the machine.
-Do not lean against machine door.

7
Instruction manual WMi4001
Please keep this instruction manual for future reference
-Please do not close the door with excessive force. If it
is found difficult to close the door, please check if the
excessive clothes are put in or distributed well.
-Transport bolts shall be reinstalled to the machine by a
competent person.
-The accumulated water shall be drained out of
the machine.
-Handle the machine carefully. Never hold any
protruded part on the machine while lifting. Machine
door cannot be used as the handle during the
conveyance. During transport, never rest the door on
the trolley. Two people are recommended to lift the
washing machine.
-Do not expose the washing machine to rain, direct
sunlight or other weather elements. Protect from
possible freezing.
-The use of converters, multiple sockets or extension
cords is strongly advised against.
-In the event of fault and / or malfunction, turn off
the washing machine, close the water tap and do not
tamper with the appliance. Immediately contact Caple
service and only use original spare parts. Failure to
observe these instructions may jeopardise appliance
safety.
!
WARNING: Water may reach very high temperatures during the
wash cycle.
WARNING: Water may reach very high temperatures
during the wash cycle.

8Instruction manual WMi4001 Please keep this instruction manual for future reference
ENVIRONMENTAL PROTECTION
Waste electrical products should not be disposed of with household waste. Please recycle
where facilities exist. Check with your Local Authority or retailer for recycling advice. This
appliance is marked according to the European Directive on Waste Electrical and Electronic
Equipment (WEEE).
By ensuring this product is disposed of correctly, you will help prevent potential negative
consequences for the environment and human health, which could otherwise be caused
by inappropriate waste handling of this product. The symbol on the product indicates that
this product may not be treated as household waste. Instead it shall be handed over to the
applicable collection point for the recycling of electrical and electronic equipment. Disposal
must be carried out in accordance with local environmental regulations for waste disposal.
For more detailed information about treatment, recovery and recycling of this product, please
contact your local council, your household waste disposal service or the retailer where you
purchased the product.
CE DECLARATIONS OF CONFORMITY
This appliance has been manufactured to the strictest standards and complies with all
applicable legislation, Low Voltage Directive (LVD) and Electromagnetic Compatibility (EMC).
UKCA DECLARATIONS OF CONFORMITY
This appliance has been manufactured to the strictest standards and complies with all
applicable legislation.
TECHNICAL FICHE
This appliance conforms to all current and applicable energy regulations. To view the Technical
Fiche that supports the energy labelling data, please visit the product page on our website
www.caple.co.uk
WARRANTY
Your new appliance is covered by warranty. The warranty card is enclosed - if it is missing, you
must provide the following information to your retailer in order to receive a replacement: date
of purchase, model and serial number (placed on the inside of the appliance storage drawer).
Registration can also be completed online by visiting www.caple.co.uk.
Ensure you keep your warranty card safe, you may need to show it to Caple Service together
with proof of purchase.
If you fail to show your warranty card you will incur all repair charges.
Spare parts are only available from Caple Service and spare parts authorised centres.
9
Instruction manual WMi4001
Please keep this instruction manual for future reference
Inlet pipe
Transport
eloh gulp
Door
Detergent DrawerControl Panel
Power Plug
Outlet Hose
Detergent Box
Inlet pipe
Transport
eloh gulp
Door
Detergent DrawerControl Panel
Power Plug
Outlet Hose
Detergent Box
PRODUCT OVERVIEW
COMPONENT
ACCESSORIES
Corrugated sound
proofing sheet

10 Instruction manual WMi4001 Please keep this instruction manual for future reference
INSTALLATION
UNPACKING THE WASHING MACHINE
Unpack your washing machine and check if there is any damage during the transportation. Also
make sure that all the items (as shown on page 9) in the attached bag are received. If there is
any damage to the washing machine during the transportation, or any item is missing, please
contact your retailer immediately.
DISPOSE OF THE PACKING MATERIALS
!
WARNING:
Keep packaging materials away from children.
The packing materials of this machine may be dangerous to children. Please dispose of them
properly. Please dispose of the related packing materials according to the relevant local
regulations. Please do no throw the packing materials away together with the other daily
living disposals.
REMOVE TRANSPORT BOLTS
Before using this washing machine, transport bolts must be removed from the backside of this
machine. Please take the following steps to remove the bolts:
1. Loosen all bolts with spanner and then remove along with the flat washers, rubber bungs
and plastic spacer tubes.
2. Cover the open transportation bolt holes with the plastic
cap included in the instruction bag.
3. Keep the transport bolts, flat washers, rubber bungs and
plastic spacer tubes stored away safely for future use.
NOTE:
During the removal of the bolts, spacer tubes fall inside the product. These can be removed
by tilting the product forward and recovering them from the floor or inside the base of the
machine.

11
Instruction manual WMi4001
Please keep this instruction manual for future reference
SOUNDPROOFING SHEET
Place the corrugated sound-proofing sheet, found on top of the
appliance during the unpacking process, into the base of the
appliance as shown.
CONNECT INLET PIPE
Connect the inlet pipe to the water supply tap only using the pipe
supplied with the appliance (do not reuse old pipe-sets).
The washing machine should be installed in its final position such
that the inlet pipe is not kinked or trapped.
INSTALL DRAIN HOSE
The corrugated drain hose should be inserted into
suitable drain pipe of between 50cm and 85cm
height above the floor using the curved drain
hose support. If an under sink connection is used
the drain hose must be routed above the sink
overfill opening to prevent back siphoning. Care
must be taken to avoid kinking or trapping the
drain hose.
ADJUST LEGS
Level the appliance using the feet:
1. Turn the nut clockwise to release the screw.
2. Rotate the foot to raise or lower it until it touches to the floor.
3. Lock the foot, screwing in the nut, until it tightens against to
the bottom of the washing machine.
Plug in the appliance.
!
WARNING:
Contact Caple Service should the power cord need replacement.
Installation faults are not covered by the manufacturers warranty.
min 50 cm
max 85 cm
+2,6 mt
max
max 100 cm
min 4 cm
Overflow
vent
min 50 cm
max 85 cm
2,5 mt
max
max 100 cm
min 4 cm
*ACCESSORY SOLD SEPARATELY
1
2
3

12 Instruction manual WMi4001 Please keep this instruction manual for future reference
BUILT IN INSTALLATION
Position the template onto the reverse of the furniture door. It is
possible to mount the hinges and closure magnet on the right or
left-hand side depending on your requirements. Mark the screw
hole positions, then drill out these positions.
› Fix the hinges in place with the 4 screws
provided (1)
› Fix the magnet (2) in place using a screw (3)
› If necessary, use the gasket (4) to adjust and
achieve the appropriate assembly (down side)
› Mount the plate (5) on the right or left-
hand side, depending on your installation
requirements.
› Place the plastic support (6) under the plate
and fix it in position with screw (7)
4
5
6
5
6
7
Instruction manual WMI4000 Please keep this instruction manual for future reference12
1
4
7
2
3
1
23
1
3
BUILT IN INSTALLATION
Position the template onto the reverse of the furniture door.
It is possible to mount the hinges and closure magnet on the
right or left-hand side depending on your requirements. Mark
the screw hole positions, then drill out these positions.
»Fix the hinges in place with the 4 screws
provided (1).
»Fix the magnet (2) in place using screw (3).
»
Mount the plate (5) on the right or left-hand side,
depending on your installation requirements.
»
Place the plastic support (6) under the plate and
fix it in position with screw (7).
WARNING:
Contact Caple Service should the power cord need replacement.
Installation faults are not covered by the manufacturers warranty.
»
If necessary, use the gasket (4) to adjust and
achievethe appropriate assembly (down side).
423
3
4
5
6
5
6
7
4
5
6
5
6
7
Instruction manual WMI4000 Please keep this instruction manual for future reference12
1
4
7
2
3
1
23
1
3
BUILT IN INSTALLATION
Position the template onto the reverse of the furniture door.
It is possible to mount the hinges and closure magnet on the
right or left-hand side depending on your requirements. Mark
the screw hole positions, then drill out these positions.
»Fix the hinges in place with the 4 screws
provided (1).
»Fix the magnet (2) in place using screw (3).
»
Mount the plate (5) on the right or left-hand side,
depending on your installation requirements.
»
Place the plastic support (6) under the plate and
fix it in position with screw (7).
WARNING:
Contact Caple Service should the power cord need replacement.
Installation faults are not covered by the manufacturers warranty.
»
If necessary, use the gasket (4) to adjust and
achievethe appropriate assembly (down side).
423
3
4
5
6
5
6
7

13
Instruction manual WMi4001
Please keep this instruction manual for future reference
Please keep this instruction manual for future reference Instruction manual WMI4000 13
570
596
600
min.
600
820 min.
825 min.
DIMENSIONS
min. 825mm
min 600mm
596mm
600mm
min 820mm
570mm
570
596
600
min.
600
12
820
min.
825
min.
The 4 adjustable feet allow the height of the washer to be adjusted
from 820mm to a maximum of 840mm. To adjust the height, you
should remove the nuts fitted to each foot and replace these with the
5mm nuts supplied. Raise the feet to your desired height and then fully
tighten the lock nut to the base of the washer.
Slide the washer into an opening
of the size indicated in the
diagram opposite. A furniture
plinth may be run across the front
of the appliance, but its height
will be dictated by the height the
washer is set at. Position outlet
hose properly so that the floor will
not be damaged by water leakage.
NOTE:
We suggest mounting the furniture door so that it
opens towards the left, which is the same direction
as the porthole door. This will leave more space
when you are loading washing into the appliance.
1
1
2
3
Mount the furniture door to the front of the washing
machine using the hinges. Fix the spacers (1) in
place with the 2 screws (2) and then fix the hinges
wth 2 screw (3)
Slide the washer into an opening of the
size indicated in the diagram opposite.
A furniture plinth may be run across the
front of the appliance, but its height will
be dictated by the height the washer is
set at. Position the outlet hose properly
so that the floor will not be damaged by
water leakage.
The 4 adjustable feet allow the height of
the washer to be adjusted from 820mm
to a maximum of 840mm. To adjust the
height, you should remove the nuts fitted
to each foot and replace these with the
5mm nuts supplied. Raise the feet to your
desired height and then fully tighten the
lock nut to the base of the washer.
Mount the furniture door to the front of the washing
machine using the hinges. Fix the spacers (1) in place
with the 2 screws (2) and then fix the hinges with 2
screws (3).
NOTE:
We suggest mounting the furniture door so that it
opens towards the left, which is the same direction
as the porthole door. This will leave more
space when you are loading washing into
the appliance.
DIMENSIONS
min. 825mm
min 600mm
596mm
min 560mm
820mm - 840mm
545mm

14 Instruction manual WMi4001 Please keep this instruction manual for future reference
OPERATION
EMPTY ALL POCKETS
Foreign objects (e.g. nails, coins, paper, clips, etc.) can cause damage to garments and to the
components in the machine.
Check the laundry before washing and remove foreign objects.
SORT THE LAUNDRY
Sort the laundry by colour and care label. Most garments have a textile care label in the collar
or side seam.
TIP:
Dark textiles often contain excess dye and should be washed separately several times before
being included in a mixed load. Always wash whites and colours separately.
PRE-TREAT STAINS
Badly soiled areas, stains etc. should be cleaned as soon as possible, preferably whilst still
fresh. Spillages should be carefully dabbed off using a soft, colour fast cloth. Do not rub.
TIP:
Badly soiled areas can be pretreated with a liquid detergent, stain removers etc. first, following
the manufacturer’s instructions. With particularly stubborn stains ask your dry cleaner
for advice.
Solvent-based cleaners (e.g. benzine) can damage plastic parts. When pre-treating garments,
make sure that any plastic parts (e.g. buttons) are protected from cleaning agent.
Chemical (solvent-based) cleaning agents can cause severe damage to the washing machine.
Do not use solvent-based cleaning agents in the machine.

15
Instruction manual WMi4001
Please keep this instruction manual for future reference
GENERAL TIPS:
Curtains: Remove lead weights first or place in a laundry bag
Underwiring and collar stiffeners: Any loose wiring in bras, shirt collar stiffeners, etc. should be
removed or sewn in.
Close any zips, attach Velcro fasteners, fasten hooks and eyes etc. before washing.
Fasten duvet covers, pillow cases etc. to prevent small items from being rolled up inside them.
When washing rugs, bed covers or other heavy clothing, it is recommended to avoid the
spinning cycle.
Do not wash any items in this washing machine which are specified by the manufacture as not
washable on the care label ( symbol).
HELPFUL SUGGESTIONS:
MAXIMISE THE LOAD SIZE
Achieve the best use of energy, water, detergent and time by using the recommended maximum
load size. Save up to 50% energy by washing a full load instead of 2 half loads.
DO YOU NEED TO PRE-WASH?
For heavily soiled laundry only. Save detergent, time, water and between 5 to 15% energy
consumption by not selecting Pre-wash for slight to normally soiled laundry.
IS A HOT WASH REQUIRED?
Pre-treat stains with stain remover or soak dried in stains in water before washing to reduce
the necessity of a hot wash programme. Save energy by using a low temperature wash
programme.
When washing heavily soiled whites, we recommend using cotton programs of 60°C or above
and a normal washing powder (heavy duty) that contains bleaching agents that at medium/
high temperatures provide excellent results.
For washes between 40°C and 60°C the type of detergent used needs to be appropriate for the
type of fabric and level of soiling.
Normal powders are suitable for “white” or colour fast fabrics with high soiling, while liquid
detergents or “colour protecting” powders are suitable for coloured fabrics with light levels
of soiling.

16 Instruction manual WMi4001 Please keep this instruction manual for future reference
1
2
DETERGENT DRAWER
The detergent draw is split into 3 compartments as
illustrated in figure:
Compartment “1”: for prewash detergent.
Compartment “ ”: for special additives, softeners, starch
fragrances, etc.
!
WARNING:
Only use liquid products; the washing machine is set to
automatically dose additives at each cycle during the last rinse.
Compartment “2”: for washing detergent.
!
WARNING:
Some detergents are not designed for use in the dispenser drawer but are supplied with their
own dispenser that is placed in the drum directly.

17
Instruction manual WMi4001
Please keep this instruction manual for future reference
QUICK USER GUIDE
This washing machine automatically adjusts the level of the water to the type and quantity of
washing. This system gives a reduction in energy consumption and a saving in washing times.
PROGRAMME SELECTION
› Turn on the washing machine and select the required programme.
› Adjust the washing temperature if necessary and press the required “function” buttons.
› Press the START/PAUSE button to start washing.
NOTE:
Should power go out when the washing machine is running, a special memory saves the
settings and, when power returns, the machine resumes the cycle from where it left off.
› At the end of the programme, the message “End” will appear on the display.
› Wait until the DOOR LOCKED light has gone out before opening the door.
› Turn off the washing machine.
› For any type of wash, see the programme table and follow the operating sequence
as indicated.

18 Instruction manual WMi4001 Please keep this instruction manual for future reference
BUTTON OPERATION
1Programme Selector With Off Position
2Start/Pause Button
3Delay Start Button
4Function Button
5Rapid / Stain Level Button
6Temperature Selection Button
7Spin Speed Button
8Night & Day Button
6+7 Key Lock
9
10
Digital Display
CONTROL PANEL
Pre
Pre
1
2
9
10
453876
Door Locked Indicator Light
off
whites
eco 40-60
dark
colours
shirts
silk
wool
handwash
rapid
14’-30’-44’
rinse
spin
drain
20°
C
jeans
synthetics
delicates
BUTTON OPERATION
1Programme Selector With Off Position
2Start/Pause Button
3Delay Start Button
4Function Button
5Rapid / Stain Level Button
6Temperature Selection Button
7Spin Speed Button
8Night & Day Button
6+7 Key Lock
9Digital Display
10 Door Locked Indicator Light
CONTROL PANEL
BUTTON OPERATION
1Programme Selector With Off Position
2Start/Pause Button
3Delay Start Button
4Function Button
5Rapid / Stain Level Button
6Temperature Selection Button
7Spin Speed Button
8Night & Day Button
6+7 Key Lock
9
10
Digital Display
CONTROL PANEL
Pre
Pre
1
2
9
10
453876
Door Locked Indicator Light
off
whites
eco 40-60
dark
colours
shirts
silk
wool
handwash
rapid
14’-30’-44’
rinse
spin
drain
20°
C
jeans
synthetics
delicates
!
WARNING:
Do not touch the display while inserting the plug. The machine calibrates the systems during the
first few seconds: touching the display could cause the machine to not work property. In this
case, remove the plug and repeat the operation.

19
Instruction manual WMi4001
Please keep this instruction manual for future reference
OPENING THE DOOR
A special safety device prevents the door from being opened immediately after the end of the
cycle. Wait for 2 minutes after the wash cycle has finished and the “Door Security” light has
gone out before opening the door.
PROGRAMME SELECTOR WITH OFF POSITION
When the programme selector is turned the display lights up to show the settings for the
programme selected. For energy saving, at the end of the cycle or with an inactivity period, the
display level contrast will decrease.
NOTE:
To switch the machine off, turn the programme selector to the OFF position.
Press the START/PAUSE button to start the selected cycle.
Once a programme is selected the programme selector remains stationary on the selected
programme till cycle ends.
“END” will appear in the display at the end of the programme and the DOOR LOCKED light
will go off. It will now be able to open the door.
Switch off the washing machine by turning the selector to OFF.
The programme selector must be returned to the OFF position at the end of each cycle or when
starting a subsequent wash cycle prior to the next programme being selected and started.
START/PAUSE BUTTON
Close the door BEFORE selecting the button START/PAUSE.
Press to start the selected cycle.
When the START/PAUSE button has been pressed, the appliance can take few seconds before
it starts working.
PAUSING THE MACHINE
Keep the START/PAUSE button pressed for about 2 SECONDS (some light indicators and the
residual time display will flash, showing that the machine is paused).

20 Instruction manual WMi4001 Please keep this instruction manual for future reference
For safety reasons, in some wash cycle phases, the door can be opened only if the level of the
water is below its lower edge and if the temperature is less than 45°C. If these conditions are
met, wait for the DOOR LOCKED light to switch off before opening the door.
Press the START/PAUSE button again to re-start the programme from the point it had been
paused at.
CANCELLING THE PROGRAMME
To cancel the programme, set the selector to the OFF position.
Wait 2 minutes until the safety device unlocks the door.
DELAY START BUTTON
This button allows you to pre-programme the wash cycle to delay the start of the cycle for up to
24 hours.
To delay the start use the following procedure:
› Select the required programme.
› Press the delay start button once to activate it (h00 appears on the display) and then press
it again to set a 1 hour delay (h01 appears on the display). The pre-set delay increases by
1 hour each time the button is pressed, until h24 appears on the display, at which point
pressing the button again will reset the delay start to zero.
› Confirm by pressing the START/PAUSE button. The delay countdown will begin and when it
has finished the programme will start automatically.
It is possible to cancel the delay start by turning the programme selector to OFF.
If there is any break in the power supply while the machine is operating, a special memory
stores the selected programme and, when the power is restored, it continues where it left OFF.
The function buttons should be selected before pressing the START/PAUSE button.
FUNCTION BUTTON
This button allows you to choose between three different functions:
PRE-WASHING
This function provides a prewash and is particularly useful for heavily soiled loads.
Table of contents
Other Caple Washer manuals

Caple
Caple WMI1010 User manual

Caple
Caple WMF1020 User manual

Caple
Caple WMI3001 User manual

Caple
Caple WMI3005 User manual

Caple
Caple WMI1011 User manual

Caple
Caple WMI2006 User manual

Caple
Caple WMI3000 User manual

Caple
Caple WMF1020 User manual

Caple
Caple WMi2003 User manual

Caple
Caple WMI3001 User manual
Popular Washer manuals by other brands

Hanseatic
Hanseatic HWM5T110D user manual

GERMANICA
GERMANICA GFW800AU80 instruction manual

Alliance Laundry Systems
Alliance Laundry Systems CCN020HNF Installation & operation manual

Indesit
Indesit IWC 71452 Instructions for use

Alliance Laundry Systems
Alliance Laundry Systems TR7104WN installation instructions

Bosch
Bosch WAN2829BSN User manual and installation instructions