CB ELECTRONICS TMC-1 Quick start guide

CB Electronics
TMC-1 Monitor Remote
Release
Technical
Guide
Version 1.0

TMC-1 Monitor Controller CB Electronics
C
CB
B
E
El
le
ec
ct
tr
ro
on
ni
ic
cs
s
CB Electronics has made every effort to ensure the accuracy of information contained within
this document, which is nevertheless supplied for information purposes only and does not
constitute any form of warranty or guarantee.
All trademarks acknowledged.
The information in this document is subject to change without notice.
CB Electronics
oddonside, ands End House
Beggars Hill Road
Charvil
Berkshire RG10 0UD
Tel: +44 (0)118 9320345
Fax: +44 (0)118 9320346
Email: support@colinbroad.com
Tech Support: +44 (0)118 9320345
Web: www.colinbroad.com

TMC-1 Monitor Controller Contents
C
Co
on
nt
te
en
nt
ts
s
CB ELECTRONICS 2
CONTENTS 3
INTRODUCTION 1
CONNECTIONS 2
INSTALLATION 3
Connecting to XMon 4
SETTING UP TMC-1 AND XMON FOR THE FIRST TIME OR AFTER SOFTWARE
UPDATE 5
Factory Default: 5
T/B Gain 1 & 2 5
Listen Gain 1 & 2 5
FL Gain 5
PROTECTED/CALIBRATED SETTINGS 5
Input Trim: 5
Speaker Trim: 6
Mono Trim: 6
5.1 Trim: 7
Cal /B Trim: 7
OPERATION 8
Meters Page: 8
Cue Sends Page: 8
Input Select/Mute: 9
Stem/Input Solo Page: 9
Speaker Mute: 9
Speaker Solo Page: 10
Select Page: 10
In/Out Preset 10
Information display: Shown Below 11
uto Mode: 12
uto Mute Page: Key 2 12
User Keys, GPIO’s and uto: 13
Setup Menu: Key 8 13

TMC-1 Monitor Controller Contents
T/B, L/B, FL Page: Key 5 14
TMC-1 CONTROLS 15
[Mute]: 15
[Dim]: 15
[Page]: 15
Select & Ctrl Keys: 16
[Select/Sp.Mute] Key: 16
[Ctrl/Sp.Solo] Key: 16
[User]: 16
Function Keys: Fn-1, Fn-2, Fn-3 16
User Function Keys: 17
Knob Push 19
Display Keys [1] – [8] 20
METERS PAGE 21
Listen 1 [1] and Listen 2 [6]: 21
User keys: [1], [2], [3], [4], [5], [6], [7], [8]: 21
CUE SENDS PAGE 22
User keys: [1], [5], [6], [8]: 22
[ < (2)] and [ > (4)]: 22
Mute[3]: 22
Mon [7]: 22
[Select] 22
Mute page 23
Speaker Select keys [1]-[8]: 23
Stem.Input Select keys [1]-[8]: 23
[Speaker(9)] 23
[Stem (10)] 23
Solo Page 24
In/Out Page - Speaker [3]: 24
TALKBACK 25
Internal Talkback and Listen-back Latching [1] and [6] 25
TMC-1 Internal/External Microphone Gain adjust 25
SYSTEM SETUP 26
Setup Menu: 26
Menu 01 – User key and setup Select 26
Menu 02 – Volume Knob push switch Function 27
Menu 03 – Page key function 27
Menu 04 – Meter Order 27
Menu 05 – Talkback Latch Enable 28
Menu 06 – Stereo Input 28
Menu 07 – Stereo Output 28
Menu 08 – TFT Brightness 29

TMC-1 Monitor Controller Contents
Menu 09 – Top Display 29
Menu 10 – Hui FL Enable 29
dv Menu 01 – Lock/Un-Lock User Keys 30
dv Menu 02 – Calibration Mode Enable 30
dv Menu 03– External T/B Dim 30
dv Menu 04 – lt Output Select 30
dv Menu 05, 06, 07, 08, 09,10 – GPI Inputs 31
dv Menu 11 – FL/PFL GPIO Input ctive level 32
dv Menu 12 – GPIO Record Tally ctive Level 32
dv Menu 13 – GPIO Play Tally ctive Level 32
dv Menu 14 – ction on Menu Exit 32
TMC-1-PENTA ADVANCED MENU’S 33
dv Menu 15 – Master Slave 33
TMC-1-XMON ADVANCED MENU’S 34
dv Menu 15 – Stereo Input to Studio L/S via Cue Input 3 34
dv Menu 16 – Studio L/S Monitor via Stereo Input 4 34
dv Menu 17 – Communications 34
GPIO 35
CONNECTING TO THE AVID S6 36
USB PORT 37
POWER 37
HUI EMULATION 37
MIDI TIMECODE 37
FIRMWARE UPDATES 37
RECOVERY 38
SETTING THE TMC-1 USER KEY FUNCTIONS 39
SETTING THE INPUT, OUTPUT, SPEAKER, METER AND USER NAMES 39
DIMENSIONS 0
CORRECTED XMON 15 PIN CONNECTIONS 1
OPTIMISING XMON PERFORMANCE
XMON CUE 3 & STEREO 6
XMON BLOCK DIAGRAM 7
GLOSSARY 8

TMC-1 Monitor Controller Introduction
22 June 2015 CB Electronics 1 Version 1.1
I
In
nt
tr
ro
od
du
uc
ct
ti
io
on
n
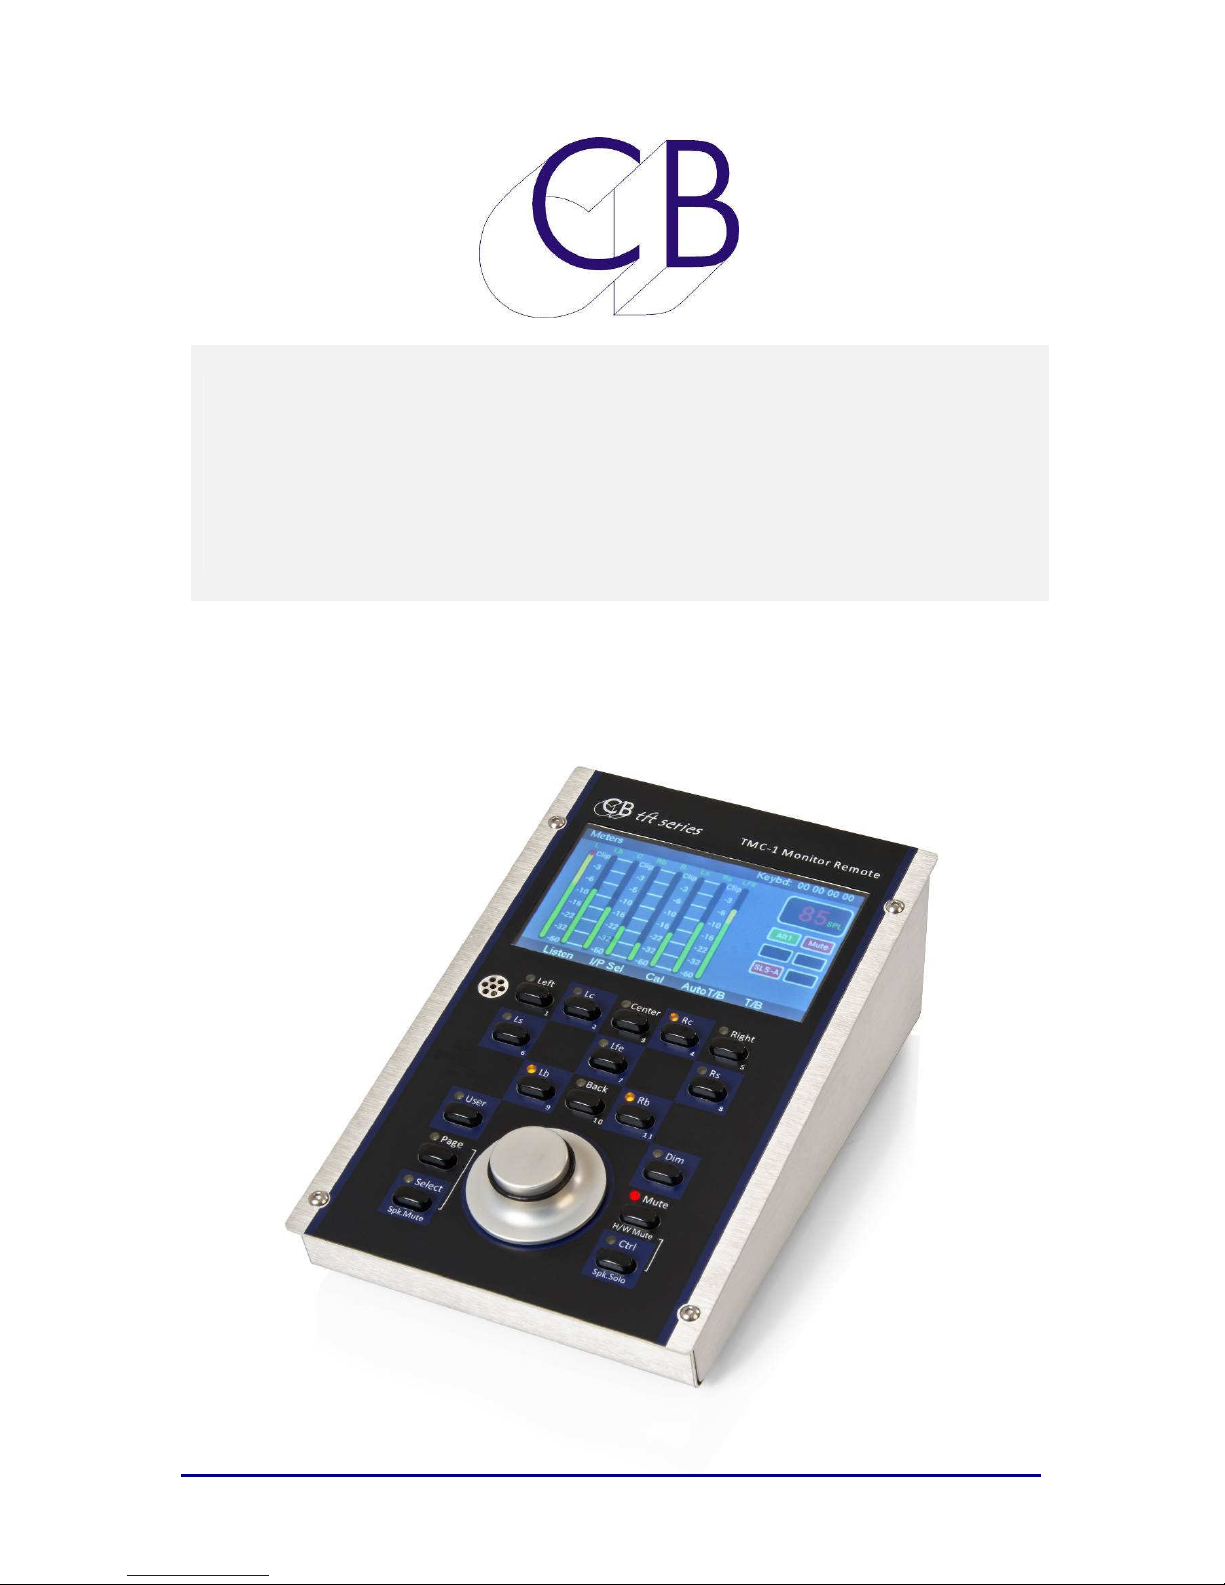
The TMC-1 Monitor Controller is supplied with different software to suit the system controlled.
This document describes the operation with the Avid XMon Monitor Control nit.
•Connects to XMon via 15 pin ‘D’ connector (1:1).
•Supports all XMon functionalities
•Protected calibration settings
•Internal Talkback Microphone
•Play tally from Play GP Input, MTC, H I or LTC
•Record/Red Light GP Input/Output
•Record Tally from Record GP Input or H I
•Auto-Mute Main LS, Studio LS, Talkback and Listen Back
programmable from Play and Record GPIO
•Before, During and After automation of Studio L/S and Headphone
Output.
•Two separate talkback destinations via GP Outputs
•Dual Calibration Settings of 85 and 80 SPL
•Dedicated speaker solo/mute keys.
•GPIO for Talkback, Listenback, PFL/AFL
•Control of Cue 3 Input and Cue 3 Output
•Stem mixing with Mute and Solo (2x8 track Stems and 4x Stereo
Stems
•Route Studio L/S to Monitors via Stereo Input 4
•Send Stereo input to Cues via Cue input 3
•A/B Input and Output selection
This guide will introduce the TMC-1 with examples and illustrations
Further information and software upgrades can be found at
www.colinbroad.com/cbsoft/tmc1/tmc1.html
Features

TMC-1
22 June 2015 CB Electronics 2 Version 1.1
C
Co
on
nn
ne
ec
ct
ti
io
on
ns
s
The TMC-1 has four connectors on the rear as follows
•15 pin ‘D’ female: XMon connection including RS-422 or MIDI, Headphone, and
Microphone. The XMon communications are via MIDI or RS-422. We have tested this
with both 5m and 10m cables. If using the talkback Mic in the TMC-1, you may need
to screen this separately, as the XMon input is unbalanced.
•SB: sed for Power and if connected to MIDI on a DAW, this is used with MTC or H I
for auto talkback and Timecode Display.
•¼” Jack: Headphone Cue monitor connection to X-Mon via 15 pin ‘D’.
•15 pin ‘D’ Male: GPIO in/out – Talkback 1 and 2 Enable/Selection, PFL/AFL enable,
H/W Mute output, LTC input, Play Input, Rec/Red light in/out.

TMC-1
22 June 2015 CB Electronics 3 Version 1.1
I
In
ns
st
ta
al
ll
la
at
ti
io
on
n
The TMC-1 is designed as a desktop unit but may be mounted flush with the desktop. The
unit should be sited in any convenient position away from sources of moisture or excessive
heat. The TFT display brightness may be adjusted via the Setup menu to optimise viewing
under different lighting conditions.
Figure 2: TMC-1 Side and Rear view

TMC-1
22 June 2015 CB Electronics 4 Version 1.1
Connecting to XMon
The 15 pin ‘D’ Female on the rear has the same pin connections as XMon. se the DB15
M/M cable to connect. Where necessary extend the cable. To check connections see
Appendix
Power the TMC-1 via the SB cable supplied. The TMC-1 may be powered directly from the
SB power supply or connected directly to the DAW.
Tip:
It there is a long distance between the XMon and TMC-1, use RS-422
The TMC-1 will recognize and configure XMON to the last TMC-1 setting on power up. If the
XMON is not discovered, then No XMON will be displayed in the top right of the TFT Display.
Once good communications are established with the XMON, this will then be replaced as
selected in the Setup Menu. You can select to see the XMon software revision; the software
revision number of the XMon used to develop the TMC-1 was “Version 11”.

TMC-1
22 June 2015 CB Electronics 5 Version 1.1
S
Se
et
tt
ti
in
ng
g
u
up
p
T
TM
MC
C-
-1
1
a
an
nd
d
X
XM
Mo
on
n
f
fo
or
r
t
th
he
e
f
fi
ir
rs
st
t
t
ti
im
me
e
o
or
r
a
af
ft
te
er
r
S
So
of
ft
tw
wa
ar
re
e
U
Up
pd
da
at
te
e
Factory Default:
We recommend that you start from the factory default setting. This sets all gains and Trims
at 0dB and selects the Main input and Output. To do this, you need to enter the advanced
menu – see appendix B: Selecting the Advanced menu (menu 24)
Having setup the unit to its default setting, you can then adjust each input trim as required
to achieve the required SPL level and trim the speaker outputs where necessary.
T/B Gain 1 & 2
Depress T/B 1 to adjust Talkback Microphone 1 gain [5]
Depress T/B 2 to adjust Talkback Microphone 2 gain [8]
Listen Gain 1 & 2
Depress Listen 1 to adjust Listen Microphone 1 gain
Depress Listen 2 to adjust Listen Microphone 2 gain
AFL Gain
Press [Page] key until the [Select Page] screen is displayed. Press Levels [5] and scroll down
to AFL I/P. The gain may now be changed via the Encoder.
Protected/Calibrated Settings
To remove the protection and enable calibration select the Menu (Depress [select] and
[Page] and select [Setup], then depress [Select] and the [>] key to access the Advanced
Menus
In ut Trim:
Each input has a -10db to +20dB input trim in 1dB steps.
1. Enable Calibration

TMC-1
22 June 2015 CB Electronics 6 Version 1.1
2. Select the Meters page
3. Select the required input
4. Hold the [Select] key down, a Red Box in the lower right will display the Input Trim
5. Adjust as required whilst holding [Select] depressed
6. Disable Calibration
S eaker Trim:
Each speaker output has a +/-4dB trim in 0.5dB steps. Select the Meters page then enable
speaker Solo using the [Ctrl/Solo] key.
1. Enable Calibration
2. Select the required output
3. Solo the individual speaker
4. Hold the [Select] key down, a Red Box in the middle of the screen will display the
speaker trim
5. Adjust as required whilst holding [Select] depressed.
6. Disable Calibration
Mono Trim:
When Mono is enabled the output has a +/-4dB trim in 0.5dB steps.
1. Enable Calibration
2. Select the Meters page
3. Hold the [Mono] key depressed, a Green Box in the lower right will display the Mono
trim
4. Adjust as required whilst holding [Mono] Depressed
5. Disable Calibration

TMC-1
22 June 2015 CB Electronics 7 Version 1.1
5.1 Trim:
When 5.1 is enabled the surround outputs have a +/-4dB trim in 0.5dB steps.
1. Enable Calibration
2. Select the Meters or Input/Output page
3. Hold the [5.1] key depressed, a Green Box in the lower right will display the 5.1
trim
4. Adjust as required whilst holding [Mono] Depressed
5. Disable Calibration
Cal A/B Trim:
The factory reset value for Cal A is 85 and Cal B is 80. However, these values can be
adjusted when calibration is enabled.
1. Enable Calibration Mode
2. Hold Cal A or Cal B depressed.
3. Adjust as required
4. Disable calibration

TMC-1
22 June 2015 CB Electronics 8 Version 1.1
O
Op
pe
er
ra
at
ti
io
on
n
The TMC-1 control panel provides access to all the available functions of XMon. There are a
number of different pages that may be selected on the TFT Display. The Two main pages
are selected by depressing the [Page] key quickly to display the screens shown below.
The legends at the bottom of the screen correspond to the button layout of the TMC-1.
Meters Page:
The Meters page is the default page.
Depressing the Page key will always
return to the Meters page
When the Meters page is displayed
the [Select] key will enable the
Speaker and Input Mute selection.
The [Ctrl] key will enable
Speaker/Input Solo. [Select] returns to
the Meters screen.
Cue Sends Page:
Depress the Page key from Meters
page will select the Cue Sends page.
When displayed the [Select] key will
enable the source selection for the
selected cue output.
[Mute}(Key3 ) mutes the selected
feed (press [Select first]. When Studio
L/S is selected [Monitor](Key7) will
select Stereo 4 input (See Menu –
Stereo 4)

TMC-1
22 June 2015 CB Electronics 9 Version 1.1
In ut Select/Mute:
The [Select] key on the meters page
will select the Input Select/Mute
page. se keys [1] to [8] to
enable/disable Inputs.
If [Speaker(9)] is lit, [Stem(10)], will
select Stem Mute.
NOTE: [Page] or [Select]returns to
Meters page
Stem/In ut Solo Page:
The [Ctrl] key on the meters page will
select the Stem Solo page. se keys
[1] to [8] to Solo Stems.
NOTE: [Page] or [Ctrl] returns to
Meters page
If [Speaker(9)] is lit [Stem(10)] will
select Stem Solo
S eaker Mute:
The [Select] key on the Meters will
enable the Speaker Mute page. se
keys [1] to [8] to enable/ disable
Outputs.
If Input Mute is displayed, key [9] will
select Speaker Mute.

TMC-1
22 June 2015 CB Electronics 10 Version 1.1
S eaker Solo Page:
The [Ctrl] key on the Meters page will
enable the Speaker Solo page. Use keys
[1] to [8] to enable/ disable Outputs.
f [Stem (9)] is lit, [Speaker (9)] will
select Speaker Solo.
[Defeat (11)] clears any Solo function
Select Page:
Depressed the [Select] and [Page}
key will access the Page Select
Screen as Shown. The keys
highlighted in yellow will access the
relevant screen.
This screen also displays the current
function for the [ ser], [Fn-1], [Fn-2]
and [Fn-3] keys (formerly Lb, Back,
Rb)
In/Out Preset
The Sum key enables/disables the
Sum Mode. If Sum is not enabled,
then the Input key selects the
individual inputs. If Sum is enabled,
the Input key will display the input/
stem mute page.

TMC-1
22 June 2015 CB Electronics 11 Version 1.1
Information dis lay: Shown Below
Having selected several pages, you will have noted that the right hand section of the
display is repeated in all but one of the above displays. This Section displays the following
information
NOTE: Switch functions can be momentary or latching
•SPL Level
•Selected Source including Listen back
•Mute/Dim
•Mono on/off
•Talk/Back on/off
•Studio Loudspeaker on/off
•Encoder control destination if not the Main output level.
In this case, the encoder controls Internal T/B Gain.

TMC-1
22 June 2015 CB Electronics 12 Version 1.1
Auto Mode:
The Auto Mode pages (shown below) can be selected from the Select Page screen
({Select} + [Page] to access) , You can switch back to the Meters page at any time using
the [Page] key alone.
The Auto mode is controlled by transport tallies; two GPI inputs are provided Play and
Record and Hui via the SB port. If there is no Play tally output from your DAW you can use
either MTC via the SB connector or LTC via the GPIO connector as a play tally. You can
change the polarity of the GPIO inputs in the Setup menu. You can also program the ser
key to act as a Play or record Start/Stop.
For each output there is an enable key (Blue = Enabled) and then Play Start, Play Stop,
Record Start, Record Stop, where you can determine the action. This provides an
equivalent to the Before/During/After selection used in the SA
Auto Mute Page: Key 2
Enable/disable different outputs
on state change there are three
choices on change of state 1) No
Change, 2) Mute, 3) Enable. The
action is only performed on
change. To set, select line using
[<] and [>] then depress the Select
key. The Enable line is used to
enable disable individual colums
Auto Studio L/S: Key 3
Before, During and After style monitor
control of Studio L/S output.
Switching on change of state as per
Auto mute. To set, select line using
[<] and [>] then depress the Select
key for Off/Mute/Enable of the
selected sources.

TMC-1
22 June 2015 CB Electronics 13 Version 1.1
Auto Head hones: Key 4
Before, During and After style
monitor control of the headphone
output. Switching on change of
state as per Auto mute. To set,
select line using [<] and [>] and
then depress the Select key to
choose the sources.
User Keys, GPIO’s and Auto:
The ser key can also be used as a Manual Red Light Control. At the beginning of a record
pass, you can disable both Listen back and Talkback, mute the studio speakers and enable
the Red light (Record/Red Light GPIO Output) from one key.
Setu Menu: Key 8
The Setup menu is selected from the Page Select ({Select} + [Page] to access). To exit the
Setup page, use the Page key to return to the Meters page.
The Setup menu is described in more
detail later in this manual. The [<] and
[>] keys select the menu page, the [+]
and [-] keys (keys [3] and [7]) change
the selected value. The [Listen] key
enables/disables Listen back and the
[T/B] key enables/disables talkback;
the associated LED indicates status.
The remaining pages are available from the Select Page screen. As usual, depressing the
[Page] key alone will return you to the Meters page. The most important extra page is
shown below [Levels]

TMC-1
22 June 2015 CB Electronics 14 Version 1.1
T/B, L/B, AFL Page: Key 5
On the Talkback and Listen page you
can see the gains for each input
displayed, including AFL. The Green
box on the lower Right of the screen is
displayed whenever the Encoder is not
controlling the Monitor Volume. In this
case, Talkback 1 input gain has been
selected and can be adjusted via the
Encoder. se the [<] and [>] keys to
change the selection

TMC-1
22 June 2015 CB Electronics 15 Version 1.1
TMC-1 Controls
[Mute]:
Mute the Monitor output, Reset Solo Red MUTE icon
[Dim]:
Dim the Monitor output, Hold [Dim] key down to adjust the dim amount, between –
10 to -40dB in 1dB steps. A green icon with the dim value is displayed in the centre of
the screen.
[Page]:
Other manuals for TMC-1
3
Table of contents