CDL tecora BRAVO plus User manual

Bravo Pump
Plus / Basic
USER'S MANUAL
MANUAL

USER MANUAL: BRAVO Plus / Basic
REF. MU DSM 46 Version : 2a Pages : 2 of 49 Date : 2019.03.18
Date Written by Date Validated by
2019.03.18
VLC 2019.03.18
VLC
2019.03.18 2a All Modification into CDL
2017.04.24 2 All New presentation + add timer GRASSLIN
2006.04.01 1.3 All
DATE Version PAGE Modifications

This document is the property of Tecora and can not be duplicated without permission
Ref : EN MU DSM 46 V2 Page 3 of 49
INDEX Page
1
Introduction........................................................................................................................................... 5
1.1
Warranty Conditions and Installation................................................................................................ 5
1.2
Installation.......................................................................................................................................... 6
1.2.1 Waste disposal ............................................................................................................................... 6
1.3
Power Supply and Precautions.......................................................................................................... 6
1.4
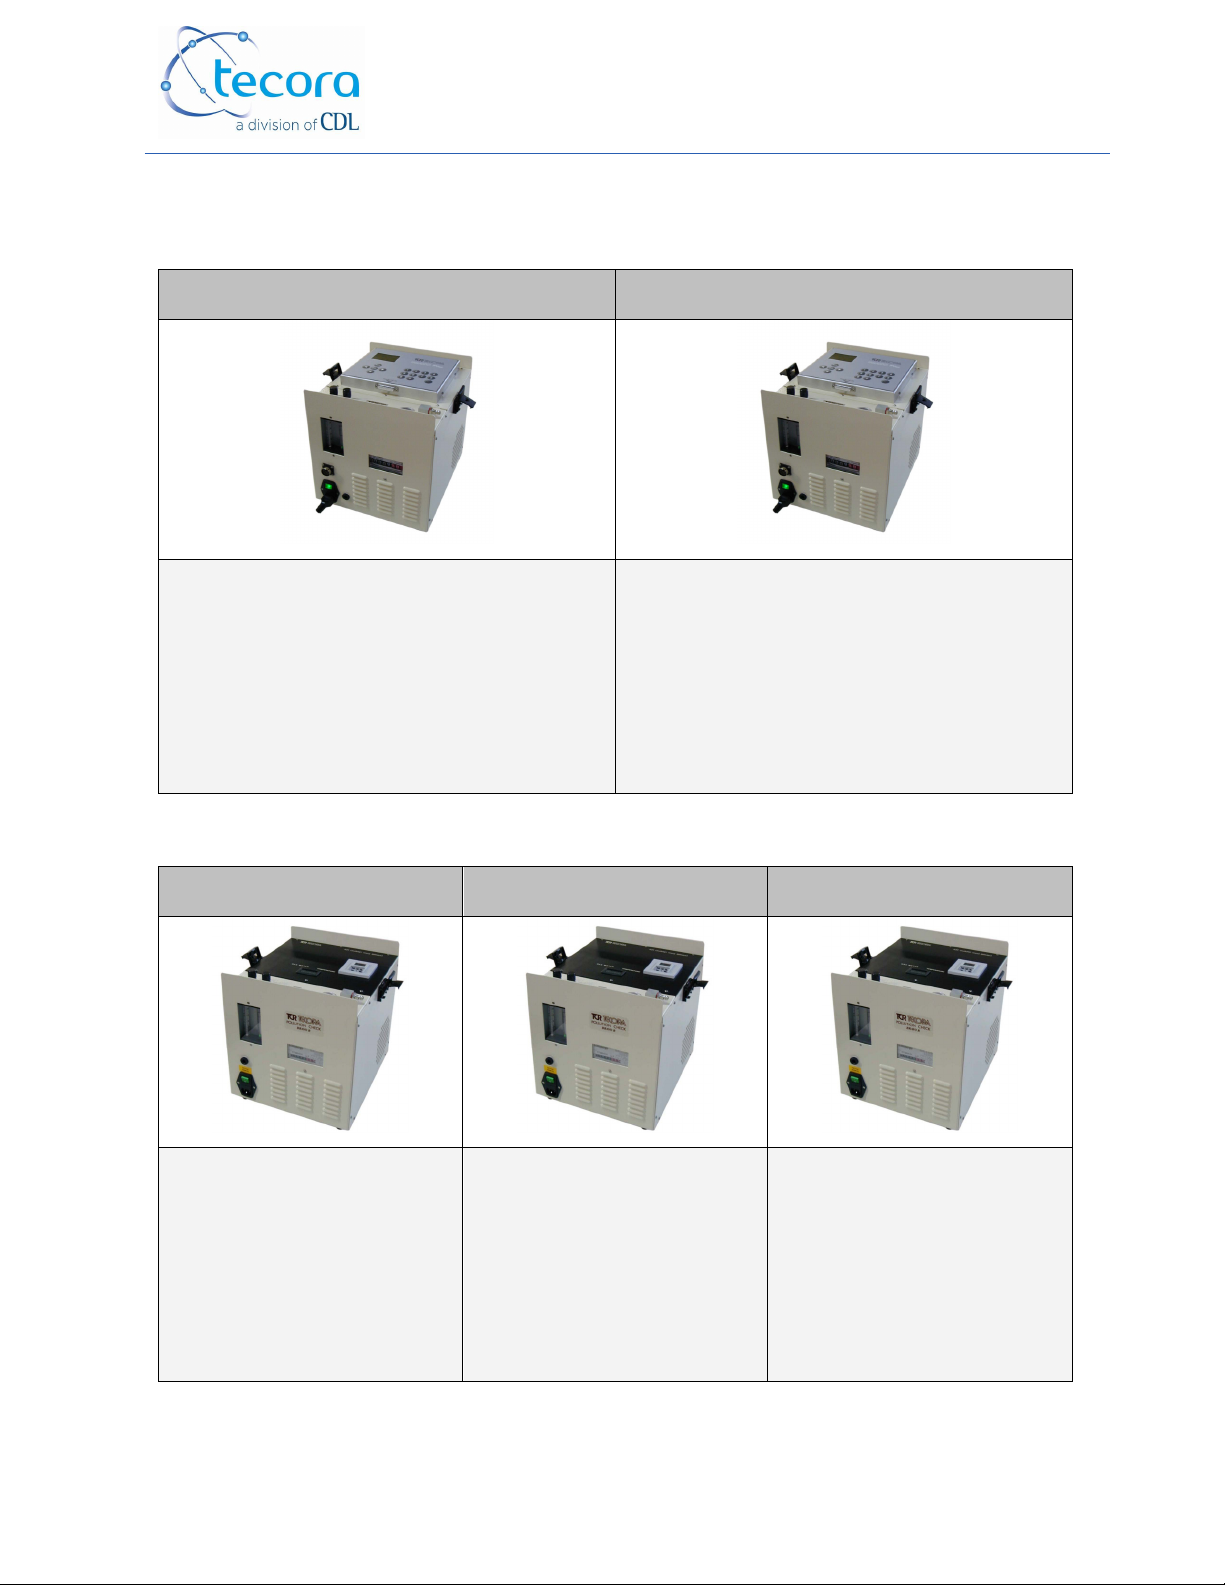
Models and Main Characteristics ...................................................................................................... 7
2
BRAVO Plus ........................................................................................................................................... 9
2.1
Description......................................................................................................................................... 9
2.1.1
Keyboard and Display.............................................................................................................. 10
2.2 Standard delivery.................................................................................................................................. 11
2.3 Accessories .......................................................................................................................................... 11
3
Quick Sampling Guide ........................................................................................................................ 12
3.1
Program the sampling...................................................................................................................... 12
3.1.1 Flowrate Setting ........................................................................................................................... 12
3.1.2 Timed Sampling, set the sampling Start and Duration................................................................. 13
3.1.3 Volumetric Sampling, set the sampling Start and volume to realize ............................................ 14
3.2
Data displayed during the sampling ................................................................................................ 15
3.3
Pause during the sampling. ............................................................................................................. 16
3.3.1 Timed Sampling ........................................................................................................................... 16
3.3.2 Volumetric sampling ..................................................................................................................... 16
3.4
Sampling Final Report ..................................................................................................................... 17
4 Utility Menu ................................................................................................................................................. 18
4.1 Test EV................................................................................................................................................. 18
4.2 Set datary ............................................................................................................................................. 18
4.3 Set the Baud Rate ................................................................................................................................ 19
4.4 Download the memory using the RS232.............................................................................................. 19
4.4.1 Measure final report ..................................................................................................................... 19
4.5 Delete Memory ..................................................................................................................................... 21
4.6 Measure Test and Calibrations............................................................................................................. 21
4.7 Load Default Calibration....................................................................................................................... 22
5 Sequential and Intermittent Sampling ...................................................................................................... 23
5.1 Programming a sequential sampling. ................................................................................................... 23
5.2 Program an intermittent sampling. ....................................................................................................... 25
6 Alarm messages and anomalies ............................................................................................................... 26

This document is the property of Tecora and can not be duplicated without permission
Ref : EN MU DSM 46 V2 Page 4 of 49
7 Measuring sensors Characteristics.......................................................................................................... 26
8 Remote control functions via SMS ........................................................................................................... 27
8.1 SMS Commands .................................................................................................................................. 27
8.1.1 Start the sampling ........................................................................................................................ 27
8.1.2 Sampler actual status................................................................................................................... 28
8.2 Anomalies in the SMS transmission..................................................................................................... 28
9. BRAVO Basic ............................................................................................................................................. 29
9.1 Instrument Description.......................................................................................................................... 29
9.2 Operation Instructions .......................................................................................................................... 30
9.2.1 Power ........................................................................................................................................... 30
9.2.2 Power On...................................................................................................................................... 30
9.2.3 Flowrate Setting ........................................................................................................................... 30
9.3 Timer Programming.............................................................................................................................. 31
9.3.1 Timer Description ......................................................................................................................... 31
9.3.2 First Program................................................................................................................................ 31
9.3.3 Normal Operation ......................................................................................................................... 32
9.3.5 Programming the device .............................................................................................................. 32

This document is the property of Tecora and can not be duplicated without permission
Ref : EN MU DSM 46 V2 Page 5 of 49
1 Introduction
1.1 Warranty Conditions and Installation
Warning: when you receive the instrument and the accessories from the packaging and verify their
integrity, otherwise contact Tecora or your distributor immediately.
Test
The instruments are tested in our laboratories at Villebon sur Yvette ZI La Prairie, and a test
certificate is released.
Warranty
The warranty cover the instruments for 12 months from the test passed date.
The warranty doesn’t cover the following:
•damages to the instruments occurred during the transport
•damages to the instruments due to negligence or wrong use
•wearable parts (batteries, motors, filters)
The technical service on the instruments is intended in our Service Department.
Email: customer.ser[email protected]

This document is the property of Tecora and can not be duplicated without permission
Ref : EN MU DSM 46 V2 Page 6 of 49
1.2 Installation
The Bravo sampler is a portable instrument suitable for outdoor ambient samplings.
The protection rate isn’t enough to allow outdoor operations with rain presence.
1.2.1 Waste disposal
Packaging: all the packaging materials are to be considered as non-toxic and non-hazardous
special waste and as such must be disposed of in accordance with current legislation.
Equipment
The crossed-out wheeled bin means that in European Union the product is to be
considered AEE (electrical and electronic equipment) and must be taken to separate
collection at the product end-of life.
This applies to your device but also to any enhancements marked with this symbol.
Do not dispose this product as unsorted municipal waste.
1.3 Power Supply and Precautions
For safety reasons and for the optimal operations, a good power supply with the ground and no
disturbs is needed. In case you use an extension cable for the power supply, it’s necessary that
you connect only the ECHO PM to this power supply cable.
On the power supply line of the ECHO PM there is an anti-disturb filter.
The socket type is a two phases plus the ground, with protection fuse on each phase and a bipolar
ON/OFF switch with “ON” LED.
Power Supply:
220 Vac 50 Hz: from 202 to 253 Vac 50 Hz;
115 Vac 50/60 Hz: from 106 to 132 Vac 50/60 Hz;
For the power, absorption and fuses used, please refer to the Chapter Technical Characteristics
Power Losses
The instrument is equipped with an internal battery and electronic circuits that protects the
sampling from power losses, anyway, disturbs caused by bad electrical contacts may create critical
situations and compromise the good operation.
Attention
To maintain the efficiency of the Ni-Cd internal battery, it’s necessary to recharge it periodically
even if the sampler is not used.
It’s recommended to charge the battery every two months if the instrument is not used connecting
it to the power supply for at least 24 hours.

This document is the property of Tecora and can not be duplicated without permission
Ref : EN MU DSM 46 V2 Page 7 of 49
1.4 Models and Main Characteristics
BRAVO M plus BRAVO H plus
Diaphragm Pump
Range : 0.15 – 35 l/min
New Controller for samplings program,
display data and logger
Sequential Interface : Optional
Piston Pump
Range : 1 – 60 l/min
New Controller for samplings program,
display data and logger
Sequential Interface : Optional
BRAVO M Basic BRAVO R Basic BRAVO H Basic
Diaphragm Pump
Range :
0.15 – 35 l/min
weekly based programmer
Digital Thermometer
3 m
3
/h Rotary vane Pump
Range :
0.2 – 35 l/min
weekly based programmer
Digital Thermometer
6 m
3
/h Rotary vane Pump
Range :
1 – 60 l/min
weekly based programmer
Digital Thermometer

This document is the property of Tecora and can not be duplicated without permission
Ref : EN MU DSM 46 V2 Page 8 of 49
BRAVO Curve caratteristiche (Performance curves)
BRAVO M
BRAVO R
0
10
20
30
40
50
60
70
80
90
100
0 10 20 30 40 50 60 70
Portata (Flow) qV l/min
Vuoto (Vacuum) KPa
BRAVO H
BRAVO M
BRAVO R
Bravo curve
characteristics
(Performance curves)

This document is the property of Tecora and can not be duplicated without permission
Ref : EN MU DSM 46 V2 Page 9 of 49
2 BRAVO Plus
2.1 Description
1. Membrane keypad and back-lighted display
2. Cover with key-lock
3. Inlet quick connector
4. Vacuum meter in line with the sampler gas
5. Dry Gas Meter
6. Flow rate regulators
7. RS 232 Interface
8. Flow Meters
9. Sequential interface connector (Optional)
10.Power supply socket with lighted switch and protection fuse
1
2
7
8
9
5
3
4
10
6

This document is the property of Tecora and can not be duplicated without permission
Ref : EN MU DSM 46 V2 Page 10 of 49
2.1.1 Keyboard and Display
Keyboard
Pause key
Move the cursor
to the left and
move on upside
raw
Move the cursor
to the right and
skip a raw
Skip a raw
Accept the
selection
Numeric
keyboard

This document is the property of Tecora and can not be duplicated without permission
Ref : EN MU DSM 46 V2 Page 11 of 49
2.2 Standard delivery
Note:
when you receive the instrument, unpack it and all the accessories and verify their integrity,
if any damage is found, contact immediately CDL-Tecora or your local dealer.
The standard supply includes:
1. BRAVO Plus
2. Power cord
3. 3 mt Rauclair tube
4. Quick connector
5. 2 spare fuses
6. Calibration certificate
7. User Manual
2.3 Accessories
The Instrument can be equipped with the following accessories and spare parts:
Accessories and Spare Parts
P/N
Sequential Sampling Interface AA99-000-9903SP
Serial Cable 999NI012
Software data acquisition Downloader + Serial cable AA99-009-9900SP
Remote connection Kit with GSM modem (included) 888

This document is the property of Tecora and can not be duplicated without permission
Ref : EN MU DSM 46 V2 Page 12 of 49
3 Quick Sampling Guide
3.1 Program the sampling..
Turn on the sampler and wait for some seconds
•
message appear when you turn on the instrument
•
Enter the main menu pressing a key
Verify the date and hour are correct (date format is dd-mm-yy) otherwise go to the
Chapter 4 - Utility Menu
3.1.1 Flowrate Setting
Before to program the sampling, set the flowrate to the desired value
•
Move the cursor using the arrows and select “Test
Pump OFF” and press Enter.
The pump will turn on and will be possible to set the
flowrate using the flow regulators (pos. 6) and reading
the value on the flow meters placed on the front of the
instrument.
.
•
Once set the flowrate, go back with th cursor on “Test Pump ON” and press Enter
To move the cursor up use the
“
” key
TECORA
Bravo Plus
Ver 1.xx
13-05-03 08:35:00
Press a key …
MAIN MENU
Timed Sampling
Volumetric Sampling
Test Pump OFF
Utility Menu
Explore Memory
ESC

This document is the property of Tecora and can not be duplicated without permission
Ref : EN MU DSM 46 V2 Page 13 of 49
3.1.2 Timed Sampling, set the sampling Start and Duration
•
Move the cursor using the arrows and select “
Timed
Sampling”
and then press the Enter key.
The sampling program mask is displayed
•
Date and Hour
are the effective sampling start date
and hour. When you enter this screen, the date and
are the current ones.
In case you want to start immediately, you can skip
those settings.
•
Duration
is the sampling time in hours and minutes.
The minimum sampling time should be not less than 5 minutes while the maximum is 99
hours and 59 minutes.
•
Norm. Temp
is the used temperature, expressed in °C, to normalize the volumes. The
default value is 25°C.
•
Press. Atm
. is atmospheric pressure, expressed in kPa, used from the instrument. The
default value is 101.3 kPa.
Note: Atm Press. Isn’t the normalizing pressure (which is always defined as 101.3 kPa) but the
atmospheric pressure at which the instrument operates .
To start the samplings, move the cursor on START and press the Enter key.
More information about the sequential and intermittent sampling see the
Chapter 6 –
Sequential Sampling -
SAMPLE TIMING
start start
Date 15-05-03 hour 08:35
Duration hhh:mm 24:00
Norm. Temp. °C 25.000
Atm Press. kPa 100.2
START
SEQUENTIAL ESC
MENU PRINCIPALE
Timed Sampling
Volumetric Sampling
Test Pump OFF
Utility Menu
Explore Memory
ESC

This document is the property of Tecora and can not be duplicated without permission
Ref : EN MU DSM 46 V2 Page 14 of 49
3.1.3 Volumetric Sampling, set the sampling Start and volume to realize
•
Move the cursor using the arrows and select
“
Volumetric Sampling”
and then press the Enter
key.
The sampling program mask is displayed
•
Date and Hour
are the effective sampling start date
and hour. When you enter this screen, the date and
are the current ones.
In case you want to start immediately, you can skip
those settings.
•
Volume
is the volume in liters to realize during the
sampling.
The minimum sampling time should be not less than 5 minutes while the maximum is 99
hours and 59 minutes.
•
Norm. Temp
is the used temperature, expressed in °C, to normalize the volumes. The
default value is 25°C.
•
Press. Atm
. is atmospheric pressure, expressed in kPa, used from the instrument. The
default value is 101.3 kPa.
Note: Atm Press. Isn’t the normalizing pressure (which is always defined as 101.3 kPa) but the
atmospheric pressure at which the instrument operates .
To start the samplings, move the cursor on START and press the Enter key.
More information about the sequential and intermittent sampling see the
Chapter 6 –
Sequential Sampling -
SAMPLE TIMING
start start
Date 15-05-03 hour 08:35
Volume liters 150.00
Norm. Temp. °C 25.000
Atm Press. kPa 100.2
START
SEQUENTIAL ESC
MENU PRINCIPALE
Timed Sampling
Volumetric Sampling
Test Pump OFF
Utility Menu
Explore Memory
ESC

This document is the property of Tecora and can not be duplicated without permission
Ref : EN MU DSM 46 V2 Page 15 of 49
3.2 Data displayed during the sampling
When the programmed start time arrives, the instrument turn on and display the following
parameters:
•
Sample 1 of 1
see chapter 6 Sequential Sampling
•
Programmed
Cycle
chapter 6 Sequential Sampling
•
Programmed Sampling
Duration
•
Elapsed Time
is the effective sampling time (pump
ON) from the start
•
Volume C.V.
is the volume expressed in m
3
sampled
until this moment and referred to the dry gas meter conditions.
•
Volume std
is the volume expressed in m
3
sampled until this moment and referred to the
normalized conditions (temperature and pressure) where the temperature is the one
selected during the sampling program and the pressure is 101.3 kPa.
•
Temp C.V.
is the gas temperature inside the dry gas meter expressed in °C
Sample n° 1 of 1
Cycle 24:00 Duration 24:00
Elapsed time 00:12:06
Volume C.V. m
3
0.06376
Volume std. m
3
0.06459
Temp C.V. °C 27.11
PAUSE TO STOP

This document is the property of Tecora and can not be duplicated without permission
Ref : EN MU DSM 46 V2 Page 16 of 49
3.3 Pause during the sampling.
During the sampling it’s possible to pause the operation and perform some operations on the
instrument.
During the pause all the measures are stopped.
Attention: If the instrument is left in pause, the programmed samplings will not take place
and the instrument will stay in pause for an indefinite time.
•
Pressing the
Pause
key the following display appears :
3.3.1 Timed Sampling
In this menu it’s possible to modify the sampling Duration and
the Cycle (for sequential samplings).
Selecting STOP SAMPLING, the operation will be interrupted
manually.
3.3.2 Volumetric sampling
In this menu it’s possible to modify the Volume and the Cycle
(for sequential samplings).
Selecting STOP SAMPLING, the operation will be interrupted
manually.
! ATTENTION!
The instrument manages the power losses, turning off the instrument
will not stop a sampling since when turned on again it will restart the last sampling, it’s necessary
to select STOP SAMPLING from the PAUSE menu.
SAMPLING PAUSE
NEW DURATION 24:00
NEW CYCLE 24:00
STOP SAMPLING
RESTART
SAMPLING PAUSE
NEW VOLUME 150.00
NEW CYCLE 00:03
STOP SAMPLING
RESTART

This document is the property of Tecora and can not be duplicated without permission
Ref : EN MU DSM 46 V2 Page 17 of 49
3.4 Sampling Final Report
At the end of the sampling the instrument prepares a report of the measures.
It’s possible to show directly this report on the display of the instrument or transfer it using the
RS232 port to a PC.
The displayed report contains only the essential data while the logged one include all the
information such as power losses etc.
To display the report proceed as follows:
•
From the main menu select
Explore Memory
•
The first displayed data are the ones related to the
last sampling. Pressing the arrow keys (
) the
other memorized reports are displayed. Pressing the
Enter key you will go back to the main menu.
Displayed data:
•
Sample 1 of 1
identify the sequential samplings
•
Data Str
is the sampling starting date/time
•
Elapsed time
is the effective sampling time
•
Volume c.v.
is the total volume measured by the dry gas meter
•
Volume Std
is the volume reported to the set normalizing conditions
•
Temp. c.v.
is the average temperature at the dry gas meter
•
Norm. temp.
Is the set normalization temperature
MAIN MENU
Timed Sampling
Volumetric Sampling
Test Pump OFF
Utility Menu
Explore Memory
ESC
Sample n° 1 of 1
Data Str 15-05-03 08:35:00
Elapsed Time 23:58:00
Volume c.v. m
3
0.36150
Volume Std m
3
0.36150
Temp. c.v. °C28.24
Norm. Temp. °C 25.00
<Enter> ESC

This document is the property of Tecora and can not be duplicated without permission
Ref : EN MU DSM 46 V2 Page 18 of 49
4 Utility Menu
The Utility Menu can be accessed from the main menu and has the following options:
4.1 Test EV
If the instrument is equipped with the sequential interface (optional) selecting the option
Test EV
the
ON
status will be displayed and a scan of the sequential ways (open and close) will be done.
4.2 Set datary
The instrument is equipped with a permanent clock/datary with a backup battery. To modify the
settings, select “Set Datary” from the Utility Menu and press Enter.
The following display will appear:
•
Use the arrow key to select the desired field
•
Use the keyboard to edit the date and clock.
•
To memorize the new date and exit select UPDATE
and press Enter
UTILITY MENU
Test EV OFF
Set datary
Baud 9600
Memory download
Delete Memory
Measure - Calibrations
Load Default calibration
ESC
Setup Clock Datary
28 – 05 - 03 gg-mm-aa
17 : 35 : 54 hh:mm:ss
UPDATE ESC

This document is the property of Tecora and can not be duplicated without permission
Ref : EN MU DSM 46 V2 Page 19 of 49
4.3 Set the Baud Rate
To modify the RS232 port Baud Rate:
•
Select “Baud” from the option menu.
•
Press the
Enter
key to display the available transfer
rates which are :
o
38400
o
19200
o
9800
o
4800
4.4 Download the memory using the RS232
To access to the logged data it’s necessary to have a PC equipped with a RS232 serial port
and a communication software such as Microsoft Windows
Hyper Terminal.
If the PC has only USB ports, it’s necessary to purchase an USB to Serial adapter available
in most of the computer shops
Software named Downloader is now available to download and managing memory data,
it’s supplied with a serial cable, the P/N is AA99-099-9900SP.
4.4.1 Measure final report
Selecting
RS232 Mem
in the Utility menu the logged data are sent to the RS 232 port.
The format is the following:
Date Start hour
Date Stop hour
Cycle ; Duration ; Sample n°of n°
Effective sampling time
ET
(hhh:mm:ss)
A string followed by “;” with the following data:
Programmed Ambient Pressure
Pam (kPa)
Parameter not used in this version
Normalization Temperature
Tn (°C)
Dry Gas Meter Avg Temp.
Tcv (°C)
Dry Gas Meter Volume
Vcv (m
3
)
Normalized Volume
Vn (m
3
)
Parameter not used in this version
Are then reported eventual power losses events.
Up to 10 power losses are logged.
Power Loss gg/mm/aa hh:mm:ss
UTILITY MENU
Test EV OFF
Set datary
Baud 4800
Download Memory
Delete Memory
Measure - Calibration
Load Default calibrations
ESC

This document is the property of Tecora and can not be duplicated without permission
Ref : EN MU DSM 46 V2 Page 20 of 49
Power return gg/mm/aa hh:mm:ss
This manual suits for next models
6
Table of contents
Popular Water Pump manuals by other brands

HNP Mikrosysteme
HNP Mikrosysteme mzr-2509 Ex operating manual

Tomei
Tomei TA206A-TY03A installation manual

AQUASYSTEM
AQUASYSTEM APDS Series Use and maintenance manual

Crane
Crane Barnes 3SE-HD Series manual

resideo
resideo AquaPUMP PCVF-ECM2020/U installation instructions

Reefe
Reefe RVC260 Exploded View & Instruction Manual

ProMinent
ProMinent CONCEPT PLUS Series operating instructions

SUN RUN
SUN RUN SPAT-130-700 operating instructions

Walrus Pump Co., Ltd.
Walrus Pump Co., Ltd. HQ Series instruction manual

Grundfos
Grundfos DMX 24-8 Installation and operating instructions

IWAKI PUMPS
IWAKI PUMPS MX Series instruction manual

JOHN BLUE
JOHN BLUE PSP-3340 Installation and operation manual