Page 8 ;&(%$*4.8"4,7%<'*#$"&8#=%/7*,#*%4,77%>?@@@?@AA?BCDC1 Item 60769
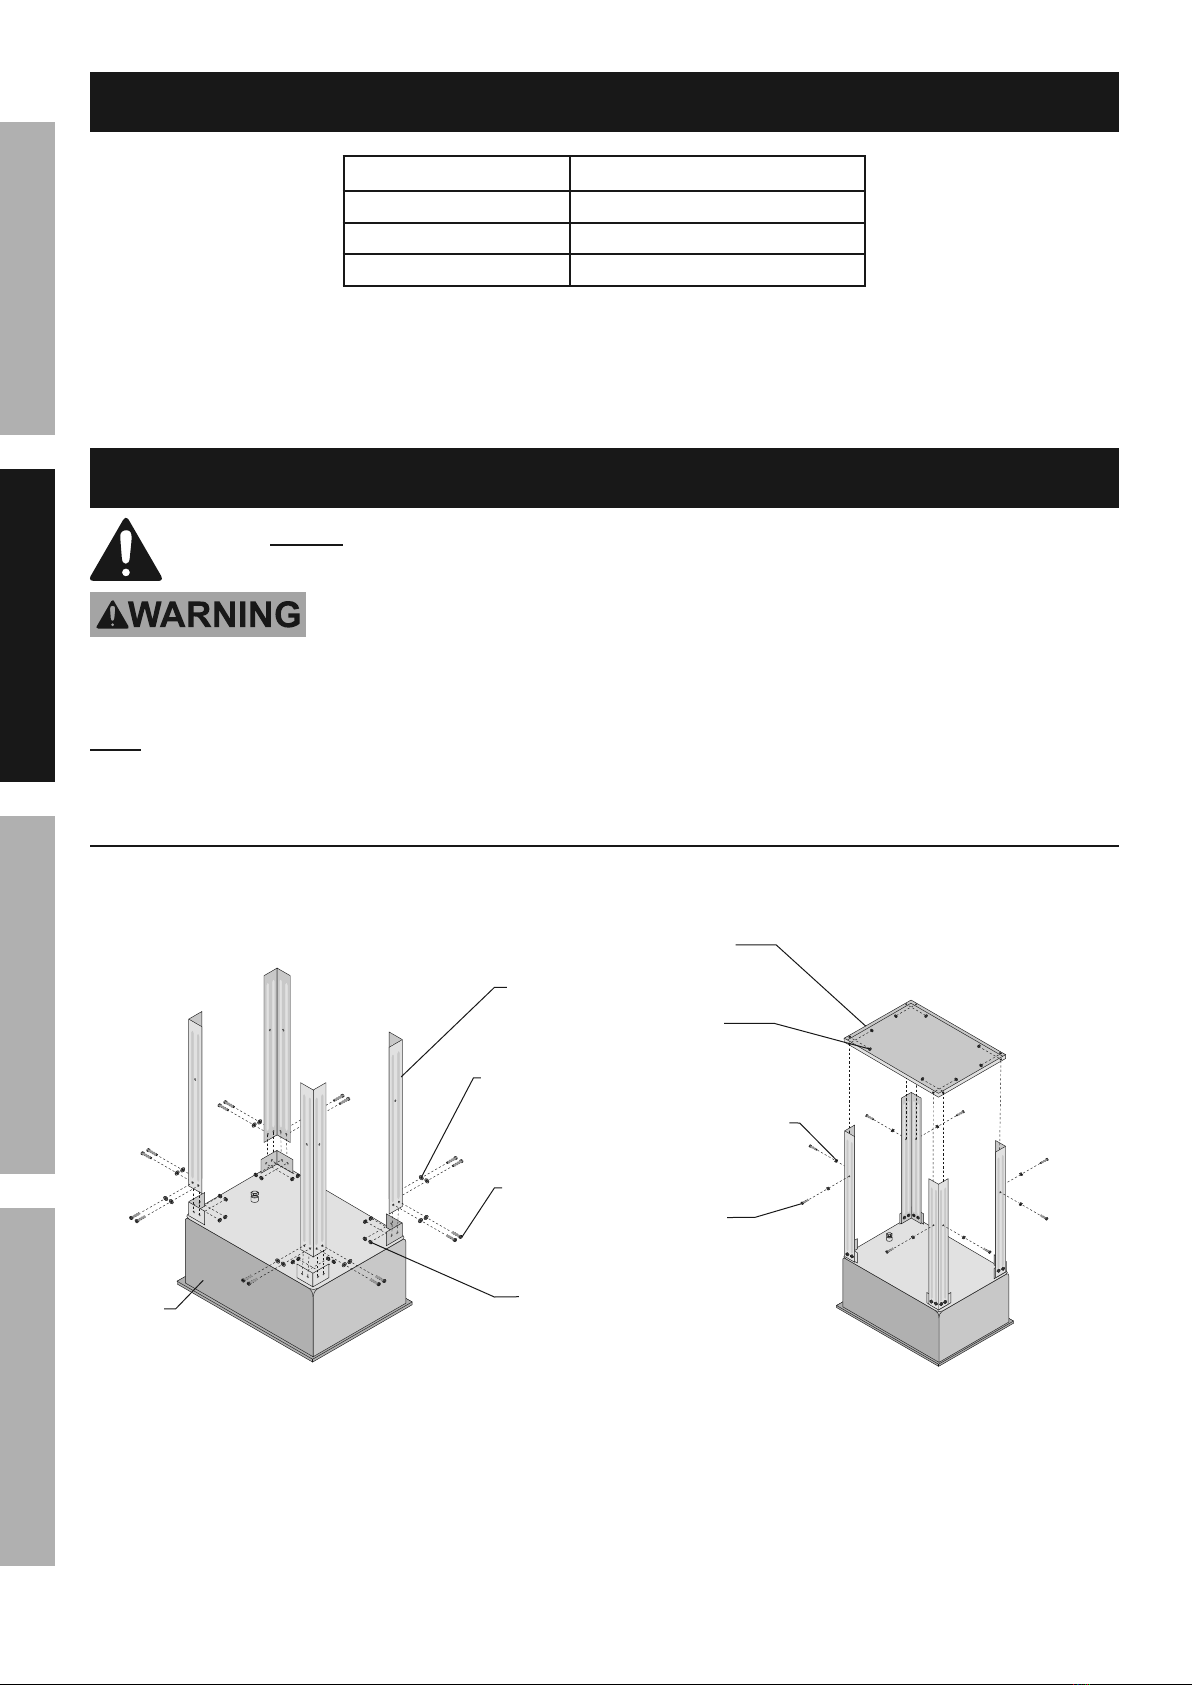
EF;6GH IJ6KFGLIM NFLMG6MFMO6E6GPJ
I/*(,$"83%L8#$('4$"&8#
%K*,9%$.*%6MGLK6%LNJIKGFMG%EF;6GH%LM;IKNFGLIM%#*4$"&8%,$%$.*%+*3"88"83%&2%$."#%
5,8',7%"847'9"83%,77%$*a$%'89*(%#'+.*,9"83#%$.*(*"8%+*2&(*%#*$%'/%&(%'#*%&2%$."#%/(&9'4$1
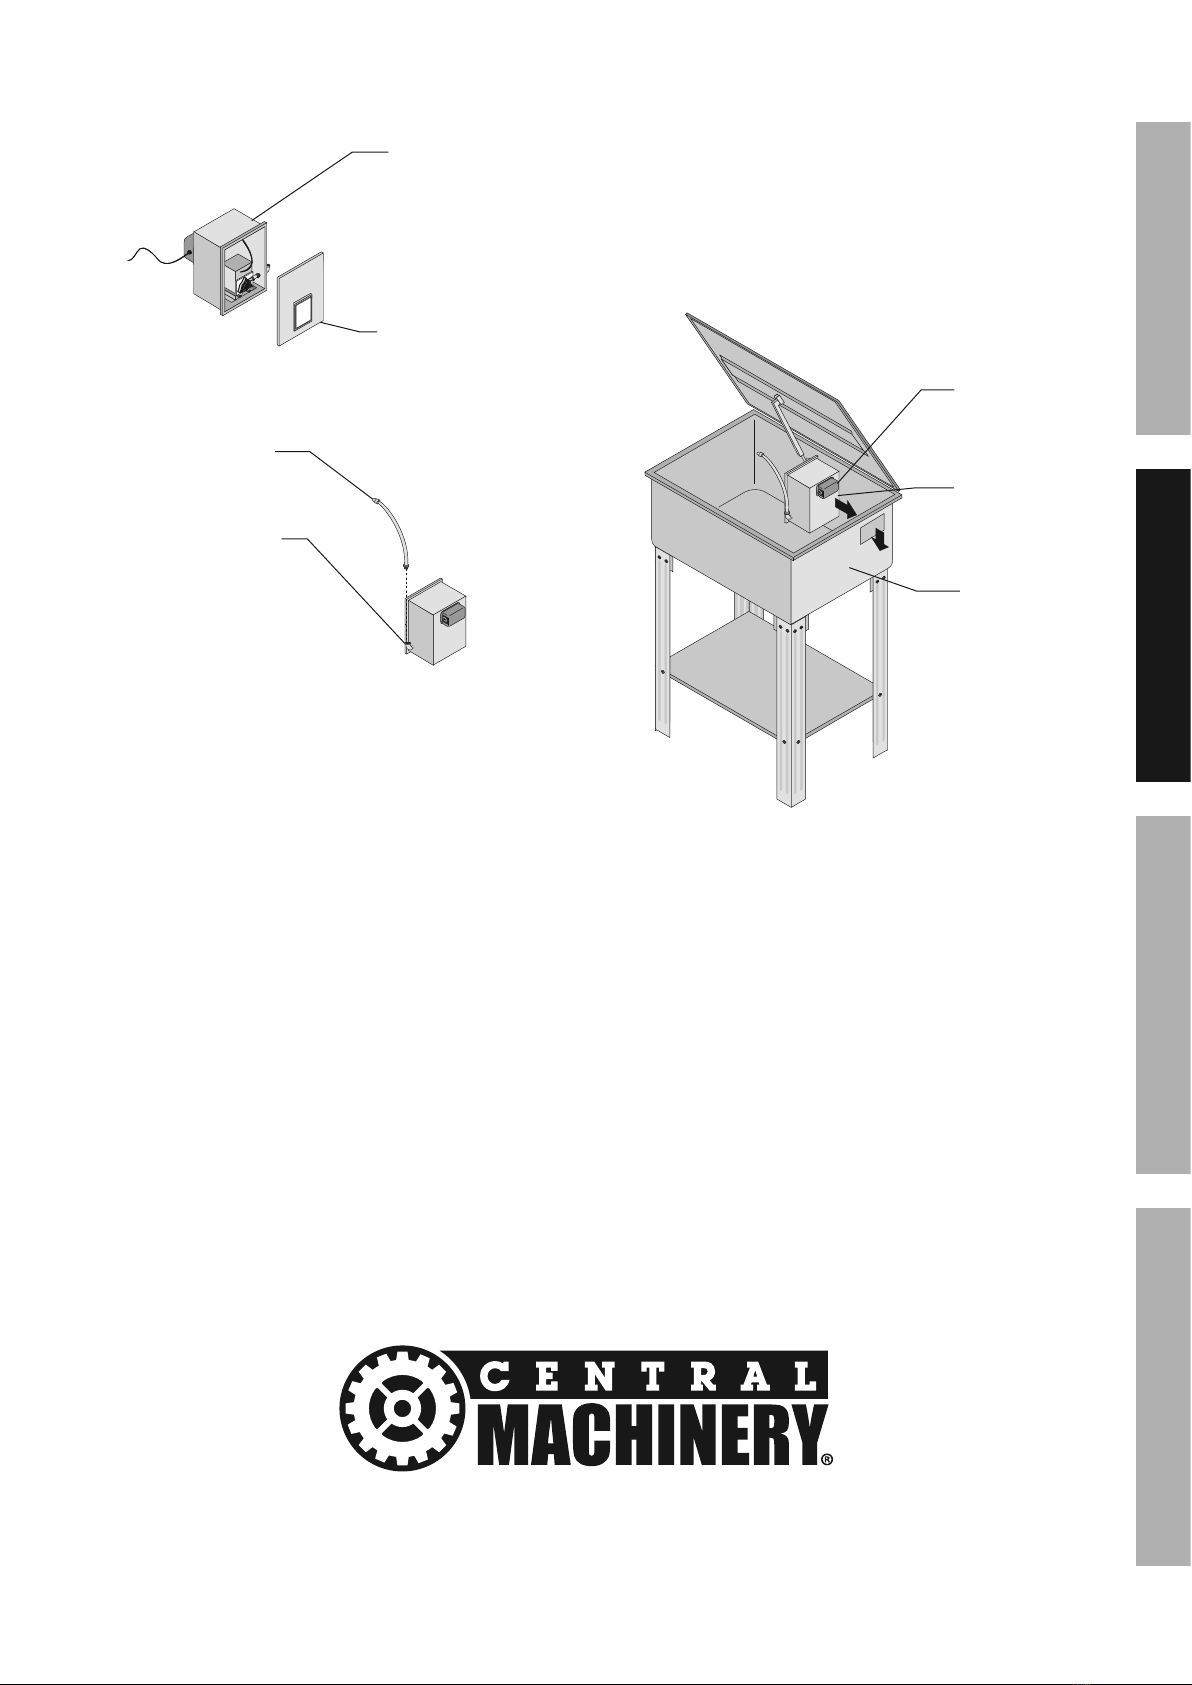
J,($#%Q,#.*(%E*$%P/
GI%JK6!6MG%E6KLIPE%LMbPKH%;KIN%FOOLU6MGFT%IJ6KFGLIM-%
G'(8%$.*%J&)*(%E)"$4.%&2%$.*%J,($#%Q,#.*(%&22%,89%'8/7'3%$.*%J,($#%Q,#.*(%2(&5%
"$#%*7*4$("4,7%&'$7*$%+*2&(*%/*(2&(5"83%,8V%/(&4*9'(*%"8%$."#%#*4$"&81
GI%JK6!6MG%E6KLIPE%LMbPKH-%
^8&)%V&'(%#&7W*8$#1%U&%8&$%'#*%,8V%."3.7V%W&7,$"7*=%27,55,+7*%&(%4&5+'#$"+7*%#&7W*8$#=%&(%%
2'*7#%#'4.%,#%3,#&7"8*=%9"*#*7=%&(%$&7'*8*1%I87V%'#*%8&84&((&#"W*%),$*(?+,#*9%#&7W*8$#1%%%
O.7&("8,$*9%#&7W*8$#=%#'4.%,#%>?>?>%?%$("4.7&(&*$.,8*%,89%
N*$.V7*8*%O.7&("9*%Y,7#&%`8&)8%,#%N*$.V7%O.7&("9*\%4,8%4.*5"4,77V%(*,4$%)"$.%,7'5"8'5%,89%5,V%*a/7&9*1%%
U&%8&$%'#*%$.*#*%#&7W*8$#1%%%
N,8V%$&&7#%,89%/"*4*#%&2%*<'"/5*8$%4&8$,"8%,7'5"8'51
Fill the Tub with the proper cleaning solution just below crease in the Tub.
QFKMLMRc L55*(#*%$.*%/'5/%"8%7"<'"9%)."7*%&/*(,$"831%;7'"9%#.&'79%+*%(*/7,4*9=%,89%J,($#%Q,#.*(%
47*,8*9=%&8%,%(*3'7,(%+,#"#%$&%,W&"9%.,d,(9&'#%4&89"$"&8#1%FW&"9%#&7W*8$%4&8$,4$%)"$.%#`"8%,89%*V*#1%
Q&(`/"*4*%,89%Q&(`%F(*,%E*$%P/
GI%JK6!6MG%E6KLIPE%LMbPKH%;KIN%FOOLU6MGFT%IJ6KFGLIM-%
G'(8%$.*%J&)*(%E)"$4.%&2%$.*%J,($#%Q,#.*(%&22%,89%'8/7'3%$.*%J,($#%Q,#.*(%2(&5%"$#%*7*4$("4,7%&'$7*$%
+*2&(*%/*(2&(5"83%,8V%/(&4*9'(*%"8%$."#%#*4$"&81%%J,($#%+*"83%47*,8*9%5,V%4&8$,"8%,89%7*,W*%27,55,+7*%&(%
4&5+'#$"+7*%(*#"9'*%&(%27'"9#%"8%$.*%/,($#%),#.*(1%O.*4`%2&(%#&7W*8$%2'5*#%$&%W*("2V%8&827,55,+"7"$V%,89%
8&8?$&a"4"$V1%P#*%"8%,%)*77?W*8$"7,$*9%,(*,1%U&%8&$%#5&`*1%M&8?),$*(%+,#*9%#&7W*8$#%5,V%,7#&%*a/*7%2'5*#%
$.,$%,(*%.,d,(9&'#%$&%V&'(%.*,7$.=%,89%5'#$%8&$%+*%'#*9%,$%,8V%$"5*1%^**/%,),V%2(&5%"38"$"&8%#&'(4*#1
1. Designate a work area that is clean and well-lit.
The work area must not allow access by children
or pets to prevent distraction and injury.
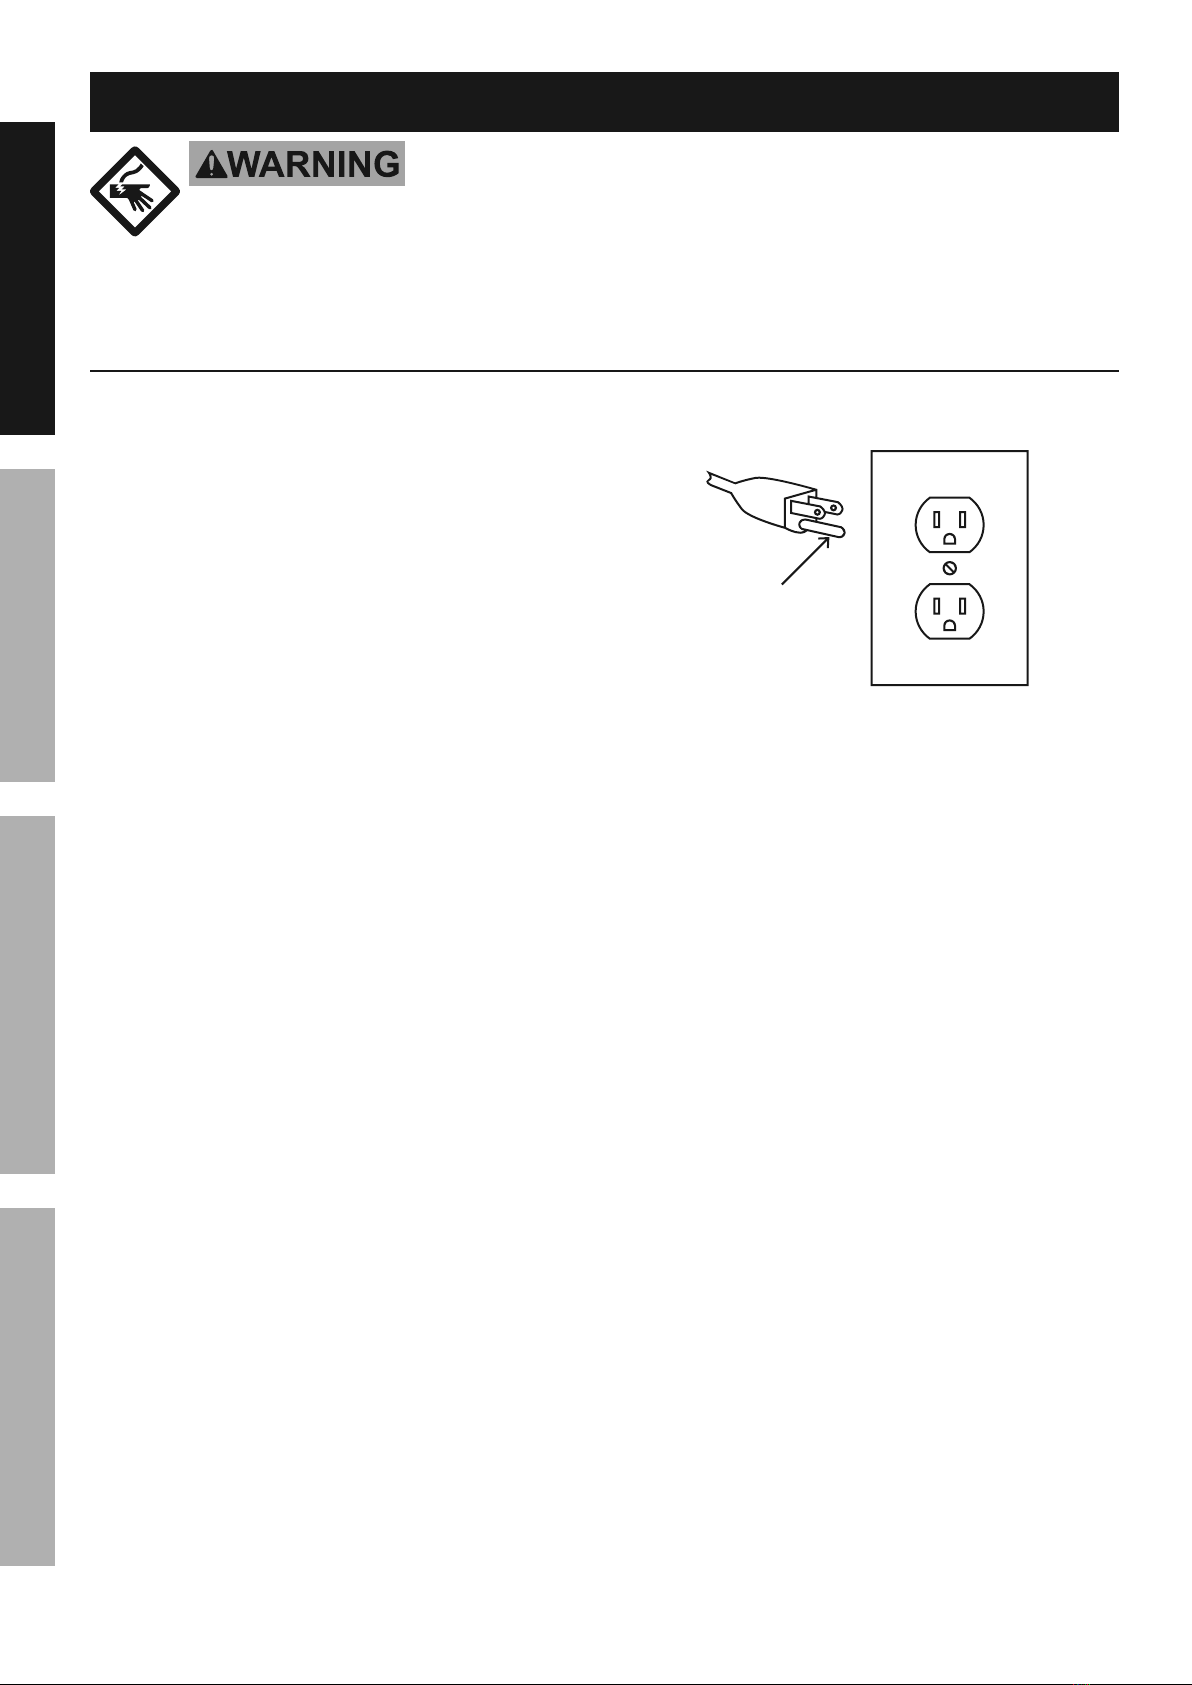
2. Route the power cord along a safe route to reach
the work area without creating a tripping hazard or
exposing the power cord to possible damage. The
power cord must reach the work area with enough
extra length to allow free movement while working.
3. There must not be objects, such as utility lines,
nearby that will present a hazard while working.