Chestnut Hill Sound GEORGE User manual

Table of Contents 1
Li
f
e with
Draft - December 18, 2006 Table of Contents
Table of Contents
•Setting Up............ 3
• Using the Remote.......... 11
• Listening to Your iPod.......... 15
• Listening to the Radio.......... 19
• Sounding the Alarm(s).......... 22
• Advanced Features.......... 25
• Options.......... 31
• In Case of Problems.......... 33
• Index.......... 36
“Chestnut Hill Sound”, “George” and their respective logo designs, “Bandless”, “Products with a Future” and “Control Your Music” are trademarks of Chest-
nut Hill Sound Inc. in the U.S. and other countries. US and International Patents Pending. All other trademarked names mentioned are properties of their
respective owners. iPod is a trademark of Apple Computer, Inc., registered in the U.S. and other countries. ZigBee is a trademark of the ZigBee Alliance.
© 2006, All Rights Reserved.

Table of Contents 2
Li
f
e with
Draft - December 18, 2006 Table of Contents
Important Safety and Installation Instructions
Important Safety and Installation Instructions
INSTRUCTIONS PERTAINING TO THE RISK OF FIRE, ELECTRIC SHOCK, OR INJURY TO PERSONS
WARNING
-
When using elec-
tric products, basic precautions
should always be followed, in-
cluding the following:
1) Read these instructions.
2) Keep these instructions.
3) Heed all warnings.
4) Follow all instructions.
5) Do not use this apparatus
near water.
6) Clean only with a dry cloth.
7)
Do not block any of the ven-
tilation openings. Install in
accordance with the manu-
facturer’s instructions.
8) Do not install near any
heat sources such as radi-
ators, heat registers,
stoves, or other apparatus
(including amplifiers) that
produce heat.
9) Do not defeat the safety
purpose of the polarized or
grounding-type plug. A po-
larized plug has two
blades with one wider than
the other. A grounding
type plug has two blades
and a third grounding
prong. The wide blade or
the third prong are provid-
ed for your safety. When
the provided plug does not
fit into your outlet, consult
an electrician for replace-
ment of the obsolete outlet.
10)
Protect the power cord from
being walked on or pinched,
particularly at plugs, conve-
nience receptacles, and the
point where they exit from
the apparatus.
11) Only use attachments/ac-
cessories specified by the
manufacturer.
12) Use only with a cart, stand,
tripod, bracket, or table
specified by the manufac-
turer, or sold with appara-
tus. When a cart is used,
use caution when moving
the cart/apparatus combi-
nation to avoid injury from
tip-over.
13) Unplug this apparatus dur-
ing lightning storms or
when unused for long peri-
ods of time.
14) Refer all servicing to quali-
fied service personnel.
Servicing is required when
the apparatus has been
damaged in any way, such
as power-supply cord or
plug is damaged, liquid
has been spilled or objects
have fallen into the appa-
ratus, the apparatus has
been exposed to rain or
moisture, does not operate
normally, or has been
dropped.
15) Do not expose this appara-
tus to dripping or splashing
and ensure that no objects
filled with liquids, such as
vases, are placed on the
apparatus.
16) WARNING: To reduce the
risk of fire or electric shock
do not expose this appara-
tus to rain or moisture.
FCC Compliance and Advisory
Statement
Note1: Changes or modifications
not expressly approved by CHS
could void your authority to oper-
ate the equipment.
This device complies with part 15
of the FCC Rules. Operation is
subject to the following two condi-
tions: (1) This device may not
cause harmful interference, and
(2) this device must accept any
interference received, including
interference that may cause
undesired operation.
Note 2: This equipment has been
tested and found to comply with
the limits for a Class B digital
device, pursuant to part 15 of the
FCC Rules.
These limits are designed to pro-
vide reasonable protection
against harmful interference in a
residential installation. This
equipment generates, uses and
can radiate radio frequency
energy and, if not installed and
used in accordance with the
instructions, may cause harmful
interference to radio communica-
tions. However, there is no guar-
antee that interference will not
occur in a particular installation. If
this equipment does cause harm-
ful interference to radio or televi-
sion reception, which can be
determined by turning the equip-
ment off and on, the user is
encouraged to try to correct the
interference by one or more of
the following measures:
-Reorient or relocate the receiv-
ing antenna.
-Increase the separation between
the equipment and receiver.
-Connect the equipment into an
outlet on a circuit different from
that to which the receiver is con-
nected.
-Consult the dealer or an experi-
enced radio/TV technician for help.

Setting Up 3
Li
f
e with
Draft - December 18, 2006 Setting Up
Setting Up
•Unpack and Get Going,page 4
• Antennas and Radio Reception,page 5
• Installing the Remote Control Battery, page 6
• Turning On, Turning Off,and Adjusting the Backlight, page 7
• George’s Home Screen,page 8
• What’s on the Home Screen,page 9

Setting Up 4
Li
f
e with
Draft - December 18, 2006 Setting Up
Unpack and Get Going
Unpack and Get Going
What’s in the Box
Unpack George™ carefully and
save all the packing materials just
in case you ever have to ship him
somewhere.
In addition to George, you’ll find
the following in the box:
• power adapter
• battery
• quick start card
• USB cable
• Phillips screwdriver
• AM antenna
• FM antenna
• Universal Dock Inserts
• Warranty Card
Where to put George
George will sound good no mat-
ter where in your room you put
him, although he will sound best
near a room or cabinet wall. Just
make sure that the speakers
(including the subwoofer that
points down from the bottom of
George) are not obstructed in any
way.
Before you can use George’s
remote, you’ll have to install and
charge the battery as described in
Installing the Remote Control
Battery, page 6. Once the battery
is fully charged, the remote will
last for up to 4 to 6 hours away
from the base unit under normal
use.
The remote will work up to 25
feet away from the base unit, and
it’s best if there are no obstruc-
tions between the remote and the
base.
Unlike other remote controls you
may have used, you do not need
to point George’s remote at the
base when you use it. For more
on using the remote, see Using
the Remote, page 11.
Power On
Insert the power cable into its
connector on the back panel of
George. Take a good look at the
connector, since there’s only one
way you can plug it in. After
you’ve connected the power
cable to George, plug the unit
into your power source.
George will start up as soon as
you plug him in. When you’re
ready to get going, one of the
first things you will want to do is
set the time. This is a painless
process, and is described on
page 10.
Check for Software Updates
One of George’s many strengths
is his ability to change with the
changing times. Just attach the
provided USB cable between
George and your computer, and
you can download software
updates and new features as they
become available.
In fact, before you use George for
the first time, you may want to
check for updated software at:
http://www.chillsound.com
Downloading software updates
is simple and straightforward.
You’ll find instructions on
page 30.
Register Your George
While you’re at the Chestnut Hill
Sound website, take a moment to
register your George. This will
help us to keep you informed of
all the news from the world of
George.
Setting Up 5
Li
f
e with
Draft - December 18, 2006 Setting Up
Antennas and Radio Reception
Antennas and Radio Reception
Two antennas are provided with
George. You’ll need to take a
moment to attach these before
you can get proper AM or FM
reception.
You’ll also want to experiment
with the placement of each
antenna until you find the posi-
tion that provides optimal signal
strength.
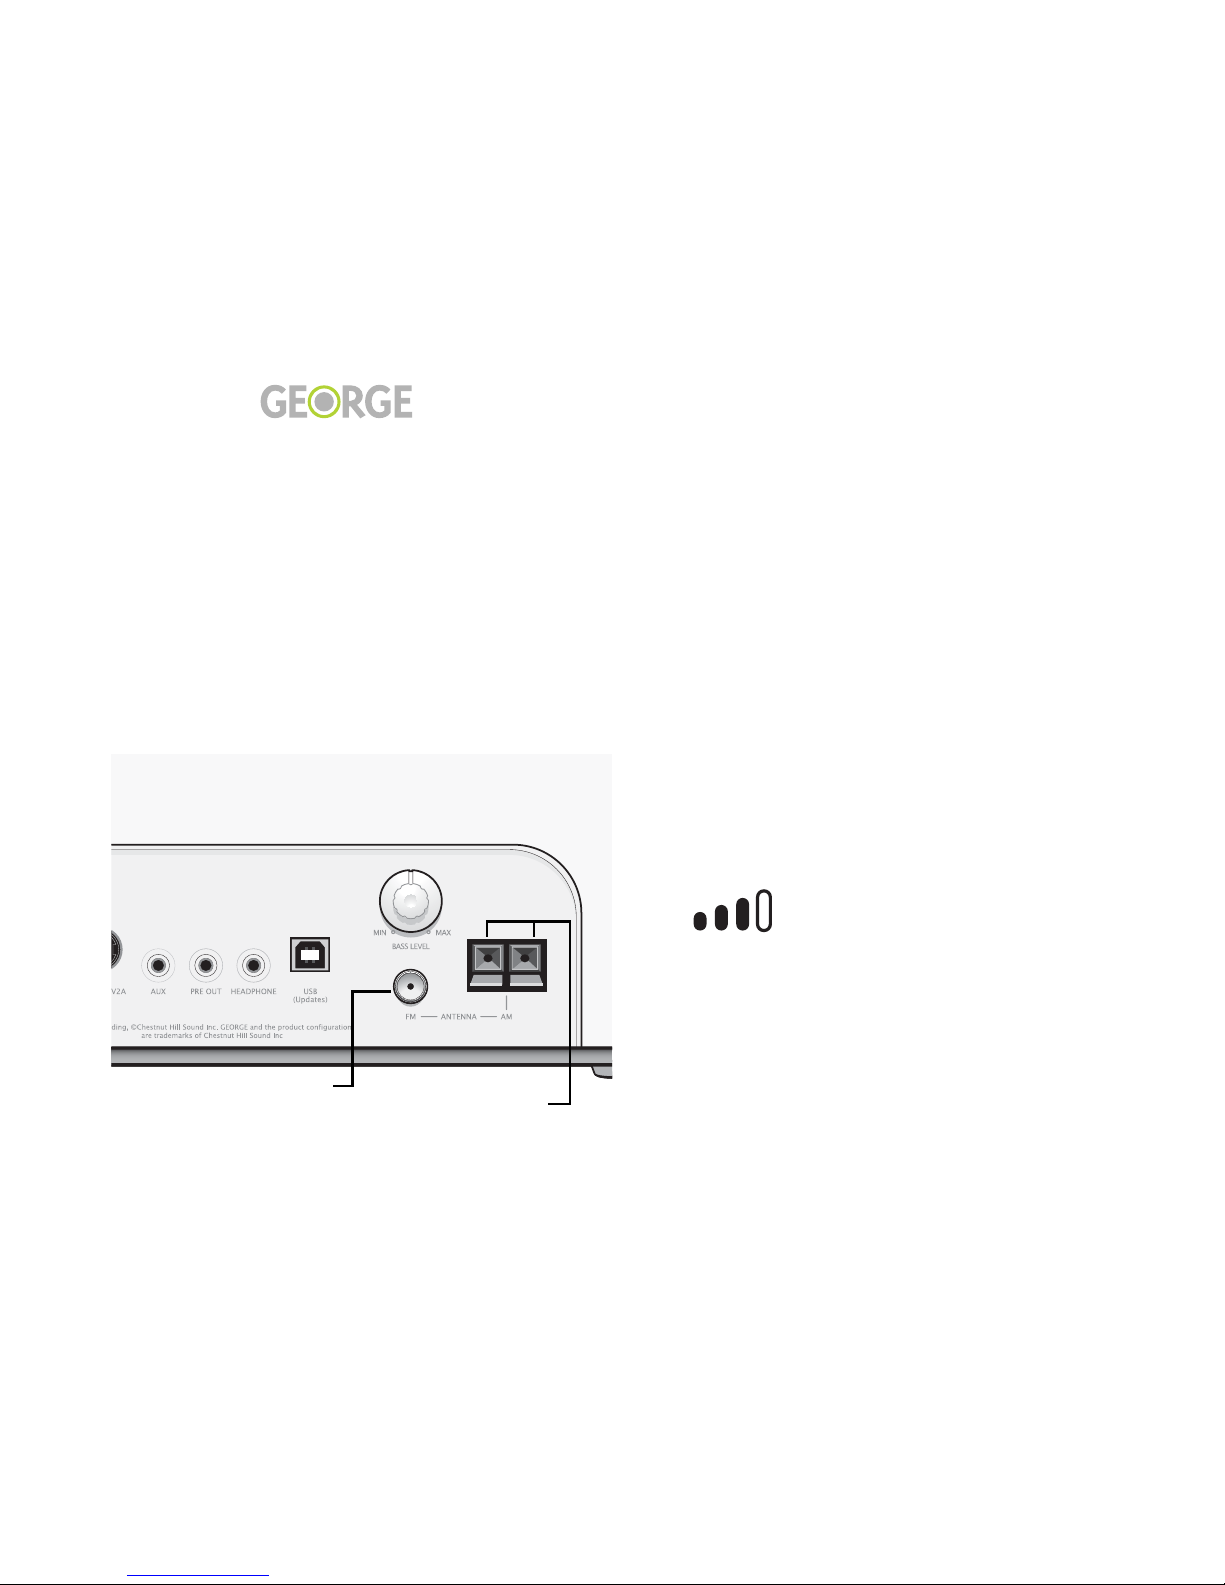
FM antenna
The
FM antenna
simply snaps
onto the corresponding connector
on the back panel of George.
AM antenna
To connect the
AM antenna
, first
pull down the two plastic hinges
at the bottom of the AM connec-
tors on the back panel of George.
Insert one of the wire leads of the
AM antenna into each of these
connectors, then snap the plastic
hinges shut to lock the antenna
leads into place.
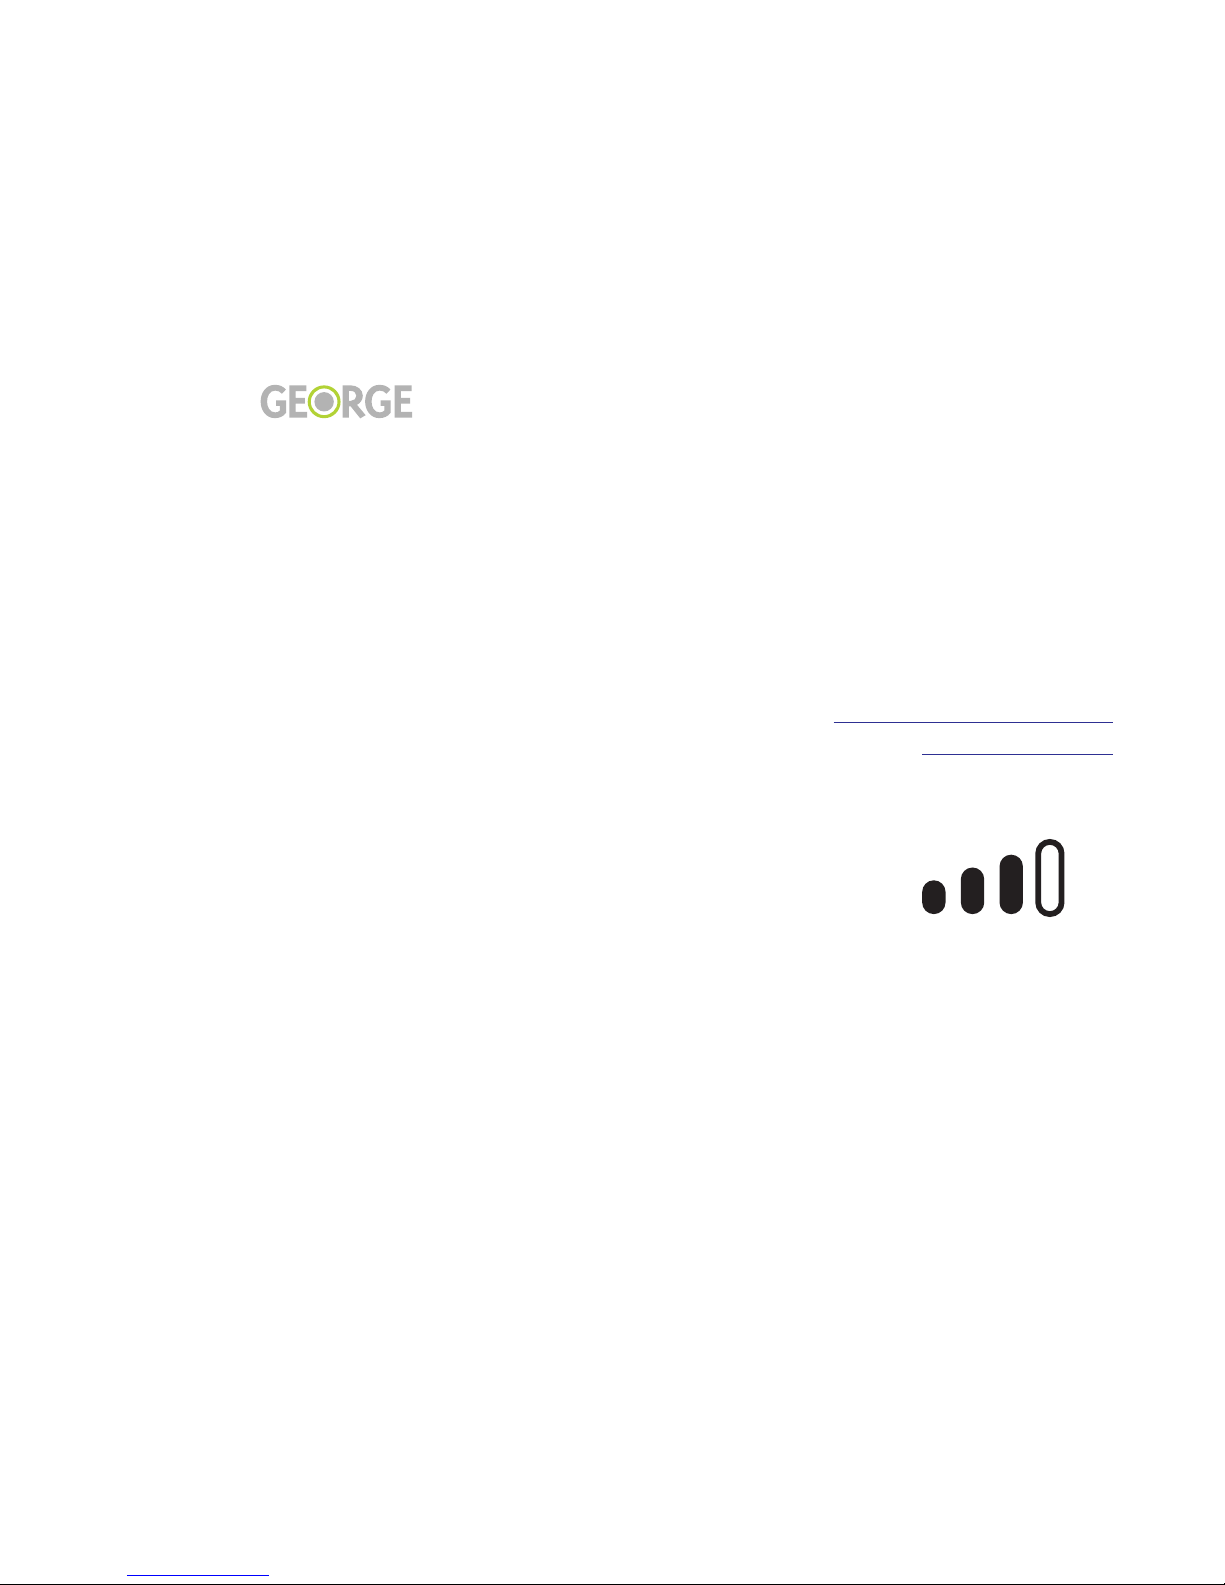
Gauging Your Reception
George displays these signal
strength bars when you’re listen-
ing to the radio:
The following section tells you
what the signal strength bars are
trying to tell you.
Reading the Signal
Strength Bars
•
No bars:
No reception.
George is tuned to a very weak or
nonexistent station. Mostly noise,
although words and music may
be audible but may not be intelli-
gible and not easy to listen to.
Environmental noises and arti-
facts from strong adjacent radio
stations may be heard.
•
1 bar:
Poor reception.
Words may be intelligible, but
still noisy; not easy to enjoy.
•
2 bars:
Fair reception.
Programs are listenable, but may
be accompanied by some noise,
possibly distracting.
•
3 bars:
Good reception.
Perfectly listenable, noise may be
present but not distracting.
•
4 bars:
Best reception.
Strong radio station, minimal
noise, easy to listen to without
fatigue.
Attach FM antenna here.
Attach AM antenna here.
Setting Up 6
Li
f
e with
Draft - December 18, 2006 Setting Up
Installing the Remote Control Battery
Installing the Remote Control Battery
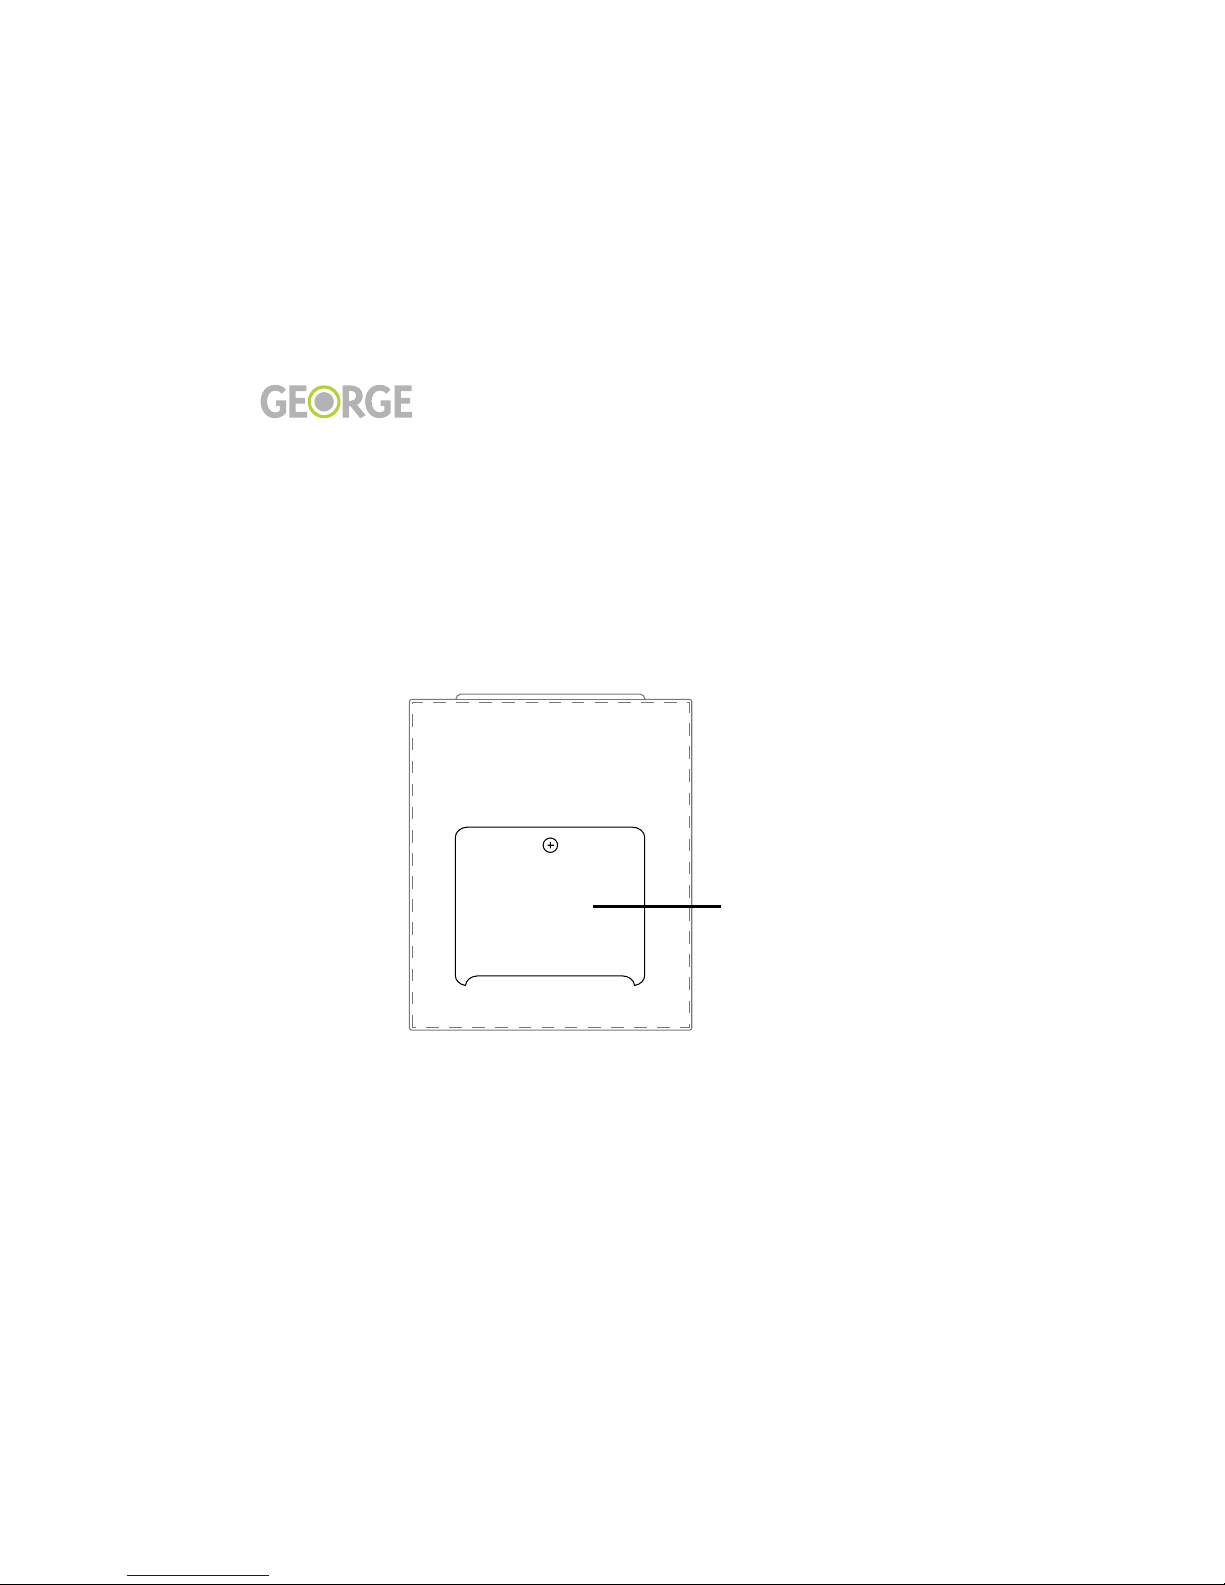
A Phillips screwdriver is pro-
vided for installing and removing
George’s remote control battery.
To install the battery:
1. Gently pull the remote con-
trol panel away from the unit
to access the battery compart-
ment.
2. Using the Phillips screw-
driver, remove the battery
compartment cover from the
back of the remote control.
3. Remove the battery from its
cardboard shipping box, then
insert into the battery com-
partment on the back of the
remote so that the copper ter-
minals on the battery come in
contact with the copper ter-
minals in the battery com-
partment. Press the battery
into place.
4. Re-attach the battery cover,
then reinsert the remote con-
trol into George.
Getting Charged Up
After you install a new battery,
you should let it charge by keep-
ing the remote inserted in George
or docked in a charging stand for
at least two hours.
Battery Safety Warnings
Remove the battery if George is
not to be used for an extended
period of time.
Do not incinerate, disassemble,
short terminals, or expose to
high temperature (212ºF/ 100ºC).
Risk of fire or explosion.
Replace only with the same or
equivalent type battery.
Keep the remote control battery
away from children.
Rechargeable batteries that are
brand new, or have not been used
in a long time, require condition-
ing (5-6 full charge/discharge
cycles) before lengthy playback
time is realized.
Dispose of spent batteries accord-
ing to your state/country’s regu-
lations.
Battery
Compartment
Cover
George remote control
(back)

Setting Up 7
Li
f
e with
Draft - December 18, 2006 Setting Up
Turning On, Turning Off, and Adjusting the Backlight
Turning On, Turning Off, and Adjusting the Backlight
Turning George On
Like the iPod, George doesn’t
have an On or Off switch. Any
time George is plugged in, he’s
ready to go.
When you first apply power to
George, a display such as this
will appear on George’s screen:
This is called the
Home Screen
. It
may look slightly different on
your George, but you should be
able to understand all of its ele-
ments after you review this page
and the diagram on the following
page.
Turning George Off
As on the iPod, you press and
hold the Play/Pause (>/||) but-
ton for a couple of seconds to
turn George off.
This will turn off any sound com-
ing from George and return you
to the time display on the Home
Screen. Turning off the sound
does not disable any of George’s
alarm functions.
Adjusting the Backlight
Click the knob to bring up the
Backlight Level Screen. After you
have turned the knob to adjust
the backlight to the level you
desire, press the
➀
jump button
(just below the
Exit
tab) to return
to the previous page.
Auto Backlight Level
George’s remote has an ambient
light detector that will automati-
cally reduce the screen’s bright-
ness in dark environments.
George doesn’t want to be keep-
ing you awake at night!
To set the backlight level to Auto,
click the knob to bring up the
Backlight Level Screen, then turn
the knob counter-clockwise until
“Auto” is selected. Press the
➀
jump button to return to the pre-
vious page.

Setting Up 8
Li
f
e with
Draft - December 18, 2006 Setting Up
George’s Home Screen
George’s Home Screen
Jump
Buttons
Press the jump button beneath a tab to access that tab’s functions.
For example, press ➁to turn on the radio.
Tabs
Alarm 2Alarm 1
Source Status
Battery Charge
S – Sleep Timer
N – Nap Timer
O – One-Time Alarm

Setting Up 9
Li
f
e with
Draft - December 18, 2006 Setting Up
What’s on the Home Screen
What’s on the Home Screen
Tabs
The four labels at the bottom of
the Home Screen are called tabs.
Other George screens also have
tabs, although their labels will be
different.
No matter what the label says,
press the button under a tab to
choose that item. The illustration
on page 8 shows how this works.
Sometimes there will be two rows
of tabs; the two rows of jump but-
tons will correspond to these.
Buttons are generally not lighted
if they have no current function.
The jump buttons are described
in further detail on page 12.
Other Inhabitants of the
Home Screen
In addition to the time, date, and
tabs for iPod, Radio, Alarm, and
Aux, the Home Screen also dis-
plays the following indicators:
• Alarms
• Source Status
• Battery Charge
Alarms
The items on the top row of the
Home Screen show whether or
not George’s various alarms are
set. For Alarms 1 and 2, the times
that have been set will also be
displayed.
See page 22 for more information
on George’s alarms.
Source Status
A Source Status Indicator will
appear on the left side of
George’s screen whenever he
plays your iPod. Additionally, the
Mute indicator will be displayed
if you press the a mute button
(either the snooze button on the
top of the remote or the Play/
Pause (>||) button) while you
are listening to the radio.
Battery Charge
An indicator on the Home Screen
will show the level of charge in
the remote’s battery:

Setting Up 10
Li
f
e with
Draft - December 18, 2006 Setting Up
Setting the Time and Date
Setting the Time and Date
When you first use George, you’ll
need to bring him up-to-date.
Follow the instructions on this
page to accurately set George’s
time and date.
If you ever lose power or unplug
George for an extended period of
time, his clock will continue to
run for about 12 hours. If you
lose power for longer than that,
you’ll have to set the time and
date again.
To set the time and date:
• While the Home Screen is
displayed, press the
MENU
button on the front of the
remote. The
System Settings
menu appears:
• Turn the knob until
Time
is
highlighted on the menu.
• Click the button in the center
of the knob.
• The
Set Time
menu appears
and the hour is flashing. Turn
the knob either direction
until the correct hour is
shown. George uses a 24-
hour clock, so at 12:00 it tog-
gles between AM and PM;
make sure AM or PM is dis-
played correctly.
• Press the fast forward button
(>>|). The minutes will now
be flashing. Turn the knob to
set these, then press >>|
again to set the month.
Set the day and year in the
same way. The day of the
week (Monday, Tuesday, etc.)
will be set for you automati-
cally. If you need to make
more changes to the time,
you can use the >>| and |<<
keys to continue moving
through the fields.
• When the date is correct,
press the
➀
jump button (on
the front panel beneath the
done
tab) to return to the
Home Screen.

Using the Remote 11
Li
f
e with
Draft - December 18, 2006 Using the Remote
Using the Remote
•What’s on the Remote,page 12
• More About the Remote,page 13
• Detaching the Remote,page 14
Using the Remote 12
Li
f
e with
Draft - December 18, 2006 Using the Remote
What’s on the Remote
What’s on the Remote
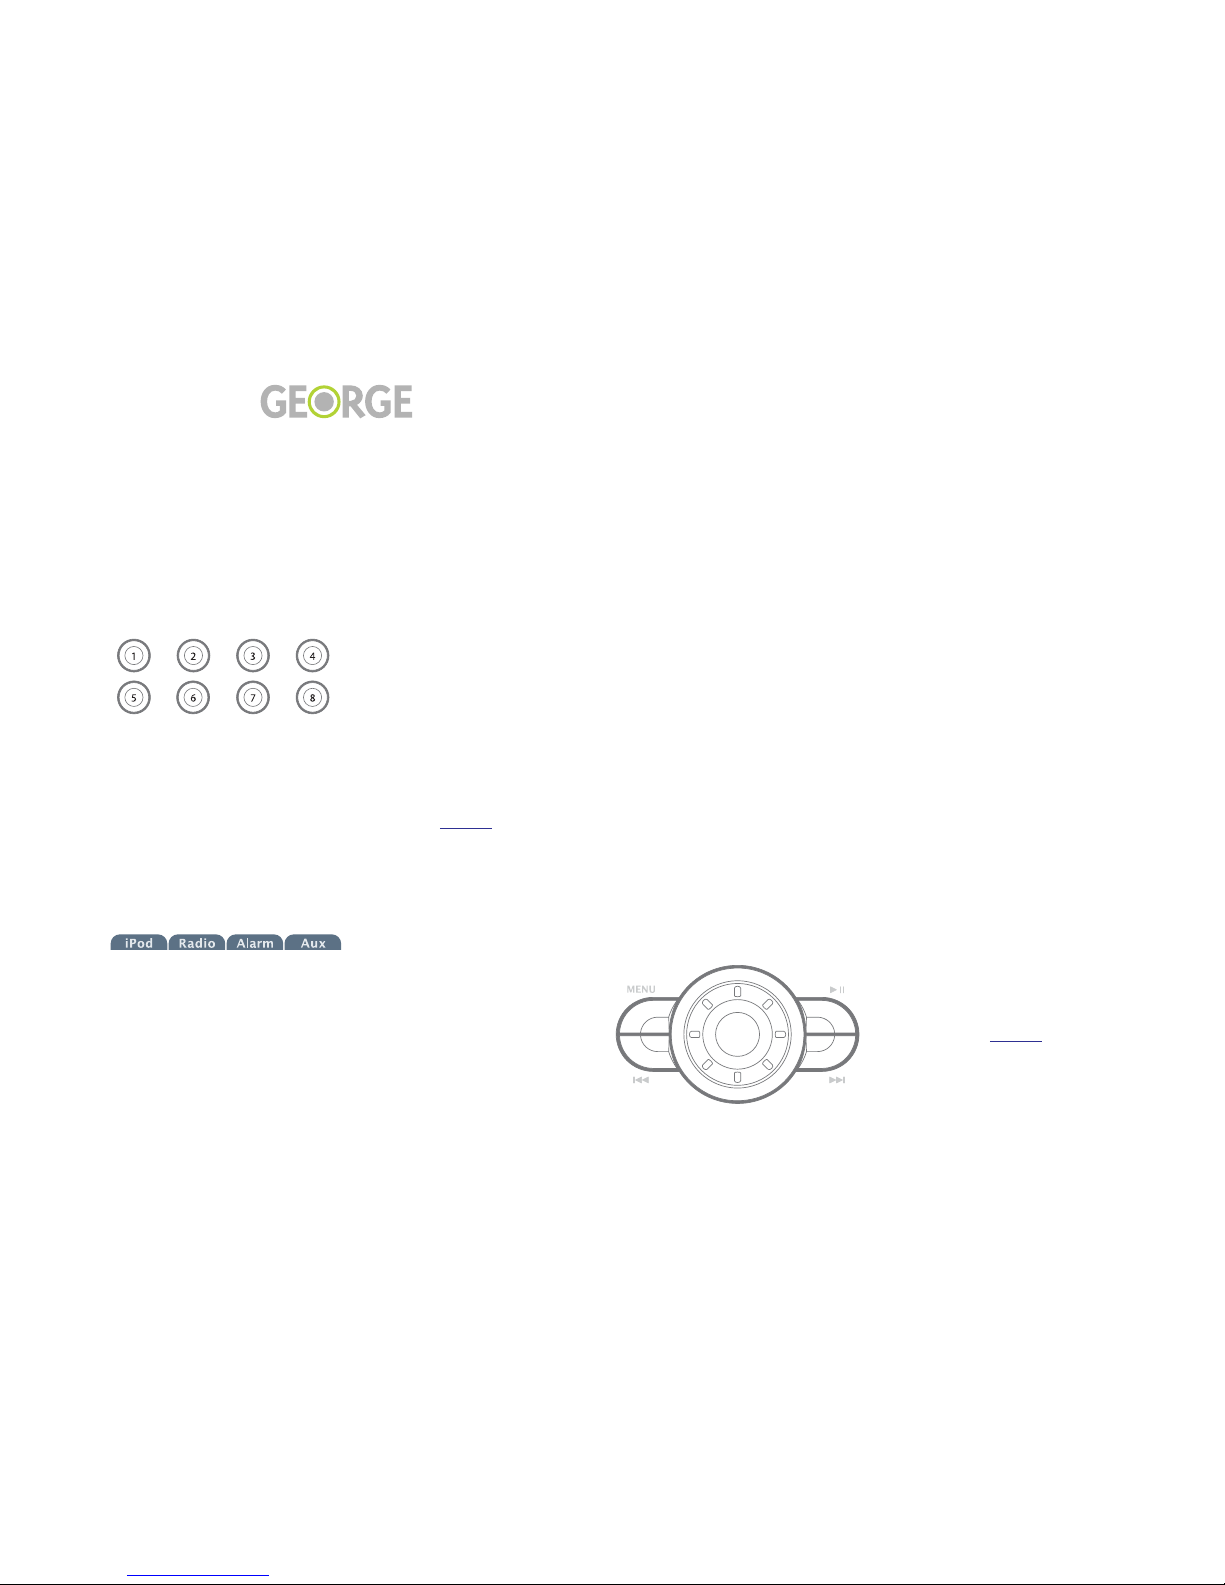
Jump buttons
The two rows of buttons beneath
George’s display are called
jump
buttons
:
What happens when you press a
jump button will depend on what
you are doing with George at the
time. Usually you will simply
press the button beneath a
tab
on
the display to perform the func-
tion indicated by the tab.
For example, the four tabs on
George’s Home Screen read:
Each of these tabs corresponds to
the jump button directly beneath
it. So to choose iPod, press jump
button
➀
; for Radio, press
➁
, etc.
When two rows of tabs are dis-
played – such as the presets that
are shown when you are on the
Radio screen – you can select the
top row of tabs using the
➀
,
➁
,
➂
,
and
➃
buttons, and the bottom
row of tabs using the
➄
,
➅
,
➆
,
and
➇
buttons.
There are also times when a jump
button will perform a function
that is not labeled by a tab. For
example, on the Home Screen
they also have special functions
with George’s alarm clock, as dis-
cussed on page 24.
Knob
The big round knob in the center
of the remote also performs a
variety of functions:
• volume
• radio tuning
• scrolling through lists
Also, when you click the knob
(that is push and release it
quickly), it will:
• select an item
• switch between radio tuning
and volume
• bring up the Backlight Level
Screen from the Home
Screen.
The Versatile MENU Button
As on the iPod, when you press
the
MENU
button you will move
up a level from the screen you are
currently viewing. If you are
viewing the list of artists, for
example, pressing MENU moves
you back to the iPod Music
Screen.
Here’s something that differs a
bit from the iPod: when you hold
down the
MENU
button from
any place in George’s menu
structure, you’ll return to the
Home Screen. This is useful to
remember if you ever need to get
to the volume control quickly,
since the knob always works as a
volume control from the Home
Screen.
Press the
MENU
button while the
Home Screen is displayed to
bring up the System Settings
Menu. The System Settings Menu
is discussed on page 26.
Using the Remote 13
Li
f
e with
Draft - December 18, 2006 Using the Remote
More About the Remote
More About the Remote
Fast Forward and Reverse
Buttons
When you’re listening to music
from your iPod, use the Fast For-
ward (>>|) and Reverse (|<<)
buttons to back up or skip for-
ward through the songs being
played.
When you are playing the radio
and you are on the Home Screen,
these buttons will page through
your radio presets.
Play / Pause Button
The Play /Pause button, with its
familiar >|| icon is versatile as
well. Press this button to begin
playing a selection from your
iPod’s music library. Press the
button again to pause; when you
repress the button, play will
resume from the point you were
at when you paused.
With the Radio or Aux, the Play /
Pause button serves as a mute. It
will stop sound coming from
George’s speakers or head-
phones; when you press it again,
sound will resume.
The Play / Pause button also
functions as George’s off switch.
Hold the button down for a few
seconds to turn George off.
Red, Green, or Amber LED
To the right of the the screen on
George’s remote, just below the
alarm clock icon, is an LED that
may emit a red, green, or amber
glow. Here’s what it’s trying to
tell you:
•
Red
means that the battery
power is low. No other LED
will light – whether the
remote is awake or asleep.
•
Green
shows that an alarm is
set (whether or not the
remote is awake). The LED is
green unless the battery is
low (in which case the LED
will be red).
•
Amber
indicates that the
remote has gone to sleep, no
alarm is set, and the battery is
not in low power mode.
• No LED means (1) the remote
is awake, (2) no alarm is
active, and (3) battery power
is not low.
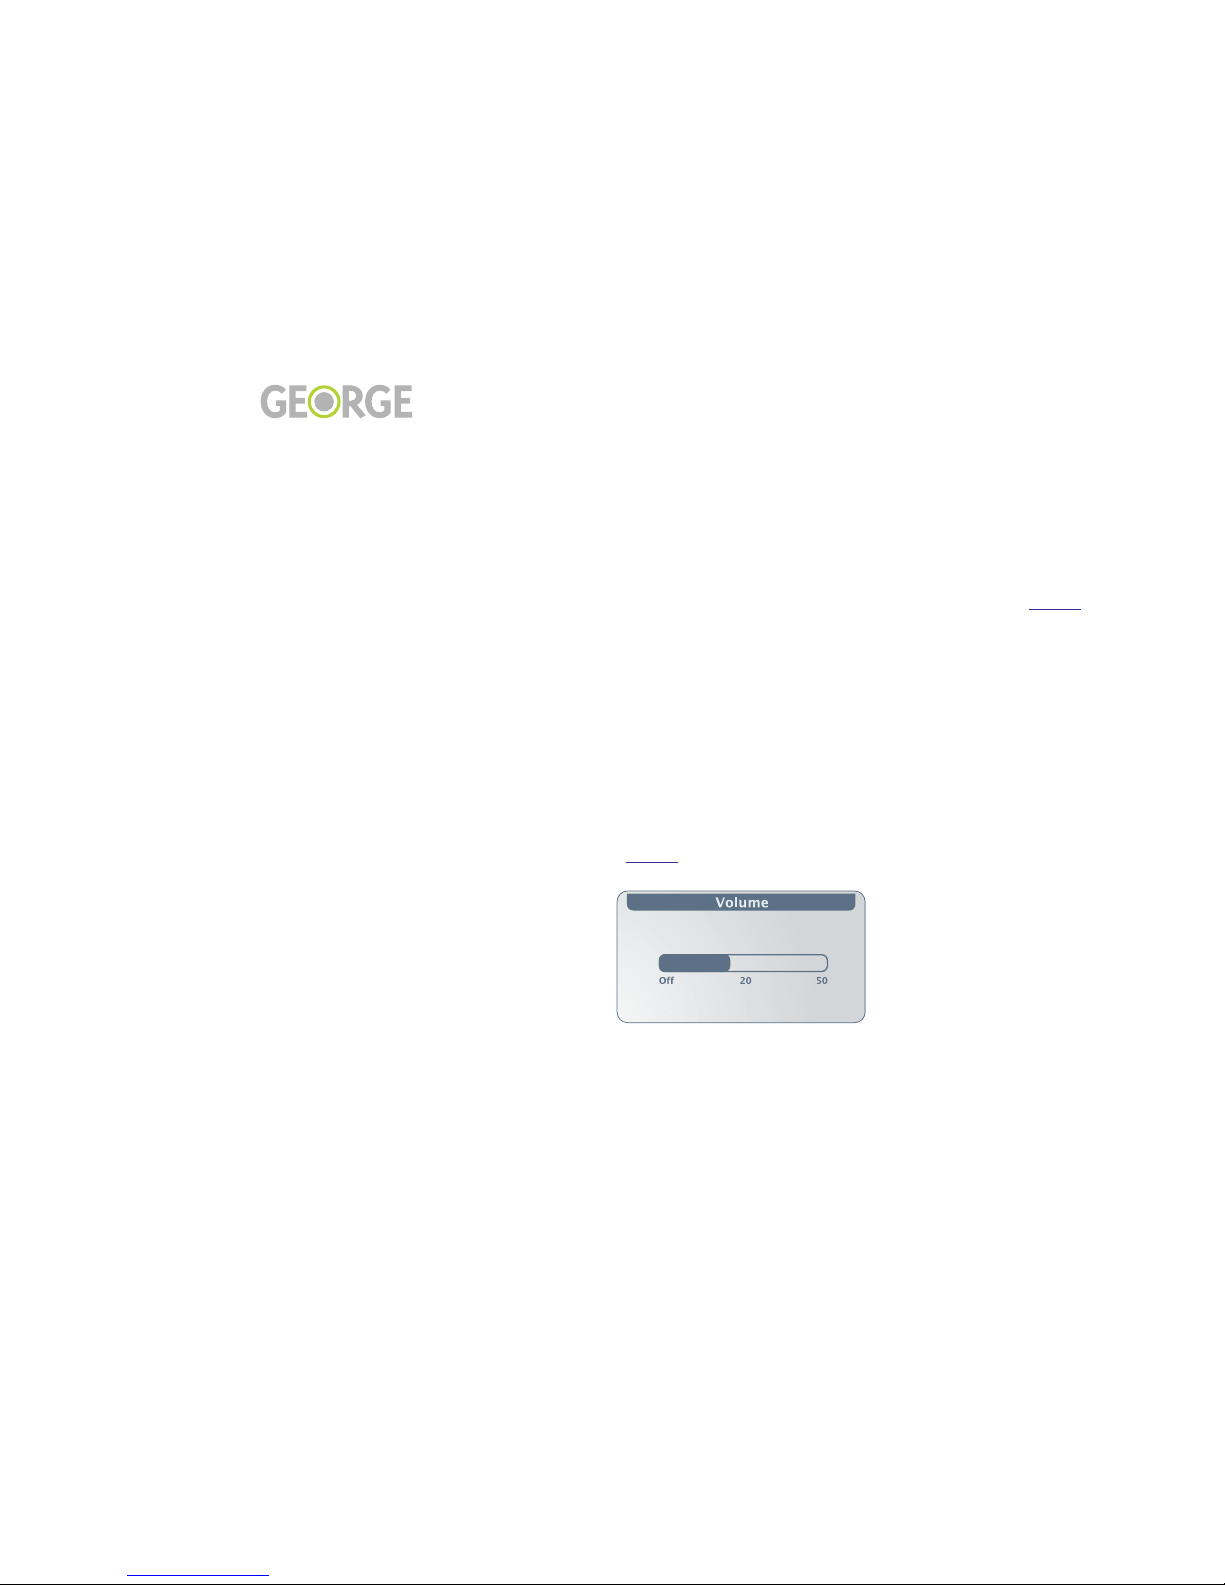
Changing the Volume
Any time you’re listening to
music you can use George’s knob
to control volume. The screen dis-
play will change to the volume
screen as soon as you start to turn
the knob.
After you’ve changed the vol-
ume, the screen will return to its
previous display. You can change
the amount of time George waits
before returning to the previous
screen, as well as other timeout
functions, using some of the
advanced features described on
page 29.
If you find that you are at a place
where turning the knob does not
change the volume, hold down
the
MENU
button to return to the
Home Screen for access to vol-
ume.
Pausing / Muting
In addition to the Play/Pause
button (described on page 13),
there are two other ways to pause
or mute the sound coming from
George:
• Mute/Snooze button - the
long grey button on top of
the remote is most famous
for its turn-off-the-alarm
function, but it will also
pause (iPod) or mute (Radio
or Aux) the sound coming
from George at any time.
This can be convenient if the
phone rings while you’re
blasting a favorite tune.
• Quiet button - the green light
that George reveals when
you remove the remote also
serves as a pause (iPod) or
mute (Radio or Aux) switch.

Using the Remote 14
Li
f
e with
Draft - December 18, 2006 Using the Remote
Detaching the Remote
Detaching the Remote
To remove the remote from
George, simply reach behind the
top of the remote and pull it
away from the front panel of
George. You’ll be reaching
behind the long grey mute/
snooze button, but don’t push the
button when you pull out the
remote (unless, of course, you
also want to silence George).
Quiet Button
When the remote is removed,
you will see an illuminated green
Quiet button:
This button allows you to quickly
mute George’s sound when the
remote is nowhere to be found.
Covering the Remote Dock
If you want to cover the remote
dock, optional covers are avail-
able from Chestnut Hill Sound
that match George’s speaker grill
cloth. The remote will still work
fine when you’ve covered the
remote dock, but you won’t be
able to access the Quiet button.
See page 32 for more information.
When the Remote Sleeps
When George’s remote is away
from the base unit, it will go to
sleep after 5 minutes of inactivity.
The screen will go blank, and the
green LED will appear. (The red,
green, and amber LEDs are
described on page 13.)
Click the knob or any button to
wake George.
If the remote goes to sleep and an
alarm has been set, the remote
will wake up five minutes before
the alarm goes off.
Keeping the Remote
charged
With a fully charged battery
George’s remote will last for up
to 4 to 6 hours away from the
base unit.
The best way to keep your
George remote handy and fully
charged is by docking it in the
optional Charging Stand (avail-
able from your George dealer).
See page page 32 for more infor-
mation.
Battery Charge Indicator
As shown on page 8, there is a
battery charge indicator on the
left side of George’s screen. One
of the following icons will show
the current state of the remote
battery:

Listening to Your iPod 15
Li
f
e with
Draft - December 18, 2006 Listening to Your iPod
Listening to Your iPod
• Making the George / iPod Connection,page 16
• How George is different from the iPod, page 17
• Shuffle, Repeat, and Now Playing, page 18

Listening to Your iPod 16
Li
f
e with
Draft - December 18, 2006 Listening to Your iPod
Making the George / iPod Connection
Making the George / iPod Connection
iPod Compatibility
George works with fourth gener-
ation (4G) and newer iPods.
These are the iPods with click
wheels, including the Nano.
George Charges Your iPod
George wants to keep your iPod
happy and healthy. So as long as
you keep George plugged in, and
your iPod plugged into George,
he’ll make sure that your iPod’s
battery stays charged.
What George Can Play
While George is happy to play all
of your music, he does not recog-
nize non-audio items in your
iPod library such as videos or
photos.
Universal Dock Inserts
Universal Dock Inserts allow the
different models of iPod’s to sit
comfortably on top of George.
Five Universal Dock Inserts are
included in the accessory box
that comes with George,
although if your iPod is a First
Generation Nano or newer you
should use the insert that came
with your iPod.
Choose the Universal Dock Insert
that fits your iPod by referring to
the chart on the accessory box.
Flip up the docking cover, then
insert your Universal Dock Insert
as shown:
Inserting iPod
Insert your iPod into the connec-
tor on top of George as shown:
(illustration: inserting iPod)
After you insert your iPod, a
check mark will appear on the
iPod’s screen and George will
gather all the song information
for the songs on your iPod (in
techno-speak this is known as
metadata - information about the
songs, but not the songs them-
selves); George will also load all
the playlist, genre, album, and
artist information from your
iPod. The amount of time this
takes will depend on the number
of songs in your iPod.
Any time the check mark is on
the iPod screen, it is safe to
remove your iPod (although you
will no longer be able to listen to
its songs through George).
Knob and Navigation
For the most part, you use
George’s knob and navigation
buttons the same way that you
use your iPod. The knob behaves
the same as your iPod click
wheel. The buttons to the left and
right of the knob correspond with
your iPod navigation.
To choose an item, click the but-
ton in the center of the knob. To
go back to the previous menu,
press the MENU button. When
you find the item that you want,
press Play (>/||) to listen.
Listening to Your iPod 17
Li
f
e with
Draft - December 18, 2006 Listening to Your iPod
How George is different from the iPod
How George is different from the iPod
Using George is very similar to
using your iPod. There are a few
differences, however, as we’ll
explain here. We think you’ll
appreciate the added power and
flexibility that George gives you,
especially when it comes to find-
ing all the music in your library.
Scrolling with George
Scrolling through lists of items
(songs, artists, etc.) is a bit differ-
ent on George than on the iPod.
While the iPod makes you stop at
the top or bottom of a list, George
lets you keep scrolling through
any list and wrap through to the
beginning (or end). When you get
to Z, for example, you don’t need
to backtrack through the alphabet
to get back to A; just keep scroll-
ing.
Similarly, George’s radio lets you
go right from AM to FM and back
again without switching bands.
We call this “Bandless Tuning,”
and it’s discussed on page 20.
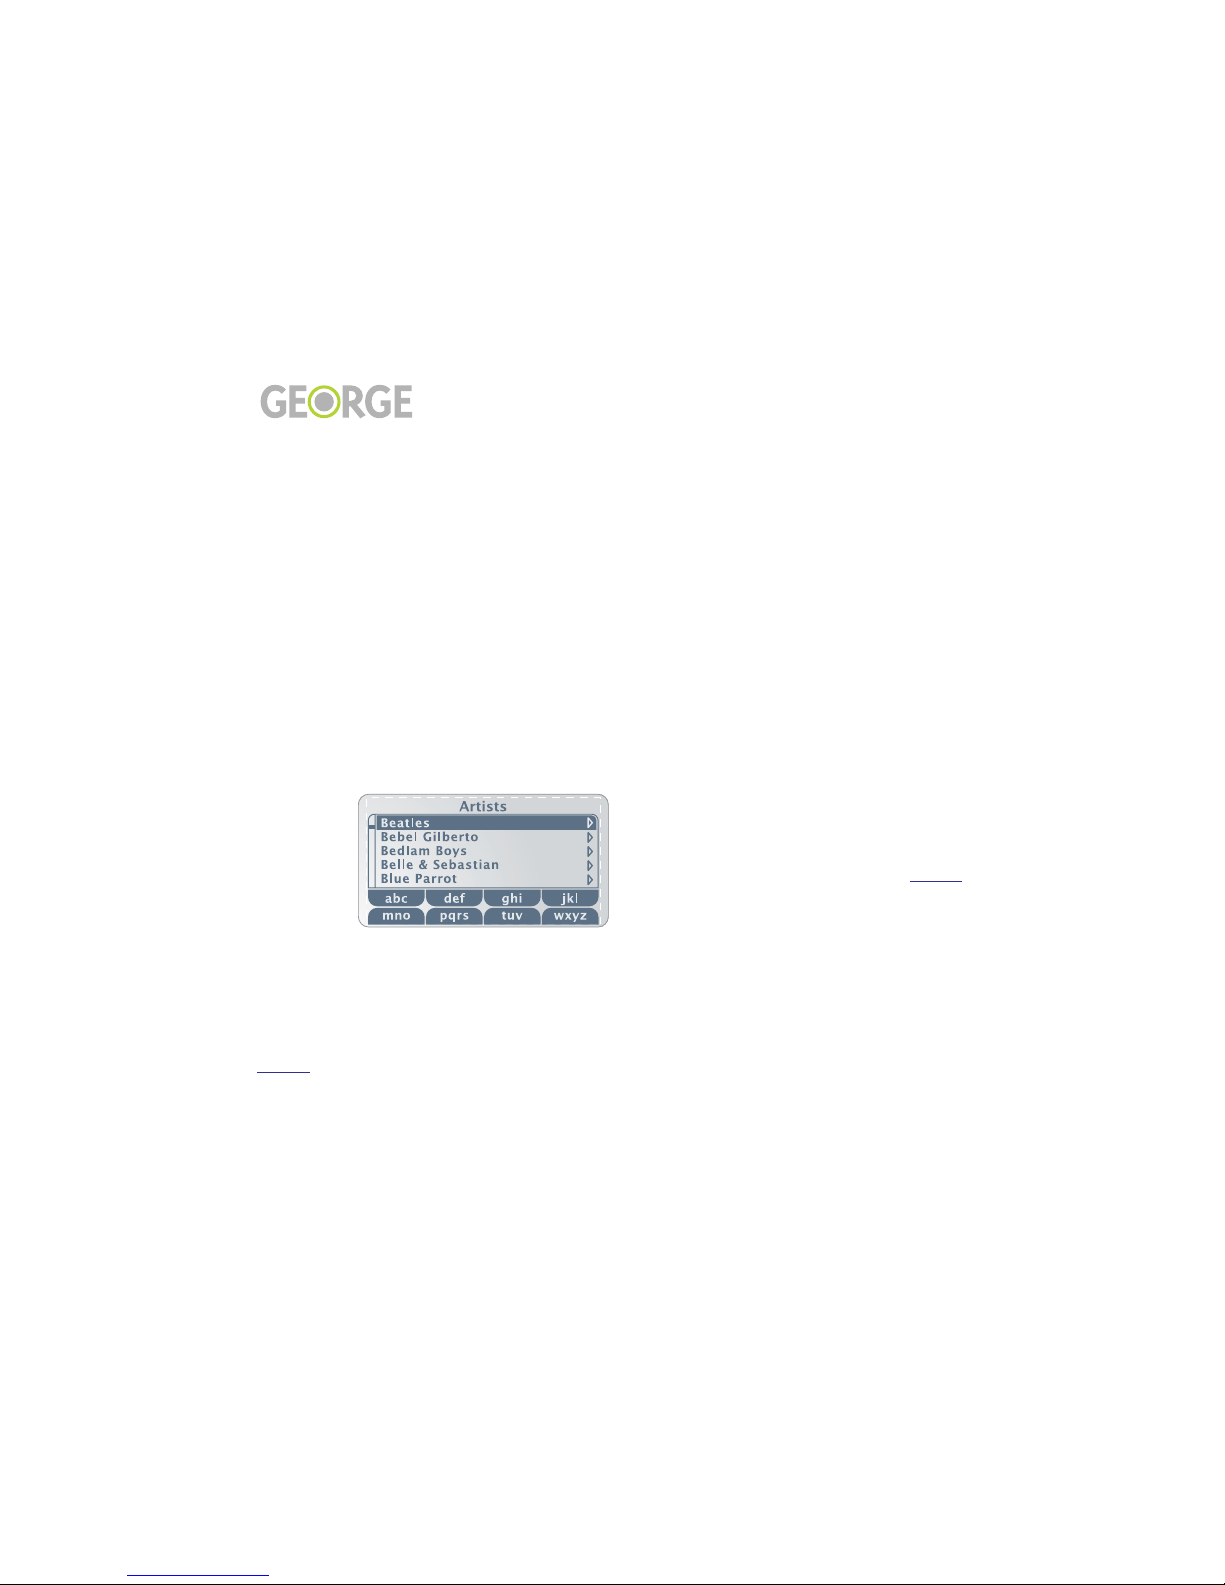
Search with Jump Buttons
Although some iPods have
search functions, George’s eight
jump buttons provide a much
faster way of searching for an art-
ist, album, song, or genre.
When George is displaying an
artist, album, song or genre list,
the jump buttons (labeled ➀– ➇)
let you move quickly through
alphabetical lists.
For example, press the jump but-
ton beneath the tab labeled “def”
to move to the beginning of the
“d” items in the displayed list. If
you press this button 3 times,
you’ll move to the beginning of
the “f” items.
Menu items that begin with non-
alphabetic characters (like num-
bers, punctuation, and symbols)
cannot be reached using the jump
buttons. Since these items are
generally found at the beginning
of the menu, however, you can
find them easily by pressing the
“abc” jump button once and then
scrolling backwards.
Timeout Options
George gives you a great deal of
flexibility over timeout options.
These are things such as:
• What screen should George
display after periods of inac-
tivity.
• How long should George
wait after displaying the Vol-
ume Screen before returning
to the Now Playing screen.
This is particularly important
since – as on the iPod – the
knob controls both volume
and navigation.
See page 29 for all there is to
know about George’s timeout
options.

Listening to Your iPod 18
Li
f
e with
Draft - December 18, 2006 Listening to Your iPod
Shuffle, Repeat, and Now Playing
Shuffle, Repeat, and Now Playing
iPod Music Menu
Press the ➀ jump button (beneath
the iPod tab on the Home Screen)
to bring up the iPod Music Menu.
iPod Settings Menu
Choose Settings from the iPod
Music Menu to bring up the
iPod Settings Menu. From here
you can turn Shuffle and/or
Repeat on or off. Turn the knob to
highlight the option you want,
then click the knob to move
through its settings.
•Shuffle works just as it does
on the iPod, allowing you to
play songs from your iPod in
any order. The Albums
option will play all the songs
from an album (in order)
before moving on to the next
randomly chosen album.
As with the iPod, you can use
the fast forward and rewind
buttons (>>| and |<<) to
move through songs while
you’re listening in shuffle
mode.
You can shuffle within a
playlist. If Shuffle is set to
songs, and you choose a
playlist, then the songs on
the playlist will play in ran-
dom order.
•Repeat plays all the songs on
your iPod, then starts over
again at the beginning. You
can also repeat only a single
song, over and over.
When you repeat multiple
songs, George will play all
the songs on the list you
chose and then start over
again, playing them in the
same order in which they
were played before.
The Now Playing Screen
If keeping track of the music
George plays is more important
than having a large time display,
you should go to the iPod Music
Menu and select Now Playing
You’ll still be able to see what the
time is, but song, artist, and
album information will now be
displayed in large type:
For long names, the words will
scroll across the screen.
In addition to the song, artist, and
album, a number of other pieces
of information are displayed on
the Now Playing Screen. These
include several things that are
also on the Home Screen. The
Now Playing screen shows you:
• battery charge information
(see page 9)
• number of items in group
(e.g., current album) and
number of current item.
• current time.
• elapsed time of song being
played.
• source status (see page 9)
• tabs for Playlists, Artists,
Albums, and Songs.
Playlists
George gathers all the playlists
from your iPod, so you’re free to
play these at any time.
You will also see a playlist with
the same name as your iPod. This
is a list of all the songs on your
iPod.
Listening to the Radio 19
Li
f
e with
Draft - December 18, 2006 Listening to the Radio
Listening to the Radio
• Turn On, Tune In,page 20
• Presets, page 21

Listening to the Radio 20
Li
f
e with
Draft - December 18, 2006 Listening to the Radio
Turn On, Tune In
Turn On, Tune In
Press the button beneath the
Radio tab to turn on George’s
radio.
The first time George is turned
on, there will be random stations
in the preset slots; follow the
instructions on page 21 to make
your own presets.
One Knob: Two Functions
George’s knob has two functions
when you’re listening to the
radio:
• Turn the knob while listening
to change the volume of the
radio.
• Click the button in the center
of the knob when you want
to change the radio fre-
quency. Now when you turn
the knob it changes the fre-
quency of the current radio
station (the frequency will
blink when you are in this
mode).
You can also use the Fast For-
ward (>>|) and Rewind (|<<)
buttons to move through stations.
Bandless™ Tuning
George’s radio uses Bandless
Tuning, which means that you
can move seamlessly between
AM and FM and organize your
presets however you like. As you
turn the knob while tuning,
you’ll notice that you can move
right from AM to FM (and vice
versa).
Radio Region
Radio Region on the System Set-
tings menu is a setting you
should never need. It’s set to
“U.S.” and that’s where you
should keep it.
Other manuals for GEORGE
1
Table of contents
Popular Docking Speakers manuals by other brands

Philips
Philips DS-7700 Specifications

Logitech
Logitech S715i Getting started

56 Denmark
56 Denmark 56Droplet AirDock user manual

Memorex
Memorex Mi1111-BLK - Home Audio System Specifications

Sirius XM RAdio
Sirius XM RAdio Portable speaker dock quick start guide

Bowers & Wilkins
Bowers & Wilkins Zeppelin Air user manual


