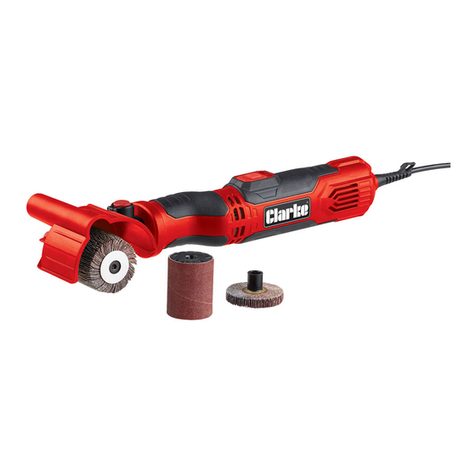
Clarke American Sanders Super 7R Edger User manual

Part No. LT068500 3/14
This book has important information for the use and safe operation of this machine. Failure to read
this book prior to operating or attempting any service or maintenance procedure to your Clarke
American Sanders machine could result in injury to you or to other personnel; damage to the
machine or to other property could occur as well. You must have training in the operation of this
machine before using it. If your operator(s) cannot read this manual, have it explained fully before
attempting to operate this machine.
All directions given in this book are as seen from the operator’s position at the rear of the ma-
chine.
Super 7R Edger
English (2 - 11)
Español (12 - 21)
Français (22 - 31)
ES
EN
FR
Operator’s Manual / Manual del operador / Manuel de l’utilisateur
Models: 07013A, 07125A, 07098A
READ THIS BOOK
LEA ESTE MANUAL
LISEZ CE MANUEL
SUPER7R.indd 1 3/16/14 6:36 PM

-2- Clarke® American Sanders Operator’s Manual (EN) - Super 7R
Contents of this Book
Operator’s Manual - Section I
Operator Safety Instructions ............................................................................... 3
....................................................................................... 6
Sanding Cuts and Sandpaper ............................................................................ 7
Machine Set-Up .................................................................................................. 8
Operating Instructions ........................................................................................ 9
Adjustment Procedures .................................................................................... 10
Routine Maintenance ....................................................................................... 10
Maintenance ..................................................................................................... 11
Parts Manual - Section II .........................................................................33-38
WARNING: The Products sold with this Manual contain or may contain chemicals that are known to
Law) to cause cancer, birth defects or other reproductive harm. In certain locations (including the State of Cali-
fornia) purchasers of these Products that place them in service at an employment job site or a publicly acces-
sible space are required by regulation to make certain notices, warnings or disclosures regarding the chemicals
that are or may be contained in the Products at or about such work sites. It is the purchaser’s responsibility to
know the content of, and to comply with, any laws and regulations relating to the use of these Products in such
that may be applicable to the use of the Products in such environments.
SUPER7R.indd 2 3/16/14 6:36 PM

Clarke® American Sanders
Operator’s Manual (EN) - Super 7R -3-
OPERATOR SAFETY INSTRUCTIONS
Refer
to instruction manual/booklet
Wear eye protection.
General Power Tool Safety Warnings
WARNING: Read all safety warnings and instructions. Failure to follow warnings and instructions may result in electric
Save all warnings and instructions for future use.
Work area safety
1. Keep work area clean and well lit.
2. Power tools
3. Keep children and bystanders away while operating a power tool.
Electrical safety
1. Power tool plugs must match the outlet. Never modify the plug in any way. Do not use any adapter plugs with earthed (grounded)
power tools.
2. Avoid body contact with earthed or grounded surfaces such as pipes, radiators, ranges, and refrigerators. There is an increased risk
3. Do not expose power tools to rain or wet conditions.
4. Do not abuse the cord. Never use the cord for carrying, pulling or unplugging the power tool. Keep cord away from heat, oil, sharp
edges or moving parts.
5. When operating a power tool outdoors, use an extension cord suitable for outdoor use. Use of cord suitable for outdoor use reduces the
6. If operating a power tool in a damp location is unavoidable, use a ground fault circuit protected supply. Use of a ground fault circuit
Personal safety
1. Stay alert, watch what you are doing and use common sense when operating a power tool. Do not use a power tool while you are
A moment of in attention while operating power tools may result in serious
Protective equipment such as dust mask, non-skid safety shoes, hard
3. Prevent unintentional starting. Ensure switch is in off-position before connecting to power source, picking up, or carrying the tool.
4. Removing any adjustment wrench or key before turning the power tool on. A wrench or key left attached to a rotating part of the power
5. Do not overreach. Keep proper footing and balance at all times.
6. Dress properly. Do not wear loose clothing or jewelry. Keep your hair, clothing and gloves away from moving parts. Loose clothes,
7. If devices are provided for the connection of dust extraction and collection facilities, ensure these are connected and properly used.
SUPER7R.indd 3 3/16/14 6:36 PM

-4- Clarke® American Sanders Operator’s Manual (EN) - Super 7R
Power tool use and care
1. Do not force the power tool. Use the correct power tool for your application.
2. Do not use the power tool if the switch does not turn it on and off. Any power tool that cannot be controlled with the switch is dangerous
3. Disconnect the plug from the power source and from the power tool before making any adjustments, changing accessories or
storing the power tool.
4. Store idle power tools out of the reach of children and do not allow persons unfamiliar with the power tool or these instructions to
operate the power tool.
5. Maintain power tools. Check for misalignment or binding of moving parts, breakage of parts and any other condition that may affect
the power tool’s operation. If damaged, have the power tool repaired before use. Many accidents are caused by poorly maintained
6. Use the power tool, accessories and tool bits ect. in accordance with these instructions, taking into account the working conditions
and the work to be performed.
Service
This will ensure that the safety of the
Safety Warnings For Sanding Operations
power tool.
2. Operations such as grinding, wire brushing, polishing or cutting-off, are not recommended to be performed with this power tool.
Just because the accessory
Accessories running faster
5. The outside diameter and thickness of your accessory must be within the capacity rating of your power tool.
Accessories with arbor
7. Do not use damaged accessory. Before each use inspect the accessory such as abrasive wheel for chips or cracks, backing pad
for cracks, tear or excess wear, wire brush for loose or cracked wires. If power tool or accessory is dropped, inspect for damage or
install an undamaged accessory. After inspecting or installing an accessory, position yourself or bystanders away from the plane
of the rotating accessory and run the power tool at maximum no-load speed for one minute. Damaged accessories will normally break
Depending on application, use face shield, safety goggles or safety glasses. As appropriate,
9. Keep bystanders a safe distance away from work area. .
10. Hold power tool by gripping insulated surfaces (handle) only, when performing an operation where the cutting accessory may
contact hidden wiring or its own cord. Cutting accessory contacting a “live” wire may make exposed metal parts of the power tool “live” and
11. Position the cord clear of the spinning accessory. If you loose control, the cord may be cut or snagged and your arm or hand may be
12. Never lay the power tool down until the accessory has come to a complete stop. The spinning accessory may grab the surface and pull
13. Do not run the power tool while carrying it at your side. Accidental contact with the spinning accessory could snag your clothing, pulling
SUPER7R.indd 4 3/16/14 6:36 PM

Clarke® American Sanders
Operator’s Manual (EN) - Super 7R -5-
14. Regularly clean the power tools air vents. The motor’s fan will draw the dust inside the housing and excessive accumulation may cause
16. Do not use excessively oversized sanding disc paper. Follow manufacturer’s recommendations when selecting sanding paper.
Kickback and Related Warnings
Kickback is a sudden reaction to a pinched or snagged rotating wheel, backing pad, brush or any other accessory. Pinching or snagging causes
rapid stalling of the rotating backing pad which in turn causes uncontrolled power tool to be forced in the opposite direction of the backing pad’s
rotation at the point of the binding.
For example, if an abrasive wheel is snagged or pinched by the work piece, the edge of the wheel that is entering into the pinch point can dig into
the surface of the material causing the wheel to climb out or kick out. The wheel may either jump toward or away from the operator, depending on
direction of the wheel’s movement at the point of pinching. Abrasive wheels may also break under these conditions.
Kickback is the result of power tool misuse and incorrect operating procedures or conditions and can be avoided by taking proper precautions as
given below.
1.
The operator can control torque reactions
2. Never place your hand near the rotating accessory.
3. Do not position your body in the area where power tool will move if kickback occurs. Kickback will propel the tool in the direction
4. Use special care when working corners, sharp edges etc. Avoid bouncing and snagging the accessory. Corners, sharp edges or
Additional Rules For Safe Operation
Always empty in a non-combustible metal container.
2. Set all exposed nails. Sweep loose abrasive away from work area. Do not strike metal pipes, ect., with sanding paper. Striking metal
3. Do not operate a partially assemble power tool.
4. Do not attempt to change the sanding paper while the power tool is running.
shown on the nameplate. Use only on an earthing (grounded) system. Do not service the power tool if it is energized or connected
to an electrical circuit.
SUPER7R.indd 5 3/16/14 6:36 PM

-6- Clarke® American Sanders Operator’s Manual (EN) - Super 7R
KNOW YOUR MACHINE
1 Control Switch
2 Dust Collection Bag
3 Operating Handles
4 Abrasive Wrench
5 Steel Reinforced Molded Rubber Sanding Pad
6 Wall Guard
7 Work Light
1
2
3
4
5
6
7
SPECIFICATIONS
Model 07013A 07098A
Electrical Rating
Storage Case Standard Standard Standard
Motor 1hp 1hp 1hp
7” x 7/8” Dia. Disc 7” x 7/8” Dia. Disc 7” x 7/8” Dia. Disc
Disc Rate 2800 RPM 2800 RPM 2800 RPM
Disc Driver System Gear Driven Gear Driven Gear Driven
Power Cable 14-3 Gray Rubber 14-3 Gray Rubber 14-3 Gray Rubber
Dust Collection Standard Standard Standard
Dust Control Rate 110 CFM 110 CFM 110 CFM
SUPER7R.indd 6 3/16/14 6:36 PM

Clarke® American Sanders
Operator’s Manual (EN) - Super 7R -7-
SANDING CUTS AND SANDPAPER
Initial Cut
cut, the abrasive has dulled and must be replaced.
Final Cuts
SUPER7R.indd 7 3/16/14 6:36 PM

-8- Clarke® American Sanders Operator’s Manual (EN) - Super 7R
Install the dust bag by
pressing the end onto the
exhaust tube until the ring
locks into the groove.
A
2” Hose from
vacuum system
(not included)
1.5” Hose from
vacuum system
(not included)
D
B
C
Exhaust Tube
(30563A) 2” Tube x 1.5” hose adaptor
Figure 1
Figure 2
MACHINE SET-UP
This sanding machine is designed to be operated with a remote vacuum
dust collection system or with the included dust bag.
Preparing Remote Vacuum Dust Collection Systems
To prepare the machine for remote vacuum dust collection systems that
B).
2. The exhaust tube can be rotated for optimum convenience.
To prepare the machine for remote vacuum dust collection systems that
Preparing to use the included dust bag
To prepare the machine for use with the included dust bag (Part No.
1. Install the dust bag by pressing the end onto the exhaust tube until the
the back of the bag opening with the palm of your hand.
2. The exhaust tube can be rotated for optimum convenience.
3. To remove the dust bag from the exhaust tube, pry up the end of the
bag opening to partially release the internal rib from the groove, then
pull.
by inverting the bag.
in this manual and on the dust bag.
SUPER7R.indd 8 3/16/14 6:36 PM

Clarke® American Sanders
Operator’s Manual (EN) - Super 7R -9-
Figure 3
Figure 4
Figure 5
MACHINE SET-UP
Preparing the Machine for Operation
statements and the Owner’s Manual before operating this machine. If you or
your operator cannot read English, have this manual explained fully before
attempting to operate this machine.
2. Remove screw and abrasive retainer. Center abrasive on pad and secure with
abrasive retainer and screw. (Figure 3)
3. Return machine to upright position and tilt machine back on casters until it
comes to rest on the exhaust bracket. Machine will be in a reclined position.
Do not allow machine to rest on pad especially after use, or compression set
during use. (Figure 4)
OPERATING INSTRUCTIONS
1. Move machine to the location of your work. Set any exposed nails with ham-
mer and punch to avoid encounter with abrasive.
WARNING: Bodily injury could occur if power is applied to
the machine with the power switch already in the “ON” position. Always
check to assure that the power switch is in the “OFF” position before
applying power to the power cable.
2. Make sure the control switch is in the “Off” position then connect the supply
cable to an appropriately grounded fused circuit. Connect the supply cable to
control switch to the “ON” position. (Figure 4.)
4. Gradually lower pad to surface intended for sanding. Make sure the ma-
chine is in motion while the pad is engaged with the surface to be sanded.
You may use broad circular motion as you sand along the length of the
surface or your may use a combination of forward and sideward motions.
recovery. It is advisable to not add effort to the pad as this may lead to “nos-
ing in” or “tipping” which produces grooves or lines on the surface.
switch to “Off” then disconnect the motor pigtail from the supply cable.
6. Empty dust bag whenever it becomes 1/3 full.
SUPER7R.indd 9 3/16/14 6:36 PM

-10- Clarke® American Sanders Operator’s Manual (EN) - Super 7R
Figure 6
OPERATING INSTRUCTIONS cont.
DANGER: Failure to disconnect the supply cable
from machine whenever servicing, replacing abrasive, or emptying
the dust bag could result in electrocution or severe injury. Never
leave machine unattended while the supply cable is connected.
DANGER: Never leave dust bag unattended with
sanding dust in it. Sanding dust can spontaneously ignite and cause
dust bag.
ADJUSTMENT PROCEDURES
Leveling
tool (pliers ect.). Using a similar tool, loosen locknut “B” with a counter
clockwise motion. (Figure 6).
Rotate both adjusting screws equal amounts clockwise. Tighten locknuts
and test on a piece of plywood. Repeat procedure until condition is cor-
-
ing screws counter clockwise, tighten locknuts and test. Repeat proce-
dure until condition is corrected. Use only 1/8 rotation for each attempt.
the adjusting screw of the side effected clockwise or rotate theadjust-
ing screw opposite counterclockwise, depending on whether the ridge
terminates beyond the tip of the pad or prior to it. If it is prior to the tip,
adjust the side effected, otherwise adjust the opposite side.
ROUTINE MAINTENANCE
CAUTION: Failure to perform maintenance at
recommended intervals may void warranty.
Carbon Brushes
frequently under heavy use.
Dust Bag
Periodically the dust bag should be turned inside out, shaken vigor-
ously and machine washed in cold water
to prevent pore blockage and loss of dust control.
Bearings
To insure reliable performance, have armature and pad driver
hours. If used heavily, have the bearings replaced seasonally.
Lubrication
The machine comes fully lubricated. The gears in the gear
box have enough lubrication for approximately six months of
6 months or more frequently under heavy use.
A
B
SUPER7R.indd 10 3/16/14 6:36 PM

Clarke® American Sanders Operator’s Manual (EN) - Super 7R -11-
Figure 9
Qty Part No.
1Qt. 16610A
1Gal. 16611A
Lubricants
Figure 7
Figure 8
MAINTENANCE
CAUTION: Maintenance and repairs performed by
warranty. Failure to perform maintenance at recommended intervals
may void warranty.
Carbon Brushes
brushes is gained through the front and back motor vent plugs and un-
(A) on spring clip assembly
the shunt wire. If any brush has worn to 3/8” in length or shorter,
replace the entire set.
CAUTION: Use only motor brush PN 40818A or PN
commutator, the spring rest in the recess of the brush, and the brush is
the commutator and any pinch site.
To Change The Lubricant In The Gearbox
1. Put the machine upside down on a bench.
2. Align one of the two holes in the rubber pad with one of the three
holes in the rotating wall guard.
3. Align both holes with one of the three screws in the gear housing
cover. Remove the screw from the gear housing cover. (Figure 9)
4. Align the holes with each of the other two screws, then remove
screws.
CAUTION: Make sure no dust enters the gear box.
Damage will occur to the gear box.
6. Remove the old lubricant from the gearbox.
7. Add six ounces of American SandersTechnology lubricant to the
gear box.
CAUTION: To prevent damage to the motor, do not add
more than six ounces of lubricant to the gearbox.
8. Using the three screws removed above, install the cover on the
gear housing.
may be necessary to add additional lubricant.
A
SUPER7R.indd 11 3/16/14 6:36 PM

-12- Clarke® American Sanders Operator’s Manual (EN) - Super 7R
LEA ESTE MANUAL
-
na.
Manual del operador - Sección I
Instrucciones de seguridad para el operador ................................................... 13
....................................................................... 16
Cortes de lija y papel de lija .............................................................................. 17
................................................................................. 18
................................................................................. 19
Procedimientos de ajuste de la lijadora ............................................................ 20
Mantenimiento de rutina ................................................................................... 20
Mantenimiento .................................................................................................. 21
Manual de piezas - - Sección II ............................................................... 33-38
ADVERTENCIA: Los Productos a la venta en este Manual contienen, o pueden contener, productos
químicos reconocidos por algunos gobiernos (como el Estado de California, según lo indica en su Proposición
-
ductivos. En algunas jurisdicciones (incluido el Estado de California), los compradores de estos Productos que
-
prador conocer y cumplir con todas las leyes y reglamentaciones relacionadas con el uso de estos Productos
en tales entornos. El Fabricante niega toda responsabilidad de informar a los compradores sobre requisitos
SUPER7R.indd 12 3/16/14 6:36 PM

Clarke® American Sanders Operator’s Manual (EN) - Super 7R -13-
Contenido de este libro
Consultar el libro de instrucciones
Usar protección ocular.
Advertencias generales de seguridad de la herramienta motorizada
ADVERTENCIA: Lea todas las instrucciones y las advertencias de seguridad. Si no respeta todas las
instrucciones y advertencias podría sufrir una descarga eléctrica, causar un incendio o sufrir lesiones graves.
Guarde todas las instrucciones y las advertencias para usos futuros.
Seguridad en el área de trabajo
1. El área de trabajo se debe mantener limpia y bien iluminada.
2. Las herramien-
3. Las
Seguridad eléctrica
No use enchufes adaptadores con las herramientas motorizadas con conexión a tierra. -
Existe un
3. No exponga las herramientas motorizadas a la lluvia o a condiciones húmedas.
4. No maltrate el cable. No utilice nunca el cable para transportar, arrastrar o desenchufar la herramienta motorizada. Mantenga el cable
5. Cuando opere una herramienta motorizada en exteriores, use una prolongación adecuada para uso en exteriores. Si se usa un cable adec-
6. Si no se puede evitar la operación de una herramienta motorizada en un lugar húmedo, utilice un suministro protegido con un circuito de
fuga a tierra.
Seguridad personal
herramienta motorizada cuando esté cansado o bajo el efecto de drogas, alcohol o medicamentos. Un momento de distracción al operar her-
a la alimentación, levantarla o transportarla.
-
6. Utilice vestimenta adecuada. No utilice ropa suelta ni alhajas. Mantenga el cabello, la ropa y los guantes alejados de las piezas móviles. La
-
adamente.
SUPER7R.indd 13 3/16/14 6:36 PM

-14- Clarke® American Sanders Operator’s Manual (EN) - Super 7R
Uso y cuidado de la herramienta motorizada
2. No use la herramienta motorizada si no se enciende y apaga con el interruptor.
guardar la herramienta motorizada.
familiarizadas con dichas herramientas o con estas instrucciones.
hacerla reparar antes de usarla.
6. Use la herramienta motorizada, los accesorios y las brocas, etc. de acuerdo con estas instrucciones, teniendo en cuenta las condiciones de
trabajo y la tarea a realizar.
Servicio
Advertencias de seguridad para las operaciones de lijado
1. Esta herramienta motorizada está diseñada para funcionar como lijadora. Lea todas las advertencias de seguridad, las instrucciones y las
2. Se recomienda no utilizar esta herramienta motorizada para operaciones de esmerilado, cepillado con cepillo de alambre, pulido o corte. El
Sólo porque un ac-
Los
Si el tamaño
herramienta motorizada.
7. No use accesorios dañados. Antes de usar los accesorios debe revisarlos siempre, por ejemplo, la rueda abrasiva para detectar si está des-
cascarada o agrietada, el disco de soporte para detectar si está agrietado, deteriorado o excesivamente desgastado, el cepillo de alambre
para detectar alambres sueltos o agrietados. Si se cae la herramienta motorizada o el accesorio, revíselos para detectar si están dañados o
-
máxima sin carga durante un minuto.
operaciones.
de corte puede tocar cables ocultos o su propio cable. Si el accesorio de corte toca un cable “que tiene corriente eléctrica”, es posible que las
13. No haga funcionar la herramienta motorizada mientras la transporta a su lado. -
SUPER7R.indd 14 3/16/14 6:36 PM

Clarke® American Sanders Operator’s Manual (EN) - Super 7R -15-
-
16. No use papel para disco de lijado cuyo tamaño sea excesivamente mayor. Respete las recomendaciones del fabricante cuando elija el papel
de lijado.
El retroceso brusco y las advertencias relacionadas
-
movimiento de la rueda en el punto en que se trabe. Las ruedas abrasivas pueden también romperse en estas condiciones.
-
1.
brusco. Use siempre las manijas auxiliares, si está incluida, para controlar al máximo el retroceso brusco o las reacciones de par durante la
puesta en marcha.
El retroceso brusco impul-
Las esquinas, los
Normas adicionales para una operación segura
1. Vacíe con frecuencia la bolsa para polvo o el depósito de recolección de polvo. No deje los residuos de la bolsa para polvo ni los del
depósito de recolección de polvo sin atención. Vacíelos siempre en un recipiente metálico no combustible.
con el papel de lijado.
fabricante. Mantenga todas las sujeciones apretadas.
4. No intente cambiar el papel de lijado cuando la herramienta motorizada esté en marcha.
de la herramienta motorizada si tiene energía eléctrica o si está conectada a un circuito eléctrico. El uso inadecuado puede causar un incendio
SUPER7R.indd 15 3/16/14 6:36 PM

-16- Clarke® American Sanders Operator’s Manual (EN) - Super 7R
1 Interruptor de control
2 Bolsa colectora de polvo
3 Manijas de funcionamiento
4 Llave del abrasivo
5 Almohadilla de lijado de goma moldeada y reforzada con acero
6 Protección de pared
7 Luz de funcionamiento
ESPECIFICACIONES TÉCNICAS
Modelo 07013A 07098A
Requerimientos eléctricos
Caja de almacenamiento
Motor 1hp 1hp 1hp
2800 RPM 2800 RPM 2800 RPM
Sistema del impulsor de disco Impulsado por engranaje Impulsado por engranaje Impulsado por engranaje
Cable de alimentación Goma gris 14-3 Goma gris 14-3 Goma gris 14-3
Colector de polvo
Tasa de control del polvo 110 CFM 110 CFM 110 CFM
1
2
3
4
5
6
7
SUPER7R.indd 16 3/16/14 6:36 PM

Clarke® American Sanders Operator’s Manual (EN) - Super 7R -17-
Cortes de lija y papel de lija
Corte inicial
abrasivo grueso.
80 granos) .
sobre el piso de madera dando lugar a problema de manchas.
SUPER7R.indd 17 3/16/14 6:36 PM

-18- Clarke® American Sanders Operator’s Manual (EN) - Super 7R
A
MANGUERA DE 2”
DEL SISTEMA DE
ASPIRACIÓN (NO
INCLUIDO)
MANGUERA DE
1.50” DEL SISTEMA
DE ASPIRACIÓN
(NO INCLUIDO)
D
B
C
TUBO DE ESCAPE
Figura 1
Figura 2
INSTALE LA BOLSA DE
RECOLECCIÓN DE POLVO
PRESIONANDO EL EXTREMO DEL
TUBO DE ESCAPE HASTA QUE EL
ANILLO ENCAJE DENTRO DE LA
RANURA.
polvo remoto mediante vacío o con la bolsa de polvo incluida.
Preparación de los sistemas colectores de polvo remotos medi-
ante vacío
-
tos mediante vacío que tengan un extremo de manguera de 2”, siga
2. El tubo de escape puede girarse para mayor comodidad.
-
tos mediante vacío que tengan un extremo de manguera de 1 ½”, siga
1. Instale el adaptador del extremo de manguera de 2” x 1½” (No de
Preparación para usar la bolsa de polvo incluida
incluida (No
1. Instale la bolsa de recolección de polvo presionando el extremo del
2). El mejor modo de hacer esto es presionando la parte posterior
de la abertura de la bolsa con la palma de su mano.
2. El tubo de escape puede girarse para mayor comodidad.
3. Para retirar la bolsa de polvo del tubo de escape, haga palanca
hacia arriba en el extremo de la abertura de la bolsa para liberar
parcialmente el saliente interno de la ranura, y después tire.
4. Para vaciar la bolsa de polvo, abra la aleta de vaciado y saque sus
contenidos dando la vuelta a la bolsa.
Siga todas las advertencias incluidas en el manual y en la bolsa de
polvo.
SUPER7R.indd 18 3/16/14 6:36 PM

Clarke® American Sanders Operator’s Manual (EN) - Super 7R -19-
Figura 3
Figura 4
Figura 5
opérateurs de cet appareil ont bien lu le Manuel de l’utilisateur. S’ils ne sont
pas en mesure de lire ce Manuel, ils devront se le faire expliquer entièrement
avant d’utiliser la ponceuse.
2. Saque el tornillo y el retenedor del abrasivo. Centre el abrasivo sobre la
almohadilla y asegúrelo con el retenedor y el tornillo del abrasivo. (Figura 3)
-
el uso. (Figura 4)
martillo y embutidor para evitar que se tope con el abrasivo. Conecte el cable
de alimentación a un circuito adecuadamente provisto de toma de tierra y
fusibles.
ADVERTENCIA: Pueden producirse lesiones corporales
control se encuentre en posición “OFF” (Apagado) antes de enchufar el
cable de alimentación.
2. Asegúrese de que el interruptor de control esté ajustado en “OFF” (Apagado).
Para la posición “OFF” (Apagado), el interruptor se mueve hacia el lado del
mueva el interruptor de control a la posición “ON” (Encendido). (Figura 4)
-
podría conducir a la “elevación de la parte delantera” o a la “inclinación” y
-
ruptor de control en la posición “OFF” (Apagado), luego desconecte el cable
eléctrico del motor del cable de alimentación.
SUPER7R.indd 19 3/16/14 6:36 PM

-20- Clarke® American Sanders Operator’s Manual (EN) - Super 7R
Figura 6
PELIGRO: La falta de desconexión del cable de
se cambia el abrasivo o se vacía la bolsa de polvo, podría producir una
mientras se encuentra conectado el cable de alimentación.
PELIGRO: Nunca deje la bolsa sin vigilancia cuando haya
polvo de lijado en la misma. El polvo de lijado puede auto-encenderse,
de metal que no contenga ningún material combustible. No vacíe el
contenido sobre fuego. No llene la bolsa de polvo en exceso.
Procedimientos de ajuste
Nivelación
-
contraria a las agujas del reloj. (Figura 6).
Condición - La almohadilla crea salientes en los dos bordes o se experimenta
de madera contrachapada. Repita el procedimiento hasta que se corrija la
condición. Recomendamos que no se exceda una rotación de 1/8” en cada
intento.
Rote los dos tornillos de ajuste en sentido contrario a las agujas del reloj,
ajuste las tuercas de seguridad y pruebe. Repita el procedimiento hasta que
se corrija la condición. Use únicamente una rotación de 1/8 en cada intento.
Rote el tornillo de ajuste del lado afectado en sentido de las agujas del reloj,
o rote el tornillo de ajuste opuesto en dirección contraria a las agujas del
-
hadilla o antes de la misma. Si es antes de la punta, ajuste el lado afectado,
y en caso contrario ajuste el lado opuesto.
Mantenimiento de rutina
PRECAUCIÓN:
intervalos recomendados la garantía puede quedar invalidada.
Escobillas de carbón
mayor frecuencia si el uso es intensivo.
Bolsa de polvo
Periódicamente se debe dar vuelta la bolsa de polvo, sacudiéndola
bloqueen los poros y que pierda su capacidad de recolectar polvo.
Cojinetes
inspeccionar los cojinetes del rotor y del impulsor de la
cambiar estacionalmente.
Lubricación
lubricación para aproximadamente seis meses de
funcionamiento normal. Cambie el lubricante por lo
menos cada 6 meses y con mayor frecuencia si el uso es
intensivo.
A
B
SUPER7R.indd 20 3/16/14 6:36 PM
This manual suits for next models
3
Table of contents
Languages:
Other Clarke American Sanders Sander manuals

Clarke American Sanders
Clarke American Sanders FloorCrafter 07104A User manual

Clarke American Sanders
Clarke American Sanders Sander 1600DC User manual
Clarke American Sanders
Clarke American Sanders 07057A User manual
Clarke American Sanders
Clarke American Sanders EZ-8 User manual

Clarke American Sanders
Clarke American Sanders RS-16 User manual
Popular Sander manuals by other brands
Festool
Festool ETS EC 150/3 EQ Original instructions

Rupes
Rupes RA150A Translation of original operating instructions
Bosch
Bosch GOF Professional Original instructions

Makita
Makita 9404 Parts Breakdown
Westfalia
Westfalia 85 10 23 Original instruction manual

Porter-Cable
Porter-Cable 444 instruction manual
