Classic ECO 1 Administrator Guide
File location : Users on Classic2K\Works Print Folder\Installation & Operators Manual 2005 Part number : UBK/ALL
Installation
Installation
&
&
Operators Manual
Operators Manual
Eco 1, 2, 3
Eco 1, 2, 3
H 500, 700, 750
H 500, 700, 750
Duo 2, 3 , 500, 750
Duo 2, 3 , 500, 750

Installation and Operation instructions
Installation and Operation instructions
For ‘Classic Glass & Dishwashing Systems’ under counter range of glass
and dishwashers.
Section Title Page(s)
1 Safety instructions
1
2 The appliance
2
3 Installation
2 - 5
4 Commissioning
5 - 8
5 Operation
8 - 11
6 Cleaning
12,13
7 Trouble shooting
13 - 15

1
1.
.0
0S
Sa
af
fe
et
ty
yi
in
ns
st
tr
ru
uc
ct
ti
io
on
ns
s
1.1 Warning :
CAREFULLY READ THESE INSTRUCTIONS, BEFORE
INSTALLING AND OPERATING THIS APPLIANCE.
INCORRECT INSTALLATION, ADAPTATIONS OR
ALTERATIONS COULD RESULT IN INJURY OR DAMAGE TO
PROPERTY.
MALICIOUS DAMAGE, DAMAGE DUE TO NEGLIGENCE, OR
FAILURE TO COMPLY WITH THESE INSTRUCTIONS AND
LOCAL LEGISALTION, OR UNAUTHORISED TAMPERING
WILL INVALIDATE ANY WARRANTY AND RELIEVE THE
MANUFACTURER OF ALL LIABILITY
1.2 Installation :
Installation should only be carried out by a ‘Classic’ approved technician, and
in accordance with current regulations and within our instructions.
1.3 Modification :
‘Classic Glass & Dishwashing Systems Limited’ reserves the right to
modify either the appliance or the contents of these instructions without notice.
1.4 Operation :
The appliance should only be used by a trained operator as instructed in
section 5 of this manual.
1.5 Failure / malfunction :
In the event of a failure / malfunction, the mains electrical
and water supplies MUST be isolated at the wall and not
just at the machine.
1.6 Repairs and spare parts :
The appliance must only be repaired by a ‘Classic’ approved technician,
using genuine ‘Classic’ spare parts.
Page 1

2
2.
.0
0T
Th
he
ea
ap
pp
pl
li
ia
an
nc
ce
e
2.1 Unpacking :
Use suitable means and protective equipment to avoid injury whilst
unpacking and handling the appliance. Remove all outer packaging and
the protective film from the outer panels of the appliance prior to
installation.
Ensure all packing materials are disposed of in accordance with local
regulations.
2.2 Items included :
The following items are included within the appliance
• 2 x Baskets
• 1 x Cutlery basket
(Dishwashers only)
• 1 x Water inlet hose
• 1 x Drain hose
(Gravity drain machines only)
• 2 x Bottle weight kits
(for Rinse Aid and Detergent tubes)
• 1 x Installation and Operation Instructions
(Must be left with the
customer)
• 1 x Warranty card
(Must be left with the customer)
3
3.
.0
0I
In
ns
st
ta
al
ll
la
at
ti
io
on
n
3.1 The site :
Ensure that there is sufficient space for the installation, servicing and easy
access to all mains isolator switches / valves (i.e. electricity and water).
Ensure that the surface the appliance is going to be installed onto is
adequately stable and capable of supporting the appliance during normal
operation, listed below are the approximate machine weights when fully
laden during normal operation.
Once installed ensure that the appliance is stable and secure, with its
weight being distributed equally and does not tilt more than 3°in any
direction.
Machine sizes Weight
350mm² basket 75 Kgs
400mm² basket 90 Kgs
500mm² basket 135 Kgs
Page 2
3.2 Electrical connection :
All electrical connections MUST be carried out by an authorised
technician and in accordance with local regulations.
As a minimum ‘Classic’ recommends that the following standards are
maintained :
• All appliances are connected via a residual current device
(R.C.D.) or earth leakage protection device.
• EN 60204
Supply isolator switch must have all pole separation of more
than 3mm.
• EN 60335
The appliance must be connected to a equi-potential
conductor, the connection stud is located at the rear of the
appliance (a suitable ring terminal shall be required), this is in
addition to the earthed electrical supply.
Prior to connecting the appliance, ensure that the voltage and the supply
fuse complies with the rating plate on the appliance.
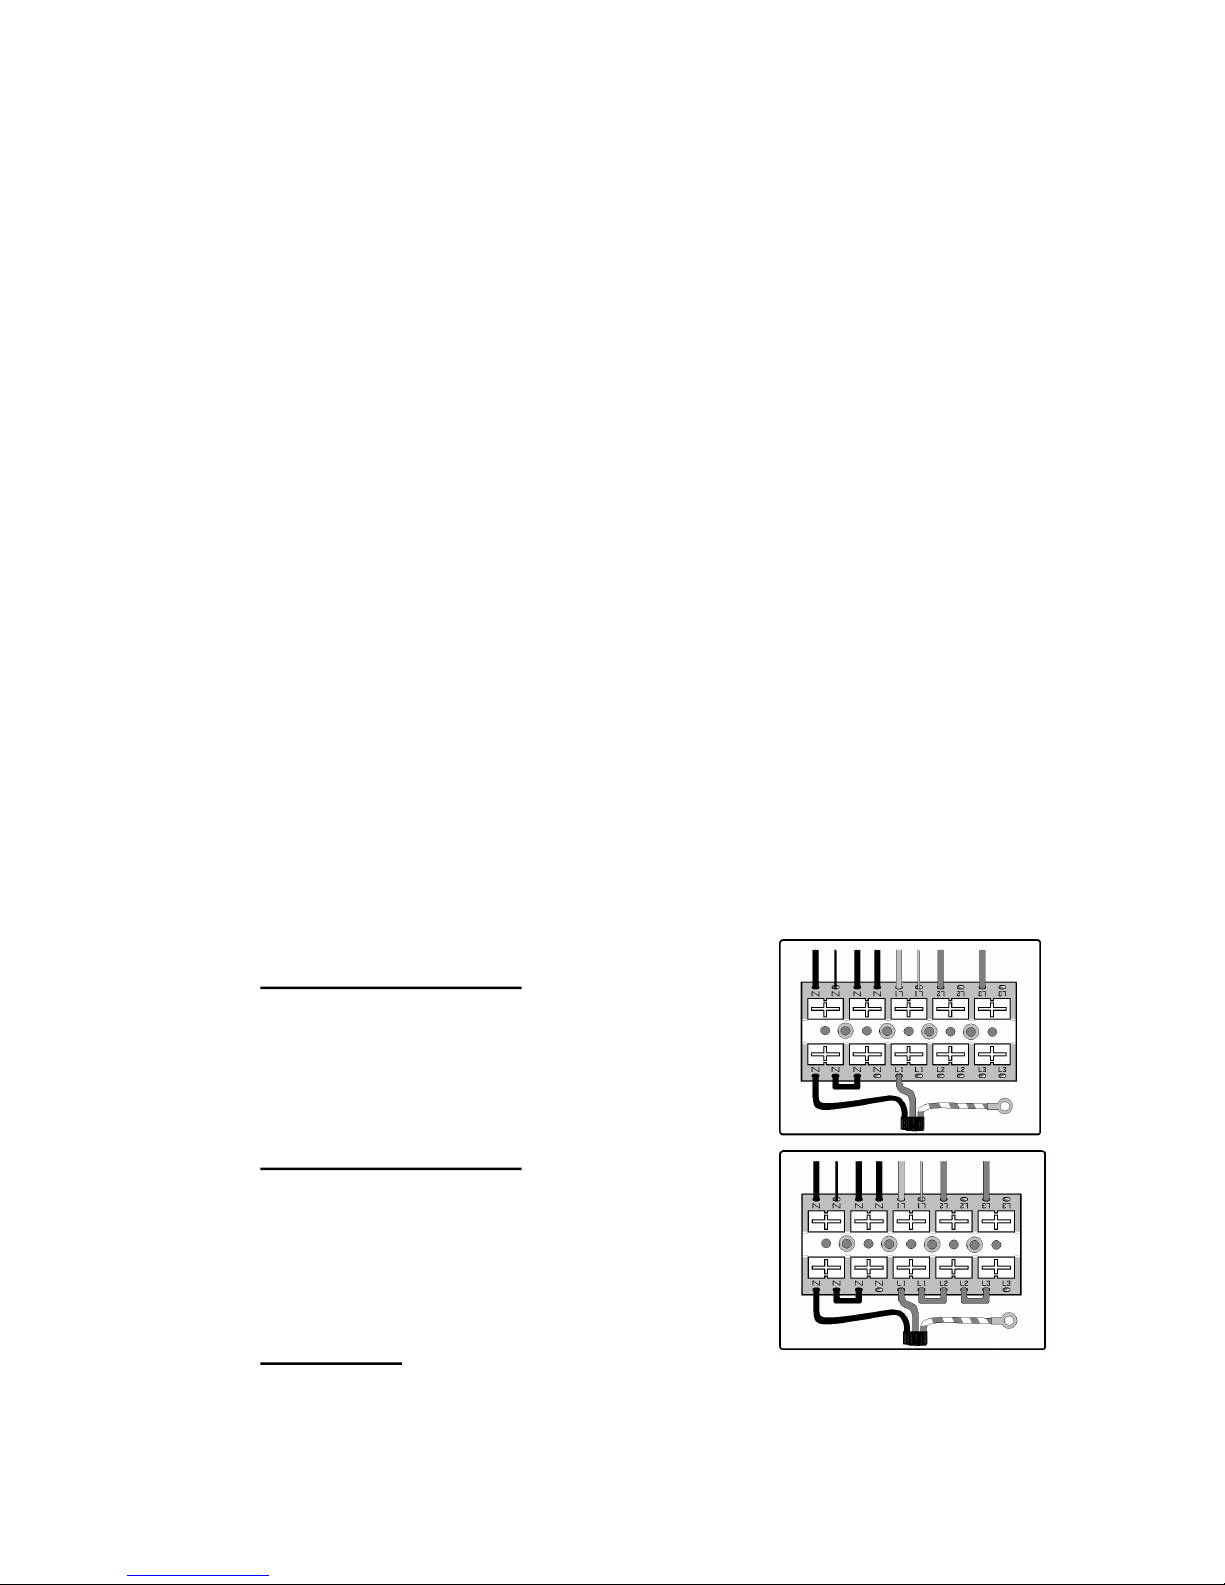
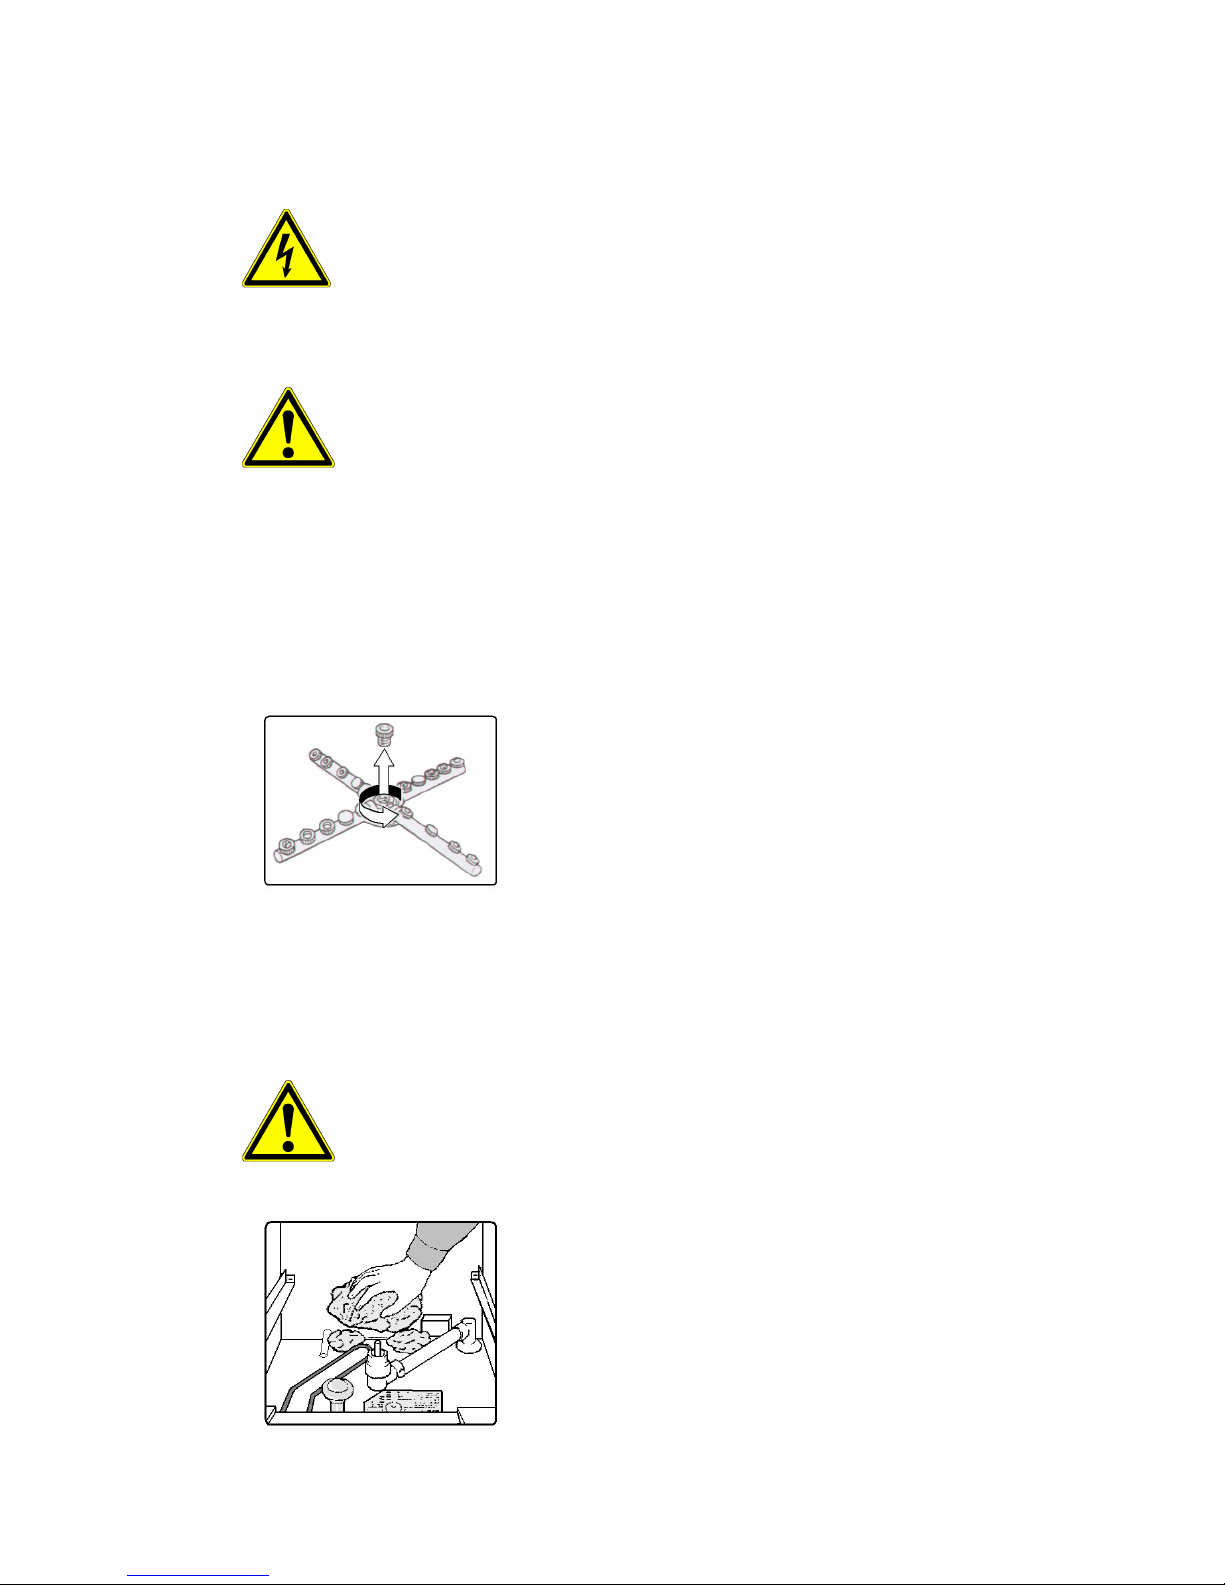
3.2.1 Electrical rating :
Within the ‘Classic’ range several of the 500mm² basket appliances can
be either down rated or up rated electrically, such a procedure MUST be
carried out by a ‘Classic’ approved technician.
The down / up rating of the machine is carried out by configuring the
terminal block within the appliance to the following
13 Amp – Single phase
•
Links removed between L1, L2 and L3
•
Ensure link remains between neutrals (N)
30 Amp – Single phase
•
Ensure all link remains between lives
terminals (L1, L2 and L3)
•
Ensure link remains between neutrals (N)
Three phase
To ensure safety standards are maintained, converting a single phase appliance to
three phase requires conversion kit ‘KIT-05-3PH’, which must be ordered from
‘Classic’ and installed as instructed in the above kit.
Page 3
3.3 Water connection :
The appliance comes with a water supply hose requiring a ¾” BSP male
threaded connection at the mains water supply, upon installation and
commissioning all water joints must be checked for leaks).
3.3.1 Water supply restrictions :
Water supply constraints must be adhered to :
• Incoming water temperature
•
4°c minimum
•
55°c maximum
• Supply water dynamic pressure
(air break machines, low water pressure is not an
issue).
•
0 to 2 bar Rinse booster pump required
•
2 to 4 bar No modifications required
•
4 to 6 bar Flow restrictor required
•
6 bar plus Pressure reducing valve required
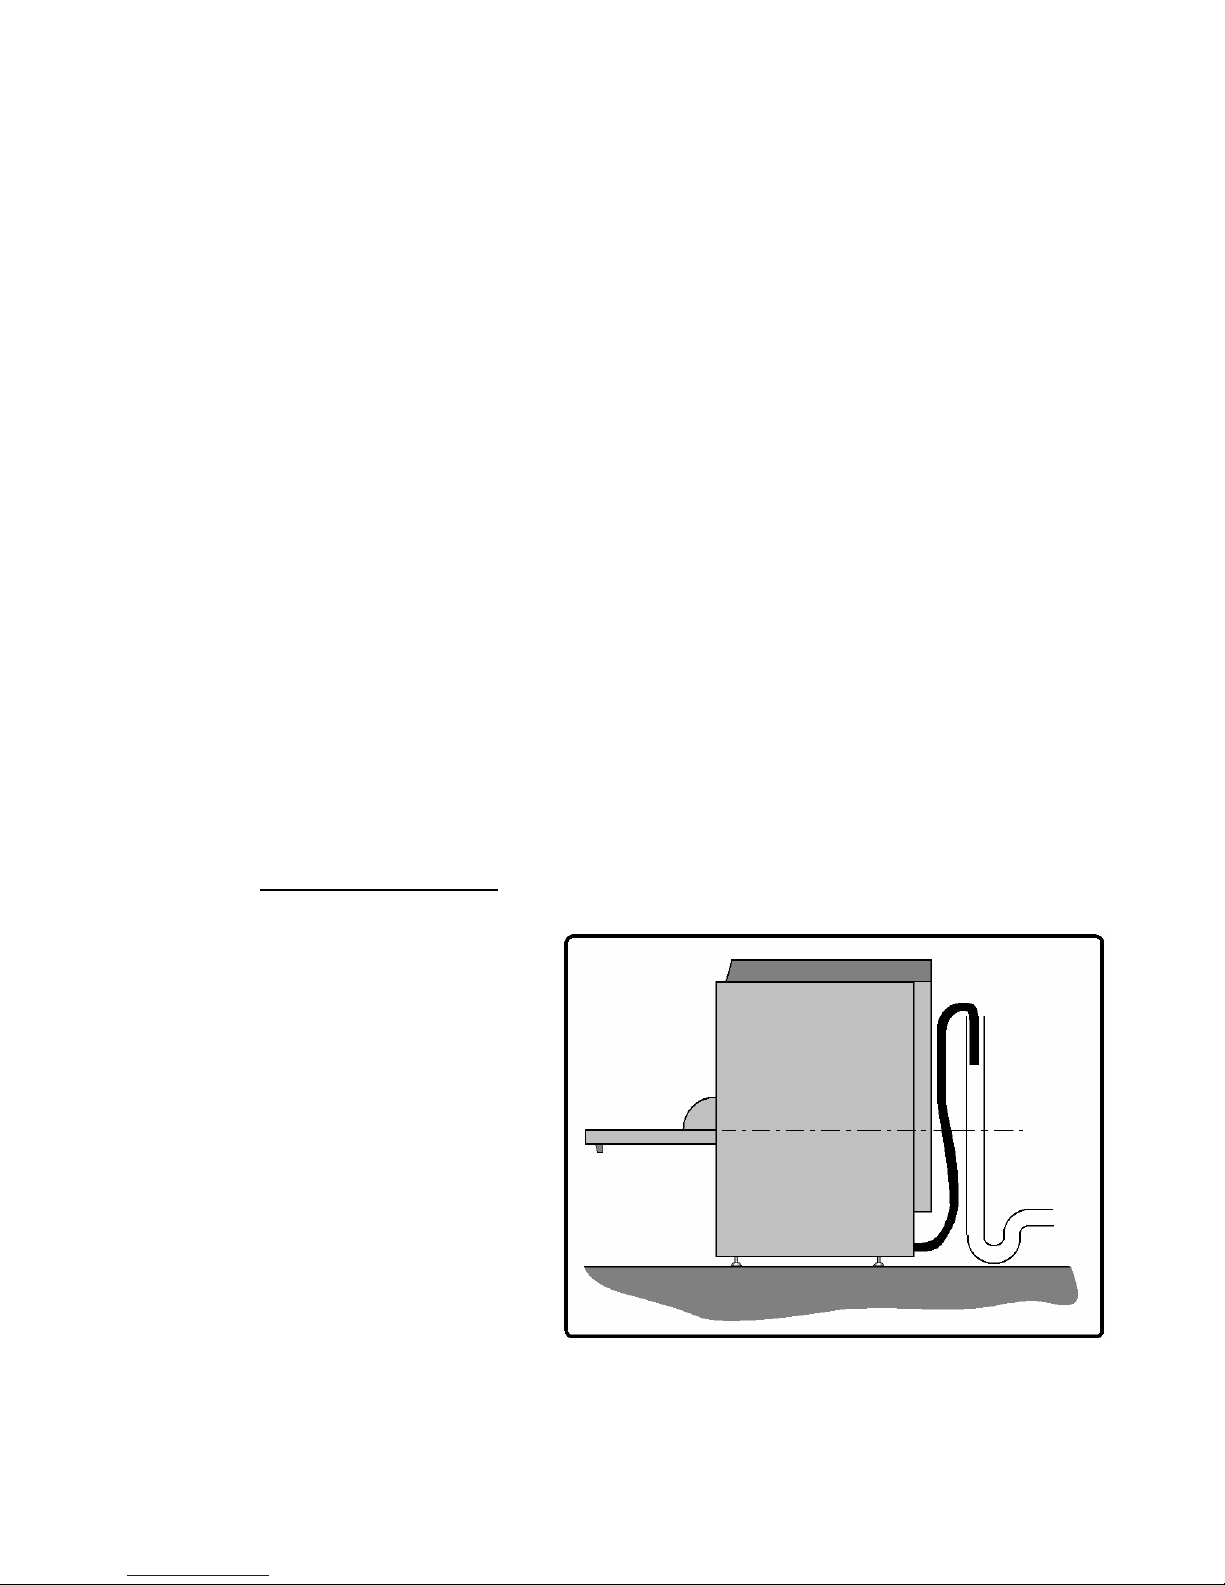
3.3.2 Drainage systems
Appliances are available as either gravity drain or pumped drain, upon
installation the waste hose and stand pipe must be configured as shown within
this manual, also all installations must be with a running / ‘P’ trap to ensure
hygiene :
Drain pump machine
• Ø40mm (Ø1 ½”)
standpipe required
• Standpipe must be
100 to 150mm (4” to
6”) below the top of
the appliance.
• The end of the
waste outlet hose
in the standpipe
must not be lower
than the bottom of
the door.
• The waste outlet
hose must be a
loose fit within the
standpipe.
Page 4

Gravity drain machine
•
Flexible waste hose must
be securely attached to
the waste outlet elbow on
the rear of the machine.
•
The waste hose must
flow down from the waste
outlet elbow to the drain.
•
Ø35mm (Ø1 ¼”) stand-
pipe required, must be
lower than the baseline
of the appliance
•
H800 standpipe must be
a minimum of 75mm (3”)
below the baseline of the
appliance.
•
Hose to be a close / tight
fit into the drain pipe to
reduce odours from the
drain system
4
4.
.0
0C
Co
om
mm
mi
is
ss
si
io
on
ni
in
ng
g
4.1 Rinse aid & detergent :
Ensure chemical tubes are attached correctly to the individual chemical
pumps (pumps located behind front lower panel of the appliance).
At the bottle end of the chemical tubes, slide the bottle weight onto the
tube, now place the tube and bottle weight into the correct chemical
bottle.
Ensure the correct chemical tubes now go to the corresponding chemical
bottles.
WARNING : Only rinse aids and detergents developed for commercial
glass and dishwashers are to be used, rinse aids must be suitable for
water temperatures down to 40°c.
Page 5

4.1.1 Rinse aid prime :
• Switch machine ON and allow to fill
• Remove the lower front panel (do not
to touch any wire connections).
• Depress and hold button located on
the chemical pump bracket.
• To fully prime, this will take approx 1 ½
minutes.
• Replace the front lower panel.
4.1.2 Detergent / Soap prime :
The detergent / soap pump system on these appliances is self
priming.
4.1.3 Chemical dosage :
Chemical doses are pre-set to the following nominal values,
however these values should be calibrated to suit individual sites
requirements
Pre-set values (in seconds)
Rinse aid Detergent
Machine sizes Cycle Initial Cycle
Eco 1 5 50 10
Eco 2 & Duo 2 5 70 10
Eco 3 & Duo 3 5 140 10
H500 & Duo 500 5 50 10
H700, H750 & Duo 750 5 90 10
Adjustment of chemical dose is via the timer located under the top
panel of the appliance, the timer allows the following values to be
calibrated to suit the sites requirements
Page 6

The chemical timer allows the following dosing to be adjusted
P1 = Detergent /
Soap pump
• Cycle rinse aid
• Cycle detergent / soap
• Initial detergent / soap
P2 = Rinse aid pump
4.2 Rinse & wash tank temperatures :
The water temperatures on ’Classic’ range of machines is none adjustable.
Temperatures
Machine type Rinse water Wash water
Glasswashers 60°c 55°c
Dishwashers 80°c
4.3 Interlock options :
Eco1,Eco2, Eco3, H500,H700 & H750 have the following four interlock options,
all other under counter appliances do not have such options, to select such an
option remove the front lower panel, towards the centre of the machine you will
find four cables tied together, each wire with a different coloured cover (black,
green, red & white), by connecting different combinations together you will
obtain the appropriate interlock option
• Interlock removed
Will start at any temperature
All four wires disconnected from each other
• Wash tank only
Will only start if the wash tank is up to temperature
Connect the Black crimp to the White crimp
• Quick start (default setting)
Will start if the rinse tank is above 55°c
Connect the Green crimp to the White crimp
• Interlock
All tanks must be up to temperature, before a cycle will start
Connect the Red crimp to the White crimp
Page 7

4.4 Demonstration :
‘Classic’ recommends that prior to leaving the site / installation, the installer
demonstrates the following to the end user, as this will ensure the appliance is
correctly used
• What to do in case of an emergency,
electricity and water (see section 1).
• Switching the appliance on.
• Operating the appliance.
• Draining down.
• Switch the appliance off.
i.e. how to isolate the mains
• Clean the appliance, including removal and replacement of all filters.
• Replenishing and priming of rinse aid and detergent.
Upon completion of the installation and commissioning of the appliance,
this manual MUST be left with the end user.
5
5.
.0
0O
Op
pe
er
ra
at
ti
io
on
n
5.1 Machine description :
The design of commercial glass and dishwashing machines differ from
their domestic versions as they are designed to run nearly continually for
many hours.
Commercial appliances, wash results can be effected by external
considerations such as incoming water temperature, pressure, hardness
and choice of chemicals, ‘Classic’ recommends that your appliance is
either connected to a water softener or a softened water supply, for
further details on water softeners please contact the supplier of your
appliance.
Page 8

5.2 Controls :
Prior to switching the machine ON, ensure that you are familiar with the
controls on the front fascia of the appliance and the location of the isolator
for mains electricity and water supply.
Eco1,Eco2, Eco3, H500,H700 & H750
1 4 7
5 & 62 & 3
Duo2, Duo3, Duo500 & Duo750
2 3 6
4 & 5
1. Supply lamp
2. ON / OFF lamp
3. ON / OFF Switch
4. Ready / Hot lamp
5. Cycle lamp
6. Cycle switch
7. Drain switch (optional)
Page 9

5.3 Switch the machine on :
Ensure that both the water and electrical supply are
connected and switched on, then depress the ‘ON/OFF’
switch located on the fascia of the machine.
The machine will now automatically fill and heat, during this process the door
should remain closed, allowing the process to be completed quickly.
5.4 Machine ready to operate :
Depending how your appliance has been commissioned, it may be possible to
start a cycle prior to the ‘Machine ready’ / ‘Water hot’ lamp being illuminated,
‘Classic’ would recommend that you wait for the lamp to be illuminated before
requesting a cycle to commence.
Note !
On the ‘DUO’ range of appliances, the ‘Machine Ready’ lamp indicates when the
machine initial reaches its desired temperatures, thereafter the lamp changes
function to a ‘Cycle in progress’ lamp and will illuminate when a cycle is
requested and during the cycle itself.
5.5 Starting a cycle :
To start a cycle, open the door, load the first basket, ensuring that
bottom and top wash arms will rotate freely, on Eco1, Eco2 and Duo2
appliances there are no top rotating wash arms.
Close the door, then depress the ‘Cycle’ switch, your appliance will now auto-
matically progress though the cycle, during which time the ‘Cycle in progress’
lamp will be illuminated.
At the end of the cycle open the door and remove the basket, then
reload the machine and repeat as required
5.6 Draining :
During normal operation your appliance will automatically drain away any
excess water.
’Classic’ recommends if your appliance is not being used for a prolonged period
of time the machine must be completely drained down
Page 10

5.6 Draining (cont.) :
Gravity drain (typically Eco1 and Eco2).
• Switch appliance OFF at fascia.
• Remove drain plug from wash tank.
• You appliance should now drain under gravity.
• Once completed replace the drain plug.
• Now isolate mains water and electricity at the wall.
Drain pump appliances (optional on Eco1,Eco2)
• Switch appliance OFF at fascia.
• Remove drain plug from wash tank on Eco1, Eco2, H500, Duo2 &
Duo500 models.
• Close the door.
• ‘Duo’ range automatically start draining 15 seconds after the
appliance has been switched off.
• ‘Eco’ and ‘H’ range, depress the drain switch, this will commence the
drain cycle.
• Once completed replace the drain plug .
• Now isolate mains water and electricity at the wall.
Note ! Once empty ‘Classic’ recommends that the mains water and
electricity supplies are isolated at the wall and the machine be
cleaned as instructed in section 6 of this manual
For hygiene reasons it is recommended that once the appliance has
been drained that the door is left open to assist in natural drying of the
wash chamber
Page 11
6
6.
.0
0C
Cl
le
ea
an
ni
in
ng
g
6.1 Prior to cleaning :
Switch off and isolated electrical supply before cleaning the
appliance
WARNING
DO NOT use cleaning agents that contain CHLORINE,
BLEACH or HYPOCHLORITE.
DO NOT use STEEL WOOL, WIRE BRUSHES or any other
abrasive materials.
DO NOT jet wash or hose pipe the appliance down either
internally or on the exterior
6.2 Internal cleaning :
Remove the wash arms from the appliance and
then remove the individual wash and rinse jets
from the arms assembly, once removed wash in
warm soapy water, ensuring all debris are
removed, before reassembling the arm
Remove all the filters from within the appliance and again wash in warm
soapy water, ensuring all debris are removed.
WARNING
Before cleaning the wash chamber, ensure all sharp items,
such as broken glass or other items which could cause injury
are removed carefully
Now wipe the inside of the wash chamber
ensuring any debris are removed and the
chamber is clean, now reassemble all filters and
wash arms.
Page 12
6.3 Exterior cleaning :
Wipe the exterior of the appliance with a damp
sponge (NOT WET)
Once dry, clean using a STAINLESS STEEL
cleaning agent
7
7.
.0
0T
Tr
ro
ou
ub
bl
le
es
sh
ho
oo
ot
ti
in
ng
g
• Before placing a service call , please check the following:
• Check the appliance is connected to the mains water and electricity
supply and both are turned on.
• Check levels of chemicals within the rinse aid and detergent bottles.
• Check the drain / stand pipe is correct for the appliance (refer to
section 3.3.2 of this manual).
NOTE
In the event of a service call being made under Warranty, and it is
found that the fault(s) are due to non-observance of instructions in
this manual, the call will be charged at current rates.
7.1 Appliance does not fill :
Appliance does not start :
Appliance does not rinse :
• Check water supply is turned ON.
• Check water supply hose is not trapped or kinked.
• Check that the appliance is switched ON.
• Drain appliance fully, then try again to fill the machine, drain as per
instructions 5.6 of this manual..
Page 13

7.2 Appliance fills slowly :
• Check water supply tap is fully open.
• Check water supply pressure, should be above 2 bar, if not ask
your dealer to install a booster pump to increase water pressure.
• Check and clean rinse jets (located on the wash arms within the
appliance).
• Check water supply hose is not trapped or kinked.
• Remove any pressure regulator or reducer from the water supply.
7.3 Appliance not heating :
• Drain appliance fully, then try again to fill the machine, drain as per
instructions 5.6 of this manual..
• Check the temperature of the mains water, as variations in water
temperature will affect the heating of the appliance.
• Check that the wash chamber is full of water.
7.4 Appliance not draining :
• Check and clean all filters within the appliance.
• Check that the stand pipe / drain is not clogged / blocked.
7.5 Poor wash results :
• Check and replenish chemicals.
• Check and clean wash and rinse jets on wash arm assembly.
• Clean filters within appliance and check that they are fitted
correctly.
• Check water supply is ON and fully open.
• Rinse dishes of any food debris before placing into the dishwasher.
• Glasses may need to be renovated.
Page 14

• If glasses are ‘Blooming’ you may need a water softener, call your
dealer to advise on size of water softener required.
• If a water softener is fitted, replenish the salt within the softener, as
per the water softener instructions.
7.6 Overfilling :
• Drain appliance fully, then try again to fill the machine, drain as per
instructions 5.6 of this manual.
• Check and clean all filters within the appliance.
• Check that the stand pipe / drain is not clogged / blocked.
• If the appliance continues to overfill isolate both the mains
electricity and water, before call a service technician.
7.7 Will not switch ON :
• On an 13 amp appliance check and replace the fuse in the plug,
ensuring the replacement fuse is of the correct rating.
• On other amperage appliances check and reset circuit breaker
within the sites fuse board, if the circuit breaker continues to trip
call a service technician immediately.
7.8 Will not switch OFF :
• Isolate at mains electricity before calling for a service technician
immediately.
Page 15

Notes
Notes
………………………………………………
………………………………………………
………………………………………………
………………………………………………
………………………………………………
………………………………………………
………………………………………………
………………………………………………
………………………………………………
………………………………………………
………………………………………………
………………………………………………
………………………………………………
……………………………………………….
..................................................................
..................................................................
..................................................................
..................................................................
..................................................................
..................................................................
..................................................................
..................................................................
Page 16

Affix
Stamp
C
C
C
C
L A S S I
LA S S IC
LA S S IC
LA S S IC
S
S
S
S
E RV ICE
E RV ICE
E RV ICE
E RV ICE
D
D
D
D
E P A RT ME N T
E PA RT ME N T
E PA RT ME N T
E PA RT ME N T
C
L A S S IC
G
L A S S
& D
IS H WA S H IN G
S
Y S T E MS
L
T D
.
W
IN T E RH A LT E R
H
O U S E
R
O E B U CK
W
A Y
K
N O WL H IL L
M
ILT O N
K
E Y N E S
MK5 8 WH
"
"
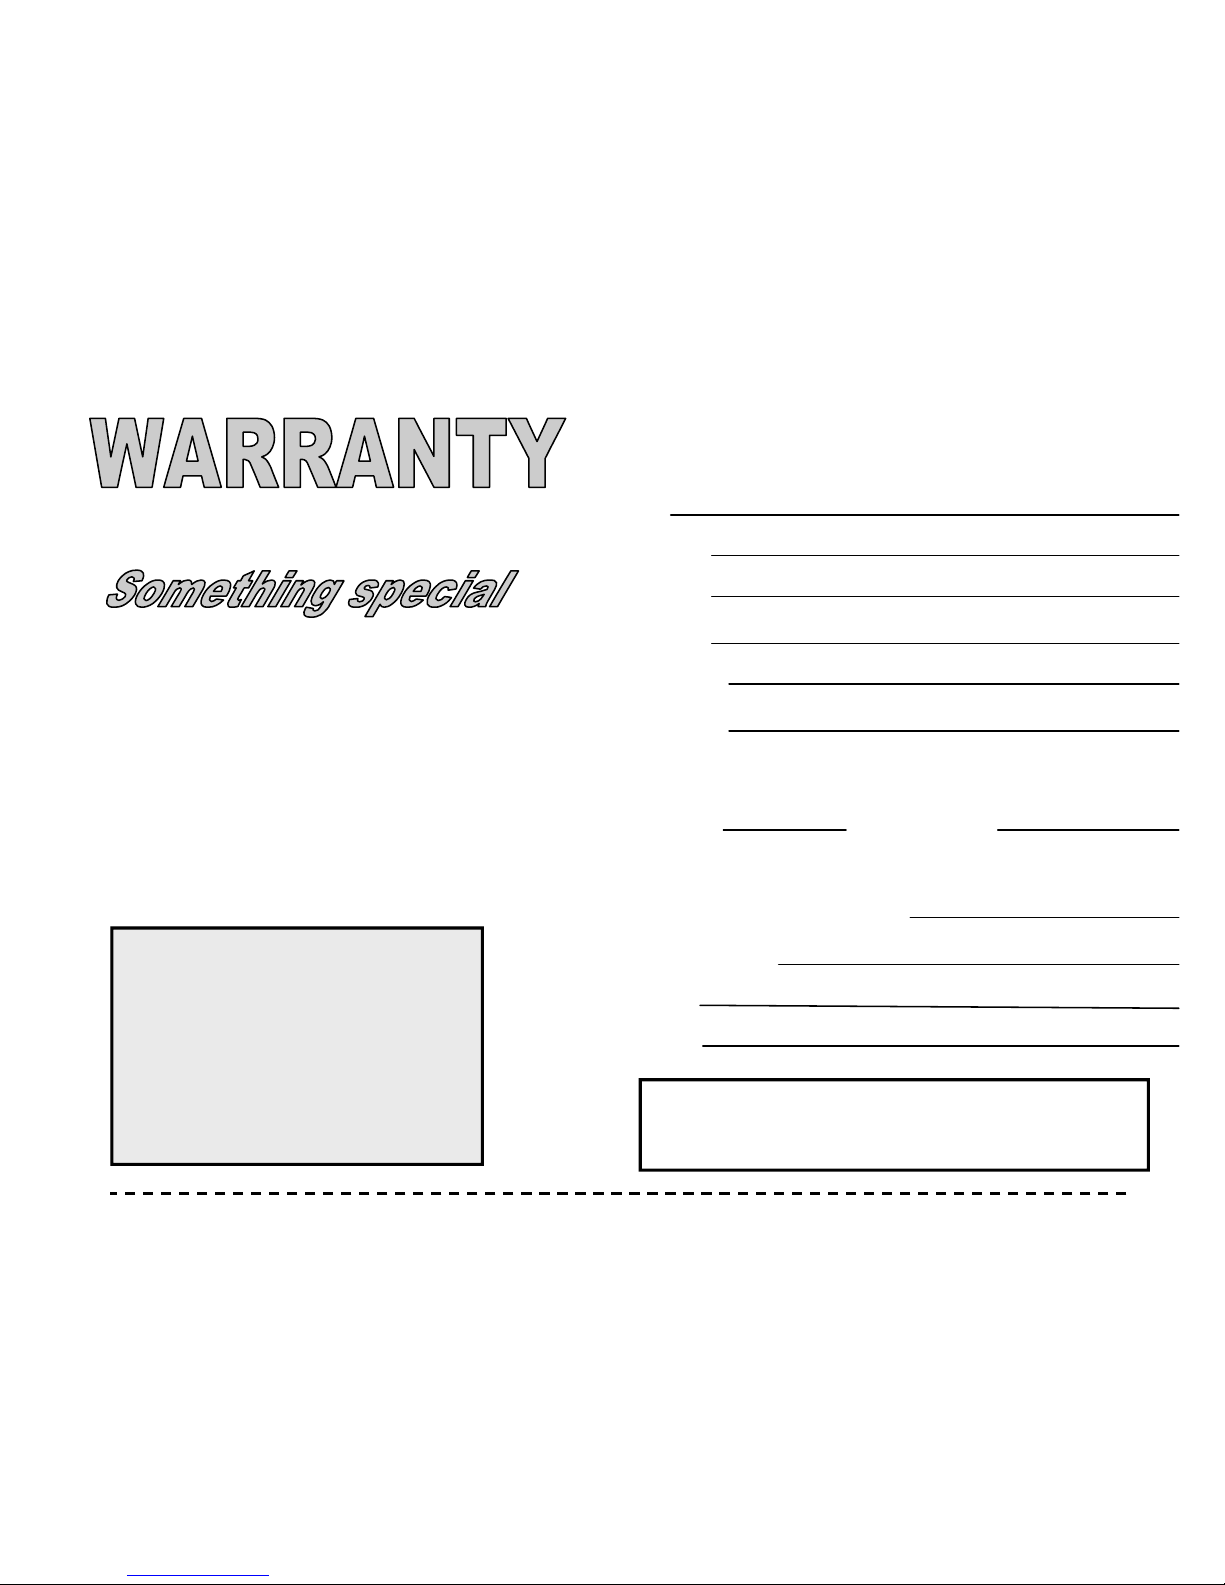
T h ank y u f r b u ying a q uality ‘Classic’p r d u ct,p lease c m p lete and p stth is f rm w ith u t d elay
Your new appliance is supplied with a full 12 months
warranty, protecting you against failure due to workmanship
or component failure
If this form is returned within one week of installation you will
be registered for the LIFETIME wash tank warranty.
If the wash tank fails within the lifetime of the machine *
‘Classic’ will supply a new tank free of charge.
* Excludes operator or chemical misuse
The information you supply to ‘Classic’ is covered by the
DATA PROTECTION ACT. This will also assist us to speed up
the process, if you require a service visit.
From time to time we may wish to contact you regarding any
future developments.
XAFI
RATING PLATE
HERE
YOUR DETAILS
SITE
ADDRESS
POST CODE
TELEPHONE
PRODUCT DETAILS
MODEL NO SERIAL NUMBER
GLASSWASHER
ß
DISHWASHER
ß
DATE OF PURCHASE / INSTALLATION
PURCHASED FROM
SIGNED
POSITION
Pl i ß ß
ARE YOU INTERESTED IN EXTENDED WARRANTIES ?
ease t ck the box YES NO
"
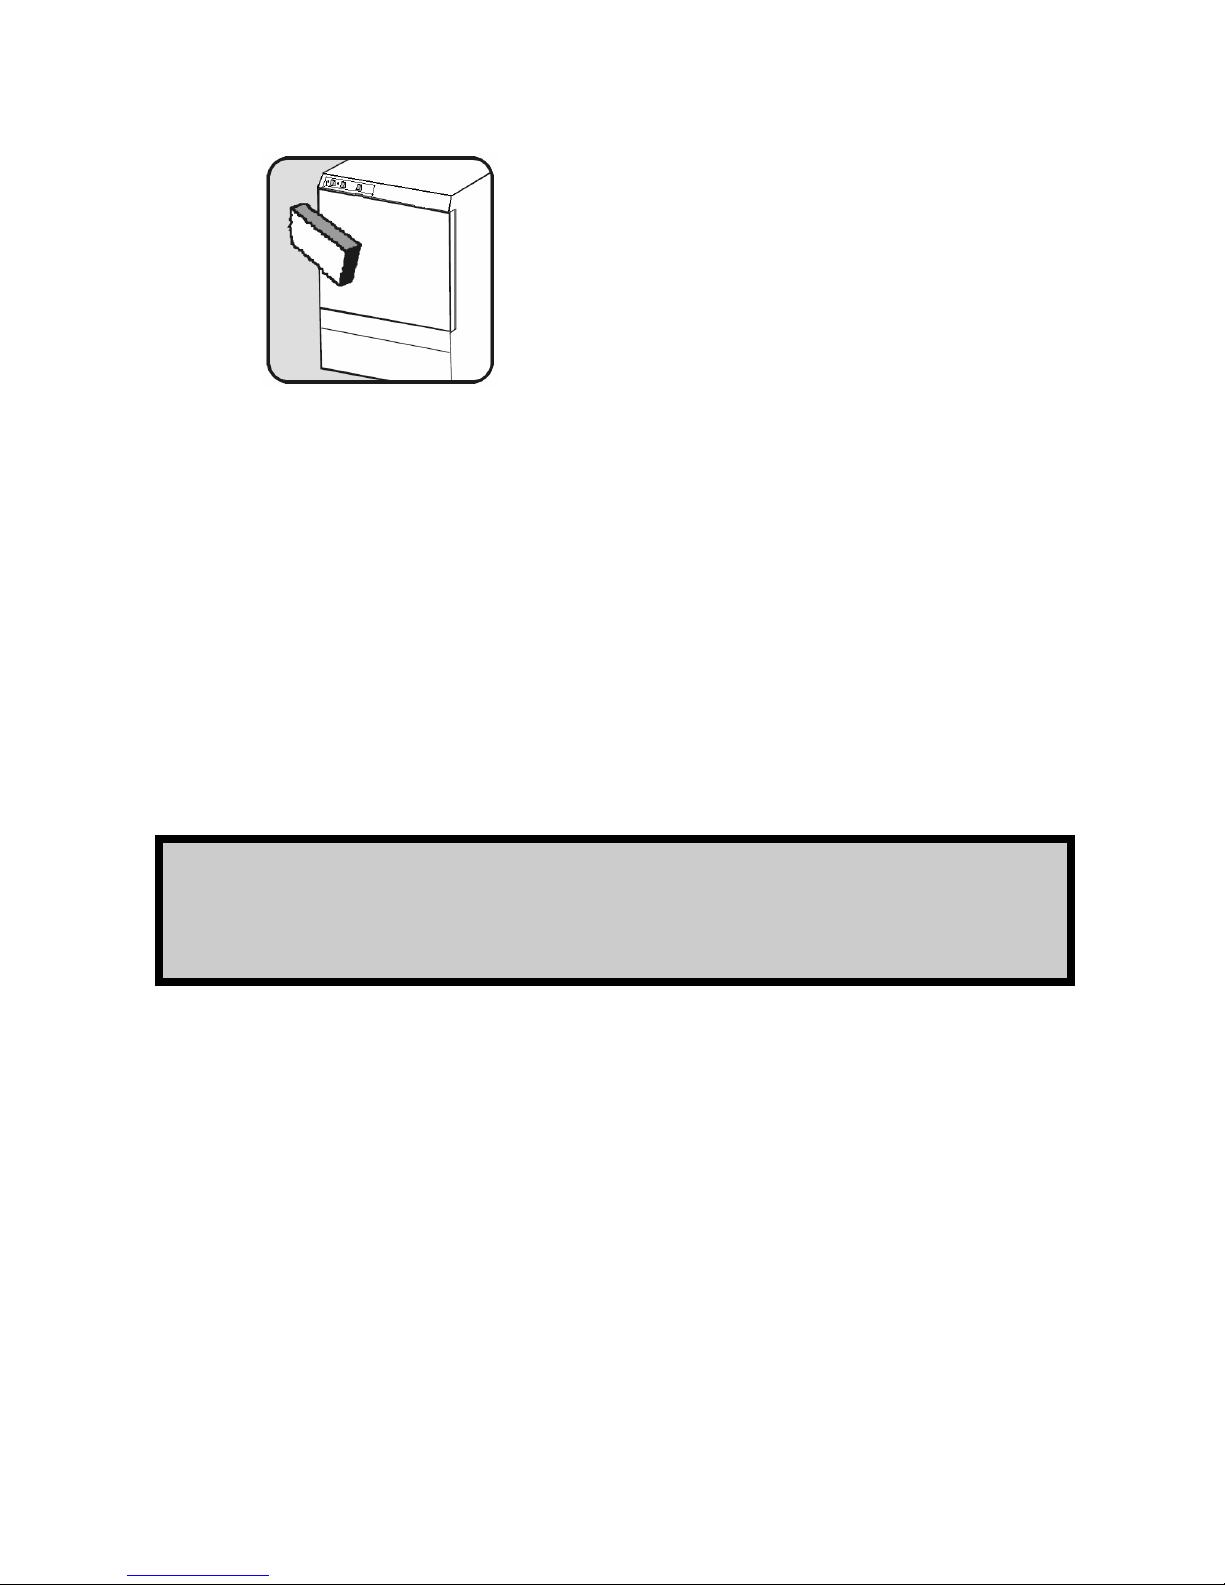
Rating plate
"
Other manuals for ECO 1
1
This manual suits for next models
9
Table of contents
Other Classic Dishwasher manuals


