cleanAIR CACS19MB User manual
Ownersmanualfor
CleanAirWoodHeaters
Tested and a ppro v e d t o Australia n
Standards AS2918-2018 for clearances and
AS/NZS 4013/4012-2014 for particle
emission and efficiency.
Prior to installation check with your state and
local authorities regarding any specific
regulations that may apply.
Please keep these instructions for future
reference.
Clean Air proudly supports
the activities of Landcare
Australia through its
membership of the AHHA

FIRSTTHINGSFIRST...
CongratulationsonyourpurchaseofaqualityCleanAirwoodheater.Thisproductisdesignedaccordingto
strictenvironmental,qualityandsafetystandardsandshouldgiveyouyearsoftroublefreehomeheating.
Readtheseinstructionscarefullytogetthemostoutofyourheaterandtoensuresafeandsatisfactoryheater
performance.Inparticular,wewouldliketodrawyourattentiontothesewarnings.
Becarefulofwhatyouburn:
*Useonlydry,wellseasonedhardwood.
*Donotusecoalorbriquettes.
*WARNING:DO NOT USE FLAMMABLE
LIQUIDSORAEROSOLSTOSTARTOR
REKINDLETHEFIRE.
*Do not burn garbage in the firebox as
garbagecancauseadangeroussootbuild
upandincreasetheamountofsmokeyour
heaterproduces.
*WARNING:DONOTBURNWOODTHATIS
PAINTED; OR COATED WITH PLASTIC;
OR HAS BEEN TREATED WITH ANY
CHEMICAL.
*CAUTION: THE USE OF SOME TYPES
OF PRESERVATIVE-TREATED WOOD
ASFUELCANBEHAZARDOUS.
*Donotplaceanytypesofbuildersboardeg
fibro, cement sheeting (or any other
materials not specified and tested by the
manufacturer)insidethefirebox.
Protect yourself and your family
fromburns:
*WA R N ING : O PEN A I R CO N T ROL
BEFOREOPENINGFIRINGDOOR.
*The exterior surfaces of the heater will
becom e h ot du ri ng op er at io n. For
protectionofchildren,theelderlyorinfirm,
provideafirescreentopreventcontactwith
theapplianceinoperation.
*To protect against injury from burns, use
caution when operating the appliance. In
particular,whenloadingthefirebox,provide
adequateprotectionforyourhands.
*IMPORTANT: We recommend you wear
glovestoopenthedoorandwhenreloading
oradjustingthecoalsinthefirebox.
Useyourheateraccordingtothese
instructions:
*CAUTION: THIS APPLIANCE SHOULD
BE MAINTAINED AND OPERATED AT
ALL TIMES IN ACCORDANCE WITH
THESEINSTRUCTIONS.
*DONOTBURNWITHDOOROPEN.
*CAUTION: THIS APPLIANCE SHOULD
NOT BE OPERATED WITH CRACKED
GLASS.
*Donotthrowlogsintothefirebox.Always
placelogscarefully.
*Do not overfire (allow firebox to glow red
continuously) as this could damage your
firebox.
*WARNING:ANYMODIFICATIONOFTHE
APPLIANCE THAT HAS NOT BEEN
APP ROVED IN WRI TING BY T HE
TESTINGAUTHORITYISCONSIDERED
AS NOT CONFORMING TO AS/NZS
4013.
*Theapplianceorfluesystemshouldnotbe
modified in any way without the written
approvalofthemanufacturer.
The heater can get very hot, so
watchobviousfirehazards:
*Donotplaceclothingorothercombustible
materialsontopoftheheater.
*WARNING:DO NOT USE FLAMMABLE
LIQUIDS OR AEROSOLS OR PLACE
THESE IN THE VICINITY OF THIS
APPLIANCEWHENITISOPERATING.
*WARNING: DO NOT STORE FUEL
WI T H I N H E A T E R I N S T A L L A TION
CLEARANCES.
*Do not store flammable liquids near the
heater.
ExclusionofLiability
Whilsteverycarehasbeentakeninformulatingtheseinstructions,noresponsibilitywhatsoeverwillattachtoand/or
claimlieagainst,themanufacturerand/orthedistributoroftheheaterasaresultofanyfailuretofollowthewholeor
anypartoftheinstructionsand/orasaresultofincorrectinformationhereinand/oranyomissionherefrom.
2

ASSEMBLINGYOURNEWCONSOLE
BafflePlate
The baffle plate for your Clean Air heater
consists of a steel frame and a Skamolex
baffle.Toplacethebaffleintotheheater,first
placetheSkamolexbaffleintothesteelframe
thenpositionintothefirebox.
Youmayneedtoanglethebaffleuponone
sidetogetitthroughthedoor.Youshouldthen
liftthebaffleoveronebracket,pushituptothe
topofthefirebox,andthenliftitovertheother
bracket.
3
LiftingHandles
Theliftinghandlesmustbeusedwhenmoving
theClearAirheater.Theycanbefoundinside
thefirebox.
Thehandlesslideintotubesfoundunderneath
the heater on the left and right sides of the
firebox. They are located behind the side
panels. The side panels do not need to be
removedwheninsertingthehandles.Please
refertothediagrambelow.
1
2
2
Slidehandles
upintolocating
tubes
Lifting
handle
Lifting
handle
OpeningTheDoor
Theremovablehandlecanbeusedtoopenthe
dooraswellasadjusttheairslide.
Remove the handle when not in use as it will
get hot to touch.
When not in use the handle can be placed in
the compartment located on the right hand
side of the heater (consoles only)
Folddown
compartment
Airslide
(topcoverremovedforclarity)
slideleftandright
Doorhandle/Air
controllever
Slidehandles
upintolocating
tubes
OperatingTheAirControl
Theremovablehandlecanbeusedadjustthe
airslideaswellasopeningthedoor.Youcan
controlwhetheryourheaterburnsonhighor
lowviatheaircontrolleverfoundonthefront.
Thehighandlowpositionsareclearlymarked
onallmodelsontopofthedoor.
Forlowburns-Thissettingisforlowburning,
orforextendedburntimes.
Formediumburns-Thisistheoptimalsetting
fornormaluse.
Forhighburns-Usethissettingforstartingthe
fireand foratleast 20minutesafter loading
andreloading.
Locating
tube

FanCord
TheFanCordisassembledontherighthand
sideasyouarelookingattheheater.Ifthe
powerpointisontheoppositesideofthe
heaterthechordcanberelocatedtotheleft
handsidebyremovingtheinnerpanelcover
fromtheheaterlegandreroutingittotheleft
handside.
ASSEMBLINGYOURNEWCONSOLE
4
Innerpanelcover
(relocatetoopposite
sideifrequired)
Fancordexitpoint
(fancordnotshown)
Innerpanel
cover
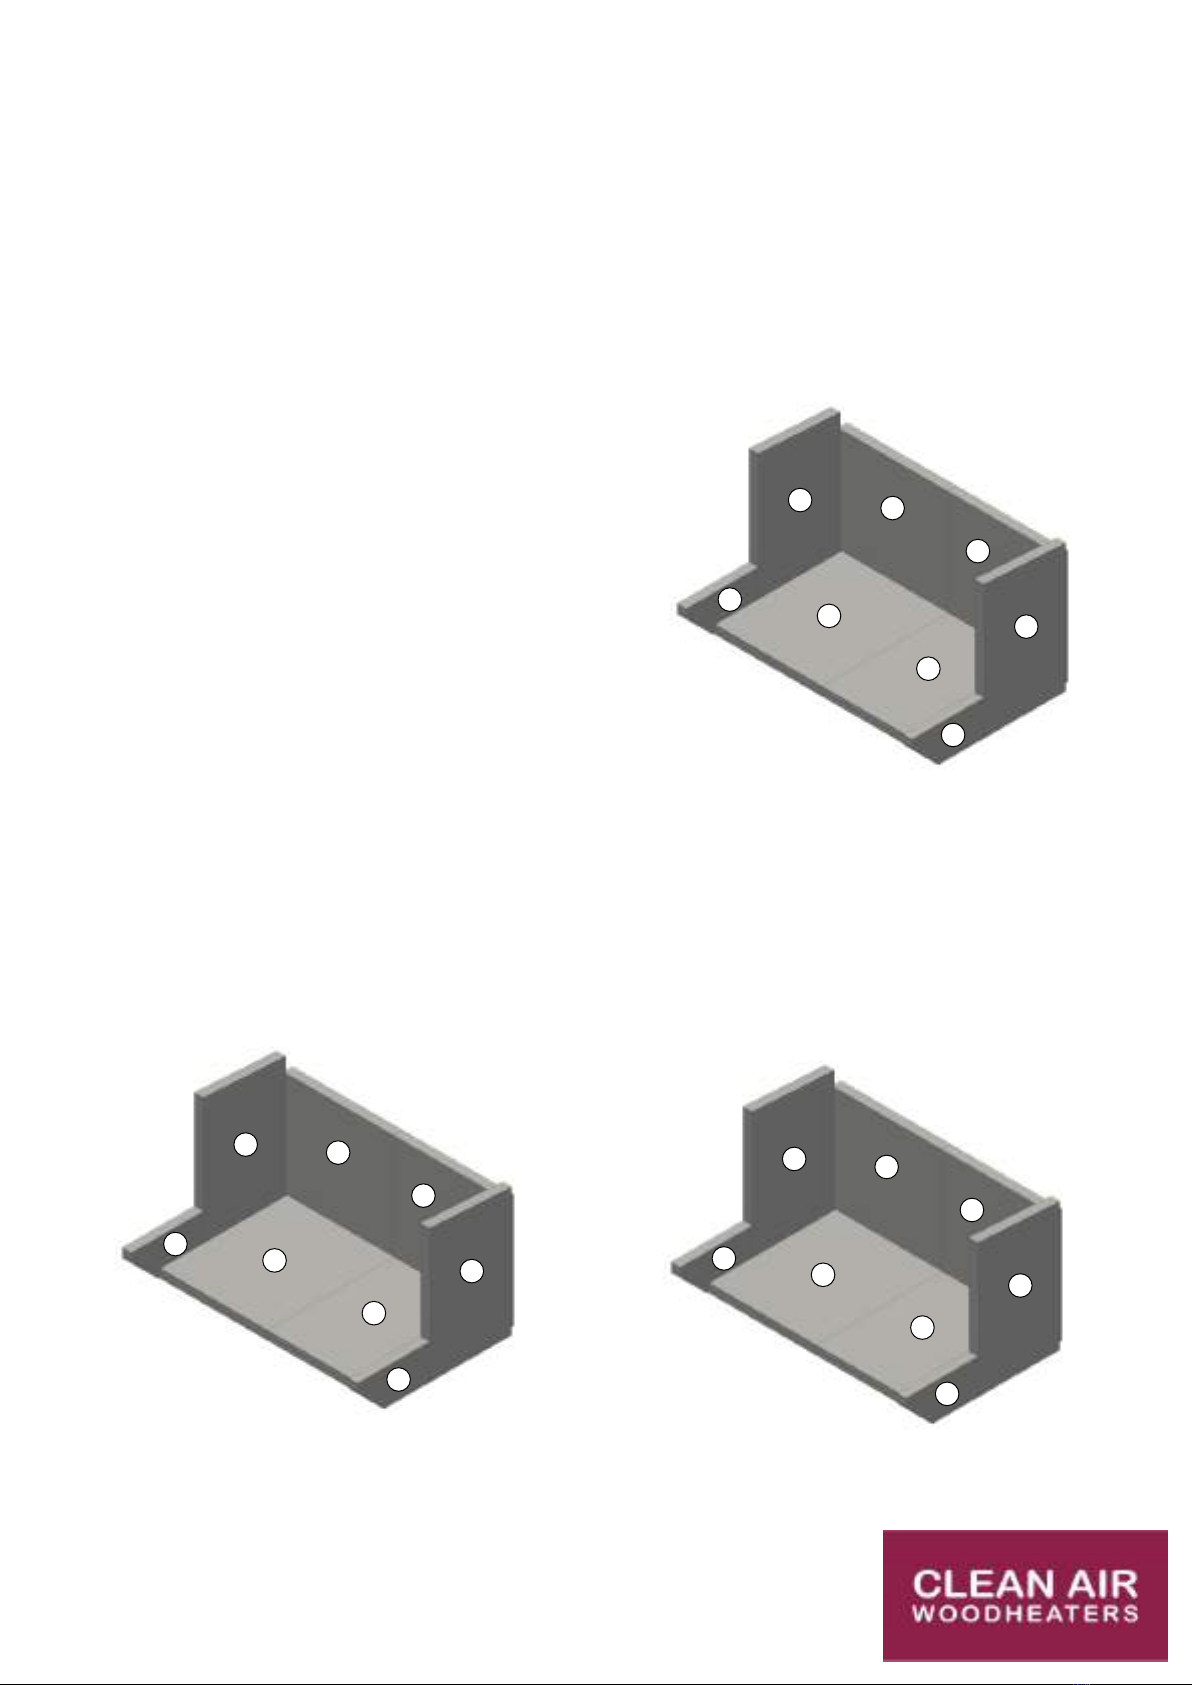
SKAMOLEX™LiningandBaffle
This heater is fitted with state-of-the-art
SKAMOLEX™liningmakingitcleanerburning
andmoreefficient.
TheSKAMOLEX™liningandbaffleMUSTbe
installedpriortooperatingtheappliance.
Refertothefollowingdiagramstoensure
thattheyareinstalledcorrectly.
TheSKAMOLEX™maydevelopcracks.this
isnotaproblem,butiftheybeginto
disintegrate,theyshouldbereplaced.
ThereisnoneedtoremovetheSKAMOLEX™
duringcleaningofthefirebox.
A
A
B
C
B
D
C
D
CACS19MB(Small)
8BRICKS
A-235x220mm
B-225x275mm
C-190x275mm
D-162x74mm
A
A
B
C
B
D
C
D
A
A
B
C
B
D
C
D
CACM19MB(Medium)
8BRICKS
A-255x270mm
B-250x315mm
C-325x190mm
D-202x74mm
CACL19MB(Large)
8BRICKS
A-310x320mm
B-300x355mm
C-230x375mm
D-202x99mm
FIREBOXLINING
5

BeforeCommencing
Before commencing the installation of your
wood heater, you should note the following
precautions:
*WARNING:THEAPPLIANCEANDFLUE-
SYSTEM SHALL BE INSTALLED IN
ACCORDANCEWITHAS/NZS2918AND
THE APPROPRIATE REQUIREMENTS
OF THE RELEVANT BUILDING CODE
ORCODES.
*WARNING: APPLIANCES INSTALLED IN
ACCORDANC E WITH AS/ N ZS 2918
S H O U L D C O N F O R M T O T H E
REQUIREMENTS OF AS/NZS 4013 AND
4 0 1 2 W H E R E R E Q U I R E D B Y T H E
REGULATORYAUTHORITY,THISIS.THE
APPLIANCE SHOULD BE IDENTIFIABLE
BYACONFORMANCEPLATEWITHTHE
MARKING'TESTEDTOAS/NZS4013AND
AS/NZS 4012' AS SPECIFIED IN AS/NZS
4012.
*WARNING:ANYMODIFICATIONOFTHE
APPLIANCE THAT HAS NOT BEEN
APP ROVED IN WRI TING BY T HE
TESTINGAUTHORITYISCONSIDERED
TOBEINBREACHOFTHEAPPROVAL
GRANTED FOR CONFORMANCE WITH
AS/NZS4013.
*CAUTION: CRACKED AND BROKEN
COMPONENTS,e.g.GLASSPANELSOR
CERAMIC TILES, MAY RENDER THE
INSTALLATIONUNSAFE.
*It is strongly recommended that a
certified/qualified installer perform the
installation.
*Youmayneedtogetcouncilapprovalprior
toinstallation.
*Youshouldalsocheckwithyourinsurerfor
anyrequirementstheymayhave.
FlueInstallation
For detailed instructions regarding flue
installation,pleaserefertotheinstructionsthat
comewithyourfluekit.
The correct flue system is critical to the
performance of your wood heater. It must
eitherbetestedwiththeheaterorbeadefault
fluekit.WerecommendyouuseaMaxiheat
DefaultFlueKit.
Thefluemustbe sealed where it enters the
heateratthefluespigot.
CAUTION: MIXING OF APPLIANCE OR
FLUE-SYSTEM COMPONENTS FROM
DIFFERENT SOURCES OR MODIFYING
THE DIMENSIONAL SPECIFICATION OF
C O M P O N E N T S M A Y R E S U L T I N
HAZARDOUSCONDITIONS.WHERESUCH
A C T I O N I S C O N S I D E R E D , T H E
M A N U F A C T U R E R S H O U L D B E
CONSULTEDINTHEFIRSTINSTANCE.
FlueHeightRequirements
Your flue must extend the required height
aboveyourrooftopromotesufficientdraught.
Iftheflueisnothighenough,theheaterwillnot
“draw” properly causing smoke to spill back
intotheroom.
Thefollowingconditionsshouldbeobserved:
*Theminimumheightoftheactivefluemust
be4.6minlengthmeasuredfromthetopof
thehearthtotheflueterminationpoint.
*If the flue terminates within 3 m from the
highestpointoftheroof,thenthefluemust
beaminimumof0.6mabovethehighest
point.
*Iftheflueterminatesfurtherthan3mfrom
thehighestpointoftheroof,thentheflue
must be a minimum of 1 m above roof
penetration.
Theinstallermustensurethattheheaterand
flue are correctly and safely installed in
accordancewithAS/NZS2918.
There are other variables that can affect
draught(eg treesortall buildingsnearby).If
youhavethecorrectflueheightandstillhave
problems,consultyourdealer.
INSTALLATION-GENERALNOTES
6

A
B
ParallelInstallation
E
D
HearthClearances
Location
Select a location for your wood heater with
greatcare.
*Donotplaceyourheaterinareasofhigh
traffic,nearfurnitureordraperies.
*Check that the intended location will not
interferewithceilingjoists,rafters,valleys
andridges.
Hearth(FloorProtector)Requirements
Ifyourwoodheateristobeinstalledoncarpet,
timberoranyothercombustiblematerial,you
must place a hearth (also known as a floor
protector) underneath the heater. Please
observethefollowing:
*Itisnotrecommendedthatyoumakeyour
ownhearth
*Thehearthandheaterassemblymustbe
placedonafirmandlevelsurface.
HearthClearances
It is necessary to ensure that the heater is
positionedonthehearthsothatthefollowing
requirementsareobserved.
Thefrontofthehearthshouldextendpastthe
heaterdoorbythedistancespecifiedasD.The
side of the hearth should extend past the
heaterdoorbythedistancespecifiedasEon
eachside.Theminimumwidthofthehearthis
specifiedbelowasF.
HeaterClearances
Itisvitalthattheheaterbeinstalledtheproper
distancefromcombustiblesurfaceslikewood,
gyprockandcurtains.
Thediagramsshowbothparallelandcorner
installations.
Failuretomaintaintheseminimumdistances
mayresultinafireforwhichyourinsurermay
refusetocover.
ReducedClearances
Theseclearancescanbereducedwithproper
heat shielding. Basically a noncombustible
surfaceisplacedbetweentheheaterandthe
co m b u s t i b l e wall . I t i s v i t a l that a n
unobstructedairflowbemaintainedbetween
thetwosurfacestoremoveexcessheat.
SeeAS/NZS2918fordetails.
200
MaxiheatDecromeshDefaultFlueKitwithinner&outershields*
Model
CACS19MB(Small)
MaxiheatDecromeshDefaultFlueKitwithinnershield**
CACM19MB(Medium)
CACL19MB(Large)
MaxiheatNon-preforatedFlueKitwithinnershield**
MaxiheatDecromeshDefaultFlueKitwithinner&outershields*
MaxiheatNon-preforatedFlueKitwithinner&outershields*
All dimensions are in millimetres
EDCBA
300225650250
200300200550150
200300200550150
200300100450
100
MaxiheatNon-preforatedFlueKitwithinner&outershields*
INSTALLATION-FREESTANDINGHEATERSONLY
7
200300225650250
200300100450100
C
CornerInstallation
C
*Inner(MXRSISS2)andOuter(MXRSOB2)shieldsarerequired
**Inner(MXRSISS2)shieldisrequired
NOTE:
LowerCasinglocationring
2
musthave4,500mm ofventing

INSTALLATION - INSERT HEATERS ONLY
WARNING: This appliance and flue MUST be installed in a full masonry fireplace, and must
be installed by a qualified wood heater installer according to the latest version of AS2918.
FIREPLACE CONSTRUCTION
This wood heater must be installed in a full
masonry fireplace, which has been carefully
inspected for cracks or deterioration. The chimney
should be cleaned prior to installation.
You must install a flue the entire length of the
chimney. This will help your heater perform to its
full capabilities. It is also easier to clean.
CLEARANCES TO COMBUSTIBLES
The table and diagram below shows the minimum
clearances (in millimetres) to combustible
materials.
Clearance ‘A’ is from the top of the hearth to the
underside of the combustible mantlepiece.
Clearance ‘B’ is between the combustible
surround columns.
REDUCED CLEARANCES
The ‘Clearances to Combustibles’ can be
reduced with proper heat shielding, which must
be installed in accordance with AS/NZS 2918.
HEARTH CONSTRUCTION
Do not build the hearth over the front of the heater
as this will prevent access to the fan through the
front bottom air inlet cover.
The hearth shall consist of no less than 30 mm
thick compressed fibre cement sheet with a 15
mm air gap underneath. The cement sheet shall
have a thermal conductivity not greater than 0.33
W/m°K. The air gap must provide a minimum of
3,750 mm² on each side (eg. two slots of 125 mm
x 15 mm ventilation on either side).
Small insert
Medium insert
10001250
9001200
8501150
BA
Large insert
All dimensions are in millimetres
Small insert
Medium insert
1071600
971550
921500
DC
Large insert
All dimensions are in millimetres
Dimensions EF G H J
firebox
width
firebox
depth
firebox
height
facia
width
facia
height
Small insert
Medium insert
Large insert
All dimensions are in millimetres
608 447 546 750 596
658 487 596 800 646
758 527 646 900 696
A
B
C
D
HE
F
JG


Fewthingsaffecttheperformanceofyourheaterasmuchasthefuelyouburn.Takenoteofthefollowing:
WhatNotToBurn
*Softwood(exceptkindling)
*Wetorunseasonedwood
*Treatedorpaintedtimber
*Saltwaterwood
*Coalorcharcoal
*Garbage,plasticetc
*Any solvents, kerosene, petrol or any
flammableliquid.
WhatToBurn
Quitesimply,dryseasonedhardwood.
Fromwhenwoodisfirstcutdown,ittakesupto
12 months of dry storage for the wood to
season properly. The seasoning process is
underwaywhencracksbegintoappearatthe
endsofcuttimber.
Useofmoistorunseasonedwoodwillresultin
excessivesmoke,longerstartuptimes,alazy
flame that requires more air to stay alight,
creosotebuildupintheflueandonthedoor
glass, and a much less powerful fire. The
reasonissimple.Heatthatwouldnormallybe
goingintotheroomiswastedboilingwaterthat
is trapped inside the wood. This poor
performancecostsyoumoneyinwastedfuel
andincreasedmaintenance.
Itisdifficulttodetermineifwoodisdryjustby
lookingatit.Ifyoucanhearthewoodsizzle
andhiss,orcanseemoisturebubblingfrom
thewoodsurface,thenyourwoodistoowet.In
practice,thebestthingyoucandoistobesure
ofthesource.Buyyourwoodfromreputable
wood merchants. Make sure you store the
woodcorrectly.
WoodStorage
Itisimportantthatwoodbestoredundercover.
Evenwoodthatisyearsoldwillabsorblarge
quantities of moisture if exposed to the
elements.
It is advisable that wood is stacked to allow
someairflowinandaroundthelogs.Thiswill
helpkeepthewooddry.
WoodSplitting
Itisbesttohaveonhandagoodrangeofwood
sizestohelpcontrolthefire.Theruleofthumb
is:thehotterthefire,thebiggerthelogyoucan
putin.
*Youneedverysmallpiecesofkindlingto
getthefirestartedefficiently.
*Smallpieces upto about50mmthick are
goodwhenthefireisstillbeingestablished,
orwhenyouwanttoreviveafirethathas
burntlow.
*Larger logs are excellent for long burns
oncethefireiswellestablished.
WOODSELECTION
8

Beforeusingyourwoodheater,studythisentiresectioncarefully.Itwillassistyouinachievingmaximum
efficiencyandenjoyment.
CuringthePaint
Variouspartsofyourheaterhavebeencoated
withhighqualitypaintstoprotectthemandto
givethemanattractivefinish.Youwillneedto
“break-in”yourheatertohardenorcurethese
coatings.
While curing, be careful not to touch the
paintedsurfacesasthepaintwillbequitesoft.
Thebasicruleis:cureslowly,overaboutthree
burns, without a hot fire. During the curing
processitisnormalforsomesmokeandsmell
tobegivenofffromthesurfaceoftheheater.
Eachtime,somewindowsshouldbeopened
toallowthepaintodourstoescape.Usingafan
alsohelpsdispersetheodours.Forthisreason
itisbestdoneduringtheday.
1. The first fire should be kindling only and
shouldlastforabout20minutes.Leavethe
doorslightlyajartostopthedoorropefrom
sticking.
2.Oncetheheaterhascooleddown,repeat
theprocess.
3.Thethirdfireshouldbeanormalfireofat
least45minutes.
Bythistime,yourheatershouldbecured.In
colderconditions,oriftheheaterusesafan,it
maytakeslightlylonger.Thehouseshouldbe
ventilateduntilallodoursaregone.
OperatingTheAirControl
Youcancontrolwhetheryourheaterburnson
highorlowwiththeaircontrollever.Thehigh
andlowpositionsareclearlymarked(ontopof
thedoorframe)onallmodels.
Forlowburns-Usethissettingforlowburning,
orforextendedburntimes.
Formediumburns-Thisistheoptimalsetting
fornormaluse.
Forhighburns-Usethissettingforstartingthe
fireand foratleast 20minutesafter loading
andreloading.
LightingTheFire
Woodburnsmostefficientlywhenplacedina
veryhotfire.Theseproceduresaredesigned
tobringyourfireboxtotherighttemperatureas
quicklyaspossible.
Puttheaircontrolonhigh.
Place a large amount of kindling in a criss-
cross pattern over a firelighter. Make sure
plentyofaircangetintothestackandaround
eachpieceofkindling.
Addafewsmallpiecesofwoodontop.The
fireboxshouldbeabouthalffulloffuel.
Ignitethefirelighter.
Leave the door slightly ajar for the first few
minutestoallowextraairtohastenthebuildup
offlame.Donotleavetheheaterunattended
whilethedoorisajar.
Continuetoaddsmallpiecesofwooduntila
bedofhotglowingcoalsisestablished.
Place two or three thoroughly dry split logs
(about 80-100mm diameter) on the well
establishedfire.Logswillburnbetteriftheyare
placedwiththeirendsneartheglass,iefrontto
back.
Leave the air control on high for about 20
minutes.Afterthistime,thefireboxshouldbe
hotenoughfornormaloperation,soyoucan
turndowntomediumorlow.
Adding fresh wood cools the fire down, so
whenyouneedtoreplenishthefuel,turnthe
aircontroltohighforabout20minutestobring
thefireboxtemperaturesbackuptonormal
Alwaysleavetheaircontrolonhighforatleast
20minutesafterreloading.Itisbesttoturnthe
fanoffduringthis20minuteperiod.
USINGYOURHEATER
9

AFewHints
Woodshouldbestackedfronttoback-withthe
endsfacingthedoor-andwithspacebetween
themforairtoflowaround.
The door should remain closed at all times
except when first establishing the fire and
whenloading.
Therearemanyfactorsthatcanaffecttheway
yourheaterburns,includingflueheight,wood
type, shape, amount, the way it is stacked,
windconditionsandoutsideairtemperatures
tonameafew.Youwillfindthatbeforelong
you will get to know how your heater works
bestforyou.
OvernightBurns
Largeunsplitlogsarethebestfueltouse.
Make sure you have a good strong bed of
glowing coals and the heater is hot before
loadingthelogs.
Placealoadofwoodonthestrongbasefire
andcoals,shutthedoorandleaveonhighfor
about20minutesoruntilthelogsarecharred
allover.
Turndowntolow.
Restarting After an Overnight
Burn
Adjustaircontroltohigh.
Rakethehotcoals.
Place some kindling and small logs on the
coals.
Once the fire is established, start putting on
largerlogs.
RemovingAshes
When the ashes are level with the firebox
opening,it’stimeforacleanout.Thisshould
onlybedonewhenthefireboxhascompletely
cooled.Removinghotashesishazardous.
Push chunks of charred wood to one side.
Thesewillburninthenextfire,soitwouldbea
shametowastethem.Usingametalscoop,
remove excess ash and place in a metal
container.
Youshouldleaveasmallamountofashinthe
firebox to provide an insulating base for the
nextfire.Rakethemoversotheyformaflat
bed.
Whendisposingoftheashes,keepthemina
metalorothernon-combustiblecontainerwith
a tight fitting lid. Move them outdoors
immediately to an area clear of combustible
materials. Do not place them in plastic
receptacles.
HeaterFans
Your Clean Air heater comes with a factory
fitted fan can be used to help spread the
heatedairaroundyourhousequicker.Itdoes
nothavetobeonifnotrequiredastheheateris
designtohavenaturalconvection.
Plugthepowercordfromtherearofthe
heaterintoapower-point.Thismustbe
switchedonforthefantorun.Aremote
controlthatissuppliedwiththeheateris
usedtoturnthefanonanddeterminethe
speed(Low,High,Boost).
THE FAN SHOULDNOTBEUSEDWHEN
THE AIRSLIDE SETTINGISONLOWOR
OVERNIGHTSETTING.
THEFANSHOULDNOTBEUSEDUNTIL
AFTERTHEFIREHASBEENBURNINGFOR
ATLEAST20MINUTES.
USINGYOURHEATER
10

Your heater has been designed as a heavy duty appliance capable of withstanding normal operating
conditions.
Care
Thefireboxlinerswherefittedmustbetreated
withcare.Avoidthrowinglogsintothefirebox
asthismayfracturetheliners.
Cleaning
Painted surfaces: to clean painted surfaces,
wipeoverwithasoft,dampcloth.Donotuse
harshsolventsandcleaningagentsasthese
candamagethecoating.Buffdrywithasoft,
drycloth.
If your heater is installed in a coastal
environment, where salt air will come in
contactwiththeheater,thiscleaningprocess
shouldbeperformedweeklytoavoidthesalt
causing deterioration of the paint and
subsequentlyrust.
Door glass: sometimes black deposits will
build up on the inside of the door glass. To
removethisbuildup,rubgentlywithaplastic
scourer pad moistened with water and
detergent.Thenusethedampanddrycloths
asbefore.Hotglasscleanerisalsoavailable
fromyourheaterretailer.
RoutineMaintenanceSchedule
Atbeginningoftheseason.
*Inspect and clean the flue system, If
required.Todothis,removethebaffleplate
andfluecowl,cleanoutwithafluebrush.
*Checkthepaintedsurfaces.Ifthereisany
wear, for instance from cleaning or
abrasion,touchuppaint isavailable from
yourdealer.
Atendofseason
*Inspectthedoorglassforanycracksand
replaceifnecessary.
*Inspectdoorropeandsealsandreplaceif
necessary.
*Inspectfireboxforwear.
*Inspect firebox liners where fitted and
replaceifbroken.
*Checkthattheairslidemovessmoothly.Ifit
issticky,lubricateitwithhightemperature
greaseavailablefromyourlocalhardware
store.
*Inspectfanfordirtbuildupandremovedust
if necessary. Excess dirt build up can
damagefan,whichmayvoidthewarranty.
Fancanbeaccessedbyremovingthefront
panelontheheatercolumn.
CreosoteBuildUp
Whentheheateriscontinuallyburntwithlower
than normal fire temperatures, eg due to
unseasoned wood, higher than acceptable
amounts of smoke are produced which
condenseontheinsideoftheflue.Thisbuilds
upasablack,tar-likedepositcalledcreosote.
Athinlayerofcreosoteinsidetheflueisnormal
andwillnotcauseaproblem.Oncethereisa
layer more than 3mm thick, problems can
occur.
1.Ifthelayeristhickenough,itrestrictstheflue
andcancauseinsufficientdrawandeven
smokespillagebackintothehouse.
2. More seriously, creosote is combustible,
andcanignite.Afluefireiseasytodetect,
involvingaroaringsound,avibrationofthe
flue, and sometimes flames and sparks
shootoutofthetopoftheflue.
Toavoidcreosotebuildupandthefiresthat
mayresult,burnseasonedwoodwiththeair
controlsettomediumorhighformostofthe
time.
To remove creosote when it does build up,
removethebaffleplateandfluecowl,anduse
a flue brush to clean the flue system. To
removethebaffleplate,slidetheplateupon
onesideandthendownaroundthebrackets
ontheother.
Incaseofafluefire,donotpanic.Yourflue
system has been constructed to withstand
hightemperatures.Immediatelyclosetheair
controldowntoitslowestsetting.Donotopen
thedoor.Oncethefirehasextinguished,you
shouldhaveyourfluesysteminspectedbya
qualifiedserviceperson.
CAREANDMAINTENANCE
11

Caringforourplanetmeansreducingpollutionandmanagingourresourcesintelligently.Everyresourcewe
usetodayweareborrowingfromourfuturegenerations.
Thekeytosuccessfullymeetingourfutureenergyrequirementsliesinourabilitytomanageexistingresources
wisely.Unlikefossilfuelssuchasoil,coalandgas,woodcanbemanagedonasustainablebasis.
Thisiswhywoodisoneofthewisest,mostcosteffectiveandenvironmentallyefficientformsofhomeheating
availabletoday.
Youcanmakeafurtherpositivecontributiontotheenvironmentbyfollowingtheseimportantsteps:-
OperatingYourHeater
*Alwaysburngood,dryhardwood.Thiswill
yield the greatest amount of heat for the
leastamountoffuel.
*Neverburngreenorunseasonedwood,or
wood that is wet. This will waste energy,
cause excessive smoke and reduce the
performanceofyourwoodheater.
*Donotallowyourwoodtosmoulder.Your
fireshouldalwaysburnbrightlyandcleanly.
Checktheflueoccasionallytoseeifthereis
anyexcessivesmoke.
OtherThingsYouCanDo
*Ensureyourhomeisadequatelyinsulated.
Thiswillreduceyourenergyrequirements,
and lessen your fuel bills, or the need to
gatherfuel.Thisinturnreducespollution.
*Donotoverheatyourhome!Ifyoufeelhot
evenwhenwearinglightclothing,thenyou
arewastingenergy.
*Installceilingfansinthemainrooms.These
areanexcellentinvestmentinyearround
comfort.Becausehotairrises,ceilingfans
pushthishotairbackclosertogroundlevel
tokeepyouwarmer.
Landcare
Aportionofthesaleofyourheaterisdonated
directlytoLandcareby the Australian Home
HeatingAssociation.
Landcare is one of the most proactive
community based environmental groups in
Australiatoday.Almost5000Landcaregroups
have sprouted across Australia and like the
millionsoftreesLandcarehasplanted,they're
stillgrowing.Oneofthreefarmersisamember
ofLandcare.
Thesegroupsgetinvolvedinactivitiesliketree
planting and revegetation, weed removal,
fencing, feral animal control, water quality
monitoring, nature surveys, riverbank repair,
andsustainableagriculturaltechniques.
Landcaregroupsareusuallyformedbecause
thereisaproblem.Localsnoticechangesin
theirenvironmentanddecidetodosomething
about it. Landcare groups can grow out of
neighbouringfarms,orneighboursinthecity
thatsharealocalpark.Landcaregroupsare
working on all imaginable ecosystems in
Australia,fromdryanddustycentralAustralia,
totropicalrainforestsofQueenslandandthe
mountainsinTasmania.
WOODHEATINGISGOODHEATING
CARINGFORTHEENVIRONMENT
12

G.L.G.AustraliaPtyLtd
BuildingA2,CampusBusinessPark
350-374ParramattaRoad
Homebush,NSW2140
HINS-254
14032019
NEEDACCESSORIES?
YourCleanAirdealeralsosellsarangeofattractive,goodvalue
accessoriesforyourheaterlikemeshguards,toolsetsandwood
baskets.
Also,youcanaskaboutmaintenanceproducts,firelighters,touchup
paint,fluecleaningproductsandmore.
This manual suits for next models
2
Table of contents
Other cleanAIR Wood Stove manuals

Popular Wood Stove manuals by other brands


Austro Flamm
Austro Flamm SPARK manual

Stove Builder International
Stove Builder International Osburn 2000 owner's manual

Ashley
Ashley AW100E Owner's operation and instruction manual

Quadra-Fire
Quadra-Fire Millennium 31M-ACC-MBK owner's manual

MHSC
MHSC WR247001 owner's manual

Jøtul
Jøtul F 600 Installation and operating instructions


