Clear One IMPRESS IM100 User manual
IMPRESS™ IM100 - Digital Signage Solution
User ManUal
TM AVoIP™

Telephone 1.800.283.5936
1.801.974.3760
FAX 1.801.974.3669
E-mail [email protected]
On the Web www.clearone.com
IMPRESS IM100 DIgItal SIgnagE
USER ManUal
ClEaROnE DOCUMEnt
800-000-097 - March, 2012 (Rev. 1.1)
© 2012 ClearOne All rights reserved. No part of this document may be
reproduced in any form or by any means without written permission
from ClearOne. ClearOne reserves specific privileges.
Other product names may be trademarks of their respective owners.
Information in this document is subject to change without notice.

USER ManUal 1
Table of Contents
IMPRESS Overview ............................................................................................................4
Hardware ..................................................................................................................................................................4
Software....................................................................................................................................................................4
Publishing .............................................................................................................................................................5
Terminology ..............................................................................................................................................................6
IMPRESS Installation .........................................................................................................6
Box Contents............................................................................................................................................................6
Hardware Installation................................................................................................................................................6
Connect with an Encoder......................................................................................................................................7
Connect the Control Keyboard .............................................................................................................................7
Connect the Ethernet Cable..................................................................................................................................8
Connect a Direct Serial Cable (Optional)..............................................................................................................8
Connect Audio Sources (Optional).......................................................................................................................8
Connect the Video Inputs (Optional) ....................................................................................................................8
Connect the Power................................................................................................................................................8
Starting the Unit........................................................................................................................................................9
IMPRESS Setup ................................................................................................................10
Control Keypad Buttons .........................................................................................................................................10
Menu ...................................................................................................................................................................10
Arrows and Select / Enter ...................................................................................................................................10
Esc ......................................................................................................................................................................10
Opt 1, Opt 2, +, – ...............................................................................................................................................10
The IMPRESS Setup Menus...................................................................................................................................10
Video Settings Menu...........................................................................................................................................11
Set Date & Time Menu........................................................................................................................................11
Network Settings Menu.......................................................................................................................................12
Verifying Network Setup......................................................................................................................................14
Installation Menu .................................................................................................................................................15
System Menu ......................................................................................................................................................15
Updating the Unit’s Software .................................................................................................................................15
Update Procedure...............................................................................................................................................15
USB Memory Stick Update..............................................................................................................................15
Online Update..................................................................................................................................................15
StreamNet Setup and TouchLinX Screens ......................................................................16
Adding a MediaLinX with an IMPRESS IM100 to a Project....................................................................................16
Source Configuration .............................................................................................................................................17
Using the IMPRESS Source ...................................................................................................................................18

2 tEChnICal SUPPORt: 800.283.5936
IMPRESS Composer Installation and Setup ...................................................................20
Composer Installation ............................................................................................................................................20
Running Composer Installation...........................................................................................................................20
Network Serial Key..............................................................................................................................................10
Composer Setup ....................................................................................................................................................22
Launching IMPRESS Composer.........................................................................................................................22
General................................................................................................................................................................23
Sites ....................................................................................................................................................................24
Connection Method .........................................................................................................................................26
Completing Site Setup.....................................................................................................................................27
Test Connection ..................................................................................................................................................28
Set Date & Time ..................................................................................................................................................28
Set Password ......................................................................................................................................................29
Managing Multiple Users .......................................................................................................................................29
File Sharing and Separate Installation ................................................................................................................29
Designate a “Server”...........................................................................................................................................30
Do Not Use “Local” File Image Files ..................................................................................................................30
Use Common Fonts............................................................................................................................................30
One User at a Time for a Particular Project ........................................................................................................30
Use Publishing Sites ...........................................................................................................................................30
Getting Started and Publishing........................................................................................31
Creating a New Project ..........................................................................................................................................31
Project Title..........................................................................................................................................................31
Display Type (Aspect Ratio) ................................................................................................................................31
Display Orientation ..........................................................................................................................................31
Resolution........................................................................................................................................................31
Open an Existing Project........................................................................................................................................33
Working Within a Project ........................................................................................................................................34
Reordering Pages ...............................................................................................................................................35
Adding and Removing Pages.............................................................................................................................35
Editing Pages......................................................................................................................................................35
Project Properties................................................................................................................................................36
General Tab......................................................................................................................................................37
Page Defaults Tab............................................................................................................................................37
Logo Tab ..........................................................................................................................................................38
Overlay Region Tab..........................................................................................................................................39
HTML Preferences Tab ....................................................................................................................................40
Omitting Specific Pages ..................................................................................................................................42

USER ManUal 3
Exporting and Importing.........................................................................................................................................43
Exporting Pages..................................................................................................................................................43
Importing Pages..................................................................................................................................................44
Saving Your Work ...................................................................................................................................................44
Previewing your Project..........................................................................................................................................45
Publishing to an IMPRESS Unit..............................................................................................................................46
Creating and Adding Content ..........................................................................................48
Standard Pages......................................................................................................................................................48
Object Selection Toolbar.....................................................................................................................................49
Safe Text Area Guides.........................................................................................................................................49
Backgrounds.......................................................................................................................................................50
Text Objects.........................................................................................................................................................52
Images ................................................................................................................................................................54
Adobe Flash........................................................................................................................................................55
MS PowerPoint....................................................................................................................................................59
PowerPoint Details and Considerations ..........................................................................................................59
Credit Roll............................................................................................................................................................60
Video Frames ......................................................................................................................................................61
Video Clip ........................................................................................................................................................62
External Video..................................................................................................................................................63
Video Pages ........................................................................................................................................................64
Overlay Regions..................................................................................................................................................64
Enabling and Defining a Region......................................................................................................................66
Adding Region Content ...................................................................................................................................67
Scheduling.......................................................................................................................................................69
Logo ....................................................................................................................................................................69
Visual Effects ...................................................................................................................................................70
Audio...................................................................................................................................................................71
Scheduling and Other Page Settings.....................................................................................................................72
General................................................................................................................................................................72
Display Settings ..................................................................................................................................................73
Scheduling ..........................................................................................................................................................74
Regular Scheduling .........................................................................................................................................75
Regular Scheduling Examples ........................................................................................................................76
Event Scheduling.............................................................................................................................................77
External Device Commands ...............................................................................................................................77
Warranty and License Agreement ...................................................................................78
Specifications ...................................................................................................................81
4 tEChnICal SUPPORt: 800.283.5936
IMPRESS Overview
The IMPRESS IM100 Digital Signage and Video Messaging system allows you to create slides
and other content on your PC with graphics, text and video which can then be played back on nu-
merous types of video monitors using the IMPRESS unit. A variety of applications can be served,
including advertising, announcements, schedules, point of sale displays, and more. Use the IM-
PRESS wherever you have one or more monitors that need to display messages in the form of still
images, video, and crawling text.
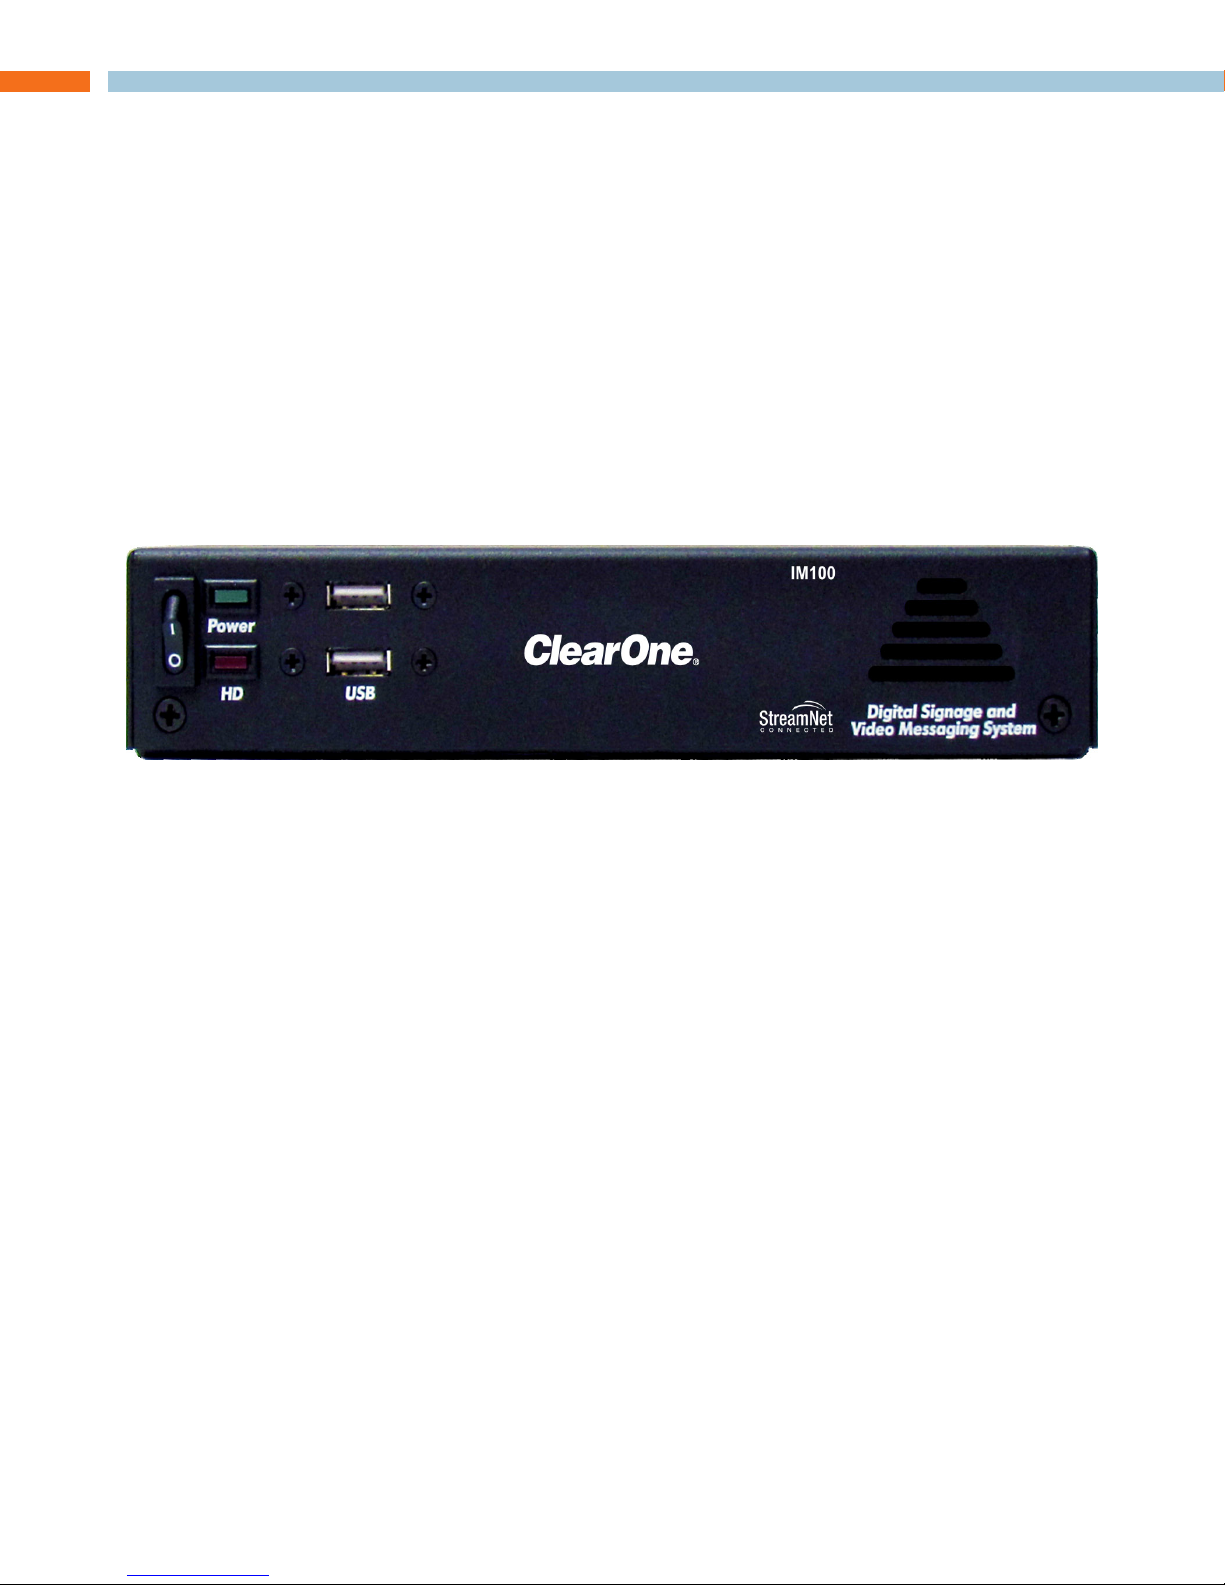
HARDWARE
The IMPRESS IM100 unit is a dedicated player in a small form factor case. It features high quality
output, quiet operation, and an easy-to-use interface with a keypad remote control.
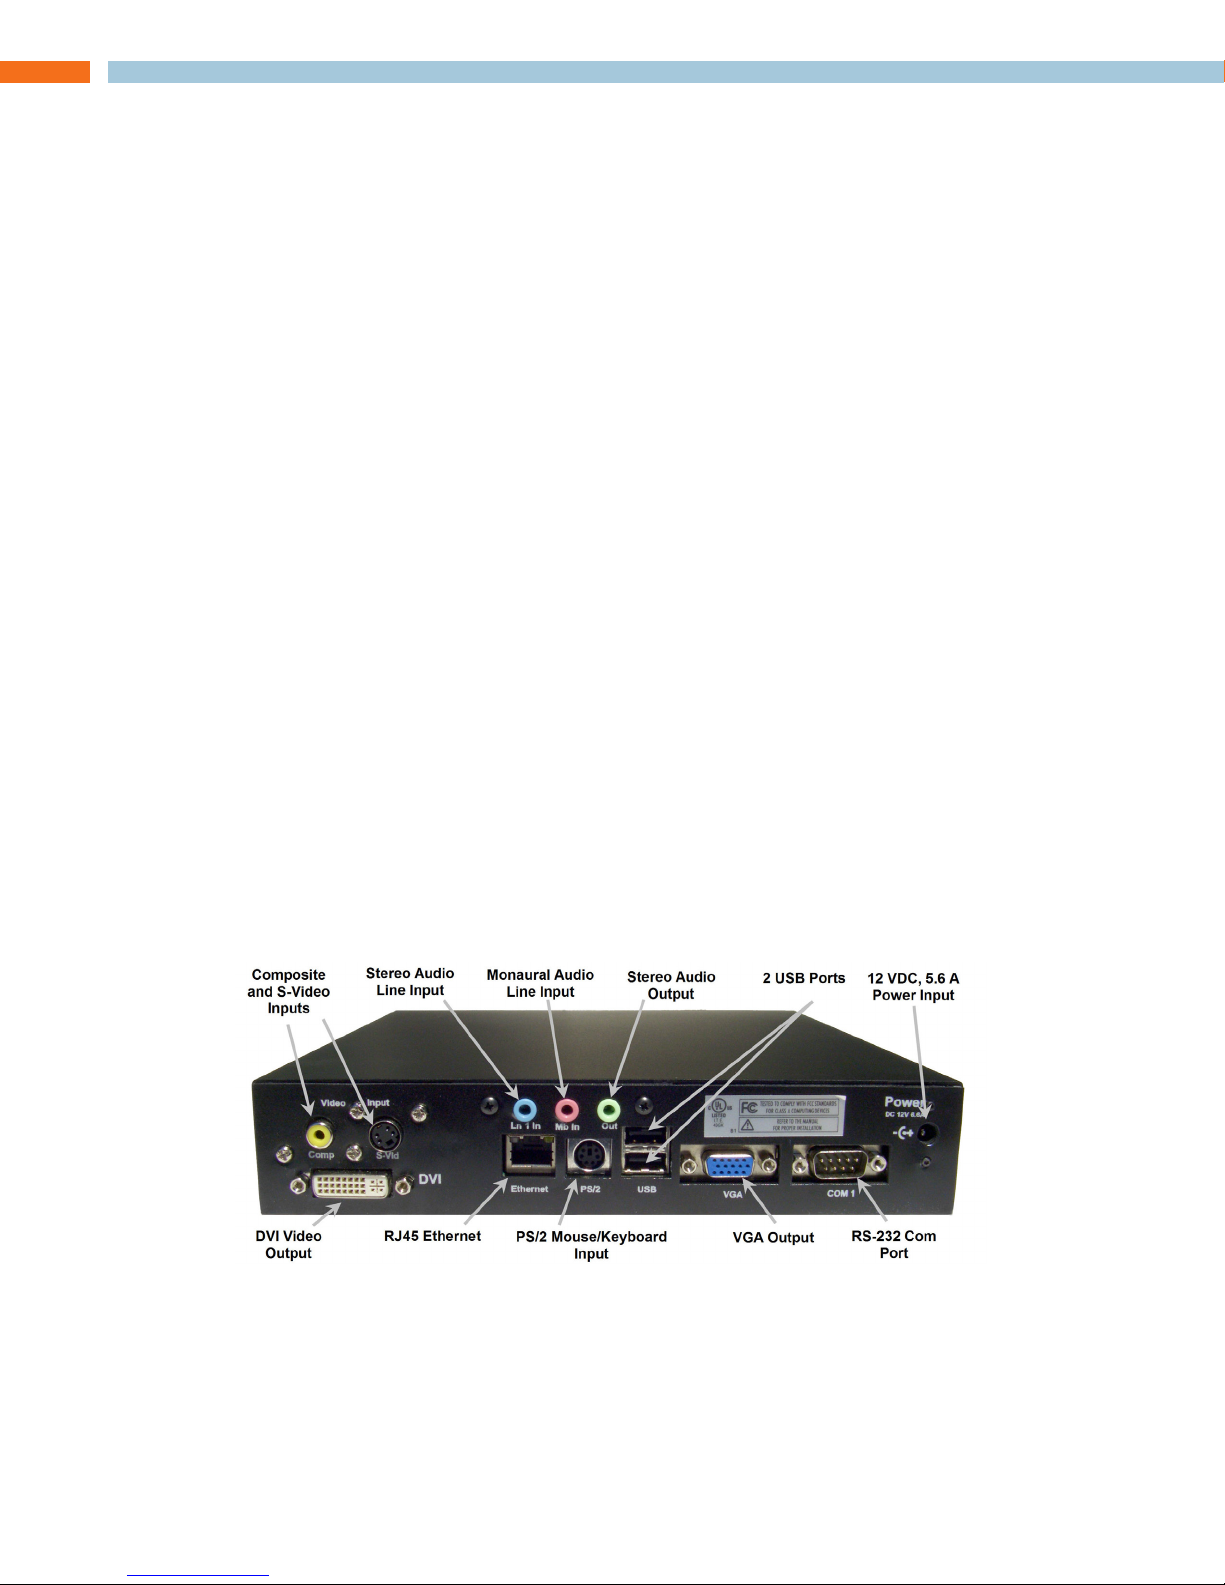
The back panel has a variety of connections for attaching various monitors and accessories to the
unit. These connectors are described later in this manual.
SOFTWARE
Each IMPRESS IM100 unit comes with a copy of IMPRESS Composer software. This software can
be installed onto a (Windows 7, Vista, 2000 or XP) computer allowing you to generate pages with
backgrounds, text, and images and other content to be displayed on an IMPRESS system.
Backgrounds can come from many sources, including other Windows applications, your own
scanned photos or digital camera images, the IMPRESS background libraries, and more. You can
copy and paste text directly into Composer from other programs such as Microsoft Word or any
browser.

USER ManUal 5
PUblIShIng
The act of transferring your content from the PC it was created on to the IMPRESS system for
playback is called “Publishing.” With the IMPRESS system, several publishing options are available:
Ethernet – All IMPRESS systems include built-in Ethernet support, allowing you to place the
IMPRESS on a network of any size for high-speed transfers.
Direct Serial – All IMPRESS systems include a 10-foot serial cable that can be connected
between the PC and the IMPRESS, using an available 9-pin communications port. Serial
transfers are slower than Ethernet, but very simple to set up.
Removable Media – You can also publish to USB Flash drives. After publishing to the
removable media, simply remove it from the PC, and insert it into the IMPRESS. The project will
be transferred and played automatically.
All of these publishing methods are described in detail later in this manual.
Once published, the IMPRESS retains the projects on its built-in hard drive. The hard drive has a
capacity for a nearly unlimited number of images (10,000+). However, capacity may vary depending
on other types of content sent.
TERMINOLOGY
Here are some terms associated with the IMPRESS that will be used frequently throughout this
document:
Publishing – The act of sending finished content to the IMPRESS unit for playback
Page – Also called a slide, or frame – a single screen of content.
Overlay Region – Also referred to as a crawl region – an area of text at the top or bottom of the
screen, separate from the page area, that contains scrolling or static text.
Time Domain – Another name for content scheduling. Previous versions of the IMPRESS
software used this term.
Upstream – With regards to video playback, an upstream video source is one that feeds into
one of the IMPRESS unit’s video inputs.
Downstream – With regards to video playback, a downstream source is one the IMPRESS
unit’s output signal passes through prior to distribution.
6 tEChnICal SUPPORt: 800.283.5936
IMPRESS Installation
BOX CONTENTS
Before you begin setup of your IMPRESS unit, make sure the following components are included
in the original packaging:
• IMPRESS IM100 Main System Unit
• Control Keypad
• Power Cord
• Null Modem Serial Cable
• IMPRESS Composer CD-ROM
• 1/8” Audio Cable
• User Manual CD
HARDWARE INSTALLATION
The IMPRESS IM100 chassis is a 1RU, 1/2 rack solution. Ideally, it will be installed in a rack mount
case or cabinet in a climate-controlled room. The height of the unit is less than 1RU to allow for
airflow requirements.
If a rack mount installation is not available, the IMPRESS unit should be placed on a stable, flat,
level surface.
Take care to ensure the unit is not placed where it may be easily knocked over, have its cords
tripped over, or have liquids spilled into it.
The IMPRESS unit warranty does not cover damage caused by accidents or misuse.
All of the connections are found on the rear panel, shown below.
»NOTE: You must unplug the IMPRESS before adding or changing any connections.
Failure to do so may damage your IMPRESS unit.

USER ManUal 7
COnnECt wIth an EnCODER
The IMPRESS unit supports two types of output connections as shown below:
The IMPRESS unit in most cases will be connected with a StreamNet Encoder MLAV9300 or
MLAV9500-CS, with the encoded data decoded by a VL9300-CS or VL9100 decoder. In these
situations The IMPRESS unit will be used as one of the sources for a StreamNet system. For more
detail, see the StreamNet Setup chapter.
The following table shows the format and resolutions of each device:.
»NOTE: All outputs are at 60 Hz, vertical.
The following diagram is an example of a typical network setup:
COnnECt thE COntROl KEybOaRD
The IMPRESS is controlled by a small keypad. Connect this keypad to a USB connector on the front
or back of the player.
Encoders Decoders
Format Resolutions MLAV9500-CS MLAV9300 VL9300-CS VL9100
800x600 Yes Yes Yes Yes
4:3 1024x768 Yes Yes Yes Yes
1280x720 Yes No Yes Yes
1280x768 Yes Yes Yes Yes
1376x768 No Yes Yes Yes
16:9
1920x1080 Yes No Yes No

8 tEChnICal SUPPORt: 800.283.5936
COnnECt thE EthERnEt CablE
IMPRESS units include an Ethernet networking adapter. If you intend to use the IMPRESS unit on a
LAN, connect the network cable here. (Contact your network administrator to help you identify your
network’s cable connection if necessary.)
»NOTE: Ethernet networking can be a complex subject. If you are not familiar with
terms such as “IP Address,” “Subnet Mask” and “TCP/IP,” we recommend that you
have your Network Administrator assist you with the initial setup of the IMPRESS unit.
COnnECt aDIRECt SERIal CablE (OPtIOnal)
If you will be publishing via a direct serial connection, connect the cable from the communications
port on the publishing PC to the COM1 serial connector on the IMPRESS. See the section above
for help identifying the COM1 port on the IMPRESS.
»NOTE: To publish with a serial cable, you must use a Null Modem serial cable,
included with your IMPRESS. A standard serial cable will not work.
COnnECt aUDIO SOURCES (OPtIOnal)
The IMPRESS system feature three audio connections – Stereo Line Input, Monaural Line Input and
Stereo Audio Output.
COnnECt thE VIDEO InPUtS (OPtIOnal)
There are 2 video inputs on the back of the IMPRESS – RCA, and S-Video.
Any device you wish to show through the IMPRESS can be connected here (VCR and DVD players
are most commonly used). Refer to the “Video Pages” section of the “Creating and Adding Content”
chapter for further details.
COnnECt thE POwER
Once you are sure everything is properly connected, connect the power cable from the adapter
to the rear of the IMPRESS unit and then plug it into a power outlet on a surge protector or battery
backup unit.
»NOTE: The IMPRESS IM100 uses a switching power adapter supporting 120/240
VAC at 60 or 50 Hz.

USER ManUal 9
STARTING THE UNIT
The IMPRESS unit has a “soft” power switch. When you plug the unit in, it will return to its last power
setting, which may have been “on” or “off.”
Turn the unit on by connecting the power and momentarily pressing the power button on the front
of the unit.
The boot process can take up to 60 seconds. During this time, the screen may be black or a series
of boot screens will be displayed (VGA only).
After the boot process is complete, the IMPRESS will begin playing pages. If this is the first time
your IMPRESS unit has been started, it will play a demonstration project. Otherwise, it will play the
default project last published from your PC.
If this is your initial use of the IMPRESS and after successfully reaching this stage, your unit is ready
to configure. Follow the steps under “IMPRESS Setup.”
»NOTE: Normally, the unit should be left on all the time, but if you need to turn off
the power (for example to connect expansion devices or to ship the unit), the
recommended method is to go through the on-screen menu > System > Shutdown.
10 tEChnICal SUPPORt: 800.283.5936
IMPRESS Setup
The IMPRESS IM100 unit’s functions are accessed using the included wired control keypad.
CONTROL KEYPAD BUTTONS
MEnU
This key will enter and exit the IMPRESS unit’s menu system. The menu display will be sent to all
the video outputs simultaneously, temporarily enabling any outputs that are turned off.
Exit the menu screen by pressing Menu again. The IMPRESS unit will resume playback on its
specified output connector.
aRROwS anD SElECt / EntER
When accessing menus, the arrow keys navigate the menus and change the values of selections.
The Select and Enter keys choose a highlighted menu item.
ESC
Pressing the ESC key will back up to the previous menu level. If you are in a requester that has a
Cancel button, pressing ESC is the same as Cancel.
OPt 1, OPt 2, +, –
These keys are reserved for future expansion.
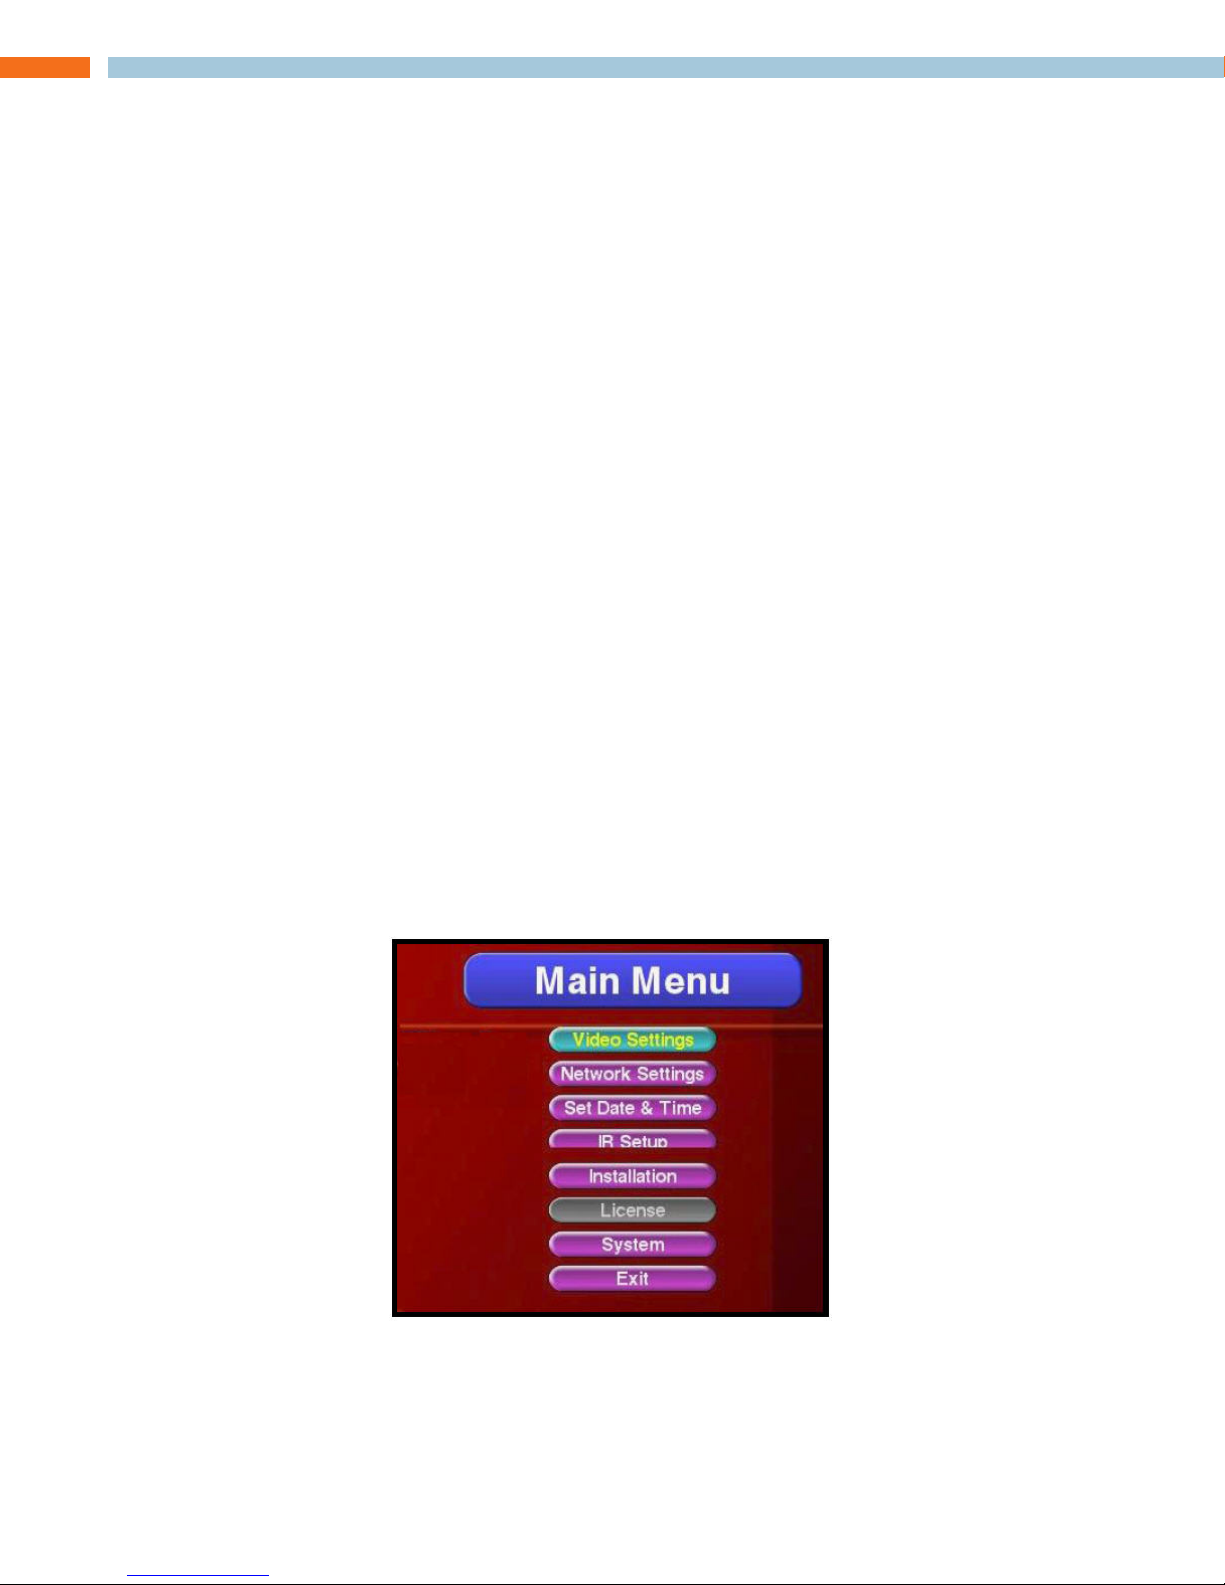
THE IMPRESS SETUP MENUS
The setup menus allow you to change some of the settings used by the IMPRESS unit. The changes
you make are remembered by the unit even after a power failure. To access the menus, press the
Menu key on the control keypad.
The main menu screen, shown below, should appear. The menus are displayed on all outputs
simultaneously. After you exit from the menus, playback resumes on the designated output
connector.
USER ManUal 11
Use the up and down arrows on the control keypad to highlight a menu item. Once the desired
item is highlighted, press the Select key.
Each of the setup menus is described on the following pages.
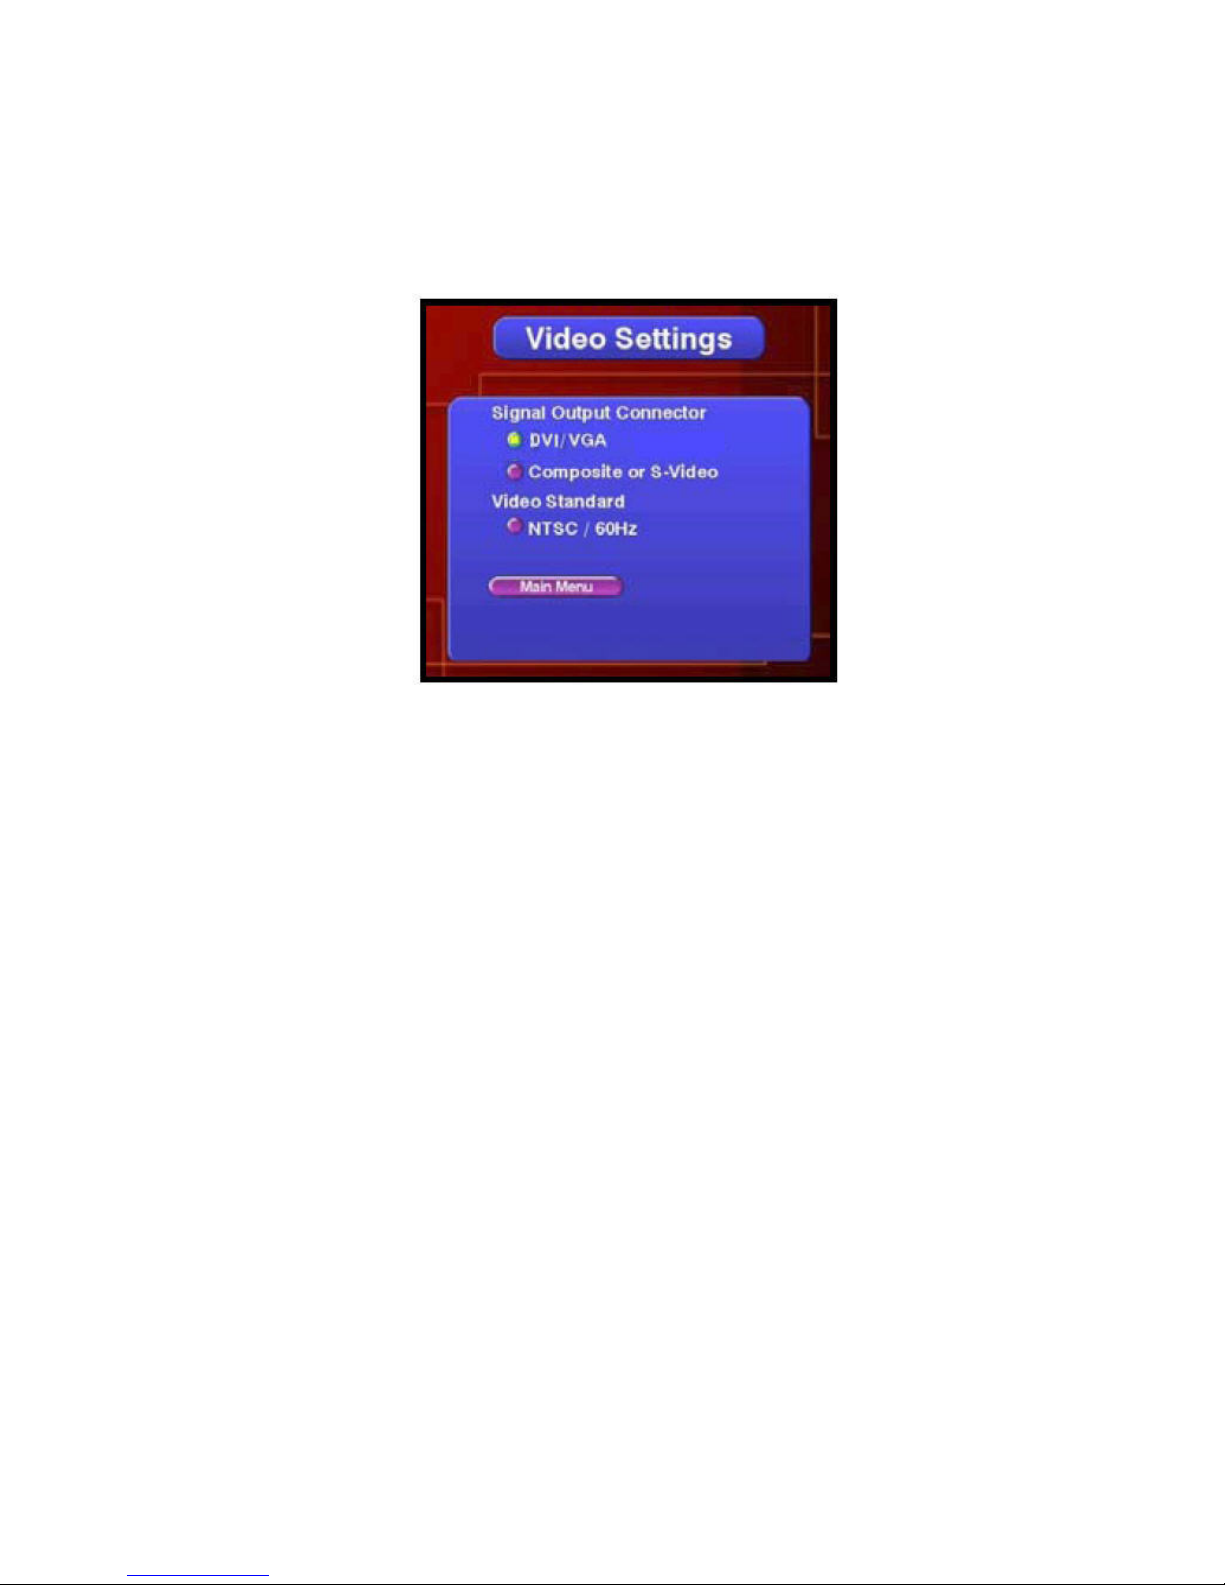
VIDEO SEttIngS MEnU
The Video Settings menu controls how the IMPRESS outputs video during the playback of projects.
Highlight the output connector you will be displaying to, and press the select key. The IMPRESS
can output its signal on the VGA or the DVI connector.
DVI/VGA – When selected, both the DVI and VGA connectors will output a signal - the composite
and S-Video connections will be disabled completely. This is the default.
Composite/S-Video – The Composite and S-Video connections are disabled.
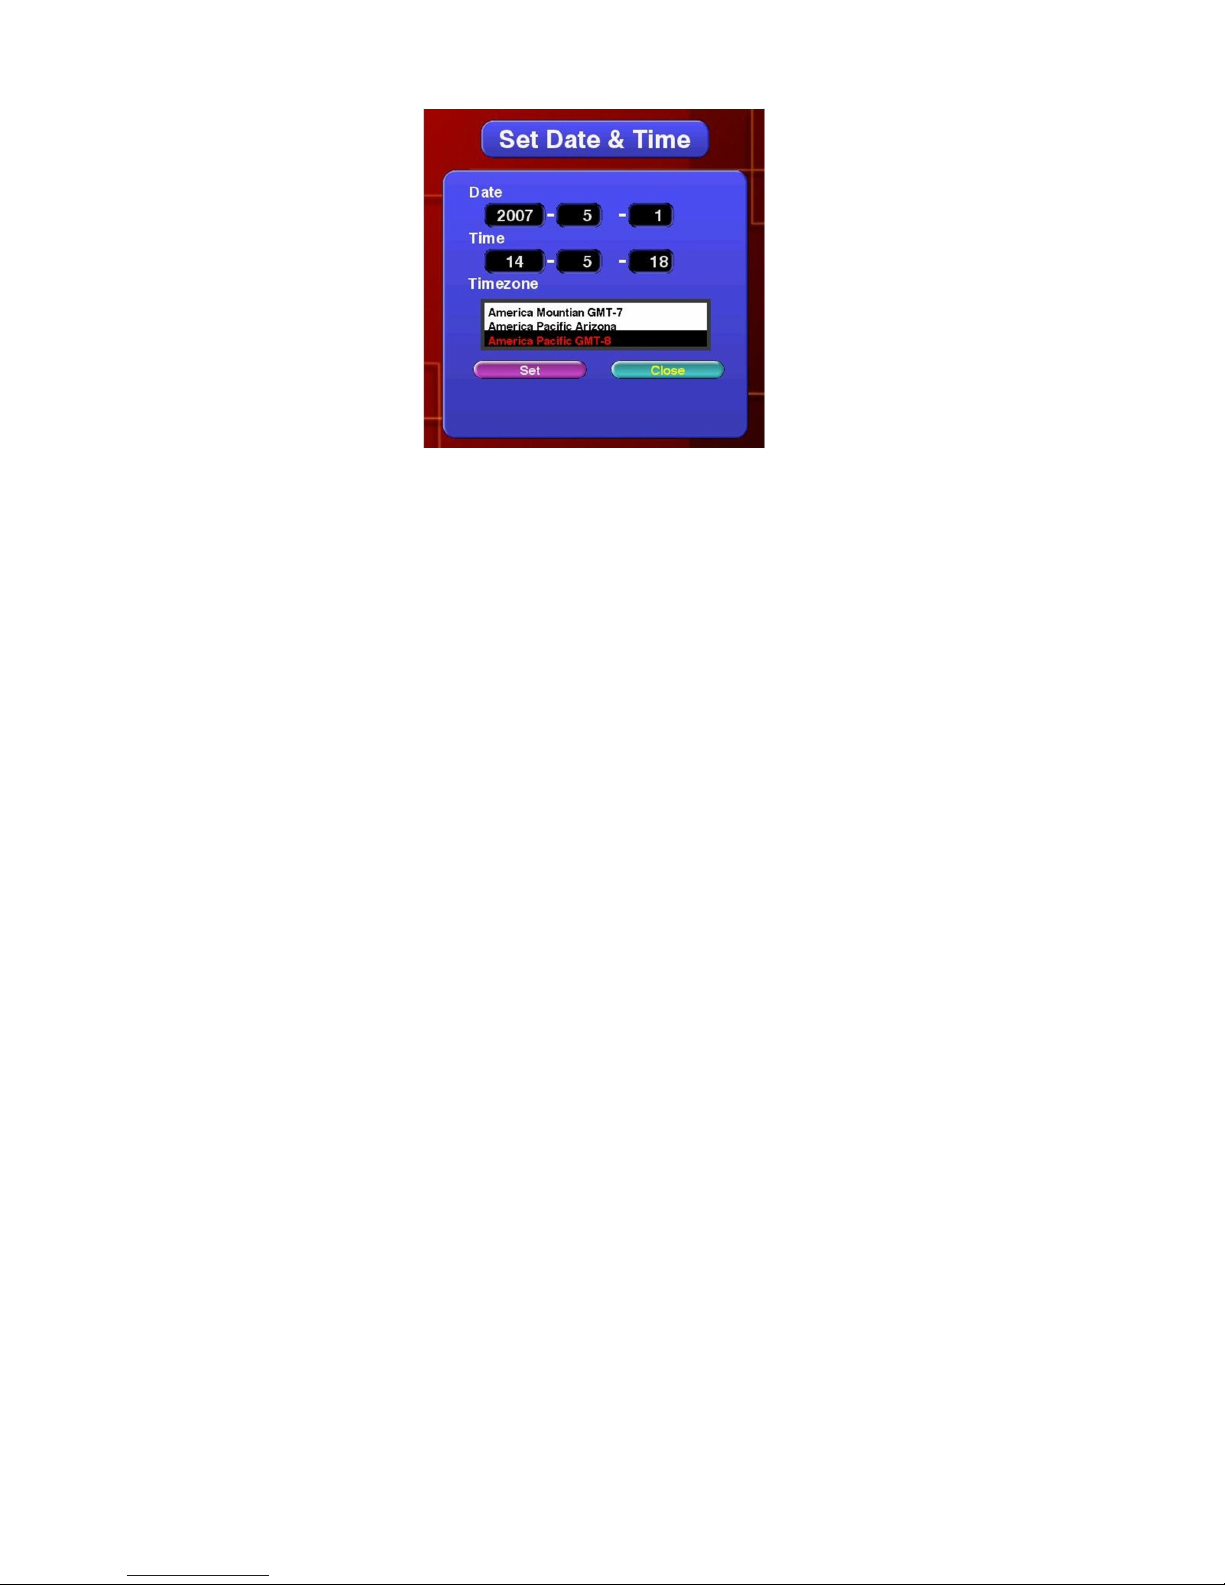
SEt DatE & tIME MEnU
From the Main menu, highlight “Set Date & Time” and press Select. The Set Date and Time menu
will appear:
12 tEChnICal SUPPORt: 800.283.5936
»NOTE: When you create pages on your PC, you can set starting and ending dates
and times, therefore it is very important that the date and time on the playback system
are set accurately to assure proper playback.
Press the right arrow key to highlight the first ‘Date’ field.
Use the up and down arrow buttons to change the value of a field, and use the left and right arrow
buttons to move between fields.
The format is YEAR – MONTH – DAY.
Once you have adjusted the numbers to reflect the current date, press Select to move down to the
first ‘Time’ field.
Use the left and right arrow keys to select which number you wish to modify, and use the up and
down arrow keys to change the value of that number.
The format is HOUR – MINUTES – SECONDS.
»NOTE: This menu uses 24-hour notation, meaning that hours range from 00 to 23
instead of the usual 1-12 AM/PM. For example, Midnight is 00:00, 8 AM is 08:00,
Noon is 12:00, 1 PM is 13:00 and 11 PM is 23:00.
Use the up and down arrow buttons to highlight the desired time zone, and press the Select key
to highlight “Set” and press the Select key again to confirm the settings.
Press the right arrow key and select to return to the main menu.
nEtwORK SEttIngS MEnU
All IMPRESS units feature built-in support for Ethernet networking.
»NOTE: Ethernet networking can be a complex subject. If you are not familiar with
the meaning and implementation of terms like “IP Address, “TCP/IP”and “Subnet
Mask,” then we recommend you have your network administrator assist you with
these menus. ClearOne can assist with the diagnosis of network-related problems,
but cannot advise on how to configure the IMPRESS system for installation on a
specific network.

USER ManUal 13
All network settings are adjusted by selecting the “Network Settings” menu from the Main Menu
screen:
TCP/IP Address - Use the left and right arrow keys to select which number you wish to modify, and
use the up and down arrow keys to change the value of that number. When you are finished, press
the Select key to move down to the Subnet entry.
Subnet Mask - Set the Subnet value to the one used on your network the same way you entered
your TCP/IP address. (This value is provided by your network administrator). It is important that the
Subnet match the Subnet of your network, or communication with the IMPRESS unit may not work.
When you are finished, press the Select key to move down to the Gateway entry.
Gateway - In some networks, setting just the TCP/IP address may be sufficient. However, in more
complex networks, a “Gateway” value is required. Set the Gateway value to the one used on your
network the same way you entered the previous two addresses. (This value is provided by your
network administrator.)
»NOTE: If you are installing the IMPRESS unit behind a router, the router address must
be entered in the Gateway setting before the IMPRESS will talk across the router.
When you are finished, press the Select key to move down to the Domain entry.
Domain - In some networks, setting just the TCP/IP address may be sufficient. However, in more
complex networks, a Domain Name Server (DNS) may be required, and that address can be
specified here. Set the Domain value to the one used on your network the same way you entered
the previous three addresses. (This value is provided by your network administrator.)
»NOTE: If you are installing the IMPRESS unit behind a router, the Domain Name
Server address must be entered in the Domain setting, or the unit may not be able to
find other machines on the network.
When you are finished, press the Select key to highlight ‘Set’ and press the Select key again to
save your settings. Press the right arrow key followed by the Select key to return to the main menu.

14 tEChnICal SUPPORt: 800.283.5936
VERIfyIng thE nEtwORK SEtUP
Once the IMPRESS networking hardware has been connected and its settings have been configured,
your Network Administrator should verify that the network is operating properly.
To verify that data can reach the IMPRESS IM100 unit, use a PC on the same network. Open a Com-
mand prompt on the PC, then type in a “ping” command:
ping x.x.x.x
Substitute your IP address for the “x.x.x.x” shown above. For example, if the IP address of your
IMPRESS unit is “10.1.1.4”, then you should type:
ping 10.1.1.4
If your network connection is successful, you should see results similar to the following:
C:\Windows>ping 10.1.1.4
Pinging 10.1.1.4 with 32 bytes of data:
Reply from 10.1.1.4: bytes=32 time<10ms TTL=255
Reply from 10.1.1.4: bytes=32 time<10ms TTL=255
Reply from 10.1.1.4: bytes=32 time<10ms TTL=255
Reply from 10.1.1.4: bytes=32 time<10ms TTL=255
Reply from 10.1.1.4: bytes=32 time<10ms TTL=255
Ping Statistics for 10.1.1.4:
Packets: Sent = 4, Received = 4, Lost = 0 (0% loss).
If a connection cannot be established between the IMPRESS and your networked PC, you should
repeat the hardware and software setup steps, verifying your settings. Pay particular attention to
the IP address and Subnet value.
If the above test still fails, have your Network Administrator contact ClearOne.
USER ManUal 15
InStallatIOn MEnU
The installation menu provides controls for updating the player unit’s software (see next section)
and restoring either of the two pre-installed demonstration projects.
SyStEM MEnU
The System menu allows you to turn off or restart the IMPRESS player. When possible, always use
one of these options rather than holding in the power switch to shut the player off.
UPDATING THE UNIT’S SOFTWARE
Occasionally, ClearOne will issue upgrades to the IMPRESS software. These upgrades are issued
on the ClearOne website. Use the either of the following procedures to update your IMPRESS.
UPDatE PROCEDURE
There are two methods for updating the IMPRESS software: USB Memory Stick and Online:
USB Memory Stick Update
This method requires a USB memory stick containing the update provided by ClearOne. Contact
ClearOne support for more information.
After you have obtained the update, press the Menu key on the control keypad to display the
IMPRESS menu. Use the arrow keys to highlight the Installation button and press the Select key.
To update from a USB memory stick you will use the same “Update From CD” control in the menu.
»NOTE: There isn’t a CD-ROM on the IMPRESS unit but the control operation is the
same.
Insert the USB Memory stick into USB connector on the face of the IMPRESS unit and press the
Update from CD button.
This procedure will take approximately 60 to 90 seconds – afterwards, the application will be
restarted.
When the IMPRESS has completed its restart, press the Menu key to verify that the new version was
installed successfully.
Online Update
The IMPRESS can also be updated using an online remote update application which pushes the
updates out to the IMPRESS unit. Contact ClearOne support for more information..

16 tEChnICal SUPPORt: 800.283.5936
StreamNet Setup and TouchLinX Screens
For the IMPRESS IM100 to become a source device on the StreamNet network, it must communicate
through a MediaLinX encoder. This is accomplished in the Dealer Setup program. This section
assumes the user is knowledgeable and experienced in using the Dealer Setup program and will
only discuss the IMPRESS specific MediaLinX settings.
When you start Dealer Setup program, the MediaLinX attached to the IMPRESS IM100 will be
automatically detected like any other DigiLinX device. :
ADDING A MEDIALINX WITH AN IMPRESS IM100 TO A PROJECT
Enter the following information:
Source Name - The Name used for the IMPRESS A/V source.
Model Number - Select from the drop-down list (using the down arrow key) to select the
correct model number for the MLAV device.
Video Input - The video source input connected to the MLAV (VGA or HDMI).
Source Type - The type of source for the MLAV. Select ClearOne IMPRESS.
Click Save & Continue.

USER ManUal 17
To configure the MediaLinX for use with the IMPRESS, set the following:
1. Source Type
In the Source tab, set the Source Type to “ClearOne Impress.” The Driver File will automatically
select “Impress.lua.”
SOURCE CONFIGURATION
The MLAV9300 or MLAV9500-CS encoder being used to interface the IM100 to the StreamNet
network must have the correct Driver File,Source Type, IMPRESS IP Address and IMPRESS
Password defined. Verify the configuration information on the tabs for the device as shown in the
following screen examples The following screen is shows the Source tab for a MediaLinX given a
Source Name of IMPRESS.

18 tEChnICal SUPPORt: 800.283.5936
USING THE IMPRESS SOURCE
Now the IMPRESS is a source within the StreamNet network, it can be selected via a TouchLinX
controller for display. Furthermore, if the IMPRESS has had multiple projects published to it, these
projects can be individually selected for display.
The following example shows “IMPRESS” highlighted to be selected on the control:
2. Enter the IMPRESS IP Address and the IMPRESS Password (if used) of the IMPRESS unit.
See “Set Password” in the “IMPRESS Composer Setup, Completing Site Setup” section of this
guide for more information.
3. Save the changes and exit the program
Other manuals for IMPRESS IM100
1
Table of contents
Other Clear One Digital Signage manuals


