Coachman Caravan 2015 User guide

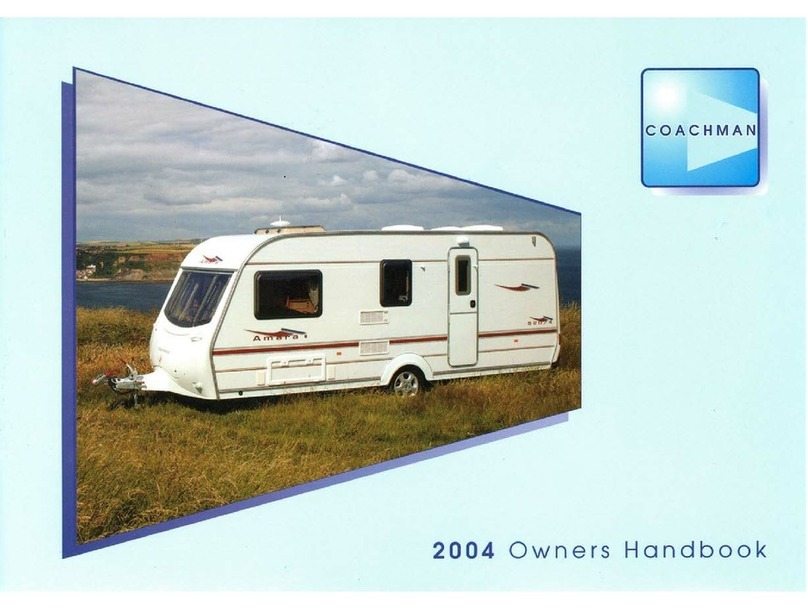
2015 Owners Handbook
Coachman 5 Year Warranty
Upgrade to a Coachman
www.coachman.co.uk
Coachman Caravan Company Ltd
Aftercare Operations
Amsterdam Road
Sutton Fields Industrial Estate
Hull HU7 0XF
Tel: 01482 877405
Upgrade to a Coachman

1
CONTENTS
Introdu tion 2
Se urity 5
Your Caravan 6
Towing Code 8
Preparing for the Road 11
Pre-Tow Checklist 13
Coupling Up Checklist 21
Towing & Driving 22
Reversing 22
Pulling Off 22
Caravan Handling 22
Changing a Wheel 23
Safety & Se urity 24
Fitment of AL-KO Se ure 25
Arrival at Site 27
Conne ting Servi es 28
Water 28
Gas 35
Electricity 38
Caravan Equipment 47
Com i Heater 47
Control Panel 50
Alde Heating/Water System 58
Refrigerator 62
Oven, Ho & Grill 69
Microwave 74
Smoke Alarm & CO2 Alarm 75
Thetford Cassette Toilet 81
Rooflights 85
Omnivent 85
Mini Heki 89
Midi Heki 89
Entertainment System 91
Television & Radio Aerial 91
Security Alarm System 92
Beds & Bunks 94
Care of your Caravan 95
Cleaning 95
Storage 99
Maintenan e 100
AL-KO Chassis 100
Servi ing 104
Warranty 106
All Coachman Caravan models have een
certified y the National Caravan Council for
compliance with stringent European Standards,
British Legislation and Industry set Codes of
Practice specifically relating to health and safety
issues. The approval process covers the testing
and inspection of critical areas of the product
from fire safety, weights and dimensions to gas,
electrics and ventilation. Every Coachman
Caravan carries the “NCC Approved Caravan”
adge. The NCC also conducts unannounced
inspections at the Coachman factory to ensure
continued compliance. NCC approval gives
you pea e of mind that your aravan is legal
and safe.
Not all equipment des ribed is fitted to
every derivative, to he k your individual
spe ifi ation please he k with the bro hures
and your Dealer.
All the illustrations and descriptive matter in this
guide are intended to give a general idea of the
caravan. Changing market and supply situations
may prevent us from maintaining exact
specification details in this guide and we therefore
reserve the right to alter specifications as
materials and conditions demand.
Please check current details with your dealer and
inspect the caravan to ensure it is satisfactory
efore purchase. Dealers are not agents and have
a solutely no authority to ind Coachman
Caravan Company Limited y any express or
implied undertaking or representation.
Coa hman Caravan Company Limited, Amsterdam Road,
Sutton Fields Industrial Estate, Hull, HU7 0XF Tel: (01482) 877405
A5 O ners Handbook 2015_2_Layout 1 26/08/2014 16:20 Page 1

WELCOME TO THE WORLD
OF CARAVANS
You are now the owner of a quality caravan.
The User’s Guide has een prepared for
your guidance to help you derive the
greatest amount of pleasure from the use of
your caravan. It is recommended that you
read the pages of this guide thoroughly so
that you are fully conversant with all the
caravan systems. The major proprietary
components of the caravan such as the
chassis, heater, oven, water heater,
refrigerator and electrical control systems all
have their own comprehensive operating
instructions which should e supplied with
your caravan. It is strongly recommended
that you read these too as it is not possi le
to include all the information they contain in
this hand ook.
Your supplying distri utor is responsi le for
carrying out a thorough pre-delivery
inspection on your caravan and also for
arranging any warranty work or routine
servicing which may e required.
Authorised Dealers will e a le to supply
any replacement parts for your caravan,
should the need arise, along with any
accessories you may require. Please note
that it is not possi le to purchase
replacement parts or accessories direct from
the manufacturer.
We are sure you will have many happy times
with your caravan ut please remem er a
happy carefree time is ased on proper,
thorough and responsi le preparation,
careful driving with regard to the “Rules of
the Road”, other road users and a ove all
ensuring your caravan is in a first class
roadworthy condition. It is a condition of
your warranty that your caravan is serviced
y an authorised Dealer once every twelve
months and that the service record in the
ack of your Warranty and Service Manual,
is maintained in accordance with
instructions.
Your Coachman Caravan has een designed
as a luxury recreational vehicle and is
intended for recreational use only. It is not
intended for living in, using for usiness
purposes, or hiring, and the Company
accepts no lia ility if the caravan is used for
any purposes other than holidays.
To ensure the very est quality and relia ility
the caravan has een through an extensive
design and testing programme. Therefore
the Company a epts no liability if the
aravan is altered or modified in such a
way that, in the Company’s opinion, the
changes would adversely affect the
relia ility.
You should onsult your Dealer before
any additional equipment is fitted.
REPAIRS
We at Coachman, together with our
suppliers, are continually undertaking
extensive research into, and testing of,
repair procedures and materials such as
ody sealant, adhesives, gaskets and tapes.
2
INTRODUCTION
TOWING VEHICLES
• When selecting a towing vehicle for
your caravan we strongly recommend
you consult THE CARAVAN TOWING
GUIDE, which is ased on the
recommendations of the NCC, and a
copy of which is in the information
pack provide with this caravan.
• The caravan is manufactured for
towing ehind normal road cars and
is not suitable for towing behind
ommer ial vehi les. Providing care
is exercised when towing with a 4x4,
especially when off road and loading
limits are strictly adhered to, then no
pro lems should arise. However,
some 4 x 4 pickups have tremendous
rear suspension movement which
could, over time e detrimental to
the chassis of any caravan, on these
we would recommend a shock link
is fitted.
A5 O ners Handbook 2015_2_Layout 1 26/08/2014 16:20 Page 2

Therefore if you damage your caravan or it
should require repairing for any reason, then
these repairs must e carried out y an
authorised dealer using Coachman genuine
parts, recommended sealant and following
Coachman procedures.
IMPORTANT
The 17 character VIN of your caravan should
e quoted in all correspondence. This
num er is also shown on the NCC
Certificate.
WARRANTY
All Coachman Caravans carry a five-year
manufa turer’s warranty. This warranty
applies to the UK and Northern Ireland.
The Coachman warranty does require that a
full annual service e carried out y a
competent Service Centre. This service must
e carried out within 90 days either side of
the anniversary of the purchase date for
interim years ut efore the anniversary date
on the final year and must include a full
damp check. Additionally if customers
damage their caravan, or should it require
repairing for any reason, then these repairs
must e carried out without delay y a
competent Service Centre using Coachman
genuine parts, recommended sealant and
following Coachman procedures.
To a tivate your warranty your dealer
must omplete the registration form in
the Warranty and Servi e handbook and
return it to Coa hman within one week of
olle tion.
WATER INGRESS
We at Coachman recognise that while over
recent years we, together with our sealant
suppliers, have made tremendous
developments in sealants and sealing
techniques and are extremely confident in
our product resisting water ingress, it is
water ingress a ove all other pro lems
which remains the main worry and concern
of potential and actual retail customers.
Therefore, on every new Coachman caravan
sold, we make a comprehensive 6 year
Worry Free Water Ingress and
Delamination Offer:
• Water Ingress etween new and 5 years
– All la our and parts covered y the
Coachman Warranty provided there is a
full service history.
• Water Ingress etween 5 and 6 years:
Coachman will pay the total la our cost and
supply parts free of charge provided there is
a full service history and the fifth service was
carried out efore the anniversary date on
the final year of the five year warranty.
When a customer part exchanges a
Coachman caravan at a Coachman Dealer
and water ingress is detected at the time of
the part exchange Coachman confirms they
will pay the dealer the total of the agreed
cost of any repair undertaken to rectify the
water ingress provided:
1. It is eing exchanged for a new
Coachman Caravan.
2. There is full documentary evidence that
the caravan has een serviced annually.
3. The caravan is less than 6 years old.
Additionally for 2015 model year aravans
onwards for the first owner, Coa hman
make a 10 year worry free water ingress
offer:
• Water ingress etween new and 5 years -
all la our and parts covered y the
Coachman warranty provided there is a
full service history.
• Water ingress etween 5 and 10 years -
Coachman will pay the total la our cost
and supply parts free of charge provided
there is a full service history and the 5th
and 10th service were carried out efore
the anniversary date on the final year of
the 5 year warranty and final year of this
offer.
3
INTRODUCTION
A5 O ners Handbook 2015_2_Layout 1 26/08/2014 16:20 Page 3

As with the Coachman 5 year warranty all
water ingress offers are su ject to the
conditions, terms and exclusions listed in
this hand ook and the Warranty and Service
Manual.
GENERAL WARRANTY TERMS
The caravan is not covered if the
manufacturer’s identification (vehicle
identification num er) of the caravan has
een defaced or removed.
The warranty also excludes
• Failure due to reasons of fair wear and
tear.
• Damage resulting from accidents.
• Misuse of any component.
• Replacement of parts which have reached
the end of their effective working life
ecause of age and/or usage.
• Cleaning or adjustment of any assem lies.
In order to preserve your Coa hman
warranty you must ensure:-
• Your annual service is carried out within
90 days either side of the anniversary of
the purchase date.
• The 5th service is carried out efore the
expiry of the 60 month period from the
original date of purchase.
To preserve your 6 year worry free water
ingress and delamination offer you must
ensure:-
• The 6th annual service is carried out
efore the expiry of the 72 month period
from the original date of purchase.
To preserve your first owner 10 year
worry free water ingress offer you must
ensure:-
• Your annual services in year 1-6 have
een carried out in line with the timings
detailed a ove.
• Your services in years 7, 8 and 9 are
carried out within 90 days either side of
the anniversary of the purchase date.
• Your 10th service is carried out efore the
expiry of the 120 month period from the
original date of purchase.
The warranty will e invalidated if the
caravan has een neglected, misused or
modified in any way without the prior
agreement of Coachman Caravans.
The aravan will be deemed to have been
negle ted if it has not been servi ed and
maintained as stated in the Warranty and
Servi e handbook.
The warranty also excludes:
• Caravans used for hire or reward.
• Caravans used for other than recreational
purposed i.e. for living in or usiness
purposes.
• The cost of transporting the caravan, y
whatever means, to the place of repair.
• Any consequential cost or loss arising.
• Damage y mould
• Damage y forces of nature.
• Damage y vermin.
For full details of the warranty refer to your
Warranty and Service hand ook.
NOTE: Caravan Movers
Any caravan mover fitted shall comply with
the design, fitment and safety requirements
of NCC Code of Practice 305. The
installation of a caravan mover shall e in
accordance with the motor mover
manufacturer’s installation instructions.
You should ensure you re eive a signed
installation ertifi ate of omplian e from
the installer. Failure to do so may
invalidate your warranty.
4
INTRODUCTION
A5 O ners Handbook 2015_2_Layout 1 26/08/2014 16:20 Page 4

5
SECURITY
FIRE RETARDANT FOAMS
Under the Condition of the Consumer
Protection Act 1987, the manufacturer has a
responsi ility to ensure that their product is
as safe as possi le.
With this in mind all caravans are equipped
with either Com ustion Modified High
Resilient (C.M.H.R.) foam cushions or
sprung mattresses. (These foams are very
much safer from a fire point of view than
those previously used. In addition all
upholstery is made of fire retardant fa ric).
NOTE: Whilst this manual will des ribe
the general operation of the aravan, we
re ommend that you refer to the
individual equipment manufa turers
manuals for detailed information.
CARAVAN REGISTRATION AND
IDENTIFICATION SCHEME – VIN
The caravan has een security marked and
recorded under the Caravan Registration
and Identification Scheme that is recognised
y the Caravan Industry.
Shortly after purchasing this caravan you
should receive your Touring Caravan
Registration Document. It will e sent y
post to your home address.
Your Touring Caravan Registration
Document will include a 17 character VIN
(Vehicle Identification Num er), shown in the
top right hand corner. This 17 character VIN
will e die stamped into the caravan
draw ar and chemically etched on up to a
maximum of 10 eye level windows.
To protect yourself and your touring caravan,
never leave the Registration Document in
the caravan. For security reasons keep it in
a safe place.
If you sell the caravan please follow the
instructions on the Touring Caravan
Registration Document.
If you do not receive a Touring Caravan
Registration Document, lose it, or any of the
details recorded are incorrect, please
contact:
CRIS
Dolphin House
New Street
Salisbury
Wiltshire
SP1 2TB
Telephone 01722 411430
SECURITY TAG
Two electronic security tags containing the
individual identity of your caravan are
concealed within the caravan ody and can
only e read y using a special decoder.
Your local police can o tain the use of a
decoder y contacting C.R.I.S. on telephone
No: 01722 411430.
A5 O ners Handbook 2015_2_Layout 1 26/08/2014 16:20 Page 5

6
PHANTOM TRACKING SYSTEM
Laser models are fitted with the Phantom
Tracking System. This ena les the 24 hours
Phantom Monitoring Centre to pinpoint the
location of the caravan through a glo al
positioning satellite system.
Once the caravan arrives at the Dealers they
could choose to call Phantom or simply
instruct the customer to do so to register
their purchase. There is no longer any
connection for the Dealer or customer to
make, nor even a need to e with the van to
complete the activation.
The caller will simply need to provide their
CRIS num er to lead Phantom to their
device on the data ase. A simple command
from the Phantom server will turn the alerts
on and the device will e fully activated in
what should e a 5 minute phone call.
The customer will then e alerted as
follows……
Battery disconnected
Leisure attery running down (triggers a out
10v).
Phantom ack up attery running low.
Sargent alarm triggering.
You can also register your Email address
which will ena le you to access the portal to
o serve your caravan’s current position and
attery status.
For further details and instructions please
refer to the Phantom literature.
The following is a rief description of the
main components used in your caravan.
More comprehensive descriptions are to e
found in the equipment manufacturers’
literature held in the wallet with this guide.
AL-KO GALVANISED CHASSIS
The AL-KO chassis fitted to your Coachman
is constructed from high quality, hot dip
galvanised steel.
The axles and suspension are comprised of
3 ru er elements within a hexagonal tu e.
Additional Al-KO Octagon Shock A sor ers
are fitted as standard for increased damping
and improved road holding.
BRAKING SYSTEM
The raking system comprises a rod
operated overrunning device with expander
mechanism and adjuster ox.
An automatic reversing system with a
spring-loaded reverse lever is attached to
the adjuster ox.
The system also incorporates a link device,
which gives added safety to the hand rake
operation when parking on a reverse slope
or steep hill. Brake adjustment should e
carried out y your Dealer.
BODY SHELL
Caravan odies are constructed from the
highest quality materials. The floor is
constructed from a Styrofoam plywood
sandwich, impregnated with anti-damp and
rot compounds and adhesives.
The wall comprises an insulated foam
sandwich having a pre-coated aluminium
exterior surface and a coated plywood
interior finish. Framing is positioned within
the sandwich to add strength.
The very latest ‘state of the art’ presses are
employed to produce the extremely well
insulated, ro ust, yet lightweight sections.
Windows are all of a dual glazed acrylic
construction and the door frames are
extruded aluminium. Fronts and acks are
moulded acrylic capped ABS construction
for strength and lightness.
Each caravan is fitted, as standard with an
awning channel as an integral part of the
YOUR CARAVAN
Note: Holes must not be drilled into
the hassis. When pur hasing a
stabiliser, onsult your Dealer who
will advise you.
A5 O ners Handbook 2015_2_Layout 1 26/08/2014 16:20 Page 6

7
YOUR CARAVAN
aluminium roof and ody side moulding.
If it is found necessary to fit additional
attachments care must e taken to ensure
any holes that are drilled in the outside of
the ody are correctly sealed (this should e
carried out only y an approved
Dealer/Workshop).
Awnings which employ ru er sucker
attachments rather than screw fixings are
recommended.
On NO a ount should s rew threads
longer than 15mm (5/8th in h) be
permitted to enter the shell sandwi h
(from inside). Ensure that all s rews are
of the self-tapping type.
All Coachman Caravans are classified as
Grade 3 thermal insulation. This means that
with an outside temperature of -15ºC the
internal temperature can e raised to 20ºC
within 4 hours of starting the heating.
EXTERIOR DOORS
The Vision and Pastiche are fitted with the
Holzhauer one piece door and VIP and Laser
models are fitted with Seitz exterior doors.
Firstly and most importantly, the door must
not e slammed.
When losing the door from the outside,
the handle should e pulled and the door
pushed to with one hand. With the other
hand, pressure should e applied to the
front of the handle surround then the handle
should e released and you will hear a click.
This indicates that the door is shut.
When losing the door from the inside,
you should move the lever down, pull the
door closed firmly then release the lever.
PLEASE NOTE. While the roof is
extremely strong and will take the
weight of a person it should not be
walked upon without spreader
boards as point loads will damage
the aluminium. Also if going on the
roof all other normal Health and
Safety points apply.
A5 O ners Handbook 2015_2_Layout 1 26/08/2014 16:20 Page 7

GETTING STARTED
Please refer to the NCC Caravan Towing
Guide contained in your information pack
prior to your first outing.
TOWING CODE
PAYLOADS FOR UK TOURING
CARAVANS
The Code of Practice has een prepared y
the National Caravan Council and
formulated with input from industry experts.
The Code of Practice applies to UK
specification Touring Caravans and applies
for NCC certification to 2012 VIN onwards
Touring Caravans.
The Code of Practice provides for the
requirements for European Whole Vehicle
Type Approval EWVTA, 2007/46/EC (The
Framework Directive) and the directives
referenced therein.
DEFINITION OF TERMS
MAXIMUM TECHNICALLY
PERMISSIBLE LADEN MASS
(UPPER LIMIT)
This mass takes into account specific
operating conditions including factors such
as the strength of the materials, load
capacity of the tyres, etc. This mass must
not e exceeded.
MAXIMUM TECHNICALLY
PERMISSIBLE LADEN MASS
(LOWER LIMIT)
The fully laden mass of the caravan in the
manufacturer’s standard specification which
is stated in the pu lications y the
manufacturer for tow car matching.
MRO – Mass in Running Order
Mass of the caravan equipped to the
manufacturer’s standard specification plus
the following
a) LPG
The mass of the recommended gas storage
tank(s) when filled to 90% of the permissi le
maximum capacity.
b)Fluids
The mass of the liquids normally remaining
in the systems:
1. Central heating system – full;
2. Freshwater – the mass of any fixed water
storage tank(s) when filled to 90% of the
permissi le maximum capacity;
3. Toilet system flushing tank – (2kg);
4. Toilet system holding tank – empty;
5. Essential fluids for the use of any other
items of standard equipment – full.
) Ele tri ity supply
4kg for the low voltage connection ca le.
NOTE: No payload allowan e is in luded
in the MRO for a full water heater. It is
re ommended that you tow with the
water heater empty.
8
TOWING CODE
PLEASE TAKE CARE TO ENSURE
THAT YOU HAVE ALLOWED FOR THE
MASSES OF ALL ITEMS YOU INTEND
TO CARRY IN THE CARAVAN e.g.
optional equipment and personal
effe ts su h as lothing, food, pets,
bi y les, sailboards, sports
equipment et .
WARNING – UNDER NO
CIRCUMSTANCES SHOULD THE
MAXIMUM TECHNICALLY
PERMISSIBLE LADEN WEIGHT BE
EXCEEDED
A5 O ners Handbook 2015_2_Layout 1 26/08/2014 16:20 Page 8

PERSONAL EFFECTS PAYLOAD
The user payload allows for items common
to all occupants, such as food, cutlery, pots,
pans, clothing, footwear, edding, sports
equipment etc.
The user payload shall not e less than:
10L + 10N + 50(kg)
Where:
L is the overall length of the caravan in
metres excluding draw gear as give in ISO
612.
N is the sum of all standard and optional
erths.
The user payload includes an allowance for
auxiliary attery.
OPTIONAL EQUIPMENT
Items made availa le y the manufacturer
over and a ove the standard specification of
the caravan.
The manufacturer shall specify the mass of
each factory fitted item of optional
equipment availa le including the mass of
any fluids required for their safe and proper
use.
Alternatively the manufacturer can specify a
maximum optional payload availa le. The
user can then choose any options up to this
limit.
In either case this mass shall e added to
the user payload.
NOSE WEIGHT
The part of the weight of the caravan
supported y the rear of the towing vehicle.
When measuring the nose weight, it is
important that the caravan is loaded and
level. Do not place extra items
indiscriminately into the caravan after this
adjustment has een made.
The caravan is intended to e towed slightly
nose heavy. The nose weight can e
adjusted y distri ution of the load within
the caravan. You must not exceed the
maximum nose weight rating of the hitch
head, which is 100kg or that of the towing
vehicle as stated in the manufacturers
hand ook. The caravan’s nose weight
should e as high as practical; taking into
account the towing vehicle and caravan
nose weight limits.
TOWING VEHICLE TERMS
Kerb weight:
The weight of the towing vehicle as defined
y the vehicle manufacturer.
The Caravan and Towing Vehi le Weight
Ratio
This can e determined y calculation and is
equal to:
actual laden mass of caravan
ker weight of towing vehicle x 100%
9
TOWING CODE
THE MASS OF THE CARAVAN IN
RUNNING ORDER CONTAINS
PROVISION FOR THE MASSES OF
LIQUIDS, GAS ETC (SEE MASS IN
RUNNING ORDER IN USER
HANDBOOK). PART OF THIS
PROVISION CAN ALSO BE UTILISED
AS ADDITIONAL PAYLOAD IF FOR
EXAMPLE YOU WISH TO TRAVEL
WITH WATER TANKS EMPTY (IF
FITTED) OR WITH NO GAS CYLINDER.
THE LAW REQUIRES THAT
CARAVANS & THEIR TOWING
VEHICLES & THE LOADS THEY
CARRY MUST BE IN SUCH A
CONDITION THAT NO DANGER OR
NUISANCE IS CAUSED. (Regulation
100 of the Road and Vehi les
(Constru tion and Use) Regulations
1986).
A5 O ners Handbook 2015_2_Layout 1 26/08/2014 16:20 Page 9

POWER TO WEIGHT RATIO:
No hard and fast rules can e stated ut
here is a general guide.
a) Conventional petrol engines with a
capacity up to approximately 1500cc
should e adequate for towing a caravan
weighing around 85% of the ker weight
of the towing vehicle.
) A ove 1500cc such engines should
manage a caravan weighing up to 100%
of the ker weight of the towing vehicle
and still give adequate performance.
Note: The towing vehicle manufacturer’s limit
is, in some cases, less than the ker weight.
Vehicles with automatic transmission may
need an oil cooler fitting or the SAE rating of
the gear ox oil increasing when towing. The
advice of the vehicle manufacturer should
e sought.
MEASUREMENT OF NOSE WEIGHT:
Nose weight may e measured using a
proprietary rand of nose weight indicator.
Such equipment is o taina le at your
caravan Dealer.
Another simple method is to use athroom
scales under the coupling head with a piece
of wood etween the coupling head and the
scales, of such length that the caravan floor
is horizontal with the jockey wheel raised.
Nose weight can e adjusted simply y
distri ution of weights in the caravan.
(See Loading)
10
TOWING CODE
A5 O ners Handbook 2015_2_Layout 1 26/08/2014 16:20 Page 10

In order to e a le to tow a caravan a driver
must hold a Category B licence. Those car
drivers who passed their tests prior to 1
January 1997 would have automatically
o tained Category B + E. However, anyone
who passed their test after 1 January 1997
will need to take a further test in order to
o tain a Category B + E if they wish to tow a
car and caravan com ination whose train
weight exceeds 3,500kg, or up to 4,250 if
the caravan is less than 750kg or if the
caravan’s Maximum Technically Permissi le
Laden Mass exceeds the unladen weight of
the car.
Note: The unladen weight of a car is
normally less than the ker side weight.
If you are unsure contact the DVLA at
Swansea for further details.
Compulsory Third Party Insurance cover is
required y the Road Traffic Act for a
caravan and this is normally provided y the
towing car Insurance Policy, ut it is
essential that you ensure your car Policy is
not invalidated y towing.
Do not forget to take out separate Insurance
Cover on the Caravan and Contents.
LOADING AND DISTRIBUTION
OF WEIGHT
Under no circumstances should the MTPLM
of this caravan e exceeded.
When the towing vehicle and caravan are
fully laden and “ready to go” the towing
vehicle should e level fore and aft. If the
nose of the caravan is high at the start of
your journey you may experience snaking
and on rough and uneven ground the rear of
the caravan could catch the road.
Caravans should e loaded so that the nose
weight of the caravan is in accordance with
the tow vehicle manufacturer’s
recommendation. Also under no
circumstances should it exceed the
maximum hitch weight shown in the
specification for the caravan.
Heavy items should e stowed as close to
the axle as possi le and lightweight items,
such as edding, should e loaded at the
rear. Try to stow ulky tinned supplies in the
lower kitchen cup oards or even in the
ottom of the ed oxes until you arrive at
your final destination. Please note that the
roller catches and spring loaded doors are
only to keep the door closed and not to stop
items falling out of lockers and on to work
surfaces. Only light items should e stowed
high up in the roof lockers. Ensure that all
items are secure and will not move around
while on tow.
11
PREPARING FOR THE ROAD
A5 O ners Handbook 2015_2_Layout 1 26/08/2014 16:20 Page 11

Towing vehi le’s rear suspension
It is important that the towing vehicle’s rear
suspension is not deflected excessively y
the nose weight on the tow all. If it is
excessive the steering and sta ility will e
affected.
The greater the towing vehicle’s tail
overhang (the distance etween the rear
axle and the tow all) the greater the effect
the nose weight will have on the towing
vehicle’s rear suspension.
After trying out the caravan it may e found
that stiffening of the vehicle’s rear
suspension is necessary - note that this may
give the towing vehicle a firmer ride when
not towing.
There are a num er of suspension aids
availa le and advice should e sought on
which to use and how to fit.
It is important to ensure that the caravan is
towed either level or slightly nose down.
This is particularly important on twin axle
models.
STABILITY
The most common causes of poor sta ility
include:
a) Worn springs or loose spring fixings on
the towing vehicle.
) Towing vehicle springs too soft.
c) Insufficient nose weight.
d) Nose of caravan is towing too high.
e) Incorrect loading.
f) Incorrect tyre pressures on car or caravan.
Tyres and Pressures
The tyres fitted to your caravan will operate
with complete safety at the UK maximum
speed limit of 60 mph, ut the tyres are
rated to 130 km/hr. The tyres on your
caravan must e operated at the pressures
indicated on the caravan’s specification
sheet. Remem er that the towing vehicle
tyres should e inflated to the ‘heavy
loaded’ pressure given in the vehicle
manufacturers’ service hand ook.
Note: Pressures should only be he ked
when the tyres are old, not after a
journey or if the vehi le has been
standing in the sun.
Tyre Tread
This caravan is su ject to the same criteria
applied to car tyres, namely, the minimum
tread should e 1.6 mm around the total
circumference and across the entire width of
the tyre.
Brakes/Breakaway able
A reakaway ca le is fitted so that in the
case of the caravan ecoming detached
from the car it immediately applies the
rakes. Always ensure the reakaway ca le
is secured to the towing vehicle. See Page
20.
SNAKING
This is a term used to denote an unsta le
car and caravan com ination where the
caravan ‘weaves’ from side to side often
causing a similar swaying movement in the
car itself.
Causes:
I. Unsuita le or un alanced outfit.
II. Incorrect loading or weight distri ution.
III. Excessive speed especially downhill.
IV. Side winds.
V. Overtaking.
VI. Being overtaken y a large fast moving
vehicle.
VII. Erratic driving.
VIII.Insufficient tyre pressure.
12
PREPARING FOR THE ROAD
A5 O ners Handbook 2015_2_Layout 1 26/08/2014 16:20 Page 12

Cures:
Cases of persistent snaking can e
alleviated or even completely cured y
various proprietary devices, a out which
your dealer will advise you.
PRE-TOW CHECKLIST AND
HITCH-UP
Loose articles must e stowed securely.
Do not stow tins, ottles or heavy items in
overhead lockers prior to towing.
- ensure all lockers and cup oard doors are
closed and secured.
- all unks are secure.
- all rooflights are closed and secured.
- ta les are stored in their transit positions.
- fridge is on 12v operation and door travel
catch is set.
- all windows are fully closed and latched.
Never tow with windows on night setting.
Leave all curtains and linds open to aid rear
visi ility.
- gas cylinders and appliances are correctly
positioned, secured and turned off.
- attery is secure and mains connecting
ca le is disconnected and stowed.
Check Gas Locker, Battery Locker, Wet
Locker and Cassette Toilet doors are secure.
Check wheel olts, tyre pressures and tyre
conditions.
Lock the entrance door
STABILISERS AND TRACTION
CONTROL
All Coachman Caravans come fitted with a
sta iliser. It can make a good towing
vehicle/caravan com ination safer to handle.
A sta iliser should never e used to try to
improve a com ination, which has poor
sta ility, since insta ility will reappear at a
higher speed.
Coachman Caravans are also equipped for
the fitment of the Al-KO Trailer Control
System (ATC) and some models have it
fitted as standard.
The Al-KO ATC is the emergency raking
system for caravans and works in a similar
way to Electronic Sta ility Programme
systems for cars. The sophisticated, ut
simple electronic system monitors the lateral
movement of a caravan during travel. When
difficult driving conditions are experienced,
such as evasive manoeuvring, high side
winds and tur ulence encountered while
overtaking HGV’s, Al-KO ATC takes. control
to regain sta ility and prevent dangerous
snaking accidents.
ATC OPERATING INSTRUCTIONS
After coupling the caravan correctly to the
towing vehicle, connect the 13 pin plug to
the tow ar.
13
PREPARING FOR THE ROAD
CAUTION: Never enter the aravan
without first lowering the four orner
steadies with the bra e provided.
Corner steadies should not be used
as a ja king devi e, or to take the
weight of the aravan. Suitable towing vehi les
The aravan is manufa tured for
towing behind normal road ars and
is not suitable for towing behind
ommer ial vehi les other than
passenger ar derivatives. If in doubt
please onta t your aravan Dealer.
Note: Under no ir umstan es should
holes be drilled into the hassis
members e.g. for fitting additional
equipment.
A5 O ners Handbook 2015_2_Layout 1 26/08/2014 16:20 Page 13

Upon connection, ATC will carry out an initial
self-test and the LED light on the front fairing
will light up RED. During the self-test, the
sound of the push rod moving inside ATC
can e heard. When the self-test is
complete, the LED will turn GREEN or
flashing GREEN to signal that ATC is active.
If the LED does not change to GREEN, then
ATC is not functioning correctly. For details
of what to do in this case, see the provided
ta le on page 15.
Always re- he k the ATC LED is green
after any interval during a journey, su h
as a servi e station break.
TROUBLESHOOTING
Should you experience a fault with ATC, the
LED light on the fairing will change colour.
Therefore, refer to the ta le a ove and
follow instructions.
If no illumination of the LED is evident, refer
to system requirements and check tow ar
wiring for permanent supply.
In the unlikely event that you receive a red
flashing LED light and disconnecting and re-
connecting the power does not alleviate the
pro lem, check the push rod position as
detailed elow.
Locate ATC on the axle and check to
position of the push rod. (See
photograph right).
If no red line is visi le, ATC is not active and
can e driven. However, we recommend that
you contact Al-KO at the earliest
convenience.
If the red line is visi le on the push rod, as
shown on the left, the caravan should not e
moved.
Contact Al-KO or a specialist workshop.
14
PREPARING FOR THE ROAD
Important - A20 amp fuse is required
on the actual towing vehicle on the
constant 12v supply. Please check with
your Vehicle Dealer/Tow ar installer. If
only a single fuse is fitted at the tow ar
a minimum fuse rating of 25 amps must
e used.
Note: When providing power from an
independent supply e.g. a porta le
power pack it is necessary that a
attery rated at least 12V 55 Ah is used
to supply the auxiliary feed. It is also
important that the power supply is fused
at 20 amps.
ATC LED light on the fairing
A5 O ners Handbook 2015_2_Layout 1 26/08/2014 16:20 Page 14

15
PREPARING FOR THE ROAD
Display Colour ATC Condition Diagnosis What to do Out ome Status
Green ATC Active Everything OK
Green Flashing ATC Active Self test incomplete Drive forward to detect
movement to complete self
test and re check LED
Green (Constant) Ready for journey
Red ATC Inactive Possi le to continue
journey. Remove 13 pin plug and wait
5 seconds. Reconnect plug
Green
Red
Ready for journey.
ATC faulty ut can e
driven. Consult Al-ko.
See ack page of Al-
ko hand ook for
details
LED not working ATC has no power.
LED faulty
Check push rod
position as detailed
on page 5 of Al-ko
hand ook efore
continuing journey.
Remove 13 pin plug and
wait 5 seconds. Reconnect
the plug.
Check for constant live -
refer to system requirements
as detailed on page 3 of Al-
ko hand ook.
Green.
LED not working.
Ready for journey.
If power ok, check
push rod position.
Red line visi le -
possi le to continue
journey ut consult Al-
ko. See ack page of
Al-ko hand ook for
details.
Red flashing ATC has detected a fault Do not continue with
ATC connected Remove 13 pin plug and wait
5 seconds. Reconnect the
plug.
Green
Red (flashing)
Ready for journey.
ATC faulty and cannot
e driven. Remove
push-rod as shown on
page 5 of Al-ko
hand ook. Consult
Al-ko. See ack page
of Al-ko hand ook for
details.
Prior to commencing any journey, ensure that the caravan lighting is fully operational and check the vehicle is loaded appropriately, the nose
weight and tyre pressure are correct and confirm that the caravan is coupled to the vehicle tow ar correctly.
A5 O ners Handbook 2015_2_Layout 1 26/08/2014 16:20 Page 15

HITCHING UP
Wind up the corner steadies to the fully
retracted position.
Wind up the jockey wheel to raise the hitch
to the a ove height of the towing vehicle
all. Remove all cover.
(It is an advantage to have a person
standing y the caravan to direct the driver
of the towing vehicle to place the vehicle in
the correct position).
Reverse the towing vehicle so that the
towing all is just under the caravan hitch.
16
PREPARING FOR THE ROAD
A5 O ners Handbook 2015_2_Layout 1 26/08/2014 16:20 Page 16

Operating Instru tions – AKS 3004
The AKS 3004 sta iliser fitted to your
caravan has 4 special friction pads, which
suppress oth snaking and pitching and it is
essential that the tow all is kept completely
clean as contaminated pads will reduce its
effectiveness.
The maximum vertical static load for this
coupling is 100kg and must not e
exceeded. However, the vertical static load
on the towing vehicle may e less than this
(check with towing vehicle manufacturer).
Whichever is the least must not e
exceeded.
To hitch up with the AKS 3004 follow the
following procedure:
• Using the coupling handle (which should
e in the upright position), put the AKS on
to the tow all. Push the lack handle
down and check the green indicator
utton is showing. (Fig. 1)
• Press the red sta ilising lever down. The
AKS is now ready for the road. (Fig. 2)
Safety Indi ators
• If the green indicator is visi le then you
know you have correctly coupled your
AKS to your towing vehicle. (Fig. 3)
Wear Indi ator
For coupling mechanism and front/rear
friction pads. (Fig. 4)
• Wear of the coupling all and mechanism
can e easily monitored. If the green
section is visi le (when coupled to your
tow all) then the front/rear friction pads,
coupling all and mechanism are in order.
• If the red lower section o scures the
green section then you need to check
these parts immediately.
17
PREPARING FOR THE ROAD
AK 3004 STABILISER
Fig. 1
Fig. 3
Fig. 4
Fig. 2
A5 O ners Handbook 2015_2_Layout 1 26/08/2014 16:20 Page 17

Friction Pads Replacement
• Unscrew the 2 screws which are under the
red ru er soft dock y using the special
tool. (Fig. 7).
• Remove screw from ack plate. (Fig. 8)
• Remove friction pads. (Fig. 9)
Loading apa ity
The AKS 3004 can tow vehicles up to gross
weight of 3000kg and a maximum nose
weight of 100kg.
UNCOUPLING
Lower the jockey wheel to the ground.
Disconnect the reakaway ca le and plugs.
Release sta ilising lever and lift the coupling
handle whilst winding.
Lift the coupling head clear of the tow all.
18
PREPARING FOR THE ROAD
Fig. 5 Friction Pads are in good order
Fig.6 Friction Pads worn out & need
replacing
Fig.8
Fig.7
Fig. 9
A5 O ners Handbook 2015_2_Layout 1 26/08/2014 16:20 Page 18

Ele tri al Conne tions and Road Lighting
Plug in the 13 pin electrical connections and
check that all road lights work.
In accordance with EN150 11446 your
caravan is fitted with a 13 pin Jaegar plug
for electrical connections and road lighting.
If your car is fitted with the old type 12N and
12S sockets we would strongly recommend
that you do not use adaptors ut have it
rewired and a 13 pin Jaegar socket fitted.
(Ensuring the car socket is wired in
accordance with the drawing elow).
19
PREPARING FOR THE ROAD
PIN NO COLOUR DESCRIPTION
1 Yellow Left Flasher
2 Blue Fog Hazard Light
3 White Return for 1,2,4,5,6,7 & 8
4 Green Right Flasher
5 Brown Right Tail Light
6 Red Stop Lights
7 Black Left Tail Light
8 Orange Reverse Lights
9 Brown/Blue Car +
10 Brown/Red Fridge
11 White/Green Return for 10
12 NOT USED
13 White/Blue Return for 9
VIEWED FROM REAR
A5 O ners Handbook 2015_2_Layout 1 26/08/2014 16:20 Page 19
This manual suits for next models
14
Table of contents
Other Coachman Motorhome manuals
Popular Motorhome manuals by other brands

FOUR WINDS INTERNATIONAL
FOUR WINDS INTERNATIONAL motor home owner's manual

Grand Design
Grand Design Reflection Fifth Wheel 150 Series owner's manual

Airstream
Airstream 2013 SPORT owner's manual

REV
REV Midwest Automotive Design American Coach Patriot... owner's manual

Gulfstream
Gulfstream 8404 WFD owner's manual

Jayco
Jayco SENECA 2023 owner's manual