Colorlight C6 User manual


www.lednets.com
Content
Chapter 1 C6 Interface and Hardware Connection ........................................................................................................................................................................ 1
1.1 C6 Interface ...................................................................................................................................................................................................................... 1
1.2 Hardware Connection ...................................................................................................................................................................................................... 2
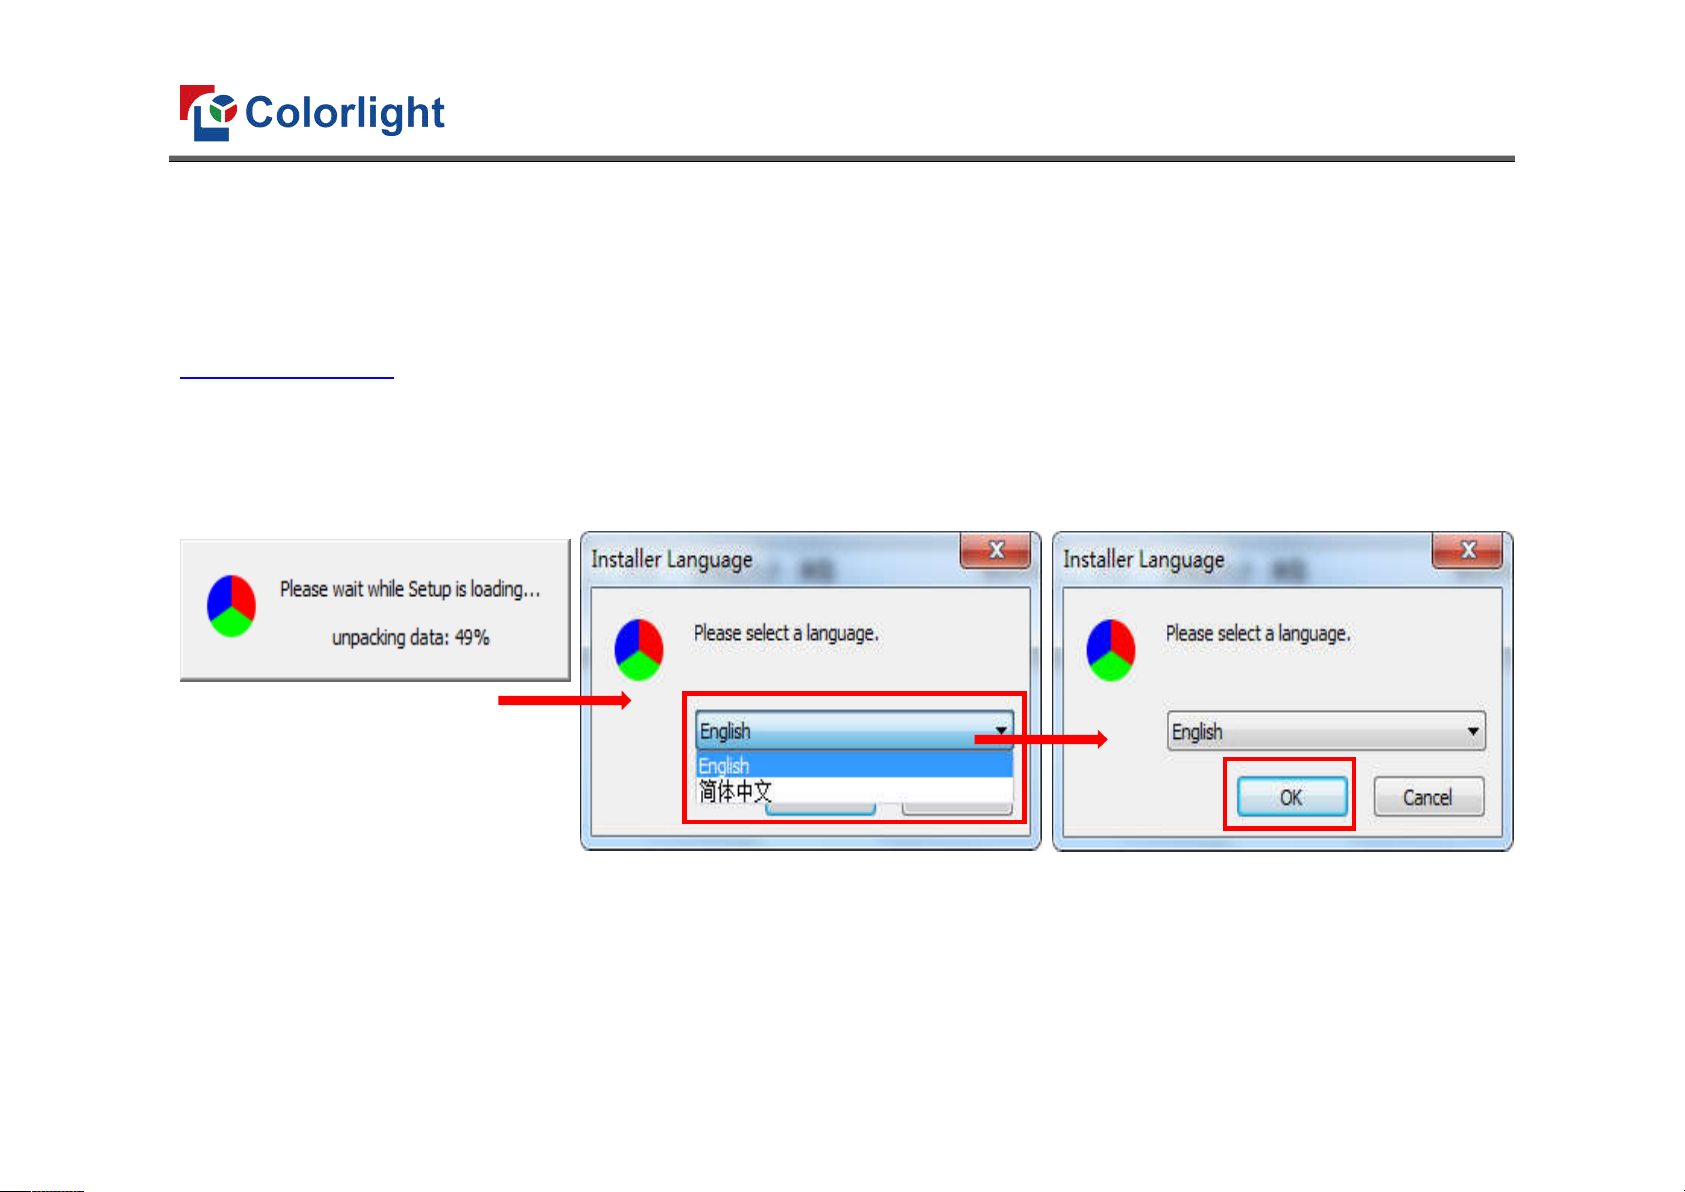
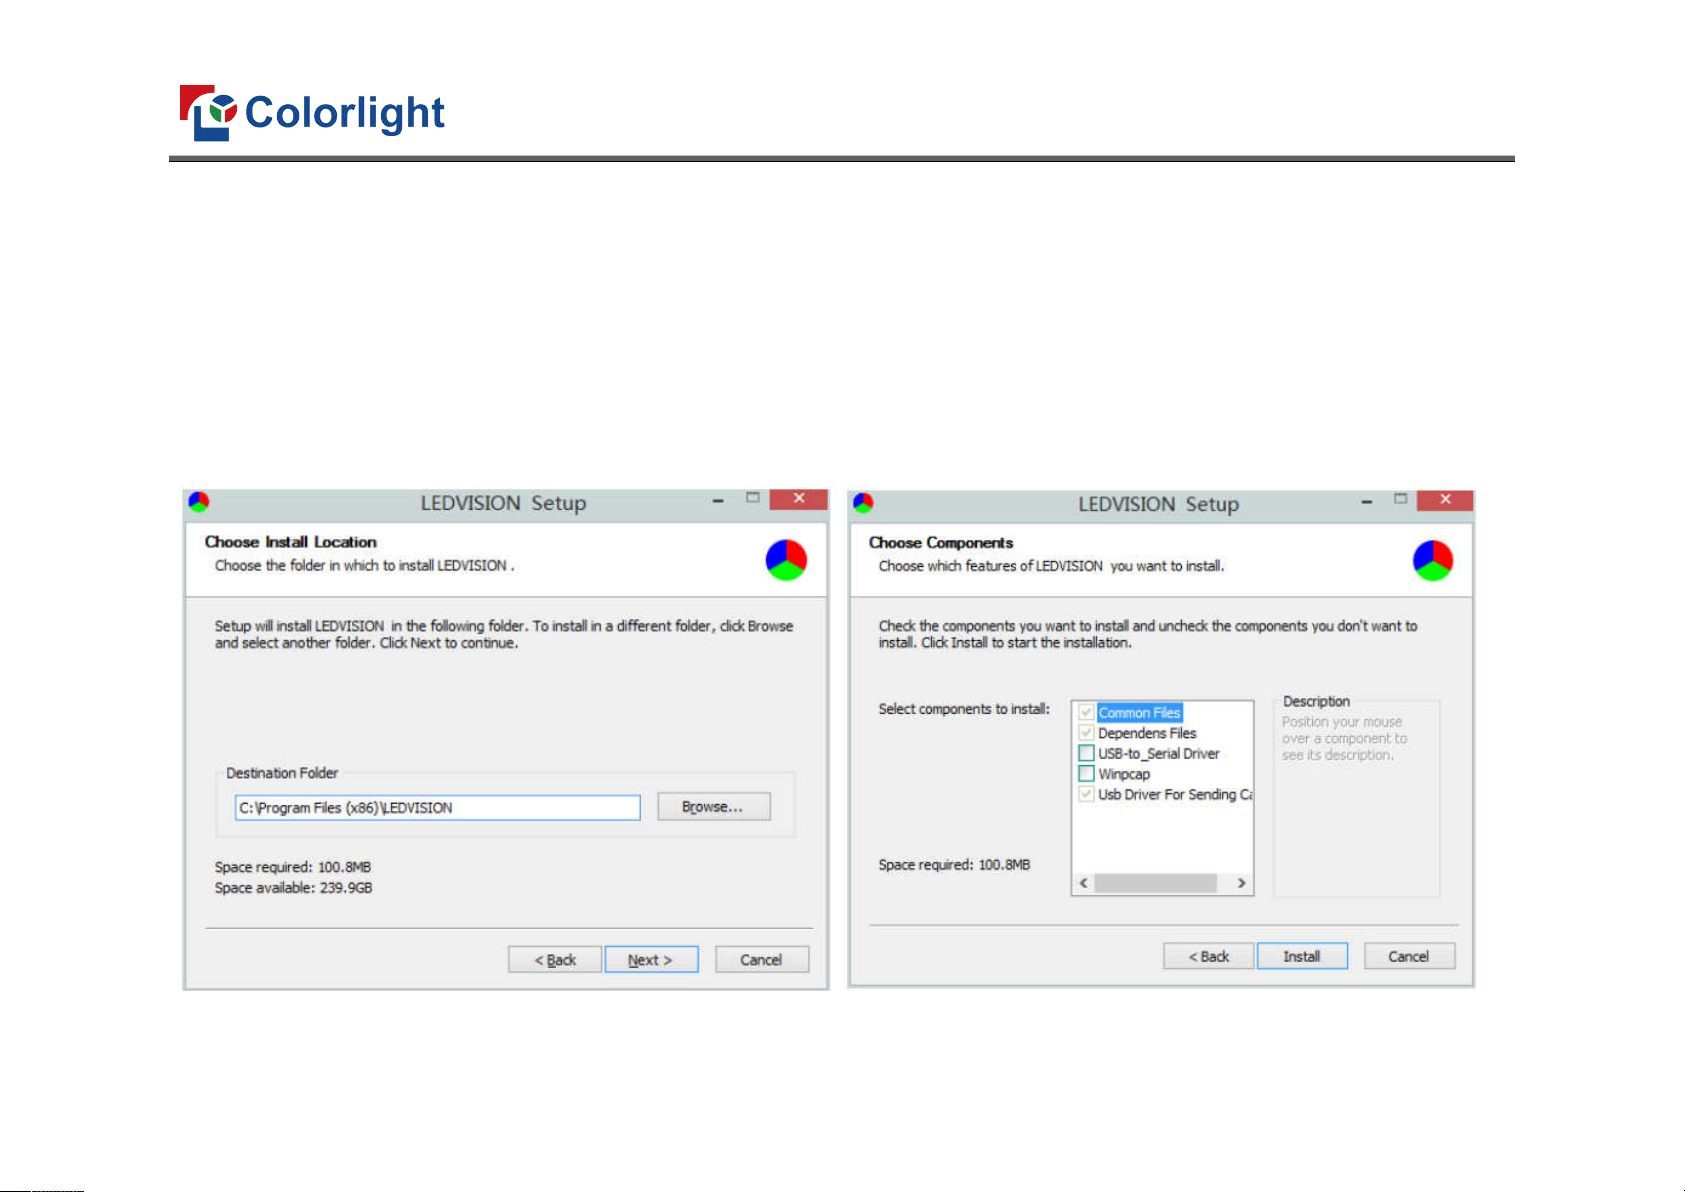
Chapter 2 LEDVISION Installation ................................................................................................................................................................................................... 3
Chapter 3 C6 Parameter Settings ................................................................................................................................................................................................... 5
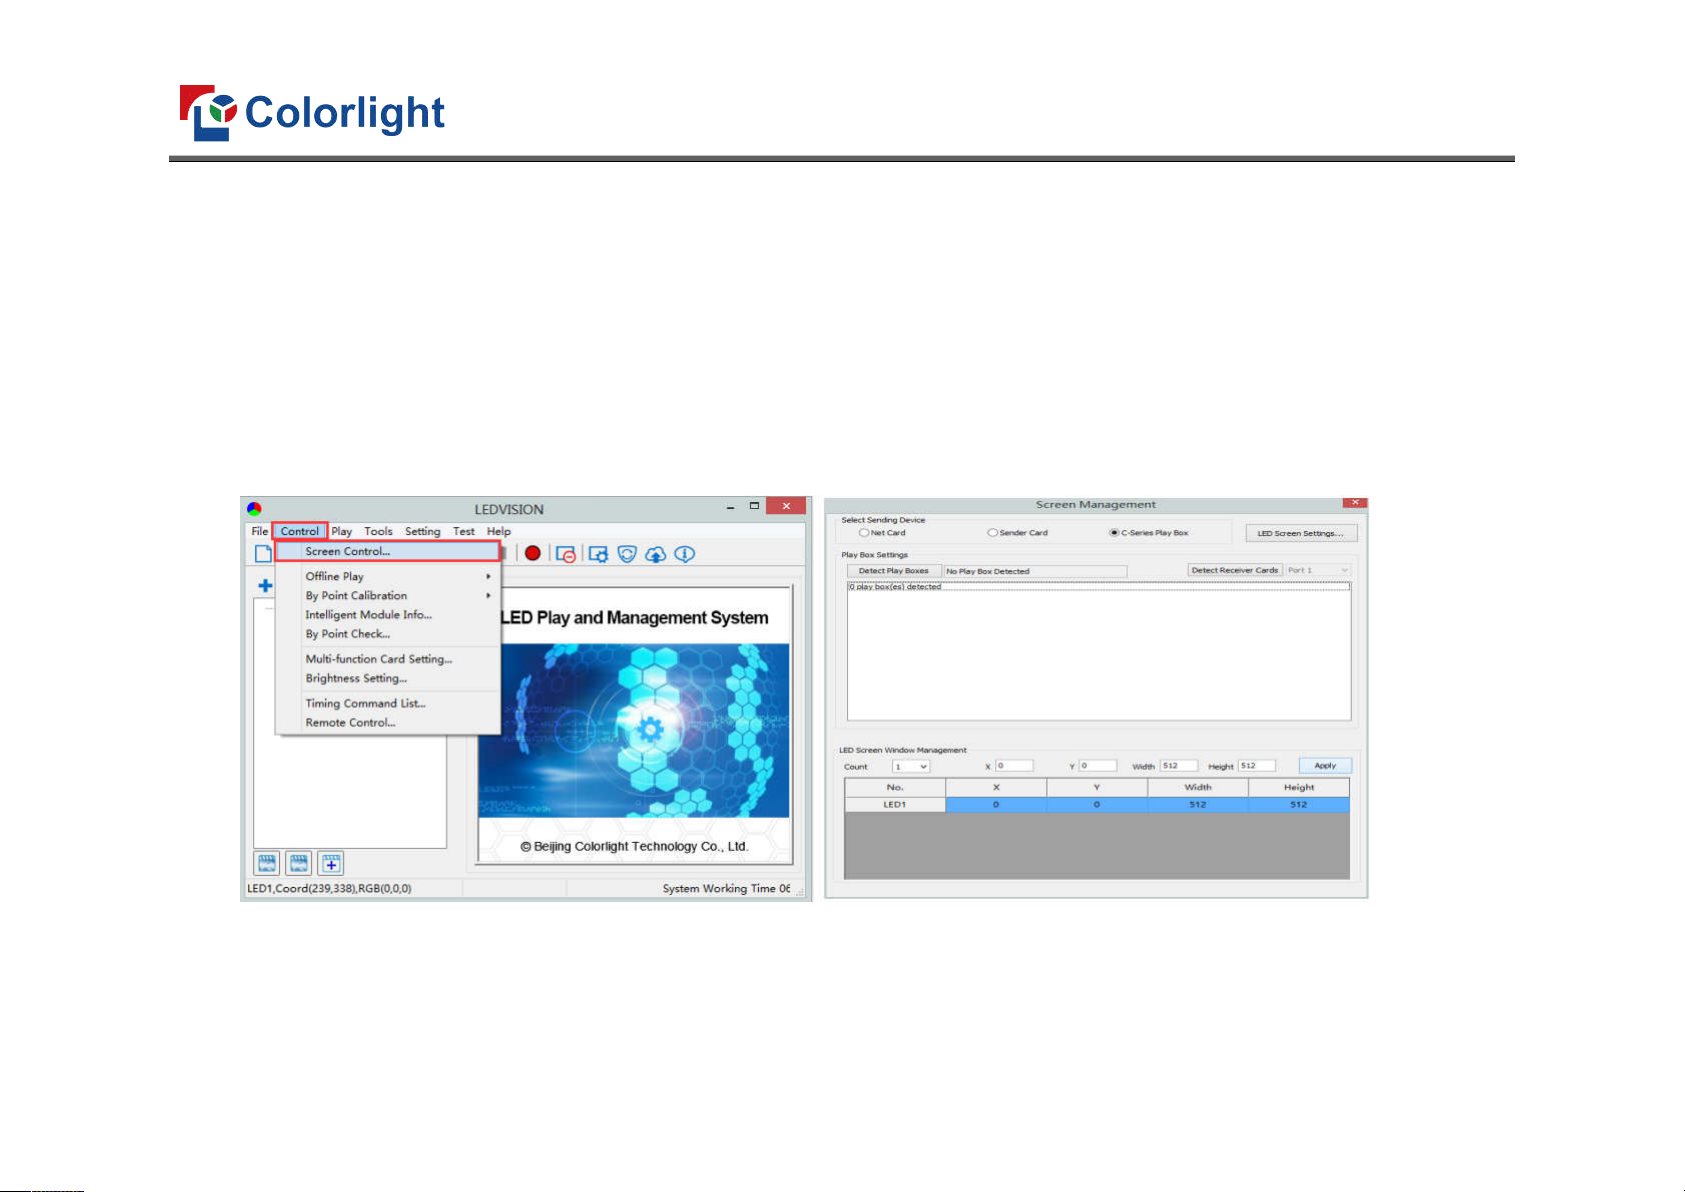
3.1 Connection Settings ......................................................................................................................................................................................................... 5
3.2 Basic Settings .................................................................................................................................................................................................................... 8
3.3 Advanced Settings .......................................................................................................................................................................................................... 10
3.3.1 Playing Parameters .............................................................................................................................................................................................. 10
3.3.2 Network Settings ................................................................................................................................................................................................. 11
Chapter 4 C6 Async Content Editing and Sync Playing ................................................................................................................................................................. 14
4.1 Async Content Editing .................................................................................................................................................................................................... 14
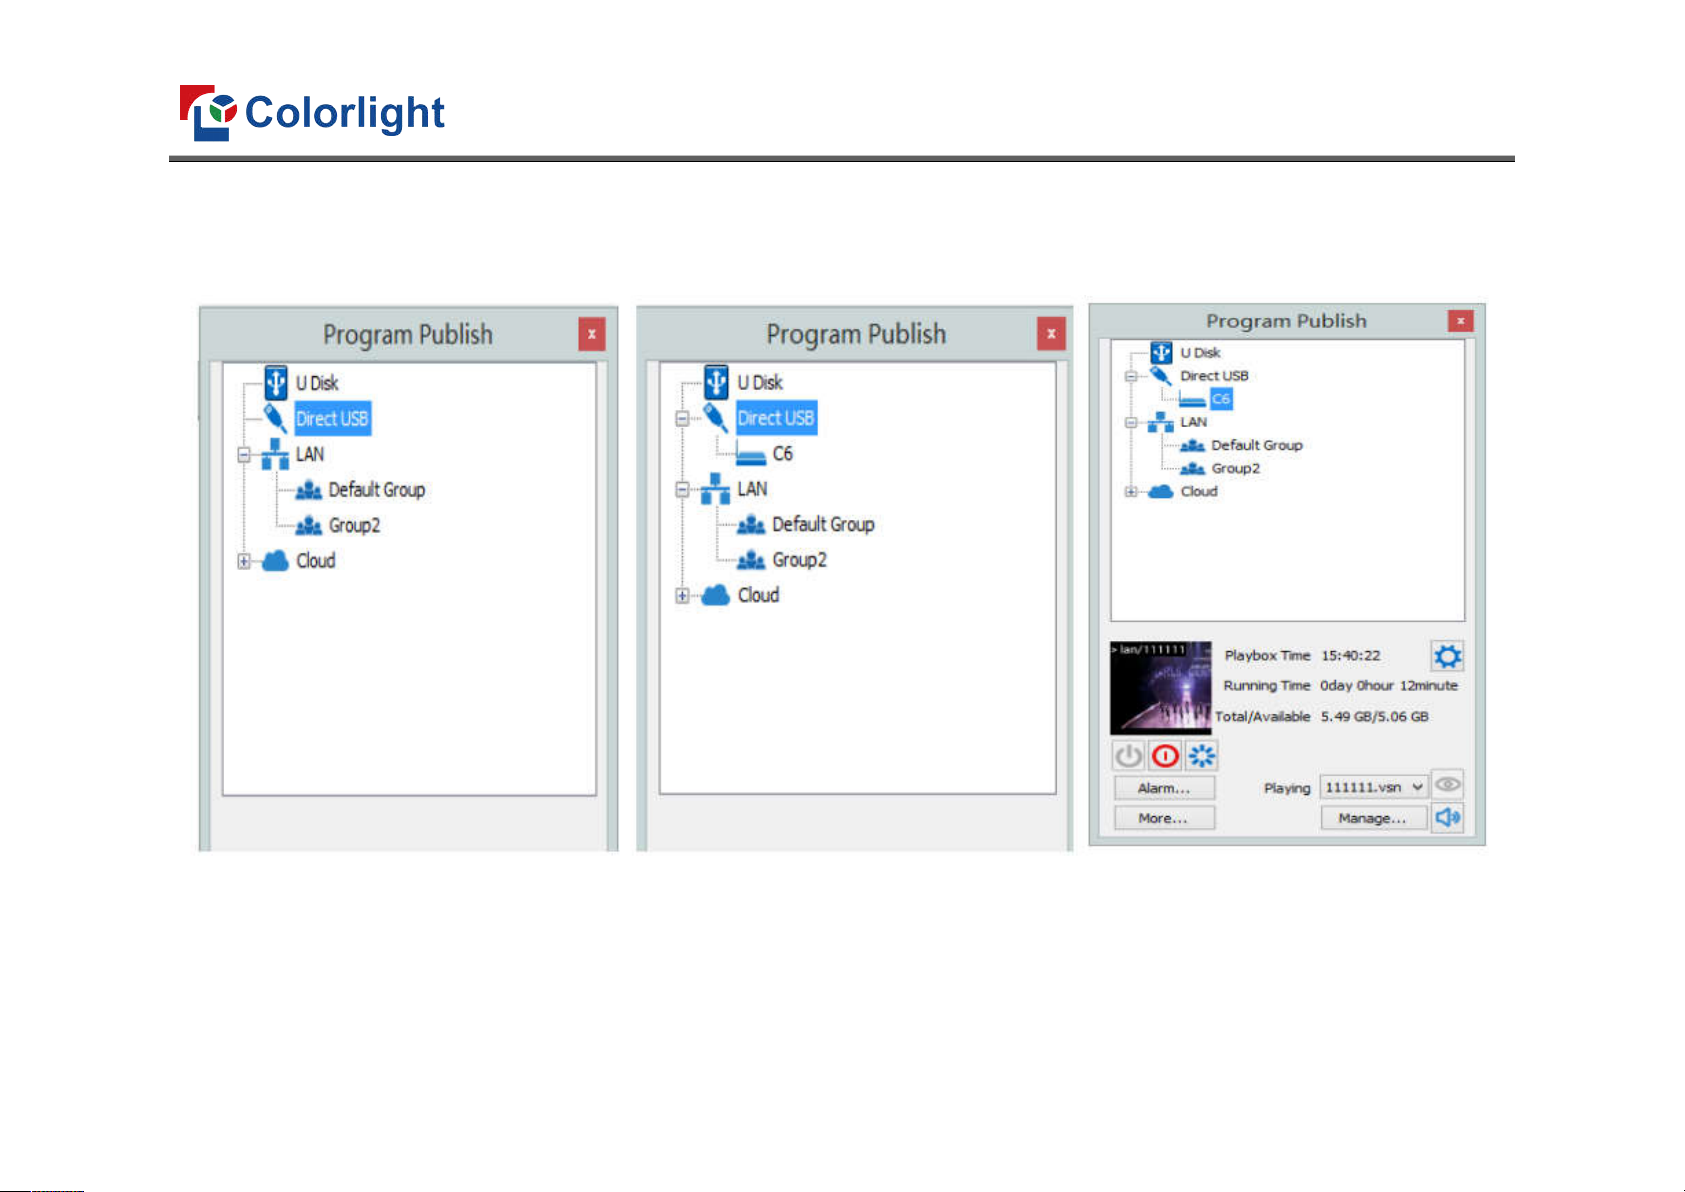
4.2 Async Content Publishing ............................................................................................................................................................................................... 15
4.2.1 Publish Contents through Direct USB .................................................................................................................................................................. 15
4.2.2 Content Publishing through USB disk .................................................................................................................................................................. 17
4.3 Sync Playing .................................................................................................................................................................................................................... 20
Chapter 5 Network Management of C6 ....................................................................................................................................................................................... 21
5.1 Connection and Management........................................................................................................................................................................................ 21
5.2 Add Group and C6 .......................................................................................................................................................................................................... 22

www.lednets.com
1
Chapter 1 C6 Interface and Hardware Connection
1.1 C6 Interface
No
Name Function
1 Input Switch Switch between synchronous and asynchronous display
2 Indicator Light Indicates power and signal status
3 USB Port Play and update contents through USB stick
4 CONFIG Parameter setting and update contents through computer
5 Power Button Power on/off
6 Power Interface
Input AC 100~240V 50Hz
7 Sensor Connect to brightness sensor or temperature /humidity/
smoke sensor
8 LED DISPLAY
Data output through Ethernet port
9 HDMI For external sync signal input
10
AUDIO For audio output
11
LAN Connect to LAN

www.lednets.com
2
1.2 Hardware Connection
C6 Configuration Control & play without computer

www.lednets.com
3
Chapter 2 LEDVISION Installation
First download the installation package of LEDVISION software from Colorlight’s official website
www.lednets.com, and complete the installation according to the diagrams shown below.
1. Run the software package, and select [ English ] for installer language. Click [ OK ] to move on.
Note: Run LEDVISION version 4.20 or higher while using your C6.

www.lednets.com
4
2. After selecting a language, an installation wizard like below will appear. Click [ Next ];
Then choose installation location, click [ Browse ] to change default target location, then click [ Next ] after
completing.
Choose components according to your own computer status, click [ Install ] to complete.
After the installation is complete you are ready to use LEDVISION.

www.lednets.com
5
Chapter 3 C6 Parameter Settings
3.1 Connection Settings
1. Before connecting your C6 to the computer, first click the control menu [ Control ] → [ Screen Control ], then
select [ C-Series Play Box ] in Select Sending Device, then set up [ LED Screen Window Management ].
Note: If you do not complete this step, LEDVISION may not function properly because of a conflict between Net
Card mode and C6 config interface.

www.lednets.com
6
2. Use standard USB A/B cable to connect C6 to computer when C6 is powered on, one side to connect USB port,
another side for C6 config port.
Click [ Publish Program to C Series Playboxes ] (as shown in the red box) to enter program publish interface.

www.lednets.com
7
3. Left-click [ Direct USB ] and then right-click choose [ Refresh ], your C6 will show up in program publishing
window, select your device to set parameters and choose what content to play.

www.lednets.com
8
3.2 Basic Settings
● Ensure LED display is under normal configuration before setting on C6 parameters.
● When setting up C6 parameters, you can connect your C6 to your PC through a standard USB A/B cable, and
connect your C6 to your LED screen through network cable.
1. Play Box Date and Time: Click [ Modify ] to set up date and time, or time zone as well.
2. Alarm Settings: Set wake up and sleeping time, which works once checked.
3. Play box Time: Display the setting time.
Running Time: Calculated once C6 sender powered on.
Capacity/Remain: View memory utilization.
4. Power on, Sleep, Restart: To perform C6 sender box operation like power on, sleep and restart once clicked.
5. Playing: Use the drop down menu to play programs.
Program Management: Check, delete and choose program, and much more.

www.lednets.com
9
The surface development of your C6’s parameter setting interface is shown below:

www.lednets.com
10
3.3 Advanced Settings
3.3.1 Playing Parameters
Screen Resolution①
The [ width ]/ [ Height ] you input must be equal to or slightly larger than
the actual screen resolution.
Output②
Every Frame ( Default ).
Every Other Frame ( Choosing [ every other frame ] can help avoid lag
when image loading area is too large ).
Control Area③
Select [ Custom ] in control area, and modify the values according to your
network interface control area, click [ Apply ] to complete setting.

www.lednets.com
11
3.3.2 Network Settings
① WiFi
Check [ WiFi ] in network tab, and input your WiFi login information for [ network name ] and [ password ], then
click [ Apply ] and [ Refresh ] to complete setting, click [ detail... ] to check connection status.

www.lednets.com
12
② WiFi Hotspot
Input your [ network name ] and [ password ] to use a WiFi Hotspot.
CDMA: 2.4G or 5G (5G mode will be faster and more reliable if both smart phone and computer support 5G WiFi.)
Channel: 14 choices, to avoid network overload.

www.lednets.com
13
③ LAN (Network Cable)
1. Automatically Obtain an IP Address (Default)
When you connect your C6’s LAN port to a networked router, your C6 will automatically obtain an IP address.
2. Use the Following IP Address
To use a specific IP address, enter information for [ IP ], [ Subnet Mask ] and [ Gateway ], then connect C6 LAN
port to the router.
3. Details
View network connection information like
connection status, Mac Address, IP, and
Subnet Mask.

www.lednets.com
14
Chapter 4 C6 Async Content Editing and Sync Playing
4.1 Async Content Editing
When you open LEDVISION, you will see [ LED1 ] in program editing area. Right-click [ LED1 ] to add [ normal
page ], you can add [ file window ] in [ normal page ], then add [ image ] and [ video ] under the [ file window ] to
add media for asynchronous play.

www.lednets.com
15
4.2 Async Content Publishing
4.2.1 Publish Contents through Direct USB
① In [ program editing area ], after finishing content editing, select the [ program page ] that you are going to
publish;

www.lednets.com
16
② Click [ C6 ] and then right-click to choose [ Publish Program to current playbox ], you must rename the
content and allow it to finish uploading to fully publish your program.

www.lednets.com
17
4.2.2 Content Publishing through USB disk
1. To begin publishing through USB, first insert your USB stick to the PC USB port.
Click [ Publish Program to C Series Playboxes ] (as shown in the red box) to extend program publishing window.
Note: USB stick should be empty before publishing for best performance. Remove previous update contents before
using it to update or play new contents, so as to avoid any problems.

www.lednets.com
18
2. Auto identify USB stick when set up USB stick parameters, click [ U Disk ] to choose [ Your USB’s Drive].
① Select [ program page ] in program editing area.
② Choose USB Stick Mode:
● Play program from USB stick ( Auto play USB stick contents after inserting to C6; and the content won’t be stored in C6).
● Upload program from USB stick ( Auto play USB stick content after inserting to C6; the content will be stored in C6).
Other manuals for C6
1
Table of contents
Other Colorlight Turntable manuals