Page 2
HYDRIM and STATIM are registered trademarks of SciCan Ltd. BRAVO, HIP,
and SysTM are trademarks of SciCan Ltd. All other trademarks referred to
in this manual are the property of their respective owners.
For all service and repair inquiries:
In Canada 1-800-870-7777
United States: 1-800-572-1211
Germany: +49 (0)7561 98343 - 0
International: (416) 446-4500
Contents
1. Introduction ................................... 3
2. Important Information .................... 4
Disclaimer
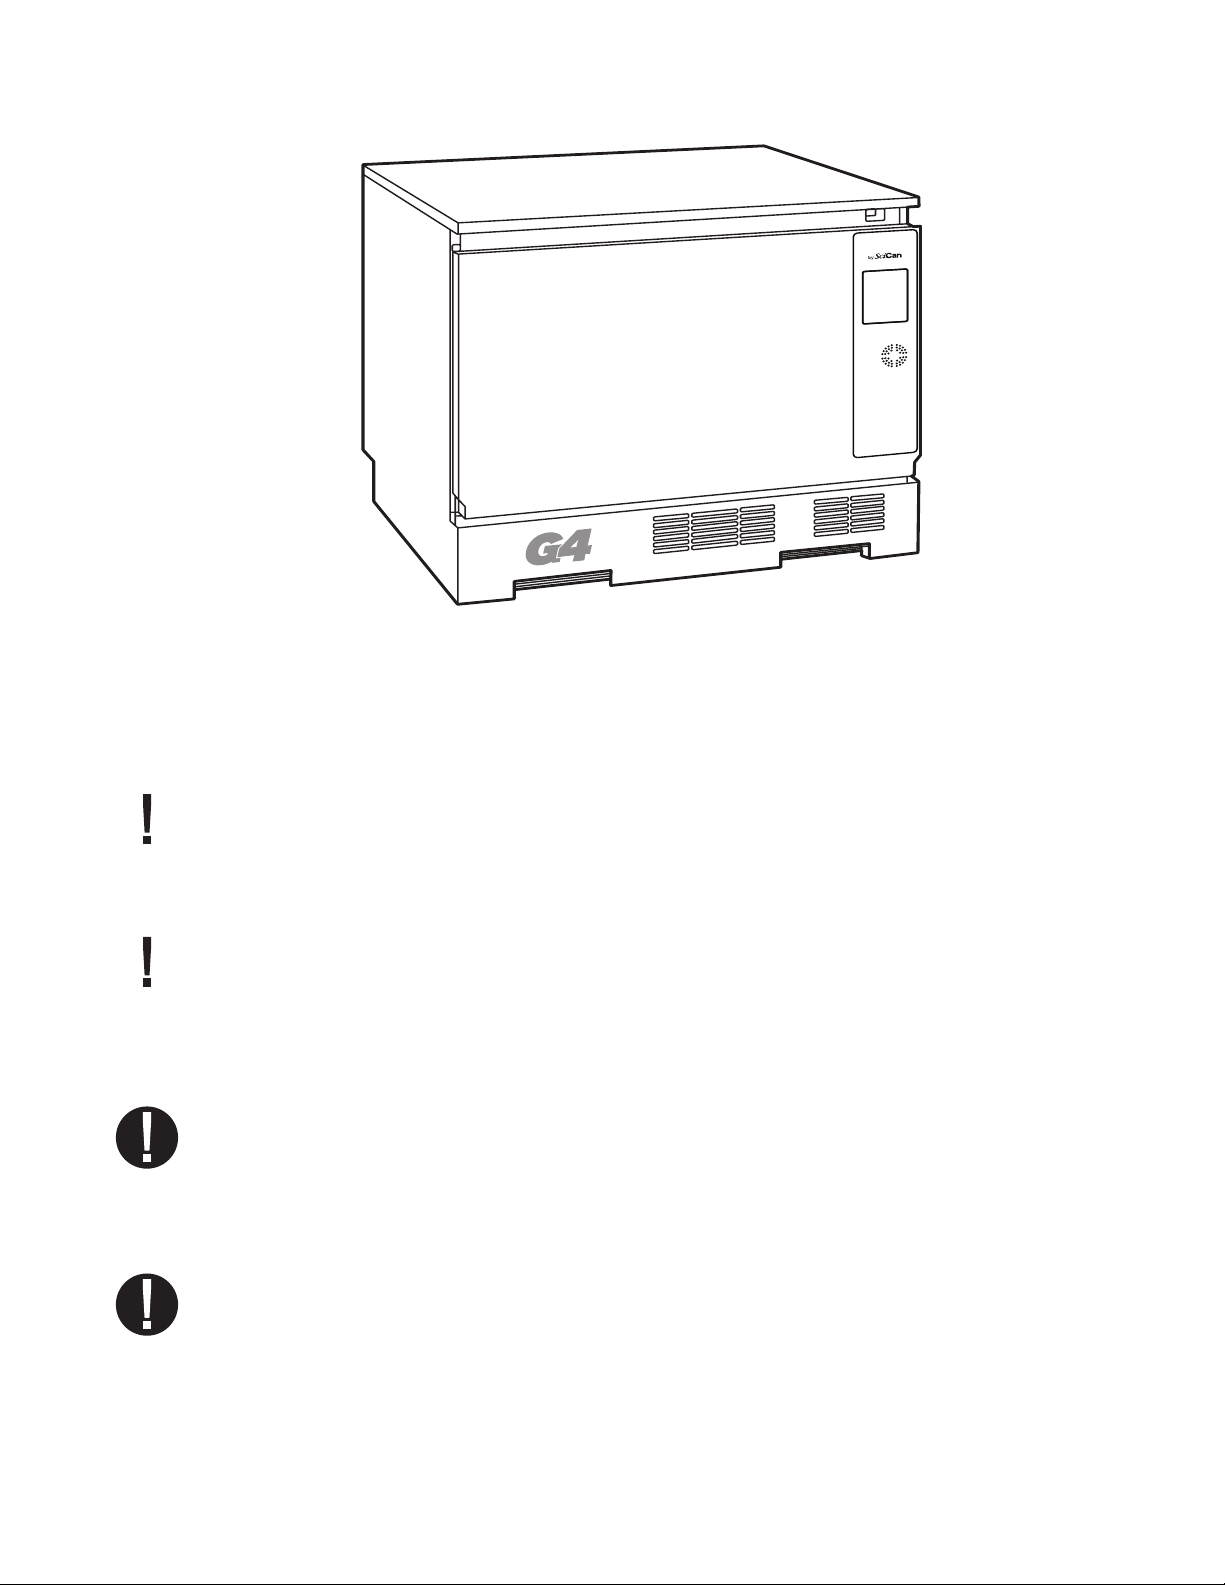
Unit overview
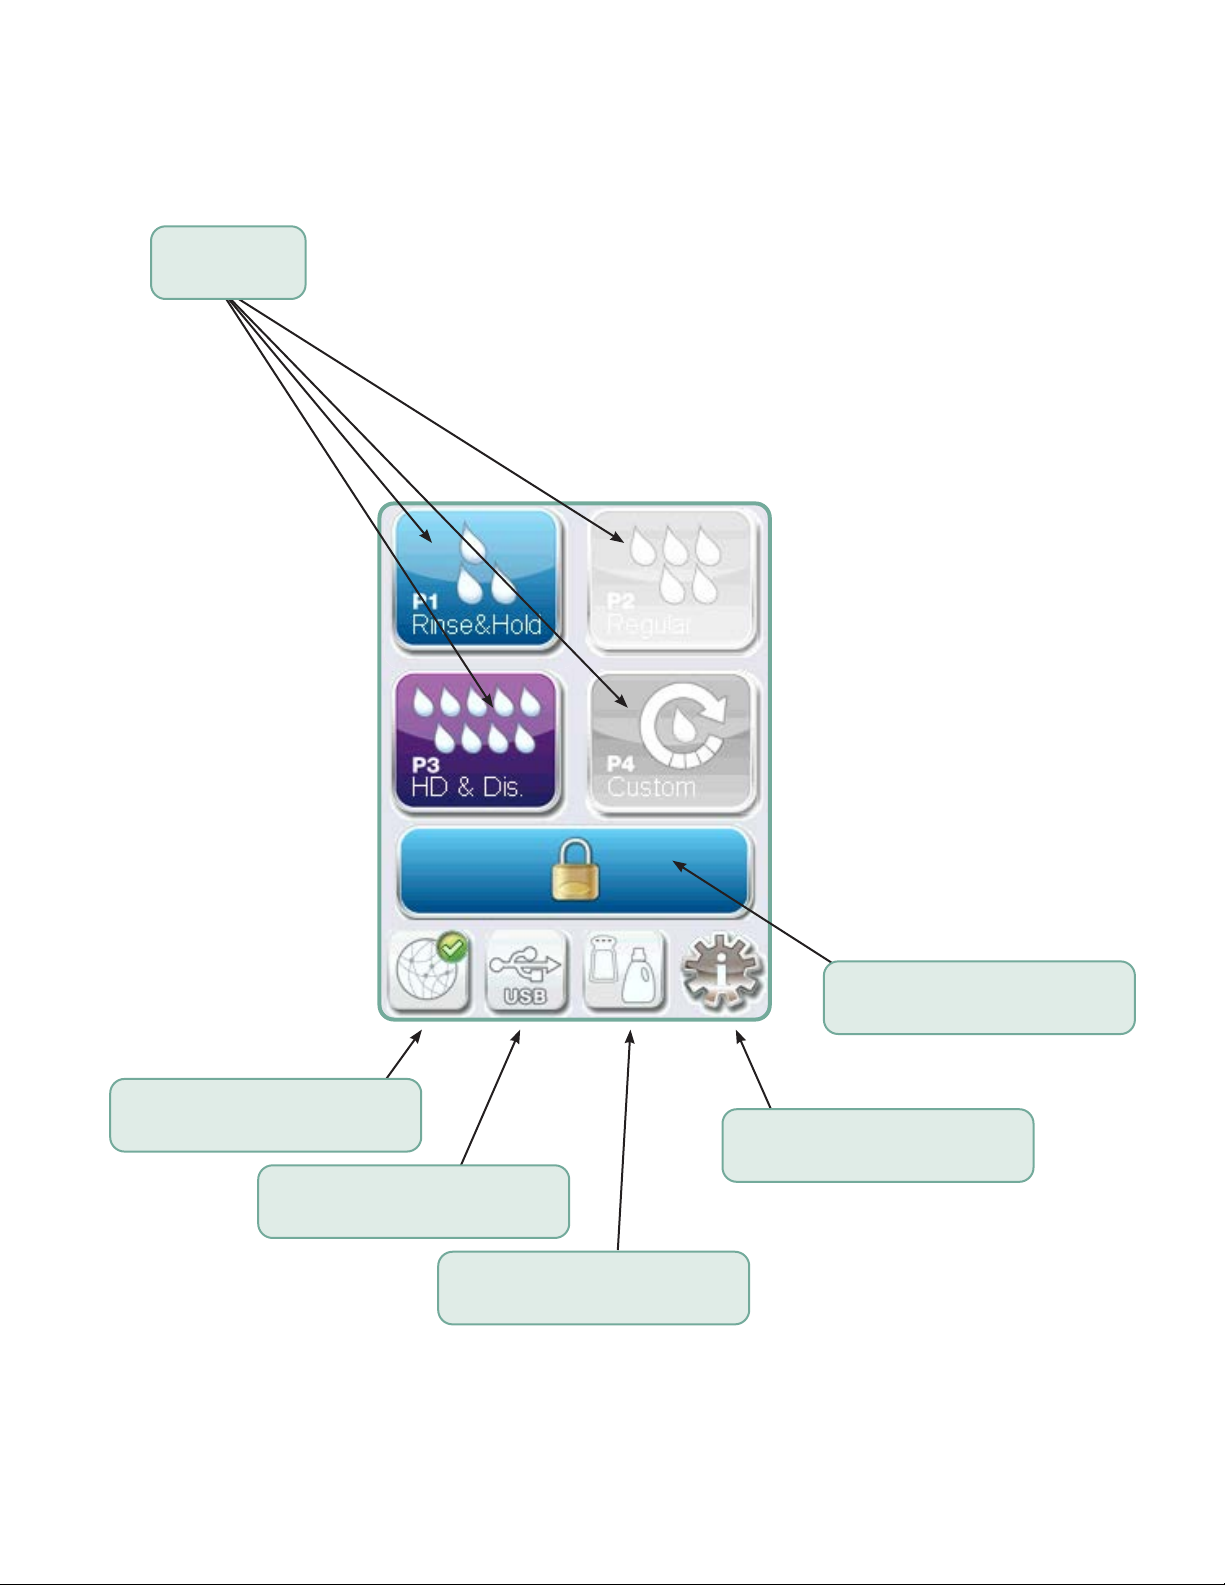
Touchscreen overview
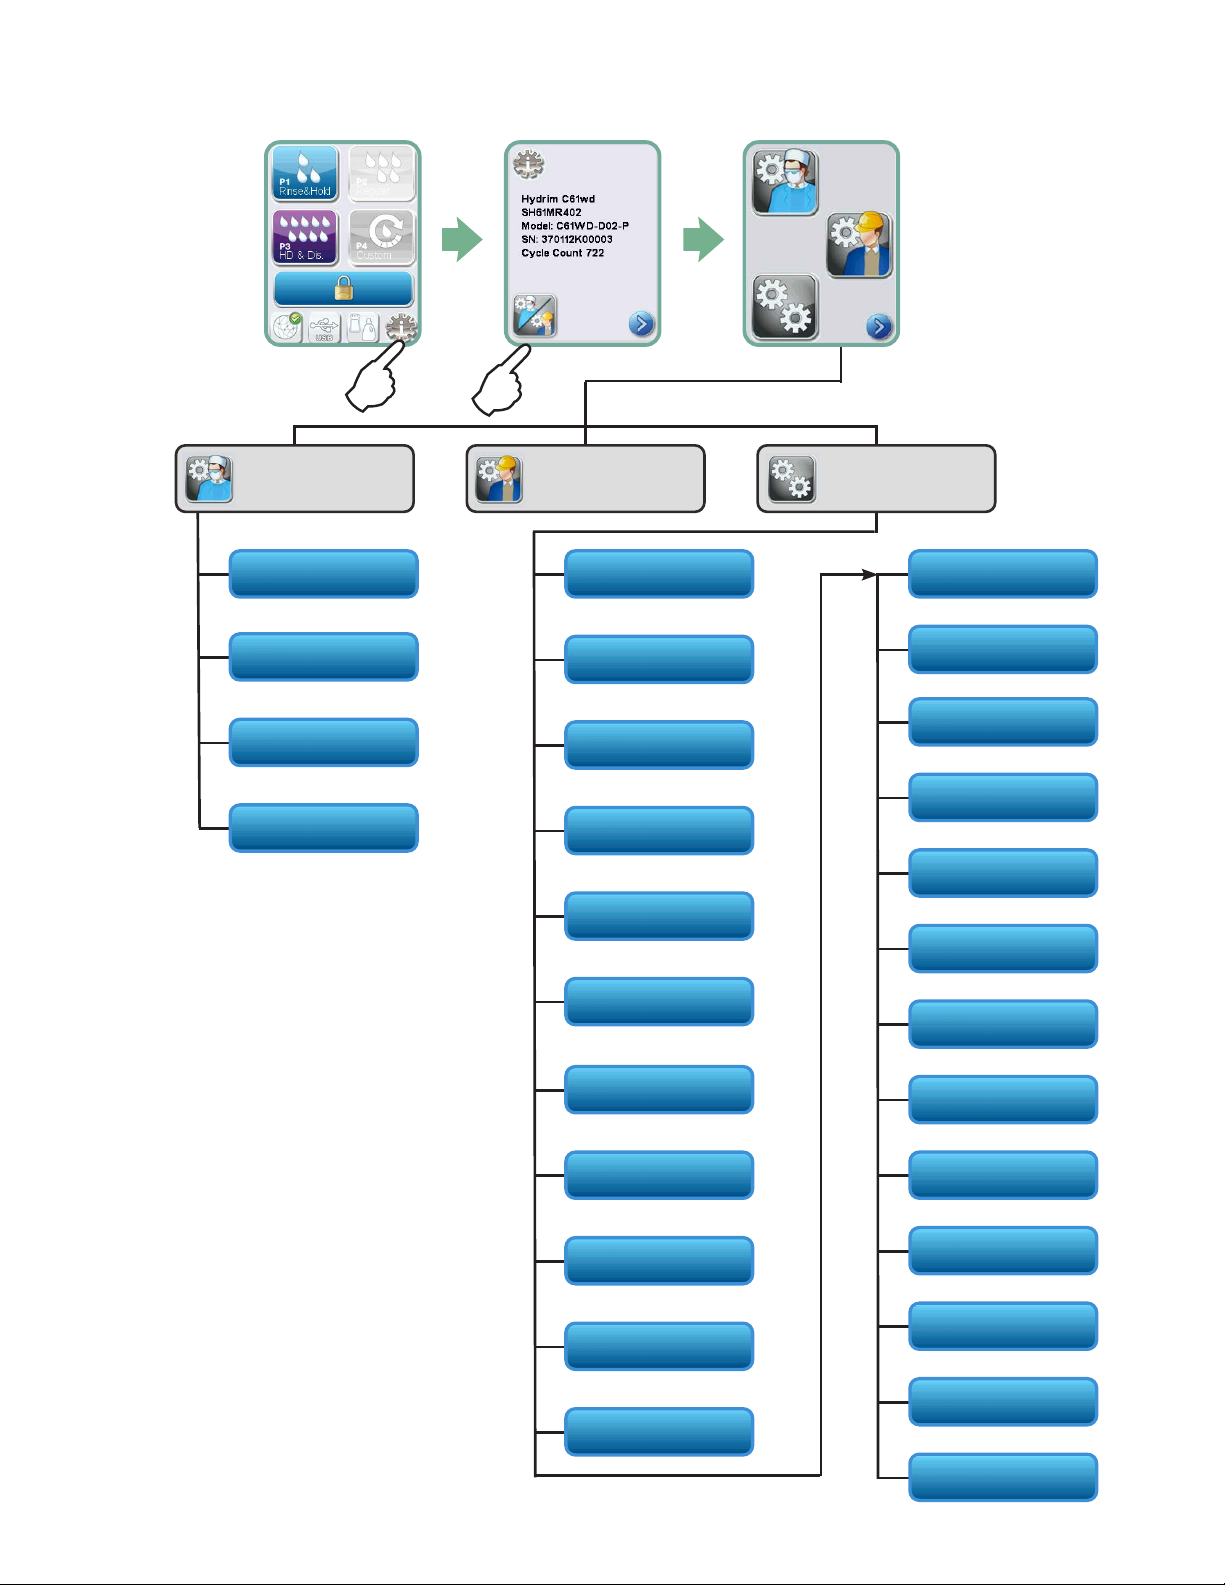
Set-up menu overview
3. Setting up your HYDRIM ................ 8
Installation
Handling and installing HIP™ Ultra
cleaning solution
Water quality
Testing water quality
Disposing of packaging and
decommissioned units
Setting language
Setting country
Setting time
Setting date
Assigning unit identifier number
Resetting drying counter
Resetting the LCS counter
Adjusting screensaver delay
Adjusting temperature delay
Turning the button sound ON or OFF
Adjusting button beep volume
Adjusting salt regeneration
Adjusting screen contrast
Changing touchscreen display themes
Creating a user name
Creating a user PIN
Setting up process enforced usage
Connecting to a network
Connecting to a wireless network
4. Using your HYDRIM ..................... 19
Instrument reprocessing recommendations
Cycle description charts
Baskets and accessories
Hints and tips for best cleaning results
Recommended load configurations
Running a cycle
Interrupting / aborting a cycle
Additional user and setup menu functions
Opening the door in case of power failure
5. Storing and Retrieving
Cycle Information ......................... 28
Retrieving cycle information using
the touchscreen
Retrieving cycle information using
the USB data back up
6. Care and Maintenance.................. 30
Replacing the HIP™ Ultra cleaning solution
Refilling the water softening salt reservoir
Changing the air filter
Filter and wash arm maintenance
Cleaning the unit
Preparing the unit for shipping
Annual maintenance
Unit testing and validation
7. Troubleshooting ........................... 37
Troubleshooting general problems
Troubleshooting error messages
8. Warranty ...................................... 42
9. Specifications .............................. 43
10. SciCan Software Product License 44
11. WiFi - Regulatory Information ...... 51
Manufactured by:
SciCan
1440 Don Mills Road,
Toronto ON M3B 3P9
CANADA
Phone: (416) 445-1600
Fax: (416) 445-2727
Toll free: 1-800-667-7733
Ukraine Representative
Simesta
20-A, Melnitskava Str.
65005 Odessa UKRAINE
Tel.: +48 (0) 705-3114, 705-3115, 705-3116
EU Representative
SciCan GmbH
Wangener Strasse 78
88299 Leutkirch GERMANY
Tel.: +49 (0)7561 98343 - 0
Fax: +49 (0)7561 98343 - 699
SciCan Medtech
Alpenstrasse 14
CH-6300 ZUG SWITZERLAND
Phone: +41 (0) 41 727 7027
Fax: +41 (0) 41 727 7029
US Office
701 Technology Drive
Canonsburg, PA 15317 USA
Phone: +1 724 820 1600
Fax: +1 724 820 1479
Toll free: 1-800-572-1211