4
Truss Rod
Adjusting the Truss Rod
In order to keep your guitar playing and performing at its best, periodic adjustments to the guitar’s truss rod will
be required. Adjusting the truss rod is the first step when setting up an instrument to play properly. To adjust the
truss rod, first locate the truss rod access at the end of the headstock or at the end of neck where it meets the
body –you can see this through the sound hole of the body. If it is located at the headstock, you may need to
first remove the truss rod cover before making any adjustments. Be sure to use the proper tool to make the
adjustments. Depending on the model of the guitar you have, you will need an allen wrench, socket/nut driver or
screw driver.
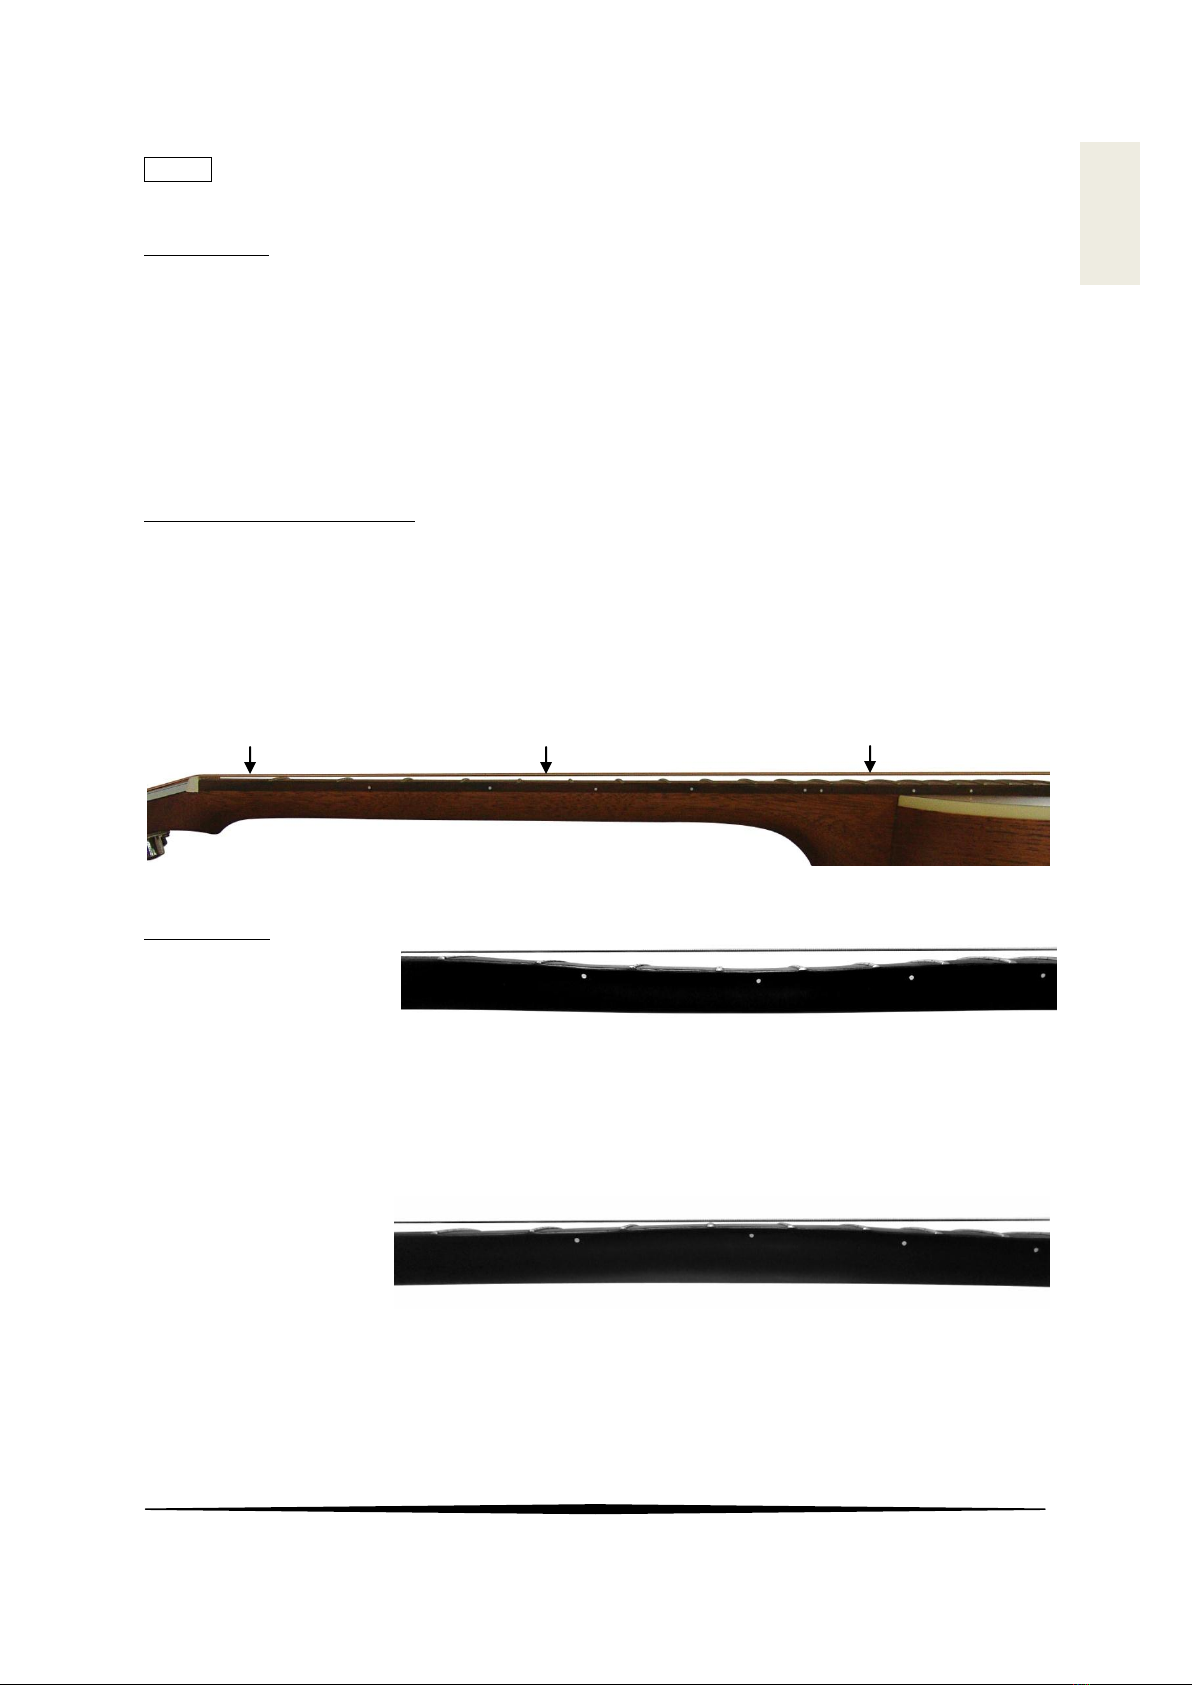
Checking neck bow
First, tune your guitar to pitch. With your fretting hand, hold down the low ‘E’ string at the first fret. If you have
a capo, it will be easier to clamp the capo at the first fret instead of using your fretting hand. Now with your
picking hand thumb, fret the same string at the area where the neck joints the body (around 14th fret). While
holding both positions on the string, reach with your first finger of your picking hand to the 6th fret and tap the
string down to the frets. The amount of distance that the string is travelling, from the bottom of the string to the
top of the fret, is the amount of relief that is in the neck. It is desirable to have some amount of relief and factory
specs for your Cort Guitar is 0.33mm (0.013”).
Making adjustments
If the relief is more than
what you prefer, your neck
has an up bow. To correct
this, tighten the truss rod by turning clockwise. Be careful not to turn too much. A quarter to a half turn should
be enough to fix the problem. If it is hard to turn or you hear squeaking when you turn, stop immediately and
consult a professional. If you continue, you risk damaging the guitar.
If the relief is less than what
you prefer, your neck has a
back bow. To correct this,
loosen the truss rod by
turning it counterclockwise. Again, be careful not to turn too much. A quarter to a half turn should be enough to
fix the problem. If it is hard to turn or you hear squeaking when you turn, stop immediately and consult a
professional. If you continue, you risk damaging the guitar.