ON CONSIGNMENT OF THE MACHINE................................................................................................................. 4
INTRODUCTORY COMMENT ............................................................................................................................. 4
TECHNICAL DESCRIPTION............................................................................................................................... 4
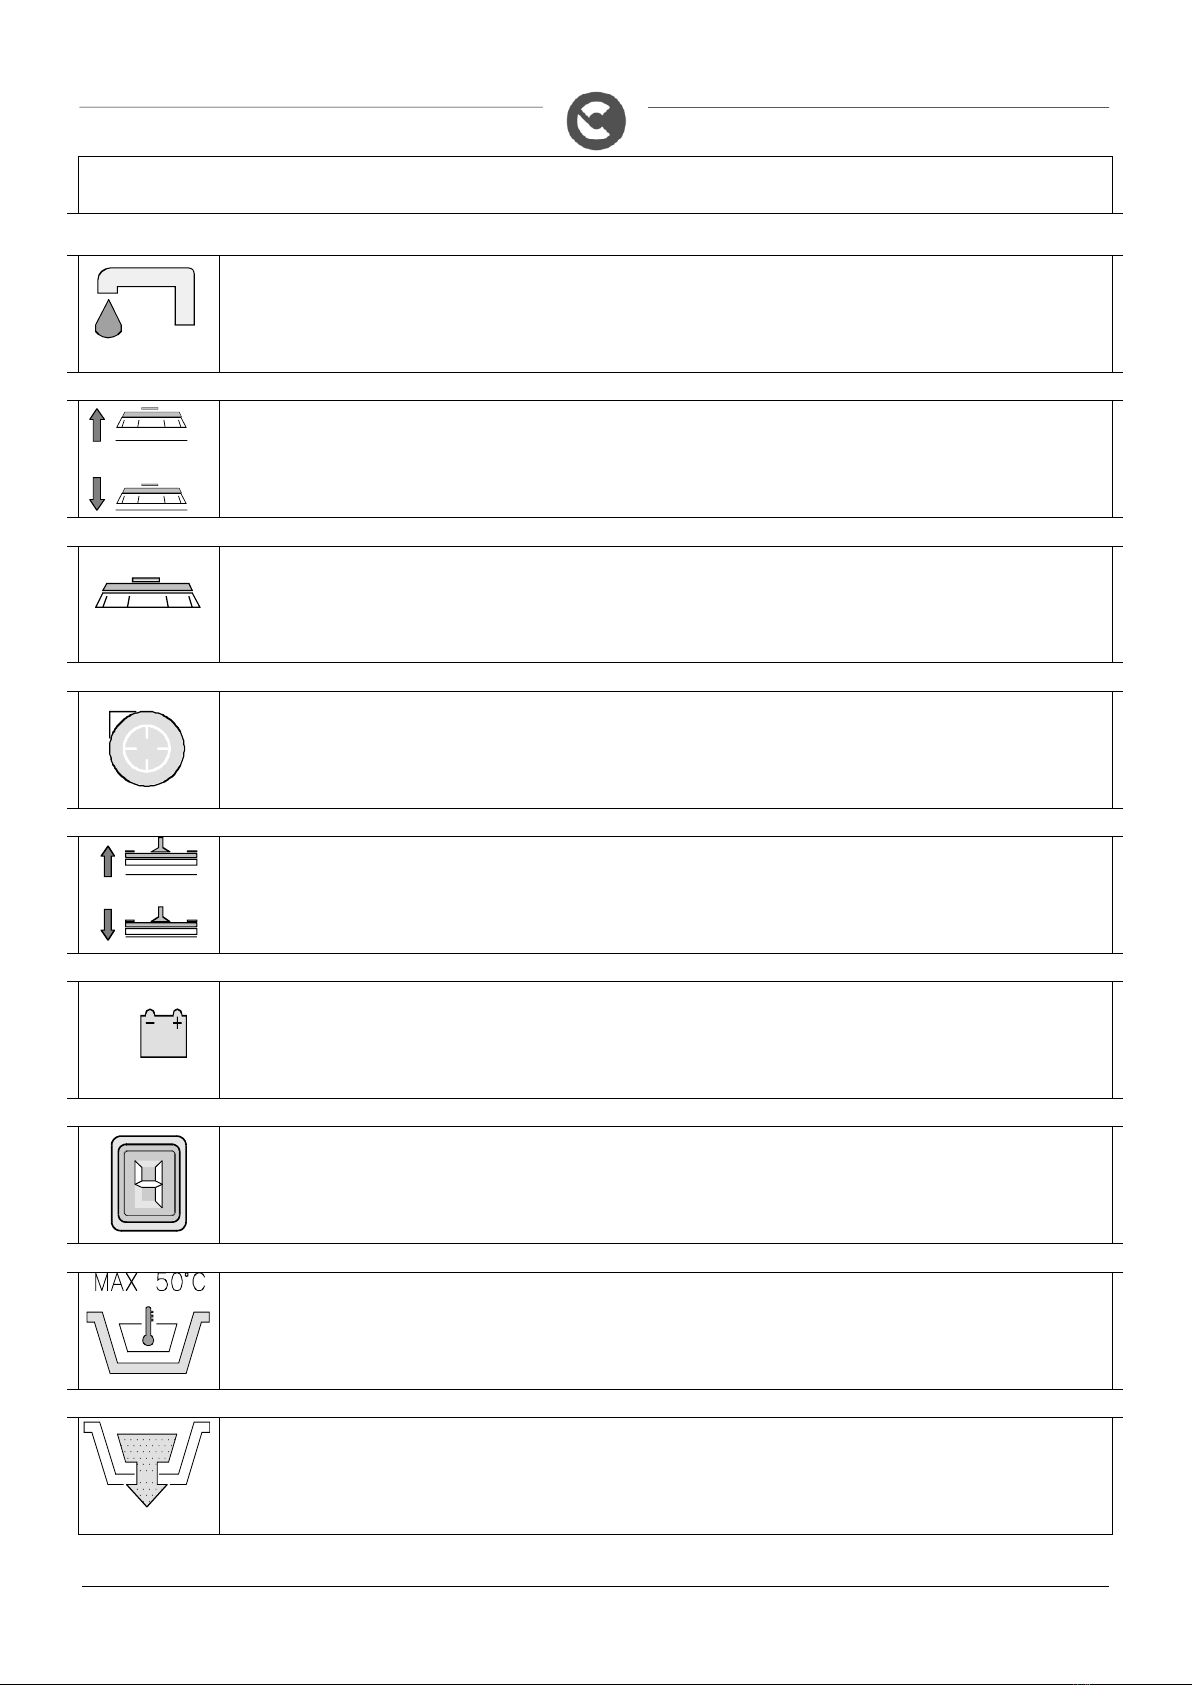
SYMBOLS USED ON THE MACHINE.................................................................................................................... 5
GENERAL SAFETY REGULATIONS...................................................................................................................... 6
MACHINE PREPARATION ................................................................................................................................ 7
HANDLING THE PACKED MACHINE
HOW TO UNPACK THE MACHINE
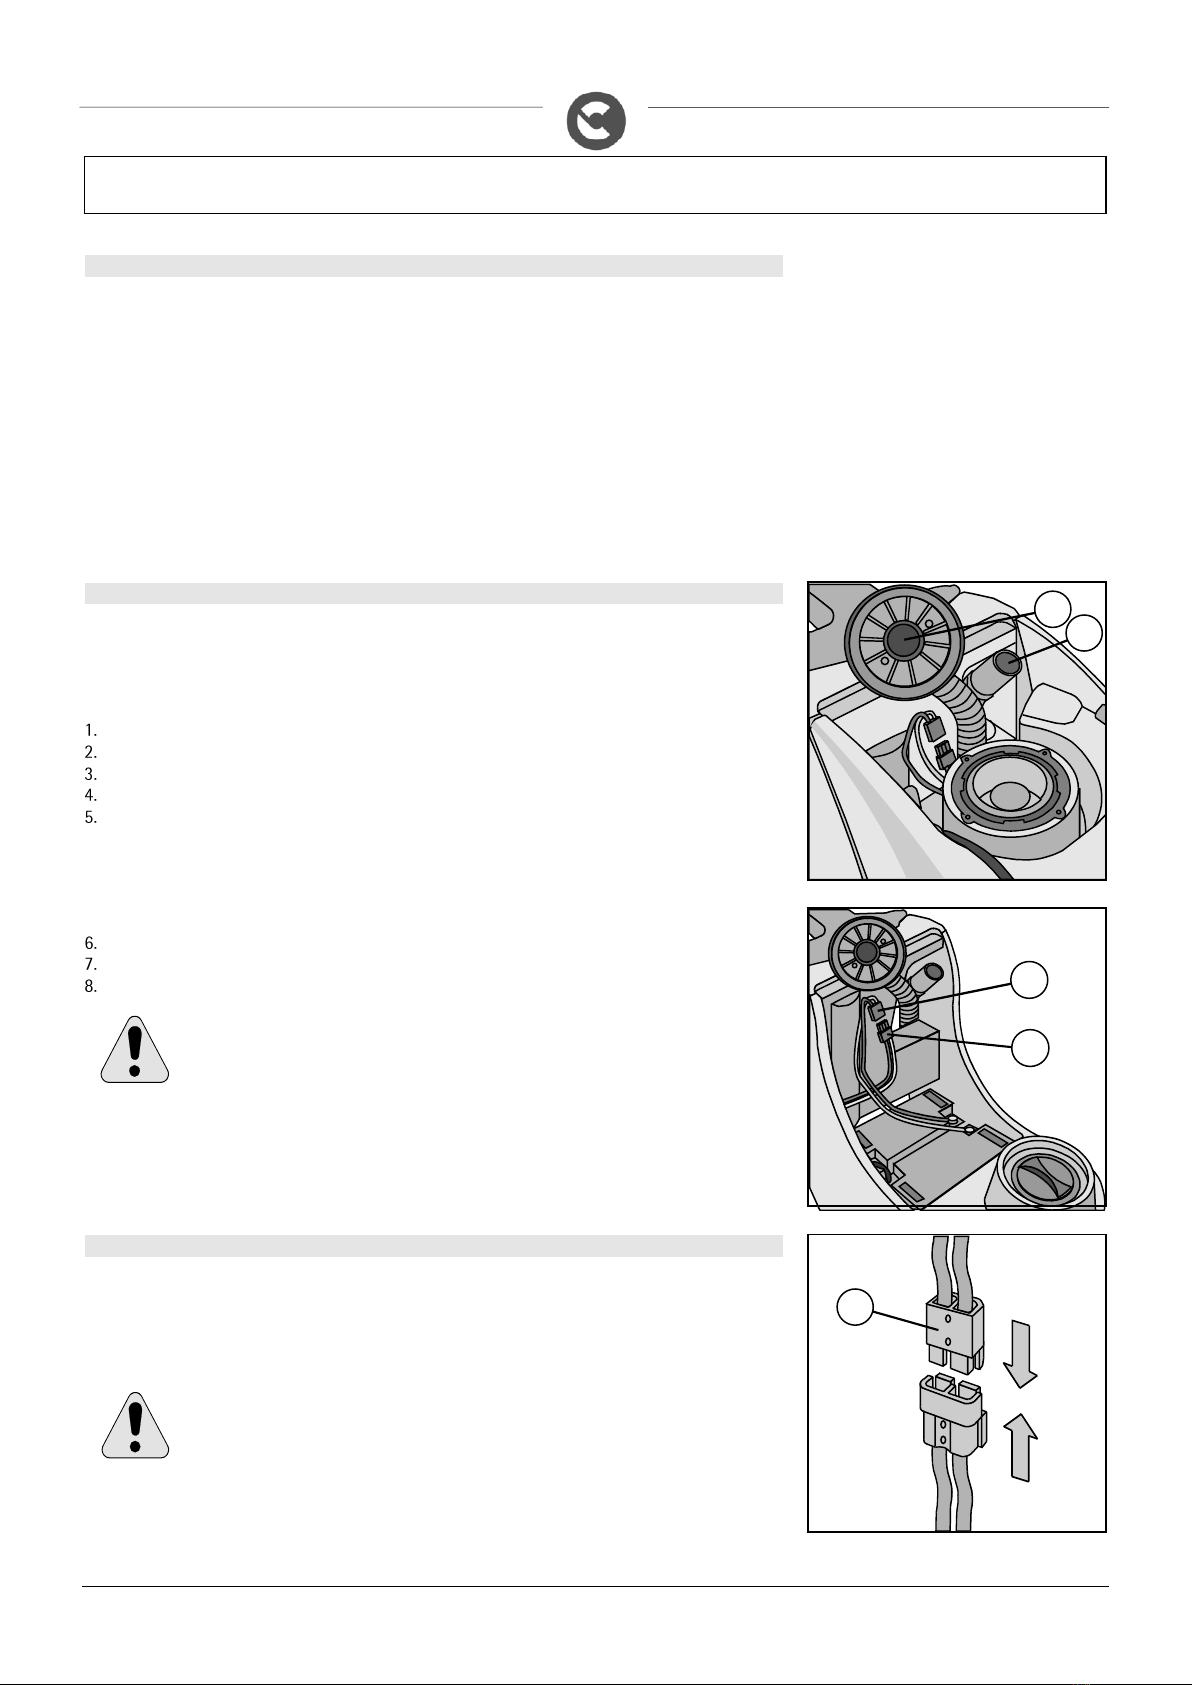
TYPE OF BATTERY
FITTING THE BATTERIES INTO THE MACHINE
CONNECTING THE BATTERY CHARGER
RECHARGING THE BATTERIES
BATTERY INDICATOR
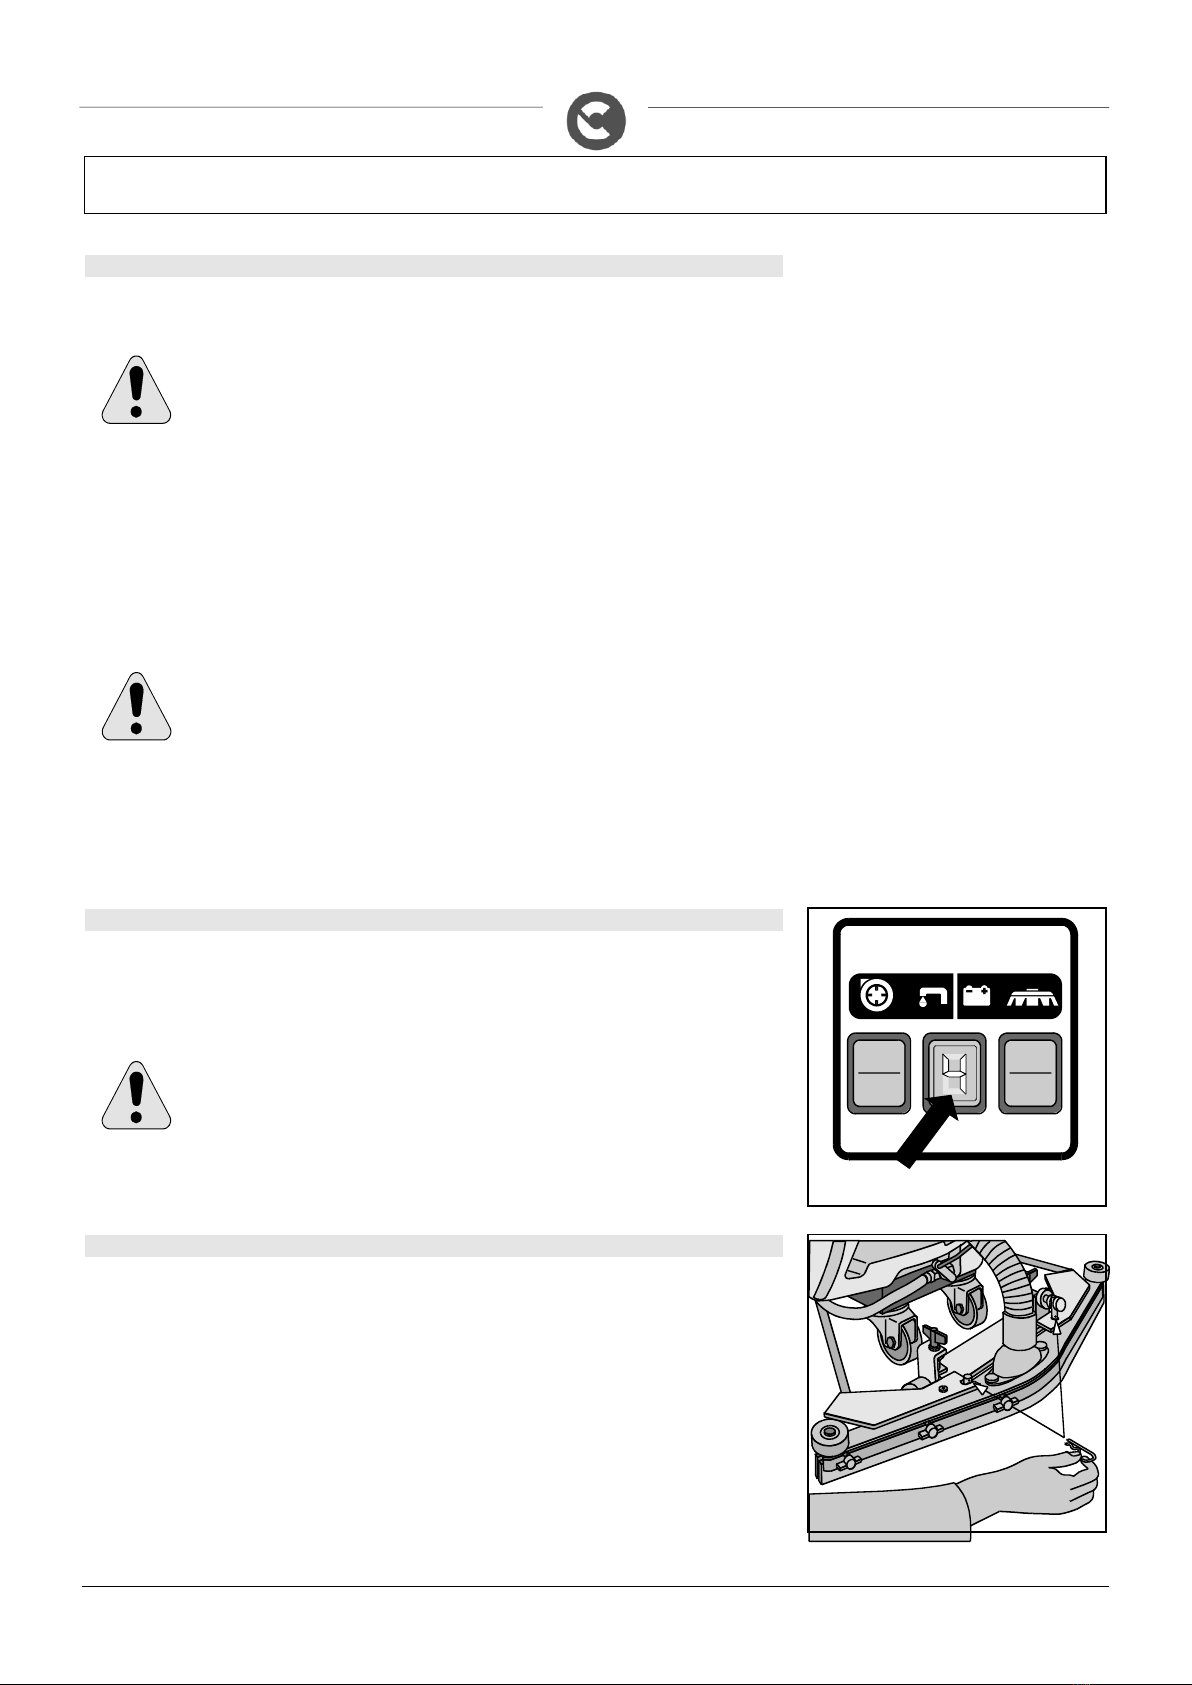
ASSEMBLING THE SQUEEGEE
ADJUSTING THE SQUEEGEE HEIGHT
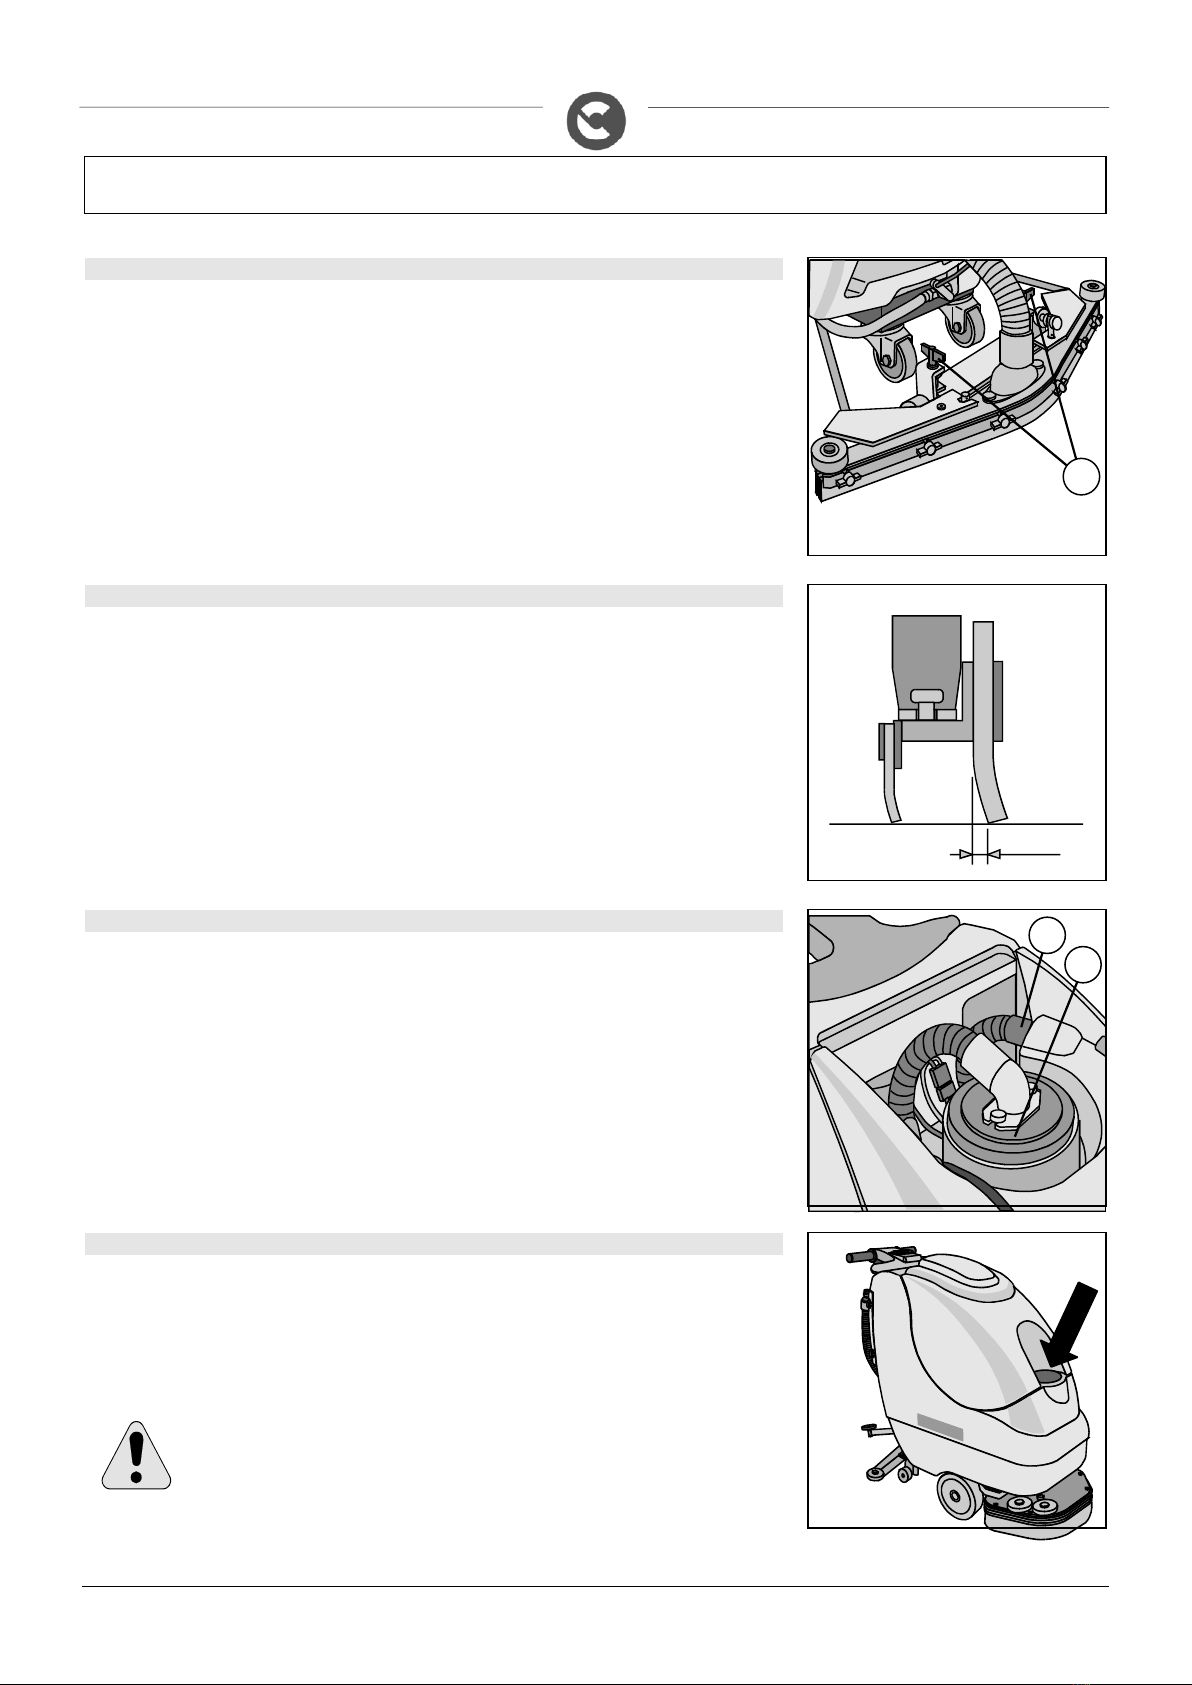
ADJUSTING THE SQUEEGEE INCLINATION
RECOVERY TANK
DETERGENT SOLUTION
ASSEMBLING THE SPLASH GUARD
ASSEMBLING THE BRUSHES ABILA 42-52
ASSEMBLING THE BRUSH ABILA 17-20
WORK...................................................................................................................................................... 13
PREPARING TO WORK
OVERFLOW DEVICE
AT THE END OF THE WORK............................................................................................................................ 15
DAILY MAINTENANCE .................................................................................................................................. 16
CLEANING THE RECOVERY TANK
CLEANING THE VACUUM FILTER
CLEANING THE SQUEEGEE
DISASSEMBLING THE BRUSHES ABILA 42 52
DISASSEMBLING THE BRUSH ABILA 17-20
CLEANING OF THE SOLUTION DISCHARGE FILTER
WEEKLY MAINTENANCE ............................................................................................................................... 18
CLEANING THE SQUEEGEE TUBE
CLEANING THE SOLUTION TANK
REPLACING THE SQUEEGEE RUBBERS
TROUBLESHOOTING .................................................................................................................................... 19
INSUFFICIENT WATER ON THE BRUSHES
THE MACHINE DOES NOT CLEAN WELL
THE SQUEEGEE DOES NOT DRY PERFECTLY
EXCESSIVE FOAM PRODUCTION
CHOOSING AND USING THE BRUSHES ............................................................................................................. 20
MACHINE DISPOSAL.................................................................................................................................... 21
EC DECLARATION OF CONFORMITY ................................................................................................................. 22
UKCA DECLARATION OF CONFORMITY ............................................................................................................. 24