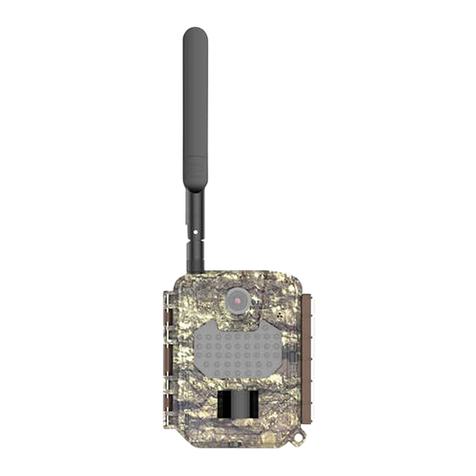
Covert Scouting Cameras AT&T Code Black LTE User manual

Page1
2018 AT&T Code Black LTE
Covert Scouting Camera Instruction Manual
Watch the set-up video on our website at:
www.covertscoutingcameras.com

Page2
What you will need to set this
camera up:
-Internet Access to Choose Your Plan.
https://secure.covert-wireless.com
-At least 4 AA Batteries
-SD Card
.

Page3
Table of Contents
Camera Button Control Diagram .............................5
Installing the Batteries .............................................6
Downloading the Mobile App ..................................7
Purchasing Your Plan ...............................................7
Setting up the Wireless Network .............................9
Sending a Test Photo .............................................11
Customizing Camera Settings ................................12
Troubleshooting ....................................................18
Tricks and Tips on Field Setup ...............................20
Warranty Policy .....................................................21
International Warranty Policy ...............................23
Technical Specifications .........................................29

Page4
Congratulations on your purchase of the Code Black
LTE Covert Scouting Camera! We truly value your
business and will continue to provide you top
quality customer service should you ever need help
with any of our products.
Check out our other products on our website at:
www.covertscoutingcameras.com
We hope you enjoy hassle free performance from
this quality product for years to come.
Covert Scouting Cameras, Inc.
4338 Highway 2376
Lewisburg, KY 42256

Page5
1. Invisible IR Flash
2. Lens
3. Light Sensor
4. Power Switch
5. PIR Sensor
6. Keyboard
7. HD Display Screen
8. LTE Main Antenna
9. LTE Diversity Antenna
Camera Button Control Diagram:
Figure 1

Page6
Installing the Batteries:
Your Code Black LTE can function short term on 4-
AA batteries. Improved battery life on 8-AA, but we
suggest you use 12-AA batteries to get the most out
of your cameras battery life. Using Covert
rechargeable NiMH, 2300mAh, AA batteries will
extend the battery life significantly when paired
with a Covert Solar Panel.
DISCLAIMER: Do not use external power source
(Example: Solar Panel) with non-rechargeable AA
battery installed in camera.
Install batteries by sliding the top battery into the
sleeve, then depressing the spring with the other
battery and snapping down in place. Pay attention
to the (+) or (-) molded into each sleeve to
determine if you insert the positive or negative end
into the sleeve first. Negative battery terminal
always contacts the spring.

Page7
Downloading the Mobile App:
Search "Covert Wireless" in your Google Play Store
or Apple App Store.
Accessing the Web Portal:
Open your web browser to:
www.covert-wireless.com
Purchasing Your Plan:
Follow these simple steps to activate or renew an
AT&T plan:
1. Open your web browser to:
https://secure.covert-wireless.com
2. Select the type of plan you'd like to add
Figure 2
Figure 3

Page8
Figure 4
3. Enter the IMEI for your Covert Code Black
LTE found on the inside white label of the
camera and on the outer packaging.
4. Follow the prompts to select your rate plan,
enter your personal/billing information
and complete your purchase.
Installing the SD card:
Now that you have activated your AT&T plan, you
will need to install a SD card in the bottom of the
camera, (Covert SD card recommended). See Figure
6 for card orientation. Push in until it clicks and
release. To remove, repeat that process, the card
will pop out enough to remove. You can use any SD
card size up to 64GB. You must have the SD card in
the camera to be able to turn the camera on and
set it up.

Page9
Setting Up the Wireless Network:
NET Tab:
While finding the network connection, you will see
the words Searching Signal in red on the screen.
The camera will then say Connecting to Server as it
is connecting to our web-portal. Once you see
AT&T in the top right corner, you are ready to move
on.
Quick Tip: If your camera doesn’t connect
successfully, first make sure your SIM card is active
on a Covert Wireless plan and then turn the camera
OFF then back ON. (Power Cycle.)
Figure 5

Page10
Download Firmware:
Anytime your camera needs a firmware update, it
will be automatically pushed to your camera. When
you go check your camera, we encourage you to
press the menu button and scroll to FW Update.
Press OK. This will download the latest firmware
version in case there’s been an update.
Important Note: Anytime you make changes
directly to the camera, press OK to save the
changes on your camera. Scroll to the last tab and
select Upload Settings to sync the changes directly
to the web portal.

Page11
Sending a Test Photo:
Definition: This is a great way to make sure that
your camera is working properly before leaving your
camera set up remotely.
1) Press the ►button that says SHOT one time to
manually take a photo with the camera.
2) Press the OK button. Then press the MENU
button. Press the ▼to highlight the SEND
option and press OK.
3) The LCD screen will display the Send Progress.
4) Once you see Sent Successfully, you have
successfully sent your first photo and your
camera is ready to take photos. Press OK to
return to the main menu.
NOTE: In the rare event your camera did not
successfully send a picture, scroll down to
Diagnose and Press OK. This will store a log file
on your SD Card for you to send to a customer
service technician for troubleshooting purposes.

Page12
Figure 8
Customizing the Camera Settings:
Camera Mode Settings:
Photo Mode: You can change Photo Size, set the
Flash power, and Photo Burst in Custom Settings.
Video Mode: You can further set the Video Size and
Video Length.
Picture+Video Mode: You can further set the
Custom Settings, Video Size and Video Length.
Figure 6
Figure 7

Page13
NOTE: Make sure to press OK to save your settings.
If you do not press OK, your setting will return back
to the previous setting.
Trigger Mode Settings:
PIR Sensitivity: The camera is triggered by heat and
motion.
•Low
•Auto
•High
PIR Interval: The camera will be triggered based on
the interval you select. We recommend using a 30
second trigger interval.
•5-60 seconds in 5 seconds steps
•1-5 minutes in steps of 1 minute
•5-60 minutes in steps of 5 minutes
Time Lapse: Camera release at defined intervals:
•5-60 seconds in 5 seconds steps
•1-5 minutes in steps of 1 minute

Page14
Figure 9
Figure 10
•5-60 minutes in steps of 5 minutes
•1-8 hours in 1-hour intervals
•12, 16, 20, 24 hours 4-hour intervals
Start-Stop Setting
Select “ON” or “OFF”. Select the time you
want your camera to operate. You can
customize the weekdays and the start-stop
time. If you want the camera to work at all
times, select “OFF”.
NOTE: 00:00-00:00 means 24 hours

Page15
System Settings:
Set Clock: The clock is set automatically from the
wireless network. You can choose different date
display formats.
NOTE: Military time is the only available option.
Password: Select “On” and enter a 4-digit code to
protect the camera from unauthorized use. Be sure
to note the password and store the code in a safe
place. It will not be possible to reset the code on
your own. Select “Off”, if you do not wish to use a
password.

Page16
*If you forget your password, please contact Covert
Scouting Cameras at support@dlccovert.com or call
877-462-1799 for an RA #. We require warranty
registration to verify your camera. This must be
completed within 10 days after your purchase.
Proof of purchase will be required.
Rename: Rename your camera in the nickname box
(see below) using the web-portal by visiting:
https://secure.covert-wireless.com/
Overwrite: Save new photos over the old photos on
your SD card if it becomes full. Each time a new
photo is taken, the oldest photo on the card will be
overwritten. If the SD Card becomes full and this
feature is turned off, your camera will no longer
take photos.
Figure 12

Page17
Formatting the SD Card: Delete all data off your
memory card. Be sure that you won’t need the data
any more.
Default: With a reset to factory settings, all your
customized settings will be lost.
Software Version: Indicates the software version
for manufacturer’s use and troubleshooting only.
Auxiliary Power: Your camera is equipped with an
Auxiliary power jack. The jack necessary to make
the connection is a standard 4mm jack. Covert
offers an auxiliary cable to extend your battery life
with an external 6 or 12-volt battery. In order to
use 12 volts, you must use the Covert auxiliary
battery cable. We also sell a Covert Solar Panel to
directly hook up to your camera for optimal battery
usage.
MINI USB: Your camera can use a mini USB cable to
hook up to your computer or TV to look at the
photos.

Page18
Troubleshooting:
COMMON ERROR MESSAGES:
Reasons for error:
Login Fail:
1. The service in your area is insufficient to run the
camera.
2. You need to add money to your AT&T account.
3. Make sure that your antenna is attached
securely.
Send Fail:
1. The camera does not have sufficient service to
send the picture.
2. You need to add money to your Covert Wireless
account.
Network Busy:
1. The AT&T Network service provider is busy.
2. The camera does not have sufficient service to
send the picture.

Page19
3. 3. Network busy can also mean you don’t have an
active plan with Covert Wireless.
If it’s a cellular service issue you may need to
purchase a booster antenna from Covert Scouting
Cameras to help boost the signal. These can be very
effective in boosting the signal to your camera in a
poor signal area. You will only need to purchase
one booster antenna on the left side of the camera
should you need to boost your signal.
1) If you are still having problems, contact
customer service at 877-462-1799 or e-mail
support@dlccovert.com If you e-mail or have
to leave a message, we will get back to you as
quickly as we can.
Cannot access the SET-UP menu:
Reasons for issue:
1) SD card not inserted
2) SD card is corrupted
3) Batteries are low

Page20
Suggestions to remedy
1) Install new SD card
2) Replace batteries
Tricks and Tips on Field Setup:
•For best results, mount the camera
approximately 3 feet off the ground facing
straight forward, as level as possible.
•To enhance the flash, we recommend
positioning the camera in an area with a
backdrop to reflect the maximum amount of
light. For instance, place the camera 20-30’
from a field edge facing the woods. For the
inside of timber, positioning the camera facing a
thicket approximately 20-30’ away.
•Try to set the camera up so it’s not facing
directly into the sun either in the morning or
the evening when game movement is at its
peak.
•Use the Covert Tree60 mounting system to
mount the camera up higher pointing down on
This manual suits for next models
1
Table of contents
Other Covert Scouting Cameras Digital Camera manuals
