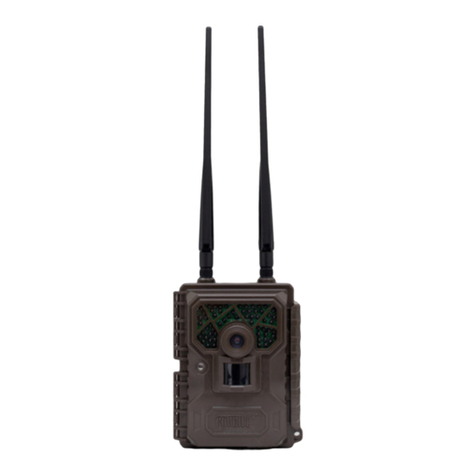
Covert Scouting Cameras AW1-A User manual

AW1-A
Covert Scouting Camera Instruction Manual
Watch the set-up video on our website at
www.covertscoutingcameras.com

Content
Introduction..................................................................3
Camera Overview .........................................................5
Button Instructions.......................................................6
Purchasing your Plan ....................................................7
Activating Multiple Cameras ........................................8
Other Plan Information.................................................9
Quick Start ..................................................................10
Purchasing your Plan ..........................................11
Connecting your Camera to Cloud Server ..........11
Settings and Start ...............................................12
The Light Information.........................................14
Manual Photo.....................................................15
Customizing the camera settings................................16
Mounting....................................................................18
Warranty………………………………………………………………...19
Technical Specifications..............................................28

5
Camera
overview

6
1. Switch
2. Reset
3. Micro SD Card slot
4. Nano SIM slot
5. USB
6. Antenna
7. “PIR & Power”Light
8. “Status”Light
9.MIC
10.PIR
11. Lens
12. IR Flash LED
13. 6V Jack 14. Tripod stand 15. Eject button
Button instruction
Button
Function description
ON: Working mode;
OFF: Power off
(Please remove batteries when not in use);

7
①:Press the button and the camera will
take a manual photo and automatically
send to the app.
②:Hold it and push the switch to ON,if
there is a FW installed on the Micro SD
Card,the camera will update.
Sound information:
Beeps once: upgrade is completed.
Beeps twice: no SIM card.
Beeps thrice: no SD card.
Purchasing
your
Plan
Follow these simple steps to activate or renew an
AT&T
plan:
1. Open yourweb browser to:
https://secure.covert-wireless.com
2. Select the type of plan you'd like to add.
3. Follow the prompts to select your rate
plan
, enter
your
personal/billing
information and complete your
purchase.
4. Log back into your account.

8
5. Enter the ICCID number located on the SIM card
included with your camera. Then enter the IMEI for
your camera found on the inside white label of the
camera or on the outer packaging.
6. Click the green activate button and refresh your page.
7. Rename your camera in the nickname field provided.
(OPTIONAL)
Activating Multiple Cameras
Same
Rate
Plan-
To activate multiple cameras on
the same rate plan, simply enter the ICCID and IMEI
number under said rate plan and click activate.
Note: You can activate as many cameras as you’d like on
a rate plan. Rate plans are charged on device quantities.

9
Different
Rate
Plan
-
To activate cameras on a
different rate plan, scroll to
Purchase
Additional
Subscription
Plans.
Select the provider and the rate plan
of your choice. This will add the rate plan option under
My
Services
and
Equipment.
Other
Plan
Information
Auto
Renew:
Covert Wireless plans automatically renew,
however there is no long-term contract. To opt out of
your billing for certain months, simply hover over the
“ACTIVE”button and click. You will no longer be billed
for services until you log back into your account and
“click to activate.”

10
Quick Start
Before you start, you need to prepare a Micro SD card
(up to 32G), a Nano SIM card and 8 AA batteries.
Please insert them correctly.

11
Connecting your Camera to Cloud Server
Login to your cloud account at:
www.covert-wireless.com.
This is the same login that you used to set up your
account at:
www.secure.covert-wireless.com.

13
Settings and Start
You can change the camera settings via APP. Click ‘Save’
to save and send the settings. Slide the power switch
to ‘ON’, the camera will receive settings and start to
work.

14
The Light Information
Color
Slow flash
Steady
Fast flash
Light1
Red
PIR is working
Low power
Light2
Green
Searching for
signal
Good signal
Sending
pictures
Yellow-gree
n
Weak signal
Red
No signal
“PIR&Power”Light (Light1)
“Status”Light (Light2)

15
* The camera begins to monitor when the two lights
are off.
Manual Photo
You can manually take a
picture and check if your APP
has successfully received the
photo.
Press the“RST”button when
the light 2 is green or
yellow-green. Camera will
shoot a picture at once and
send to cloud platform.
The cloud platform will receive the photo within 30
seconds if the camera has a good signal.
If light 2 become red after manually shooting, it means
the picture did not send. We suggest checking this:
⚫Micro SD card’s capacity (Up to 32G)
⚫That you have an active plan with AT&T.

16
Customizing the camera settings
Instant: Enables instant transmission. Max Number of
“Instant”means the number of photos that is allowed
to send out per day. If you want to control your data
flow, set the maximum number. The number 00 means
unlimited.
Remote Control: You can remotely control your
camera via mobile phone or web-portal. If you choose
Real Time, the wireless module will keep working so
the power consumption is huge. Delay 24H means the
wireless module will wake up at least one time in 24
hours but will continue to send pictures when
triggered by heat or motion.
Mode: You can choose Photo Mode or Video Mode.
Choosing Photo Mode, you can change Photo Size, set
Flash power, and Photo Burst in Photo Mode.
Choosing Video Mode, you can further set the Video
Size and Video Length.
Photo Burst: Your camera can take a 1-10 shot burst
every time the PIR is triggered to take a photo.

17
Sensitivity: There may be situations where you might
feel the camera is not catching animals too easily. You
can adjust the sensitivity of your camera to help with
this. Under most conditions, the Normal option will
work the best. In high temperatures, the High setting
might help differentiate between the outside temps
and the body temps of the animal. In cold conditions,
you may find that the Low option is best as the camera
can easily differentiate the outside temps from the
body temps of the subject.
Trigger Interval: Allows you to customize how often
the camera can be allowed to take a photo.
Time Lapse: This option allows your camera to
automatically take a photo without being triggered by
the PIR.
Work Time: The camera can work at preset times and
preset days. In the rest of the time the camera is not
work. Work hour: 00:00-00:00 means 24 hours. If the
settings is cross the day, for example: Start: 20:00 Stop:
10:00 means 00:00-10:00 am and 20:00-24:00 of the
chosen day.

18
Overwrite:The overwrite function will save new
photos over the old photos on your Micro SD Card if it
becomes full. Each time a new photo is taken the
oldest photo on the card will be overwritten.
AUXILIARY POWER: Your camera comes with a
standard 4mm Auxiliary power jack. If you want to
hook up an external 6V battery to power the camera,
you can. The jack necessary to make the connection is
a standard 4mm jack.
Tricks and Tips on Field Setup:
•For best results, mount the camera
approximately 3 feet off the ground facing
straight forward, as level as possible.
•To enhance the flash, we recommend
positioning the camera in an area with a
backdrop to reflect the maximum amount of
light. For instance, place the camera 20-30’
from a field edge facing the woods. For the

19
inside of timber, positioning the camera facing a
thicket approximately 20-30’ away.
•Try to set the camera up so it’s not facing
directly into the sun either in the morning or
the evening when game movement is at its
peak.
•Use the Covert Tree60 mounting system to
mount the camera up higher pointing down on
them for a better look. Works great when you
don’t have a straight tree to attach to.
•The FW version is reference to our engineers to
ensure a speedy and efficient warranty repair
should the need arise.
Covert Scouting Cameras Warranty:
Covert Scouting Cameras warranties this product for a
period of two (2) years from the date of purchase.
This warranty only covers manufacturer’s defects and
does not cover damage caused by misuse or abuse of
the product. This warranty includes two years repair

20
or replacement service on product from date of
purchase. If you have problems with this product,
please do not contact the store you purchased it from.
Contact Covert Scouting Cameras Customer Service
toll free at 877-462-1799 or e-mail
support@dlccovert.com.
** Proof of purchase required for replacement**
Covert Warranty Policy and Procedure:
To receive repair or replacement by Covert Scouting
Cameras two-year warranty, we ask you to do the
following:
-All returns must have a Return Authorization
(RA#) prior to sending in the camera.
1. E-mail or call our customer service department.
-support@dlccovert.com
-toll free: 877-462-1799
Please explain to the technician what issues you
are having with your camera.
2. If you are asked to return your camera to
Covert Scouting Cameras, you will be
Table of contents
Other Covert Scouting Cameras Digital Camera manuals


