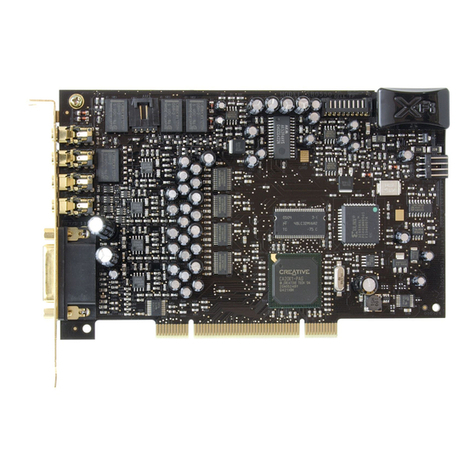
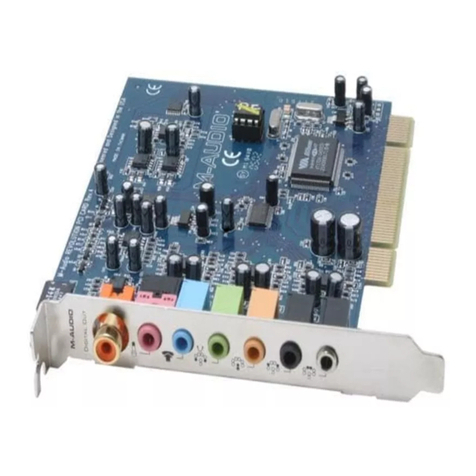
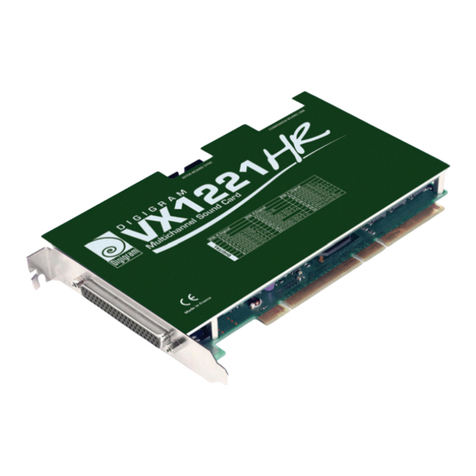
Creative Structures Sound Blaster 16 User manual

Getting Started
Information in this document is subject to change without notice and does not represent a
commitment on the part of Creative Technology Ltd. No part of this manual may be reproduced
or transmitted in any form or by any means, electronic or mechanical, including photocopying
and recording, for any purpose without the written permission of Creative Technology Ltd.
The softwaredescribed in this documentis furnished undera license agreementand may be used
or copied only in accordance with the terms ofthe license agreement. It is against the law to copy
the software on any other medium except as specifically allowed in the license agreement.
The licensee may make one copy of the software for backup purposes.
Copyright © 1997 by Creative Technology Ltd. All rights reserved.
Version 2.0
October 1997
Sound Blaster is a registered trademark of Creative Technology Ltd.
Sound Blaster 16 and Wave Blaster are trademarks of Creative Technology Ltd.
Microsoft, MS-DOS, Windows, and the Windows logo are registered trademarks of
Microsoft Corporation.
All other products are trademarks or registered trademarks of their respective owners.
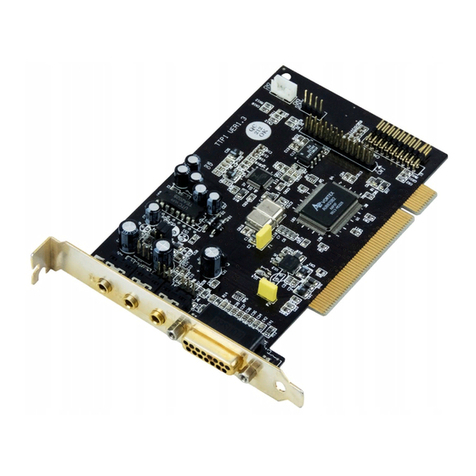
Audio Card
Plug and Play
This manual downloaded from http://www.manualowl.com

Regulatory Information
The following sections contain regulatory notices for Europe.
FCC Part 15: This equipment has been tested and found to comply with the limits for a Class B
digital device, pursuant to Part 15 of the FCC Rules. These limits are designed to provide
reasonable protection against harmful interference in a residential installation. This equipment
generates, uses, and can radiate radio frequency energy and, if not installed and used in
accordance with the instructions, may cause harmful interference to radio communications.
However,there is no guarantee that interference will not occur in a particular installation. If this
equipment does cause harmful interference to radio or television reception, which can be
determined by turning the equipment off and on, the user isencouraged to try one or more of the
following measures:
❑Reorient or relocate the receiving antenna.
❑Increase the distance between the equipment and receiver.
❑Connect the equipment into an outlet on a circuit different from that to which the receiver
is connected.
❑Consult the dealer or an experienced radio/TV technician.
Caution
To comply with the limits for the Class B digital device, pursuant to Part 15 of the FCC Rules,
this device must be installed in computer equipment certified to comply with the Class B limits.
All cables used to connect the computer and peripherals must be shielded and grounded.
Operation with non-certified computers or non-shielded cables may result in interference to radio
or television reception.
Modifications
Any changesor modifications notexpresslyapproved by the grantee of this device couldvoid the
user’s authority to operate the device.
Safety Information
CAUTION: This device is intended to be installed by the user in a CSA/TUV/UL certified/listed
IBM AT or compatible personal computers in the manufacturer’s defined operator access area.
Check the equipment operating/installation manual and/or with the equipment manufacturer to
verify/confirm if your equipment is suitable for user-installed application cards.
Compliance
This product conforms to the following Council Directive:
❑Directive 89/336/EEC, 92/31/EEC (EMC)
This manual downloaded from http://www.manualowl.com

iii
Contents
Before You Begin.............................................................................................. v
Using This Guide.................................................................................. v
Getting More Information.................................................................... v
Document Conventions........................................................................ v
1 Installing Audio Card and Related Hardware
To install the card and related peripherals........................................1-1
To test the DRAM upgrade...............................................................1-3
2 Installing Software in Windows 95
Setting Up the Audio Drivers........................................................................2-1
Installing the Applications.............................................................................2-4
Testing the Installation...................................................................................2-4
Uninstalling the Applications........................................................................2-6
3 Installing Software in DOS/
Windows 3.1x
Installing the Software...................................................................................3-1
Testing the Installation...................................................................................3-2
Optimizing Memory Usage...........................................................................3-2
Using Memory Managers.................................................................3-3
A Understanding the Installation
Understanding the Software-Configurable Settings....................................A-1
Input/Output (I/O) Addresses ..........................................................A-2
Interrupt Request (IRQ) Lines.........................................................A-3
Direct Memory Access (DMA) Channels.......................................A-3
Understanding the Environment Variables..................................................A-3
SOUND Environment Variable .......................................................A-4
BLASTER Environment Variable...................................................A-4
MIDI Environment Variable............................................................A-5
Understanding the Installation Program in Windows 3.1x.........................A-6
The AUTOEXEC.BAT File Settings...............................................A-6
The CONFIG.SYS File Settings......................................................A-7
This manual downloaded from http://www.manualowl.com

iv
B Changing Audio Card Settings
Enabling/Disabling Creative 3D Stereo Enhancement Effect....................B-1
Enabling/Disabling Full-Duplex Operation.................................................B-2
Enabling/Disabling MPU-401 MIDI Emulation.........................................B-3
Enabling/Disabling Joystick or IDE Interface.............................................B-5
CTroubleshooting
Problems Installing Audio Card Software from CD-ROM........................C-1
Problems with Sound....................................................................................C-2
Problems in DOS..........................................................................................C-3
Problems in Windows 3.1x...........................................................................C-4
Resolving Hardware Conflicts.....................................................................C-5
D Hardware Information
Redirecting PC Sounds to External Speakers..............................................D-2
AUX1 Connector Pin Assignments.............................................................D-3
AUX2 Connector Pin Assignments.............................................................D-3
CD Audio Connector Pin Assignments.......................................................D-4
DRAM Upgrade Connector Pin Assignments............................................D-5
Gold Finch Connector Pin Assignments......................................................D-7
IDE Connector Pin Assignments.................................................................D-7
Microphone Connector Pin Assignments....................................................D-8
Modem Connector Pin Assignments...........................................................D-9
PC Speaker Connector Pin Assignments.....................................................D-9
SPDIF Connector Pin Assignments...........................................................D-10
Speaker/Line Connector Pin Assignments................................................D-10
Telephone Answering Device Connector Pin Assignments.....................D-11
Wave Blaster Connector Pin Assignments................................................D-11
E Technical Support
Inside Europe................................................................................................. E-3
Through CompuServe................................................................................... E-3
By Fax............................................................................................................ E-3
This manual downloaded from http://www.manualowl.com

v
Before You Begin
The README file on the first installation diskette or CD-ROM
contains informationand changes not available at the time of printing.
Read the file before you continue. If your package contains floppy
diskettes, you may want to make backup copies. In addition, read the
following sections:
❑Using This Guide
❑Getting More Information
❑Document Conventions
Using This Guide
Chapter 1 showsyou howto install the audio card into your computer.
Chapters 2 and 3 describes how to install the audio software in
Windows 95 and Windows 3.1x, respectively. For information on
installation, changing settings, and troubleshooting, see the
appendices.
Getting More Information
Refer to the Knowing Your Audio Card leaflet to familiarize yourself with
the key features of your audio card. Refer to the online User’s Guide for
MIDI specifications and connector pin assignments, as well as
instructions on how to use the various applications in your audio package.
Document Conventions
This guide uses the following conventions to help you locate and
identify the information that you need.
Tablei: Icons.
This Icon Represents
Tip or useful information.
Warning.
This manual downloaded from http://www.manualowl.com

vi
If you are not familiar with the elements found in a typical dialog box,
refer to the following figure:
Tableii: Textconventions.
Text In Represents
bold Text that must be entered exactly as it appears.
italic Title of a book.
Otherwise, whenpresented at the DOS command
line, it is a placeholder that represents
information you must provide.
This information usually appears in the
parameter listing after the command is presented.
UPPERCASE Directory name, file name, or acronym.
< > Symbols, letters, andkey names on the keyboard.
Figure i: Elements of a dialog box.
Tabs
Check box
(selected)
Option
buttons
Up/Down
buttons
Drop-down
list box
Text box
List box
Check box
(cleared)
This manual downloaded from http://www.manualowl.com

Installing Audio Card and Related Hardware 1-1
1
Installing Audio Card and Related
Hardware
If you want to install this Plug and Play (PnP) audio card in a
non-PnP environment such as DOS/Windows 3.1x or
Windows 95 MS-DOS Mode, you must first install a PnP
configuration manager. For details, refer to the documentation
that comes with your PnP configuration manager.
To install the card and related peripherals
1. Switch off your system and all peripheral devices, and unplug
the power cord from the wall outlet.
2. Touch a metal plate on your system to ground yourself and
discharge any static electricity.
3. Remove the cover from your system.
This manual downloaded from http://www.manualowl.com

1-2 Installing Audio Card and Related Hardware
4. If youhaveamemoryupgrade module (DRAM daughterboard)
and your card has DRAM upgrade connectors, you may want
to mount the module onto your audio card now, as shown in
Figure 1-1.
5. Find a free 16-bit expansion slot in your system. Remove the
metal plate from the slot you have chosen and put the screw
aside. The screw will be used in a later step.
6. Align your card’s 16-bit slot
connector with the expansion
slot and gently press down the
cardintothefreeslotasshown.
7. Secure the card to the
expansion slot with the screw
that you removed from the
metal plate.
8. Connect powered speakers or an external amplifier to the Line
Out jack(s) if your audio card does not have an internal
amplifier, or if you do not want to use the amplifier.
You can also connect non-powered speakers to your audio
card’s Speaker Out jack. Refer to the Knowing Your Audio
Card leaflet to learn how to connect the various devices.
Figure 1-1: Mounting the memory upgrade module.
Audio Card
Memory
upgrade module
DRAM Upgrade
connectors
Housing
Figure 1-2
Audio card Metalplates
16-bit slot 8-bit slot
This manual downloaded from http://www.manualowl.com

Installing Audio Card and Related Hardware 1-3
For better quality sound, use powered speakers even if your
card has an internal amplifier.
The joystick connector on your audio card is identical to
that on a standard PC game control adapter or game I/O
connector. You can connect any analog joystick with a
15-pin D-shell connector or any device that is compatible
with the standard PC joystick. To use two joysticks, you
need a Y-cable splitter.
9. Replace the cover onto your system.
10.Plug the power cord back into the wall outlet, and switch on
the system.
To test the DRAM upgrade
If you have mounted a memory upgrade module in step 4, you can test
it as follows:
1. Make sure that you have installed the audio software.
(The installation of the software is covered in the next two
chapters.)
2. Start the AWE Control Panel. That is, click the Start button,
point to Programs, point to the menu of your Sound Blaster
card, and then click AWE Control Panel.
3. Load SoundFont banks. That is, click the User tab, click the
Browse button to browse for the installed folder of the SoundFont
bank, select the file name, and then click the Apply button.
From the memory status bar, you can see the changes in the
amount of onboard memory available.
4. Play your SoundFont banks to make sure that your memory
upgrade module is working properly.
Refer to the online User’s Guide for detailed information on how to
use the AWE Control Panel.
This manual downloaded from http://www.manualowl.com

Installing Software in Windows 95 2-1
2
Installing Software in Windows 95
This chapter shows you how to install the audio software in Windows
95 after installing your card. It consists of the following sections:
❑Setting Up the Audio Drivers
❑Installing the Applications
❑Testing the Installation
❑Uninstalling the Applications
Setting Up the Audio Drivers
You need device drivers to controlthe components on youraudio card.
After you have installed the card and switched on your system,
Windows 95 automatically detects the components, and either installs
the drivers or prompts you for the drivers. You may encounter the
following messages, which may not be in the sequence shown.
❑If a message similar to Figure 2-1 appears, just take note of it
and wait for the next message to appear.
Figure 2-1: Message box indicating the detection of a device.
This manual downloaded from http://www.manualowl.com

2-2 Installing Software in Windows 95
❑If a dialog box similar to Figure 2-2 appears:
If the device detected is Standard IDE/ESDI Hard Disk
Controller:
• Click the second option, and then click the OK button.
Otherwise:
• Click the first option, and then click the OK button. If you
are prompted for the Windows 95 installation diskette or
CD-ROM, insert it into a drive and click the OK button.
❑If a dialog box similar to Figure 2-3 appears, click the second
option, and then click the OK button.
Figure 2-2: Driver installation dialog box in which the Windows default driver
option is available.
Figure 2-3: Driver installation dialog box in which the Windows default driver
option is NOT available.
This manual downloaded from http://www.manualowl.com

Installing Software in Windows 95 2-3
❑If a dialog box similar to Figure 2-4 appears, click the Next
button, and follow the instructions on the screen to complete
the installation of the driver.
❑If the Install From Disk dialog box appears, and
If your package comes with a Drivers Disk:
• Insert it into your floppy disk drive, select the appropriate
drive, and click the OK button.
Otherwise:
1. Insert the installation CD-ROM into your CD-ROM drive
and select the drive.
2. Click the Browse button and look for a .INF file in the root
directory.
If you cannot find it, select the folder
\WIN95\Language\DRIVERS, where Language is the
language of the software that you want to install.
3. Click the OK button.
The required files are copied to your hard disk.
Figure 2-4: Update Device DriverWizard dialog box at start of installation.
This manual downloaded from http://www.manualowl.com

2-4 Installing Software in Windows 95
Installing the Applications
Your audio card’s applications can be installed from floppy diskettes,
a CD-ROM, or both, depending on which is supplied in your package.
To install from CD-ROM
1. Make sure that your CD-ROM drive is installed and working
properly. For details, refer to the documentation that comes
with it.
2. Insert the installation CD-ROM into your CD-ROM drive.
The CD-ROM supports Windows 95 AutoPlay modeand starts
running automatically. If it does not, see Appendix C,
“Troubleshooting”.
3. Follow the instructions on the screen to complete the
installation.
To install from diskettes
1. Insert the first installation diskette into your floppy disk drive.
2. Click the Start button, and then click Run.
3. In the Run dialog box, type A:\SETUP or B:\SETUP.
4. Click the OK button and follow the instructions on the screen
to complete the installation.
Testing the Installation
After the applications are installed, you can use Windows 95 Media
Playerto test if youraudio card isworkingproperly. If you donot have
Media Player, follow the instructions below to install it.
To install Media Player
1. Click the Start button, point to Settings, and then click
Control Panel.
2. In the Control Panel window, double-click the Add/Remove
Programs icon.
This manual downloaded from http://www.manualowl.com

Installing Software in Windows 95 2-5
3. Click the Windows Setup tab.
The Windows Setup tabbed page similar to Figure 2-5 appears.
4. Make sure that the Multimedia check box is selected, and then
click the Details button.
5. In the Multimedia dialog box, make sure that the Media Player
check box is selected.
If you do not have Volume Control, Sound Recorder or
Audio Compression installed, make sure that the
relevant check boxes are also selected.
6. Follow the instructions on the screen to complete the
installation.
Figure 2-5: Windows Setup tabbed page.
This manual downloaded from http://www.manualowl.com

2-6 Installing Software in Windows 95
To test the audio card
1. Click the Start button, point to Programs, point to Accessories,
point to Multimedia, and then click Media Player.
Media Player appears as shown in Figure 2-6.
2. On the Device menu, click Sound.
3. In the Open dialog box, select a sound from the list, and then
click the Open button.
4. On Media Player, click .
You should hear the selected sound being played. If you
encounter any problems, see Appendix C, “Troubleshooting”.
Uninstalling the Applications
The Windows 95 Uninstall feature allows you to remove applications
cleanly and then reinstall them to correct problems, change
configurations, or make version upgrades.
Quit the audio card’s applications before uninstalling.
Applications that arestillrunningduring uninstallation will not
be uninstalled.
Some applications may share files with other Windows
applications. If so, the uninstallation program will prompt you
when it tries to delete these files. Do not delete the files unless
you are sure that you do not need to use them.
Figure 2-6: Media Player interface.
This manual downloaded from http://www.manualowl.com

Installing Software in Windows 95 2-7
To uninstall the applications
1. Click the Start button, point to Settings, and then click
Control Panel.
2. Double-click the Add/Remove Programs icon.
3. In the Add/Remove Programs Properties dialog box, select the
Sound Blaster entry for your card (see the Knowing Your
Audio Card leaflet for your exact card model) and click the
Add/Remove button.
4. Follow the instructions on the screen to uninstall.
This manual downloaded from http://www.manualowl.com

Installing Software in DOS/ Windows 3.1x 3-1
3
Installing Software in DOS/
Windows 3.1x
This chapter shows you how to install the audio software in
DOS/Windows 3.1x after installing your card. It consists of the
following sections:
❑Installing the Software
❑Testing the Installation
❑Optimizing Memory Usage
Installing the Software
To install the software
1. If your package comes with installation diskettes, insert the
first installation diskette into a floppy disk drive. Otherwise,
insert the installation CD-ROM into your CD-ROM drive.
2. Select Run from the File menu.
3. Type D:\WIN31\DISK1\SETUP and press <Enter>
4. Follow the instructions on the screen to complete the
installation.
After you have completed the installation and rebooted your system,
proceed to the next section to test whether your installation works.
This manual downloaded from http://www.manualowl.com

3-2 Installing Software in DOS/ Windows 3.1x
Testing the Installation
To test the installation
1. At the DOS prompt, change to the directory containing your
audio card’s software. For example, if your directory path is
C:\SB16, type C:\SB16 and press <Enter>.
The directory name may also be VIBRA16.
2. Type DIAGNOSE and press <Enter>.
(This test program checks the resources used by your audio
card and displays a menu to let you test the card’s sound and
music output.)
3. Follow the instructions on the screen to complete the test.
If the test program stops or displays an error message, it may bedue to
a conflict between the audio card and another peripheral device. To
resolvetheconflict,youhavetochangethesettingsofyouraudiocard.
For more information, see Appendix A, “Understanding the
Installation” or Appendix C, “Troubleshooting”.
Optimizing Memory Usage
If you choose to install thelow-level DOS devicedrivers under custom
installation (see “The CONFIG.SYSFile Settings” onpage A-7), your
system will load them into memory during system startup.
However, if you do not need these drivers (for example, you are
running only Windows applications or playing DOS games), you can
bypass loading these drivers. Otherwise, it is recommended that you
load them into high memory (for example, using memory managers).
This manual downloaded from http://www.manualowl.com

Installing Software in DOS/ Windows 3.1x 3-3
Using Memory Managers
To bypass loading of low-level device drivers
1. During system startup, press and hold down the <Alt> key
when the message “Starting MS-DOS...” appears.
2. Release the key only when you see the DOS prompt.
Alternatively, you can use MS-DOS 6.x’s multiple boot
sessions feature. Create a session with settings that load the
drivers into memory. If you do not want to load these drivers,
select another session without them at system bootup.
(Refer to your MS-DOS 6.x documentation for instructions on
how to create multiple boot sessions.)
To use a memory manager
❑If you are using MS-DOS 6.x, run MEMMAKER.
(For details, refer to your MS-DOS 6.x documentation.)
❑If you have a memory manager such as QEMM or 386MAX,
refer to their respective documentation for instructions.
This manual downloaded from http://www.manualowl.com
Table of contents


