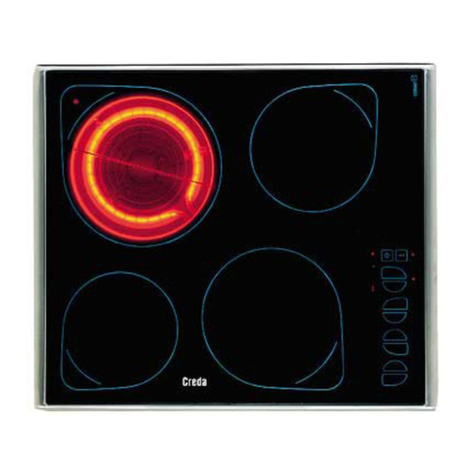
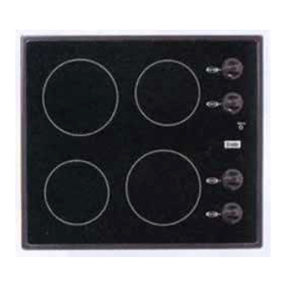
Creda S710E User manual

InstructionsforInstallationandUse
ElectricHob
Model S710E

2
CONTENTS
Introduction
For Your Safety
Know your Hob
How to use your Hob
Practical Advice
Care and Cleaning
Troubleshooting
Installation
Electrical Connection
Key Contacts
3
4
5
5
6
7
7
8
9
Back Cover
Retention of this Instruction Book
ThisInstructionBookmustbekepthandyforreferenceasitcontainsimportantdetailsonthesafeandproperuseofthe
appliance.
Ifyou sell or passthe appliance to someoneelse, or move houseand leave it behind,make sure this Bookis also
providedso the new ownercan become familiar withthe appliance and safetywarnings.
Ifthe Book is lostor damaged a copymay be obtained from:
GDALTD.,MorleyWay,Peterborough,PE29JB

3
Your new hob is guaranteed* and will give lasting service. This guarantee is only applicable if the appliance has been
installedinaccordancewiththeinstallationinstructionsdetailed in thisbooklet.
Tohelpmakebestuse of your cooking equipment, pleasereadthisbookletcarefully.
Thehobisdesigned specifically for domestic useandresponsibilitywillnot be accepted for useinanyotherinstallation.
Introduction
* The guarantee is subject to the provisions that the appliance:
(a) Has been used solely in accordance with this booklet.
(b) Has been properly connected to a suitable supply voltage as stated on the rating plate, attached to the
appliance.
(c) Has not been subjected to misuse or accident or been modified or repaired by any person other than the
manufacturersauthorisedemployeeoragent.
(d) Has been correctly installed.
Thisapplianceconforms with the following European Economic Community directives
- 73/23/EEC of19/02/73 (Low Voltage) andsubsequentmodifications.
- 89/336/EECof03/05/89(Electromagnetic Compatibility) and subsequent modifications.
- 93/68/EEC of22/07/93and subsequent modifications.
Beforeusing the hotplatesforthefirsttime, we recommendyouheatthemat maximum temperatureforapproximately4
minutes(without pans). During thisinitialstage,theirprotective coating hardensandreachesitsmaximum resistance.
Whenfirstusing the hob, ensure thattheroomis well ventilated (eg.openawindow or use an extractorfan)and that
personswho may be sensitivetothe odour avoid anyfumes.it is suggestedthatany pets be removedfromthe room
untilthe odour has ceased.Thisodourisdueto temporary finishonelements.

4
For Your Safety
ALWAYS:
-makesureyouremoveallpackaginganddisposeofsafely.
- check the soundness of the appliance after it has been
unpacked.
- make sure you understand the controls before using the
appliance.
-keepchildren away from theapplianceduring use.
- take care to avoid heat/steam burns when operating the
controls.
-makesurethecontrolsareturnedoffwhenyouhavefinished
cookingand when notin use.
-disconnectfromthepowersupply,andallowtocool,before
cleaningorperformingmaintenance.
-refer servicing to aqualifiedapplianceserviceengineer.
- keep the hob clean as a build up of grease or fat from
cookingcancausea fire.
-followthebasicprinciplesoffoodhandlingandhygieneto
preventthepossibilityofbacterialgrowth.
-dryfoodthoroughlybeforefryingandloweritslowlyintothe
hotoilorfat. Frozenfoodinparticular,willcausefrothingand
spittingifadded too quickly.
-keep outside ofpans clean andfree from streaks of oil or
fat.
- place pans centrally over the hotplates making sure
handlesarekept away from the edge of thehobandcannot
beheated by other hotplates/pans.
-keepanyventilationslotsclearof obstructions.
NEVER:
- attempt to install or repair the appliance without the
assistanceofqualified personnel.
-storeitems above the appliance that children mayattempt
toreach.
-heatup unopened food containers, aspressurecanbuild
upcausingthecontainertoburst.
-use the appliance to heatup anything otherthan food.
-use the appliance as aroom heater.
- dry any items on the hob.
-installtheappliancenexttocurtainsorothersoftfurnishings.
-allowchildren to play with ortamperwiththe controls.
-leavechildrenunsupervisedwhere cookingappliancesare
installedasallthecooking surfaces get hot during and after
use.
-storechemicals,foodstuffsor pressurised containers in or
ontheappliance, or in cabinetsimmediatelyabove or next
totheappliance.
-useflammable or plastic itemsonor near the hob.
-useadapters, multiple sockets and/or extensionleads.
-fill a deepfatfryingpanmore than 1/3fullofoil,or use alid.
DO NOT LEAVE UNATTENDED WHILE COOKING.
- fry too much food at a time, especially frozen food. This
onlylowersthetemperatureortheoilorfattoomuch,resulting
ingreasyfood.
-pull on theapplianceor the supplycable to unplug itfrom
theelectricaloutlet.
-allowpowercablesofotherappliancestocomeintocontact
withhot parts of this appliance.
- expose the appliance to atmospheric agents, such as
rainorsunlight.
- operate the appliance with wet hands.
-operate the appliancewhenbarefoot.
-allow anyone to sit or stand onany part of the appliance.
- use misshapen pans which may be unstable.
- use fish kettles or large preserving pans across two
hotplates.
-leave anything onthe hob surfacewhen unattended and
notinuse.
When used properly your appliance is completely safe but as with any electrical product there are certain
precautions that must be observed.
PLEASE READ THE BELOW PRECAUTIONS BEFORE USING YOUR APPLIANCE.
Tomaintaintheefficiency and safety of thisappliance,werecommendyou do the following:
-onlycalltheServiceCentresauthorisedbythemanufacturer.
- always use genuine spare parts.
SAFETY ADVICE
IMPORTANT-Aswithany cooking appliance there could be some fire risk attached to the heatingofoil,particularlyfor
deepfatfrying. Cookingutensilscontaining oil must not be left unattended (eg. to answer the telephone) onorinclose
proximityto thecookingareas.
IN THE EVENT OF A CHIP PAN OR ANY OTHER PAN FIRE:
1.Turn offthehotplates.
2.Coverthepanwithafireblanketordampcloth,thiswillsmother the flames and extinguish the fire.
3.Leavethe pan to coolforat least 60 minutesbeforemoving it. Injuries are oftencausedby picking up ahotpan and
rushingoutsidewithit.
NEVERUSE A FIRE EXTINGUISHERTOPUT OUT A PANFIREas the forceofthe extinguisher is likelytotip the pan
over.Neveruse water to extinguishoilorfatfires.

5
How To Use Your Hob
Know your Hob
AElectric plate
BControl knobs for the electric hotplates
CPilot light of the electric plates
Thepositionofthecorrespondingelectrichotplateisindicated
oneach control knob.
Electric Hotplates
The hot plates vary in diameter and power: "normal" and
"fast".Thelattercanbe identified by a red spot in the centre
ofthehotplateitself.
Thehot platecanberegulatedby turningthecorresponding
knobintheclockwiseor counter-clockwise direction to any
oneof the 6differentsettings:
0Off
1Low
2-5 Medium
6High
Thesectionentitled,"PracticalAdvice",providesinformation
on the recommended settings for various types of food or
cookingprocesses.
When the knob is on any of the settings other than "Off",
the "C" pilot light comes on.
BC
A

6
Practical Advice
Choiceof utensils:
EveryElectric Hob deservestherightchoiceof utensils. We
recommendforoptimumperformancetheuseofgoodquality
utensils.
PANS SHOULD NOT:
• Beconcave (bowed in).
• Beconvex (bowed out).
• Berimmed.
• Bedeeplyridged.
BUT SHOULD BE ESSENTIALLY FLAT
Always
• Usegood qualityflat-basedcookwareonall electricheat
sources.
• Placepanscentrally on the hotplate.
• Ensure pans have clean, dry bases before use.
• Ensurepans match thesize of theheating area.
• Remember good quality pans retain heat well, so
generallyonlya low or mediumheatis necessary.
• Ensure pan handles are positioned safely and away
fromheatsources.
• Liftpans,do not drag.
• Usepan lids, exceptwhen frying.
• Dealwithspillageimmediately, but with care.
Never
• Use gauze, metal pan diffusers, asbestos mats and
stands eg. wok stands - they can cause overheating.
• Use utensils with skirts or rims eg. buckets and some
kettles.
• Usebadlydented or distorted pans.
• Leaveanelement on when notcooking.
• Cookfooddirectly on the hotplate.
• Dragorslideutensilsacross the hotplate.
• Place large preserving pans or fish kettles across two
hotplates.
• Placeplastic vessels or utensils ona hot hob.
• Use the hob as an area for storage.
Inordertoavoidheat loss and damage to thehotplate,use
utensilswith a flatbottom the diameterof which is not less
thanthat of the hotplate.
Setting Normal or Fast Plate
0 Off
1 Cookingvegetable,fish
2 Cookingpotatoes(using steam), soups,
chickpeas,beans
3 Continuingthe cooking oflargequantitiesof
food,minestrone
4 Forroasting (average)
5 Forroasting(aboveaverage)
6 Forbrowningandreachingboilinashorttime

7
Before cleaning or performing maintenance on your hob,
disconnectitfromthepowersupply.Checkthatallcontrols
arein theOFFpositionbeforereconnecting.
Cleanspills immediately.
NEVER USE: Washing powder, harch abrasive,
scouring pads, aerosol cleaners or oven chemical
clearnersof any kind.
Cleaning materials to avoid
• Householdabrasivepowders,eg. Vim.
• Oven chemical cleaners, aerosols and oven pads -
Causticcleanerssuch as these will etch the surfaceand
attackthe metalframe.
• Bathandsink cleaners may markthesurface.
Care and Cleaning
Troubleshooting
Before calling service for assistance, check through the
followinglist,theremaybenothingwrong.
Nothingworks.
Check to make sure that:
• themains wall switch is switched on.
Hotplates are slow to boil or will not simmer.
Check to make sure that:
• Yourpansconformwiththe recommendations detailed
inthisbook.
If, despite all of these checks, the hob does not function
properly and problem persists, call Hotpoint Service (see
KEYCONTACTS,backpage), informing them of:
-Thetypeof problem.
- The abbreviation used to identify the model (Mod. ...) as
indicatedonthewarranty.
IMPORTANT:
Never call upon technicians not authorized by the
manufacturer,andrefusetoacceptsparepartsthatarenot
original.
Enamelled, Stainless Steel and Glass parts
Wipewith a clothwrung out inwarm soapy water followed
by a wipe with a cloth wrung out in clean water and then
drywith a soft cleancloth.
ControlKnobs
Wipe over the knobs with a soft cloth wrung out in warm
soapywaterormildnon-abrasive.Then,afterwipingwitha
clothwrungout in clear water,drywith a soft cleancloth.
PaintedMetal Surround Trim
Wipe over with a cloth wrung out in warm soapy water
only. DO NOT USE ABRASIVES.
The Hotplates
Cleanwithaclothwrung out in warm water. Then rub a litlle
cooking oil into the hotplates while they are still warm to
conditionthesurface.Ensurecare is taken as the hotplates
will be warm.

8
Installation
The following instructions are intended for a qualified
installer so that the installation and maintenance
proceeduresmaybefollowed in the most professionaland
expertmanner possible.
Important: Unplug the electrical connection before
performinganymaintenanceorregulation upkeepwork.
Installation of built-in hobs
Theelectrichobsarepreparedwithprotectiondegreeagainst
excessiveheatingofYtype,itisthereforepossibletoinstal
themnexttofurniturewhich ishigherthantheworktop.Fora
correctinstallation ofthehobthefollowing precautionsmust
befollowed:
a) Thehob may belocatedin a kitchen,a kitchen/diner or
bedsittingroom,butnot in a bathroom or showerroom.
b) Thehoodsmustbeinstalledaccordingtotherequirements
inthehoodhandbook.
c) Thedimensions of the cutoutforthe appliance must be
thoseindicatedinthefigure.Clampsareprovidedtofasten
the hob to worktops measuring from 20 to 40 mm in
thickness.Tofastenthehobsecurely,itisrecommended
that all the clamps be used.
555
mm
475
mm
55
mm
Fastening Clamps - Assembly Diagram
Clamp Position for Clamp Position for
H=20mmtop H=30mmtop
Front
Clamp Position for
H=40mm top Back
N.B: Use the clamps contained in the "accessory kit."
d) In case a wooden panel should be fitted under the top
forinsulation,it will have be fitted at aminimumdistance
of20mm from the inferior part of thetop.
Important: Wheninstalling the hob on a built-in oven,the
oven should be placed on two wooden strips; in the case
ofa joining cabinetsurface,remember to leavea space of
at least 45 x 560 mm at the back.
Wheninstallingon a built-in oven without forced ventilation,
ensurethatthere are air inlets and outlets forventilatingthe
interiorofthe cabinet adequately. Assemblyexamplesare
giveninfigs.
560 mm.
45 mm.

9
Electrical Connection
Connecting the supply cord to the electrical mains:
Thehob must beconnected to themains by a double pole
mainsswitch, which must have a minimum 0f3mm space
between the contacts, correctly fused with a capacity
appropriate to that shown on the hob Rating Plate. All
electricalwiring from theconsumerunittothe appliance, via
the switched double pole cooker outlet, must be of an
acceptabletype and currentrating as above.
Thesupplycordshouldconform to BS6004 conductor size
4mm2, must be positioned so that no part of it reaches a
temperatureof50°Caboveroomtemperature.Theelectrical
installationmustcomplywiththeIEERegulations, Building
Regulation& local By-Laws.
Beforemaking theconnection,makesurethat:
• thelimiterswitch(fuse)andtheresidualwiringcansupport
theappliance load (see therating plate).
• themainssystem is properly earthedincompliancewith
currentregulationsandprovisions.
• there is easy access to the socket or the double pole
switchafterthe appliance is installed.
IMPORTANT:
If the hob is installed above a built-in oven, the electrical
connectionfor the hobmustbe independent ofthat for the
oven,both for safety reasonsandtofacilitatetheremoval of
the oven for maintenance, repair etc.
Voltage and frequency of power supply:
240V~50/60Hz5600W
Supply cable installation
Theelectrcichobsaresuppliedwithoutcable. Use a cable:
H05VV-F3x2.5mm2
•Open the terminal box by removing the "V" screw and
taking off the cover.
•Thewiresinthemains lead are coloured in accordance
withthe following code:
Green &Yellow - Earth “E”
Blue - Neutral “N”
Brown - Live“L”
Connect the wires in accordance with the following
diagram
32154
NL
•Fix the cable in place with the "F" cable clamp, close
the lid and fasten it with the "V" screw.
F
V
12345

10
Note

11
Note

August 2003 Part no. FP158 - 01
Over 1200 trained specialists, directly employed by us, ensure that you can have complete confidence in
both the appliances and services we offer.
Repair Service and Information Desk
UK:08709066066
(Open 8 to 8 Mon - Fri, 8 to 6 Sat, 10 to 4 Sun & Bank Holidays)
www.theservicecentre.co.uk
Republicof Ireland: 1850 302 200
Note: Our operators will require the following information:
Model number:
Serialnumber:
Extended Warranties
UK:08709088088
(Open 8 to 8 Mon - Sun)
www.theservicecentre.co.uk
Republicof Ireland: 1850 502 200
Genuine Parts and Accessories
UK: 08709 077 077
(Open 8-30 to 5-30 Mon - Fri & 9 to 12 Sat)
www.theservicecentre.co.uk
Republicof Ireland: (01)8426836
GeneralDomestic AppliancesLimited,Morley Way,Peterborough,PE2 9JB.
KeyContacts
After Sales Service
195.039.375.01
Table of contents
Other Creda Hob manuals

Creda
Creda S911E User manual

Creda
Creda S930E User manual

Creda
Creda W810 User manual

Creda
Creda HB42311 Operating instructions

Creda
Creda HB42329 User manual

Creda
Creda HB42207 Product guide

Creda
Creda HB42326 Operation instructions

Creda
Creda S830G User manual

Creda
Creda D700E Assembly Instructions

Creda
Creda S860G User manual
Popular Hob manuals by other brands

Kuppersbusch
Kuppersbusch VKET3800.0 Instructions for use and installation

Laurus
Laurus LIA78 user manual

Kuppersbusch
Kuppersbusch GCM 642.1 Instructions for use and installation instructions

Malloca
Malloca MH-03I N Operating and installation instructions

Caple
Caple C970i instruction manual

Electrolux
Electrolux LIT60320C user manual