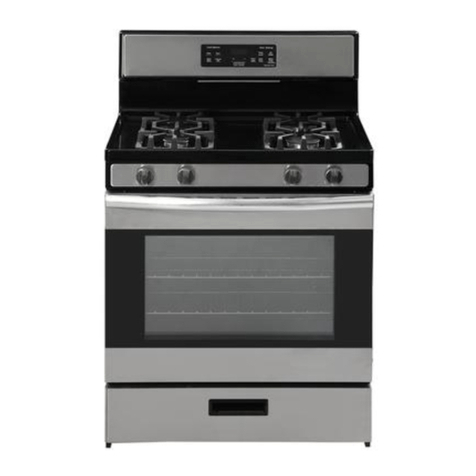
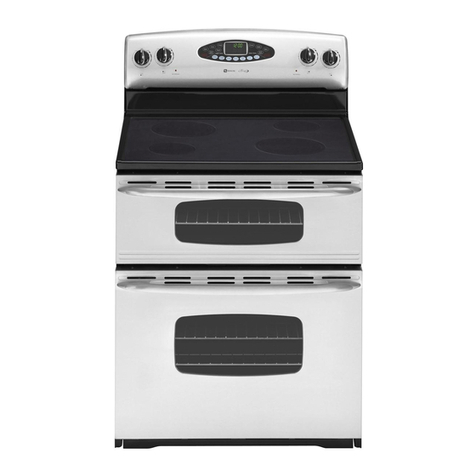
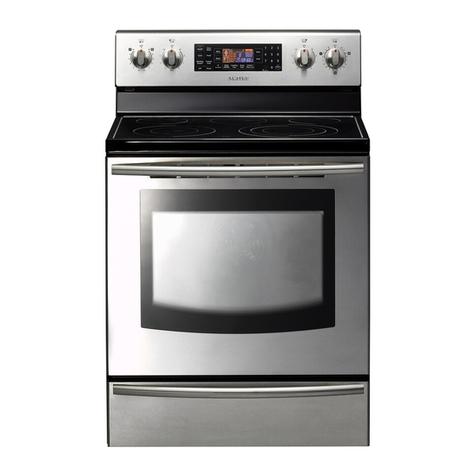
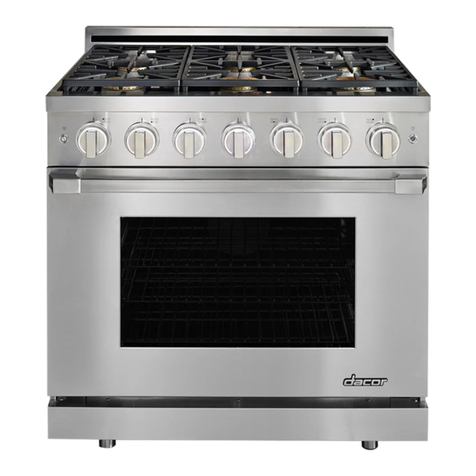
Criterion 455-4603 User manual

To Reduce The Risk Of Injury, User Must Read And
Understand Operator’s Manual. Save These Instructions For Future Reference.
455-4603 / 455-4604 / 455-4605
30" Standard Gas Range
Installation Manual
INSTALLATION MANUAL
Cook Options
Bake Start
Oven Settings
Automatic Oven
Lock Controls
Hold 3 Seconds
Broil Hi/Lo Cancel/O Oven / Light Cook / Time Delay Time
Timer / On/o Set / Clock
88:88

2 3
TABLE OF CONTENTS
RANGE SAFETY . . . . . . . . . . . . . . . . . . . . . . . . . . . . . . . . . . . . . . 3
Anti-Tip Bracket . . . . . . . . . . . . . . . . . . . . . . . . . . . . . . . . . . . . . . . 4
Install Anti-Tip Bracket . . . . . . . . . . . . . . . . . . . . . . . . . . . . . . . . . . . 4
INSTALLATION REQUIREMENTS . . . . . . . . . . . . . . . . . . . . . . . . . . . . . 5
Tools and Parts . . . . . . . . . . . . . . . . . . . . . . . . . . . . . . . . . . . . . . . 6
Electrical Connection . . . . . . . . . . . . . . . . . . . . . . . . . . . . . . . . . . . . 8
Electrical Requirements . . . . . . . . . . . . . . . . . . . . . . . . . . . . . . . . . . . 9
Gas Supply Requirements. . . . . . . . . . . . . . . . . . . . . . . . . . . . . . . . . . 10
INSTALLATION INSTRUCTIONS. . . . . . . . . . . . . . . . . . . . . . . . . . . . . . 12
Make Gas Connection. . . . . . . . . . . . . . . . . . . . . . . . . . . . . . . . . . . . 12
Electronic Ignition System. . . . . . . . . . . . . . . . . . . . . . . . . . . . . . . . . . 14
Oven Door . . . . . . . . . . . . . . . . . . . . . . . . . . . . . . . . . . . . . . . . . . 15
LEVEL RANGE . . . . . . . . . . . . . . . . . . . . . . . . . . . . . . . . . . . . . . . 16
GAS CONVERSIONS . . . . . . . . . . . . . . . . . . . . . . . . . . . . . . . . . . . . 17
Make Gas Connection. . . . . . . . . . . . . . . . . . . . . . . . . . . . . . . . . . . . 17
LP Gas Conversions. . . . . . . . . . . . . . . . . . . . . . . . . . . . . . . . . . . . . 17
Gas Pressure Regulator . . . . . . . . . . . . . . . . . . . . . . . . . . . . . . . . . . . 17
Natural Gas to LP Gas. . . . . . . . . . . . . . . . . . . . . . . . . . . . . . . . . . . . 18
LP Gas Orice Spud Chart . . . . . . . . . . . . . . . . . . . . . . . . . . . . . . . . . 18
Natural Gas to LP Gas. . . . . . . . . . . . . . . . . . . . . . . . . . . . . . . . . . . . 19
RANGE SAFETY INFORMATION
FOR YOUR SAFETY AND THE SAFETY OF OTHERS, PLEASE READ ALL SAFETY
INSTRUCTIONS BEFORE INSTALLING THIS APPLIANCE.
There are important safety messages in this manual for this appliance. Failure to follow
the instructions may result in potential safety hazards to you or to the product, which may
cause bodily injury.
All safety messages will explain what the potential hazards are, explain how to reduce the
chance of injury, and state what can happen if the instructions are not followed.
SYMBOL MEANING
ALL SAFETY MESSAGES WILL EXPLAIN WHAT THE POTENTIAL HAZARDS ARE, EXPLAIN
HOW TO REDUCE THE CHANCE OF INJURY, AND STATE WHAT CAN HAPPEN IF THE
INSTRUCTIONS ARE NOT FOLLOWED.
• This is the safety alert symbol.
• This symbol alerts you to potential hazards that can hurt or kill you and
others.
• All safety messages will follow the safety alert symbol with either the
word: “DANGER” or “WARNING.”
• All safety messages will explain what the potential hazards are, explain
how to reduce the chance of injury, and state what can happen if the
instructions are not followed.
• Do not store or use gasoline or other flammable vapors and liquids in
the vicinity of this or any other appliance.
• For your safety, have your range installed and/or serviced by a qualified
technician or service agency.
• What to do if you smell gas:
— Do not light any appliance
— Do not touch any electrical switch
— Do not use any phones in your home
— Immediately call your gas supplier from a safe location outside of the
home. Follow the gas suppliers instructions
— In the event of an emergency, exit the home immediately, and call the
fire department.
YOU MAY BE SERIOUSLY INJURED OR KILLED IF YOU DO NOT IMMEDIATELY FOLLOW
INSTRUCTIONS!
DO NOT STORE OR USE GASOLINE OR OTHER FLAMMABLE VAPORS AND LIQUIDS IN
THE VICINITY OF THIS OR ANY OTHER APPLIANCE.
FIRE EXPLOSION HAZARD
IF THE INFORMATION IS NOT FOLLOWED EXACTLY, A FIRE OR EXPLOSION MAY
OCCUR, RESULTING IN PROPERTY DAMAGE, PERSONAL INJURY, OR DEATH.
INSTALLATION MUST BE PERFORMED BY A QUALIFIED TECHNICIAN.
REMOVE PACKAGING MATERIALS BEFORE INSTALLATION, REMEMBER TO REMOVE
ALL THE PACKAGING MATERIAL FROM THE INTERIOR AND EXTERIOR PARTS OF THE
RANGE, INCLUDING INSIDE THE OVEN. FAILURE TO REMOVE PACKAGING MATERIALS
MAY RESULT IN DAMAGE OR INJURY.
IMPORTANT:
INSTALLER: LEAVE INSTALLATION INSTRUCTIONS WITH THE HOMEOWNER.
HOMEOWNER:
KEEP INSTALLATION INSTRUCTIONS FOR FUTURE REFERENCE.

4 5
RANGE SAFETY INFORMATION (continued) INSTALLATION REQUIREMENTS
ANTI-TIP BRACKET
The range will not tip during normal use. However, the range can tip if you apply too much
force or weight to the open door without the anti-tip bracket fastened down properly.
TIP OVER HAZARD
• A child or adult can tip the range and be killed.
• Make sure the anti-tip bracket has been properly installed and
secured per the installation instructions.
• Re-secure the anti-tip bracket if range is moved.
• Do not operate the range without the
anti-tip bracket installed and secured.
• Failure to follow these instructions can result in death or
serious burns to adults and children.
Range Foot
Anti-Tip Bracket
TO VERIFY THE ANTI-TIP BRACKET IS INSTALLED
AND SECURED PROPERLY:
1. Slide range forward
2. Look for the anti-tip bracket attached to the floor or wall,
then slide range back so rear range foot is under anti-tip
bracket.
3. If the range can be tipped away from the wall, the range has
not been secured in place. Repeat steps 1-2 to ensure rear
range foot is set properly.
NOTE: SEE SAFETY INSTRUCTIONS BELOW FOR FURTHER
DETAILS.
How To Install Anti-Tip Bracket:
1. Remove the anti-tip bracket from the
supplies and manual packet.
2. Determine which mounting method to
use: floor or wall. If you have a stone
ormasonry floor, you can use the wall
mounting method. If you are installing
the range in a mobile home, you must
secure the range to the floor.
3. Determine and mark centerline of the
cutout space. The mounting can be
installed on either the left side or right
side of the cutout. Position mounting
bracket against the wall in the cutout
sothat the V-notch of the bracket is
13-1/9" (33.3 cm) from centerline as
shown.
4. Drill two 1/8" (3 mm) holes that
correspond to the bracket holes of the
determined mounting method. See the
following illustrations.
Centerline
14-2/3" (37.2 cm)
A
FLOOR/ WALL MOUNTING:
Front/Floor Position Rear/Wall Position Diagonal (2 Options)
Before beginning the installation process, gather all the required tools and parts. Read and
follow the instructions asprovided.
Remember to remove all the packaging material from interior and exterior parts of the oven
before connecting the gas or electrical supply.
LOCATION REQUIREMENTS
IMPORTANT:
• Observe all governing codes and ordinances. Do not obstruct flow of combustion and
ventilation air.
• It is the installer’s responsibility to comply with installation clearances specified on page
8 of this installation manual. The model/serial rating plate is located on the oven frame
behind the top right side of the oven door.
• Recessed installations must provide complete enclosure of the sides and rear of the
range.
• All openings in the wall or floor where range is to be installed must be sealed.
• Do not seal the range to the side cabinets.
• Cabinet opening dimensions that are shown must be used.
• Given dimensions are minimum clearances.
• The floor anti-tip bracket must be installed. To install the anti-tip bracket shipped with
the range, see “Install Anti-Tip Bracket” section.
• Grounded electrical supply is required. See “Electrical Requirements” section.
• Proper gas supply connection must be available. See “Gas Supply Requirements”
section.
• Contact a qualified floor covering installer to check that the floor covering can withstand
at least 200°F (93°C).
• Use an insulated pad or ¼" (0.64 cm) plywood under range if installing range over
carpeting.
IMPORTANT:
TO AVOID DAMAGE TO YOUR CABINETS, CHECK WITH YOUR BUILDER OR
CABINET SUPPLIER TO MAKE SURE THAT THE MATERIALS USED WILL NOT
DISCOLOR, OR SUSTAIN OTHER DAMAGE.

6 7
INSTALLATION REQUIREMENTS (continued) INSTALLATION REQUIREMENTS (continued)
Tools/Parts Needed:
Tape Measure Hammer 15/16" Combination Wrench
Flathead Screwdriver Pipe Wrench 1/4" Drive Ratchet
Phillips Screwdriver Wrench or Pliers 3/8" Nut Driver
Level Marker or Pencil 1/8" (3.2 mm) drill bit (for
wood floors)
Hand or Electric Drill Gas Line Thread Tape or Gas Pipe Joint Compound
For LP/Natural Gas Conversions
3/8" Combination Wrench Phillips Screwdriver
1/2" Combination Wrench Masking Tape
5/8" Combination Wrench 7 mm (9/32")
Nut Driver
D
C
E
B
A
A
B
#10 x 1-7/8" screws (2) IMPORTANT:
To avoid damage to your cabinets, check with your builder or cabinet supplier to make
sure that the materials used will not discolor, the laminate, or sustain other damage. This
oven has been designed in accordance with the requirements of UL and CSA International
and complies with the maximum allowable wood cabinet temperatures of 194°F (90°C).
Mobile Home Installation Requirement:
When this range is installed in a mobile home, it must be secured according to the instructions
in this document.
Product Dimensions:
A. 25.63" (65.10 cm) depth. Back of range to front of cooktop
B. 28.5" (72.4 cm) max. depth with handle
C. 46.38" (117.8) overall height (max.) with leveling legs
D. 29.87" (75.9 cm) width
E. 35.9" (91.2 cm) c ooktop height (max.) with leveling legs
IMPORTANT:
Range must be level after installation. Follow the instructions in the “Level Range” section.
Using the cooktop as a reference for leveling the range is not recommended. Range can be
raised approximately 1.18" (3 cm) by adjusting the leveling legs.
Parts Supplied:
Check that all parts are included. Anti-tip
bracket must be securely mounted to the
floor or wall. Thickness of flooring may
require longer screws to anchor bracket to
the floor.
A. Anti-tip bracket
B. #10 x 1-7/8" screws (2)
C. LP Conversion Kit
Parts You May Need:
Check local codes and consult gas suppli-
er. Check existing gas supply and electrical
supply. See “Electrical Requirements” and
“Gas Supply Requirements” sections.

8 9
INSTALLATION REQUIREMENTS (continued) INSTALLATION REQUIREMENTS (continued)
A
B
CD
E
F
G
J
I
H
Gas and
Electrical Supply
CABINET DIMENSIONS
Cabinet opening dimensions shown are for
26" (66.0 cm) countertop depth, 24" (61.0
cm) base cabinet depth and 36" (91.4 cm)
countertop height.
A. 18" (45.7 cm) upper side cabinet to
countertop
B. 13" (33 cm) maximum upper cabinet
depth
C. 30-1/8" (76.5 cm) minimum opening
width
D. For minimum clearance to top of
cooktop, see “*NOTE” below.
E. 30-1/8" (76.5 cm) minimum opening
width
F. 13" (33 cm) minimum clearance from
both sides of range to side wall or other
combustible material.
G. 27" (68.7 cm)
H. 7-4/5" (19.8 cm)
I. 3-1/5" (8 cm)
J. Cabinet door or hinges should not
extend into the cutout.
K. 24" (61.0 cm)
L. 26" (66.0 cm)
IMPORTANT:
TO AVOID DAMAGE TO YOUR CABINETS, CHECK WITH YOUR BUILDER OR
CABINET SUPPLIER TO MAKE SURE THAT THE MATERIALS USED WILL NOT
DISCOLOR, OR SUSTAIN OTHER DAMAGE.
ELECTRICAL CONNECTION
ELECTRICAL SHOCK HAZARD
• Disconnect power before servicing.
• Use 18 gauge copper wire.
• Electrically ground range.
• Failure to follow these instructions can result in death, fire
and/or electric shock.
ELECTRICAL REQUIREMENTS
• 110/120V, 60HZ, properly grounded circuit protected by a 15-amp or 20-amp circuit
breaker or time delay fuse. Itis recommended that a separate circuit serving only this
range be provided.
• Note: Use of automatic, wireless, or wired external switches that shut off power to the
appliance are not recommended for this product.
• Grounding the power cord of this appliance is equipped with a three-prong (grounding)
plug which plugs into a standard three-prong grounding wall receptacle to minimize the
possibility of electric shock hazard from this appliance.
• The customer should have the wall receptacle and circuit checked by a qualified
electrician to make sure the receptacle is properly grounded.
• Where a standard two-prong wall receptacle is encountered, it is the person-
al responsibility and obligation of thecustomer to have it replaced with a properly
groundedthree-prong wall receptacle.
DO NOT, UNDER ANY CIRCUMSTANCES, CUT OR REMOVE THE THIRD (GROUND)
PRONG FROM THE POWER CORD. DO NOT USE AN ADAPTER. DO NOT USE AN
EXTENSION CORD.
GAS SUPPLY REQUIREMENTS
EXPLOSION HAZARD
• Use a new CSA or UL International approved gas supply line.
• Install a shut-off valve.
• Securely tighten all gas connections.
• If connected to LP, have a qualified person make sure gas
pressure does not exceed 14" (36 cm) water column.
• Examples of a qualified person include: Licensed Heating Per-
sonnel, Authorized Gas Company Personnel, and Authorized
Service Personnel.
• Failure to do so can result in explosion, fire and death.
Observe all governing codes and ordinances.
IMPORTANT:
This installation must conform with all local codes and ordinances. In the absence of local
codes, installation must conform with American National Standard, National Fuel Gas Code
ANSI Z21.1 Household Cooking Gas Appliances.
IMPORTANT: Leak testing of the gas lines to the range must be conducted before using the
range.
*NOTE: Allow 30" minimum clearance
between surface units and bottom of un-
protected wood or metal cabinet, or allow
a 24" (61.0 cm) minimum when bottom
of wood or metal cabinet is protected by
no less than 1/4" (0.64 cm) thick flame
retardant millboard covered with not less
than No 28 MSG sheet metal [0.015" (0.4
mm)], 0.015" (0.4 mm) thick stainless steel,
0.024" (0.6 mm) aluminum or 0.020" (0.5
mm) copper.

10 11
INSTALLATION REQUIREMENTS (continued) INSTALLATION REQUIREMENTS (continued)
B. Manual Shutoff
Valve “Open”
Position
A.Gas Supply
Line
C. To Range
TYPE OF GAS
Natural Gas:
This range is design-certified by UL International for use with Natural gas or, after proper
conversion, for use with LP gas.
This range is factory set for use with Natural gas. The model/serial rating plate located on
the oven frame behind the top right side of the oven door has information on the types of
gas that can be used. If the types of gas listed do not include the type of gas available,
check with the local gas supplier.
LP Gas Conversion:
Conversion must be done by a qualified service technician. No attempt shall be made to
convert the appliance from the gas specified on the model/serial rating plate for use with a
different gas without consulting the serving gas supplier. An LP conversion kit is included
with the unit. Refer to page 17 for instructions on LP conversion.
Flexible Metal Appliance Connector:
If local codes permit, a new CSA de-
sign-certified, 4 to 5 ft (122 to 152 .4 cm)
long, ½" (1 .3 cm) or ¾" (1 .9 cm) NPT x
½" (1 .3 cm) I .D., flexible metal appliance
connector may be used for connecting
range to the gas supply line. ½" (1.3 cm)
male pipe thread is needed for connection
to the female pipe threads of the inlet to the
appliance pressure regulator. Do not kink
or damage the flexible metal tubing when
moving the range.
Rigid Pipe Connection:
The rigid pipe connection requires a
combination of pipe fittings to obtain an
in-line connection to the range. The rigid
pipe must be level with the range connec-
tion. Allstrains must be removed from the
supply and fuel lines so range will be level
and in line.
Must Include A Shutoff Valve:
The supply line must be equipped with a
manual shutoff valve. This valve should be
located in the same room but external to the
range opening, such as an adjacent cabinet.
It should be in a location that allows ease of
opening and closing. Do not block access to
the shutoff valve. The valve is for turning on
or shutting off gas to the range.
A. Gas supply line
B. Shutoff valve “open” position
C. To range
Gas Pressure Regulator:
The gas pressure regulator supplied with this range must be used. The inlet pressure to the
regulator should be as follows for proper operation:
Natural Gas:
Minimum pressure: 5" WCP
Maximum pressure: 13" WCP
LP Gas:
Minimum pressure: 10" WCP
Maximum pressure: 14" WCP
Contact local gas supplier if you are not sure about the inlet pressure.
Gas Supply Pressure Testing:
Gas supply pressure for testing regulator must be at least 1" water column pressure above
the manifold pressure shown on the model/serial rating plate.
Line pressure testing above 1/2 psi gauge (14" WCP):
The range and its individual shutoff valve must be disconnected from the gas supply
piping system during any pressure testing of that system at test pressures more than
1/2 psi (3.5 kPa).
Line pressure testing at 1/2 psi gauge (14" WCP) or lower:
The range must be isolated from the gas supply piping system by closing its individual
manual shutoff valve during any pressure testing of the gas supply piping system at test
pressures equal to or less than 1/2 psi (3.5 kPa).

12 13
INSTALLATION INSTRUCTIONS INSTALLATION INSTRUCTIONS (continued)
MAKE GAS CONNECTION
EXPLOSION HAZARD
• Use a new CSA International approved gas supply line.
• Install a shut-off valve.
• Securely tighten all gas connections.
• If connected to LP, have a qualified person make sure gas pres-
sure does not exceed 14" (36 cm) water column.
• Examples of a qualified person include: Licensed Heating
Personnel, Authorized Gas Company Personnel, and Authorized
Service Personnel.
• Failure to do so can result in explosion, fire and death.
TYPICAL RIGID PIPE CONNECTION:
A combination of pipe fittings must be used to connect the range to the existing gas line.
Your connections may be different, according to the supply line type, size and location.
1. Apply pipe-joint compound made for use with LP gas to all pipe thread connections.
2. Using a pipe wrench to tighten, connect the gas supply to the range.
A. Gas pressure regulator
B. 90° elbow (must have 1/2" male
pipe thread)
C. Nipple
D. Union
E. Black iron pipe
F. 90° elbow
G. Union
H. Nipple
I. Manual gas shutoff valve
J. 1/2" or 3/4" gas pipe
Flexible Connection:
1. Apply pipe-joint compound or gas line pipe tape made for use with LP gas to the smaller
thread ends of the flexible connector adapters (see B and G in the following illustration).
2. Attach one adapter to the gas pressure regulator and the other adapter to the gas shut-
off valve. Tighten both adapters.
3. Use a 1-5/16" combination wrench and channel lock pliers to attach the flexible connec-
tor to the adapters. Check that the flexible connector is not kinked.
A. Gas pressure regulator
B. Use pipe-joint compound
C. Adapter (must have 1/2" male
pipe thread)
D. Flexible connector
E. Manual gas shutoff valve
F. 1/2" or 3/4" gas pipe
G. Use pipe-joint compound
H. Adapter
A
B
C
D
E
F
G H
I
J
AB C D
E
FGH
A.Closed Valve
B.Opened Valve
ELECTRICAL SHOCK HAZARD
• Plug into a grounded 3 prong outlet.
• Do not remove ground prong.
• Do not use an adapter.
• Do not use an extension cord.
• Failure to follow these instructions can result in death, fire, or
electrical shock.
A. Burner Base
B. Burner Cap
C. Burner Grate
C
Completing the Connection:
1. Open the manual shutoff valve in the
gas supply
line. The valve is open when the handle
is parallel
tothe gas pipe.
A. Closed valve
B. Open valve
2. Test all connections by brushing on an
approved noncorrosive leak-detection
solution. If bubbles
appear, a leak is indicated. Correct any
leakfound.
3. Burner caps should be level when
properly positioned. If burner caps are
not properly positioned, surface burn-
ers will not light. Place burner grates
over burners andcaps.
A. Burner Base
B. Burner Cap
C. Burner Grate
NOTE: Before plugging in the grounded
cord, please read notes in the WARNING
box before doing so.
4. Plug into a grounded 3-prong (110/120
VAC).
5. Slide range into final location, making
sure the rear leveling leg slides into the
slot of the anti-tip bracket.

14 15
INSTALLATION INSTRUCTIONS (continued)INSTALLATION INSTRUCTIONS (continued)
ELECTRONIC IGNITION SYSTEM
Initial Lighting and Gas Flame Adjustments:
• The Cooktop uses electronic igniters in place of standing pilots. When the cooktop
control knob is turned to the “IGNITE” position, the system creates a spark to light the
burner.
• This sparking continues, as long as the control knob is turned to “IGNITE.”
• When the oven control is turned to the desired setting, sparking occurs and ignites the
gas.
• Check Operation of Cooktop Burners.
Check Operation of Cooktop and Oven Burners
Igniting the Standard Surface Burners:
• Push in and turn the control knob to the “IGNITE” position.
• The flame should light within 4 seconds. The first time a burner is lit, it may take longer
than 4 seconds to light because of air in the gas line. Once the burner is lit, turn the knob
to the desired heat setting.
Check Operation of Oven Burner
The oven burner is located beneath the oven, above the Broil drawer. To test the operation
initiate the Bake or Broil function as outlined in page 15 of the User's Manual.
• Ignitors will "click" several times before the flame is ignited.
• A "poof" sound is heard when the oven burner ignites.
• A good flame is blue in color.
If Burners Do Not Light Properly:
• Turn cooktop control knob to the “OFF” position.
• Check that the range is plugged in. Check that the circuit breaker has not tripped or the
household fuse has not blown.
• Check that the gas shutoff valves are set to the “open” position.
• Check that burner caps are properly positioned on burner bases.
• Repeat the steps in the Igniting the Standard Surface Burners section. If a burner does
not light at this point, turnthe control knobs to “Off” and contact your dealer or authorized
service company for assistance.
Adjust Flame Height
Adjust the height of top burner flames. The
cooktop “low” burner flame should be a
steady blue flame approximately 1/4" (0.64
cm) high.
A. Low flame
B. High flame
A. Low Flame
B. High Flame
How to Adjust the Standard Burner:
The flame can be adjusted using the
adjustment screw in the center of the
valve stem. The valve stem is located
directly underneath the control knob.
If the “low” flame needs to be adjusted:
A. Control knob stem
B. Screwdriver
1. Light 1 burner and turn to the lowest
setting.
2. Remove the control knob. (To remove the control knob, ensure the burner is set to “LO,”
then pull knob straight away from the range).
3. Hold the knob stem with a pair of pliers. Use a small flat blade
screwdriver to turn the screw located in the center of the control
knob stem until the flame is the proper size. To increase the size of the flame turn
counterclockwise, turn clockwise to reduce the size of the flame.
4. Replace the control knob. (To replace the control knob, align the inside compartment of
the control knob with the control knob stem, and push control knob inward.)
5. Test the flame by turning the control knob from “LO” to “HI,” checking the flame at each
setting.
6. Repeat above steps for each burner.
OVEN DOOR
HOW TO REMOVE OVEN DOOR:
IMPORTANT: Use both hands to remove oven door(s).
1. Open the oven door fully so it is at a 90 degree angle.
2. Next, locate the oven door latches in both corners of the oven door, then flip up the
hinge latch on each side tothe unlocked position. (See diagram below). Pliers may be
required to unlock hinges.
3. Once the latch is in the unlocked position, grasp the oven door with both hands, and
then gently close the oven door to as far as it will shut.
4. Using both hands, lift and pull the oven door towards you and remove.
5. Set the oven door(s) aside on a covered work surface.
B
A
A. Oven door hinge latch
in locked position
B. Oven door hinge latch
in unlocked position
A. Control Knob Stem
B. Screwdriver

16 17
INSTALLATION INSTRUCTIONS (continued)
HOW TO REINSTALL THE OVEN DOOR:
1. To reinstall the oven door, insert both hanger arms of the
oven door into the range. The hinge latches on both sides
should be in the unlocked position before inserting hanger
arms into the range.
2. Once the hanger arms are placed into the range, open the
oven door fully.
3. Next, locate the hinge lever latches, move them back to the
locked position. It is recommended to use a rubber mallet
to ensure hinges are securely locked into place.
4. Once the oven door levers are locked, gently close the
door and check that the door can open and close with no
issues.
5. Check to see if there are any gaps on both sides of
the oven door. If there are gaps, the door has not been
reinstalled correctly. Repeat the removal and installation
procedure.
LEVEL RANGE
How To Level The Range:
1. To level your range, place a level straight across (left to right), on one of the racks inside
your oven. If the range is uneven, adjust the leveling legs until the level is balanced. (Lev-
eling legs are on the bottom of the range and can be adjusted by turning feet clockwise
or counterclockwise.
2. Once you have checked the levelness from left to right, take another reading by moving
the level and placing itdiagonally across the bottom of the oven. If the range is still
uneven, adjust the leveling legs again until all angles on the level are balanced.
GAS CONVERSIONS
Gas conversions from Natural Gas to LP Gas or from LP Gas to Natural Gas must be done
by a qualified installer.
MAKE GAS CONNECTION
EXPLOSION HAZARD
• Use a new CSA or UL International approved gas supply line.
• Install a shut-off valve.
• Securely tighten all gas connections.
• If connected to LP, have a qualified person make sure gas
pressure does not exceed 14" (36 cm) water column.
• Examples of a qualified person include: Licensed Heating
Personnel, Authorized Gas Company Personnel, and
Authorized Service Personnel.
• Failure to do so can result in explosion, fire and death.
LP GAS CONVERSIONS
How to Turn Gas Supply Off
1. Turn the manual shutoff value to the
closed position.
2. Unplug range or disconnect power.
A. Gas Supply Line
B. Manual Shutoff Valve “Closed”
Position
C. To Range
HOW TO CONVERT GAS PRESSURE REGULATOR
Natural Gas to LP Gas
1. Unplug the appliance from the eletrical outlet to disconnect power supply and shut off
gas supply to the range by closing the manual shut-off valve.
2. Turn gas pressure regulator cap counter-clockwise with a 5/8" combination wrench to
remove (Fig. #1)
3. Remove the adapter from the top cover (Fig. #2).
4. Invert assembly adapter (Fig. #3) to the top cover and tighten into place fully (Fig. #4).
5. Reinstall the pressure regulator top cap.
A. Gas Supply Line
B. Manual Shutoff
Valve “Closed”
Position
C. To Range
Fig. #1
Top Cap
Gas
Pressure
Factory-Set State
Fig. #3
Fig. #2
Fig. #4
Set to
LP Gas State

18 19
How to Convert the Surface Burner.
NATURAL GAS TO LP GAS
1. Make sure the power is disconnected from the appliance and the manual gas shutoff
valve is in the closed position.
2. Remove Burner Cap (C) and Burner Base (D).
3. Remove the Burner Base (D).
4. Replace the Natural Gas Orifice Spud (E) [Hex-Nut 7 mm (9/32")] with correct LP Gas
Orifice Spud [Hex-Nut 7 mm 9/32")] using a 7 mm or 5/16" Hex Sockets (Nut Driver).
5. Replace the Burner Base (D) and check whether it is properly placed.
6. Return the Burner Cap (C) to its original position and check whether it is properly placed.
7. Repeat steps 1-4 for the remaining burners.
8. Place Natural Gas Orifice Spuds in a plastic bag and label for your reference later.
GAS CONVERSIONS (continued)
Engraved
Number
E. Orice Spud
B. Gas Tube
Opening
C.Burner Cap
E. Orice
Spud
D. Burner
Base
A. Ignitor
Electrode
LP GAS ORIFICE SPUD CHART
BURNER OUTPUT RATINGS: BTU/HR
Liquid Propane (LP) Gas 10" W.C.P
BURNER BTU RATE ORIFICE SIZE (mm)
INTERNAL
VALVE COLOR
LF 9500 0.9 (0.035") Green
LR 9500 0.9 (0.035") Green
RF 11500 1.02 (0.04") Blue
RR 5000 0.66 (0.026") Red
OVEN 18000 1.24 (0.049")
NOTE: Refer to the Model number and Serial Number Plate located on the left side of the
frame when opening the “Broil” door.
After installation, Leak testing is to be conducted by the installer according to the instructions
given in this section. Turn on gas. Apply a non-corrosive leak detection fluid to all joints and
fittings in the gas connection beteeen the shutoff valve and the cooktop. Include gas fittings
and joints in the cooktop as the connections may have been loosened during installation.
Bubbles appearing around fittings and connections indicate a leak. An electronic Gas Leak
Detector can also be used. If a leak appears, turn of the supply line gas shutoff valve and
tighted the leaking connections. Retest for leaks by turning on the supply line gas shutoff
valve. When the leak check is complete (no bubble appear), the test is complete. Wipe off
all detection fluid residue.
How to Convert the Oven Burner.
NATURAL GAS TO LP GAS
The Oven Burner Orifice is located at the rear of the broiler inside.
1. Make sure the power is disconnected from the appliance and the manual gas shutoff
valve is in the closed position.
2. Remove the oven bottom (A) by removing 4 screws using a Phillips head screwdriver.
3. Remove the oven burner cover plate (B) by removing 3 screws using a Phillips head
screwdriver.
5. With a Phillips head screwdriver, loosen the lock screw (D) securing the air shutter (E) on
the oven burner (C). Adjust the air shutter to the fully opened position (F), then re-tighten
air shutter lock screws.
GAS CONVERSIONS (continued)
C.Oven
Burner
D. Lock
Screw
E. Air Shutter
(Factory-Set State
5mm open for
Natural Gas)
F. Air Shutter
(Fully Open –
Setting for LP Gas)

NOTES
20
6. Remove the bracket (G) of the gas pipe connector (H) on the back of the oven by remov-
ing two 4 x 8 mm screws and two 4 x 12 mm screws using a Phillips head screwdriver,
and then gently pull out the gas pipe connector (I). Next, replace the natural gas orifice
spud (J) with the correct LP gas orifice spud using a 7 mm or 5/16" Hex Sockets (Nut
Driver).
7. First, make sure that the gas pipes connector (D) and the rear of oven burner are correct-
ly connected, and then reinstall the bracket (C). Make sure the gas pipe connector (K)
and rear oven burner are properly connected, then re-attach the bracket (C)
8. Reinstall the burner cover plate (B) and oven bottom (A).
NOTE:
Once LP conversion is complete, check the cooktop and oven burner operations in accor-
dance with the instructions on page 14. Regulator valve outlet pressure is set at the factory
to function according to the specifications of this range and should be adjusted. The factory
default setting for the lever on the gas pressure regulator is in the “ON” position. Make sure
this lever is in the “ON” position for the range to function properly.
GAS CONVERSIONS (continued)
H.Gas Pipe
Connector
4x12 mm
Screws
4x8 mm
Screws
I. Pull Out Gas
Pipe ConnectorG.Bracket J. Orice Spud
L. Rear of Oven Burner M. Properly Connected
K. Gas Pipe Connector

NOTES
NOTES

24
455-4603 / 455-4604 / 455-4605
30" Standard Gas Range
User Manual
Other manuals for 455-4603
1
This manual suits for next models
2
Table of contents
Other Criterion Range manuals
