RECARGA
Joule GPS se alimenta mediante una batería recargable. Para cargar
la batería, conéctelo a un ordenador o a un cargador de CA para
enchufe de pared (accesorio nº. 7060 no incluido). La recarga
normal de la batería dura aproximadamente unas 20 horas.
Guía del usuario de Joule GPS, página 4
Gracias por comprar CycleOps Joule GPS. Esta guía de usuario es solo uno de los recursos que le
ayudarán a comprender todas las características que Joule GPS pone a su disposición.
Visite www.cycleops.com para:
• Obtener más información acerca de Joule GPS y el sistema de productos CycleOps, incluidos los rodillos
de entrenamiento estáticos, las bicicletas de interior, el software y los medidores de potencia
• Registrar todos los productos de CycleOps y activar la garantía
• Ver vídeos de instrucciones
• Suscribirse al boletín de CycleOps Power: la fuente de últimas noticias y actualizaciones técnicas
de CycleOps Power
CAPÍTULO 1: INICIO
Joule GPS es compatible con cualquier medidor
de potencia, sensor de velocidad, sensor de
cadencia o sensor de frecuencia cardíaca ANT+
o con sensores de combinación de velocidad/
cadencia. Además de estos sensores ANT+,
Joule GPS también es compatible con:
Bicicleta de interior CycleOps 200Pro
Bicicleta de interior CycleOps 300Pro
CycleOps PowerBeam Pro
COMPATIBILIDAD
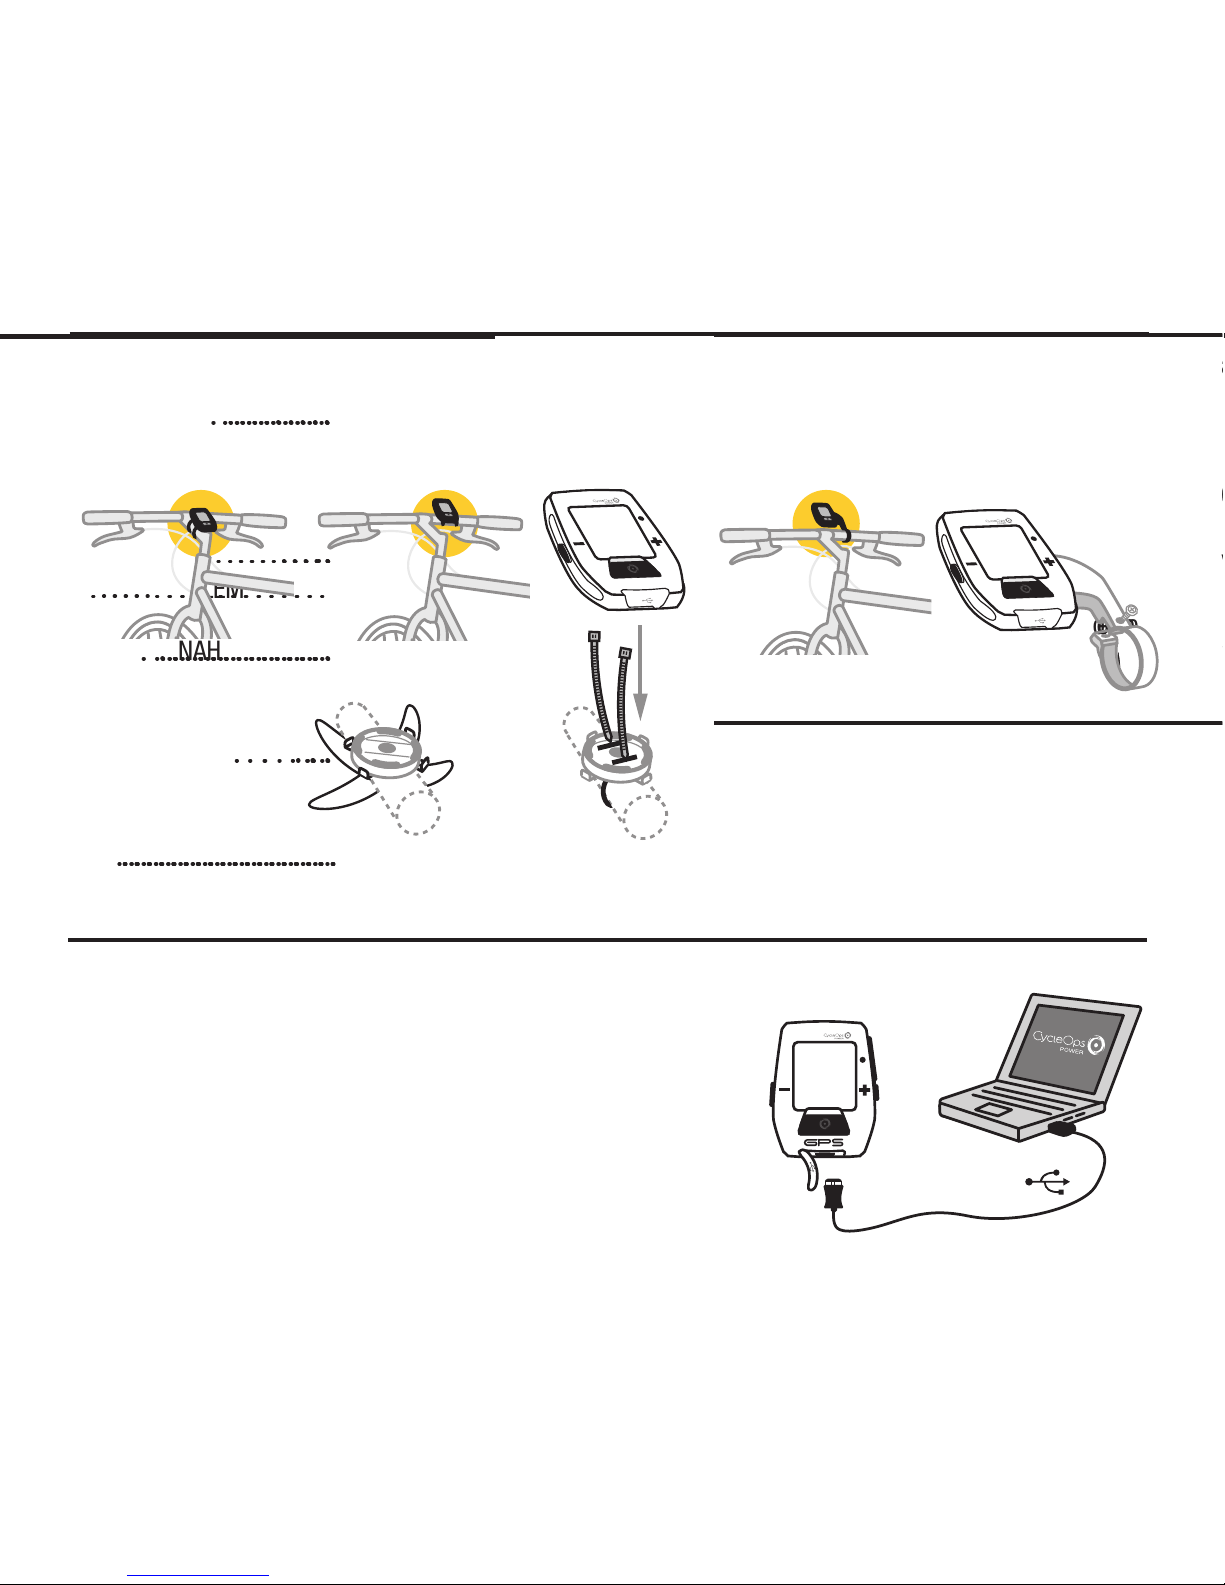
INSTALACIÓN
Instalación del CycleOps Joule GPS
Juntas anulares: entrecruzar bajo
la potencia o el manillar y engarzar
los ganchos
oColocar bridas alrededor de la potencia,
introduciéndolas por las ranuras
MONTURA SOBRE MANILLAR/POTENCIA
INT
CAPÍTULO 1: INICIO
INT
CHARGEMENT
Le GPS Joule est alimenté par une batterie rechargeable. Pour
charger la batterie, branchez l'appareil sur un ordinateur ou un
adaptateur mural CA (#7060 non inclus). La durée d'autonomie
moyenne de la batterie est d'environ 20 heures.
Guide de l'utilisateur du GPS Joule page4
Nous vous remercions d'avoir choisi le GPS CycleOps Joule. Ce guide de l'utilisateur constitue l'une des
nombreuses ressources qui vous aideront à acquérir la maîtrise de l'ensemble des fonctionnalités du GPS
Joule.
Veuillez vous connecter à l'adresse www.cycleops.com pour:
• Obtenir de plus amples informations sur le GPS Joule et les produits CycleOps (entraîneurs, vélos
d'intérieur, logiciels et wattmètres)
• Enregistrer l'ensemble des produits CycleOps et activer leur garantie
• Visionner des vidéos informatives
• S'abonner à la lettre d'informations CycleOps Power, recensant les dernières informations en date et
les nouveautés techniques de CycleOps Power
CHAPITRE 1: DÉMARRAGE
Le GPS Joule fonctionne avec les wattmètres,
capteurs de fréquence cardiaque, capteurs de
cadence, capteurs de vitesse ou combinaisons
capteurs de vitesse et cadence compatibles
ANT+. Outre ces capteurs compatibles ANT+,
le GPS Joule fonctionne également avec:
le vélo de cycling CycleOps 200Pro
le vélo de cycling CycleOps 300Pro
le CycleOps PowerBeam Pro
COMPATIBILITÉ
INSTALLATION
Installation du GPS CycleOps Joule
Bagues en O: croisez sur
le guidon/la potence, verrouillez
sur les crochets
OU Insérez l’attache dans les encoches
autour de la potence
MONTAGE SUR LE GUIDON/LA POTENCE
INT
CHAPITRE 1: DÉMARRAGE
INT
LADEN
Der Joule GPS wird von einer aufladbaren Batterie mit
Strom versorgt. Schließen Sie zum Aufladen der Batterie
einen Computer oder einen Netzadapter (Nr. 7060, nicht
im Lieferumfang enthalten) an. Die normale Batterie-
ladung liefert ca. 20 Betriebsstunden.
Joule GPS Benutzerhandbuch Seite 4
Vielen Dank, dass Sie den CycleOps Joule GPS gekauft haben. Dieses Benutzerhandbuch ist nur eines
der Hilfsmittel, das Sie dabei unterstützt, die Funktionen des Joule GPS kennenzulernen.
Bitte besuchen Sie www.cycleops.com. Dort können Sie
• mehr über Joule GPS und das CycleOps-Produktsystem zu erfahren, zum Beispiel stationäre Trainer,
Heimtrainer, Programme und Leistungsmessgeräte.
• alle CycleOps-Produkte registrieren und die Garantie aktivieren.
• anleitungsvideos ansehen.
• sich für den CycleOps-Power-Newsletter anmelden - Ihre Informationsquelle für Neuigkeiten und
technische Updates von CycleOps Power.
KAPITEL 1: ERSTE SCHRITTE
Der Joule GPS ist mit jedem ANT+
- Leistungsmesser, -Herzfrequenzsensor,
-Trittfrequenzsensor, -Geschwindigkeits-
sensor und mit jeder Kombination aus
Geschwindigkeits- und Trittfrequenzsensor
kompatibel. Neben diesen ANT+-Sensoren ist
der Joule GPS auch kompatibel mit:
CycleOps 200Pro Heimtrainer
CycleOps 300Pro Heimtrainer
CycleOps PowerBeam Pro
KOMPATIBILITÄT
INSTALLATION
Installation des CycleOps Joule GPS
O-Ringe: Unter dem Vorbau/Lenker
kreuzen, an den Haken befestigen ODER Kabelbinder um den Vorbau
und durch die Öffnungen führen
MONTAGEHALTERUNG VORBAU/LENKER
INT
KAPITEL 1: ERSTE SCHRITTE
INT
CHARGING
Joule GPS è alimentato da una batteria ricaricabile. Per caricare
la batteria, collegarla a un computer o ad un adattatore AC a
parete (N. 7060 non incluso). La carica della batteria ha una
durata di 20 ore di esercizio.
Manuale dell’utente Joule GPS pag. 4
La ringraziamo per avere acquistato CycleOps Joule GPS. Il presente manuale è solo una delle risorse
utili a comprendere tutte le funzionalità offerte da Joule GPS.
Visitare www.cycleops.com per:
• Ulteriori informazioni su Joule GPS e sulla gamma di prodotti CycleOps, compresi telai fissi, cyclette,
software e misuratori di potenza
• Registrare tutti i prodotti CycleOps e attivare la garanzia
• Visualizzare video con istruzioni
• Iscriversi alla newsletter CycleOps Power, la fonte delle ultime notizie e degli aggiornamenti tecnici
di CycleOps Power
CAPITOLO 1: PER INIZIARE
Joule GPS è compatibile con tutti i misuratori di
potenza, i sensori di frequenza cardiaca, i sensori di
cadenza, i sensori di velocità e i sensori combinati di
velocità/cadenza compatibili ANT+. Oltre ai sensori
ANT+, Joule GPS è compatibile con:
Cyclette CycleOps 200Pro
Cyclette CycleOps 300Pro
CycleOps PowerBeam Pro
COMPATIBILITÀ
INSTALLAZIONE
Installazione di CycleOps Joule GPS
O-Ring: Incrociati sotto pipa/
manubrio, bloccati con ganci OPPURE
MONTAGGIO MANUBRIO/PIPA
INT
CAPITOLO 1: PER INIZIARE
INT
BATTERIJ OPLADEN
De Joule GPS wordt gevoed door een oplaadbare batterij. Om de
batterij op te laden, sluit u de Joule GPS aan op een wisselstroom-
adapter (#7060 niet meegeleverd). Met een volle batterij kan u
ongeveer 20 uur aan de slag.
Gebruikershandleiding Joule GPS pagina 4
Hartelijk dank voor uw aankoop van de CycleOps Joule GPS. Deze gebruikershandleiding is slechts één van de
hulpmiddelen om u te helpen alle functies te begrijpen die de Joule GPS te bieden heeft.
Surf naar www.cycleops.com om:
• meer te weten te komen over de Joule GPS en het CycleOps-systeem van producten zoals trainingstoestellen,
indoorfietsen, software en vermogenmeters
• alle CycleOps-producten te registreren en de garantie te activeren
• instructievideo's te bekijken
• u te abonneren op de CycleOps Power-nieuwsbrief - uw bron voor de laatste nieuwtjes en de technische
updates van CycleOps Power.
HOOFDSTUK 1: VAN START GAAN
Joule GPS is compatibel met elke ANT+-compatibele
vermogenmeter, hartslagsensor, cadanssensor,
snelheidssensor of combinatie van snelheids- en
cadanssensor. Bovenop deze ANT+-sensoren, is de
Joule GPS ook compatibel met:
CycleOps 200Pro-indoorfiets
CycleOps 300Pro-indoorfiets
CycleOps PowerBeam Pro
COMPATIBILITEIT
INSTALLATIE
De CycleOps Joule GPS installeren
O-ringen: Gekruist onder de stang en
vastgemaakt aan de haakjes of Met bindertjes rond de stang
door de gleuven
STUUR- OF STANGBEUGEL
INT
HOOFDSTUK 1: VAN START GAAN
INT
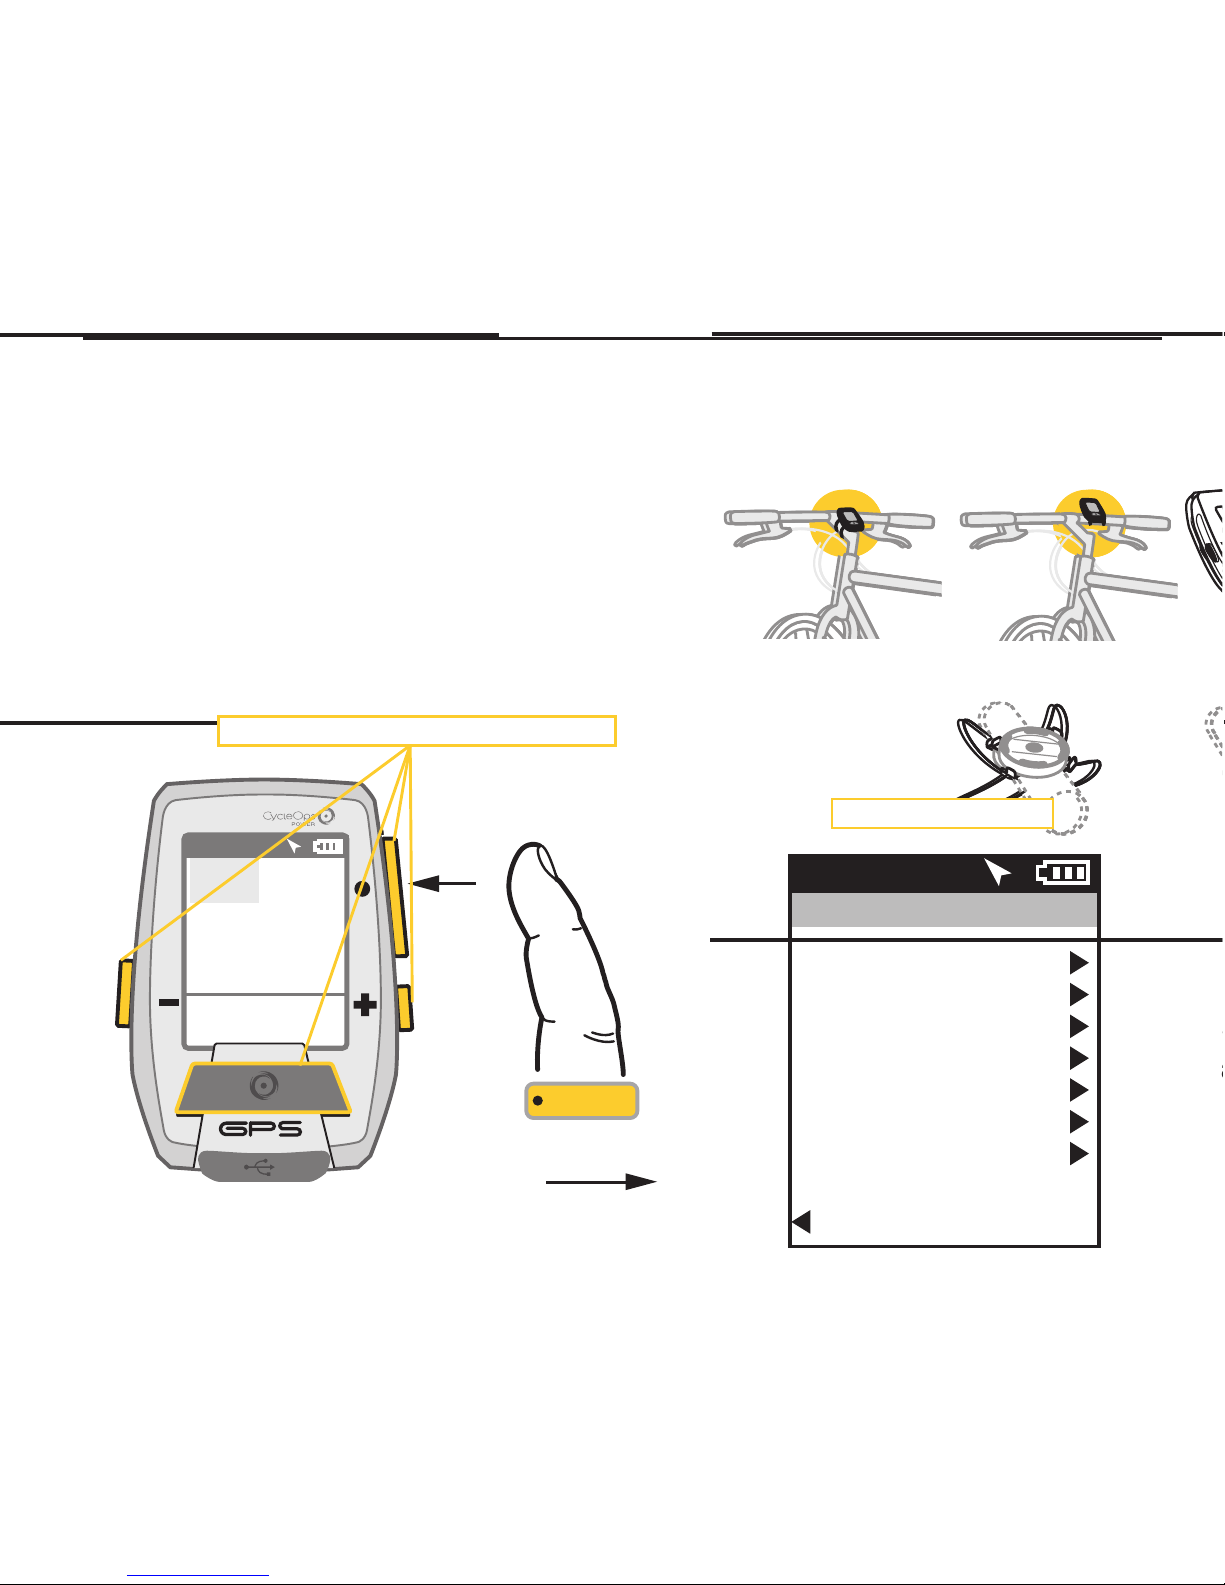
Main Menu
Ride
History
Sensors
Training
Navigation
User
Device
Back to Dashboard
9:34A71º
[ENTER]
Press & Hold 3 sec.
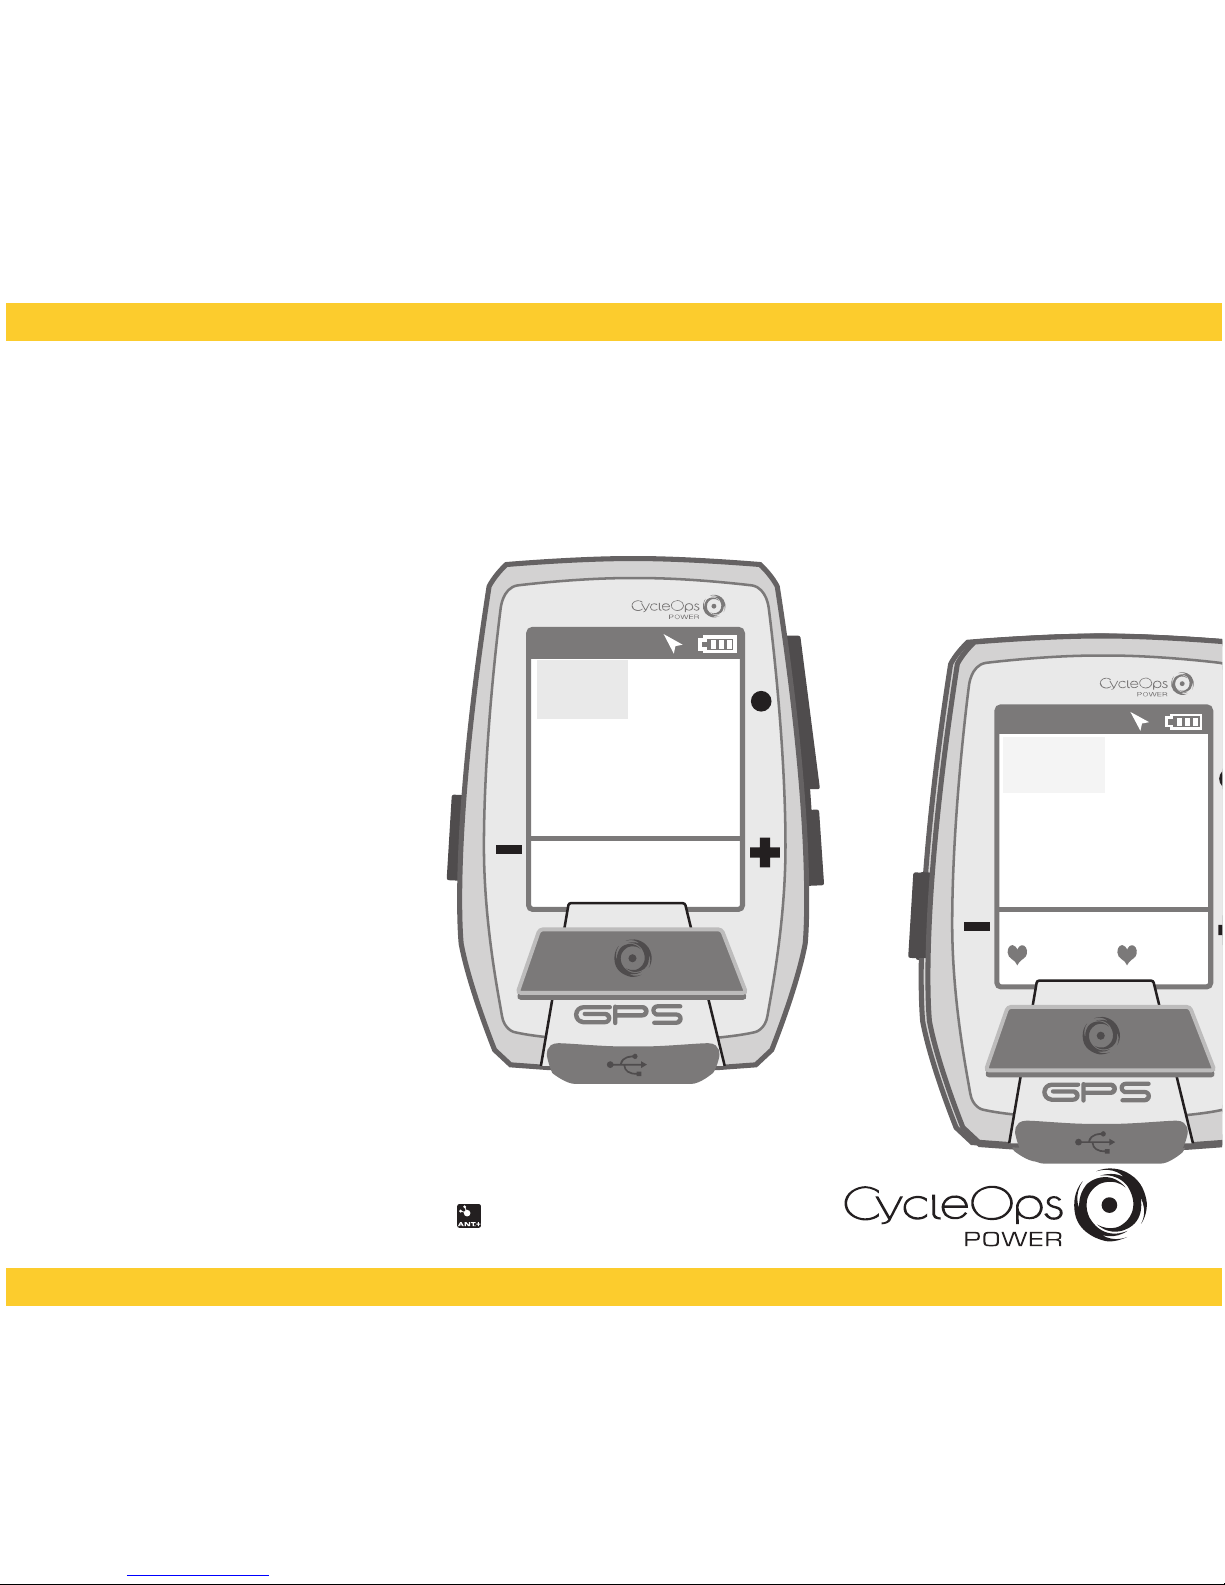
CHAPTER 2: JOULE GPS OVERVIEW & SETUP
DASHBOARDS
When the Joule GPS is turned on you are presented with one of 5 Dashboard screens (3 dashboards
displaying various Metrics, 1 dashboard displaying completed intervals, and 1 dashboard displaying the
GPS map). Pressing the Enter button allows you to scroll through all of the Dashboard screens. Dashboard
1, by default, is initially set to display 6 metric windows in the configurable area. Other screens can appear
between the Dashboards and the GPS Map, depending on what features you are using (e.g. Training and
Workouts, Navigating to a Waypoint, Following a Route, etc...).
• To view the Main Menu from any Dashboard, press and hold the ENTER button for 3 seconds.
• To return to the Dashboard from any Menu press and hold the ENTER button for 3 seconds.
Press any of the 4 buttons to turn the unit on
WATTS
--- ---
--- ---
0:00:00
HR
MPH CAD
0.0 0.0
AV WATTS MX WATTS
RIDE TIME KJ
9:34
A
71º
0
INT
Displays the Main Menu
Joule GPS User Guide page 6