Daewoo International DBU-38 User manual

DBU-38
MANUAL DE INSTRUCCIONES
REPRODUCTOR DE CD/MP3 CON RADIO FM PLL
Y LECTOR USB
Lea y siga estas instrucciones antes de utilizar la unidad.

1
VISIÓN GLOBAL DEL REPRODUCTOR
1. ASA PLEGABLE
2. ANTENA TELESCÓPICA FM
3. PUERTA DEL CD
4. APERTURA DE LA PUERTA DEL CD
5. BOTÓN VOL -
6. BOTÓN PROG/MODO/MEM
7. INDICADOR DE ESPERA
8. BOTÓN DE FUENTE
9. PANTALLA LCD
10. BOTÓN DE ENCENDIDO/ESPERA
11. BOTÓN CARPETA/10+
12. BOTÓN VOL +
13. ALTAVOCES
14. BOTÓN STOP/CH-
15. BOTÓN SALTAR/BÚSQUEDA DESC
16. PUERTO USB
17. BOTÓN SALTAR/BÚSQUEDA ASC
18. BOTÓN REPR/PAUSA/CH+
19. COMPARTIMENTO DE LAS PILAS
20. CONECTOR DC IN
21. CONECTOR AURICULARES
22. CONECTOR AUX IN
1234
19 20 21 22
56789
10
11 12
13 14 15 16 17 18 13

2
FUENTE DE ALIMENTACIÓN
FUNCIONAMIENTO MEDIANTE PILAS
1. Retire con cuidado la tapa del compartimento de las pilas.
2. Instale 6 pilas tipo 'C' (UM-2 o equivalente) con la polaridad correcta.
3. Vuelva a colocar la tapa del compartimento de las pilas.
NOTA:
El adaptador AC/DC debe estar separado del conector DC IN del reproductor para
que la unidad funcione a pilas.
Las fugas causadas por pilas pueden dañar el compartimento de las pilas y el
reproductor en general, extraiga las pilas cuando estén gastadas o si prevé que no
utilizará el reproductor mediante pilas durante algún tiempo.
FUNCIONAMIENTO MEDIANTE CORRIENTE
Conecte el adaptador suministrado al conector DC IN de la unidad y a la red principal.
El adaptador de alimentación es el dispositivo de desconexión del equipo. La base de
toma de corriente debe estar cerca del equipo y ser fácilmente accesible
NOTA: Si la unidad no recibe ninguna señal de audio en una hora, la unidad pasará
automáticamente al modo de espera (salvo en el modo de radio FM).
RADIO FM
SINTONIZACIÓN DE LA RADIO FM
1. El indicador del modo de espera se iluminará una vez al conectar la unidad a la red
principal. Pulse el botón de ENCENDIDO/ESPERA para encender la unidad (el indicador
del modo de espera estará apagado).
2. Pulse varias veces el botón de FUENTE S para pasar la unidad al modo de radio FM.
3. Para iniciar la búsqueda automática, pulse y mantenga pulsado el botón SALTAR/
BÚSQUEDA DESC o el botón SALTAR/BÚSQUEDA ASC durante varios segundos
y luego suéltelo.
4. Pulse el botón SALTAR/BÚSQUEDA DESC o el botón SALTAR/BÚSQUEDA
ASC para sintonizar las emisoras de radio manualmente.
5. Ajuste el volumen a un nivel de escucha que resulte agradable pulsando los botones
VOL+/-.
6. Pulse el botón de ENCENDIDO/ESPERA para apagar la unidad.
NOTA:
La ANTENA TELESCÓPICA FM es direccional. Cuando usted recibe una emisión FM,
extienda por completo la ANTENA TELESCÓPICA y gírela para obtener la mejor
recepción posible.
GUARDAR EMISORAS DE RADIO
1. En primer lugar, sintonice su emisora de radio favorita y pulse el botón
PROG/MODO/MEM para guardar la emisora actual hasta que el número de célula de
memoria parpadee en la pantalla.
2. Utilice el botón STOP/CH- o el botón REPR/PAUSA/CH+ para seleccionar la célula de
memoria correspondiente.
3. Confirme la selección pulsando el botón PROG/MODO/MEM.
4. Durante la reproducción de la radio, pulse varias veces STOP/CH- o REPR/PAUSA/CH+
para escuchar las emisoras predeterminadas.

3
MANIPULACIÓN Y MANTENIMIENTO DE UN DISCO
Siga las siguientes instrucciones relativas a la manipulación y el
mantenimiento de los discos para prolongar la vida útil y lograr un
funcionamiento sin problemas:
Intente no tocar la cara del arcoíris de los discos; manipule los
discos sujetándolos por los bordes.
Exposiciones prolongadas a la luz solar, temperaturas
elevadas y humedad dañarán los discos. Mantenga limpia la
zona donde los guarda.
Evite pegar etiquetas en ambas caras de un disco. No utilice
nunca productos puntiagudos para escribir sobre los discos.
Limpie los discos desde el centro hacia fuera utilizando un
paso seco y suave o un cepillo especial para discos. No utilice
productos químicos.
Guárdelos en sus cajas cuando no los utilice.
CARGAR UN DISCO
1. Abra la puerta del CD por el área de apertura.
2. Cargue un disco en la bandeja con la etiqueta mirando hacia arriba y cierre la puerta del
CD.
REPRODUCIR UN DISCO (CD/MP3)
1. Pulse el botón de ENCENDIDO/ESPERA para encender la unidad (el indicador del modo
de espera estará apagado).
2. Pulse varias veces el botón de FUENTE para cambiar al modo CD.
3. Siga los pasos anteriores para cargar un disco. El reproductor iniciará automáticamente
la lectura del disco.
4. Una vez el reproductor ha leído el disco, se inicia automáticamente la reproducción a
partir de la primera pista.
5. Pulse una vez el botón REPR/PAUSA/CH+ para detener la reproducción de la música,
vuelva a pulsar el botón para reanudar la reproducción normal; pulse el botón STOP/CH-
para finalizar la reproducción de la música.
FUNCIONAMIENTO DEL USB
1. Pulse el botón de ENCENDIDO/ESPERA para encender la unidad (el indicador del modo
de espera estará apagado).
2. Inserte un USB en el puerto USB.
3. Pulse el botón de FUENTE varias veces para pasar al modo USB.
4. Una vez detectado y leído el USB insertado, se reproducirá automáticamente la primera
pista.
5. Pulse el botón REPR/PAUSA/CH+ para hacer una pausa o reiniciar la reproducción.
6. Pulse el botón STOP/CH- para finalizar la reproducción.
MANIPULAR LOS DISCOS SÓLO
COMO SE MUESTRA
LIMPIAR DESDE EL CENTRO
HACIA FUERA
NO GUARDAR CERCA DE
FUENTES DE CALOR

4
SALTAR PISTAS Y BUSCAR UN PUNTO CONCRETO PARA REPRODUCIR
(CD/MP3/USB)
1. Pulse una vez el botón
SALTAR/BÚSQUEDA ASC durante la reproducción de
música para pasar a la siguiente pista; pulse una vez el botón
SALTAR/BÚSQUEDA
DESC durante la reproducción de música para volver al principio de la pista en curso, y
pulse el botón dos veces seguidas para saltar a la pista anterior.
2. Pulse y mantenga pulsado el botón
SALTAR/BÚSQUEDA ASC o el botón
SALTAR/BÚSQUEDA DESC durante la reproducción de música para buscar
rápidamente un punto concreto que desea reproducir.
3. Pulse una vez el botón CARPETA/10+ durante la reproducción para saltar 10 pistas y
dos veces para saltar 20 pistas. También puede utilizar este botón para ir a la última pista
del disco.
SALTAR A LA CARPETA ANTERIOR/SIGUIENTE (MP3/USB)
1. Durante la reproducción, pulse y mantenga pulsado el botón CARPETA/10+ hasta que el
número de carpeta parpadee en la pantalla.
2. Pulse el botón de SALTAR/BÚSQUEDA DESC o SALTAR/BÚSQUEDA ASC para
seleccionar la carpeta que desee.
3. Cuando en la pantalla aparezca el número de carpeta seleccionada, pulse
CARPETA/10+ para confirmar.
REPETIR REPRODUCCIÓN (CD/MP3/USB)
Durante la reproducción, pulse el botón PROG/MODO/MEM para repetir la reproducción de
una sola pista; pulse el botón dos veces para repetir la reproducción de todas las pistas;
pulse el botón tres veces para acceder al modo de reproducción desde el principio; pulse el
botón cuatro veces para pasar al modo de reproducción aleatoria; y pulse el botón cinco
veces para salir.
PROGRAMACIÓN DE LA REPRODUCCIÓN (CD/DISCO MP3/USB)
1. En modo stop, pulse una vez el botón PROG/MODO/MEM, aparece el icono de
programación con una indicación de secuencia "P01" en primer lugar y luego en la
pantalla LCD parpadea un número de pista con el icono de programación.
2. Seleccione la primera pista a programar utilizando el botón SALTAR/BÚSQUEDA ASC o
SALTAR/BÚSQUEDA DESC, y luego vuelva a pulsar PROG/MODO/MEM para guardar y
pasar al próximo paso de la programación (si el disco MP3 o el USB tiene varias
carpetas, primero se deben programar las carpetas y luego las pistas. El método de
programación de las carpetas es el mismo que la programación de las pistas).
3. Repita los pasos anteriores para programar más pistas. Se pueden programar en la
memoria un máximo de 20 pistas para CD y 99 pistas para disco MP3/USB en el orden
que se prefiera. Si la memoria está llena, en la pantalla aparecerá "FUL".
4. Pulse el botón REPR/PAUSA/CH+ para iniciar la reproducción programada en el orden
establecido una vez finalizada la programación. El reproductor se detendrá
automáticamente tras reproducir todas las pistas programadas.
5. Puede pulsar el botón STOP/CH- para finalizar una reproducción programada. En modo
de detención de programa, pulse el botón REPR/PAUSA/CH+ para iniciar la
reproducción programada en el mismo orden de programación que el anterior; pulse de
nuevo STOP/CH- para borrar la programación.

5
AUX IN
1. Enchufe el conector AUX IN a una fuente de audio, por ejemplo, un reproductor MP3,
con un cable de audio.
2. Encienda la unidad siguiendo las instrucciones correspondientes.
3. Pulse varias veces el botón de FUENTE hasta activar el modo AUX.
4. Utilice los controles del dispositivo de audio conectado para iniciar la reproducción de
música a través de la unidad conectada.
CONECTOR AURICULARES ESTÉREO
En la parte posterior del reproductor se ha incluido un conector de auriculares estéreo para
que pueda escuchar música o la radio sin molestar a otras personas. Para utilizar este
conector, conecte los auriculares (NO INCLUIDOS) y ajuste el volumen que desee.
NOTA: Cuando se conectan auriculares externos, los altavoces quedan silenciados.
PRECAUCIÓN: Si escucha música o la radio a un volumen alto durante mucho tiempo,
podría hacerse daño en los oídos.
INSTRUCCIONES IMPORTANTES SOBRE SEGURIDAD
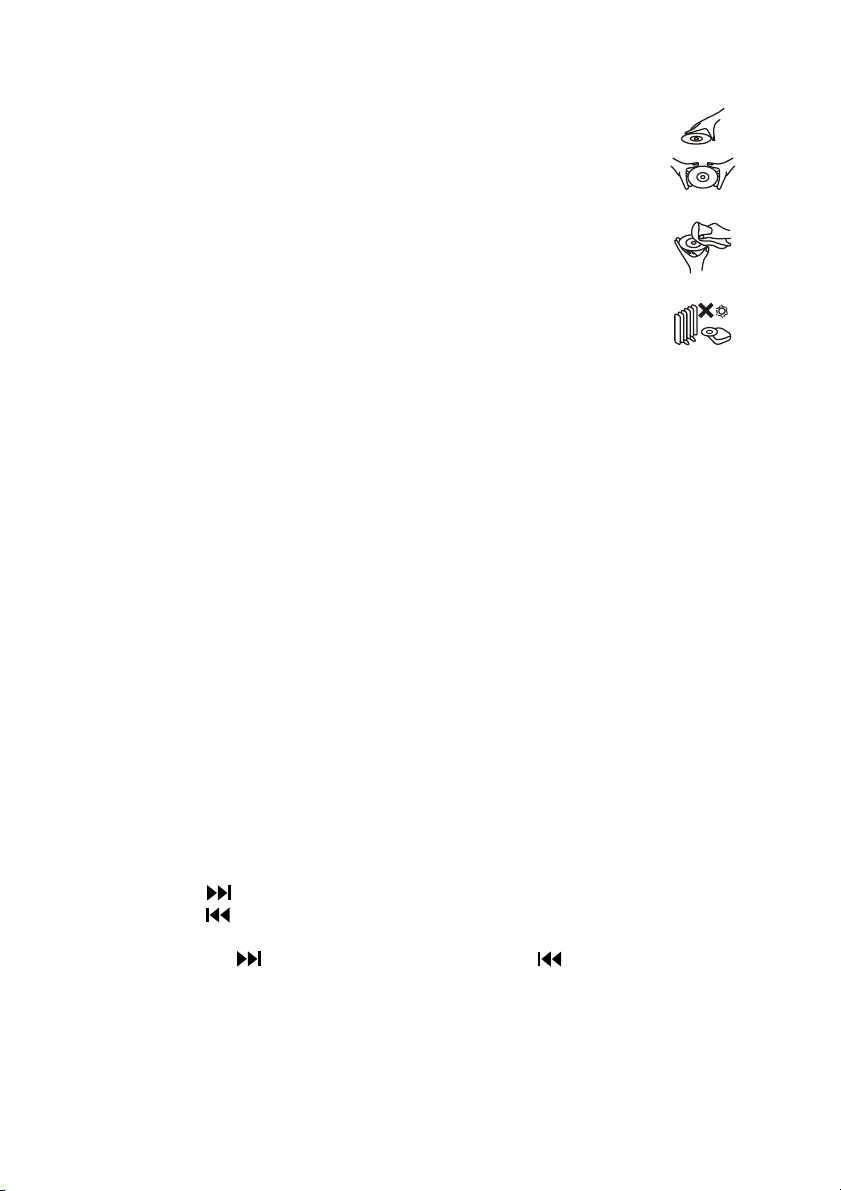
No exponga el aparato a goteos o salpicaduras de agua ni coloque sobre el mismo
objetos que contengan líquidos, como jarrones.
Cuando se utiliza el adaptador AC/DC como dispositivo de desconexión, el dispositivo
de desconexión podrá accionarse fácilmente. Para desconectar por completo la entrada
de corriente, el adaptador AC/DC debería estar desenchufado de la corriente.
No coloque sobre el aparato fuentes de llamas vivas, por ejemplo, velas encendidas.
Deje una distancia mínima de 2,0 cm alrededor del aparato para proporcionar una
ventilación suficiente. No cubra las aberturas de ventilación del aparato con diferentes
artículos como periódicos, manteles, cortinas, etc.
Utilice la unidad en climas tropicales y/o moderados.
Preste atención a los aspectos medioambientales relativos a la eliminación de las pilas.
PRECAUCIÓN: Existe peligro de explosión si las pilas se instalan incorrectamente.
Sustituya las pilas siempre por otras del mismo modelo o equivalente.
No exponga las pilas a temperaturas elevadas como la luz solar, el fuego o similares.
La placa de características se encuentra en la parte inferior del aparato.
INFORMACIÓN SOBRE LA ELIMINACIÓN DEL PRODUCTO
Si en algún momento futuro debe deshacerse de este producto, recuerde que los aparatos
eléctricos no deben desecharse junto con los residuos domésticos. Recicle el aparato si es
posible. Póngase en contacto con la autoridad local o su distribuidor minorista, quienes le
asesorarán en materia de reciclado. (Directiva sobre residuos de aparatos eléctricos y
electrónicos).
DECLARACIÓN DE CONFORMIDAD
Por medio de la presente Flamagas SA declara que el producto DBU-38 cumple los
requisitos y objetivos de protección básicos de:
• La Directiva 2006/95/EC de Baja Tensión
• La Directiva 2004/108/EC de Compatibilidad Electromagnética
Para obtener una copia completa de la declaración de conformidad visite la dirección
www.electronicaflamagas.com

6
DBU-38
INSTRUCTION MANUAL
CD/MP3 PLAYER WITH PLL FM RADIO
AND USB READER
Please read and follow these instructions before using your unit.

7
OVERVIEW OF THE PLAYER
1. FOLDING HANDLE
2. FM TELESCOPIC ANTENNA
3. CD DOOR
4. CD DOOR OPEN AREA
5. VOL - BUTTON
6. PROG/MODE/MEM BUTTON
7. STANDBY INDICATOR
8. SOURCE BUTTON
9. LCD DISPLAY
10. ON/STANDBY BUTTON
11. FOLDER/10+ BUTTON
12. VOL + BUTTON
13. SPEAKERS
14. STOP/CH- BUTTON
15. SKIP/SEARCH DOWN BUTTON
16. USB PORT
17. SKIP/SEARCH UP BUTTON
18. PLAY/PAUSE/CH+ BUTTON
19. BATTERY COMPARTMENT
20. DC IN JACK
21. EARPHONE JACK
22. AUX IN JACK
1234
19 20 21 22
56789
10
11 12
13 14 15 16 17 18 13

8
POWER SUPPLY
BATTERY OPERATION
1. Remove the battery compartment cover gently.
2. Install 6 x 'C' size batteries (UM-2 or equivalent) while observing the correct polarities.
3. Replace the battery compartment cover.
NOTE:
The AC/DC adapter must be detached from the DC IN jack of the player for battery
operation.
Leaking batteries may damage the battery cabinet and the player as a whole, so they
should be removed from the cabinet when becoming flat or when the player is not to
be played on batteries for some time.
DC INPUT OPERATION
Plug the supplied adapter to the DC IN jack on the unit and the main power
NOTE: If not any audio signal inputs to the unit in about one hour, the unit will enter to
standby mode automatically (except at FM radio mode).
FM RADIO
TUNING THE FM RADIO
1. The standby indicator will light once connect the main unit to the main power. Press the
“ON/STANDBY” button to turn the unit on (the standby indicator will be off).
2. Press the S“SOURCE” button repeatedly to switch the unit to the FM radio mode.
3. To launch the auto-searching, press and hold the
”
SKIP/SEARCH DOWN” button or
“
SKIP/SEARCH UP” button several seconds and then release it.
4. Press the
”
SKIP/SEARCH DOWN” button or
“
SKIP/SEARCH UP” button to
tune the radio stations manually.
5. Adjust the volume level to a comfortable listening level via pressing the VOL+/- buttons.
6. Press the “ON/STANDBY” button to turn off the unit.
NOTE:
The FM TELESCOPIC ANTENNA is directional. When you are receiving an FM
broadcast, fully extend the TELESCOPIC ANTENNA and rotate it for the best reception.
STORING YOUR FAVORITE RADIO STATION
1. Tune to your favorite station first; press the PROG/MODE/MEM button for storing the
current station until memory cell number flashes on the screen.
2. Use the STOP/CH- button or the PLAY/PAUSE/CH+ button to select the corresponding
memory cell.
3. Confirm your selection by pressing the PROG/MODE/MEM button.
4. During radio playback, press the STOP/CH- button or the PLAY/PAUSE/CH+ button
repeatedly to recall the preset stations.

9
HANDLING AND MAINTENANCE OF A DISC
Follow the instructions below to handle and maintain your disc in
order that long time and trouble free performance can possibly be
obtained:
Ensure not to caress the rain bow side of the disc; handle the
disc by the edge.
Long time exposure to sunshine, high temperatures and
humidity will damage the disc. And keep storage area clean.
Avoid sticking labels on both sides of a disc. Writing with
pointed articles on the disc should be strictly avoided.
Clean the disc wiping the centre and then working out to the
edge with a dry & soft cloth or a disc brush. Avoid any
cleansing lotion or chemical eradicator.
Store them in their cases when they are not to be used.
LOAD A DISC
1. Open the CD door by the Door open area.
2. Load a disc on the disc tray with the label side facing up and close the CD door.
PLAY A DISC (CD/MP3)
1. Press the ON/STANDBY button to turn the unit on (the standby indicator will be off).
2. Press the SOURCE button repeatedly to switch to CD mode.
3. Follow the steps above to load a disc. The player begins reading disc immediately.
4. When the disc is successfully read, the playback will start from the first track
automatically.
5. Press the PLAY/PAUSE/CH+ button once to halt music playback, press the button again
to resume the normal playback; press the STOP/CH- button to cease music playback.
USB OPERATION
1. Press the ON/STANDBY button to turn the unit on (the standby indicator will be off).
2. Insert an USB to the USB port.
3. Press the SOURCE button repeatedly to switch to USB mode.
4. When the inserted USB is detected and read, the first track will be played automatically.
5. Press the PLAY/PAUSE/CH+ button to pause or resume the playback.
6. Press the STOP/CH- button to cease the playback.
SKIP TRACKS AND SEARCH FOR A SPECIFIC POINT TO PLAY (CD/MP3/USB)
1. Press once the
SKIP/SEARCH UP button in music play to skip to the next track;
press once the
SKIP/SEARCH DOWN button in music play to go back to beginning
of the current track, press the button twice continuously to skip to the previous track.
2. Press and hold the
SKIP/SEARCH UP button or the
SKIP/SEARCH DOWN
button in music play to search at quick rate for a specific point to play.
3. Press the FOLDER/10+ button once in play to skip to the track 10 tracks ahead, twice to
skip to the track 20 tracks ahead. You can reach the last track of the disc using this
button.
HANDLE DISC ONLY AS SHOWN
CLEAN FROM CENTER TO EDGE
DO NOT STORE NEAR HEAT

10
SKIP TO THE PREVIOUS/NEXT FOLDER (MP3/USB)
1. During playback, press and hold the FOLDER/10+ button until the folder number flashes
on the screen.
2. Press the SKIP/SEARCH DOWN button or SKIP/SEARCH UP button to select the folder
you want.
3. Once the selected folder number shows on the screen, press the FOLDER/10+ button to
confirm.
REPEAT PLAYBACK (CD/MP3/USB)
During playback, press the PROG/MODE/MEM button to repeat play a single track; press
the button twice to repeat play all tracks; press the button three times to enter the
introduction play mode; press the button four times to enter the random play mode; press
the button five times to exit.
PROGRAMMED PLAY (CD/MP3 DISC/USB)
1. At stop mode, press the PROG/MODE/MEM button once, the program’s icon shows with
a program sequence indication "P01" first, then a track number flickers on the LCD with
the program’s icon.
2. Select the first track to be programmed using the SKIP/SEARCH UP button or the
SKIP/SEARCH DOWN button, and then press the PROG/MODE/MEM button again to
store and advance to the next programming step (If there are several folders on the MP3
disc or USB, it is necessary to program folders first and then the tracks. The method of
the folders programming is the same as the tracks programming.).
3. Repeat the above steps to program more tracks. A maximum of 20 tracks for CD and 99
tracks for MP3 disc/USB can be programmed in memory in a preferred order. If the
memory is full, the screen will show “FUL” for indicating.
4. Press the PLAY/PAUSE/CH+ button to begin programmed play in the preferred order
after you are done with programming. The player stops automatically after all
programmed tracks are played.
5. You may press the STOP/CH- button to terminate programmed playback. In program
stop mode, press the PLAY/PAUSE/CH+ button to begin the programmed playback with
the programming order identical with the previous one done; press the STOP/CH- button
again to clear the programming.
AUX IN
1. Connect the Aux in jack on the unit to an audio source, for example, MP3 player with an
audio cable.
2. Power on the unit following the corresponding instructions.
3. Press the SOURCE button repeatedly to switch to AUX mode.
4. Use the native controls on the connected audio device to begin playing music through the
connected unit.
STEREO PHONE JACK
A stereo earphone jack has been provided on the back side of the player so that you can
listen without disturbing others. To use this jack, plug in the headphones/earphones (NOT
INCLUDED) and adjust the volume level to a preferred level.
NOTE: When external headphones/earphones are connected, the speakers will be muted.
CAUTION: Listening at high power for a long moment could damage users' ears.

11
IMPORTANT SAFETY INSTRUCTIONS
The apparatus shall not be exposed to dripping or splashing and that no objects filled
with liquids, such as vases, shall be placed on the apparatus.
When the AC/DC adapter is used as the disconnect device, the disconnect device shall
remain readily operable. To be completely disconnected the power input, the AC/DC
adapter shall be disconnected from the mains completely.
No naked flame sources, such as lighted candles, should be placed on the apparatus.
Minimum distances 2.0cm around the apparatus for sufficient ventilation. The ventilation
should not be impeded by covering the ventilation openings with items, such as
newspapers, table-cloths, curtains, etc.
The use of apparatus is in tropical and/or moderate climates.
Attention should be drawn to the environmental aspects of battery disposal.
CAUTION: Danger of explosion if battery is incorrectly replaced. Replace only with the
same or equivalent type.
Battery shall not be exposed to excessive heat such as sunshine, fire or the like.
The marking plate is located at the bottom of the apparatus.
PRODUCT DISPOSAL
If at any time in the future you should need to dispose of this product please note that
Waste electrical products should not be disposed of with household waste. Please recycle
where facilities exist. Check with your Local Authority or retailer for recycling advice. (Waste
Electrical and Electronic Equipment Directive).
STATEMENT OF COMPLIANCE:
Flamagas SA hereby declares that the DBU-38 product complies with the requisites and
basic safety requirements of: Directive 2004/108/EC on Electromagnetic Compatibility.
For a full copy of the statement of compliance please see:
www.electronicaflamagas.com

12
DBU-38
MANUEL D'INSTRUCTIONS
REPRODUCTEUR DE CD/MP3 AVEC RADIO FM PLL
ET LECTEUR USB
Lisez et suivez les instructions avant d’utiliser l’unité.

13
VISION GLOBALE DU REPRODUCTEUR
1. ANSE PLIABLE
2. ANTENNE TELESCOPIQUE FM
3. COMPARTIMENT DU CD
4. OUVERTURE DU COMPARTIMENT DU
CD
5. TOUCHE VOL -
6. TOUCHE PROG/MODE/MEM
7. INDICATEUR D’ATTENTE
8. TOUCHE SOURCE
9. ÉCRAN LCD
10. TOUCHE D’ALLUMÉ/ATTENTE
11. TOUCHE DOSSIER/10+
12. TOUCHE VOL +
13. HAUT-PARLEURS
14. TOUCHE STOP/CH-
15. TOUCHE SAUTER/RECHERCHE
DESC
16. PORT USB
17. TOUCHE SAUTER/RECHERCHE ASC
18. TOUCHE REPR/PAUSE/CH+
19. COMPARTIMENT DES PILES
20. CONNECTEUR DC IN
21. CONNECTEUR CASQUE
22. CONNECTEUR AUX IN
1234
19 20 21 22
56789
10
11 12
13 14 15 16 17 18 13

14
SOURCE D’ALIMENTATION
FONCTIONNEMENT AVEC PILES
1. Retirez avec soin le couvercle du compartiment des piles.
2. Installez 6 piles type 'C' (UM-2 ou équivalentes) en respectant la polarité.
3. Replacez à nouveau le couvercle du compartiment des piles.
NOTE:
L’adaptateur AC/DC doit être séparé du connecteur DC IN du reproducteur afin que
l’unité fonctionne avec les piles.
Les fugues causées par les piles peuvent endommager le compartiment des piles et
le reproducteur en général, retirez les piles si elle sont épuisées ou si vous prévoyez
que vous ne n’utiliserez pas le reproducteur avec les piles pendant une longue
période.
FONCTIONNEMENT PAR COURANT
Connectez l’adaptateur fournit au connecteur DC IN de l’unité et du réseau principal.
NOTE: Si l’unité ne reçoit aucun signal audio pendant une heure, l’unité passera
automatiquement au mode attente (sauf en mode radio FM).
RADIO FM
SYNTONISATION DE LA RADIO FM
1. L’indicateur du mode attente s’illuminera une fois lorsque vous connecterez l’unité au
réseau principal. Appuyez sur la touche ALLUMÉ/ATTENTE pour allumer l’unité
(l’indicateur du mode attente restera éteint).
2. Appuyez plusieurs fois sur la touche de SOURCE S pour passer l’unité au mode de radio
FM.
3. Pour initier la recherche automatique, appuyez et maintenez appuyez la touche
SAUTER/RECHERCHE DESC ou la touche SAUTER/RECHERCHE ASC pendant
plusieurs secondes et ensuite lâchez.
4. Appuyez sur la touche SAUTER/RECHERCHE DESC ou la touche
SAUTER/RECHERCHE ASC pour syntoniser les émissions de radio manuellement.
5. Ajustez le volume à un niveau d’écoute qui soit agréable en appuyant sur les touches
VOL+/-.
6. Appuyez sur la touche ALLUMÉ/ATTENTE pour éteindre l’unité.
NOTE:
L’ANTENNE TÉLÉSCOPIQUE FM est directionnelle. Lorsque vous recevez une
émission FM, étirez complètement l’ANTENNE TÉLÉSCOPIQUE et tournez l’antenne
jusqu’à obtenir le meilleure réception possible.
SAUVEGARDER DES EMISSIONS DE RADIO
1. Dans un premier temps, syntonisez votre émission de radio et appuyez sur la touche
PROG/MODE/MEM pour sauvegarder l’émission actuelle jusqu’à ce que le numéro de
cellule à mémoriser clignote sur l’écran.
2. Utilisez la touche STOP/CH- ou la touche REPR/PAUSA/CH+ pour sélectionner la cellule
de mémoire correspondante.
3. Confirmez la sélection en appuyant sur la touche PROG/MODE/MEM.

15
4. Pendant la reproduction de la radio, appuyez plusieurs fois sur STOP/CH- ou
REPR/PAUSA/CH+ pour écouter les émissions prédéterminées.
MANIPULATION ET MAINTENANCE D’UN CD
Suivez les instructions suivantes sur la manipulation et la
maintenance des CDs afin de prolonger la vie utile et obtenir un
fonctionnement sans problèmes:
Essayez de ne pas toucher la face arc-en-ciel des CDs ;
manipulez les CDs en les tenants par les bords.
De longues expositions à la lumière solaire, températures
élevées et humidité peuvent endommager les CDs. Maintenez
propre la zone de rangement des CDs.
Evitez de coller des étiquettes sur les 2 faces du CD. Ne
jamais utiliser des produits pointus pour écrire dessus.
Nettoyez les CDs du centre vers l’extérieur en utilisant un drap
sec et doux ou une brosse spéciale pour CDs. Ne pas utiliser
des produits chimiques.
Gardez les CDs dans ses boîtes correspondantes lorsque
vous ne les utilisez pas.
CHARGER UN CD
1. Ouvrez le compartiment du CD depuis la zone d’ouverture.
2. Chargez le CD sur le plateau, la face visible doit être l’étiquette et fermez le porte du CD.
REPRODUIRE UN CD (CD/MP3)
1. Appuyez sur la touche d’ALLUMÉ/ATTENTE pour allumer l’unité (l’indicateur du mode
attente sera éteint).
2. Appuyez plusieurs fois sur la touche SOURCE pour passer au mode CD.
3. Suivez les pas antérieurs pour charger le CD. Le reproducteur initiera automatiquement
la lecture du CD.
4. Une fois le reproducteur lit le CD, la reproduction s’initie automatiquement à partir de la
première piste.
5. Appuyez une fois sur la touche REPR/PAUSE/CH+ pour arrêter la reproduction de la
musique, appuyez à nouveau sur la touche pour redémarrer la reproduction normale ;
appuyez sur la touche STOP/CH- pour terminer la reproduction de la musique.
FONCTIONNEMENT DE l’USB
1. Appuyez sur la touche d’ALLUMÉ/ATTENTE pour allumer l’unité (l’indicateur du mode
attente sera éteint).
2. Insérez un USB au port USB.
3. Appuyez sur la touche de SOURCE plusieurs fois pour passer au mode USB.
4. Une fois détecté et lu l’USB inséré, la première piste se reproduira automatiquement.
5. Appuyez sur la touche REPR/PAUSE/CH+ pour faire une pause et redémarrer la
reproduction.
6. Appuyez sur la touche STOP/CH- pour terminer la reproduction.
MANIPULER LES CDs TEL QU’ON
L’INDIQUE CI-DESSOUS
NETTOYER DU CENTRE VERS
L’EXTÉRIEUR
NO PAS GARDER LES CDs À
PROXIMITÉ DES SOURCES DE
CHALEUR

16
SAUTER DE PISTE EN PISTE ET CHERCHER LE FRAGMENT CONCRET À
REPRODUIRE (CD/MP3/USB)
1. Appuyez une fois sur la touche
SAUTER/RECHERCHE ASC pendant la
reproduction de musique pour passer à la piste suivante; appuyez une fois sur la touche
SAUTER/RECHERCHE DESC pendant la reproduction de musique pour revenir au
début de la piste en cours, et appuyez sur la touche deux fois d’affilée pour sauter à la
piste antérieure.
2. Appuyez et maintenez appuyée la touche
SAUTER/RECHERCHE ASC ou la touche
SAUTER/RECHERCHE DESC pendant la reproduction de musique pour chercher
rapidement un fragment concret que vous souhaitez reproduire.
3. Appuyez une fois sur la touche DOSSIER/10+ pendant la reproduction pour sauter 10
pistes et deux fois pour sauter 20 pistes. Vous pouvez aussi utiliser cette touche pour
aller à la dernière piste du CD.
SAUTER AU DOSSIER ANTERIEUR/SUIVANT (MP3/USB)
1. Pendant la reproduction, appuyez et maintenez appuyée la touche DOSSIER/10+
jusqu’à ce que le numéro de dossier clignote sur l’écran.
2. Appuyez sur la touche de SAUTER/RECHERCHE DESC ou SAUTER/RECHERCHE
ASC pour sélectionner le dossier souhaité.
3. Lorsque sur l’écran s’affiche le numéro de dossier sélectionné, appuyez sur
DOSSIER/10+ pour confirmer.
RÉPÉTER LA REPRODUCTION (CD/MP3/USB)
Pendant la reproduction, appuyez sur la touche PROG/MODE/MEM pour répéter la
reproduction d’une seule piste; appuyez sur deux fois sur la touche pour répéter la
reproduction de toutes les pistes; appuyez trois fois sur la touche pour accéder au mode
reproduction dès le début; appuyez quatre fois sur la touche pour passer au mode de
reproduction aléatoire; et appuyez cinq fois sur la touche pour sortir.
PROGRAMMATION DE LA REPRODUCTION (CD/MP3/USB)
1. En mode stop, appuyez une fois sur la touche PROG/MODE/MEM, l’icône de
programmation s’affiche dans un premier temps avec un indication de séquence "P01" et
ensuite sur l’écran LCD s’affiche un numéro de piste avec l’icône de programmation.
2. Sélectionnez la première piste à programmer en utilisant la touche de
SAUTER/RECHERCHE ASC ou SAUTER/RECHERCHE DESC, et ensuite appuyez à
nouveau sur la touche PROG/MODE/MEM pour sauvegarder et passer au prochain pas
de la programmation (si l’MP3 ou l’USB contient plusieurs dossiers, il faut tout d’abord
programmer les dossiers et ensuite les pistes. La méthode de programmation des
dossier est la même que la programmation des pistes)
3. Répétez les pas antérieurs pour programmer plus de pistes. Vous pouvez programmer à
la mémoire un maximum de 20 pistes pour chaque CD et 99 pistes pour les MP3/USB
selon l’ordre que vous souhaitez. Si la mémoire est pleine, sur l’écran s’affichera "FUL".
4. Appuyez sur la touche REPR/PAUSE/CH+ pour initier la reproduction programmée selon
l’ordre établit une fois terminée la programmation. Le reproducteur s’arrêtera
automatiquement après la reproduction de toutes les pistes programmées.

17
5. Vous pouvez appuyer sur la touche STOP/CH- pour terminer la reproduction. En mode
d’arrêt du programme, appuyez sur la touche REPR/PAUSE/CH+ pour initier la
reproduction programmée dans le même ordre de programmation que l’antérieur;
appuyez à nouveau sur STOP/CH- pour effacer la programmation.
AUX IN
1. Branchez le connecteur AUX IN à une SOURCE audio, par exemple, un reproducteur
MP3, avec un câble audio.
2. Allumé l’unité en suivant les instructions correspondantes.
3. Appuyez plusieurs fois sur la touche de SOURCE jusqu’à activer le mode AUX.
4. Utilisez les contrôles du dispositif audio connecté pour initier la reproduction de musique
à travers de l’unité connectée.
CONNECTEUR CASQUE STÉRÉO
Sur la partie postérieure du reproducteur on a inclus un prise écouteurs stéréo pour écouter
de la musique ou la radio sans déranger d’autres personnes. Pour utiliser ce connecteur,
connectez les écouteurs (NON FOURNIS) et ajustez le volume souhaité.
NOTE: Lorsqu’on connecte les écouteurs externes, les haut-parleurs s’annulent.
PRECAUTION: Si vous écoutez de la musique ou la radio à un volume fort pendant une
longue période, votre ouïe peut souffrir des dommages.
INSTRUCTIONS IMPORTANTES DE SÉCURITÉ
Ne pas exposer l’appareil à des dégoulinements ou à des éclaboussures d’eau, ne pas
placer sur l’appareil des objets qui contiennent des liquides, tels que les vases.
Lorsqu’on utilise l’adaptateur AC/DC comme dispositif de déconnexion, le dispositif de
déconnexion pourra s’activer facilement. Pour déconnecter complètement l’entrée de
courant, l’adaptateur AC/DC devra être débranchez de la prise de courant.
Ne pas placer sur l’appareil des sources appelées vivantes, par exemple, les bougies
allumées.
Laissez une distance de 2,0 cm minimum autour de l’appareil pour avoir une ventilation
adéquate. Ne pas couvrir les ouvertures de ventilation de l’appareil avec différents
articles tels que les journaux, les nappes, les rideaux, etc…
Utilisez l’unité dans des climats tropicaux et/ou modérés.
Soyez attentifs aux aspects environnementaux relatifs à l’élimination des piles.
PRECAUTION: Il existe un danger d’explosion si les piles s’installent incorrectement.
Remplacez toujours les piles par d’autres du même modèle ou équivalentes.
Ne pas exposer les piles à des températures trop élevées tels que la lumière solaire, le
feu ou similaires.
La plaque des caractéristiques se trouve sur la partie inférieure de l’appareil.

18
INFORMATIONSURL’ELIMINATIONDUPRODUIT
Si dans l’avenir vous souhaitez vous débarrasser de ce produit, rappelez-vous que les
appareils électriques ne vont pas ensembles avec les résidus domestiques. Recyclez
toujours l’appareil si possible. Contactez une autorité locale ou votre distributeur au détail
qui vous recommanderons en matière de recyclage. (Directive sur les résidus d’appareils
électriques et électroniques).
DECLARATION DE CONFORMITÉ
Par la présente Flamagas SA déclare que le produit DBU-38 accomplit les objectifs
essentiels de protection:
• La Directive 2006/95/EC de Basse Tension
• La Directive 2004/108/EC de Compatibilité Électromagnétique
Pour obtenir une copie complète de la déclaration de conformité visitez le site :
www.electronicaflamagas.com

19
Table of contents
Languages: