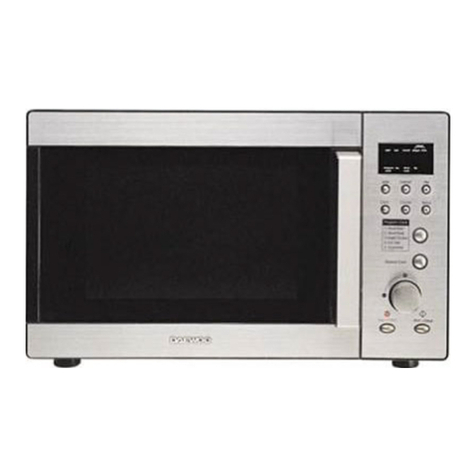
Daewoo KQG-9GPB Assembly Instructions

vviissiioonn@
@ccrreeaattiivveeLL@
@iinnccNN
Էړ ܞĸ ࣃۉʷ
VѨݖ ێΟӂ˱ Tࠚ
ABOUT THIS MANUAL
ABOUT THIS MANUAL
ɽɽʁʁъʅঐ ɮ
ҸҸ˝˝daewoo ضضششٙش
ffNN@
@mmooddeellkqgMYgpbWs
bbNN@
@mmooddeellkqgMYgpb
bb@
@uu@
@yy@
@ee@
@rramiridis
ccoouunnttrryyŗπ֢
ېېլլܿĹ
mmeemmoo߭SS
ِߏ
vision ɽ ʁ іОր
telZ WSPMPVVP@faxZ WSPMSWXX
QTNPSNRUMݖ @֭Ŕ Q
QTNPSNSQMSR@Hێݖ ÃI@ր܄@֭Ŕ Q

Before operating this oven, please read these instructions completely.
OPERATING INSTRUCTIONS
& COOK BOOK
MICROWAVE OVEN
KQG-9GPB

1
PRECAUTIONS TO AVOID
POSSIBLE EXPOSURE TO
EXCESSIVE MICROWAVE ENERGY
(a) Do not attempt to operate this oven with the
door open since open-door operation can result in
harmful exposure to microwave energy. It is
important not to defeat or tamper with the safety
interlocks.
(b) Do not place any object between the oven front
face and the door or allow soil or cleaner residue to
accumulate on sealing surfaces.
(c) WARNING : If the door or door seals are damaged,
the oven must not be operated until it has been
repaired by a competent person : (1) door (bent), (2)
hinges and latches(broken or loosened), (3) door
seals and sealing surfaces.
(d) WARNING : It is hazardous for anyone other than a
competent person to carry out any service or repair
operation that involves the removal of a cover which
gives protection against exposure to microwave
energy.
(e) WARNING : Liquids and other foods must not be
heated in sealed containers since they are liable to
explode.

2
PRECAUTIONS TO AVOID
POSSIBLE EXPOSURE TO
EXCESSIVE MICROWAVE ENERGY
(f) WARNING : This appliance can be used by children
aged from 8 years and above and persons with
reduced physical, sensory or mental capabilities or
lack of experience and knowledge if they have been
given supervision or instruction concerning use of
the appliance in a safe way and understand the
hazards involved. Children shall not play with the
appliance. Cleaning and user maintenance shall not
be made by children unless they are aged from 8
years and above and supervised.
(g) WARNING : Accessible parts may become hot
during use. Young children should be kept away.
(h) WARNING : The appliance and its accessible parts
become hot during use.
Care should be taken to avoid touching heating
elements.
Children less than 8 years of age shall be kept away
unless continuously supervised.
(i) WARNING : Keep the appliance and its cord out of
reach children less than 8 years.

3
• PRECAUTIONS TO AVOID POSSIBLE EXPOSURE
TO EXCESSIVE MICROWAVE ENERGY ...................................................................................1
• IMPORTANT SAFETY INSTRUCTIONS .....................................................................................4
• EARTHING INSTRUCTIONS .......................................................................................................6
• INSTALLATION ............................................................................................................................6
• FEATURES DIAGRAM ................................................................................................................7
• OPERATION PROCEDURE ........................................................................................................9
• CONTROLS ...............................................................................................................................10
SETTING THE CLOCK ..............................................................................................................10
DEFROST AUTOMATICALLY ...................................................................................................11
SETTING COOKING TIME & POWER LEVELS ........................................................................12
EXPRESS COOKING .................................................................................................................12
AUTO COOK ..............................................................................................................................13
QUICK DEFROST ......................................................................................................................14
CHILLED MEAL ..........................................................................................................................14
FROZEN MEAL ..........................................................................................................................14
GRILL COOKING ........................................................................................................................15
COMBI COOKING.......................................................................................................................15
CHILD SAFETY LOCK ...............................................................................................................16
HOW TO STOP THE OVEN WHILE THE OVEN IS OPERATING ............................................16
DISPLAY OFF ............................................................................................................................16
• CARE OF YOUR MICROWAVE OVEN .....................................................................................17
• QUESTIONS AND ANSWERS ..................................................................................................18
• BEFORE YOU CALL FOR SERVICE ........................................................................................19
• CARE AND CLEANING .............................................................................................................19
• DISPOSAL OF USED ELECTRICAL & ELECTRONIC EQUIPMENT .......................................19
• SPECIFICATIONS .....................................................................................................................20
• COOKING INSTRUCTIONS ......................................................................................................21
• COOKING UTENSILS ................................................................................................................21
• USE YOUR MICROWAVE OVEN SAFELY ...............................................................................22
• ARCING .....................................................................................................................................22
• MICROWAVING PRINCIPLES ..................................................................................................23
• HOW MICROWAVES COOK FOOD ..........................................................................................23
• CONVERSION CHARTS ...........................................................................................................23
• COOKING TECHNIQUES ..........................................................................................................24
• DEFROSTING GUIDE ...............................................................................................................25
• COOKING & REHEATING CHART ............................................................................................26
• VEGETABLE CHART .................................................................................................................28
• RECIPES ....................................................................................................................................29
TABLE OF CONTENTS

4
IMPORTANT SAFETY INSTRUCTIONS
READ CAREFULLY AND KEEP FOR FUTURE REFERENCE
WARNING : To prevent fire, burns, electric shock and other
warnings:
Listed below are, as with all appliances, certain rules to follow
and safeguards to assure high performance from this oven:
1. Do not use the oven for any reason
other than food preparation, such as
for drying clothes, paper, or any other
nonfood items or for sterilizing
purposes.
2. Do not use the oven when empty, this
could damage the oven.
3. Do not use the oven cavity for any type
of storage, such as papers, cookbook,
cookware, etc.
4. Do not operate the oven without the
glass tray in place. Be sure it is
properly sitting on the rotating base.
5. Make sure you remove caps or lids
prior to cooking when you cook food
sealed in bottles.
6. Do not put foreign material between
the oven surface and door. It could
result in excessive leakage of
microwave energy.
7. Do not use recycled paper products for
cooking. They may contain impurities
which could cause sparks and/or fires
when used during cooking.
8. Do not pop popcorn unless popped in
a microwave approved popcorn
popper or unless it's commercially
packaged and recommended
especially for microwave ovens.
Microwave popped corn produces a
lower yield than conventional popping;
there will be a number of unpopped
kernels. Do not use oil unless specified
by the manufacturer.
9. Do not cook any food surrounded by a
membrane, such as egg yolks,
potatoes, chicken livers, etc., without
first piercing them several times with a
fork.
10. Do not pop popcorn longer than the
manufacturer's directions. (popping
time is generally below 3 minutes).
Longer cooking does not yield more
popped corn, it can cause scorchings
and fire.
Also, the cooking tray can become too
hot to handle or may break.
11. If smoke is emitted, switch off or unplug
the appliance and keep the door
closed in order to stifle any flames.
12. When heating food in plastic or paper
containers, keep an eye on the oven
due to the possibility of ignition.

5
SAVE THESE INSTRUCTIONS
13. The contents of feeding bottles and
baby food jars shall be stirred or
shaken and the temperature
checked before consumption, in
order to avoid burns.
14. Always test the temperature of food
or drink which has been heated in a
microwave oven before you give it to
somebody, especially to children or
elderly people. This is important
because things which have been
heated in a microwave oven carry on
getting hotter even though the
microwave oven cooking has
stopped.
15. Eggs in their shell and whole hard-
boiled eggs should not be heated in
microwave ovens since they may
explode, even after microwave
heating has ended;
16. Keep the waveguide cover clean at
all times. Wipe the oven interior with
a soft damp cloth after each use. If
you leave grease or fat anywhere in
the cavity it may overheat, smoke or
even catch fire when next using the
oven.
17. Never heat oil or fat for deep frying
as you cannot control the
temperature and doing so may lead
to overheating and fire.
18. Liquids, such as water, coffee, or tea
are able to be overheated beyond
the boiling point without appearing to
be boiling due to surface tension of
the liquid. Visible bubbling or boiling
when the container is removed from
the microwave oven is not always
present. THIS COULD RESULT IN
VERY HOT LIQUIDS SUDDENLY
BOILING OVER WHEN A SPOON
OR OTHER UTENSIL IS
INSERTED INTO THE LIQUID.
To reduce the risk of injury to
persons:
a) Do not overheat the liquid.
b) Stir the liquid both before and
halfway through heating it
c) Do not use straight-sided
containers with narrow necks.
d) After heating, allow the container
to stand in the microwave oven for
a short time before removing the
container.
e) Use extreme care when inserting
a spoon or other utensil into the
container.
19. Children should be supervised to
ensure that they do not play with the
appliance.
20. Only use utensils that are suitable for
use in microwave ovens.
21. Microwave heating of beverages can
result in delayed eruptive boiling,
therefore care must be taken when
handling the container.
22. During use the appliance becomes
hot. Care should be taken to avoid
touching heating elements inside the
oven.

6
EARTHING INSTRUCTIONS
This appliance must be earthed. In the event of an
electrical short circuit, earthing reduces the risk of
electric shock by providing an escape wire for the
electric current. This appliance is equipped with a
cord having a earthing wire with a earthing plug.
The plug must be plugged into an outlet that is
properly installed and earthed.
WARNING : Improper use of the earthing plug can
result in a risk of electric shock. Consult a qualified
electrician or serviceman if the earthing instructions
are not completely understood, or if doubt exists as
to whether the appliance is properly earthed.
If it is necessary to use an extension cord, use only a
3-wire extension cord that has a 3-blade earthing
plug, and a 3-slot receptacle that will accept the plug
on the appliance. The marked rating of the extension
cord should be equal to or greater than the electrical
rating of the appliance.
IMPORTANT
The wires in this mains lead fitted to this appliance
are colored in accordance with the following code.
Green-and-yellow : Earth
Blue : Neutral
Brown : Live
As the colors of the wires in the mains lead of this
appliance may not correspond with the colored
markings identifying the terminals in your plug,
proceed as follows : the wire which is colored green-
and-yellow must be connected to the terminal in the
plug which is marked with the letter ‘E’ or by the
earth symbol or green-and-yellow. The wire which is
colored blue must be connected to the terminal
which is marked with the letter ‘N’ or colored black.
The wire which is colored brown must be connected
to the terminal which is marked with the letter ‘L’ or
colored red.
WARNING : The appliance must be earthed.
INSTALLATION
1. Ventilation
Do not block air vents. If they are blocked during
operation, the oven may overheat and eventually
cause a failure. For proper ventilation, allow above
76mm of space between oven sides, rear and the
minimum height of free space necessary above
the top surface of the oven is 150mm.
2. Steady, flat location
This oven should be set on a steady, flat surface.
This oven is designed for counter top use only.
The microwave oven shall not be placed in a
cabinet unless it has been tested in a cabinet.
3. Leave space behind and side
All air vents should be kept a clearance.
If all vents are covered during operation, the oven
may overheat and, eventually, oven failure.
4. Away from radio and TV sets
Poor television reception and radio interference
may result if the oven is located close to a TV,
Radio antenna, feeder and so on. Position the
oven as far from them as possible.
5. Away from heating appliance and water taps
Keep the oven away from hot air, steam or Splash
when choosing a place to position it, or the
insulation might be adversely affected and
breakdowns occur.
6. Power supply
• Check your local power source. This oven
requires a current of approximately 10 amperes,
220-240V 50Hz.
• Power supply cord is about 0.8 meters long.
• The voltage used must be the same as specified
on this oven. Using a higher voltage may result in
a fire or other accident causing oven damage.
Using low voltage will cause slow cooking. We
are not responsible for damage resulting from
use of this oven with a voltage of ampere fuse
other than those specified.
• If the supply cord is damaged, it must be
replaced by the manufacturer or its service agent
or a similarly qualified person in order to avoid a
hazard.
7. Examine the oven after unpacking for any
damage such as:
A misaligned door, Broken door, A dent in cavity.
If any of the above are visible, DO NOT INSTALL,
and notify dealer immediately.
8. Do not operate the oven if it is colder than
room temperature.
(This may occur during delivery in cold weather.)
Allow the oven to become room temperature
before operating.
7
11Door latch - When the door is closed, it will
automatically shut off. If the door is opened
while the oven is operating, the magnetron will
automatically shut off.
22Door seal - The door seal surfaces prevent
microwaves escaping from the oven cavity.
33Oven cavity
44Oven lamp - Automatically turns on during
oven operating.
55Safety interlock system
66Control panel
77Waveguide cover - Protects the microwave
outlet from splashes of cooking foods.
88Roller guide - This must always be used for
cooking together with the glass cooking tray.
99Coupler - This fits over the shaft in the center
of the oven cavity floor.
This is to remain in the oven for all cooking.
00Glass cooking tray - Made of special heat
resistant glass. The tray must always be in
proper position before operating. Do not cook
food directly on the tray.
qqViewing screen - Allows viewing of food.
The screen is designed so that light can pass
through, but not the microwave.
wwMetal Rack
eeHeater - Used for Grill or Combi cooking.
rrDoor open button - To open the door push
the door open button.
FEATURES DIAGRAM
12
qw08
9
345
6e 7
r

8
11Display - Cooking time, power level,
indicators and the current time are
displayed.
22Auto Cook - Used to cook or reheat many
of favorite food.
33AUTO Defrost - Used to defrost foods for
weight.
44One Touch Cook - Used to cook or reheat
specific quantities of food.
55Power Level - Used to set power level.
66Clock - Used to set clock.
77Quick Defrost - Used to defrost food very
quickly.
88Up/Down - Used to set weight of food.
99Time Set Pad - Used to set the cooking
time and the current time.
00Stop/Clear/off - Used to stop the oven
operation or to delete the cooking data or to
turn off the display.
qqStart/Express cook - Used to start the
oven and also to set express cook. (each
press adds 30 seconds to microwave
cooking time)
wwGrill/Combi - Used to cook grill or
combination mode.
FEATURES DIAGRAM (continued)
1
32
5
6
4
w
8
7
q0
9

9
Plug power supply cord into 220-240V AC
50Hz power outlet.
After placing the food in a suitable container,
open the oven door and put it on the glass
tray. The glass tray and roller guide must
always be in place during cooking.
Close the door. Make sure that it is firmly
closed.
The oven door can be opened at any time
during operation by pushing the door open
button. The oven will automatically shut off.
To restart the oven, close the door and then
press the START pad.
The oven automatically cooks on full power
unless set to a lower power level.
The display will show “ : 0” when the oven is
plugged in.
Time clock returns to the present time when
the cooking time ends.
When the STOP/CLEAR pad is pressed
during the oven operation, the oven stops
cooking and all information retained. To erase
all information(except the present time), press
the STOP/CLEAR pad once more.
If the oven door is opened during the oven
operation, all information is retained.
If the START pad is pressed and the oven
does not operate, check the area between the
door and door seal for obstructions and make
sure the door is closed securely. The oven will
not start cooking until the door is completely
closed or the program has been reset.
NOTE : When using the GRILL or COMBI
mode;
• Do not open the door so often, the
temperature inside the oven decrease and
the cooking may not be completed in setting
time.
• Never press the oven window and metal
interior of the oven when taking food in and
out, because the temperature inside the oven
and door is very high.
• When using these modes, be careful as the
tray will be hot to press, use oven gloves or
pot holders while handling tray.
OPERATION PROCEDURE
This section includes useful information about oven operation.
1
2
3
4
5
6
7
8
9
10
WATTAGE OUTPUT CHART
•The power-level is set by press the MICRO POWER pad. The chart shows the display, the power level
and the percentage of power.
once P-HI 100%
twice P-90 90%
3 times P-80 80%
4 times P-70 70%
5 times P-60 60%
6 times P-50 50%
7 times P-40 40%
8 times P-30 30%
9 times P-20 20%
10 times P-10 10%
11 times P-00 0%
Press the MICRO POWER pad Power level (Display) Approximate Percentage of Power
Make sure the oven is properly installed
and plugged into the electrical outlet.

10
CONTROLS
SETTING THE CLOCK
When the oven is first plugged in, the display will flash “:0”. If the AC power ever goes off, the
display shows “:0” when the power comes back on.
1. Touch the CLOCK pad.
This is a 12 hour clock system.
2. Touch the CLOCK pad once more.
This is a 24 hour clock system.
3. Enter the correct time of day by touching the TIME SET
pads in sequence.
4. Touch the CLOCK pad.
NOTE: If you attempt to enter an incorrect time, the time will not be set and it will return to previous
status. Touch the CLOCK pad and re-enter the time.
The display stops blinking, and the colon
starts blinking. If you selected 12 hour clock
system, this digital clock allows you to set
from 1:00 to 12:59.
If you selected 24 hour clock system, this
digital clock allows you to set from 0:00 to
23:59

11
[AUTO DEFROST chart]
DEFROSTING AUTOMATICALLY
To thaw frozen food, set the weight of the food and the microwave automatically sets the defrosting time, power level.
1. Touch the AUTO DEFROST pad to set the item.
Touch the AUTO DEFROST pad repeatedly to select the item you want.
(Refer to the AUTO DEFROST chart below)
2. Touch the Up/Down pad to set the weight of the food.
3. Touch the START pad to start defrosting.
4. The calculates the defrosting time and during the defrosting, the oven will beep to let you to turn
the food over.
Open the door, turn the food over and touch the START pad to resume defrosting.
Touch
pad
Once
Twice
3 times
4 times
Item
Meat
Poultry
Fish
Bread
Display
Ad - 1
Ad - 2
Ad - 3
Ad - 4
Weight
200g ~ 2000g
200g ~ 2000g
200g ~ 2000g
100g ~ 500g
Utensil
Paper towel or
flat plate
Remark
Shield the edges with aluminium foil. Turn the food
over when the oven beeps. After defrosting, let
stand for 20~60min.
Sliced bread, Buns, Baguette, etc..
Turn the food over when the oven beeps.
After defrosting, let stand for 1-2 min.

12
1. Touch the Power level pad to set the power level.
Touch the Power level pad repeatedly to select the power level you want.
2. Touch the Time set pad to set the cooking times.
You can set the time up to 59 minutes 90 seconds.
3. Touch the START pad to start cooking.
SETTING COOKING TIMES & POWER LEVELS
NOTE : If step 1 is omitted, the oven can be set the High power level.
NOTE : Using lower power levels increases the cooking time which is recommended for foods such as cheese,
milk and slow cooking of meats.
NOTE : When the operation is finished the oven beeps three times, “End” appears in the display, the rotating plate
stops turning and the oven light turns off. The oven will continue to beep every 1 minute until the
STOP/CLEAR pad is touched, or the door is opened.
EXPRESS COOKING
EXPRESS COOK allows you to reheat for 30 seconds at 100% (full power) by simply touching the
START / Express cook pad.
By repeatedly touching the START / Express cook pad, you can also extend reheating time to 5 minutes by
30 seconds.
1. Touch the START / Express
cook pad.
When you touch the START / Express cook
pad, ":30" appears the oven starts reheating.
When the cooking time ends, you will hear 3
beeps.

13
[AUTO COOK chart]
Touch
pad
Once
Twice
3 times
4 times
5 times
Item
Fresh
Vegetable
Frozen
Vegetable
Baked
Potato
Rice/Pasta
Pizza
Reheat
Display
AC - 1
AC - 2
AC - 3
AC - 4
AC - 5
Weight
200g ~ 400g
200g ~ 400g
1 ~ 3ea
100g ~ 300g
1 ~ 3 pieces
Remark
Trim and wash the mixed vegetables. Place them in the round dish.
Add to 2 tbsp. water cover with wrap.
Places the vegetables in the round dish. Add to 2 tbsp. water cover
with wrap.
Choose medium sized potatoes 200g ~ 250g wash and pierce
potatoes with a fork. Place them on the turntable.
Wash rice, Darin water. Place rice & boiling water with 1/4 to 1teaspoon
salt in a deep and large bowl.
* Rice - After cooking, stand covered for 5 minutes until water is a
absorbed.
* Pasta - During the cooking, stir several times. After cooking, stand for 1
or 2 minutes with cover. Rinse pasta with cold water.
• Use only refrigerated foods.
• Put the pizza on a microwave-safe plate with wide end of slice towards
the outside edge of the plate.
• Do not let slices overlap. Do not cover.
• Before serving, let stand 1~2min.
Weight 100g 200g 300g Cover
Water Rice 180ml 330ml 480ml o
Pasta 400ml 800ml 1200ml x
1. Touch the AUTO COOK pad to set the item.
Touch the AUTO COOK pad repeatedly to select the item you want.
(Refer to the AUTO COOK chart below)
2. Touch the Up/Down pad to set the weight of the food.
3. Touch the START pad to start Auto Cooking.
AUTO COOK

14
QUICK DEFROST
Use this function to thaw only 500g of minced meat very quickly.
This will require a standing time to allow the center to thaw.
1. Touch the Quick defrost pad to set defrosting.
2. Touch the START pad to start defrosting quickly.
The oven calculates the defrosting time.
During the defrosting, the oven will beep to let you to turn the food over. Open the door,
turn the food over and touch the START pad to resume defrosting.
CHILLED MEAL
1. Touch the CHILLED MEAL pad.
The display shows “A--1”.
2. Touch the Up/Down pad to set the weight of the food.
You can set a weight from 300g to 500g every 100g.
3. Touch the START pad to start cooking.
FROZEN MEAL
1. Touch the FROZEN MEAL pad.
The display shows “A--2”.
2. Touch the Up/Down pad to set the weight of the food.
You can set a weight from 300g to 500g every 100g.
3. Touch the START pad to start cooking.

15
2. Press the time pad to adjust the cooking time.
3. Press Start pad.
NOTE: Time can be set up to 29 minutes
90 seconds.
When you press Start pad, the Grill indicator starts blinking to show the oven is cooking.
The display counts down the time to show how much cooking time is left. When the cooking time ends, you
will hear 3 beeps.
GRILL COOKING
This function allows you to brown food quickly. The heating element is located in the top of the oven.
There is no pre-heating the oven for grill cooking. Place food inside the oven when setting the
controls.
1. Press Grill/Combi pad. The Grill indicator lights and “ : 0” is
displayed.
The display will show what you pressed.
2. Press Grill/Combi pad once more.
3. Press the time pad to adjust the cooking time.
4. Press Start pad.
NOTE: Time can be set up to 59 minutes
90 seconds.
When you press Start pad, the Combi indicator starts blinking to show the oven is cooking.
The display counts down the time to show how much cooking time is left. When the cooking time ends, you
will hear 3 beeps.
COMBI COOKING
The oven has combination mode which cooks food with heater and microwave at the same time.
The combination mode accelerates the cooking process.
1. Press Grill/Combi pad. The Grill indicator lights and “ : 0” is
displayed.
The Combi indicator lights and “ : 0” is
displayed.
The display will show what you pressed.

16
HOW TO STOP THE OVEN WHILE THE OVEN IS OPERATING
1. Touch the STOP/CLEAR pad.
• You can restart the oven by touching the START pad.
• Touch the STOP/CLEAR once more to erase all instructions.
• You must enter in new instructions.
2. Open the door.
• You can restart the oven by closing the door and touching the START pad.
NOTE: Oven stops operating when door is opened.
CHILD SAFETY LOCK
The safety lock prevents unwanted oven operation such as by small children. To set, touch and hold
the STOP/CLEAR pad for 3 seconds. To cancel, touch and hold the STOP/CLEAR pad for
3 seconds.
DISPLAY OFF.
1. Touch the STOP/CLEAR/off pad.
“ :0” or clock appears in the display.
2. Touch the STOP/CLEAR/off pad once more.
The display will turn off and a beep sounds.
3. To turn on the display touch the any pad or open the door. When the display is on and a beep sounds.
The oven is again available for normal use.

17
CARE OF YOUR MICROWAVE OVEN
Turn the oven off before cleaning.
Keep the inside of the oven clean. When food
spatters or spilled liquids adhere to oven walls,
wipe with a damp cloth. Mild detergent may be
used if the oven gets very dirty.
The use of harsh detergent or abrasives is not
recommended.
The outside oven surface should be cleaned
with soap and water, rinsed and dried with a
soft cloth. To prevent damage to the operating
parts inside the oven, water should not be
allowed to seep into the ventilation openings.
If the Control Panel becomes wet, clean with a
soft, dry cloth. Do not use harsh detergents or
abrasives on Control Panel.
If steam accumulates inside or around the
outside of the oven door, wipe with a soft cloth.
This may occur when the microwave oven is
operated under high humidity conditions and in
no way indicates malfunction of the unit.
It is occasionally necessary to remove the
glass tray for cleaning. Wash the tray in warm
sudsy water or in a dishwasher.
The roller guide and oven cavity floor should be
cleaned regularly to avoid excessive noise.
Simply wipe the bottom surface of the oven
with mild detergent water or window cleaner
and dry. The roller guide may be washed in
mild sudsy water.
1
2
3
4
5
6
7
The oven should be cleaned regularly and any food deposits removed.
Failure to maintain the oven in a clean condition could lead to deterioration of the surface that
could adversely affect the life of the appliance and possibly result in a hazardous situation.
ROLLER GUIDE
Glass Tray Roller Guide
The ROLLER GUIDE and oven floor should be
cleaned frequently to prevent excessive noise.
The ROLLER GUIDE MUST ALWAYS be used
for cooking together with the Glass Tray.
1
2
GLASS TRAY
DO NOT operate the oven without the Glass Tray
in place.
DO NOT use any other Glass Tray with this oven.
If Glass Tray is hot, ALLOW TO COOL before
cleaning or placing it in water.
DO NOT cook directly on the Glass Tray.
(Except for popcorn)
1
2
3
4

18
QUESTIONS AND ANSWERS
* Q : I accidentally ran my microwave oven
without any food in it. Is it damaged?
* A : Running the oven empty for a short time will
not damage the oven. However, it is not
recommended.
* Q : Can the oven be used with the glass tray
or roller guide removed?
* A : No. Both the glass tray and roller guide must
always be used in the oven before cooking.
* Q : Can I open the door when the oven is
operating?
* A : The door can be opened anytime during the
cooking operation. Then microwave energy
will be instantly switched off and the time
setting will maintain until the door is closed.
* Q : Why do I have moisture in my microwave
oven after cooking?
* A : The moisture on the side of your microwave
oven is normal. It is caused by steam from
cooking food hitting the cool oven surface.
* Q : Does microwave energy pass through the
viewing screen in the door?
* A : No. The metal screen bounces back the
energy to the oven cavity. The holes are
made to allow light to pass through. They do
not let microwave energy pass through.
* Q : Why do eggs sometimes pop?
* A : When baking or poaching eggs, the yolk may
pop due to steam build-up inside the yolk
membrane. To prevent this, simply pierce the
yolk with a toothpick before cooking. Never
cook eggs without piercing their shells.
* Q : Why is standing time recommended after
the cooking operation has been
completed?
* A : Standing time is very important.
With microwave cooking, the heat is in the
food, not in the oven. Many foods build up
enough internal heat to allow the cooking
process to continue, even after the food is
removed from the oven. Standing time for
joints of meat, large vegetables and cakes is
to allow the inside to cook completely,
without overcooking the outside.
* Q : What does “standing time” mean?
* A : “Standing time” means that food should be
removed from the oven and covered for
additional time to allow it to finish cooking.
This frees the oven for other cooking.
* Q : Why does my oven not always cook as
fast as the microwave cooking guide
says?
* A : Check your cooking guide again, to make
sure you’ve followed directions exactly ; and
to see what might cause variations in cooking
time. Cooking guide times and heat settings
are suggestions, to help prevent over-
cooking... the most common problem in
getting used to a microwave oven.
Variations in the size, shape and weights and
dimensions could require longer cooking
time. Use your own judgement along with the
cooking guide suggestions to check whether
the food has been properly cooked just as
you would do with a conventional cooker.
* Q : Will the microwave oven be damaged if it
operates while empty?
* A : Yes. Never run it empty.
* Q : Can I operate my microwave oven
without the turntable or turn the turntable
over to hold a large dish?
* A : No. If you remove or turn over the turntable,
you will get poor cooking results. Dishes
used in your oven must fit on the turntable.
* Q : Is it normal for the turntable to turn in
either direction?
* A : Yes. The turntable rotates clockwise or
counterclockwise, depending on the rotation
of the motor when the cooking cycle begins.
* Q : Can I pop popcorn in my microwave
oven? How do I get the best results?
* A : Yes. Pop packaged microwave popcorn
following manufacture’s guidelines. Do not
use regular paper bags. Use the “listening
test” by stopping the oven as soon as the
popping slows to a “pop” every 1 or 2
seconds. Do not repop unpopped kernels. Do
not pop popcorn in glass cookware.
Table of contents
Other Daewoo Microwave Oven manuals

Daewoo
Daewoo AFMW200E User manual

Daewoo
Daewoo KOR-86AR7S Assembly Instructions

Daewoo
Daewoo Magic Chef MCM980A User manual

Daewoo
Daewoo KOG-57470S User manual

Daewoo
Daewoo T1710W User manual

Daewoo
Daewoo KOR-63350S User manual

Daewoo
Daewoo KOC-9N7T7S User manual

Daewoo
Daewoo KOG-37G59S User manual

Daewoo
Daewoo MCB780W User manual

Daewoo
Daewoo KOR-63D7 User manual

Daewoo
Daewoo KOR-146HW User manual

Daewoo
Daewoo KOR-638RSL User manual

Daewoo
Daewoo KOC-1B0K0S User manual

Daewoo
Daewoo KOG-392G User manual

Daewoo
Daewoo 181GOA0A User manual

Daewoo
Daewoo KOC-1C0KB User manual

Daewoo
Daewoo KOC-25X-1 User manual

Daewoo
Daewoo KOR-860A User manual

Daewoo
Daewoo KOR-1A1G0A User manual

Daewoo
Daewoo KOR-631H User manual