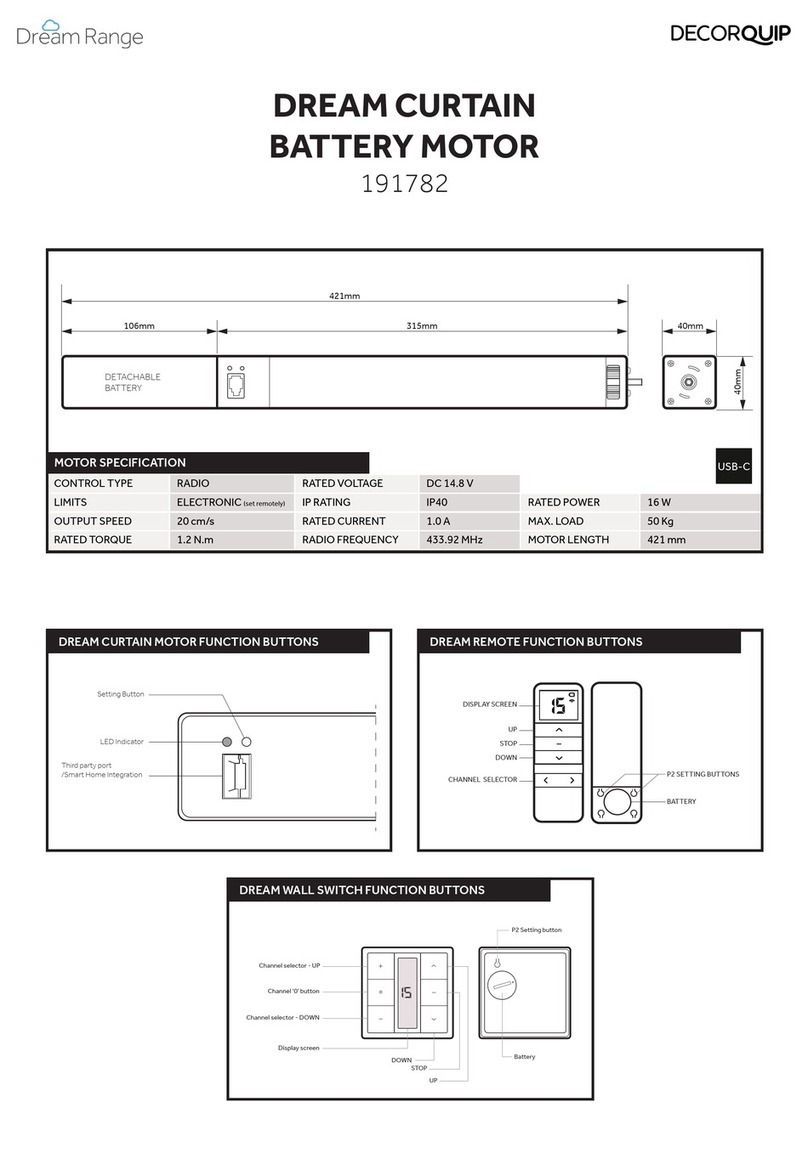
DecorQuip Cura User manual

Cura Roller Blind Motor
Fitting Instructions
This procedure can be completed by non-professionals.
Fitting the blind:
This procedure for fitting can be completed by non-professionals. No modification of the design or the
configuration of the equipment must not be made without consulting with your local distributor.
1. Decide whether you want to fit face fix or top fix.
2. Position the brackets in where you want to fit the blind.
3. If necessary, mark through the brackets with a pencil, and drill and plug holes for the
screws.
4. Fix the brackets with suitable fixings.. [Please note that screws and other fixings are not
provided.]
5. Take the blind out of all the packaging and insert the pin into the round hole of the idle end bracket.
6. Hook the control end into the slotted bracket making sure that it is firmly clipped into place.
7. Remove the retaining strip of fabric holding the blind.
IMPORTANT SAFETY INSTRUCTIONS
WARNING - FOR PERSONAL SAFETY, IT IS IMPORTANT TO FOLLOW THESE INSTRUCTIONS AT ALL TIMES
SAVE THESE INSTRUCTIONS
Operating Instructions
1. Press the buttons on the remote to operate the blind. *15 Channel Remote Only* Switch channel using the
buttons labelled on the inside page.
2. Do not allow children to play with the remote control of the blind. Keep remote controls away from children.
3. Take appropriate organisational measures for preventing operation of the blind when maintenance, such as
window or wall cleaning, is being carried out in the vicinity.
Maintenance Instructions
1. Replacing/Recharging the Batteries (Cura Motor with Battery Option only)
1.1 Unplug the wire from the motor
1.2 Remove the battery tube from the brackets.
1.3 Unscrew the end of the battery tube and remove and replace the batteries. Ensure that the polarity of
the batteries is correct, and that the end cap of the battery tube is screwed back on tightly.
1.4 Clip the battery tube back into the brackets.
1.5 Please note that if you are using rechargable batteries, you can plug Power Adator code 191662 into
the female part of the wire coming from the battery tube. Leave the Power Adaptor for 6 hours to
recharge the batteries.
2. Caring for your Blind
2.1 Wiping the blind with a soft brush or duster is usually sufficient.
2.2 If necessary, Blinds can be wiped clean with a mild detergent and warm water. Leave in the open
position to dry.
2.3 Do not make alterations to the blind, motor or handset.
2.4 Frequently examine the installation for signs of wear or damage to cables. Do not use if a repair
is necessary.
2.5 For an inspection or maintenance of the electrical parts, the internal blind shall be disconnected from
the energy supply in a safe way.
The sound level emitted by the blind is less than or equal to 70 dB(A).
Up
Switch
Channel
Front Back
Down
Switch
Channel
Stop
P2
Button
(Can be labelled as ‘Setup’)
Up
Front Back
Down
Stop
P2
Button
(Can be labelled as ‘Setup’)
15 Channel / Timer Remote
Single Channel Remote
Up
Switch
Channel
Front Back
Down
Switch
Channel
Stop
Up
Front Back
Down
Stop
P2
Button
Elite 15 Channel / Timer Remote
Elite Single Channel Remote
P2
Button
15 Channel / Timer Wall Switch
Single Channel Wall Switch
Up
Down
Stop
P2
Buttons
(press together)
Down
Up
Switch
Channel
Stop
P2
Button
Switch
Channel

6. Cancelling the Pairing & Limits
6.1 If al l the l imi ts and pai ri ng need to be deleted then press the P2 button, stop and then the P2
button again. The handset will now need to be re-pai red to the Motor.
7. Reversin g the Direction of a Motor
7.1 Press and hold the programming button on the motor until the blind steps. The direction of the
motor should be reversed.
8. Adding an Additional Handset
8.1 Press the P2 button tw ice on the ori ginal handset and then the P2 button on the handset
that is to be added (al low 1 second between pressi ng each button).
8.2 The motor should beep to confirm that the pairing has been successful.
9. Extra Information
9.1 Approximate range of hand-held remotes with obstruction (such as a wall): 35m.
9.2 If you are adding more than one bli nd to a channel , ensure that al l o ther bl inds paired to that channel
have the power turned o ff. Once the other blind has been pai red and had the l imi ts set the other blinds
can be turned back on.
10. Troubleshooting
* Multi -channel remo tes onl y
10. Further Support
10.1 Please contact your local distributor.
Cura Roller Blind Motor
Programming Instructions
1. Pairing the Handset
1.1 *15 Channel Handset Only *Select the channel on the handset that you wish
to pair the blind to. [Please note that you cannot pair blinds to Channel 00.]
1.2 Press and hold the programming button on the motor. Alternatively, if the
motor is not easily accessible and you are using a power adapter, you can turn the
power to the motor off and back on again. The motor should step and beep.
1.3 Press the P2 button (labelled as Setup or P2) on the back of the handset twice then the up button. This
must be done in a smooth rhythm (allow 1 second between pressing each button). The motor should beep
and step to confirm that the pairing is complete.
1.4 Check that the motor is running in the correct direction. (I.e. Press the up button and the blind goes up).
If required, refer to section 7 to change the motor direction.
1.5 All blinds paired to a handset will all automatically work together when you select channel 00.
2. Setting the Limits
2.1 Wake up the handset by pressing any button, apart from up or down.
2.2 Press the P2 button in the back of the handset then the up button and then the P2 button again
(allow 1 second between pressing each button). The motor should beep and step.
2.3 Make the blind go up. When the blind is near the upper limit press the P2 button on the handset and
the blind will step up slowly. Stop the blind in the desired upper limit position. Press stop 5 times, or until the
blind steps. The motor should beep every time you press stop.
2.4 Make the blind go down. When the blind is near the lower limit press the P2 button on the
handset and the blind will step down slowly. Stop the blind in the desired lower limit position. Press stop 5
times, or until the blind steps. The motor should beep every time you press stop.
2.5 The limits have now been set. Test this by pushing the up and down buttons to make sure that the
blind stops in the correct positions. [Please note that you must set both top and bottom limits before
testing the limits.]
3. Adjusting the Limits
3.1 To adjust the limits repeat the process for setting the limits.
4. Cancelling the Limits
4.1 To cancel the limits press the P2 button, down and then the P2 button again (allow 1 second
between pressing each button). You will now need to reset all the limits.
Issue Possible Cause Solution
The blind is not responding
to the remote
The blind has no power
The blind is not paired to the remote
The battery in the remote is flat
The incorrect channel is selected*
Check the power / batteries
Follow steps 1 & 2
Replace the battery
Select the correct channel
The blind is stopping in the
incorrect position
The limits are set incorrectly Reset the limits shown in stage 2
You press up but the blind
goes down
The motor is running in the wrong
direction
Change the direction of the motor
(see section 6)
The blind is not pairing The remote has channel 00 selected Choose a different channel
Programming
Button
Cura Motor
Other DecorQuip Engine manuals
Popular Engine manuals by other brands
Siemens
Siemens 1PH728 operating instructions
Yanmar
Yanmar 2YM15 Operation manual

FAW Jiefang Automotive
FAW Jiefang Automotive 485 Operation & maintenance guide
Volvo Penta
Volvo Penta D1-20 Operator's manual
Econex
Econex AR2 SE Series Installation and operating instructions
FeiaoModel
FeiaoModel DLA Series user manual
