DENAFRIPS AVATAR User manual

© DENAFRIPS CO. LTD. & VINSHINE AUDIO PTE. LTD. (SINGAPORE)
ALL RIGHTS RESERVED
V1.
0
19th Aug 2020
AVA
TAR CD TRANS
PORT
OWNER’S MANUAL

© DENAFRIPS CO. LTD. & VINSHINE AUDIO PTE. LTD. (SINGAPORE)
ALL RIGHTS RESERVED
Contents
1. INSTALLATION & SAFETY INSTRUCTIONS ........................................................................... 2
2. INTRODUCTION .................................................................................................................. 3
3. OPERATING INSTRUCTION .................................................................................................. 4
3.1 Quick Start Guide ........................................................................................................ 4
3.2 Front Panel .................................................................................................................. 5
3.3 Rear Panel ................................................................................................................... 6
3.4 Remote Control ........................................................................................................... 9
4. SPECIFICATIONS ................................................................................................................ 10
5. WARRANTY ....................................................................................................................... 11

© DENAFRIPS CO. LTD. & VINSHINE AUDIO PTE. LTD. (SINGAPORE)
ALL RIGHTS RESERVED
1. INSTALLATION & SAFETY INSTRUCTIONS
This CDT is designed and built to provide trouble-free performance, but as with all electronic
devices it is necessary to observe a few precautions:
Unpack the CDT carefully.
Position the CDT on a stable, horizontal surface, i.e. sturdy rack.
The CDT supports voltage 100-250VAC worldwide voltage. Please connect the AC
power cord with earth(ground) pin unless it is absolutely required to reduce hum
from the ground loops of the connected devices.
Always ensure that when disconnecting and reconnecting your audio equipment the
mains supply is turned off.
Position the power cord and signal interconnects where they are not likely cause trip
and fall hazard.
Do not use the CDT near water, or place water-filled containers on the CDT. Entry of
liquid into the CDT is hazardous and may cause electric shock and/or fire hazard.
Do not place the unit under direct sunlight or heat source.
Do not remove any covers or try to gain access to the inside. There are no user
adjustments or fuses to change without qualification.
Clean regularly with a damp soft cloth. Do not use any cleaning agents as it might
damage the surface finishing.
The electronics in modern hi-fi equipment is complex and may, therefore, be
adversely affected or damaged by lightning. For protection of the audio system
during electrical storms, disconnect the mains plugs.
AVATAR CDT supports Redbook CD only.

© DENAFRIPS CO. LTD. & VINSHINE AUDIO PTE. LTD. (SINGAPORE)
ALL RIGHTS RESERVED
2. INTRODUCTION
Thank you for purchasing the DENAFRIPS AVATAR CDT.
The AVATAR CDT leveraged our knowledge and technologies in the Digital Domain, we
integrated the famous Philips CDM4/19 laser assembly in the AVATAR along with a dozen of
Ultra Low Noise, Precision Linear Power Regulars along with dual oversized O-Core
Transformers, delivers clean power to the digital circuitry effortlessly.
The digital data retrieved by the CDM4/19 is FIFO buffered and reclocked via the Precision
Crystal Oscillator. This process eliminates the jitter to negligible level, ensuring the digital
output signal are free from the harmful jitter noise.

© DENAFRIPS CO. LTD. & VINSHINE AUDIO PTE. LTD. (SINGAPORE)
ALL RIGHTS RESERVED
3. OPERATING INSTRUCTION
3.1 Quick Start Guide
Package Contents
AVATAR CDT
Disc Clamp
Remote Control
– CR2032 battery is required
Disc Loading
To open the AVATAR top loading door, slide the lid towards the rear of the unit fully. The
CDM4 assembly shall be visible, and the Disc Clamp shall be accessible.
Lift the Disc Clamp gently by holding the centre part of the Disc Clamp. Place a disc to the
centre of the disc holder. Place the Disc Clamp in the centre of the disc and disc holder.
The Disc Clamp is magnetic, once it is in position with the centre of the CDM4 spinner, you
should feel the grip. Please note that the Disc Clamp must be in the correct position for the
CDT to be operational.
Slide the top loading lid towards the front of the unit fully. The micro limit switch must be
triggered for the CDT to be operational.
Change Disc
It is recommended to stop playing the current disc before changing the disc. This allow the
CDM4 mechanism motor to stop spinning gradually. Press Stop button on the front panel to
stop playing the current disc.
Slide the top loading lid towards the rear of the unit fully. Retrieve the Disc Clamp and Disc
gently. Follow the same steps stated in Disc Loading above.
© DENAFRIPS CO. LTD. & VINSHINE AUDIO PTE. LTD. (SINGAPORE)
ALL RIGHTS RESERVED
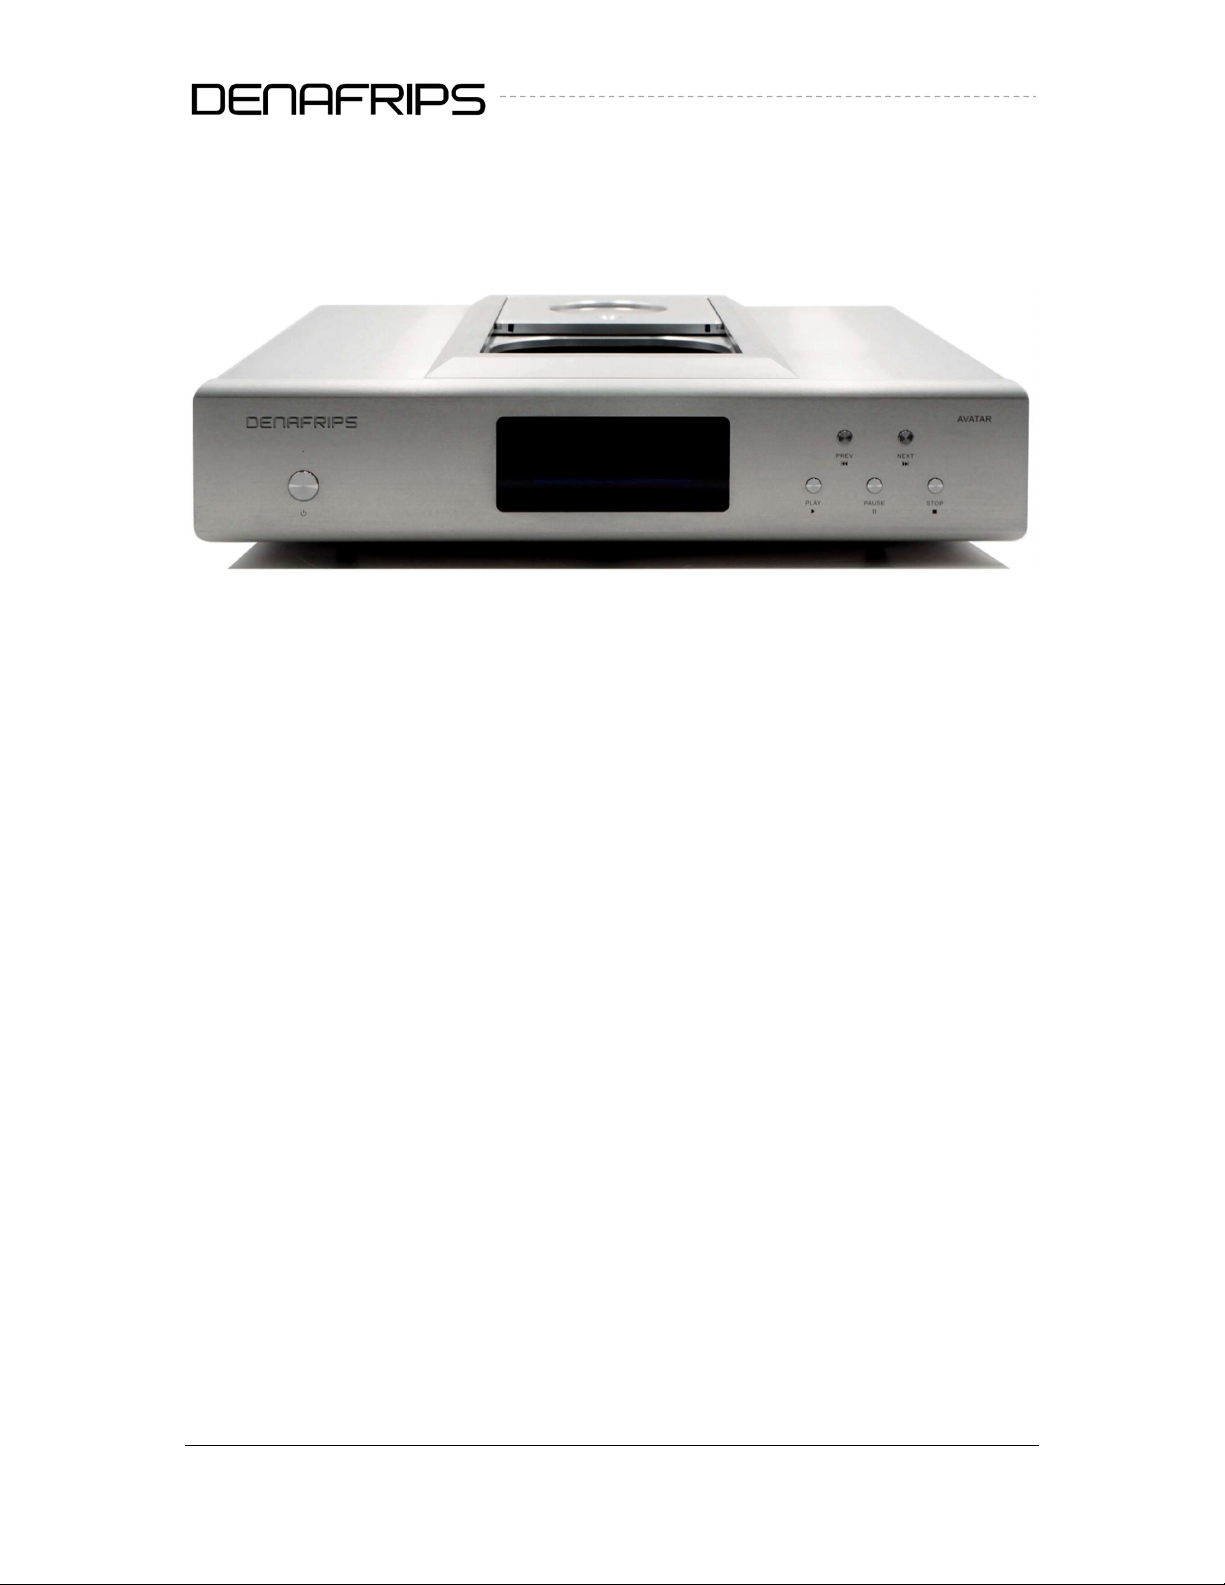
3.2 Front Panel
Figure 1. Front Panel
(1) Standby Button
Press the button once to switch on the CDT, vice versa, press once to put the CDT into
standby mode. The Standby LED shall be on when the CDT is in Standby Mode. The LED shall
be off when the CDT is in Operating Mode.
(2) OLED Display
The OLED displays the disc information.
(3) Control Button (From left to right)
a. PREV/NEXT
Press the buttons select the previous/next trac
b. PLAY
Press the button to start playing the tracks
c. PAUSE
Press the button to pause the playback
d. STOP
Press the button to stop the playback
1
2
3
© DENAFRIPS CO. LTD. & VINSHINE AUDIO PTE. LTD. (SINGAPORE)
ALL RIGHTS RESERVED
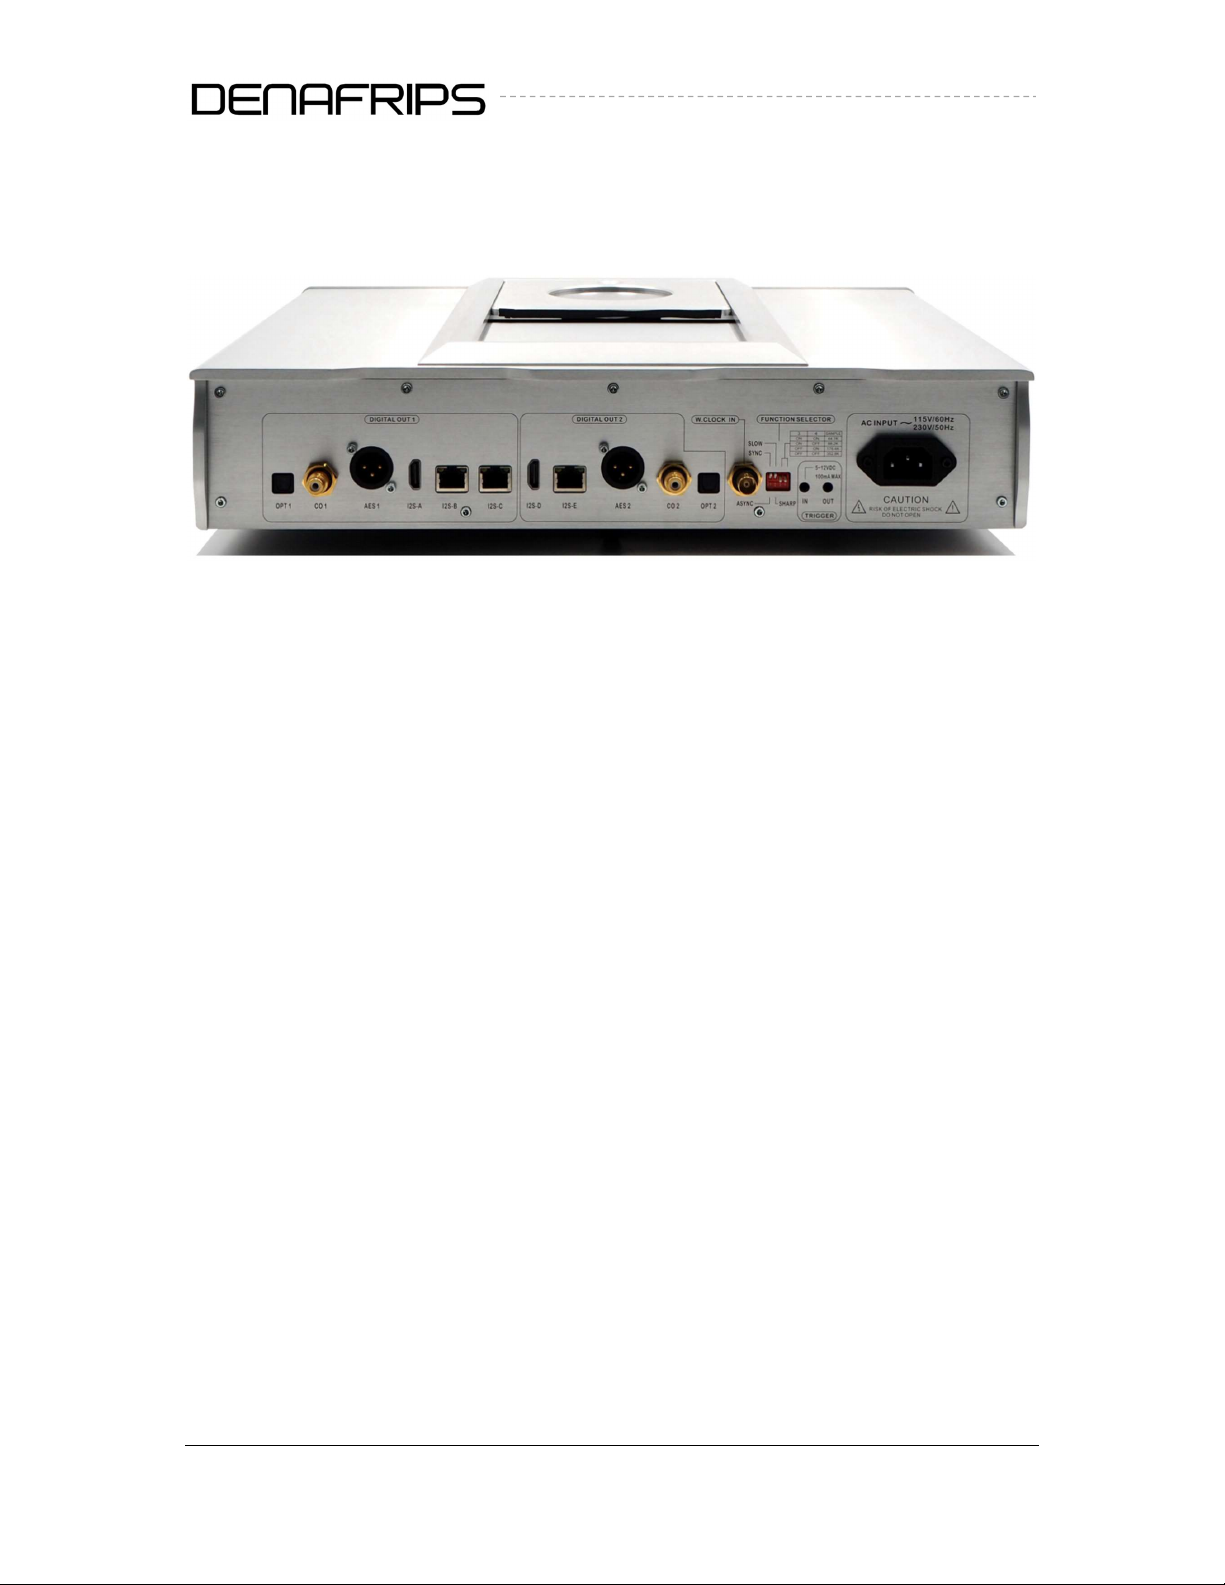
3.3 Rear Panel
Figure 2. Read Panel
Description:
(1) AC Power Supply
CAUTION! AVATAR supports worldwide AC mains, range from 100-250VAC. The Please use a
good quality power cord with earth/ground pin connected
(2) Digital Signal Output #1 (Async)
There are two groups of Digital Output. Digital Output #1 uses the internal Crystal Oscillator
Clocks. Select the dip switch to Async and connect any of the digital output interface of this
group to an external DAC. All output are active simultaneously.
(3) Digital Signal Output #2 (Sync)
Digital Output #2 uses the external Master Clock input (45.1584MHz). Select the dip switch
to Sync and connect any of the digital output interface of this group to an external DAC.
(4) Function Selector
Async – Toggle the SW1 to down position to use the internal clock
Sync – Toggle the SW1 to up position to set the CDT to use the external clock
Filters - Toggle the SW2 to up position for Slow filter, down position for Sharp filter.
Sampling Rate – There are 4 sampling rates to choose from. Both SW3/4 at down
position output native Redbook CD sampling rate at 44.1kHz. SW3(down)/SW4(up)
for 88.2kHz, SW3(up)/SW4(down) for 176.4kHz, SW3(up)/SW4(up) for 352.8kHz,
1
2
3
4
© DENAFRIPS CO. LTD. & VINSHINE AUDIO PTE. LTD. (SINGAPORE)
ALL RIGHTS RESERVED
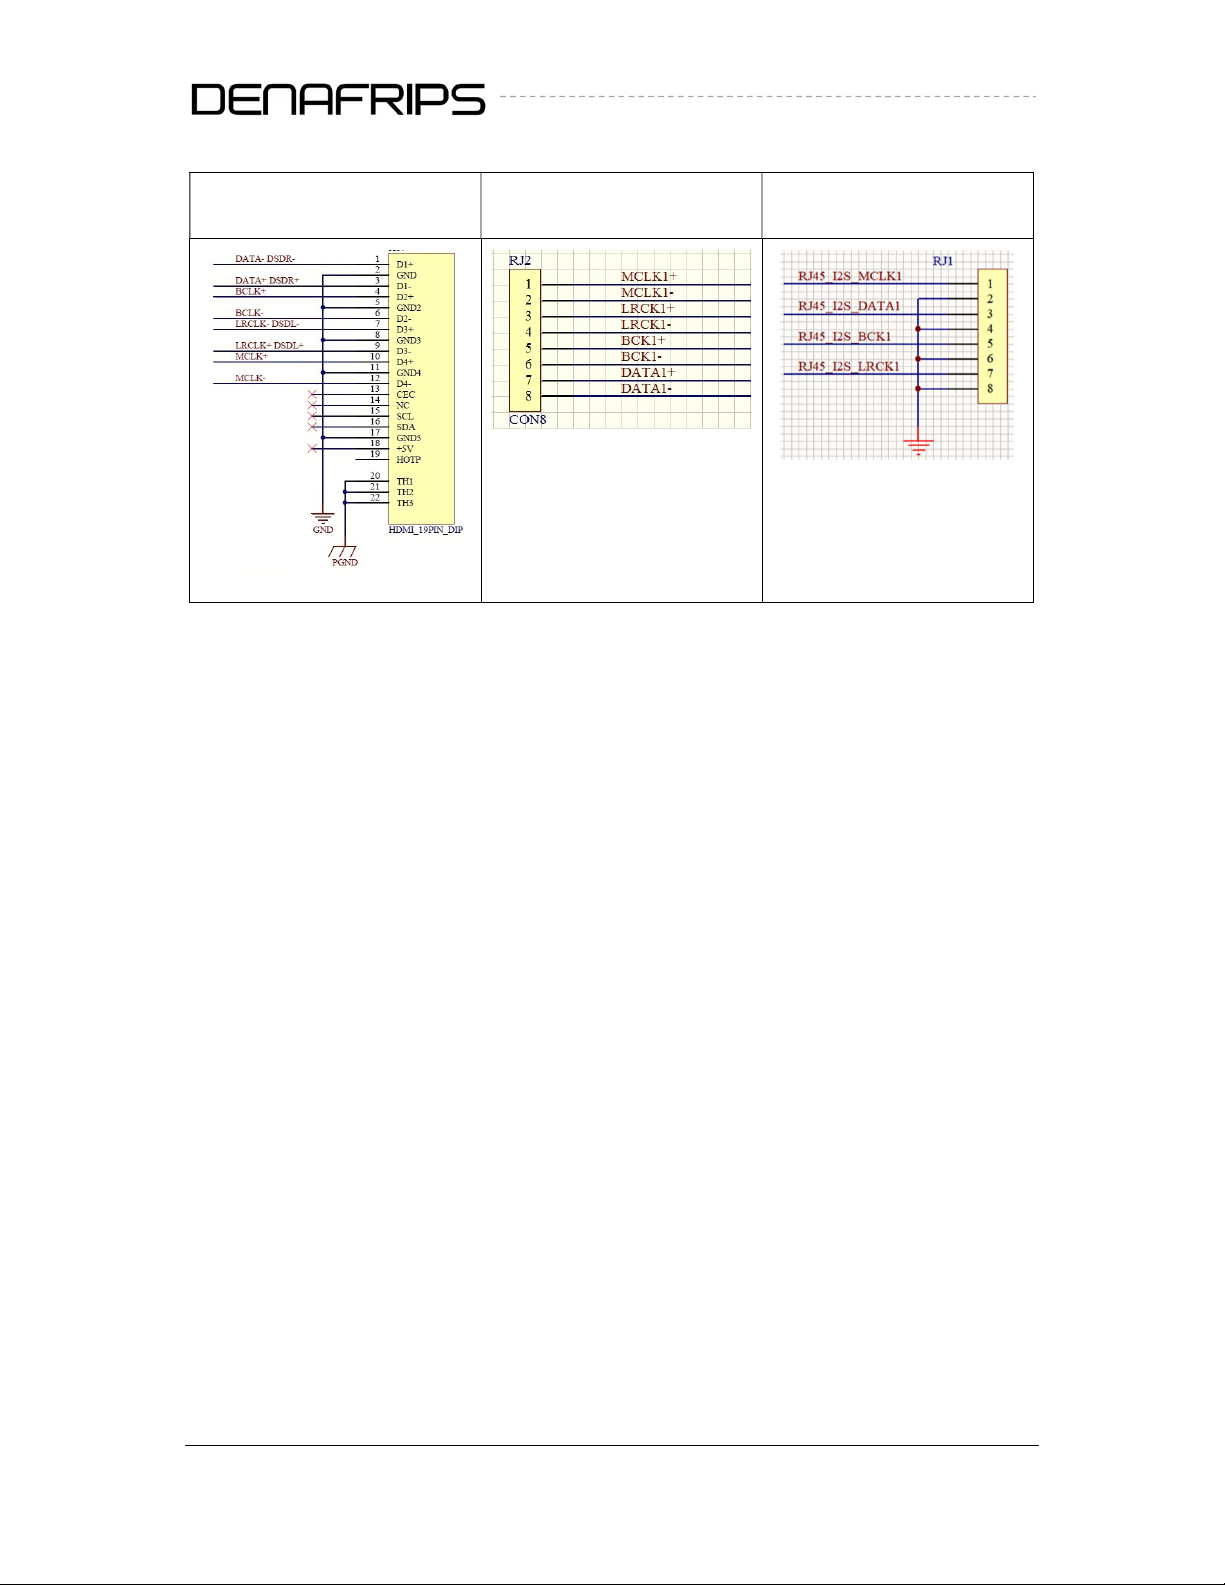
I2S-A/D HDMI (LVDS) I2S-B (LVDS) I2S-C/E RJ45 (LVCMOS)
Table 1. I2S Pinout

© DENAFRIPS CO. LTD. & VINSHINE AUDIO PTE. LTD. (SINGAPORE)
ALL RIGHTS RESERVED
CLOCK SYNC
The AVATAR supports the following clock frequencies input 45.1584MHz or 22.5774Mhz
Use Case Examples:
T
ERMINATOR
-
PLUS
Clock Sync with AVATAR CDT
Table 3. Use case examples of AVATAR CLOCK IN
© DENAFRIPS CO. LTD. & VINSHINE AUDIO PTE. LTD. (SINGAPORE)
ALL RIGHTS RESERVED
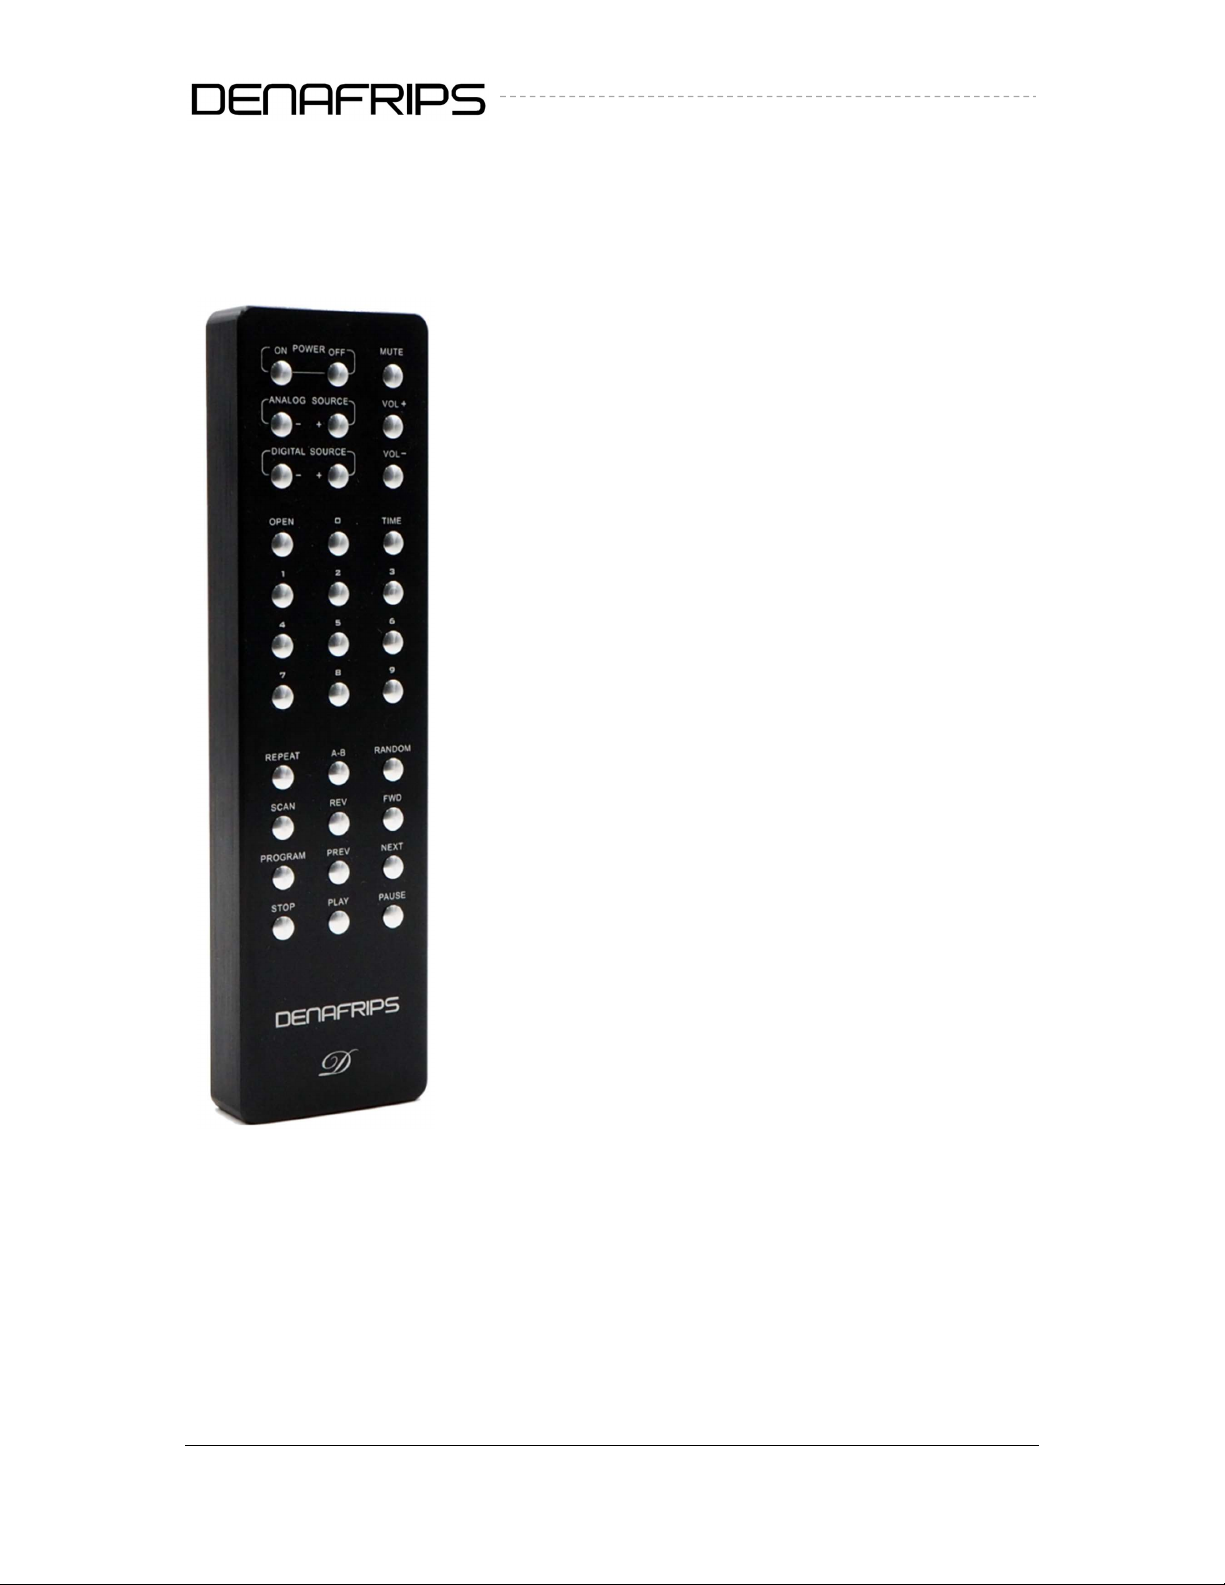
3.4 Remote Control
Power
Vol +-
Analog Source
Digital Source
Open
Time
Track 0-9
Play
Pause
Stop
Next/Prev
Rew/Fwd
Repeat
Random
Program
Scan
Turn on/standby the CDT
No function
No function
No function
No function
No function
Select Track 0-9
Begin CD playback
Pause CD playback
Stop CD playback
Select Next/Prev track
Fast Forward/Backward
Repeat Mode
Random track playback
No function
No function
Table of contents


