Denon DCD-A100 User manual

a:
0
w
~
0
...J
Q.
...
~
:::s
ZC
CI)
u
<C
....
0
nJ
IA "i:
00-"-
nJ
nJ
-
-I
:::s
",t:;
:::s
C c
::J
IA
:)
C
nJ
..
:::s
-
Z«
~
CI)
"i
"'C "'C
a:
UIA
LLJ
..
--
w
...
CI)
nJ
CI)
:::s :::s
0
Q.
Cccc
:)
~
nJ
nJ
en
0
~
~

oSAFETY PRECAUTIONS
A.
RISK OF
~LECTR~C
SHOCK A
~
DO NOTOPEN
~
CAUTION:
TO REDUCETHE RISK OF ELECTRIC SHOCK, DO
NOT
REMOVE
COVER (OR BACK).
NO
USER-SERVICEABLE PARTS INSIDE.
REFER
SERVICING
TO
QUALIFIED SERVICE PERSONNEL.
A
The
lightning flash with arrowhead symbol, within
an
equilateral
triangle,
is
intended to alert the user to the presence of
un
insulated "dangerous voltage" within the product's enclosure
that may
be
of sufficient magnitude to constitute arisk of electric
shock to persons.
A
The
exclamation point within
an
equilateral triangle
is
intended
to alert the user to the presence of important operating
and
maintenance (servicing) instructions
in
the literature
accompanying the appliance.
WARNING:
TO
REDUCE
THE
RISK OF FIRE OR ELECTRIC SHOCK,
DO
NOT
EXPOSETHISAPPLIANCETO RAIN
OR
MOISTURE.
CAUTION:
USE
OF
CONTROLS OR ADJUSTMENTS
OR
PERFORMANCE OF
PROCEDURES OTHER THAN THOSE SPECIFIED HEREIN
MAY
RESULT IN HAZARDOUS RADIATION EXPOSURE.
THIS PRODUCT SHOULD
NOT
BE
ADJUSTED
OR
REPAIRED
BY
ANYONE EXCEPT PROPERLY QUALIFIED SERVICE PERSONNEL.
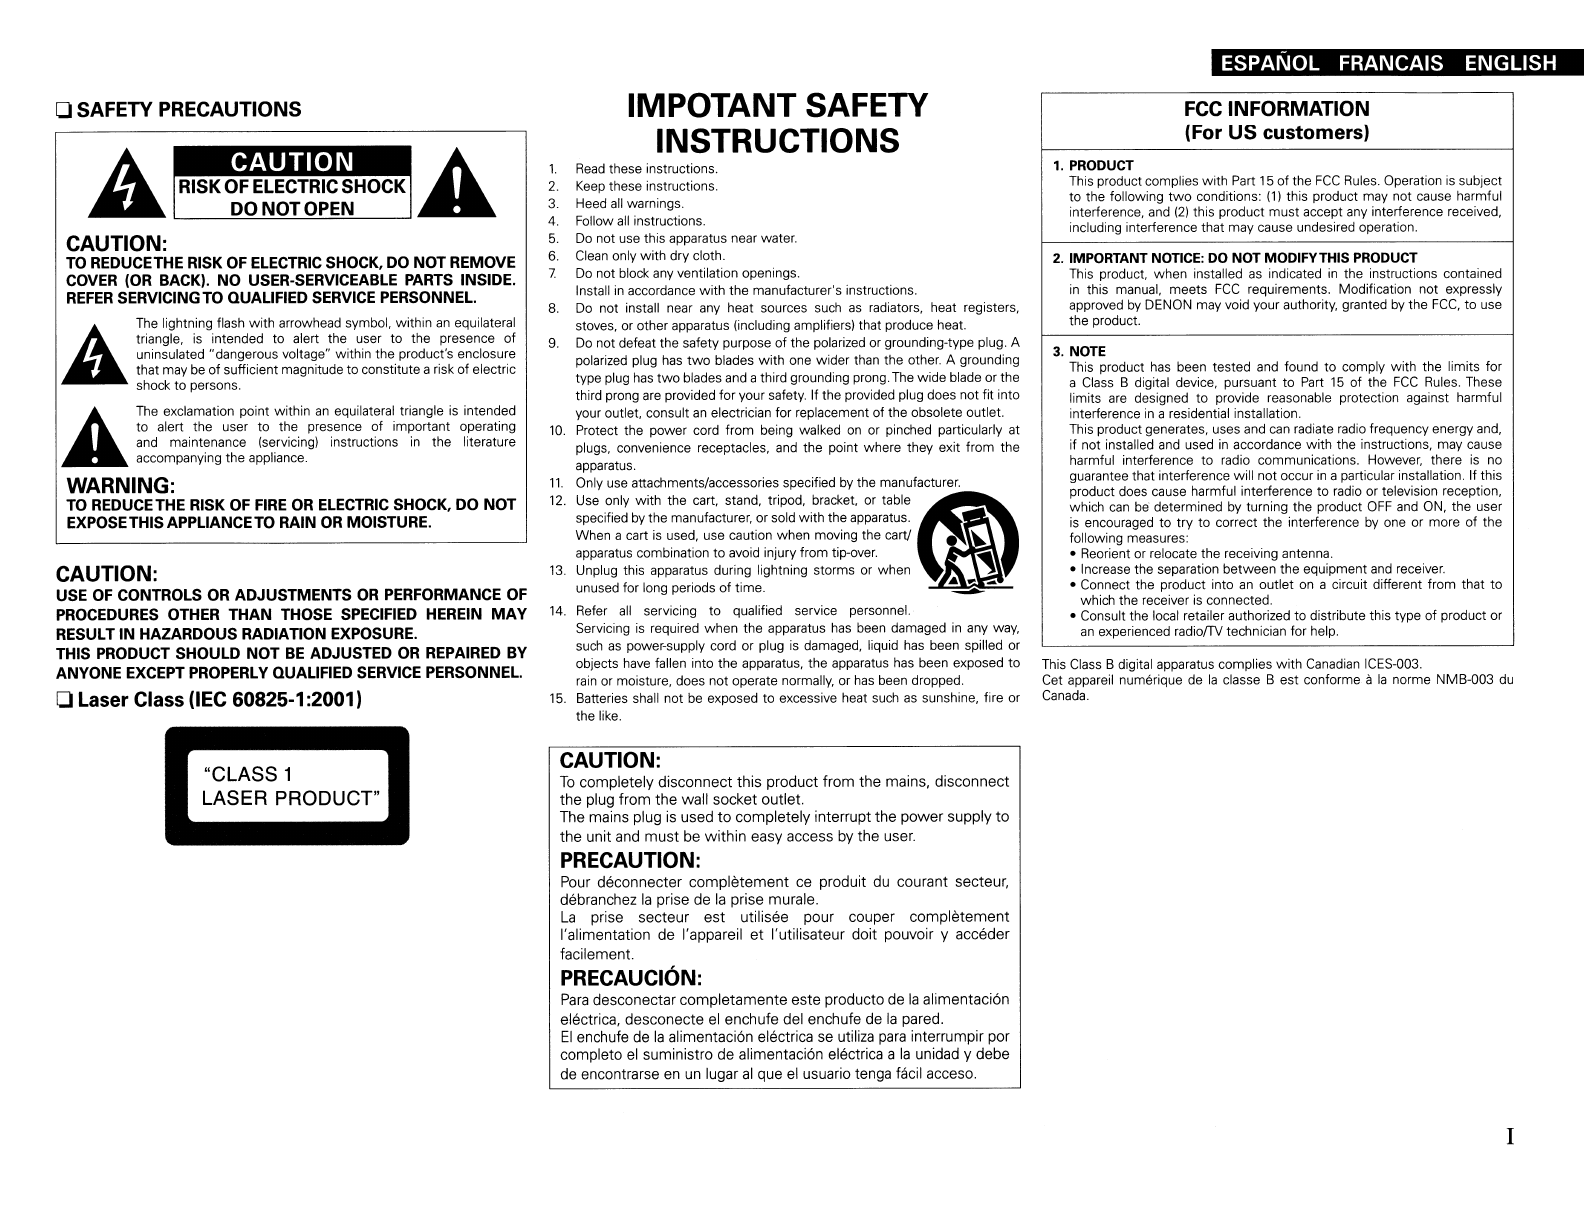
oLaser Class (IEC 60825-1:2001)
IMPOTANT SAFETY
INSTRUCTIONS
1.
Read
these instructions.
2.
Keep
these instructions.
3.
Heed
all
warnings.
4.
Follow
all
instructions.
5.
Do
not use this apparatus near water.
6.
Clean
only with dry cloth.
7
Do
not block
any
ventilation openings.
Install
in
accordance with the manufacturer's instructions.
8.
Do
not install near any heat sources
such
as
radiators, heat registers.
stoves, or other apparatus (including amplifiersl that produce heat.
9.
Do
not defeat the safety purpose of the polarized or grounding-type plug. A
polarized plug
has
two
blades with one wider than the other. Agrounding
type plug
has
two
blades
and
athird grounding prong.
The
wide blade or the
third prong
are
provided for your safety. If the provided plug does not
f~
into
your outlet, consult
an
electrician for replacement of the obsolete outlet.
10.
Protect the power cord from being walked
on
or pinched particularly at
plugs. convenience receptacles,
and
the point where they exit from the
apparatus.
11.
Only
use
attachments/accessories specified
by
the manufacturer.
12.
Use only with the cart, stand, tripod, bracket, or table
(i)
specified
by
the manufacturer, or sold with the apparatus.
t!1
When acart
is
used, use caution when moving the
cart!
~
apparatus combination to avoid injury from tip-over.
..1
13.
Unplug this apparatus during lightning storms or when l
~
unused for long periods
of
time.
~-
14.
Refer
all
servicing to qualified service personnel.
Servicing
is
required when the apparatus
has
been damaged
in
any
way,
such
as
power-supply cord or plug
is
damaged, liquid
has
been spilled or
objects
have
fallen into the apparatus, the apparatus
has
been exposed to
rain
or moisture, does not operate normally, or
has
been dropped.
15.
Batteries shall not
be
exposed to excessive heat
such
as
sunshine, fire or
the like.
CAUTION:
To
completely disconnect this product from the mains, disconnect
the plug from the wall socket outlet.
The
mains plug is used
to
completely interrupt the power supply
to
the unit
and
must be within easy access
by
the user.
PRECAUTION:
Pour
deconnecter completement
ce
produit
du
courant secteur,
debranchez
la
prise de
la
prise murale.
La
prise secteur est utilisee pour couper completement
I'alimentation de I'appareil et I'utilisateur doit pouvoir yacceder
facilement.
PRECAUCI6N:
Para
desconectarcompletamente este producto
de
la
alimentaci6n
electrica, desconecte
el
enchufe del enchufe de
la
pared.
EI
enchufe
de
la
alimentaci6n electrica
se
utiliza
para
interrumpir por
completo
el
suministro
de
alimentaci6n electrica a
la
unidad ydebe
de
encontrarse
en
un
lugar
al
que
el
usuario tenga facil acceso.
ESPANOL FRANCAIS ENGLISH
FCC
INFORMATION
(For
US
customers)
1.
PRODUCT
This product complies with Part 15
of
the
FCC
Rules.
Operation
is
subject
to the following
two
conditions:
(1)
this product may not cause harmful
interference,
and
121
this product must accept any interference received,
including interference that may cause undesired operation.
2.
IMPORTANT
NOTICE:
DO
NOT
MODIFY
THIS
PRODUCT
This product. when installed
as
indicated
in
the instructions contained
in
this manual, meets
FCC
requirements. Modification not expressly
approved
by
DENON may void your authority, granted
by
the
FCC,
to use
the product.
3,
NOTE
This product
has
been tested
and
found to comply with the limits for
a
Class
Bdigital device, pursuant to
Part
15
of the
FCC
Rules. These
limits
are
designed to provide reasonable protection against harmful
interference
in
aresidential installation.
This product generates, uses
and
can
radiate radio frequency energy
and,
if not installed
and
used
in
accordance with the instructions, may cause
harmful interference to radio communications. However, there
is
no
guarantee that interference will not occur
in
aparticular installation. If this
product does cause harmful interference to radio or television reception,
which
can
be
determined
by
turning the product
OFF
and
ON,
the user
is
encouraged to try to correct the interference
by
one or more of the
following measures:
•Reorient or relocate the receiving antenna.
•Increase the separation between the equipment
and
receiver.
•Connect the product into
an
outlet
on
acircuit different from that to
which the receiver is connected.
•Consult the local retailer authorized to distribute this type
of
product or
an
experienced radiofTV technician for help.
This
Class
Bdigital apparatus complies with
Canadian
ICES-003.
Cet
appareil numerique de
la
classe
Best
conforme
11
la
norme NMB-003
du
Canada.
I

ENGLISH
FRANCAIS
ESPANOL
oNOTE
ON
USE IOBSERVATIONS RELATIVES AL'UTILISATION INOTAS SOBRE
EL
USO
WARNINGS
•Avoid high temperatures.
Allow for
suHicient
heat
dispersion when installed
in
a
rack.
•
Handle
the power
cord
carefully.
Hold the plug when unplugging the cord.
•Keep the unit free from moisture, water, and dust.
•Unplug the power cord when not using the unit for
long periods of time.
•
Do
not obstruct the ventilation holes.
•
Do
not let foreign objects into the unit.
•
Do
not let insecticides, benzene,
and
thinner come
in
contact with the unit.
•Never disassemble or modify the unit
in
any way.
•Ventilation should not
be
impeded by covering
the ventilation openings with items, such
as
newspapers, tablecloths or curtains.
•Naked flame sources such
as
lighted candles
should not
be
placed
on
the unit.
•Observe
and
follow local regulations regarding
battery disposal.
•
Do
not expose the unit to dripping or splashing
fluids.
•Do not place objects filled with liquids, such
as
vases,
on
the unit.
•Do not handle the mains cord with
wet
hands.
•When the switch
is
in
the
OFF
position, the
equipment
is
not completely switched off from
MAINS.
•The equipment
shall
be
installed near the power
supply
so
that the power supply is easily accessible.
II
AVERTISSEMENTS
•Eviter des temperatures elevees.
Tenir compte d'une dispersion de chaleur suffisante
lors
de
I'installation sur
une
etagere.
•Manipuler
Ie
cordon d'alimentation avec precaution.
Tenir
la
prise lors
du
debranchement du cordon.
•Proteger I'appareil contre I'humidite, I'eau et
la
poussiere.
•Debrancher
Ie
cordon d'alimentation lorsque
I'appareil n'est
pas
utilise pendant de longues
periodes.
•
Ne
pas
obstruer les trous d'aeration.
•
Ne
pas
laisser des objets etrangers dans
I'
appareil.
•
Ne
pas
mettre
en
contact des insecticides,
du
benzene et
un
diluant avec I'appareil.
•
Ne
jamais demonter ou modifier I'appareil d'une
maniere
ou
d'une autre.
•
Ne
pas
recouvrir les orifi ces de ventilation avec des
objets tels que des journaux, nappes
ou
rideaux.
Cela
entraverait
la
ventilation.
•
Ne
jamais placer
de
flamme nue sur I'appareil,
notamment des bougies allumees.
•Veillez arespecter les lois
en
vigueur lorsque vous
jetez les piles usagees.
•L'appareil
ne
doit
pas
etre expose aI'eau
ou
a
I'humidite.
•
Ne
pas
poser d'objet contenant
du
liquide,
par
exemple
un
vase,
sur I'appareil.
•
Ne
pas
manipuler
Ie
cordon d'alimentation avec les
mains mouillees.
•Lorsque I'interrupteur est sur
la
position
OFF,
I'appareil n'est
pas
completement deconnecte
du
SECTEUR
(MAINS).
•L'appareil
sera
installe pres de
la
source
d'alimentation, de sorte que cette derniere
so
it
facilement accessible.
ADVERTENCIAS
•Evite altas temperaturas.
Permite
la
suficiente dispersi6n del calor cuando
esta instalado
en
la
consola.
•Maneje
el
cord6n de energia con cuidado.
Sostenga
el
enchufe cuando desconecte
el
cord6n
de
energia.
•Mantenga
el
equipo libre de humedad,
agua
ypolvo.
•Desconecte
el
cord6n de energia cuando
no
utilice
el
equipo por mucho tiempo.
•
No
obstruya los orificios de ventilaci6n.
•
No
deje objetos extraiios dentro del equipo.
•
No
permita
el
contacto de insecticidas, gasolina y
diluyentes con
el
equipo.
•Nunca desarme 0modifique
el
equipo
de
ninguna
manera.
•
La
ventilaci6n
no
debe quedarobstruida por haberse
cubierto
las
aperturas con objetos como peri6dicos,
manteles 0cortinas.
•
No
debe
ran
colocarse sobre
el
aparato fuentes
inflamables
sin
protecci6n, como velas encendidas.
• A
la
hora
de deshacerse de
las
pi
las,
respete
la
normativa
para
el
cuidado del medio ambiente.
•
No
exponer
el
aparato
al
goteo 0salpicaduras
cuando
se
utilice.
•
No
colocar sobre
el
aparato objetos lIenos de
IIquido, como jarros.
•
No
maneje
el
cable de alimentaci6n con
las
manos
mojadas.
•Cuando
el
interruptor esta
en
la
posici6n
OFF,
el
equipo no esta completamente desconectado de
la
alimentaci6n MAINS.
•
EI
equipo
se
instalara cerca de
la
fuente de
alimentaci6n de manera que resulte facil acceder
aella.
oCAUTIONS ON INSTALLATION
PRECAUTIONS D'INSTALLATION
EMPLAZAMIENTO
DE
LA
INSTALACI6N
/.
[*
tj
0-
.00.
o
~~~
••
!'-*~
77'7T/.
'+WI77l?lT/?7T/T/7?
*
/I
nwall
Parol
Pared
,;;)y£mmTmrdh0r/T/J
*For proper heat dispersal, do not install this unit
in
aconfined space,
such
as
abookcase or similar enclosure,
•More than
0.1
m
is
recommended.
•Do not place any other equipment
on
this unit.
*Pour permettre la dissipation de chaleur requise, n'installez
pas
cette
unite dans un espace confine tel qu'une bibliotheque
ou
un
endroit
similaire,
•Une distance de plus de
0,1
mest recommandee.
•
Ne
placez aucun materiel sur cet appareil.
*Para
la
dispersion del calor adecuadamente,
no
instale este equipo
en
un
Jugar
confinado tal como una Iibreria 0unidad similar,
•
Se
recomienda dejar mas de
0,1
malrededor.
•No coloque ningun otro equipo sobre
la
unidad.

ENGLISH
oContents
Getting
Started
Main Features' 1
Accessories'" 2
Cautions on Handling·······················
..
·· ..
···
..
············
..
····················· 2
Discs··········································································
..
··,··,···············2
Discs Compatible with the DCD-A100 " " 2
Holding Discs 2
Loading Discs ,
..
,.", "
..
, 3
Cautions
on
Loading Discs " " ·
..
·
..
· ,3
Cautions
on
Handling 3
Cautions
on
Storing Discs " 3
Cleaning Discs
..
· · ·
..
·
..
· ·
..
· · ,
··
3
About the Remote
Control
,
..
·
..
· ·
..
· ·
..
· · ·3
Inserting the Batteries 3
Operating Range of the Remote Control ·
·4
Part Names and Functions ·
..
· · · ·
..
·
·"
4
Front
Panel
· ·
..
·"
..
· · · ·
··,·
4
Rear
Panel·
··
·
,·
·
..
· ·
···
5
Display , ,
',
,'
..
,5
Remote Control· · ·
·,
· , · ,
..
· ·6
Connections
Preparations························
..
···
..
···,,·
..
,,·················
..
···········,,·,·········6
Connecting Cables " , 6
Analog Connections ,
..
" ,
..
"7
Digital Connections ,
",
..
" , 7
USB Port Connections·····
..
, ·
..
,
..
,,·· ···
.. ·,
··,
..
,·
7
USB
Memory device··
..
···
..
· · · · " ·
..
"·
..
··,
..
·
..
,,
..
· 7
iPod · · ,
..
,
..
·"
···
···
···
7
Digital
Input
Connections " " 7
Connecting the Power Cord "
"."
7
Once Connections are Complete · · " ·
·"
,
..
7
Turning the Power
On
7
Playback
Preparations'
..
'
··
, ·
..
, · ·
..
,
..
· · ,", ·
..
, ·
·8
Setting the top priority playback layer for Super Audio
CDs"
8
Before Playing a
USB
or
an
iPod 8
Operations During Playback
..
· ·
..
· · ·
..
· ·
..
·9
Switching the Display's Brightness · · · 9
Switching the Pure Direct Mode " " " 9
CD Playback · ·
..
· · ·
..
· ·
..
·9
Playing
CDs
9
Displaying text (Super Audio
CD
only) " " 9
Playing Repeatedly <Repeat Playback> 9
Playing
in
Random Order <Random Playback> 9
Playing Tracks
in
aSpecific Order <Program playback> ·
..
10
Playback of MP3 and
WMA
Files · ·
..
· · ·
10
Playable MP3 and
WMA
Formats
10
Pla¥i.ng
MP3 and
WMA
Files
11
iPod(J!)
Playback , ,
12
Playing
an
iPod®
13
Disconnecting
an
iPod · ·
"·
..
,,
· · ·
..
·
13
USB Playback · · · ·
..
,
..
· ·
..
· ·
..
·
..
,
..
·,',.
14
Playable
USB
Memory Formats
14
Playing
USB
Memory Device
14
Using
as
aOfAConverter 15
Using the Timer Play Function 15
Troubleshooting
16
Specifications
!I
Index
17
Getting
Started
Thank you for purchasing this DENON product.
To
ensure proper
operation, please
read
this owner's manual carefully before using the
product.
After reading the manual,
be
sure to keep it for future reference.
Main Features
1.
Advanced AL32 Processing and High-precision 32bit OfA
Converter
Equipped with Advanced AL32 Processing, DENON's proprietary
analog waveform reproduction technology.
We
have
enhanced the reproducibility of weak signals
by
expanding
16
bit digital data
to
32
bit.
The player
is
also equipped with ahigh-performance, 32 bit/192
kHz-compatible D/A Converter for analog signal conversion of the
digital data expanded with Advanced AL32 Processing,
2. Playback of MP3 and
WMA
files
A
USB
port
is
mounted
on
the front panel. MP3/WMA files
can
be
played
by
connecting a
USB
Player,
USB
memory device. Connect
your iPod with the
USB
cable that came with it. Music files
in
an
iPod.
USB
Player or
USB
memory device are transmitted
via
digital
signal and
can
be enjoyed at high audio quality using the DCD-
A1
OO's
own audio circuitry. .
3.
Advanced S.V.H. Mechanism &Direct Mechanical Ground
Construction
In
the newly-developed Advanced
S,V.H.
Mechanism, each
individual part, including the aluminum die-cast tray,
is
composed
of different metallic materials, each of which was designed for
its own specific purpose. This produces outstanding vibration-
damping properties, including damping enhancementand diffusion
of the resonance point. due
to
the high mass. The mechanism
is
designed with a
low
center of gravity, reducing vibration from
the inner
area
during disc rotation and its structure
is
also highly
resistant to external vibration.
The player also utilizes Direct Mechanical Ground Construction,
which completely eliminates the impact of internal and external
vibration
by,
for example, locating the power transformer close to
the feet. This prevents the transmission of unwanted vibration
as
well
as
noise.
1
(")
o
:::s
:::s
'"
n
...
o'
:::s
'"
"C
0;
'<
C'
0>
n
""
~
o
"
C'
;0
'"
:::r
o
I!
'"
'"
n
::;;
n'
0>
!:!.
o
:::s
'"
:;-
"-
'"
'"

ENGLISH
[gJO§@
DIGITAL
AUDIO
>0
~
Do
not touch the signal surface.
Holding
Discs
•Discs
in
special shapes (heart-
~
shaped discs. octagonal discs,
etc.) cannot be played.
Do
not
attempt to play them,
as
doing
-~~:-
so
can
damage the unit.
•Some discs
and
some recording formats cannot be played.
•Non-finalized discs cannot
be
played.
f)
Music CDs
Discs marked with the logo at right
can
be played
in
this unit.
•CD-R/CD-RW
'*
What
is
finalization?
Finalization
is
the process that makes recorded
CD-R/CD-RW
discs
playable
on
compatible players.
.~['JI'
I
Stereo
Il!IIIIJI
6C\
~
SUPER
AUDIO
CD
There
are
three types of Super Audio
CDs:
CD
Single layer discs
Single layer Super Audio
CD
with just
an
HD
layer.
~
Dual
layer discs
Super Audio
CD
with adouble
HD
layer, offering extended
playing time
and
high sound quality.
®Hybrid discs
Two-layer Super Audio
CD
with
an
HD
layer
and
a
CD
layer.
The signals
on
the
CD
layer
can
be
played
on
aregular
CD
player.
Types of Super Audio CDs
Single layer disc
Dual
layer disc Hybrid disc
~
-
~
H~HOI'"
~~
Discs
•Moving the unit
Turn off the power
and
unplug the power cord from the power
outlet.
Next. disconnectthe cables connected to other system units before
moving the unit.
•Note that for explanatory purposes the illustrations
in
these
instructions
may
differ from the actual unit.
'*
What
is
the HD layer?
The
HD
layer
is
alayer of high density signals for Super Audio
CDs.
'*
What
is
the CD layer?
The
CD
layer
is
the layer of signals that
can
be
read
on
aregular
CD
player.
..
When "Multi-channel" is selected with the
DISC
LAYER
button, a
downmixed audio
is
output to the
Land
Rchannels.
I
Discs
Compatible with the
DCD"A100
..
"'~··.1
oSuper Audio CDs
Super Audio
CDs
with the following logos indicated below
can
be
played
on
this unit.
Accessories
Cautions on Handling
®
CD
Owner's manual 1
®Service network list.. 1
®Power cord (Cord length: Approx. 6.2
ft
/1.9
m)
1
®Remote control (RC-1138) 1
®
R03/AM
battery 2
®Audio cable (Cord length: Approx. 4.9
ft
/1.5
m)..
..
1
~
d6
•Before turning the power switch on
Check once again that
all
connections
are
correct
and
that there
are
no
problems with the connection cables.
•When leaving home for long periods of time,
be
sure to unplug the
power cord from the power outlet.
•Proper ventilation
If the unit
is
left
in
aroom full of the smoke from cigarettes, etc
..
for
long periods of time, the surface of the optical pickup may get dirty,
preventing it from receiving the signals properly.
•About condensation
If there is amajor difference
in
temperature between the inside
of the unit
and
its surroundings, condensation may form
on
parts
inside the unit. causing the unit to fail to operate properly.
If this happens, let the unit sit for
an
hour or
two
with the power off
and
wait until there is little difference
in
temperature before using
the unit.
•Cautions on using mobile phones
Using amobile phone near this unit may result
in
noise. If that
occurs, move the mobile phone away from the unit when it
is
in
use.
Check that the following parts come with the product.
(")
o
"
"
'"
~
o'
"
~
:!l I
~!
..
I
~
!
II
'"I
~I
o ,
jl
!
(/)
~
!:!.
~1
~
~I
___
~J
2

ENGLISH
5"
Q.
..
x
n
o
::l
::l
..
~
o'
::l
'"
."
iii
<
.,.
'"
'"
~
en
"
..
'"
::;;
r;'
~
o'
::l
'"
~
o
r:::
.,.
..
'"
::r
o
So
:;'
<0
G)
Put the
rear
cover back
on.
CD
Remove the rear cover of the @Set
two
R03/AAA batteries
in
remote control. the battery compartment
in
the
indicated direction.
About the Remote Control
g.yw
•Replace the batteries with new ones if the set does not operate
even when the remote control
is
operated close to the unit.
•The supplied batteries
are
only for verifying operation.
-Insert the batteries
in
the proper direction, following the
"$"
and
"8"
marks
in
the battery compartment.
•
To
prevent damage or leakage of battery fluid:
•
Do
not use anew battery with
an
old one.
•
Do
not
use
two
different types of batteries.
•
Do
not attempt to charge dry batteries.
•
Do
not short-circuit, disassemble. heat or dispose of batteries
in
a
fire.
-If
the battery fluid leaks carefully wipe the fluid off the inside of the
battery compartment and insert new batteries.
-Remove the batteries from the remote control if it will not
be
used
for along time.
-Dispose of batteries
in
accordance with local regulations
on
battery
disposal.
Discs
•
Be
sure to remove discs after using them.
•
Be
sure to store discs
in
their cases to protect them from dust,
scratches. warping, etc.
•
Do
not store discs
in
the following places:
1.
Places
exposed to direct sunlight for long periods of time
2.
Dusty or humid places
3.
Places
exposed to heat from heaters etc.
•
Do
not get fingerprints. oil or dirt
on
discs.
•
Take
special care not to scratch discs when removing them from
their cases.
•
Do
not bend or heat discs.
•
Do
not enlarge the hole
in
the center.
•
Do
not write
on
the labeled (printed) surface with ball-point pens,
pencils. etc
..
or stick new labels
on
discs.
-Water droplets may form on discs if they
are
moved suddenly from
acold place (outdoors for example) to awarm place, but do not try
to dry them off using ahairdryer, etc.
·If
there
are
fingerprints or dirt
on
adisc, wipe them off before using
the disc. Fingerprints
and
dirt
can
impair sound quality and cause
interruptions
in
playback.
•
Use
acommercially available disc cleaning set or asoft cloth to
clean discs.
1
Ca~orijcirrStC>ril1g
D.$tS
.',I~·;i11.,\
. ' I
•
"TRACKO
OmOOs"
is
displayed if adisc that cannot
be
played
is
loaded.
•"NO
DISC"
is
displayed if the disc
is
loaded upside-down or if
no
disc
is
loaded.
•
Place
8
cm
discs
in
the inner tray guide without using
an
adapter.
•
Place
the disc
in
the tray. label side
up.
•Make sure the disc tray is fully open when inserting the disc.
•
Place
the discs flat
12
cm discs
in
the outer tray guide (Figure
1).
8
cm
discs
in
the inner tray guide (Figure
2).
IFi9U~
FigUr~
00"""''1
goid'
I
["
""y
go;d'
g.)
••
Do
not push the disc tray
in
by hand when the power
is
turned off.
Doing
so
could damage the set.
I
eautibns;9
A
Loading
Di~
,,',0'"
I!
:1
•Only load one disc at atime. Loading two
or
more discs
can
damage
the unit or scratch the discs.
•
Do
not use cracked or warped discs or discs that have been repaired
with adhesive. etc.
•
Do
not use discs
on
which the sticky part of cellophane tape or
labels
is
exposed or
on
which there
are
traces of where labels
have
been removed.
Such
discs
can
get caught inside the player
and
damage it.
Gently wipe the disc from the
inside towards the outside.
Do
not wipe
in
acircular
motion.
-N,n.
Do
not
use
record spray, antistatic agents. benzene. thinner or other
solvents.
3

ENGLISH
+
fi
.....
L
...
t~
~J
tD
Stop button
'.1
..
·
..
···
..
···
..
····
..
·····
..
··
..
··
..
···
.. ··
·
..
· · · ·
..
'''(9)
41
Play/Pause button
'~/l11·····
..
·
···
.. ·· ·· ..
·
..
·
··
..
·
(9)
411
Disc tray (3)
eSUPER AUDIO CD indicator
If the unit
is
one of the following states, this indicator lights.
•
The
super audio
CD
is
inserted.
•The layer mode of the super audio
CD
is
set to
"STEREO"
or
"MULTI."
~
Advanced AL32 Processing indicator
If the unit
is
one of the following states. the Advanced AL32
Processing
is
enabled
and
this indicator lights.
•
CD
is
inserted.
•
The
unit
is
in
MP3,
WMA, or external input mode.
•The layer mode of the super audio
CD
is
set to "CD."
1
--
- -
.
--
AOVAI"CW Jf£.J2
'llIOCt'.$SIHC
(Q
mHOEI
e-._
p~1.~;;::;ii"'"
r~un..
•
....
~d~,""~
For
buttons not explained here, see the page indicated
in
parentheses (
).
Part Names and Functions
oPower switch
,_ON/STANDBY
.OFFI
..
·
..
·
..
· · ·
(8)
f)
Power indicator
"(8)
•Power "ON"
..
· ·
..
·
..
· · ·Green
•Standby··
··..
·
··
..
·
..··
·
..
·
Red
•Power "OFF" Off
..
DISC LAYER
button
·
..
·····
·· ..
··
· ·
..
··
· ·
..
(8)
o
PURE
DIRECT
button
..
···
..
···
..
···
.. ·· .. ·· .. ··
·
··
·
..··
·
..·· ..
·
..
(9)
Cit
Remote control sensor
····
..
·
..
·· .. ·· .. ··
· ·
..
· · ·
..
·····
..
(4)
oDisplay· ·
..
·
··..
·
..
··
· ·
.. ··
..
·
..
· · · ·
..
·
..
(5)
•Disc tray open/close button
'~1
·
..
· ·
..
···
..
(3)
oSOURCE
button··
..
····
..
·····
..
· · ·
..
·
..
··..
· · ·
..
·
..
···(8)
oUSB port 'USBI·
··
·
..
·
..
· · · ·
(8)
4@
Reverse·skip/Forward·skip buttons ,
~1
..
· · ·
..
·(9)
Approx.
26.2
ft
/8 m
About the Remote Control
Operate the remote control while pointing it at the remote sensor.
fiWW
The set may function improperly or the remote control may not
operate if the remote control sensor
is
exposed to direct sunlight or
strong artificial light from afluorescent or infrared light.
C"l
o
:::l
:::l
'"
::.
o'
:::l
'"
:;
a.
'"
)(
(/l
"tl
'"
£.:
;;.
~
o'
:::l
'"
"
iii
<
0-
..
n
""
:;i
o
C
0-
..
'"
:::l"
o
S,
s·
ec
4

ENGLISH
(")
o
::l
::l
..
~
o'
::l
'"
~
I 0
15-
If.
1.5
If
ll
2.
n'
0>
...
o'
::l
'"
If
oPlayback signal channel indicator
L : Front left
LFE
:Subwoofer
C : Center SL :Surround left
R : Front right
SR
:Surround right
oTime display indicator
SING
REM:
Lights
up
when displaying the
remaining time
in
single-track
playback.
TOTAL
REM:
Lights up when displaying
the remaining time
in
all-track
playback.
8Random
indicator
Lights up during random playback.
eProgram indicator
Lights up during program playback.
eTrack
number
indicator
Lights up when displaying the track number.
4D
Playback media indicator
~
!
1-t'
I
:scm-:
l
-:.:
TRACK
PROG
RAND
:m"M:"~~G"mf:
:
Yi;;
ell -•••••••••••••••-
:alia.
~f
f·or;
::::: ::::: ::::: ::::: ::::: :::::
:::::
::::: ::::: ::::: ::::: ::::: :::::
ta-'f'
._.l
::::: ::::: ::::: ::::: ::::: :::::
:::::
::::: ::::: ::::: ::::: ::::: :::::
tW~I~~3.l
--
, ! '• -
Part Names and Functions
oPlayback mode indicators
~
:During Playback
II
:During pause
f)
Repeat mode indicators
The
display switches
as
follows each time the
REPEAT
button
on
the remote control unit
is
pressed.
c::
' -
c;.
('·track
repeat) (All-track repeat)
Not displayed
...
---'
(Repeat off)
•Information display
Various information
is
displayed here. depending
on
the operation mode.
ePlayback
format
indicators
.~t.U.
In
FOLDER
mode. the "MP3" or "WMA" indicator
flashes.
[gl
eDIGITAL IN OPTICAL connector······
(7)
oDIGITAL IN COAXIAL connector
(7)
o
AC
inlet
(AC IN)·············································
(7)
oANALOG OUT connectors
(7)
f)
DIGITAL OUT OPTICAL connector
(7)
•DIGITAL OUT COAXIAL connector
(7)
5

ENGLISH
Part Names and Functions
e
e
Audio cable (supplied)
iPod
cable (sold separately)
m::J
~---~~
::>----c:
e
e
e
Coaxial digital cable (sold separately)
Analog connections (stereo)
Optical
digital
connections
[£J]C)
(}[£J]
Optical cable (sold separately)
Connections
e~~e
Preparations
Coaxial
digital
connections
iPod connections
Select the cables according to the equipment being connected.
Connections
for
all compatible audio signal
formats
are described in
this
owner's
manual. Please
select
the
type
of
connections corresponding
to
the
equipment
you are connecting.
-N·nW
•Do not plug
in
the power cord until
all
connections have been completed.
•When making connections, also refer to the owner's manual of the other components.
•
Be
sure to connect the left and right channels properly (left with left. right with right).
•
Do
not bundle power cords together with connection cables.
Doing
so
can
result
in
humming or noise.
Amplifier
operating buttons
CD
player operating buttons
CD
POWER
button·
.. ··
..
·········· "(8)
DISC LAVER
button
..
··
·················
···
(8)
SOURCE
button
"'(8)
Number
buttons
(0 -9, +10) "(9)
Cursor
buttons
(.6.
\7<1
[» ·········
..
·····
..
·······
..
(10)
ENTER
button
····
..
················
..
···
....
··
..
·
..
·······
..
(10)
CLEAR
button
····......
···
..
···
..
··..
···
..
····
....
······
(10)
MODE SELECT button·············
..
····
..
·
..
······
(10)
TITLE/ARTIST
button
··
·············
.. ·· ..
···
..
·····(10)
PLAVSELECT
button
"(9)
RESTORER
button"
···· ·····(12)
TIME
button
·······(9)
REPEAT
button
··
···
..
······
..
····
..
······ ······(9)
Reverse-skip
button
, )
....
····
..
·········
..
········(9)
Play/Pause
button
(~/111········
..
········
..
·
..
········(8)
Forward-skip
,~)
/CALL
button
··
..
·····(9.
10)
Fast-reversing
button
(
...
)....·
..
·······
..
···········(9)
Stop
button
(.)····························
..
············
..
·
..
(9)
Fast-forwarding
button
(~)··
..
····
..
·
..
······
..
···(9)
DIMMER
button·····
/q\
The buttons
can
be used to operate
an
amplifier
supported by the supplied remote control
unit (such
as
the PMA-A
100).
See
the Owner's
Manual of the amplifier for information
on
how
to operate it.
Amplifier
operating buttons
The buttons
can
be used to operate
an
amplifier
supported by the supplied remote control
unit (such
as
the
PM
A-A
100).
See
the Owner's
Manual of the amplifier for information on how
to operate it.
,-,
I
I
:
__
..
_.-
----
_.-
._
_
---.-_
_.-
_.-
.
AMPlIFIRJ=R
DENON
RC·1138
MODE
TITLE!
PLAY
SELECT
ARTIST
SELECT
===
POWER-
I
~
.!f-ER-b-U-RC-'-;,-------i
_._.
__
.
---------------------
..
_---_._.
__
.
CALL
1:11
aD
11:31
===
RESTORER
TIME
REPEAT
===
1
.,
J
@@@
.1'",
~@
@@,
\.
ENTER
~
7~'8/.9
@(Q5@
'"
o
tID
CLEAR
@ @
@I:
:
IIDI
mII~O
o0
.............
~
OIMMERf0"0
oi
0
·...
.
• A •
!
J~rE~~
i-;....-...,
:~~;,~~.
~
(5
i
:0
~
:
. .
:
VOLUME
•••••••
~
.
•
The
supplied remote control
can
operate
DENON
amplifiers.
•When using it. also refer to the operating instructions of the other devices.
•The remote control may not operate some devices.
:;
0-
n>
"
"tI
<iT
<
tT
'"
("l
~
~I
oI
c:
I
tTl
- I
~
~
'
:;;
(j'
~
cl"
::l
'"
6

ENGLISH
C)
..
;:
:i'
'"
fa
'"
~
..
c.
"'tl
iii
<
0-
'"
n
'"
I~
l[
is
I
g.
~
I.g'
,
..
I
2.
I[
(.
~
I"
l~
L
.,,
_
To
household power outlet
(AC
120
V,
60
Hz)
d-J
uu
Fl
Power cord
~
(included)
Once Connections are Complete
Connecting
the
Power Cord
Digital Input Connections
The DCD-A
100
can
be used
as
aD/A converter
(~page
15).
CD player /
Satellite receiver /
MD
recorder etc,
---
AUDIO
---
U'DW
•Insert the plugs securely. Loose connections will result
in
the
generation of noise.
•
Do
not unplug the power cord while the set is operating.
D
USB
o
1------/
USB Port Connections
·To
connect
an
iPod to the DCD-A100, use the
USB
cable supplied
with the iPod.
•Players such
as
the iPod touch, classic
and
nano sold from generation
5
can
be
played. For details, check the Web (www.denon.com).
W«'DW
•
Do
not
use
an
extension cable when connecting a
USB
Memory
device.
• A computer may not
be
connected to
and
operate the DCD-A1
OO's
via
its
USB
port.
•
For
details about
USB
memory devices, see "Playable
USB
Memory
Formats"
(~page
14).
•
d-J
:J
Ath"h'P~
CD recorder /
MD
recorder
~
~:tivecap
---
AUDIO
---
Amplifier
-AUDIO-
Analog Connections
Digital Connections
oWhen connecting the optical digital output connector
with
an
optical transmission cable (sold separately)
Remove the protective cap, match the shapes then insert firmly
all
the way
in
.
•Store the protective cap
in
asafe place
so
as
not to lose it, and
use it when not using the terminal.
7

ENGLISH
The playback media mode setting remains
in
the memory. even when
the power
is
set
to
standby.
1
Turn
the DCD·AlOO power on.
(Press
<ON/STANDBY
/
OFF>.)
2Connect aUSB memory device
or
iPod connection
cable.
oWhen a
USB
memory device or iPod is connected to the
USB
port
on
the
DCD-A
100.
the source media mode automatically
switches
to
"USB" and file playback begins.
oThe priority playback layer cannot be set when adisc
is
in
the player
or "OPEN"
is
shown
on
the display.
oDuring playback of the multi-channel area. the analog output of the
DCD-A100 plays back a2-channel downmix.
oIf the
area
and
layer have not been setfor adisc. the priority playback
order
is
as
follows:
CD
STEREO
®
MULTI
Q)
CD
oThis setti
ng
is
memorized by the DCD-A100 and
is
retained even
if the disc tray
is
opened/closed or the power
is
switched on/off.
Please reconfigure the settings if you wish to change them.
Uln.
Do
not place any foreign objects
in
the disc tray. Doing so could
damage it.
o
Setting
the
power
to
the
standby
mode
Press
[CD
POWER).
oCanceling
the
standby
mode
Press
[CD
POWER]
again
oTurning
the
power
off
Press
<ON/STANDBY
/
OFF>.
-NlnW
o
Be
sure to stop playback before turning the power off.
oMake sure that the disc tray
is
completely shut before turning off
the power.
Preparations
1
Turn
the
DCD-AlOO power on.
(Press
<ON/STANDBY
/
OFF>.)
2Check
that
no disc is loaded.,
'*
If the layer
is
switched while adisc is
in
the player the playback
layer switches for that disc. but the
top
priority playback layer
setting itself does not change.
4
Press
DISC
LAYER
and
switch
to
the
layer you
want
to
set
(SuperAudio CD only).
C
STEREO
~
~
MULTI
~
[Selectable items]
SliREo'
:Plays back the 2-channel
area
of
the Super Audio
CD
(the default setting).
MULTI
:Plays back the multi-channel area of the Super
Audio
CD.
The analog output
of
the DCD-A100
outputs adown-mixed 2-channel signal.
:
Plays
back the
CD
layer
of
the
Super Audio
CD.
3
Press
SOURCE
to
set
the
playback media mode to
"DISC".
..
'*
When adisc
is
loaded after the setting has been made. the
contents recorded
on
the set layer are displayed.
'*
If adiscthatdoes notcontain the layer setfor
top
priority playback
is loaded. the contents recorded
on
another layer are displayed
automatically.
'*
This setting
is
stored
in
the memory and is not cleared even when
the disc holder is opened or closed or the power is turned off.
To
change the setting. repeat the procedure above.
oThe layer that
is
played with priority when the disc
is
loaded
can
be
set.
oUpon purchase. the priority layer is set to the "STEREO".
SOURCE
R:EmI
[TIME]
IIC":'
"'"
~I
[PLAY
SELECT]
~1I1
Iln~
d-
[REPEAT]
11_~al'l
c;::>
e::p
L'~~'~
[DIMMER]
::~j~~'~]
'E)"
0
';6
Playback
@
[CD
POWER]
~W"-c::S::
SOURCE
DISC
LAYER
,···:·····T······;··!
I@
@@!
.1'"
",\,
l
[
NUMBER]
l@ @
~1
)
-----t11"
,\.. .../
iRI
•
(0-9,
+10
!@
~
.~j
,
I,
!@
@jt1
:.
D[NON
<PURE
DIRECT>
~,
~
DISC
LAYER
I
Disc
tray
~1I1.
. ti
;0···01
4>
~
I
JI
©
'nn:
!
~
..
__
....
J:J
:1-"
LI
<ON/STANDBY
/
OFF>
•Synibott.uHd
,to
indicate buttons
In
this
m,ri'ual):!
Button located
on
both the main unit
and the remote control
)0
BUTTON
Button only
on
the main unit
)0
<BUTTON>
Button only
on
the remote control
)0
[BUTTON]
~
I'
::l.
,
CD
I
~
(")
o
::>
::>
CD
E:.
~
o
c:
r:T
iii
'"
::r
o
S-
oj"
to
---j
enl
I
!I
n'
~.
I
-n
_~_J
8

ENGLISH
Cl
'"
::;
S'
<.0
Yl
...
II>
~
III
Co
(")
o
:J
:J
'"
!l
o
:J
'J>
t
l::
cr
iO
'J>
::r
o
~
S'
'"
(f)
'C
'"
"
::;;
c;.
~
I0'
~
I
:>
t
...
~
:Normal playback resumes.
Press
[REPEAT].
Playback
in
the respective repeat mode starts.
c=
<:;..1
-:::J
.0'
.••.
••••
1.track repeat All-trackrepeat
;;
....
.
.
Not
Displayed
(Repeat off)
1
In
thestopmode,press[PLAY$ELECT]until
"RAND"
lights.
*
Each
time
[PLAY
SELECT]
i.s
the display changes
as
follows: .
r.
..""
...•
RA
"r
..
ND~qF'
•.
'.
']
~
0
••.•••
,.
~====:====:
Only 1track is played repeatedly.
ill
:All \racks are played repeatedly.
~
Press
~1I1~"
.~
·.r
..;.
c
&.
The tracks
st~rt
playing:
in'
random
o~der.
:.
.
o
Stopping
Random Playback
While stopped. press [PLAY
SELECT]
twice.
The
"RAND" indicator turns off.
INen.
Direct searching
is
not possible during random playback.
•
The
player
can
display the textual information of Super Audio
CDs
that contain
it
while either stopped or playing.
•
The
album title. artist name
and
track titles
can
be
displayed.
•
The
player
can
display capital
and
small letters. numbers
and
some
symbols.
The album title scrolls Thealbum'sartistname
on
the display
--
scrolls on the display
*The display
sWitcne&.ea·~·h
time tbe;button is pressed.
In.
the stop
mode~
pressrrloT~f!ARTISTJ;
~
.
"*i;V}'i.'
'\:.,i
.'1;;
o
Stopping
Playback
Press
•.
oPausing
Press
~1I1.
The "
..
"indicator lights.
*
To
resume playback. press
~1I1.
oFast-Forwarding and Fast-Reversing (searching)
During playback. press
and
hold
in
[~,
~].
o
Moving
to
the
Beginning
of
Tracks (skipping)
During playback. press
~,
~.
*
The
disc
is
skipped the number of tracks
equal
to the number of
times the button
is
pressed.
*When pressed once
in
the return direction. playback returns to
the beginning of the currently playing track.
oPlaying aSpecific Track
(Remote
Control
Unit
Only)
Press
[NUMBER]
(0
-
9.
+10)
to select the track.
[Example] :
Track
4 : [4]
[Example] :Track
12
:
[+10].
[2]
[Example] :Track 20:
[+10].
[+10].
[0]
•
Press
[TIME] to switch to the display of the recorded time while text
information
is
being displayed.
;"
.
..
.
.'
.
,,;
'.%'
2\;
:i',""
.
;:'c
l~back
preparation
(~~ge8
~Set~ing
the
top
dority
playback layeiCor Sup-erAudio CDs").
CD
Playback
r
Bri=h,
--:;
.•
'01~
e
c:.:,
OM'
J
.
"~.
.
o'FF
~
The display's' brigbtness switches
each
time the button
is
pressed.
Operations
During Playback
~i'i·
..
Press
~1I1.
.
...
.F
~'The
"~"
indicator lights
and
playback begins.
In
fhestop
mode,
press
<PURE
DlREtT>.
*'n
Pure
Direct Mode. the
DCD-A
1
og
i§
in"t!1efollo~ifl9
state:
".;~~~.,.Display:OFF
~0"{Digital
output:
OFF
,t,L::':
9

ENGLISH
Writing
software
format
"Windows Media"
and
"Windows" are registered trademarks or
trademarks of Microsoft Corporation
in
the United States
and
other countries.
Playback
of
MP3 and
WMA
Files
There are many music distribution sites
on
the Internet allowing you
to download music files
in
MP3 or
WMA
(Windows Media® Audio)
formats. The music (files) downloaded from such sites
can
be
stored
on
CD-R
or
CD-RW
discs
and
played
on
the
DCD-A
100.
MP3 (MPEG-l Audio Layer-3)
WMA
(Windows Media Audio)
Total number of folders
and
files: 1000
Number of folders:
255
CD-R
and
CD-RW
discs created
in
the format described below
can
be played.
IS09660 level 1
*When written
in
other formats, it may not be possible to play the
disc properly.
Maximum
number
of
playable files and folders
File formats
PROG
I
Indicatorturn
off
~
*
Each
time
[PLAY
SELECT]
is 'pressed, the display changes
as
follows:
LD
3
Press
~/Il.
Playback starts
in
the programmed order.
2Use
(NUMBER]
(0
-9;+!0) to select the
tritckS.
(Example)'
To
program tracks
3,
12,7
to
play
in
that order:
Press [3], [+'0]. [2],
[7].
1
In
the
stop
mode,
presslPLAYSELECTj
....
til'rp~OG"
is Ilgllts.
'.
'
Up
to
20
tracks
can
be
programmed.
CD
Playback
oChecking the order
of
the
programmed tracks
While stopped, press
[CALL].
The
track numbers
are
displayed
in
the programmed order
each
time the button
is
pressed.
oTo clear the last track programmed
While stopped, press
[CLEAR].
The
last track programmed
is
cleared
each
time the button
is
pressed.
oClearing the all programmed track
While stopped, press
[PLAY
SELECT].
•
•If
[REPEAT]
is
pressed during program playback, the tracks
are
played repeatedly
in
the programmed order.
•Programmed playback
is
not possible with MP3tWMA discs.
[NUMBER]~~
[ENTER]
(0-9,
+10)
•
~r~[~
'\7<]1>]
F~~""
•
......
~
..
dIII"""'-
Button located
on
both the main unit
and
the remote control •
BUTTON
Button only
on
the main unit ..
<BUTTON>
Button only
on
the remote control •[BUTTON]
~/Il
mtcrI
00
~
1:
0
:
g
1I I r
@~~.
.@
...
@J~
[MODE
SELECT]
::~
r.'IM
~:I
[PLAY
SELECT]
[TITLE/ARTIST]
-I
W::S'!
~II
[REPEAT]
'-/11
'~~
::l.J
I!
[CALL]
000
6f02
o106
(")
o
~
~
lI>
~
o'
~
'"
:;
Q.
lI>
X
CJ>
"C
lI>
"
~
,r
..
...
o'
~
'"
G'l
lI>
:::
5'
'"
~
..
~
lI>
Q.
~
c
~
ii"
'"
:T
o
~
5'
'"
()[NON
10

ENGLISH
Tag data
103-Tags
(Ver.
1.x
and
2.x)
META-Tags
(Compatible with title. artist
and
album names)
File
format
Sampling
Bit
rate IExtension
frequency
MP3
32.
44.1. 48
kHz
32
-320 kbps .mp3
WMA
32.
44.1. 48
kHz
64
-
160
kbps .wma
•
oOnly music files that are not copyright-protected
can
be played
on
this set.
o
Be
sure to give files the extension ",MP3" or ".WMA". Files with any
other extensions or with
no
extensions cannot be played.
oln accordance with copyright laws. recordings you have made
should only be used for your personal enjoyment
and
may not be
used
in
other ways without permission ofthe copyright holder.
oFolder mode and disc mode settings
Press
[MODE
SELECT]
to switch the range of files to be played.
oFolder mode
The
"WMA" or "MP3" indicator flashes.
The
files
in
the selected folder
are
played.
oDisc mode
The
"WMA" or
"MPT
indicator lights.
All the files
on
the disc are played.
1
',
Load aCD·R
or
CD.RW disc containing music
files in the MPJ
or
WMA
formats into the disc tray
(r:if'page 3).
2Press
[MODE
SELECT]
to select the.folder mode
,or
,disc mode.
*Refer
to
"Folder mode and disc mode settings" (aaf'page
11
).
3Press
"'/11
•
.Playback starts.
oChanging the
folder
to
be
played
Use
[.6..
\7] to select the desired folder. and then press
[ENTER).
oChanging the file
to
be played
Use
[<I.
l>]
to select the desired file.
and
then press
[ENTER].
•
When afolder
is
selected. playback switches to the first track of the
selected folder.
oSwitching the Display
During playback. press
[TITLE/ARTIST].
CFolder name •File name
~
*With the
OCO-A
100. the folder
and
file names
can
be displayed like
titles.
Up
to
11
characters consisting of numbers. letters
and
the
underscore
can
be
displayed. Characters that cannot be displayed
are replaced with asterisks.
*
The
player
can
display the following characters:
~B[8]
I! " #$ % & : ; <>?@ \ [ ] - ' I{} -
/\
.()*+ , - . / =(space) I
Playback of MP3 and
WMA
Files
Listening
to
MP3
or
WMA
files in random order
(Random playback)
1Press[M,DE
SELECT]
to select the disc mode:
*Refer
to
"Folder mode and disc
mode
settings" (r::t"'page
11):
, ,
2
'While stopped, press
[PLAY
SELECT].
The "RANO" indicator lights.
3Press
"'/1-
or
[ENTER].
Tracks are selected and played automatically
in
random order.
oCanceling random playback
While stopped, press
[PLAY
SELECT].
oThe "RANO" indicator turns off.
Listening
to
MP3
or
WMA
files repeatedly
(Repeat folder/disc playback)
1Press
[MODE
SELECl]
t,o
select the folder mode
or
disc mode.
'.,
*Refer to "Folder mode and disc mode settings" (aaf'page
11
).
2Press
[REPEAT]
to select the repeat mode.
Playback'in
the
respective repeat mode starts.
C
c;.1·
•
c;.
I
N6t
di~played
4 '
(Repeat off)
3
Press'~/I
••
,,'
',
..
',
..
,
,.,..
,
Either
thElfrle'~;'ih
the selected folder or
ail
tt)e files on
,the
disc
are played
repea~edly.
oCanceling repeat folder/disc playback
Press
[REPEAT]
until the
"e."
indicator turns off.
11
1'--
I~
i;,
I
:::l
itO
I~
I
::+
!
~
'0-
f-:-
1(")
, 0
I
:::l
,
:::l
,
'"
I "
!
g.
::l
'"
::;i
o
c
C'
iO
Ig
~
II
[

ENGLISH
iPod® Playback
"Made for iPod" means that
an
electronic accessory
has
been
designed to connect specifically to
iPod
and
has
been
certified
by
the developer to meet Apple performance standards.
Apple
is
not responsible for the operation of this device or its
compliance with safety
and
regulatory standards.
iPod
is
a trademark of Apple Inc
..
registered
in
the
U.S.
and
other
countries.
With the
DCD-A
100. you
can
listen to music
on
an
iPod
and
you
can
also operate the
iPod
from the main unit or the remote control.
*
The
iPod
may only
be
used to copy or play contents that
are
not
copyrighted or contents for which copying or playback
is
legally
permitted for your private
use
as
an
individual.
Be
sure to comply
with applicable copyright laws.
,~'tM"RES~funCtIon,
:Does notuse
RESTORER
function
(the defaUlt setting).
~E:
Optimized mode for compressed
'::: , : sources with very weak,highs,
kiJiOiiJ~:
Applies suitable bass
and
treble
bOO$tf%~n
Gompressed,5,0ljrces.
~n!!!'._)
:
O~tim'iz~d
':"~'ode
'~~r'
co~press~d
sources with normal highs,
Playback
of
MP3
and
WMA
Files
Compressed audio formats such
as
MP3. WMA (Windows Media
Audio)
and
MPEG-4
MC
reduce the amount of data
by
eliminating
signal components that
are
hard
for the human
ear
to
hear.
The
RESTORER
function generates the signals eliminated upon
compression. restoring the sound to conditions
near
those of the
original sound before compression. It also corrects the sense of
volume of the
bass
to obtain richer sound with compressed audio
signals.
"The
RESTORER
function
is
effective when playing
back
MP3 files
and
WMA files recorded
on
adisc or
USB
memory device.
and
also
during
iPod
playback, However. it
is
not effective when
"EXT
IN
OPT"
and
"EXT
IN
COAX"
are
selected with the
SOURCE
button.
•This canal
so
be
set
by
pressing
[RESTORER]
during playback.
C
OFF
--
MODEl
--
MODE2
(RESTORER
64)
(RESTORER
96)
MODE3
(RESTORER
HOl
This function restores compressed audio signals to how they were
before compression
and
corrects the sense of volume of the
bass
and
treble to obtain aricher sound,
Playback with
the
RESTORER function
,P~~s[R~STO"ERho
sel~t
t"e~STORER
mode.
·[Selectable items]
*1£1-.
..
--...,;., ._*
•
EEl
SOURCE
[ENTER]
<0
©
g
ilIill:l[j
~1I1
Button located
on
both the main unit
and
the remote control
~
BUnON
Button only
on
the main unit
~
<BUnON>
Button only
on
the remote control
~
[BUnON]
Ii'.
V<ll>lV
I
[TITLE/ARTIST]
I
II~
©I
[PLAY
SELECT]
[MODE
SELECT]
~
llI'l\
.~"
[REPEAT]
[RESTORER]
--U:::o-
~
"....
!
Ir·~~~111
_
..
-P-II
[~,~]
<f
0 [
....
~]
~JO
9I '
""';
~
;:L'
o
~
0
._';;JW'Jij.iii4iif;!'...
·.......,,~
(")
o
"
"
'"
~
o'
"
III
:;
Co
'"
x
en
"0
'"
~
n'
~
0'
"
III
G)
'"
::I
5'
""
~
..
;
Co
~
o
c:
<:T
ii"
III
'"
o
~
:;'
""
DENON
,
,.~,
12

ENGLISH
en
'0
(\)
a:
r;-
~
o'
::J
l/l
:;-
C.
(\)
x
:;t
o
c:
tr
;;-
l/l
::r
o
S
:;'
...
~'
Ie;)
I
~.
.'"
!en
!
a:
I[
In
II.
ill
iPod®
Playback
2Disconnect the iPod cable
from
the
USB
port:.
Switches the shuffle function
Enters
the
selection or plays
the
track
Displays the menu or return
to
the
previous menu
Switches the repeat function
Fast reverses
the
track I
Fast forwards the track
Selects
an
item
Switches between the browse
mode
and
the
remote
mode
Plays the track
*PlaylPause in remote
mode
Plays the track from
the
beginning
IPlays the next track
~II
Select
MENU
......
~
~/il
<l
L::..
'V I
Click
Wheel
REPEAT
ENTER
or
~
......
~
PLAY
SELECT
MODE
SELECT
.....
·~I
.....
·~
(Press
and
hold)
(Press
and
hold)
~.~
Remote control unit and iPod button relations
u'nw
•DENON will accept no responsibility whatsoever
for
any loss
of
iPod data.
•Depending on
the
type
of
iPod and the software version.
some
functions may not operate.
Display
mode IBrowse mode I,Remote mode I
Display location Main unit display
iPo~
display
Playable Audio file 00
files.;
,Video file X0
.Remote
Active
';
control and 0 0
.Main
unit
buttons (DCD-A1001
.
iPod'
"'fl'
':"
X0.
4Press·"/1I.
.Playback starts,
3
'~'
.
Use
[.6.
'\7]
to
select the'item,
then
press
[ENTER]
or
,
,'"
[t>]
to select the music file
to
be
played.
-1
Playback preparation
(r:i'"page
8
"Before
Playing
U:SB
or
an
iPod"). '
2
'Press
[MODE
SELECT]
to
select
the
,displiy mode.
rhe)llOde
switches
each
time
the
button is pressed.
To Switch the Display (Browse mode only)
During playback. press
[TITLE/ARTIST].
The display switches each
time
the
button is pressed.
~.
-
Mol
",m.
l
Album
name
~
oSwitching the Time Display
Press
[TIMEl
Playback
with
the
RESTORER function
See page
12
"Playback
with
the
RESTORER
function"
for
Owner's
Manual.
13

ENGLISH
DevIceS
y§,t
3Press
~J1I.
Playpack starts.
2Press
[MODE
SELECT]
to select the folder mode or
disc mode.,. . .
*Refer
to
"Folder mode and disc mode settings"
(larpage
11
).
oTo Switch the Folder or File During Playback
•Folder
Use [.6., \7] to select the folder, then press
[ENTER).
•File
Use
[<1.
l>] to select the file, then press
[ENTER).
Use
~,
~
to select the file.
*The file numbers
are
set automatically when the
USB
memory
device
is
loaded.
oStopping Playback
Press
•.
oPausing
Press
~JII.
The "
..
"
is
displayed.
*
To
resume playback, press
~JlI.
oFast-Forwarding and Fast-Reversing (searching)
During playback. press
and
hold
in
[
....
~).
'1
Playback preparation ("Before Playing
Jl
USB
or an
iPod"
(Fpage
8).
Tag Data
Pliyabl.~lItiQlorY
~
File Format
Maximum
number of playable files and folders
Files created
in
the following formats
and
stored on a
USB
memory
device
can
be
played.
Maximum number of files
in
afolder: 255
Maximum number of folders: 255
USB Playback
IP.
I
'"f'li
~".,,..
MP31WMA
file
.
.~rr~:~~,"
liff
M
.;.
File
format
Sampling Bit rate Extension
frequency
MP3
32,
44.1, 48
kHz
32
-320 kbps .mp3
WMA
32,
44.1, 48
kHz
54 -
192
kbps .wma
USB-Compatible File Systems
Only music files that
are
not copyright-protected
can
be
played
on
this set.
*Contents downloaded from pay sites on the Internet
are
copyright
protected. Also. files encoded
in
WMA
format when ripped from a
CD.
etc
..
on acomputer may
be
copyright protected. depending
on
the computer's settings.
ID3-Tags
(Ver.l.x
and
2.x)
META-Tags
(Compatible with title, artist
and
album namesl
MP3 (MPEG-l Audio Layer-3)
WMA
(Windows Media Audio)
"FAT15" or "FAT32"
*If the
USB
memory device
is
divided into multiple partitions. only
the top drive
can
be selected.
~
o©
©)
~J11
SOURCE
.~,~
-1-
DENON
@
[CD
POWER]
I
~~s-~l,
SOURCE
II@
:~.,
(6;
II
[ENTER]
[~\7<][>]
'_.,
I
[TITLE/ARTIST]
II!:
't:
I
[PLAY
SELECn
[MODE
SELECT]
!!3
lI'lM
.'lI1,
[REPEAT]
[RESTORER]
!!~
,~,
.~'!
~J11
[TIME]
J
II!~!II
~,
~
!T~[~'~]
L~j09IL.
c00
1J
.~'~ij~",,'n~,~1
Button located
on
both the main unit
and
the remote control •
BUTTON
Button only
on
the main unit •
<BUTTON>
Button only
on
the remote control •
[BUTTON]
("")
o
:l
:l
l1>
::l.
o'
:l
'"
s-
o.
l1>
"
::;l
o
c:
r:r
..
'"
:r
o
~
S'
'"
CIl
"
l1>
a
i'i'
~
o'
:l
'"
~
:::
S'
'"
~
.,
~
l1>
0.
14

ENGLISH
en
."
'"
£;
ii'
~
o'
:>
V>
::;t
o
<::
""
iii'
V>
;;r
o
~
:::i"
to
:;
c.
'"
)(
I;
:i'
to
~
..
;l
I
~
I---
I
~
I
'"
I0
,
=-.
o
:>
V>
o000
@o
E3
EU
--
~~
o0
o
.....
the·owner:s manual·of.
tile
audio timer.
audio timer
for
the
desired
times.
:;,~:;-
~
~<,
- -
¥f/y-f';
-* "
:""0
1
::;':>
DCD-Al00
Using the Timer Play Function
5
C';1'9r1fttie
timer
"ON~.
.'
·.T~~'po~~r
'the
~omP2nents
conn~ctedto,t~e
,i'
1~"
,."
~
__
";
',,'
,",
,.
~~::.
set
tirneis
re~ched,
the power
of
the different
e~tsautomatically
turns
on.
and playback
s~arts.
;*,~:;i;1'S1'-:;;;+C;G1m;S;;!L)i"":+;#
,<::\922
';;:
.....
">;i+,
J~';;-<_;-
->:::;1:<11:;:»'\
';';:',1>«',:<
<:
;;:/~I-LH«<0A+;-:J:;C
·~I·:~~i.ltbepo:er
of
the~!lectecl
~:m~~~~~
•..
;;
~".;.>;--
',,',:
i:
-.
" .
,.
--- -
-~;
_ - .
._
..
""
-
,-",'.;"'"
:;-,
2~c~i'!tF~.thea~el.l~~r'!l
~DCti~lI.tQ
illPlltfrO~i
the
i.'
ii,(:Q~ectedmam
UIIlt.
.'
..
..
,Pi~4)J
di~
QrCOII~e<;tc'.J1S~
.me~~rYderi~'or
9d
if
cM
k'"
....
. .
DISC
EXT
IN
Orr
----
,
*
"EXT1N
00
K"
is displayedaccording to the samplingfrequency
"
of
th~ext~rnal
input.
.,..
"
.,
.
'.
*If
the'
sampling' frequency
cannot
flashes.
.':
0:
>;i'
·"
..
:·;;:i.:L·~'41(1:\;'Z,;'
':"~I:::;>:{;;(;;(~;\ir~ff
Press
SOURCE
to
'
seled"E~
.
QP,T".
w~rIR_
•Linear
PCM
signals with sampling frequencies of 32kHz,
44.1
kHz,
48kHz,
64kHz,
88.2kHz, 96kHz, 128kHz, 176.4kHz
and
192kHz
can
be input to the DCD-A
100.
Do
not input non-PCM signals, such
as
CD-ROM,
Dolby Digital,
and
DTS.
This causes noise
and
could
damage the speakers.
•If the sampling frequency switches, such
as
from Amodeto Bmode
in
a
CS
broadcast. muting may operate for
1-2
seconds, cutting the
sound.
=
Title name
Artist name
Album name
[
Wh1[IU-
•
DENON
will take
no
responsibility whatsoever for any loss or
damage to data
on
a
USB
memory device when using it connected
to the
DCD-A
100.
•
USB
memory devices will not work
via
a
USB
hub,
•
DENON
does not guarantee that
all
USB
memory devices will
operate or be suppled power. When using a
USB
portable hard disk
that
can
draw power from
an
AC
adapter, we recommend using the
AC
adapter.
USB Playback
oPlaying Repeatedly
Press
[REPEAT].
oPlaying
in
Random Order
While stopped, press
[PLAY
SELECT].
oSwitching
the
Display
During playback, press
[TITLE/ARTIST],
File name
I!
..
#$% & : ; < > ?@ \ [ 1
'I
{} -
1\
' ( ) *+ , - . / =(space) I
oSwitching
the
Time Display
Press
[TIME).
*
The
player
can
display the following characters:
IA-ZI~~
Amplifier
.....
0
0@
CO CO CO
0
@
CO
o
AC
outlet (Wall)
[]
Timer device
15

ENGLISH
7
14
14
~,.R~,.I
•Connect a
USB
memory device
conforming to mass storage
class or MTP standards.
•This
is
notamalfunction. DENON
does not guarantee that
all
USB
memory devices will operate or
receive power.
•Connect the
USB
memory
device directly to the
USB
port.
•Set the format to
FAT16
or
FAT32.
For
details, refer to the
USB
memory device's operating
instructions.
•When divided into multiple
partitions, only files stored
in
the
top partition
can
be played.
•Record the files
in
acompatible
format.
•Files that
are
copyright protected
cannot be played
on
this set.
~
Cause
COuntermeasu
...
'
•
The
USB
memory device is
divided into multiple partitions.
•Files
are
stored
in
anon-
compatible format.
•
You
are
attempting to playa file
that
is
copyright protected.
•
The
USB
memory device is
in
aformat other than
FAT16
or
FAT32.
•The
USB
memory device
is
connected
via
USB
hub.
•
The
set cannot recognize a
USB
I • Check the connection.
memory device.
• A
USB
memory device not
conforming to mass storage
class or MTP standards is
connected.
• A
USB
memory device that
the set cannot recognize
is
connected.
Symptom'
When a
USB
memory device
is
connected.
"NO
DEVICE"
is
displayed.
Files
on
a
USB
memory device
cannot be played.
Sympt~
-
i~#",'"
:~.
Ca_
~j"-~
•.
COuntermeasure'
,
•.
;. -
ii'.
~!ff,,""',
The
iPod
cannot •Cable
is
not properly connected. •Reconnect. 7
be played.
[USB)
symptoin
'.
'~,~"'!lii:.
Cal,l"
ifF~
COuntenne
.....
-~
_:i:Il~-
:.""1'
...
The set does •
The
batteries are dead. •Replace the batteries with new 3
not operate ones.
properly when the •The remote control unit
is
too far •Move the remote control unit 4
remote control
is
from the set. closer to the set.
operated.
File
recorded
in
•
You
have selected acopyright- •
Use
the
<l.
[> button
on
the
11
MP30rWMA
protected
WMA
file or afile that remote control unit to select a
formats cannot cannot be played normally. different file.
be
played.
[iPod)
Troubleshooting
If aproblem occurs, first check the following:
1.
Are the connections correct?
2.
Is
the
set being operated
as
described in the owner's manual?
If this unit does not operate properly. check the items listed
in
the table below. If the problem persist
there may
be
amalfunction.
In
this case. disconnect the power immediately
and
contact the retail outlet.
,
Syn1Rt°",
,lc,
iMjl:J
"CillUU'
·'·ii',iiiAit~#i,·Count.~
••
ure
~tau.,
Disc tray does not •The power is not on. •
Turn
on the power. S
open.
"NO DISC"
is
•The disc
is
not properly loaded, •Reload the disc, 3
displayed even
though adisc
is
loaded.
"TRACKO
OmOOs"
•The loaded disc is not a
CD.
•
Load
a
CD,
3
is displayed
even
though adisc
is
loaded.
Playback does not •The disc
is
dirty or scratched. •Wipe the dirt
off
the disc or 3
start even when replace the disc.
the
~/Il
button
is
pressed.
No sound
·The
output cables
are
not •Check the connections. 7
is produced properly connected to the
or sound
is
amplifier.
distorted. •The amplifier's function setting •Check the amplifier's functions -
or adjustments
are
not right.
and
controls and adjust
as
necessary.
Aspecific section •The disc
is
dirty or scratched. •Wipe the dirt
off
the disc or 3
of adisc does not replace the disc.
play properly.
Programmed •The tracks have not been •Program properly.
10
playback
is
not programmed properly.
possible. •Programmed playback
is
not •
Use
a
CD
10
possible with MP3
and
WMA
files.
A
CD-R
or
CD-RW
•The disc
has
not been finalized. •Finalize the disc then play it. 2
disc cannot
be
•The recording conditions and/or •
Use
aproperly recorded disc. 2
played. the quality
of
the disc itself
are
poor.
CIl
'tl
C1l
&
,,'
~
o'
~
f
--i
[ I
~
C)l
~.
I
to
,
CIlI
....
..
~
C1l
Co
C"l
o
:>
:>
C1l
;l
o'
:>
V>
~
I[General)
-<
tT
..
"
,...
16

ENGLISH
~
I~
I..
I
;;
F
, 0
I 5
I
..
1
~
I
o'
Ii
I[
!---
::;l
g
a-
lb
<Jl
::r
o
~
:;'
(Q
Searching g
Single-track repeat g
Single layer disc
..
Skipping··································
..
··········· g
Stopping playback
..
·
..
·
..
·
..
····
..
····
..
·
··
..
·
..
·
···
··g
Stopping playback temporarily g
Super Audio
CD·
·
··
..
·
..
·
·· ..
· ·
..
···
··2
Random playback ·
..
·
..
·
.. ·· ..
········ ·
..
····g
Repeat playback·· ·
..
·
..
·
..
··..
·· ..
······
..
··
··..
·g
Remote control unit ·
..
·
..
··6
RESTORER
.
Playing CDs g
Playing
in
random order ·
..··..··..··..··..
··
·g
Playing repeatedly············································ g
Playing tracks
in
aspecific order · · · ·
..
10
Power cord····
··
··
·
..
···
····
Program
playback"""''''''''''''''''''''''''''''''''''''''''''
10
Pure direct mode·· ·
..
·
..
·
..
··
·····
..
·
..··
..
····g
Index
Fast-forwarding g
Fast-reversing g
File format
11
Finalization ·
..
· ·
..··
..
·
···
·
..
· ·
..
·
..
2
Folder mode
11
Connecting cables
··
·
..
···
..
· ·
..
·
..
·6
CD-R/CD-RW
..
·
..
·
..
·2
CD
layer
..
·
..
· · · ·
..
·· ·· ··
.. ··
··2
Coaxial digital cable
..
·
..
·6
D/A converter··
..
·
..
·
..
·
..
·
..
·
..
···
······
..
· .
Digital connections
..
Digital input connections .
Disc mode
·11
Display·············
..
····························
..
······················5
Display's brightness ·······
..
·
·· ..
·
··
·g
Dual layer disc·....·
··
..
·
..
·
····
..
·
..
·
··
..
·
..
2
Extension
·11
HD
layer·· ·
..
· · · · ·
..
····
..
·
..
2
Hybrid disc
..
[CD]
2channels
2
Hz
-20
kHz
2
Hz
-20
kHz
119 dB
100 dB
0.0017 %
(1
kHz)
Below measurable limits
2.0 V
(10
kOlkohms)
16-bit linear
PCM
44.1
kHz
Compact Disc
0.5 Vp-p /75 O/ohms
-15--21
dBm
660nm
[Super Audio CD]
2channels
2
Hz
-100
kHz
2
Hz
-
50
kHz
(-3
dB)
119 dB (Audible range)
114 dB (Audible range)
0.0008 %
(1
kHz.
Audible range)
Below measurable limits
2.0 V(10 kO/kohms)
l-bit
DSD
2.822 MHz
Super Audio
CD
AC
120
V.
60
Hz
33W
Standby: 0.3 Wor less
173/32
(W)
x 5 25/64
(HI
x
13
15/64
(DI
inchs
(434
(W)
x
137
(HI
x336
(D)
mm)
31
Ibs 15.470z (14.5 kg)
Maximum external dimensions:
Weight:
Specifications
oAudio performance
•Analog output
Channels:
Playable frequency range:
Playable frequency response:
SIN:
Dynamic range:
Harmonic distortion:
Wow
&flutter:
Output level:
Signal type:
Sampling frequency:
Usable discs:
•Digital output
Coaxial:
Optical:
Emission wavelength:
oRemote control unit (RC-1138)
Remote control method: Infrared pulse method
Power supply: R03/AAA Type
(two
batteries)
Maximum external dimensions: 147/64 (W) x
911/64
(H)
x55/64
(D)
inchs (44 (W) x233
(H)
x22 (D)
mm)
Weight: 5.820z (165 g) (including batteries)
'*
For purposes
of
improvement. specifications and design are subject to change
without
notice.
oGeneral
Power supply:
Power consumption:
Moving
to
the beginning of tracks ·
..
· ·
..
·g
MP3· · ·
..
· · · · ·
..
·
11
Music CDs· ·
..
·
..
· ·
..
·
·· ··
..
······
..
·······
17
Other manuals for DCD-A100
3
Table of contents
Other Denon CD Player manuals

Denon
Denon DVM-745 Instruction Manual

Denon
Denon DVM-1845/745 User manual

Denon
Denon DN-D9000 User manual

Denon
Denon DCM-27 User manual

Denon
Denon DVM 1845 User manual

Denon
Denon DVD-1930CI User manual

Denon
Denon DN-C680 User manual

Denon
Denon DVD-1940CI User manual

Denon
Denon DN-2600F User manual

Denon
Denon DN-951FA User manual

Denon
Denon DN-501C User manual

Denon
Denon DCD-810 User manual

Denon
Denon 270 User manual

Denon
Denon DVM-1815 User manual

Denon
Denon DCM-390 User manual

Denon
Denon DCD-900NE User manual

Denon
Denon DCD-F107 User manual

Denon
Denon DND4500 - Dual CD Player User manual

Denon
Denon DCD-1500AE User manual

Denon
Denon DN-D4000 User manual