Desco Europe 19588 Installation and operating instructions
DESCO EUROPE - 2A DUNHAMS LANE, LETCHWORTH, HERTFORDSHIRE, SG6 1BE, UK
TB-3076.E Page 1 of 5 © 2019 DESCO INDUSTRIES INC
Employee Owned
Ion Python Compressed Air Ioniser
Installation, Operation and Maintenance
Description
The Desco Ion Python Compressed Air Ioniser is a
ready-to-use unit designed for use in applications and
areas where static can create manufacturing or handling
problems. These units quickly and effectively neutralise
bulk static charges and aid in controlling contamination
by dislodging dust and debris attracted by static
electricity. Airflow may be easily adjusted from a gentle
stream to a powerful blast. These units are designed
for use in applications and areas where electrostatic
attraction contamination create manufacturing or
handling problems (Ref: IEC TR 61340-5-2, paragraph
5.3.3.4.6.12 Point of Use Ionisation). The Ion Python
meets or exceeds the recommended technical
requirements of IEC 61340-5-1 tested in accordance
with IEC 61340-4-7.
Ionisers are useful in preventing electrostatic charge
generation, electrostatic discharge, electrostatic
attraction, as well as preventing equipment latch-up
and safety related shock. Paragraph 5.3.4.2 Insulators
in IEC 61340-5-1: “If the measured electrostatic field or
surface potential exceeds the stated limits, ionization or
other charge mitigating techniques shall be used.”
Ionisation is used to neutralise charges on process
necessary insulators and isolated semiconductors.
Some examples of process necessary insulators are:
the PC board itself, plastic test stands, plastic housing
where a PCB may be mounted, as well as computer
monitor screens and regular cleaning wipes. Examples
of floating or isolated conductors are: loaded PCB
mounted in a stand where the pins are not contacting
the dissipative workstation. Ionisation is not effective on
items that have large capacitance, like people and carts;
however, ionisers should be considered as a method for
charge neutralisation in cases where grounding cannot
be achieved.
July 2019
Air ionisation can neutralise the static charge on
insulated and isolated objects by producing separate
charges in the molecules of the gases of the
surrounding air. When an electrostatic charge is present
on objects in the work environment, it will be neutralised
by attracting opposite polarity charges from the ionised
air. Note that ionisation systems should not be used
as a primary means of charge control on conductors or
people. (Reference: IEC 61340-5-2:1 paragraph 5.2.9).
The Ion Python is NIST calibrated. It comes equipped
with universal IEC cord connectors.
NOTE: These units are not recommended for
continuous use.
The Ion Python and its accessories are available in the
following item numbers:
Item Description
19588 Ion Python Compressed Air Ioniser
92115 Flexible Arm Attachment
92118 Replacement Hand Gun Attachment
92119 Air Filters, 2-Pack
200220 Power Cord, Europe
200225 Power Cord, UK
Packaging
1 Ion Python Controller
1 Hand Gun Attachment
1 Certificate of Calibration
Made in the
United States of America
TECHNICAL BULLETIN TB-2079.E
Figure 1. Desco 19588 Ion Python Compressed Air
Ioniser
DESCO EUROPE - 2A DUNHAMS LANE, LETCHWORTH, HERTFORDSHIRE, SG6 1BE, UK
TB-3076.E Page 2 of 5 © 2019 DESCO INDUSTRIES INC
Employee Owned
Installation
Air Requirements
Always supply the Ion Python Hand Gun with filtered,
dry noncombustible gases, such as compressed shop
air or nitrogen. (If nitrogen is used, the tip will need to
be replaced and the unit recalibrated. This MUST be
done by the factory. Contact customer service at
+44 (0) 1462 672005). If the air is not dry, damage
to the equipment may result and the warranty will
be voided. Dirty air can introduce moisture and oil,
contaminating the units’ emitter assembly along with
the materials to be cleaned or neutralised. Filters
must therefore be used at all times upstream of the
air nozzle. A water trap-type pre-filter should be used
in conjunction with an oil coalescing-type filter. Also
drain all moisture traps regularly to prevent moisture in
the line. Several drainings per day may be necessary,
especially in areas of high humidity.
The Neutralising Ion Python Hand Gun may be operated
over a range of 30 PSI to 100 PSI. The specific
pressure needed will depend upon the application.
Pressures exceeding 100 PSI are not recommended
since these higher pressures are detrimental to effective
ion production. An air pressure setting of 60 PSI is
recommended. Use the needle valve located on the
back of the controller to properly adjust the air flow.
Air Supply Connection
Turn off air at regulator (or compressor). Insert the
brass male connector (1/4” tubing to 1/8” pipe thread)
into an available port on the regulator. If all ports are
being used, a “T” or “+” may be added to create more
ports. Connect the 1/4” tubing to the male connector on
the needle valve on back side of the unit, following the
instructions given below.
To connect tubing or filter to quick connect fitting:
Cut end of plastic tubing square and clean. Push
against the collar with thumbnail. While holding collar
in, push tubing into the fitting until it bottoms out
completely.
To release tubing or filter from quick connect fitting:
Push against the collar with thumbnail. While holding
collar in, push tubing inward slightly, then pull tubing
out.
IMPORTANT NOTE: User should exercise caution when
using any compressed air device.
Electrical Requirements
The Ion Python and Neutralising Hand Gun must be
connected to a properly grounded receptacle for the
units to operate properly. It is recommended that the AC
outlet be checked for proper wiring and grounding.
Do not under any circumstances remove the ground pin
from the plug of these units.
NOTE: Grounding of these units is necessary not only
to ensure that they operate properly, but to eliminate the
possibility of an electrical shock.
Mounting the Controller
The mounting slots on the bottom of the controller allow
for easy mounting of the base. Install screws either on a
wall or bench. Using the mounting slots, place controller
on the screws for secure mounting of the unit. Mounting
the controller underneath a bench or on a wall saves
valuable bench space. After mounting the unit, a locking
screw is provided on the back of the unit to prevent
accidental removal.
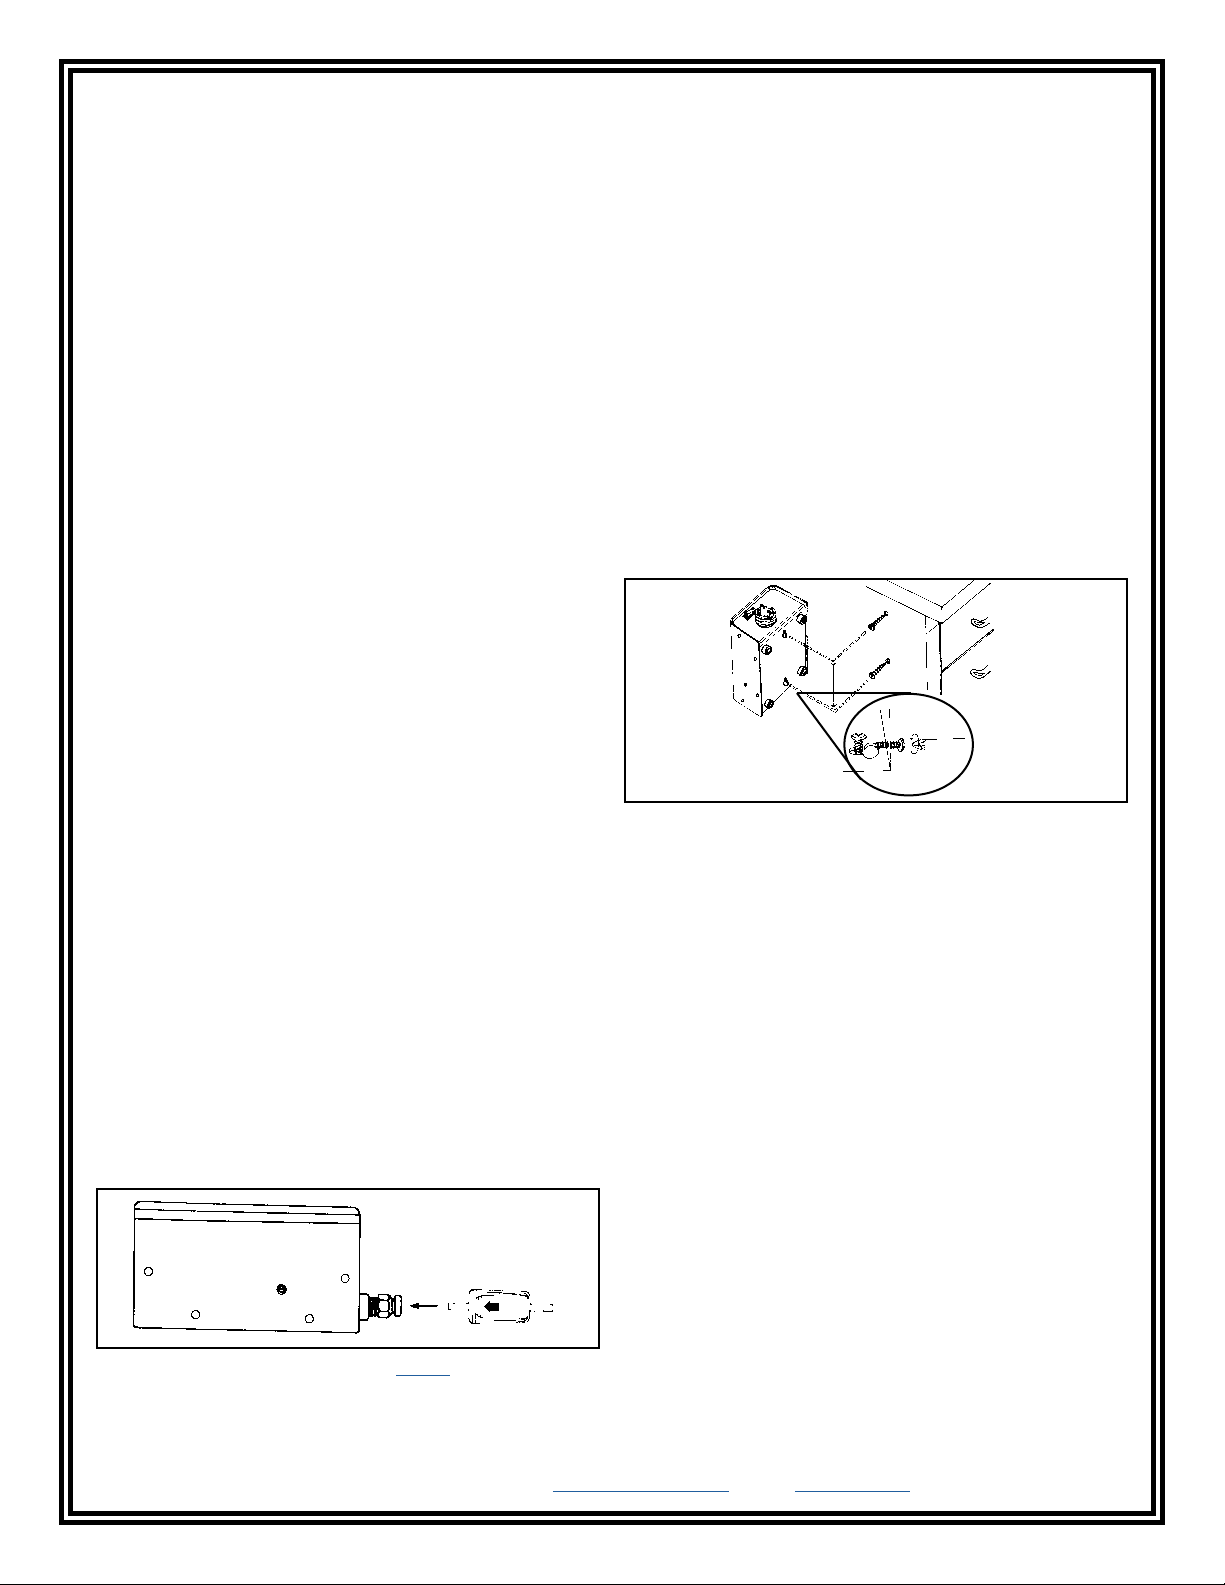
Filter (when used)
Figure 2. Connecting the optional 92119 air lter
Locking screw inside unit
helps secure Python Controller
Figure 3. Mounting the controller to a workbench
Operation
Turn on unit with switch on the front panel. The green
light indicates that the air nozzle is ready for use. Point
nozzle at object to be cleaned or neutralised.
For the Neutralising Hand Gun, push button on the
nozzle body to initiate the flow of air and neutralising
ions. Best results are normally obtained when holding
the nozzle within 2 or 3 feet (61 cm or 91 cm) of the
item being neutralised; hold the nozzle closer when
required.
NOTE: These units are not recommended for
continuous use.
A needle valve is located on the back of the unit for fine
adjustments to the air flow, or for shutting off the air to
the nozzle. Airflow on the unit can be adjusted from a
gentle blow to a strong blast, allowing for use in most
applications. Do not obstruct the air jet with fingers or
other objects. Do not force any object into the air jet
hole; this action can easily damage the emitter pin and
prevent the controller from producing the ionisation
necessary for neutralising static charges.
DESCO EUROPE - 2A DUNHAMS LANE, LETCHWORTH, HERTFORDSHIRE, SG6 1BE, UK
TB-3076.E Page 3 of 5 © 2019 DESCO INDUSTRIES INC
Employee Owned
The ion balance is affected by many factors, such as
distance, air flow, humidity, and emitter contamination.
Therefore, before using this device around components
and assemblies which are highly sensitive to ESD, it is
recommended that the user thoroughly evaluates the
application prior to its use. Avoid sharply bending or
crushing the black convoluted tubing under feet, rolling
chairs or other furniture.
IMPORTANT NOTE: These air nozzles are not
explosion proof. Do not use in environments where
volatile materials are present.
Desco Europe solid-state electronic equipment is
compact and rugged but should be treated as sensitive
electronic equipment. With proper installation and a
continued preventive maintenance programme you will
ensure the proper performance of the unit.
Maintenance
The frequency of monitoring ionisers really depends
on how and where they are used. Since the majority
of them use a fan to transport the ions to the working
area, the cleanliness of the air directly affects their
performance over time and how often the emitters
should be cleaned.
EIA-625 recommends checking ionisers every 6
months, but this may not be suitable for many programs
particularly since an out-of-balance may exist for months
before it is checked again. IEC TR 61340-5-2 paragraph
5.3.3.4.6.16.1 General considerations for mantanence
and cleaning, paragraph 5.3.3.4.6.16.1.1 Introductory
remarks states: "All ionization devices will require
periodic maintenance for proper operation. Maintenance
intervals for ionizers vary widely depending on the type
of ionization equipment and use environment. Critical
clean room use will generally require more frequent
attention. It is important to set up a routine schedule for
ionizer service. Routine service is typically required to
meet quality compliance verification requirements."
Under normal conditions, the ioniser will attract dirt and
dust (especially on the emitter electrodes). To maintain
optimum performance, cleaning must be performed on a
regular basis. The electrodes should be cleaned at least
every six months. However, more frequent cleaning
may be required if used in environments with more
contaminants.
These units need very little maintenance. In order to
maintain the optimum performance of your unit, the
following maintenance procedures must be performed
on a regular basis.
Make sure that the air supply is clean and free of
contamination and moisture. Drain compressor tank
and filters periodically. The filters may require draining
several times daily, depending on your compressed air
system.
The fuse may be replaced by removing the power cord
at the back of the unit and opening the fuse box at the
IEC receptacle. The controller uses a 1 amp fast acting
fuse. For safety, do not use other ratings.
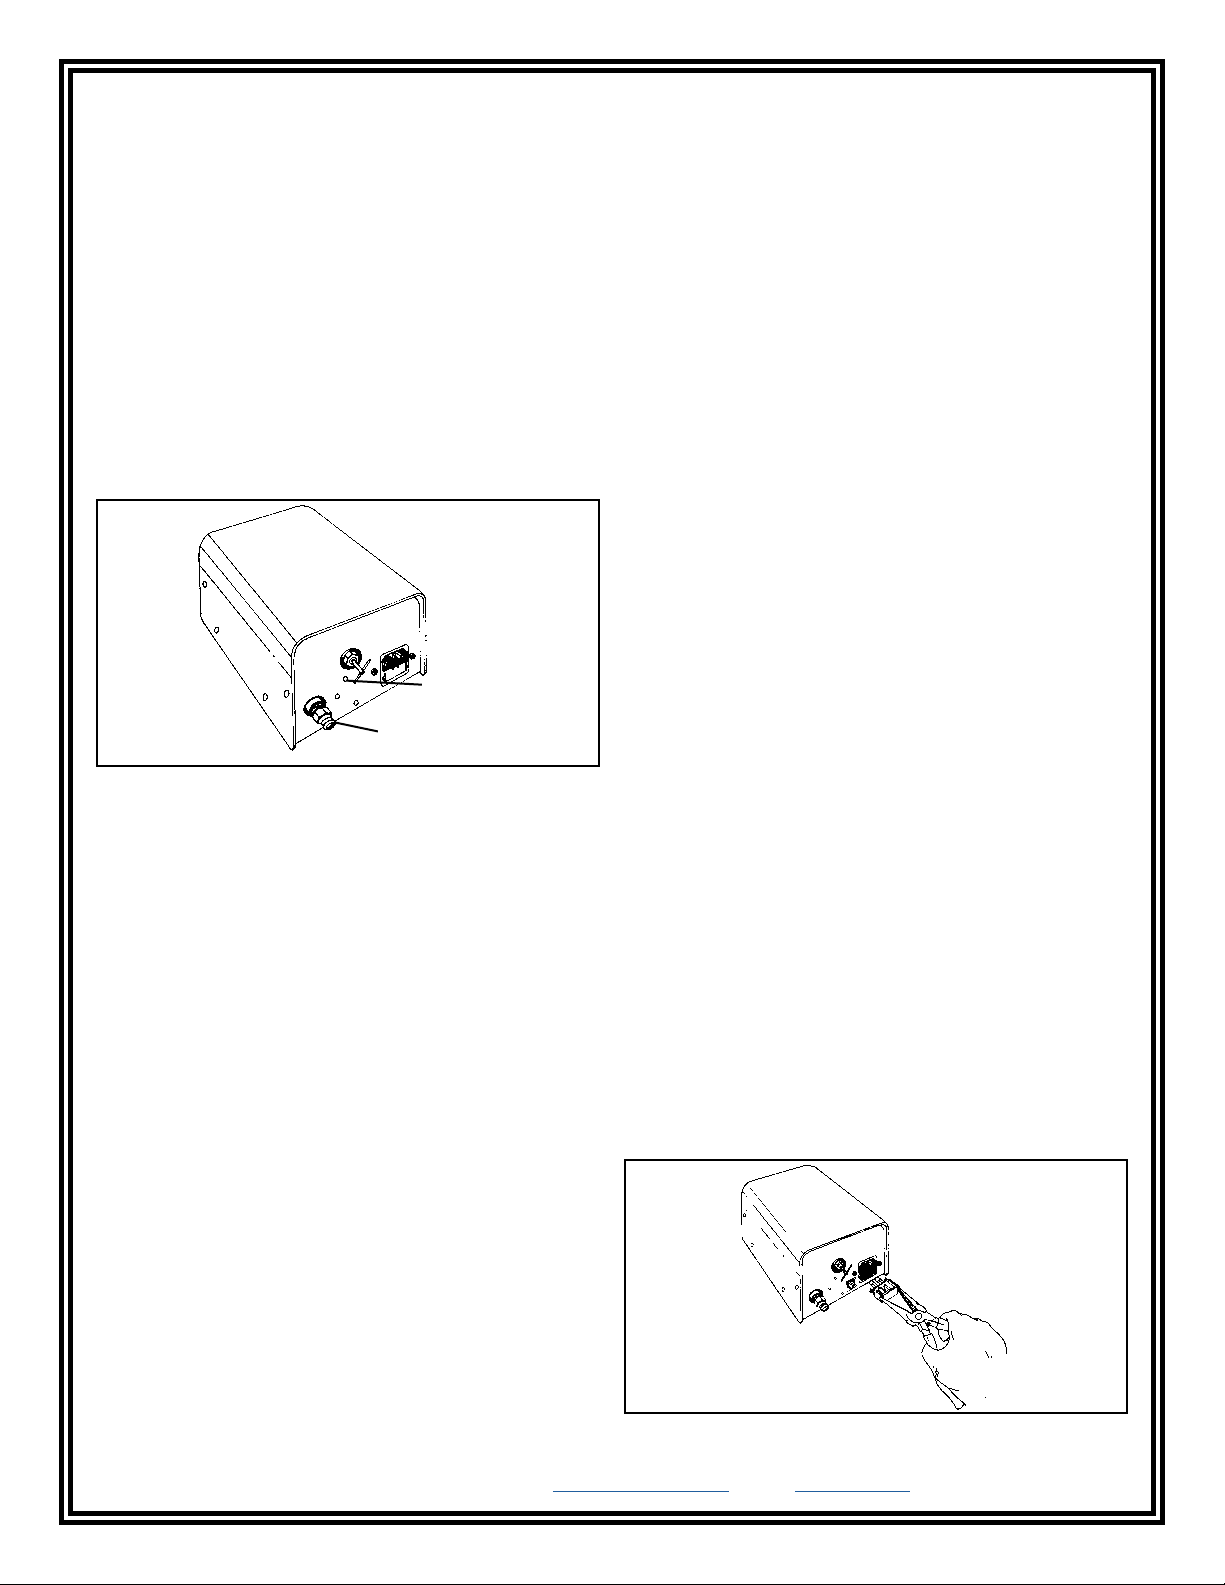
Air supply
conection
Needle
valve
Figure 4. Airow adjustment valve
Figure 5. Replacing the fuse
Theory of Operation
The Ion Python and Neutralising Hand Gun employs
high voltage AC to create a balanced ion field. AC
systems utilise emitters that are switched rapidly
between positive and negative high voltage, usually
at the power line frequency (50/60 Hz). The emitter is
located at the end of the nozzle. This emitter produces
large amounts of positive and negative ions, which
mix with the air supply and create a highly effective
neutralising field. Any material within this field will be
neutralised rapidly. The air nozzles also eliminate
contamination by dislodging dust and debris which
are attracted to a material’s surface by static charges.
Once static charges are neutralised, dust particles and
other forms of contamination are freed and carried
away by the air stream. Desco Europe ionisers meet
the IEC 61340-5-1 minimum recommended technical
requirement range of less than ±35 volts voltage offset
tested in accordance with IEC 61340-4-7. Air Nozzle
Ionisers provide ±20 volt balance.

DESCO EUROPE - 2A DUNHAMS LANE, LETCHWORTH, HERTFORDSHIRE, SG6 1BE, UK
TB-3076.E Page 4 of 5 © 2019 DESCO INDUSTRIES INC
Employee Owned
Do not attempt to perform any repairs or adjustments on
your Desco Europe equipment except for those covered
in the operation manual. Self-made repairs could create
a hazard and will void the warranty.
Replacing the Air Nozzle Assembly
The air nozzle and hose assembly is designed to be
removed or replaced by the user in the event of damage
or wear. To replace the assembly, simply unscrew the
collar at the base of the hose and gently disconnect the
connector from the receptacle.
Neutralisation Efficiency (Decay Time)
The comparative neutralisation efficiency of ionisers
is determined by a standard test published by
IEC 61340-4-7. The decay rates measured using
this standard are shown in the chart below. This
performance was measured with the air nozzle at a
distance of 6" (15 cm) from the charged plate and
utilising an air pressure of 30 psi.
Decay Rate per IEC 61340-4-7
Test Pressure Decay Rate
30 psi 2 seconds
Charge Decay Time Constants
1. Decay times are from ±1,000 volts to ±100 volts.
2. The air nozzle’s air stream is perpendicular to the
charged plate.
Depress
to release
Figure 7. Replacing the air lter
ION
PYTHON
CONTROLLER
Figure 6. Replacing the hand gun attachment
To replace the nozzle assembly simply repeat the
process in reverse.
NOTE: Make sure the fittings inside the connector are
properly aligned with their receptacles before tightening
the threaded collar.
Replacing the Air Filter of the Ion Python
Periodic replacement of the air filter is recommended
for optimum performance of the ioniser. Compress
outer sleeving away from the filter housing. Examine
the filter for any evidence of contamination. The filter
will turn red if there is any oil contamination. If there
has been moisture build-up, there will be a change in
air volume or a brownish colour to the filter. If either of
these conditions exist, you should replace the filter by
unsnapping connectors. Depress air line connectors
allowing removal of filter. The filter replacement is sold
as Desco Europe item 92119. Be sure to observe the
flow direction on filter when installing a replacement.
Nozzle
Charged Plate
Figure 8. IEC 61340-4-7 decay time test setup
Calibration
Test using a version of IEC 61340-4-7. Observe and
record offset voltage (float voltage) in voltage, measure
of discharge time for +1000 volts to +100 volts and
-1000 volts to -100 volts in seconds.
Equipment and tools used
• Charged Plate Monitor (CPM)
• Medium sizes insulative flat head screw driver
Set-up
1. Refer to IEC 61340-4-7. Test should be performed
on static dissipative worksurface. Testing technician
and worksurface needs to be properly grounded.
2. Refer to figure 8 - Test location for compressed gas
- Guns or nozzles on page 13. CPM needs to be 6”
from the center of the CPM plate to worksurface.
Tip of air nozzle needs to be at 6" (15 cm) away
from surface of CPM plate.
DESCO EUROPE - 2A DUNHAMS LANE, LETCHWORTH, HERTFORDSHIRE, SG6 1BE, UK
TB-3076.E Page 5 of 5 © 2019 DESCO INDUSTRIES INC
Employee Owned
Testing
Lab environment should be at 75 °F at ±5 °F (23.9 °C at
±5 °C), relative humidity at 45 % at ±5 % RH. Observe
offset voltage for no less than 10 seconds before
recording.
Specification Recorded
value
Balance 25 V
Discharge time
(+1,000 V to +100 V)
≤ 2 s
Discharge time
(-1,000 V to -100 V)
≤ 2 s
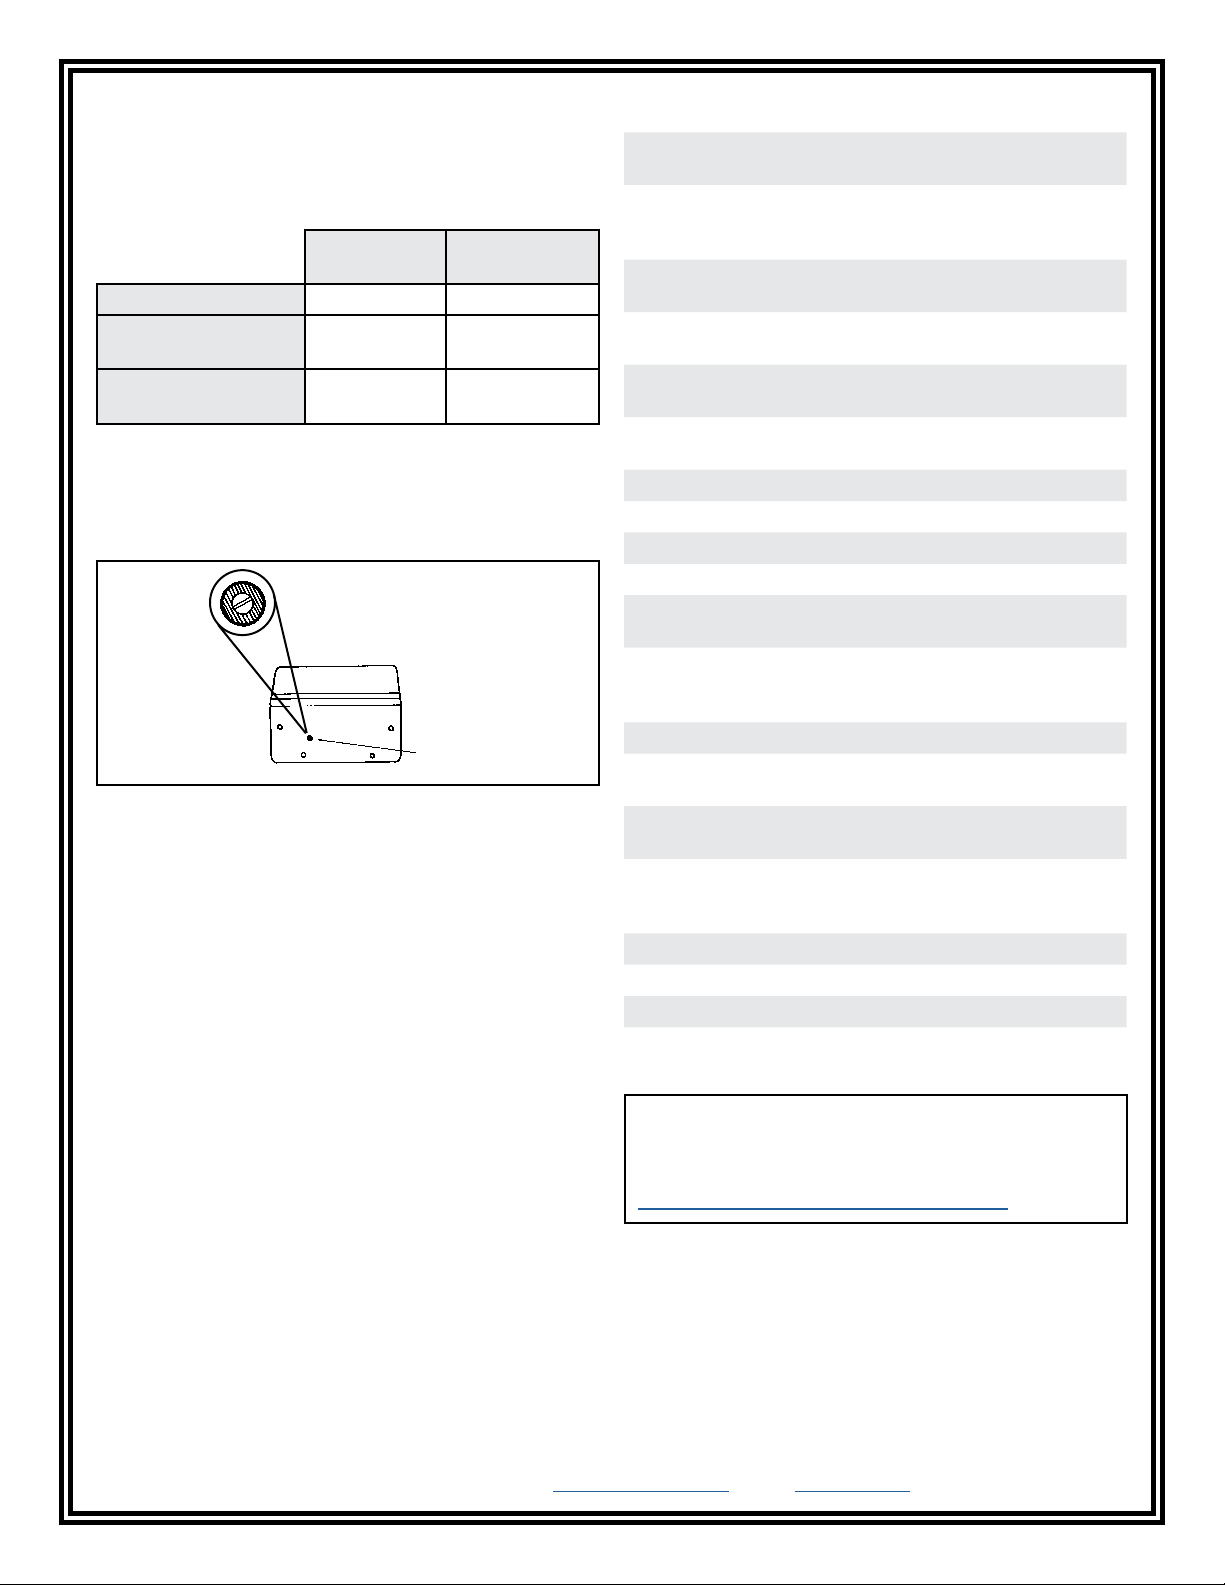
Adjustment
Adjustments to the offset voltage could be made by
using an insulative flat head screw. Balancing pot is
located on the side of controller, where the white plastic
cap is covering it.
Specifications
Input voltage and
frequency
220 VAC, 50/60 Hz
Neutralisation
(discharge) time at
6" (15 cm), 30 psi
< 2 seconds
Balance at 15 cm,
30 psi
±25 V
Power consumption 2.5 W (standby)
25 W (in-use)
Amperage < 50 mA (standby)
< 400 mA (in-use)
Fuse 1 A, 5 x 20 mm, fast-acting
(2 each)
Ion emission AC
Emitter point Stainless steel
Ozone < 0.005 ppm
Air hose ABS plastic, 2 m length
Gas input 30 to 100 psi, Clean Dry Air
(CDA)
Gas connection 1/4" O.D. tubing with 1/8"
NPT with adjustable needle
valve
Gas consumption 3.5 CFM @ 30 psi
Mounting Metal mounting plate attaches
to back of console
Enclosure Powder coated steel and
stainless steel
Dimensions (console) 5.1" x 6.4" x 7.1"
(130 mm x 163 mm x 180
mm)
Weight (console) 11 lbs (5.0 kg)
Certications Intertek, CE
Country of origin United States of America
Adjustment screw
Figure 9. Balance adjustment trimpot
Limited Warranty, Warranty Exclusions, Limit
of Liability and RMA Request Instructions
See the Desco Europe Warranty -
DescoEurope.com/Limited-Warranty.aspx
Table of contents


