Aqueon JukeBox 5 User manual

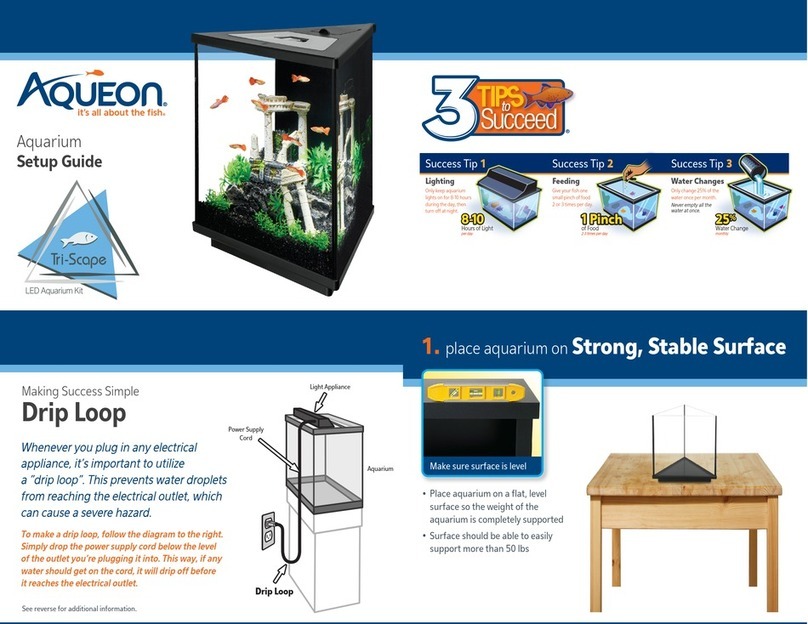
•Place aquarium evenly on a level
surface so that all sides of aquarium
are supported.
•Surface should be able to easily
support more than 80 lbs.
Make sure surface is level
1. place aquarium on Strong, Stable Surface
•Carefully pour rinsed gravel
into middle of aquarium.
• Spread gravel evenly
around aquarium bottom.
•Gravel depth should measure
about 1" - 3" from the bottom.
See reverse for additional information.
•Place aquarium evenly on a level
surface so that all sides of aquarium
are supported.
•Surface should be able to easily
support more than 80 lbs.
Make sure surface is level
1. place aquarium on Strong, Stable Surface

•Carefully pour rinsed gravel
into middle of aquarium.
• Spread gravel evenly
around aquarium bottom.
•Gravel depth should measure
about 1" - 3" from the bottom.
•Place plants and décor items into
aquarium in desired location.
• Cover base of plants and bottom
of décor items with gravel to hold
securely in place.
•Place lter holder on back of aquarium so that
clips on back and sides hold rmly in place.
•Place lter in lter holder with lter clip so that
lter is held rmly in place.
• Place rinsed lter cartridge into lter making
sure that the word “front” on lter cartridge
tab is facing up to secure in place.
•Position lter power cable to run down back
wall of aquarium.
•Plug USB connector from light cable into
USB bar on bottom back of aquarium.
•Add cover, positioning the feeding hole
towards front of aquarium.
• Insert MP3 device into cradle if applicable.
6. add Cover and MP3 Device5. add Filter
Use rocker switch to operate light
RED - USB from speaker
to USB bar
BLUE - hardwired USB cable
from speaker to speaker
PURPLE - from lter to wall
socket
GREEN - USB from LED light
to USB bar
ORANGE - USB from MP3
device charger to USB bar
YELLOW - 3.5 mm audio from
MP3 device to speaker
•Place aquarium evenly on a level
surface so that all sides of aquarium
are supported.
•Surface should be able to easily
support more than 80 lbs.
Make sure surface is level
1. place aquarium on Strong, Stable Surface
•Carefully pour rinsed gravel
into middle of aquarium.
• Spread gravel evenly
around aquarium bottom.
•Gravel depth should measure
about 1" - 3" from the bottom.
Add Water Conditioner as directed
•Pour room-temperature water into
aquarium over your hand to avoid
moving gravel, plants and décor.
• Fill aquarium with water to 1/2"
from top of frame.
•Add water conditioner.
•Place lter holder on back of aquarium so that
clips on back and sides hold rmly in place.
•Place lter in lter holder with lter clip so that
lter is held rmly in place.
• Place rinsed lter cartridge into lter making
sure that the word “front” on lter cartridge
tab is facing up to secure in place.
5. add Filter
RED - USB from speaker
to USB bar
BLUE - hardwired USB cable
from speaker to speaker
PURPLE - from lter to wall
socket
GREEN - USB from LED light
to USB bar
ORANGE - USB from MP3
device charger to USB bar
YELLOW - 3.5 mm audio from
MP3 device to speaker

•Position lter power cable to run down back
wall of aquarium.
•Plug USB connector from light cable into
USB bar on bottom back of aquarium.
•Add cover, positioning the feeding hole
towards front of aquarium.
• Insert MP3 device into cradle if applicable.
R49983
6. add Cover and MP3 Device
Use rocker switch to operate light
•Remove aquarium cover.
• Place sh, while in bag from store, into
aquarium. Let sit for 20 minutes.
• Open bag and add about 1/2 cup of
aquarium water. Wait 5 minutes. Repeat once.
• Carefully allow sh to enter aquarium.
Replace cover.
9. add Fish
RED - USB from speaker
to USB bar
BLUE - hardwired USB cable
from speaker to speaker
PURPLE - from lter to wall
socket
•Pour room-temperature water into
aquarium over your hand to avoid
moving gravel, plants and décor.
• Fill aquarium with water to 1/2"
from top of frame.
•Add water conditioner.
7. connect MP3 Device and Speakers
• Plug mini USB end of included USB cable into
“USB Power” on speaker. Plug opposite,
standard size USB end into USB bar on bottom
back of the aquarium.
• Plug the hardwired mini USB cable that runs
from the speaker into second speaker.
Connect the included 3.5mm audio cable to the
MP3 device and “audio in” on the speaker.
•Carefully pour rinsed gravel
into middle of aquarium.
• Spread gravel evenly
around aquarium bottom.
•Gravel depth should measure
about 1" - 3" from the bottom.
•Place lter holder on back of aquarium so that
clips on back and sides hold rmly in place.
•Place lter in lter holder with lter clip so that
lter is held rmly in place.
• Place rinsed lter cartridge into lter making
sure that the word “front” on lter cartridge
tab is facing up to secure in place.
•Position lter power cable to run down back
wall of aquarium.
•Plug USB connector from light cable into
USB bar on bottom back of aquarium.
•Add cover, positioning the feeding hole
towards front of aquarium.
• Insert MP3 device into cradle if applicable.
R49983
6. add Cover and MP3 Device5. add Filter
Use rocker switch to operate light
•Plug USB charging cable from MP3 device
into USB bar on bottom back of aquarium.
• Connect included transformer male end
to female end from USB bar. Plug other
end of transfomer into wall socket.
• Plug lter power cable into wall socket.
(cords color-coded for reference only)
8. connect Cables
•Remove aquarium cover.
• Place sh, while in bag from store, into
aquarium. Let sit for 20 minutes.
• Open bag and add about 1/2 cup of
aquarium water. Wait 5 minutes. Repeat once.
• Carefully allow sh to enter aquarium.
Replace cover.
9. add Fish
Plug charging cable
(not incliuded)
into MP3 device.
Tuck audio and charging cables into channel.
RED - USB from speaker
to USB bar
BLUE - hardwired USB cable
from speaker to speaker
PURPLE - from lter to wall
socket
GREEN - USB from LED light
to USB bar
ORANGE - USB from MP3
device charger to USB bar
YELLOW - 3.5 mm audio from
MP3 device to speaker
Other Aqueon Other manuals
