manuals.online logo
Brands
  1. Home
  2. •
  3. Brands
  4. •
  5. DeWalt
  6. •
  7. Impact Driver
  8. •
  9. DeWalt DW292 User manual

DeWalt DW292 User manual

Definitions: Safety Guidelines
The definitions below describe the level of severity for each signal word. Please read the
manual and pay attention to these symbols.
DANGER: Indicates an imminently hazardous situation which, if not avoided, will
result in death or serious injury.
WARNING: Indicates a potentially hazardous situation which, if not avoided, could
result in death or serious injury.
CAUTION: Indicates a potentially hazardous situation which, if not avoided, may result
in minor or moderate injury.
NOTICE: Indicates a practice not related to personal injury which, if not avoided, may
result in property damage.
IF YOU HAVE ANY QUESTIONS OR COMMENTS ABOUT THIS OR ANY DEWALT TOOL, CALL
US TOLL FREE AT: 1-800-4-DEWALT (1-800-433-9258).
WARNING: To reduce the risk of injury, read the instruction manual.
General Power Tool Safety Warnings
WARNING! Read all safety warnings and all instructions. Failure to follow the
warnings and instructions may result in electric shock, fire and/or serious injury.
SAVE ALL WARNINGS AND INSTRUCTIONS
FOR FUTURE REFERENCE
The term “power tool” in the warnings refers to your mains-operated (corded) power tool or
battery-operated (cordless) power tool.
1) WORK AREA SAFETY
a) Keep work area clean and well lit. Cluttered or dark areas invite accidents.
b) Do not operate power tools in explosive atmospheres, such as in the presence
of flammable liquids, gases or dust. Power tools create sparks which may ignite the
dust or fumes.
c) Keep children and bystanders away while operating a power tool. Distractions can
cause you to lose control.
2) ELECTRICAL SAFETY
a) Power tool plugs must match the outlet. Never modify the plug in any way. Do
not use any adapter plugs with earthed (grounded) power tools. Unmodified plugs
and matching outlets will reduce risk of electric shock.
b) Avoid body contact with earthed or grounded surfaces such as pipes, radiators,
ranges and refrigerators. There is an increased risk of electric shock if your body is
earthed or grounded.
c) Do not expose power tools to rain or wet conditions. Water entering a power tool
will increase the risk of electric shock.
d) Do not abuse the cord. Never use the cord for carrying, pulling or unplugging
the power tool. Keep cord away from heat, oil, sharp edges or moving parts.
Damaged or entangled cords increase the risk of electric shock.
e) When operating a power tool outdoors, use an extension cord suitable for
outdoor use. Use of a cord suitable for outdoor use reduces the risk of electric shock.
f) If operating a power tool in a damp location is unavoidable, use a ground fault
circuit interrupter (GFCI) protected supply. Use of a GFCI reduces the risk of electric
shock.
3) PERSONAL SAFETY
a) Stay alert, watch what you are doing and use common sense when operating a
power tool. Do not use a power tool while you are tired or under the influence
of drugs, alcohol or medication. A moment of inattention while operating power tools
may result in serious personal injury.
INSTRUCTION MANUAL
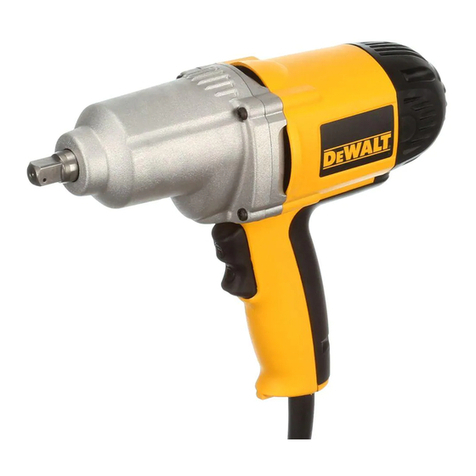
DW292, DW293 1/2" Impact Wrench
DW294 3/4" Impact Wrench
(OCT12) Part No. N232377 DW292, DW293, DW294 Copyright © 2004, 2012 DEWALT
The following are trademarks for one or more DEWALT power tools: the yellow and black color scheme, the “D” shaped
air intake grill, the array of pyramids on the handgrip, the kit box configuration, and the array of lozenge-shaped humps on
the surface of the tool.
b) Use personal protective equipment. Always wear eye protection. Protective
equipment such as dust mask, non-skid safety shoes, hard hat, or hearing protection
used for appropriate conditions will reduce personal injuries.
c) Prevent unintentional starting. Ensure the switch is in the off position before
connecting to power source and/or battery pack, picking up or carrying the tool.
Carrying power tools with your finger on the switch or energizing power tools that have
the switch on invites accidents.
d) Remove any adjusting key or wrench before turning the power tool on. A wrench
or a key left attached to a rotating part of the power tool may result in personal injury.
e) Do not overreach. Keep proper footing and balance at all times. This enables
better control of the power tool in unexpected situations.
f) Dress properly. Do not wear loose clothing or jewelry. Keep your hair, clothing
and gloves away from moving parts. Loose clothes, jewelry or long hair can be caught
in moving parts.
g) If devices are provided for the connection of dust extraction and collection
facilities, ensure these are connected and properly used. Use of dust collection can
reduce dust-related hazards.
4) POWER TOOL USE AND CARE
a) Do not force the power tool. Use the correct power tool for your application. The
correct power tool will do the job better and safer at the rate for which it was designed.
b) Do not use the power tool if the switch does not turn it on and off. Any power tool
that cannot be controlled with the switch is dangerous and must be repaired.
c) Disconnect the plug from the power source and/or the battery pack from the
power tool before making any adjustments, changing accessories, or storing
power tools. Such preventive safety measures reduce the risk of starting the power tool
accidentally.
d) Store idle power tools out of the reach of children and do not allow persons
unfamiliar with the power tool or these instructions to operate the power tool.
Power tools are dangerous in the hands of untrained users.
e) Maintain power tools. Check for misalignment or binding of moving parts,
breakage of parts and any other condition that may affect the power tool’s
operation. If damaged, have the power tool repaired before use. Many accidents
are caused by poorly maintained power tools.
f) Keep cutting tools sharp and clean. Properly maintained cutting tools with sharp
cutting edges are less likely to bind and are easier to control.
g) Use the power tool, accessories and tool bits, etc. in accordance with these
instructions, taking into account the working conditions and the work to be
performed. Use of the power tool for operations different from those intended could
result in a hazardous situation.
5) SERVICE
a) Have your power tool serviced by a qualified repair person using only identical
replacement parts. This will ensure that the safety of the power tool is maintained.
Additional Specific Safety Instructions
•Hold power tool by insulated gripping surfaces, when performing an operation
where the fastener may contact hidden wiring or its own cord. Fasteners contacting a
“live” wire may make exposed metal parts of the power tool “live” and could give the operator
an electric shock.
•Use clamps or other practical way to secure and support the workpiece to a stable
platform. Holding the work by hand or against your body is unstable and may lead to loss
of control.
•Wear safety goggles or other eye protection. Hammering and drilling operations cause
chips to fly. Flying particles can cause permanent eye damage.
•Accessories and tools get hot during operation. Wear gloves when touching them.
•Do not operate this tool for long periods of time. Vibration caused by tool action may
be harmful to your hands and arms. Use gloves to provide extra cushion and limit exposure
by taking frequent rest periods.
•Air vents often cover moving parts and should be avoided. Loose clothes, jewelry or
long hair can be caught in moving parts.
•An extension cord must have adequate wire size (AWG or American Wire Gauge)
for safety. The smaller the gauge number of the wire, the greater the capacity of the cable,
that is 16 gauge has more capacity than 18 gauge. An undersized cord will cause a drop in
line voltage resulting in loss of power and overheating. When using more than one extension
to make up the total length, be sure each individual extension contains at least the minimum
wire size. The following table shows the correct size to use depending on cord length and
nameplate ampere rating. If in doubt, use the next heavier gauge. The smaller the gauge
number, the heavier the cord.
Minimum Gauge for Cord Sets
Ampere Rating
Volts Total Length of Cord in Feet (meters)
120V 25 (7.6) 50 (15.2) 100 (30.5) 150 (45.7)
240V 50 (15.2) 100 (30.5) 200 (61.0) 300 (91.4)
More
Than
Not More
Than AWG
0 6 18 16 16 14
610 18161412
10 12 16 16 14 12
12 16 14 12 Not Recommended
WARNING: ALWAYS use safety glasses. Everyday eyeglasses are NOT safety glasses.
Also use face or dust mask if cutting operation is dusty. ALWAYS WEAR CERTIFIED SAFETY
EQUIPMENT:
• ANSI Z87.1 eye protection (CAN/CSA Z94.3),
• ANSI S12.6 (S3.19) hearing protection,
• NIOSH/OSHA/MSHA respiratory protection.:
WARNING: Some dust created by power sanding, sawing, grinding, drilling, and other
construction activities contains chemicals known to the State of California to cause cancer, birth
defects or other reproductive harm. Some examples of these chemicals are:
• lead from lead-based paints,
• crystalline silica from bricks and cement and other masonry products, and
• arsenic and chromium from chemically-treated lumber.
Your risk from these exposures varies, depending on how often you do this type of work. To
reduce your exposure to these chemicals: work in a well ventilated area, and work with approved
safety equipment, such as those dust masks that are specially designed to filter out microscopic
particles.
•Avoid prolonged contact with dust from power sanding, sawing, grinding, drilling,
and other construction activities. Wear protective clothing and wash exposed areas
with soap and water. Allowing dust to get into your mouth, eyes, or lay on the skin may
promote absorption of harmful chemicals.
WARNING: Use of this tool can generate and/or disperse dust, which may cause serious and
permanent respiratory or other injury. Always use NIOSH/OSHA approved respiratory protection
appropriate for the dust exposure. Direct particles away from face and body.
WARNING: Always wear proper personal hearing protection that conforms to ANSI
S12.6 (S3.19) during use. Under some conditions and duration of use, noise from this product
may contribute to hearing loss.
• The label on your tool may include the following symbols. The symbols and their definitions
are as follows:
V.....................volts A.........................amperes
Hz...................hertz W........................watts
min .................minutes or AC.............alternating current
or DC.....direct current or AC/DC......alternating or direct current
...................Class I Construction no.......................no load speed
.......................(grounded) n.........................rated speed
...................Class II Construction .......................earthing terminal
(double insulated) ........................safety alert symbol
…/min ............per minute BPM...................beats per minute
IPM.................impacts per minute RPM...................revolutions per minute
SPM ...............strokes per minute sfpm...................surface feet per minute
SAVE THESE INSTRUCTIONS FOR FUTURE USE
Motor
Be sure your power supply agrees with the nameplate marking. Voltage decrease of more than
10% will cause loss of power and overheating. DEWALT tools are factory tested; if this tool does
not operate, check power supply.
COMPONENTS (Fig. 1)
WARNING: Never modify the power tool or any part of it. Damage or personal injury could
result.
A. Switch
B. Anvil
OPERATION
WARNING: To reduce the risk of injury, turn unit off and disconnect it from power
source before installing and removing accessories, before adjusting or when making
repairs. An accidental start-up can cause injury.
Switch (Fig. 1)
Pressing the BOTTOM part of the switch (A) runs the tool in forward (right-hand thread) direction.
Pressing the TOP of the switch reverses motor direction. This allows “rocking” fasteners to break
them loose.
Anvil with Detent Pin (Fig. 1)
CAUTION: Use only impact accessorires. Non-impact accessories may break and cause a
hazardous condition. Inspect accessory prior to use to ensure that it contains no cracks.
To install an accessory on the anvil (B), align the hole in the side of the accessory with the detent
pin on the anvil. Press the accessory on until the detent pin engages in the hole.
To remove an accessory, depress the detent pin through the hole, using a small, pointed object,
and pull the accessory off.
Impact Time
Many variables exist that will cause the torque available on any fastener to vary considerably.
Usage
Your impact tool generates the following output torque:
Cat # Ft.-Lbs. (Nm)
DW292 345 (468)
DW293 345 (468)
DW294 345 (468)
CAUTION: Ensure fastener and/or system will withstand the level of torque generated by the
tool. Excessive torque may cause breakage and possible personal injury.
1. Place the accessory on the fastener head. Keep the tool pointed straight at the fastener.
2. Press rocker switch to start operation. Always check torque with a torque wrench, as the
fastening torque is affected by many factors including the following:
•Voltage: Low voltage, due to generator or long extension cord, will reduce fastening
torque.
•Accessory size: Failure to use the correct accessory size will cause a reduction in
fastening torque.
•Bolt Size: Larger bolt diameters generally require higher fastening torque. Fastening
torque will also vary according to length, grade, and torque coefficient.
•Bolt: Ensure that all threads are free of rust and other debris to allow proper fastening
torque
•Material: The type of material and surface finish of the material will affect fastening
torque.
•Fastening Time: Longer fastening time results in increased fastening torque. Using a
longer fastening time than recommended could cause the fasteners to be overstressed,
stripped or damaged.
Capacity
Your 1/2" (12.7mm) impact wrench uses sockets with 1/2" (12.7mm) square drive ends. A 3/4"
(19mm) impact wrench uses sockets with 3/4" (19mm) square drive ends. Both sizes of impact
wrenches are capable of driving the same range of hex impact sockets available.
In particularly heavy duty usage the 3/4" (19mm) drive impact wrench has an extra strong anvil
that will resist breakage.
MAINTENANCE
WARNING: To reduce the risk of injury, turn unit off and disconnect it from power
source before installing and removing accessories, before adjusting or when making
repairs. An accidental start-up can cause injury.
Cleaning
WARNING: Blow dirt and dust out of all air vents with clean, dry air at least once a week.
To minimize the risk of eye injury, always wear ANSI Z87.1 approved eye protection when
performing this.
WARNING: Never use solvents or other harsh chemicals for cleaning the non-metallic parts
of the tool. These chemicals may weaken the plastic materials used in these parts. Use a cloth
dampened only with water and mild soap. Never let any liquid get inside the tool; never immerse
any part of the tool into a liquid.
Accessories
WARNING: Since accessories, other than those offered by DEWALT, have not been tested
with this product, use of such accessories with this tool could be hazardous. To reduce the risk
of injury, only DEWALT recommended accessories should be used with this product.
Recommended accessories for use with your tool are available at extra cost from your local
service center. If you need any assistance in locating any accessory, please contact
DEWALT Industrial Tool Co.
WARNING: Use only impact accessories. Non-impact accessories may break and cause a
hazardous condition. Inspect accessories prior to use to ensure that they contain no cracks.
Repairs
To assure product SAFETY and RELIABILITY, repairs, maintenance and adjustment (including
brush inspection and replacement) should be performed by a DEWALT factory service center,
a DEWALT authorized service center or other qualified service personnel. Always use identical
replacement parts.
DW293DW292, DW294
A
B
FIG. 1
A
B
DEWALT Battery and Charger Systems
Battery Output Chargers/Charge Time (Minutes)
120 Volts 12 Volts
“X” Indicates that the battery pack is not compatible with that specific charger.
All charge times are approximate. Actual charge time may vary. Read the instruction manual for more specific information.
Cat # Voltage DW9106 DW9118 DW9107 DW9108 DW9116 DW9216 DW9117 DW911 DC011 DC022 DC9000 DC9310 DC9320 DCB100 DCB101 DCB103 DW0246 DCB119 DW0249 DW9109 DC9319
DC9360 36 X X X X X X X X X X 60 X X X X X X X X X X
DC9280
28 X X X X X X X X X X 60 X X X X X X X X X X
DW0242
24 X X X X X X X X X X X X X X X X 60 X 60 X X
DC9096 18 X X X 60 60 60 20 60 60 60 X 60 60 X X 60 X X X 60 60
DC9099 18 X X X 45 45 45 15 45 45 45 X 45 45 X X 45 X X X 45 45
DC9180
18 X X X X X X X X X X X 60 60 X X 60 X X X X 60
DC9181 18 X X X X X X X X X X X 30 30 X X 30 X X X X 30
DCB200 20 X X X X X X X X X X X X X X 60 60 X 90 X X X
DCB201
20 X X X X X X X X X X X X X X 30 30 X 45 X X X
DW9096
18 X X X 60 60 60 20 60 60 60 X 60 60 X X 60 X X X 60 60
DW9098 18 X X X 30 30 30 12 30 30 30 X 30 30 X X 30 X X X 30 30
DW9099 18 X X X 45 45 45 15 45 45 45 X 45 45 X X 45 X X X 45 45
DC9091
14.4 90 115 60 60 60 60 20 60 60 60 X 60 60 X X 60 X X X 60 60
DC9094 14.4 60 90 45 45 45 45 15 45 45 45 X 45 45 X X 45 X X X 45 45
DW9091 14.4 60 90 45 45 45 45 15 45 45 45 X 45 45 X X 45 X X X 45 45
DW9094 14.4 45 60 30 30 30 30 12 30 30 30 X 30 30 X X 30 X X X 30 30
DCB120 12 X X X X X X X X X X X X X 40 30 30 X 40 X X X
DC9071 12 90 115 60 60 60 60 20 60 60 60 X 60 60 X X 60 X X X 60 60
DW9050 12 40 X X X X X X X X X X X X X X X X X X X X
DW9071 12 60 90 45 45 45 45 15 45 45 45 X 45 45 X X 45 X X X 45 45
DW9072 12 45 60 30 30 30 30 12 30 30 30 X 30 30 X X 30 X X X 30 30
DW9048 9.6 40 X X X X X X X X X X X X X X X X X X X X
DW9061
9.6 60 90 45 45 45 45 15 45 45 45 X 45 45 X X 45 X X X 45 45
DW9062 9.6 45 60 30 30 30 30 12 30 30 30 X 30 30 X X 30 X X X 30 30
DW9057 7.2 45 60 30 30 30 30 12 30 30 30 X 30 30 X X 30 X X X 30 30
Discover other impact wrenches on our website.

Other manuals for DW292

6

This manual suits for next models

2

Other DeWalt Impact Driver manuals

DeWalt XR Li-Ion DCF903 User manual

DeWalt

DeWalt XR Li-Ion DCF903 User manual

DeWalt DCF850P2T User manual

DeWalt

DeWalt DCF850P2T User manual

DeWalt DCF896 User manual

DeWalt

DeWalt DCF896 User manual

DeWalt DCF787 User manual

DeWalt

DeWalt DCF787 User manual

DeWalt DCD708 User manual

DeWalt

DeWalt DCD708 User manual

DeWalt DCF886-XE User manual

DeWalt

DeWalt DCF886-XE User manual

DeWalt DCF886 User manual

DeWalt

DeWalt DCF886 User manual

DeWalt DCF889 User manual

DeWalt

DeWalt DCF889 User manual

DeWalt DCF836 User manual

DeWalt

DeWalt DCF836 User manual

DeWalt DCF835 User manual

DeWalt

DeWalt DCF835 User manual

DeWalt DCF885C2 User manual

DeWalt

DeWalt DCF885C2 User manual

DeWalt DCF889 User manual

DeWalt

DeWalt DCF889 User manual

DeWalt DCF886 User manual

DeWalt

DeWalt DCF886 User manual

DeWalt DCF850P2LRT User manual

DeWalt

DeWalt DCF850P2LRT User manual

DeWalt DCF840NT User manual

DeWalt

DeWalt DCF840NT User manual

DeWalt DCF900P2G User manual

DeWalt

DeWalt DCF900P2G User manual

DeWalt DCF836 User manual

DeWalt

DeWalt DCF836 User manual

DeWalt DXCM024-0393 User manual

DeWalt

DeWalt DXCM024-0393 User manual

DeWalt DCF809L2T User manual

DeWalt

DeWalt DCF809L2T User manual

DeWalt DCF836 User manual

DeWalt

DeWalt DCF836 User manual

DeWalt DCF894HB User manual

DeWalt

DeWalt DCF894HB User manual

DeWalt XR DCF850 User manual

DeWalt

DeWalt XR DCF850 User manual

DeWalt DWDCF894 User manual

DeWalt

DeWalt DWDCF894 User manual

DeWalt DCD778M1 User manual

DeWalt

DeWalt DCD778M1 User manual

Popular Impact Driver manuals by other brands

HART HPID25 Operator's manual

HART

HART HPID25 Operator's manual

LF KOBALT KID 324B-03 manual

LF

LF KOBALT KID 324B-03 manual

Facom NS.3500G Original instructions

Facom

Facom NS.3500G Original instructions

Craftsman 11483 - C3 19.2 Volt Impact Driver Operator's manual

Craftsman

Craftsman 11483 - C3 19.2 Volt Impact Driver Operator's manual

RIDGID R86230 Operator's manual

RIDGID

RIDGID R86230 Operator's manual

RODCRAFT RC2444 Operator's manual

RODCRAFT

RODCRAFT RC2444 Operator's manual

Cornwell Tools IR-C2131 instructions

Cornwell Tools

Cornwell Tools IR-C2131 instructions

Parkside 354238-2010 Translation of the original instructions

Parkside

Parkside 354238-2010 Translation of the original instructions

Facom Expert CL3.CH18SD Service repair training

Facom

Facom Expert CL3.CH18SD Service repair training

Matco Tools MT2769 manual

Matco Tools

Matco Tools MT2769 manual

Atlas Copco LMS88 GOR38 Product instructions

Atlas Copco

Atlas Copco LMS88 GOR38 Product instructions

Dongcheng DCPL03-14 operating instructions

Dongcheng

Dongcheng DCPL03-14 operating instructions

Makita LXDT02 instruction manual

Makita

Makita LXDT02 instruction manual

Portable Cable PCC647 instruction manual

Portable Cable

Portable Cable PCC647 instruction manual

Chicago Pneumatic CP772H Series instruction manual

Chicago Pneumatic

Chicago Pneumatic CP772H Series instruction manual

Ingersoll-Rand 2902 Series Maintenance information

Ingersoll-Rand

Ingersoll-Rand 2902 Series Maintenance information

Sioux Tools IW100AI-8H Instructions-parts list

Sioux Tools

Sioux Tools IW100AI-8H Instructions-parts list

RIDGID R860372 Operator's manual

RIDGID

RIDGID R860372 Operator's manual

manuals.online logo
manuals.online logoBrands
  • About & Mission
  • Contact us
  • Privacy Policy
  • Terms and Conditions

Copyright 2025 Manuals.Online. All Rights Reserved.