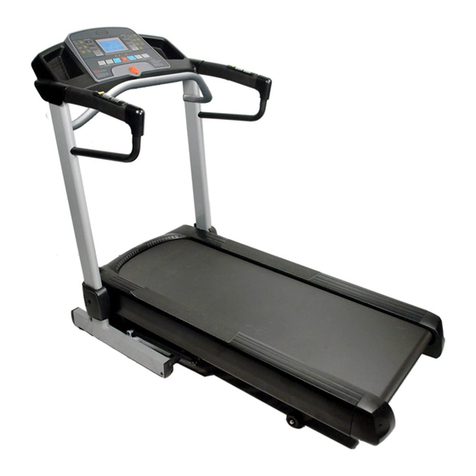
DFC Premio User manual

Модель: DFC Premio
Артикул: T730
Электрическая

1
Safety Precauons
Please keep this manual for future reference.
1. Before commencing assembly and use of your new Treadmill, carefully read the
instrucon manual to understand the informaon provided. The correct
installaon, maintenance and use of your Treadmill is important to ensure you
get the safest and most effecve fitness workout.
2. Please ensure the equipment has been assembled according to the assembly
manual.
3. If you are over 45 years old, have health or medical problems and/or this is your
first me exercising in over 12 months, please consult your local Doctor or
Medical Professional before use.
4. Should you experience any of the following symptoms including: headache,
chest ghtness, irregular heartbeat, shortness of breath, dizziness, nausea or any
sharp muscle or joint pain, immediately stop training and consult your Doctor or
Medical Professional.
5. Ensure that young children and pets are kept away from the equipment to
prevent injury, the equipment is for adult use only.
6. The equipment should be placed on a hard, flat surface and at least 0.5 meters
away from any obstacles.
7. Before using the equipment, please check all nuts and bolts of the Treadmill are
ghtened securely.
8. Do not place the treadmill in rooms or areas that are exposed to high levels of
moisture i.e. outside, near heated indoor pools/spas, non-insulated garages or
rooms.
9. It is strongly recommended you wear appropriate clothing and footwear when
using your Treadmill for your own personal comfort.
10. The equipment is not suitable for use as a medical device.

2
Direcons for Use
In order to avoid an accident, please ensure you have the treadmill safety key
securely aached to your clothing. In the event, that you accidently trip or slip whilst
walking or running on the treadmill, removing the safety key from the console will
ensure the power is paused to the motor bringing the belt to a stop. Re-aach the
safety key to commence your workout.
When exercising on the treadmill concentrate on looking straight ahead and not at
your feet, to avoid any risk of tripping or falling. Increase the speed gradually
allowing yourself to adapt to the speed seng before making any further speed
adjustments.
To pause or stop your treadmill use the emergency stop buon or safety key when
necessary.
Once you have completed installaon of the treadmill and the motor cover is
securely on, you may plug in the power cord. It is recommended you use a good
quality surge protector device.
1. Posion the treadmill on a clean and level surface, close to a dedicated wall
socket power point. A rubber floor mat is recommended to assist with
maintenance and protecon of your floor.
2. For your safety, never start the treadmill while you are standing on the running
belt. Place your feet on either side of the running belt side rails and press the
start buon. Increase the speed gradually to the desired speed level before
standing on the belt surface.
3. Wear appropriate clothing and footwear when exercising on the treadmill. Do
not wear long, loose fing clothing that could become caught in any of the
moving parts of the treadmill.
4. Always wear the safety key aachment.
5. The motor cover should never be removed while in use. A qualified electrical
technician must be in aendance should any maintenance work need to be
carried out. Always unplug the power cord should the cover ever need to be
removed for maintenance reasons.
6. Young children should be kept away from the treadmill whilst it is in use to avoid
injury and safety concerns.

3
Assembly Instrucons
We recommend 2 people assist in assembling this unit. Place all parts of the
Treadmill in a cleared area and remove the packing materials. Do not dispose of the
packing materials unl assembly is completed. Before you start installaon inspect
and prepare all parts and screws featured in this manual. When you open the carton,
you will find the following parts.
(S1) #5/#6 Allen Wrench
each 1 PC
(S2) Hex Bolt M8x50mm
teeth 12 mm
4 PCS
(S4) Philips Head Screw
M5x25mm
2 PCS
(S3) Hex Bolt
M8x16mm
6 PCS
(S6) Audio Cable
1 PC
(S5) Multi Hex Tool with
Philips Screwdriver
1 PC
(S7) Safety Key
1 PC
(S9) Treadmill Main Body
1 PC
(S8) Covers
2 PCS

S2
S2
S3
Step 1 Installing the upright frame
Abutting Joint
S3
S3
Upright and secure the upright frame into the stabilizer with Hex Bolt M8x50mm teeth 12mm
(S2) and Hex Bolt M8x16mm(S3) back sides.
Important : While assembly, it need two person work together. One people hold the computer
and another one tighten the bolts with the Allen Wrench (S1) provided.
Step 2 Installing the Computer
Connect the Signal Wire from the computer to the Signal Wire from the upright frame first .
Then, secure the computer into the upright frame with two Hex Bolt M8x16mm (S3) back
sides. Tighten the bolts with the Allen Wrench (S1) provided.

5
S4 S8 S4S8
Step 3 Installing the Covers
Secure the cover (S8) to the upright frame with one Hex Bolt (S4) both sides, tighten the
bolts with Multi Hex Tool with Philips Screwdriver (S5) provided.
Before beginning a workout session ensure that the Safety Tether Key is properly placed
onto the Computer Console and the Safety Clip is securely attached to an article of your
clothing. If you fall the clip will pull out the SAFETY KEY from the Computer Console and
the running belt will stop immediately for emergency stop, helping to prevent injury.
Replaced the Safety Tether Key onto the Computer Console. Press the START button to
begin exercise again.
SAFETY KEY
EMERGENCY STOP

6
Display Funcons
TIME No Set Target Time - TIME will count up from 00:00 to maximum 99:00
with each increments is one minute.
Using Set Target Time - TIME will count down from Preset Value . Each
preset Increment is one minute between 5:00 to 99:00 minutes.
SPEED
Display current training speed from 1.0 to a maximum of 20.0 km/h.
DISTANCE No Set Target Distance - DISTANCE will count up from 0.00 to a
maximum of 99.5km with each increment 0.1 KM.
Using Set Target Distance - DISTANCE will count down from preset
Value. Each preset increment is 0.5 KM between 0.5 to 99.5.
CALORIES
No Set Target Calories - CALORIES will count up from zero to maximum
995 with each increment 1 cal.
Using Set Target Calories - CALORIES will count down from preset
value. Each preset increment is 5 cal from 10 to 995 cal.
PULSE
Hold the hand sensor ght and the console will detect your pulse
signal. When monitor is reading your heart tare signal, the HEART
SYMBOL will flash on the console.

7
P1
P
2
P3
P4
P5
P6 HILL
WEIGHT - LOSS
COMPETITION
5K RUN
RANDOM
WARM- UP P7
P8
P9
P1 0
P1 1
P1 2 CROSS COUNTR Y RACE
MOUNTAIN CLIMB
CALORIES GOAL
DISTANCE GOAL
TIME GOAL
BEACH SPORT
Funcon Buons
1. MODE: To confirm all sengs and to enter exercise modes.
2. Speed +: To select training mode and adjust the funcon value up.
3. Speed -: To select training mode and adjust the function value down.
4. START/STOP: To start or stop your workout.
POWER ON:
Plug the main power cord in a grounded wall outlet, please make sure the power
matched. Ensure the ‘Safety Key’ is in the correct posion and inserted properly in
the console.
QUICK WORKOUT:
PROGRAM MODE
MUSIC
This treadmill console has 12 Preset Workout Programs to choose from (see below
for breakdown of each Program). When in PROGRAM mode, use PROGRAM buon
to select your chosen workout – P1 TO P12. Press START buon to confirm and start
your workout.
User can start a workout by pressing the ‘Quick Select’ buon for either Speed or
incline.
There are 3 ‘Quick Select’ buons for both Speed and Incline –
6km/h to 18km/h for speed opons and 2% to 8% for Incline opons.
You can use Quick Workout (the speed and incline) during your workout, press
‘START’ to beginning your workout.
If you need to stop the treadmill during your workout, press ‘STOP’ or pull out the
Safety Key.
The computer with MP3 player, USB Port and SD Port,This program design support user
to play music during training.

8
BELT ADJUSTMENT:
• Place treadmill on a level surface. • Run the treadmill at 6-8km/h.
•
•
• Test for at least 15 seconds at 4km/h (check and adjust a further quarter or half turn
damage the machine.
Moving & Storage Instrucons
Folding away your Treadmill
Moving your Treadmill
A.)Turn off the treadmill, switch off at the main power switch and
pull out the plug.
B.) Li the treadmill deck up towards the main console. You
should feel the treadmill gas spring system engage.
C.) To lower the treadmill deck, press the gas spring system in
with your foot to disengage the lock. The treadmill deck can now
be lowered to the ground.
The treadmill can then be moved by lng the treadmill deck
towards you onto it’s transportaon wheels.
(Please ensure the power cord cable has been disconnected from
the treadmill before aempng to move it).

9
Warm-Up Exercise
Warm up exercise is important in preparing the muscles for acvity whilst
minimising the risk of injury. You may choose to warm up with a light/brisk walking
pace for 5-10 minutes before stopping and performing some simple stretches. (As
shown in the pictures below)
1. Hamstring Stretch (Standing) - Keep your
knees slightly bent and slowly lean forward,
back and shoulders relaxed, reaching towards
your toes. You should feel the tension and
slight discomfort in your hamstring muscles.
Hold for 15 - 20 seconds. Repeat 2-3 mes.
2. Hamstrings Stretches (Seated) - Sing on
the floor preferably on a mat, put one leg
straight, the other inward and close to the
inside of the straight leg. Lean forward from
the hips, reaching towards your toes. Hold for
10-15 seconds, and relax. Repeat 3 mes for
each leg (See picture2).
3. Calf Stretches - Standing with two hands on
the wall or tree, one leg behind. Keeping your
legs straight and the heel on the ground, lean
forward towards the wall or tree. Hold for 10
-15 seconds, and relax. Repeat 3 mes for
each leg (See picture 3).
4. Quadrice ps Stretches - Keeping your
balance with your lehand holding onto a
wall or staonery fixture, grasp your right foot
with your right hand and stretch your right
heel toward your buttocks slowly, unl you
feel the stretch in the front of your thigh.
Hold for 10 - 15 seconds, and relax. Repeat 3
mes for each leg (See picture 4).
5. Sartorius (Inner Muscles of the Thigh)
Muscle Stretches - Sing down with the
soles of your feet or shoes together and your
knees posioned outward. Pull your feet
towards your groin unl you can feel the
stretch. Hold for 10 -15 seconds, and relax.
Repeat 3 mes
(See picture 5).

10
•
•
•
Maintenance Instrucons
WARNING:
Before cleaning or carrying out any maintenance on your treadmill, ensure the
power is turned offand the power cord removed from the plug socket.
At least once a year, the motor cover on your treadmill should be removed and any
dust or debris vacuumed up to maintain the smooth operaon of the motor and
drive system.
CLEANING:
General cleaning the unit will greatly prolong the treadmills working life.
Keep the treadmill clean by dusng regularly. Be sure to clean the exposed parts of
the deck surface on both side of the walking belt and also the side rails. Make sure
the soles of your shoes are clean, this reduces the build up of foreign material
underneath the running belt. The top of the belt can be cleaned with a slightly damp
cloth. Be careful to keep liquid away from the electrical components and underneath
the running belt.
The belt/ deck fricon may play a major role in the funcon and life of your treadmill,
thus requiring periodic lubricaon. We recommend a periodic inspecon of the deck.
We recommend lubricaon of the deck according to the following metable
Light user (less than 3 hours/ week) annually
Medium user (3-5 hours/ week) every six months
Heavy user (more than 5 hours/ week) every three months
Treadmill lubricang oil can be purchased from your nearest Fitness store or our
Service Department.
1. In order to maintain and prolong the working life of your treadmill, we suggest
you power offthe treadmill for 10 minutes aer every 2 hours of running use.
2. A loose running belt may slip when you are running and may require a small
adjustment; if the running belt is over ghtened it can affect the performance of
the motor and add extra wear to the rollers. For ideal tension, the running belt
can be lied 50-75mm from the central part of the running deck.

11
This manual suits for next models
1
Table of contents
