Diamond Tech International Diamond Max User manual

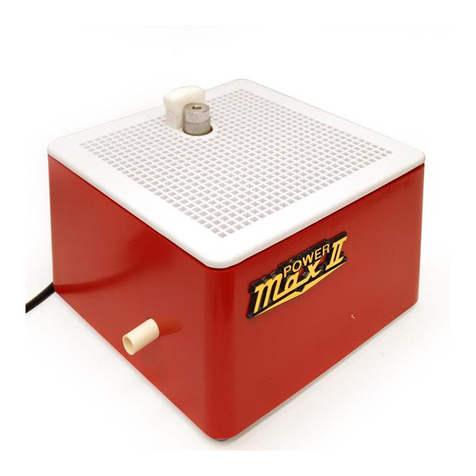
Diamond Max
Two-In-One Grinder
Operations Manual

Safety Precautions
Router Operating Instructions
1. Remove the packing included to protect the grinder during shipment.
2. The grinder disk must be installed before initial operation of the grinder.
To install the grinder disk use a hex wrench, loosen and remove
Grinder Head. Then, remove the grind surface, water tra , Beveling
Block and splash guard. Line up the pin hole on the bottom of the
disk with the pin on the lower support collar and lower the disk into
place. Remove the disk retaining nut and install the grinding disk.
Grease the threads of the lower support collar, then reattach the
disk retaining nut and tighten securel . Push disk down firml to
minimize disk vibration. Installation of the disk is necessar even if no
water dripping on the motor housing.
3. Replace the water tra , grid surface, splash guard and Beveling
Block. Grease the motor shaft, then replace and tighten ensuring
that the hex screw on the bit is aligned with the flat part of the
motor shaft.
4. Fill the water reservoir about 3/4 of the wa to the top. You ma add
special grinding lubricant if desired.
5. Soak the sponge in water, then position it behind the water reservoir
and Grinder Head. If the sponge goes dr while grinding add
extra water directl to the sponge. NEVER GRIND DRY. Keep the slide
valve closed until read for disk use.
6. Replace the grid cover and the grinder is read for use. The grinder plugs directl into the Foot
switch (recommended for use) or into an outlet.
7. To setup the 1/4 bit and the Step-Up-Work Surface (Deluxe Model Onl ), place the 1/4 bit
directl onto the top of the shaft and tighten hex screw. The Step-Up-Work Surface has pins on
the bottom that fit into the grid cover.
8. When it is time to replace the router head or diamond disk, replace with Diamond Tech Grinder Bits
onl . Other brands ma not properl fit on the Diamond Max.
PLEASE NOTE: Snap 3/4 grinder head adapter into the grid surface before using the 3/4
Grinder Head.
1. Read the instruction manual before operating this tool.
2. ALWAYS WEAR FULL EYE PROTECTION.
3. Be sure the power switch is OFF before plugging in this tool.
4. Use onl with a properl grounded electrical outlets that acceptS a three prong plug.
5. Unplug grinder before servicing. Alwa s be sure the grinder is proper working condition before use.
6. Keep grinder clean and lubricated for safet and best performance.
7. Avoid dangerous environments. Use in a clean, well lit, and ventilated area awa from flammable
vapors
8. Wear proper apparel. Remove jewelr neckties and clothing that could become caught in the
moving parts.
9. Remove all ke s and wrenches before using this tool. Leaving ke s and wrenched attached while
operating this tool ma result in damage to the tool or operator.
10.Never leave grinder running unattended. Turn power off. Dont leave tool until it comes to a
complete stop.

Disk Operating Instructions
1. Fill the water reservoir about 3/4 of the wa to the top and
when read to start disk grinding, open the Slide Valve. If needed,
ou can increase water suppl to the grinding disk b slightl
enlarging the holes located behind the slide valve. Use caution to
prevent over-enlargement of the holes.
2. While grinding, hold glass firml and move material from side to
side over disk. To grind accurate 300 or 450 edges, use the
reversible Bevel Block. To grind an accurate 900 flat edge hold
material against the back of the water reservoir.
3. If the material ou are grinding rubs against the sides of the grinder,
then raising the disk is necessar . To raise the disk, first remove the
Grind Head, water reservoir, and retaining nut and the disk. The
support collar is secured b 2 hex screws on the side, loosen it and
raise the lower collar to the needed height, then retighten.
4. To avoid unnecessar disk vibration, ensure a secure fit between the disk and lower support collar.
5. Minor chipping ma occur with new disk. Chipping will stop after a little use.
How To Drill
1. Start with the 1/4 grinder head attached to the top of the shaft.
2. Grip the glass firml suing the lower ver gentl on the top of the drill bit,
hold the wet sponge as close as possible to the point of contact .
3. Lighten pressure downward when ou near completion of our drilling
to avoid chipping.
Use and Care Information
1. NEVER GRIND DRY. Alwa s make sure the sponge for the router bit is wet or that water is dripping
on the disk while grinding.
2. DO NOT OPERATE WITHOUT DIAMOND DISK INSTALLED. Disk acts as a cover to keep water from
dripping on the motor housing.
3. While using the grinder head, use onl light to medium pressure on the head. Do not push material
against head using excessive force. Unnecessar pressure will shorten grinder and grander head life.
4. Clean water reservoir and Super Sponge after each use.
5. If the router Grinding Head becomes dr , add water directl to the Super Sponge.
6. To maintain ease of assembl , disassembl , and to extend the life of the grinder, clean and grease
the motor shaft (rod that holds grinder head). Inner disk circle, and set screws ever 50 hours of use.
7. Some rust ma form onto he Diamond Disk, it does to effect the efficienc of life of the disk.
8. DO NOT GRIND METAL. It will make the surface unsuitable for glass in seconds.

Warranty
TheDiamondMax™is backedby 6 year manufacturerswarranty. Iffailure occursfor anyreason other
thanmisuse during thisperiod, it will be corrected free ofcharge when shippedprepaid to our distribution
center.Grinder Heads,Disks and SuperSponge™are notincluded in thiswarranty except for
manufacturingdefects.
Ifyouare havingfurther problemsnotcovered inthis manual,callour customerHelp Lineat
800-937-9593
NOTE: This machine was designed for certain applications only. Diamond Tech International strongly
recommends that this machine NOT be modified and/or used for any application other that for which it
was designed. If you have any questions relative to its application DO NOT use the machine until you
have contacted Diamond Tech International and we have advised you.
Upgrade Kits and Replacement Parts
Universal Face Sheild™ - Protect eyes and face while grinding.
Fits any ginder or beveler.
M3 Conversion Kit -Everythingyou need toconvert yourDiamond
Max™ into a Bevel Max™ StudioBeveling System.
Kit Includes:• 5 pack of 60 and 1 micron laps
• Polishing Pad and Compound
• 150/300 Bevel Block™
• Splash Gaurd Booth
• Water Bottle
• “How To Bevel” Video
Step-Up-Work Surface™ - Second story work surface provides a
flat surface when using the 1/4” router bit.
Grinder Disks™ - Replacement disks come in three different grits -
180 coarse, 260 fine and 360 extra-fine.
Silver Bullet Bits™ - DTI manufactures a full line of grinder bits.
Sizes include: 1/4” screw, 1/4” screw, 1/4” cap, 1/4” fast grind(cap),
3/4” fast grind, 1” standard, 1” fast grind, Angle Bit and a Reducing Bit.
Table of contents
Other Diamond Tech International Grinder manuals
