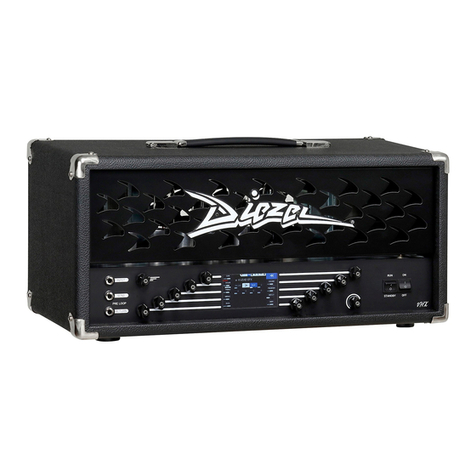
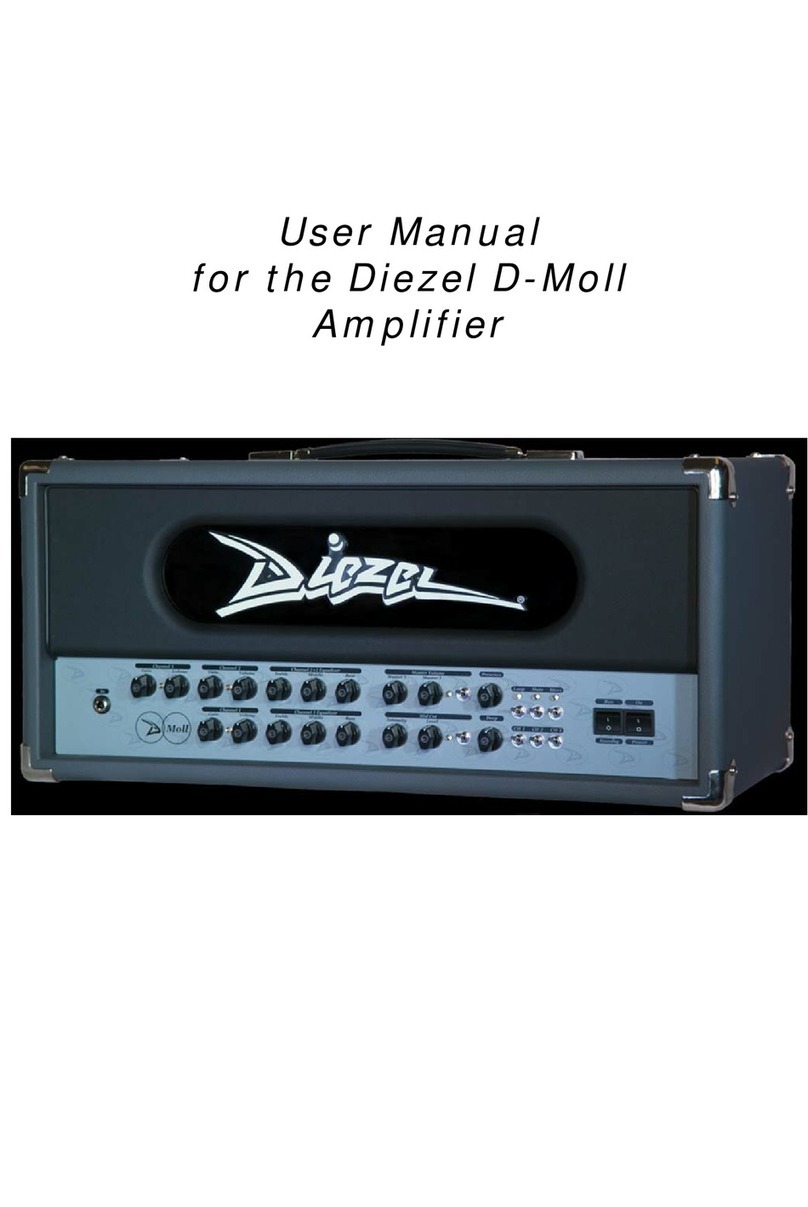
Diezel VH4 User manual

Diezel VH4/VH4S
Owner’s Manual

Chapter One
Safety Warnings and Warranty Information
1.1 Safety Warnings
We want you to be aware of certain safety aspects, for reasons of product safety and
liability. With all due respect, please read the following before operating your new Diezel
Amplifier.
-Do not use or store this Amplifier in or near moist or wet areas.
-Check voltage selector at rear of unit before plugging unit in. Make sure that voltage
shown is the correct voltage for the location you are using the amplifier at. Under no
circumstances can the amplifier be used at different than shown voltages.
-Opening of the amplifier housing must only be done by authorized personnel. No user
serviceable parts inside.
-The VH4/VH4S was designed to amplify a guitar signal and can be used only for this
purpose.
-When transporting the VH4(S) please observe the following:
The Diezel VH4 is a vacuum tube instrument amplifier. Vacuum tubes are shock sensitive,
especially when hot. To avoid damaging the unit, we recommend using care during setup
and tear down of the unit.
Allow the Amplifier to adjust to ambient temperature before operating, 60 minutes should
be sufficient in all cases.
The VH4 4 lives inside an extremely rugged chassis, but for continued road use, please
protect the amplifier by using a professional flight case. Transport only in operating
position. Do not transport upside down or on it’s side.
-The Diezel VH4 power amp is configured to deliver highest tone fidelity at “ normal “
volume levels. ( 76-80dB ) We caution you for your own good not to expose yourself to
very high volume levels for long periods of time. It can lead to hearing damage.
-Blown fuses can only be replaced with fuses of equal values. The use of incorrect fuses is
prohibited and can cause severe injury and damage of the amplifier. Use only a grounded
power cable in good operating condition.
1.2 Warranty Information
10 years to the original owner with proof of purchase. Power Tubes and Pre Amp tubes
are covered for 3 months to the original owner. The amps will be tracked via both Diezel
USA and Diezel Germany recorded sales beginning 1/20/2009. ALL REPAIR WORK MUST
BE DONE BY A DIEZEL CERTIFIED TECHNICIAN. Not following this procedure will VOID
WARRANTY. This will ensure the the original owner and us at Diezel Amplification that the

work is done correctly and that there is knowledge of what is going on out there with
each amp. To any second owners or more, there is no warranty coverage nor is a
warranty transferable. (This policy is no different then before). Of course we at Diezel are
happy to serve people who purchase their amplifier on the used market should your amp
ever need servicing. Parts and labor charges will occur for our work on your amplifier as
usual.
If you purchased your amp before 1/20/2009 you are categorized under the same
guidelines as when you purchased your amp (Lifetime warranty for the original owner, 1
year transferrable warranty).
Chapter 2
Setting up your VH4
2.1 Power connection/Mains
Before connecting to a grounded power outlet, make sure the power and standby
switches are in the off ( facing down) position. Never turn this amp on without speakers
connected. The VH4S requires a speaker to be connected to side A and B of the amplifier
output jacks. Obey impedance requirements! ( see 3.4) The VH4 S cannot be operated in
“bridged mono” mode.
Once your VH4 is connected to power and the speakers are plugged in correctly, then we
can get started!
2.1.2 Power/Warmup/Standby Off
First turn the Power switch to on ( facing up). The indicator will light up. This starts the
tube heating process. After about 40 seconds, the tubes have sufficiently heated for
normal operation. Your VH4 is now ready for operation and the standby switch can be
turned to “run” (also facing up). Premature activation of the standby switch will lead to
unnecessary tube stress and subsequent reduction of the power tube’s life span.
2.1.3 To protect and serve
Tubes are electronic components that only function with vacuum intact and under very
high operating temperatures. Each tube has one or more heating filaments, much like a
light bulb. These filaments heat up the Anode of the tube. If you switch the standby
switch before these Anodes have reached their operating temperature then the Anode
surfaces are not heated evenly yet; the “operating temperature” of the tube is not
reached yet. This causes undue stress on the tubes and their related components inside
the amp. One should therefore always give the amp it’s much needed warmup time, even
if musical inspiration hits with full force.

2.1.4 Optimum Operating temperature
It will take a little more time after warmup until everything inside the amp is working in
sync and to it’s fullest potential. A trained ear will notice a slightly warmer tone and better
complexity in tone after playing the amp for a short while. It’s like warming up before
running a marathon. Get it?
2.2.1 Factory Setting
The Amplifier is set to 110V/60Hz for use in the United States. Keep the amplifier on this
setting for use in US, and check it after servicing the amp of after receiving the amplifier
from third parties. The operating voltage is indicated by white letters inside a little window
above the power input jack.
2.2.2 Traveling Abroad
If traveling to countries outside the US, then always check their local voltage before
operating the VH4. Mismatched voltages can and most likely will destroy your amplifier.
Should you encounter voltages and frequencies other than those indicated, then a
transformer must be used between the power socket and the VH4. This transformer must
be able to transform the voltage and frequency to one of the indicated settings. The
transformer must also be able to handle the necessary amperage for your VH4.
2.3 Safety fuses
2.3.1 Main Fuse
The Main Fuse is situated inside a little drawer which is part of the power input jack. This
sliding fuse holder also hides a spare fuse. The fuse values depend on the operating
voltage in your country. For 110V, the fuse is to be a 8A slow blow, for 220V operation,
the fuse must be 4 A slow blow. It is crucially important to use the specified fuse values
only.
2.3.2 Tube Fault
Each power amp tube utilizes it’s own tube fault system, consisting of a tube fault fuse
(250mA slow blow) and a tube fault indicator ( small red warning light). Ideally, a
defective tube will blow it’s fuse and illuminate the tube fault indicator. This is very very
cool for several reasons: The tube fault system will not shut down the entire amp and
leave you or us embarrassed in the midst of a heated set. The remaining tubes will
continue operation and allow you to finish your song, or the set, or the show. Output
power, volume and tone might change some, but you will remain being heard. The
indicator shows which tube and fuse just gave up, and with a little effort and a spare tube
and fuse, you are back on stage with great tone and a smirk on your face.
We do recommend you take a look at the other tubes and replace them as soon as
possible with a matched set, followed by careful biasing.

2.3.3 Causes for Faulty Tubes
There are different reasons for failing tubes. Often tubes fail prematurely due to strong
vibrations. Tubes are very sensitive to mechanical impacts and vibrations, such as happen
when transporting an amplifier or unloading/loading etc. The inside filaments of a tube
deform easily and will cause a short inside the tube, resulting in it’s early demise. This is
why we can not extend our warranty to the tubes. A relatively new, but defective tube
can be replaced by a matching unit, no need to replace the entire set. (Unless you want
to, which is always a good solution) This is not age or wear related, but accidental
damage.
Tube Failure due to normal wear and old age is also a common cause. If this is the case,
then it makes more sense to replace the entire tube set with a matched quartet. Testing
has proven that matched sets last longer and are more reliable than mismatched sets.
Also, if one tube of a matched set fails after a few years, then the general status of the
remaining tubes is no longer a secret, because the tubes in a matched set will wear
evenly, and at the same rate. Yes - this means that the remaining tubes are likely to fail
very soon and it is time for a new set of matched tubes.
The aging process is a slow depletion of the anode’s coating ( Wolfram). The more power
the tube has to produce, the quicker this coating wears off.

Chapter 3
Peripheral Connections
3.1 Front Panel Hookups
3.1.1 Signal In Jack
The input jack (“IN”) receives your Electric Guitar signal by means of a shielded guitar
cord with 1/4” mono style plug.
3.1.2 The Cord
Your guitar cord is an important part of your signal chain and it’s quality and construction
type clearly affect the overall tone of your rig. Try and buy the best quality guitar cord
that you can or want to afford. Call us if you have doubts and need recommendations.
This is where the smart “weak link” comment comes in. Get it?
Some cords and cables sound very neutral, others color the sound spectrum and/or
attenuate high frequencies due to capacitance inside the wire and shield. What are we
talking about? OK. A capacitor is used in electronic crossovers, amongst other things, to
divide low and high frequencies. Capacitance in an cable therefore cuts your guitar’s high
end to a certain degree. Generally, the longer of a cord you use, the more of the cords
inherent characteristics will be audible.
3.1.3 The right cord for the specific instrument
In certain instances it is desirable to match a guitar cord to a specific instrument. One
can use the otherwise undesirable qualities of a cord to one’s advantage, if one has the
time and patience to experiment with different cords and guitars. This should be done
while playing with your band, or when recording. Sometimes it is difficult to tell a
components true advantages until it is used in the right context.
A guitar that has very piercing highs could theoretically be tamed down somewhat by the
use of a long guitar cord that offers some high end attenuation.
The inserts and loops of your Diezel VH4 or VH4S send signals at higher levels and
impedances, which makes this section of wiring less sensitive. You should still use reliable
and good quality wiring for all loops and inserts.
3.1.4 Signal Splitting via “Thru” jack
The “Thru” jack is wired in parallel to the input jack. You must be careful not to hook up
low impedance tuners or other devices to this jack, because if you do, the signal portion
that is split into the amplifier might be compromised. In other words, you want more
signal to go into your amp then into your tuner or other device. This jack was designed to
be used for high impedance tuners or to go into a second amplifier input stage. You can
try this out by plugging a secondary device into this jack while playing, and listening to
your tone. If you notice a change in sound quality or volume, then you should not use the
device in question at this jack. There is a better solution to connect a tuner anyway. See
section 3.3.2

3.2 Rear Panel Jacks
3.2.1 Loops, Sends, Returns
The Loop System consists of “Send1”, and the switch able/programmable “Send2”.
“Return A” with parallel or serial option and “Return B” ( VH4S only)
The individual channel volume controls determine the signal strength at the send jacks.
The range is - ... to +10dB. The output impedance is 4.7 kΩ. If you want to use the loops,
then connect the “Send” to the input of the Effects unit. Be sure and adjust the input
level of the effects unit to the amplifiers level. Most effects units have a led bar or other
level control devices. The Output of the effects unit must be connected to one of the two
return jacks, parallel or serial. If you use the parallel return, then the signal can be mixed
to the original signal via the front panel mounted “Mix” control.
3.2.2 Send 2 Functions
Send 2 has an edge over send 1: it is switch able and midi programmable. This is
especially handy if you are using a multi effects unit in this loop, but don’t want it in the
signal path all the time, but only when you are using it’s effects. You can activate or de-
activate this loop by pushing the red ”Send2” button on the front of the amp, or by
assigning it a midi command. More on midi programming later in this program.
3.2.3 The Returns: Parallel or Serial?
Which is better for you? Read on.
There are 2 ways to handle effects signals. If you use the serial return, then the signal
path of your VH4 is interrupted, the signal is sent to the processor, gets more or less
processed, then sent back to the serial return into the power amp. Digital effects units
often digitize this signal, then process it, then convert it back to analog, then send it to
the amp. This is called ADA conversion. It is necessary for digital effects units to do this
to your guitar signal, so that it becomes a digital code which the processor can read and
understand. Your tubes, however, need a old fashioned analog signal, so the processor
needs to convert the signal back to analog before it goes back to the amp. Generally,
even in highest quality effects processors, this causes a change in the original signal,
typically a loss of tonality and warmth, also noticeable as a “harder” sound. When you use
the serial loop for an effects unit like this, then your signal will have been ADA converted
at least once. Tone junkies and vintage freaks alike will more than likely have hives
developing by now. But - as always, there is a better way. Use the Parallel loop and the
mix control in the front determines how much effect signal is being added to the original
signal, which now still flows through the amplifier. There is always an analog connection
between the send and return jacks; a parallel loop!
Important: You must set the mix control on the effects unit to 100% wet when using the
parallel loop. Otherwise there will be nasty phasing problems resulting in unsatisfactory
tone. The signal portion that is unaffected by the mix control in the effects unit would
reach the amplifier at a different time due to the cabling, and cause phasing cancellations.

3.2.4 Loop as Second Master Volume
Those of you who can live without processors in the parallel loop can use this loop for a
second master volume for each channel.
To do this, just loop a short 1/4” cable from send 2 to parallel loop return. Now you can
choose a second master volume by turning the mix control past 1:00 PM to full open, and
push the send 2 button to activate your second master volume. To do this for the VH4S,
you must use a Y-cable and send the signal from send 2 to parallel return A and B.
3.2.5 Reasons for Loss of Dynamics
Many different factors can be responsible for loss of dynamics, aside from those
mentioned in 3.2.3 ( ADA conversion). A vital point that often leads to frustration is a
maladjusted output level of an effects unit. If the output level is too high, then unwanted
distortion is caused in the power amp. If it is too low, then the rig will not sound punchy
and might get lost easily in the band sound. When used in the serial loop, the output of
the effects unit determines the ultimate drive signal strength of the power amp. The
output level should be matched to give the best possible sound with all 4 channels
without over driving the power amp section. Headroom adjustments of 10% are usually
sufficient.
3.2.6 Function of the Channel Inserts
Stomp Boxes beware!
These little jewels often cause a medium to heavy wiring nightmare. If put in the signal
chain between the guitar and the amp, then one must accept massive losses of signal
purity due to the long wiring length and all the electrical connections that essentially
destroy the weak signal coming from your guitar. This holds especially true when the
units are turned off. It also adds points of potential trouble. A noticeable improvement
can be realized here by using the channel inserts. Using the Send/Return System would
add even more cabling, even though it would alleviate the signal loss problem. Channel
Inserts are perfect for the use of stomp boxes. And - they are programmable. The
channel insert button turns the insert of the selected channel on or off.
Some tips: Channel one responds well to compression. Connect the send of the channel
insert to the input of the effects unit, and the output of the effects unit to the return of
the channel insert. Turn the unit on and you are done. Now just push the insert button
and the effects unit is in the signal path for channel one. You want to program this to a
midi patch? Sure - just pick an appropriate patch on your midi controller, then hit the
store button. All selected functions will now blink. Hit the store button again and that’s it.
Your channel insert for channel one is now programmed.
We can not think of a really useful effects unit for channel two, so here is a way to loop in
your tuner. connect the tuner to the send of channel 2 insert. Now take a 1/4”jack and
connect the tip and sleeve internally. Plug it into the return of channel 2 insert. Yes - this
shorts the signal and will cause a forced muted operation of channel 2 with the insert on.
Your tuner works, but the amp is quiet while you tune. Very suave!

Advantage: No losses of tone due to splitting the signal at the “thru” jack
It is a midi programmable tuning loop.
To program: Select a midi patch at your foot controller. channel 2 on - insert on - push
“Store” twice - done.
Channel insert 3 and 4 allow you to use other diverse tone shaping devices, like noise
gates, eq, etc. Remember that the effects units that are assigned to the channel inserts
will only work for the selected channels that they are connected to. Also, the “feel” of the
effects units will be different due to the higher signal voltage to the input of the effects
unit.
3.4 Speaker Connections
As a rule, the impedance of the loudspeaker to be connected should match the
designation of the output jacks that it is connected to. We suggest using speakers that
have an impedance range of 4Ωto 16Ω, as singular speakers or in combinations.
Do not ever run the VH4/VH4S without having speakers connected to the output jack (
both sides of the VH4S).
Danger of Amplifier damage.
ΩΩΩΩΩ’s
If you are using 2 ea. 16Ωspeakers, then the total impedance is 8Ω. Really -trust us on
that. 2ea. 8Ωspeakers make 4Ω. This is because the speaker jacks on the amp are wired
in parallel mode. Your local library has many books on Ohm’s law.........
3.4.1 Choosing Speaker Cabinets
Oh boy. This is one big subjectivetug-o-war. Every manufacturer has it’s own philosophy,
even though most cabinets are constructed surprisingly similar.
The influences of magnets, coils, box volume, open or closed backs etc, all this has a
certain influence on the ultimate way the cabinet will respond to amplifier input at
different levels.The rule is that if you like the way it sounds and if it matches the amp,
then its a good choice. Make sure the combined impedance is no less than the amplifiers
minimal requirements.
Test your speakers at realistic volumes, as if you would play them most often. Many
cabinets sound very different at higher volumes than at low volumes like in a music store.
Ultimately this speaker will have the last word in at what you are going to sound like.
Many cabinets swallow the all important midrange of your tone spectrum due to internal
cancellations, which is often caused by a vibrating rear speaker cabinet wall.
We have designed a speaker cabinet that matches the Diezel VH4 series amplifier quite
well. It is the Diezel V212/V412 speaker. The cabinets are Mono/Stereo wired and utilize
Celestion Vintage 30 Speakers, or your choice of speakers on a special order basis. These
cabinets are constructed by hand, from choice hardwoods and with very good tolerances
and internal bracing. They make an excellent all round speaker and can cover a wide
array of styles. Of course, the VH4 amplifier will also work with other brands of cabinets,
including your own favorite.

3.5 Midi Connections
3.5.1 Midi In
Midi in receives “program change” orders from commonly available midi pedals
and control systems.
The VH4 is able to supply phantom power to your midi pedal via a 5-prong DIN
midi
cable.
Pin 1 and 6 = minus
Pin 3 and 7 = plus
Pin 4 and 5 = midi data
The voltage is 12VDC which is acceptable for 98% of all midi pedals.
Maximum power usage of the pedal can not exceed 800mA
3.5.2 Midi Through
This jack routes the midi signal to other midi partners. Midi data not addressed
to the VH4 get looped through this jack.
See chapter 6 for midi programming instructions

Chapter 4
Pre-Amp Section of the VH4/VH4S
4.1 Layout
The Diezel VH4/VH4S comes equipped with 4 different and totally independent preamps.
This allows the artist to play through nearly all musical styles without having to make
major changes to his amplifier. The preamps are voiced to deliver the 4 most wanted
guitar tone flavors: 1-Clean, 2-Crunch, 3-Heavy and 4-Lead. The Concept delivers 4 stellar
guitar sounds with excellent playability, warm dynamics and razor sharp equalization
possibilities. The tone controls work in an unusually wide range, so a little adjustment
goes a long way. As with so many other things - less is often more.
We suggest you start exploring the channels with all controls set to 12:00 o’clock, and
the master volume just slightly cracked open. ( to avoid hearing damage)
4.1.1 Channel One ( Clean )
This channel was designed for clean, undistorted sound with high power and good
harmonics. With it’s gain control to the upper third, it sounds soft and warm, gain at lower
settings produce more percussive and penetrating clean sounds. Full gain setting makes
crunch sounds possible. The tone reminds of a cross between a twin and a Hiwatt® 100,
but with better overall dynamic response.
4.1.2 Channel Two ( Crunch)
Channel 2 is a blues guitarists closest friend. It’s dynamic spectrum is especially beautiful
in the lower frequency range. It’s gain range goes from clean to distorted.
Due to it’s different voicing the 2nd channel will sound a little softer than channel one in
clean mode ( gain 2:00-3:00, and approaches channel 3’s tone in high gain mode ( gain
3:00-4:00, but with softer midrange and less compression.
“Raw” probably best describes this channel.
4.1.3 Channel Three ( Distortion)
It’s concept is heavy rhythm guitar. The distortion is noticeably tighter than in channel 2.
The side effect of this added compression is that he signal gets somewhat limited in it’s
dynamic range. This limitation hits mostly the lower frequencies. This loss is corrected by
a negative feedback loop to the power amps, which adds fat low end to this tone without
muddling up the tone. The control for this low end is in the master section and bears the
“Deep” designation.
The gain structure of channel 3 is designed to deliver great distorted sound even with
guitars that have relatively low output, like many vintage guitars. The side effect here is
that guitars with very high output (active EMG® etc.) might overdrive this channel too
much and become too compressed. The guitar loses it’s punch in the band sound and
becomes very undefined. In this case, a radical gain reduction is the cure. The guitar
sound will clean up a little bit, and the overtones and harmonics will once again sparkle. It
is best to start with a 12:00 o-clock gain setting and start to feel your way to the point of

perfection and very little compression. This works best while the band is playing with you.
Remember - less is often more.
4.1.4 Channel Four ( Ultra High Gain)
The Solo channel. A little more mid heavy then channel 3, therefore punches through the
band sound quite well. See channel 3 description for gain control setting. Often a gain
setting near 1:00 o’clock is sufficient for absolute high gain distortion. Use the volume
control here and for all other channels to match the individual channel volumes
4.2 Preamp tubes
The preamps are stocked with 12AX7 tubes. These tubes are not used as power tubes
and therefore last much longer than the much larger power amp tubes. However, preamp
tubes of different brands and styles produce differences in gain and tone behavior.
4.3 Noises and Microphonic Preamp Tubes
the first preamp tube ( input stage is especially prone to becoming microphonic. This is
noticeable by a feedback like tone at higher volumes. Replace the first tube with a 12AX7
High Grade tube if this happens.
Even though tube amplifiers are not typically very quiet amps, you should expect
unusually small noise levels from your Diezel amplifier. Some idle noise in channel 3 and 4
is normal, due to the higher gain structures of these channels.
Chapter 5
VH4/VH4S Power amp(s)
5.1 Tone and Volume of the Power Amplifier
5.1.1 The Master Volume
controls the final volume of the Power amplifier(s). The layout of the controls is such that
full volume is achieved at the 1:00 o’clock knob setting. Turning the knob further will
overdrive the power amp(s) to create power amp distortion for those of you that prefer
this sort of thing. We added this feature to round out the distortion sound palette on the
extreme end. So you friends of all things vintage can get colorations and distortion
textures that only power amp tubes can deliver. Bring your ear plugs, please.
5.1.2 Parallel Loop Mix
See 3.2.3 for function of the loop. The parallel loop mix control adds effect signal to the
original signal in relation to the control knobs setting. Don't forget: Effects unit 100% wet!
Also, this control allows for a programmable second master volume as described in 3.2.4

5.1.3 Presence
This knob controls the treble part of the power amps tone spectrum. Its frequency centers
at about 4kHz. Treble is produced and dispersed in a very small beam from the speaker,
so be sure to position yourself in the projection area of the speaker when making
adjustments.
5.1.4 Deep
The Deep control is an active bass control for the power amp that adds low end punch to
the power amp centered at 80Hz. It does not alter the dynamic behavior of the power
amp. Diezel Co. is not responsible for cabinet handles popping out etc.
5.2 Power Amp Tubes
5.2.1 Function
As the name suggests, the power amp section is the part of the amplifier that produces
output power, measured in watts. Preamp signals are sent to the power amp(s), which
amplifies this signal to a level that is acceptable for loudspeakers.Guitar amplifiers utilize
several different type of power amps which differ in output power and tone. We chose the
tube type power amplifier for it’s tried and true performance and familiar tonal behavior.
5.2.2 Tube Selection
VH4(S) comes factory equipped with 6550 type tubes. The 6550 tube delivers transparent
tone with good warm tendencies and strong low end. It is possible to use other types of
tubes in the Diezel amplifier. This makes this amp more versatile than most other amps
and allows you to fine tune your rig to your own special needs.
EL34/6CA7: aggressive, slender low end, higher total harmonic distortion
6550: very loud, very good dynamics, strong low end (150 to 180W)
5.2.3 Life Span
Power tubes last 1 to 3 years, depending on care, volume and frequency of use of the
amplifier. If you use your amp only once am month, then the tubes will last longer. Get it?
We have heard tubes that are over 10 years old, but it was not a good thing. Tubes age
very slowly, slow enough for the artist to get used to the changing tone. To keep things
fresh, we recommend retubing, cleaning and biasing once a year if the amp is used
frequently.

Chapter 6
Red Switches and Switching
6.0 Programming your VH4
It is quite easy to program your Diezel VH4, and easy to explain. Each change in the midi
program must be followed by pushing the “Store” button twice. After the first touch, the
selected red function switches will blink, then touch again and your program is in
memory. Each of the 128 programs (patches, program changes) can be changed as often
as is desired.
6.1 Preamp Channel Selection
The 4 channels of the Diezel can be selected manually by activating the red button above
each channel strip, or can be programmed via the midi control system. If you assign the
channel one switch function to a midi program ( for example “01”), then you can initiate
this channel’s switching via your midi pedal. Push “01” on your midi pedal after
programming, and the pedal will send digital information to the amplifier. The amp will
read this information and decide whether or not it is supposed to respond. When properly
programmed, it will then switch on channel one. OK, here it is again:
select 01 on your midi pedal. select channel one of the VH4. Now push “Store” twice.
Voila’, it’s a midi program! Now select program change “02” on your pedal, switch the
amp to channel two, hit “Store” twice, and suddenly you have a midi program with 2
program changes. Continue on until you run out of channels, about 2 more times.
All the other function of the amp can be programmed in the same exact way. Remember:
push “Store “ twice to finalize a midi program procedure. Select the program from the
pedal to recall it at the amp.
6.2 Inserts on/off
The “Insert” function always relates to the selected channel. If the “Insert” switch is
illuminated, then the corresponding channel insert is activated, and vice versa. You can
program this function as well, of course, for all 4 channels.
6.3 Send 2 on/off
“Send 2” is programmable as well. When activated, signal will go to the send 2 jack in the
rear of the amp. This is independent of channel selection, but programmable just like the
inserts.
6.4 Mute
“Mute” mutes the VH4 in it’s entirety. The signal will not go anywhere , not to the inserts,
not to the master sends, not anywhere. That’s why we call it “Mute”. Get it? We thought it
would be a very cool feature for tuning or guitar changes without pops and hums etc, and
without changing your volume settings every time you have to disconnect your cord.
Especially cool when your amp is somewhere on stage where you are not.

6.5 Store
As discussed earlier, this is the universal programming button. Activating this button twice
will verify a intended program procedure.
In case you have pushed this button once by accident, or if you have started to program
and don’t want to anymore for whatever reason, then you can push any other switch (
any switch but the “Store” switch) to cancel the programming procedure. The previously
established program will be preserved .
Chapter 7
Musical Instrument Digital Interface - MIDI
7.1 Midi
Midi is short for Musical Instrument Digital Interface, and is an internationally accepted
Communications system between musical instruments of all kinds. We will only need to
learn a small portion of this “language” to use the VH4 and it’s peripheral midi partners.
We are going to learn only about “program change” here.
7.2 Midi In
Midi in is a 5 or 7 pole DIN jack. It must be connected to the midi out jack of your foot
controller (or midi pedal), or the midi out of any effects unit connected to the pedal
directly.
7.3 Midi Through
Connect this port to the midi in of other units to continue the midi chain.
7.4 Midi channels
Midi information can be received on up to 16 midi channels. These channels can be
programmed automatically or manually.
7.4.1 Omni Mode
The Omni mode will allow reading of midi information on all 16 channels.
It is an easy way to get into the midi system, but it is not advisable if more midi partners
on different channels are in the same system. Then a certain midi channel should be
assigned to the VH4 and it’s program changes should be restricted to this channel.
(see 7.4.2) To put the amp into the Omni mode, hold the “Mute” switch down and
activate the “Channel Insert” switch quickly and then release the mute switch. The Insert,
Send 2, and Mute switches will now blink to verify that the Omni mode is being accepted.

7.4.2 Single Channel Mode - Automatic Channel Recognition
Your VH4 can automatically recognize the pedal’s send/receive channel. To get your amp
into the mood ( or mode) for this, push and hold “Mute” and then activate any program
change button on your midi pedal. The amp will look for a program change and recognize
the channel it is being sent on. Then it will switch to this channel and stay there as soon
as you let go of “Mute”.
7.4.3 Single Channel Mode - Manual Midi Channel Selection
If you would like to have your VH4 on a certain midi channel, then we can accommodate
you here as well. Here is how this works:
Push and hold “Mute” and then turn on the preamp channels in the order that
corresponds to your midi channel preference.
For example: if you want to have your VH4 to respond only to midi information that is
being sent on channel 12, then you must hold the “Mute” button down and turn the
Preamp channel one selector on, channel two selector on, channel 3 selector off, and
channel 4 selector on. If you let go of “Mute” now, then your VH4 is set to respond to
Midi channel 12 only. Get it?
The table below gives you the sequence for all 16 Midi channels.
Midi Channel Ch1 CH2 CH3 CH4
1 off off off off
2 on off off off
3 off on off off
4 on on off off
5 off off on off
6 on off on off
7 off on on off
8 on on on off
9 off off off on
10 on off off on
11 off on off on
12 on on off on
13 off off on on
14 on off on on
15 off on on on
16 on on on on
7.5 Program Change Capability
The VH4(S) can accept up to 128 program changes.

7.6 Phantom Power
The two outer pins of the Midi port can supply power to the midi controller pedal. See
3.5.1
Chapter 8
Cleaning and Servicing the VH4/VH4S
8.1 Cleaning
Never use a wet method of cleaning the amplifier. Any amplifier. Usually it is sufficient to
wipe down the outside of the amp with a slightly moist cleaning rag. Do not use abrasive
cleaning chemicals. Sometimes a vacuum cleaner can be used to remove dust and dirt
from nooks and crevices. Do not remove the chassis from the housing to clean the amp.
The inside of your amp carries dangerous Voltages.
8.2 Care and Feeding
Be gentle with this Amplifier. Any mechanical shocks and wide temperature changes,
moisture rich environments and extreme conditions ( dust, wind, heat, cold, moisture) can
substantially shorten tube life, in some cases even amplifier life.
Do not block the air circulation grilles in the front and in the back of the amp. Do not push
the amp right up against objects that would interfere with it’s normal airflow. The top of
the amplifier might get warm after prolonged use, this is normal, but will melt your ice
cream and definitely ruin your beer. Never put beverages on top of the amp where they
could spill and flow inside the amplifier. This would be very bad overall.
Get it?
8.3 Tube Change
Tube changes are only to be undertaken by authorized service personnel. If Power tubes
with different values then the original ones are to be installed, then the amplifier must be
re-biased before operation can be resumed. The amplifier uses a hard wire bias system. It
is quick and easy to accomplish biasing, but involves removing the chassis and
soldering/measuring currents inside the amplifier. Only trained professionals should
attempt this procedure.
Salwender International and the Diezel Company wish to express their gratitude and
congratulate you for your decision to purchase the Diezel VH4 or VH4S Amplifier.

This manual suits for next models
1
Table of contents
Other Diezel Musical Instrument Amplifier manuals
