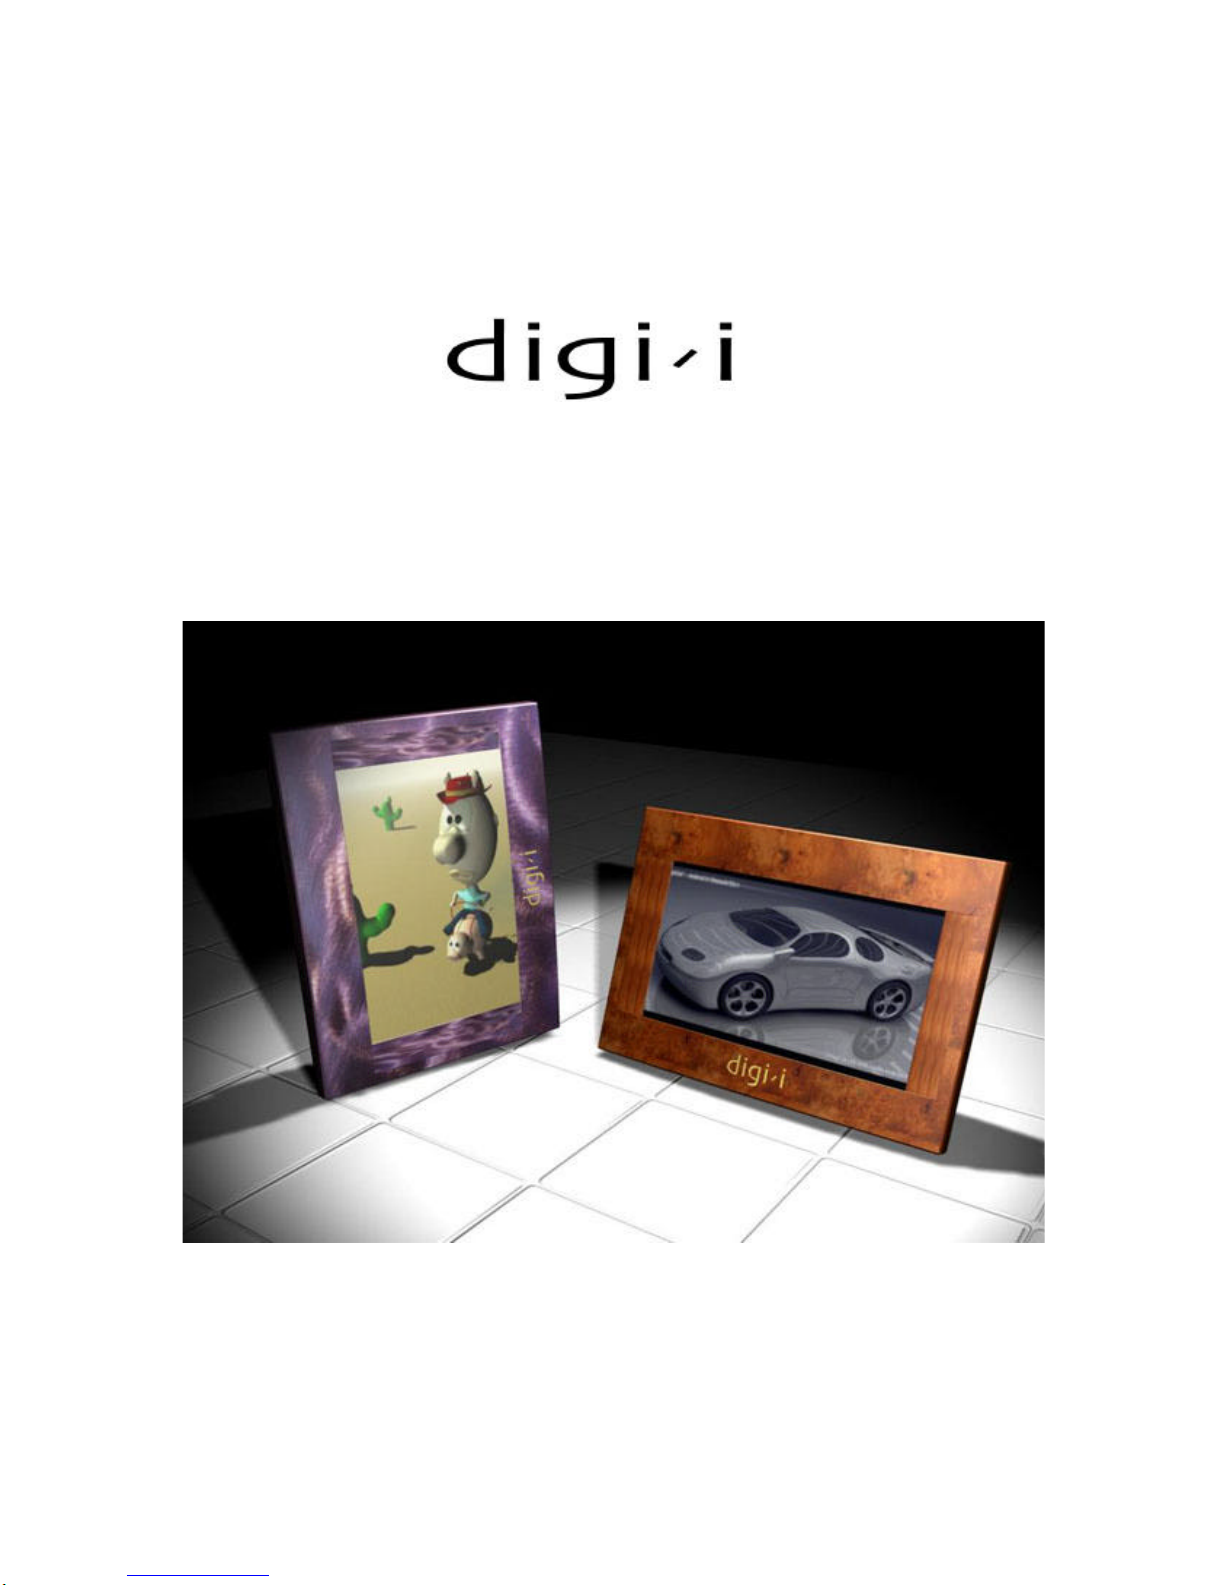
Digi/i DPF-700 User manual
1
///////////////////////////////////// Digi/i manual //////////////
Model : DPF-700

2
///////////////////////////////////// Digi/i manual //////////////
Contents
Feature list --------------- 03
Getting Started --------------- 04
Way to use your Digital-Frame ---------- 04
Applied Digital-Frame --------------- 09
Menu System --------------- 11
Tips & Tricks --------------- 15
Digital-link PC software --------------- 16
Upgrade Digital-Frame Firmware ------ 17
Trouble Shooting --------------- 18
Technical Specifications ---------------- 20
The use’s manual will provide you with the brief explanation of basic function
of Digi/i. Details can be referred to the “Help”in Digi-Link software
which will be provided to you with Digi/i.
You should have read a on-line document if you want system software upgrade
and carefully read upgrade document too.

3
///////////////////////////////////// Digi/i manual //////////////
JPEG picture viewing.
View image files in the popular JPEG image format used by most digital cameras.
Picture files may be any size up to the limit of available memory.
The digital-frame can only read JPEG images.
If your have images in some other format that you wish to display
on the digital-frame, use an image editing soft ware to change the format
of the image to JPEG.
DO NOT just change the tag at the end of the file name to:
<your picture>.jpg
Compact Flash and Smart Media (SSFDC) storage card support.
Use storage cards directly from almost all popular digital cameras.
Computer connection.
Built in USB interface allows you to connect Digital-Frame to
your personal computer (Windows) to transfer images to and from the computer.
Download your favorite pictures from E-mail or the Internet
and store them on a Compact Flash or Smart Media card for convenient
viewing at any time.
Large, bright color display.
Digi-i has 7.0 active-matrix color LCD capable of displaying thousands of colors.
Contrast is user-adjustable.
The low resolution setting on your camera will display beautifully
on the digital-frame. Higher resolutions will not improve display on the
digital-frame, and may slow down the slideshow.
Feature List

4
///////////////////////////////////// Digi/i manual //////////////
Programmable slideshow.
Assemble your own slideshows (up to ten different slideshows on each memory card) and show
your pictures in any order you want. Simply select images from a list of thumbnails on the card.
Each slideshow can have its own different pictures, transitions, slide intervals, effects, etc. During
the slideshow you can pause or resume and manually skip forwards or backwards. The interval
between slides is programmable in ten-second increments up to ten minutes. Further enhance your
slideshows with our variety of selectable transition effects.
Instant start.
Insert your card full of images, turn on the Digital-Frame, and it will immediately begin a cycling
slideshow of all available pictures, with no user interaction necessary.
Simple, graphical menus.
Menus are shown as both as large, easily-visible icons and descriptive text.
Delete pictures from memory cards.
Delete pictures to free up card space.
Audio feedback.
Menu commands and other actions are confirmed with audible tones ( Beep tone ).

5
///////////////////////////////////// Digi/i manual //////////////
Setting up the Digital-Frame for the first time:
Digi-i is designed to be used either horizontally (landscape) or vertically (portrait).
The Digital-Frame will be changed the display mode in main menu to match its
orientation.
Choose the orientation that you prefer, then rotate the Rotating Stand to match
that orientation. Set the Digi-i on a flat surface, and adjust the height of the stand
to change the viewing angle.
Connect the External Power Supply (Input 110-240 VAC 50/60 Hz ,
Output DC12V, 1.8A) to the Power Supply jack on the back of the Digital-Frame.
Insert a Compact Flash and/or Smart Media Storage card with your digital pictures
in JPEG format. Take care to orient the Cards as shown.
Push the Power Button to turn on the Digital-Frame.
Enjoy your pictures.
Using the Rotating Stand:
The stand on the back of your Digital-Frame rotates 90 and securely clicks into
two rotational positions, one for portrait, the other for landscape.
The stand is designed to support the Digital-Frame on flat surfaces.
Both rotation positions can support the Digital-Frame at several viewing angles,
choose the one that looks best.
Easy-to-use controls:
The icon-based menus on the Digital-Frame are controlled by a group of four buttons.
Except for the Power Switch, all of the controls are located on one side of
the Digital-Frame. It is the top in landscape mode, and the right side in portrait mode.
Getting Started
6
///////////////////////////////////// Digi/i manual //////////////
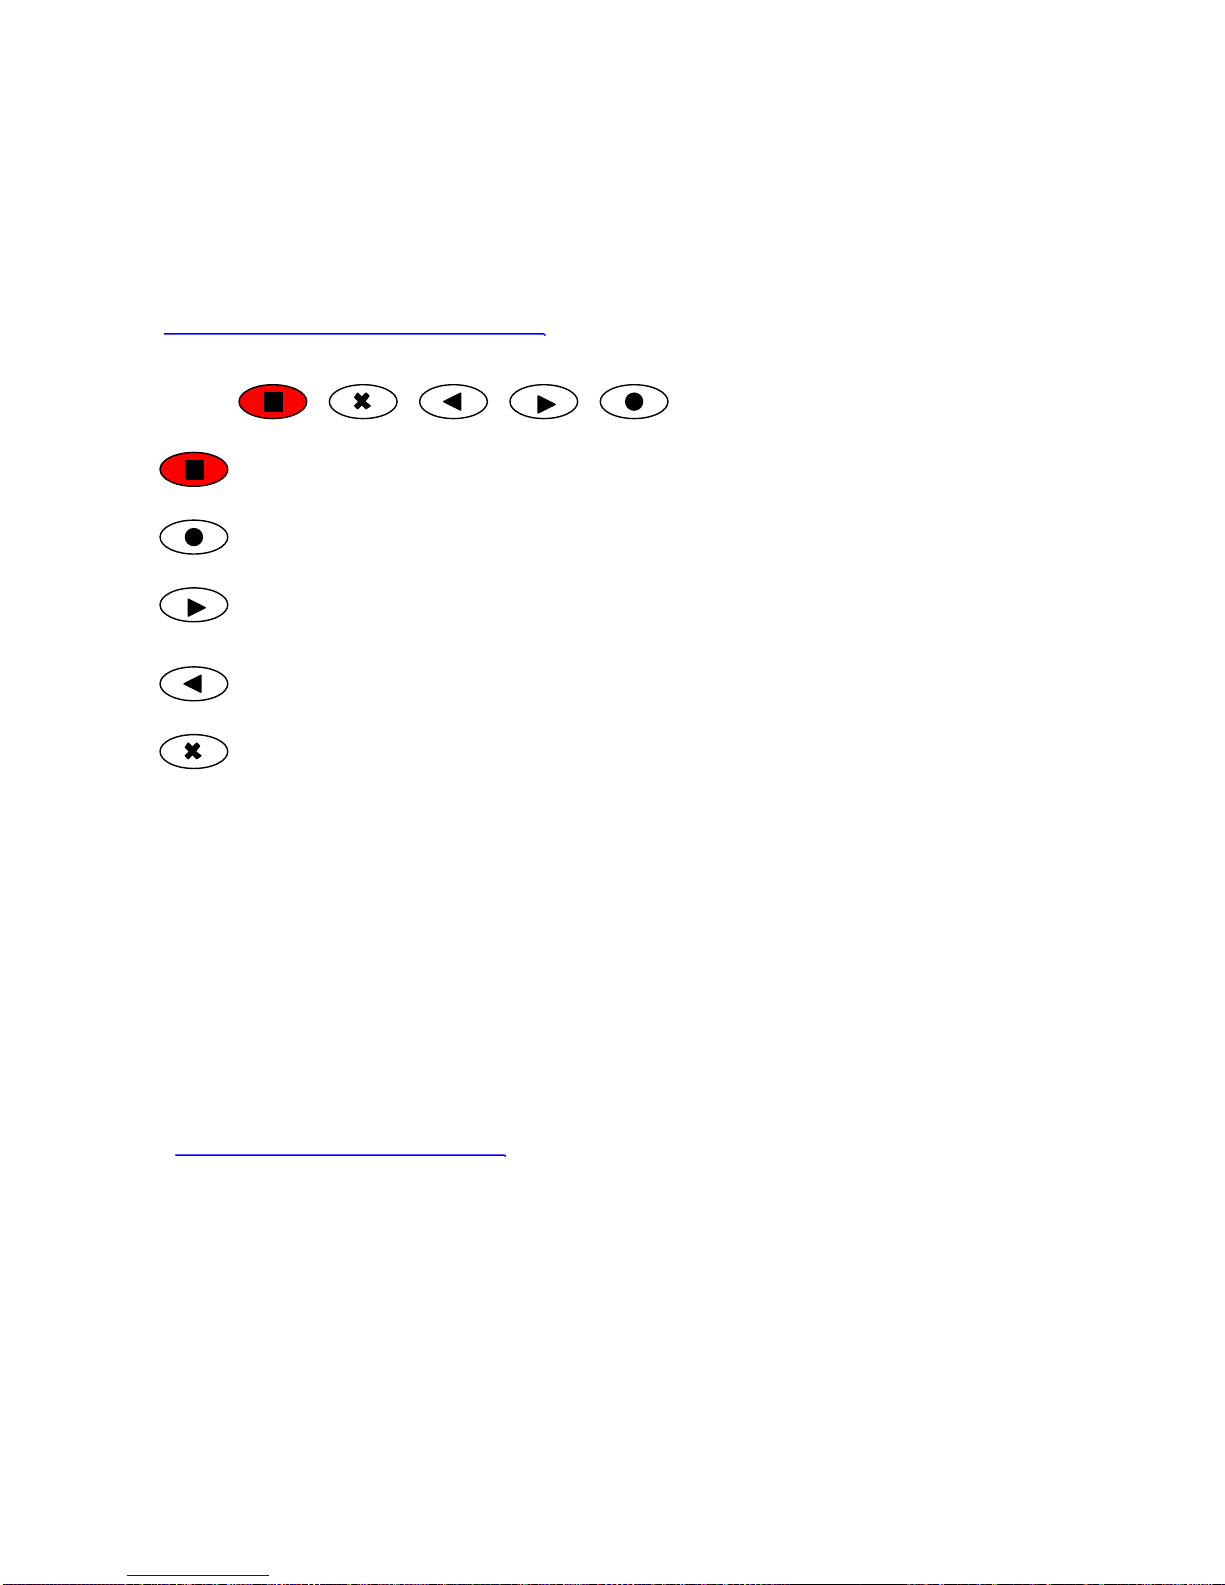
The Manual Control Buttons:
: Power Button -Power On / Off
: Menu Button -Call the menu box and Select function.
: Forward Button -Move the cursor forward
: Backward Button -Move the cursor backward
: Cancel Button -Cancel the selected function
The four buttons on the control side of the Digital-Frame provide control of image viewing.
Press the (X) button to pause or restart the slideshow. When the show is paused, the play/pause
resumes the slideshow.
Press the button to advance to the next picture.
Press the button to go back to the previous picture.
Press the button to display menu box.
The buttons can have a variety of other functions while in the menu system. Follow the on screen
directions.
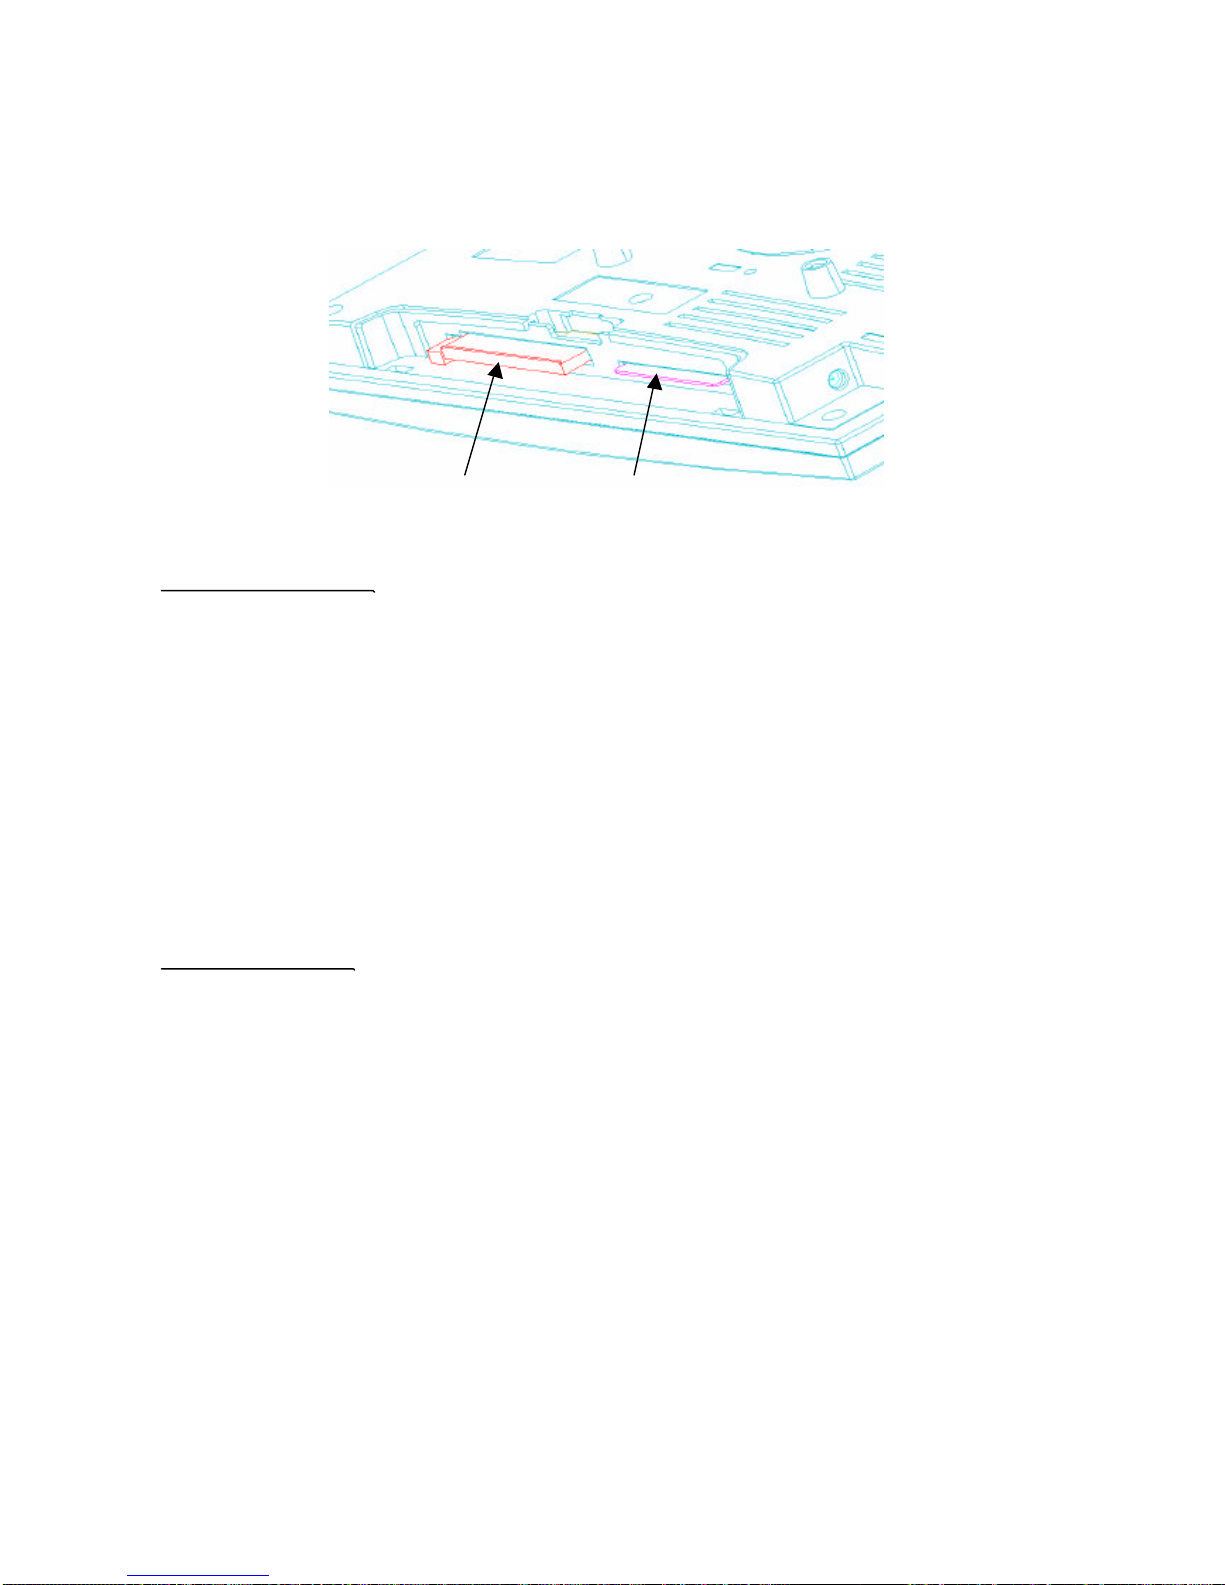
Inserting Memory Storage Cards :
DPF-700 is designed to read either Smart Media or Compact Flash memory
storage cards.
7
///////////////////////////////////// Digi/i manual //////////////
Compact Flash Smart Media
Compact Flash Card :
-Compact Flash slot :
Insert Compact Flashstorage cards here.
-To insert the Compact Flash card :
Make sure the Digital-Frame is off.
Gently slide the card into the Compact Flash slot. The card only goes in one way.
Do not force the card into the slot.
-To remove the Compact Flash card :
Make sure the Digital-Frame is off.
Press the eject lever into the Digital-Frame, this will partially eject
the Compact Flash card. Once the lever is pressed inside the Digital-Frame,
gently pull the card free.
Smart Media Card :
-Smart Media slot :
Insert Smart Media (SSFDC) storage cards here.
-To insert the Smart Media card :
Make sure the Digital-Frame is off.
Insert the card with the gold contacts facing toward the back of the Digital-Frame,
notched end first. Do not force the card into the slot.
-To remove the Smart Media card :
Make sure the Digital-Frame is off.
Push the card, this will dislodge the Smart Media card. Once the card pushed,
gently pull the card free.
8
///////////////////////////////////// Digi/i manual //////////////
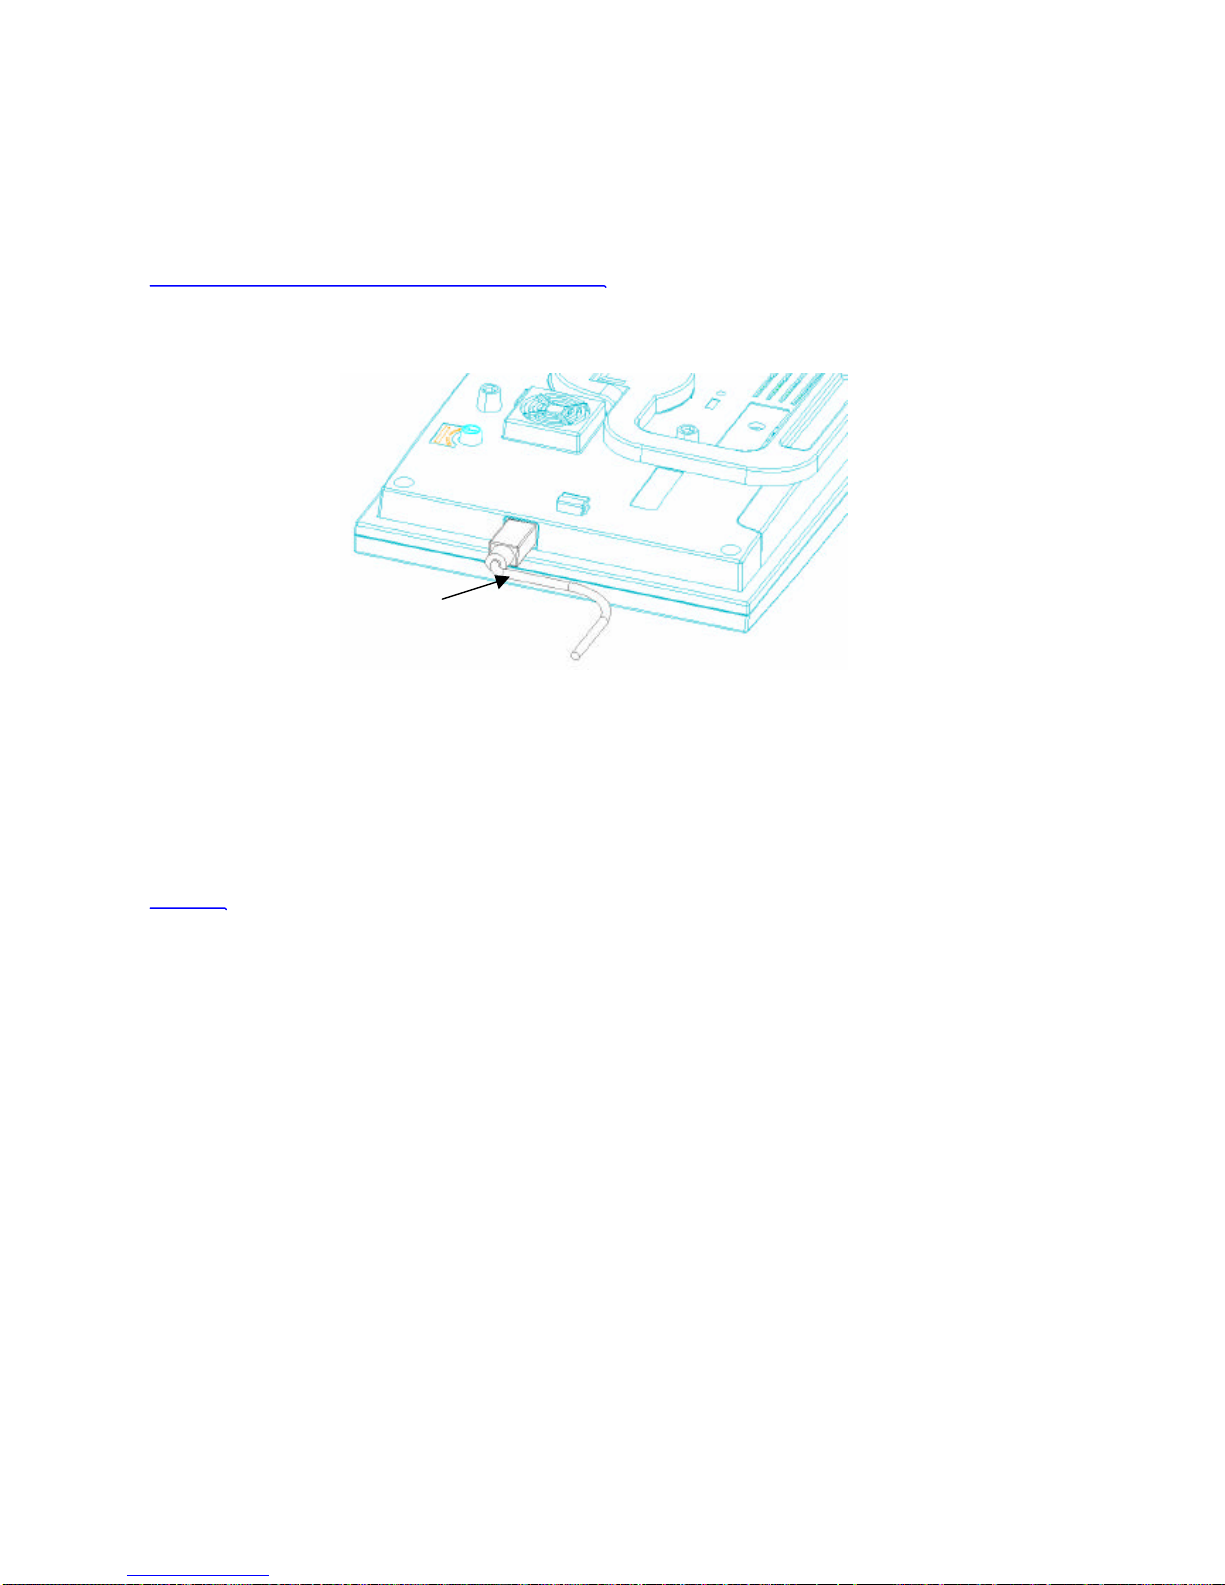
Connecting Digital-Frame to your desktop PC :
The Digital-Frame can link to your Desktop PC to upload and download Digital Pictures.
-Digital-Link port :
Connect the Digital-Frame to your PC by attaching the USB link cable between
this socket and the computer’s USB port.
In order to connect to your desktop PC,
your Digital-Frame comes with PC compatible USB cable ( Digital-Link cable ).
The Digital-Link cable has two dedicated connector ends.
The USB connector connects to the serial port on the back of
most IBM-compatible computers.
The Digital-Frame connector connects to the Digital-Link port on the Digital-Frame
Screen :
Displays your pictures in vivid color. Your Digital-Frame’s screen is made
of glass and should be treated with care. Use soft cloth and a recommended screen
cleaning solution to remove fingerprints.
Digital Link port (USB)
WARNINGS
Do Not Block the Ventilation Holes on the back of the Digital-Frame at any time.
Keep your Digital-Frame out of direct sunlight. Direct sunlight may cause damage.
Do not open the case of the Digital-Frame.
There is risk of electric shock, and there are no user-serviceable parts inside.
Opening the case will void your warranty.
Do not use Digital-Frame if conditions could allow condensation to occur,
or damage may result.
The screen on the Digital-Frame is made of glass and can break.
It is covered with plastic polarizing material that can be scratched.
Treat it gently, and follow the screen care instructions in this Manual.

9
///////////////////////////////////// Digi/i manual //////////////
Applied Digital Frame
Camera Images Direct to Digital-Frame :
This is the simplest way to use your Digital-Frame. Take a picture with
your digital camera, remove the memory card from the camera, insert it into
your Digital-Frame and view your pictures.
Images found on many websites can be saved to your hard disk and then
downloaded to your Digital-Frame in the same way as e-mail images.
Camera Images to PC and then to Digital-Frame :
Images can be transferred from the camera to the computer by a serial connection
( USB ) or by use of a card-reader peripheral. After editing,
transfer the images to your Digital-Frame using Digital-Link or a card reader.
Important information about the Screen :
The backlighting of the display panel in your Digital-Frame has a minimum life
expectancy of at least 10,000 hours. This is equivalent to about 14 months of continuous
24-hour usage. To prolong the life of your Digital-Frame’s display
we suggest turning it off when not in use. If used five hours or less per day
it will last at least five years.
Quick View :
Quick View shows a small "thumbnail" for each image on the memory cards
currently inserted. Use the direction button to high-light the desired image,
then click the menu button to "zoom in" on the highlighted image.
Click the menu button again to return to the Quick View screen.
Press (X)to exit Quick View and return to the Slide Show.
Slide Order :
The user shall be selected pictures order by selected slideshow sequence.
You are the select of internal memory first or external memory first for slideshow pattern.
Note : Whichever setting you choose here, only pictures that you have added to
the currently selected slideshow will be displayed.
Add All To Slideshow :
Selecting this option will add all pictures on inserted cards to the current slideshow.
Picture Orientation:
Some of your pictures will have been taken with the camera in a horizontal position,
and others in a vertical position. The Picture Orientation screen allows you to tell
your Digital-Frame which is the correct position for each image.
A screen of thumbnails is displayed for the images currently in the slideshow.
Highlight images and push buttons as necessary to rotate all the images to
a vertical orientation.

10
///////////////////////////////////// Digi/i manual //////////////
Menu System
Power On / Off :
After plug in the Digi/i and click the Power button, display slide-show last stored or default 2 images
from warehouse.
Click the Power button during 2 seconds for power off.
Menu System :
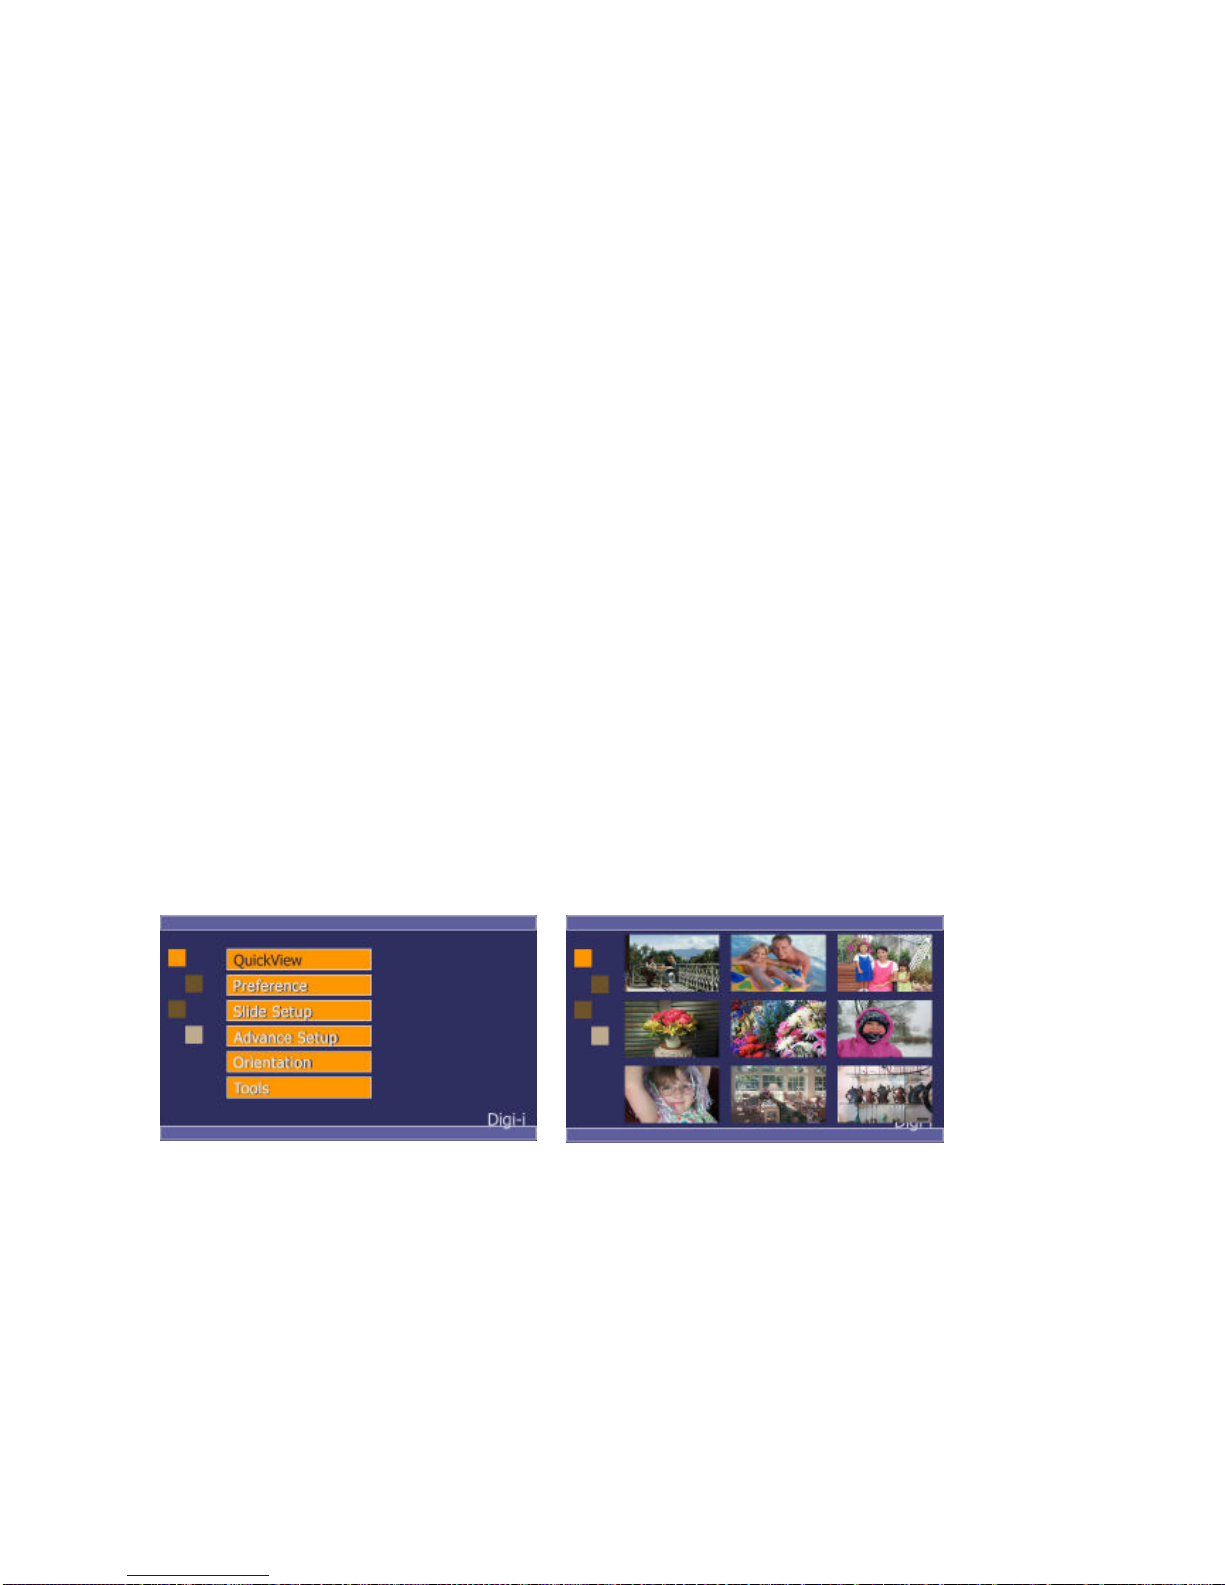
Click the menu button and display main menu box at the right-bottom side of the screen as
shown [ Fig. 1-1 ].
Clicking forward or backward button highlights each icon in turn.
Click menu button to enter a sub-menu of selected icon. Press Cancel button (X) to exit
the menu system at any time.
Fig. 1-1
Button operation under menu system :
In order to provide you with the diversity of function with limited number of button,
Digi/i has adopted the basic structure of button operation, as shown. (Tab. 1-1)
When you power on Digi/i, it will display initially the sample pictures preset by manufacturer.
For the access to menu system, you need to press the button of “Select”.
And, it will lead you to the main menu as shown above.
The button highlighted shows you the current position that Digi/i is in function.
You may able to see the change of cursor when you press the buttons of "Forward",
"Backward", "Select" and "Cancel".
11
///////////////////////////////////// Digi/i manual //////////////
Operation Map
Main Menu Sub-Menu
Quick View
Preference Effect
Color fill
Slide order
Transition time
special effect
Slide setup
Advance Setup Slideshow
Add All
Slideshow Manage
Orientation Vertical
Horizontal
Tools Erase card
Delete picture
Format Card
Information
Tab. 1-1
Quick View
This function look for a quickly indicate with thumnail pattern.
Through the menu screen, move to Quick view and move to forward and backward key
with search on pictures. For the move to slide mode, push to cancel(X) Button and refer to Fig.i-2.
Fig.1-2

12
///////////////////////////////////// Digi/i manual //////////////
Preference : Initial Function define.
These function are picture effect, fitting, slide order, duration of display time and
special effect.
Fig. 1-3
.Slide Setup
Control of slide in internal memory and external memory.
It’s controlled select / delete / add / manage for each slide.
Fig. 1-4
.Advance Setup
It’s upgrade of slide setup function and will be upgrade software very soon.

13
///////////////////////////////////// Digi/i manual //////////////
Orientation
Selected horizontal on vertical of slide pictures.
Fig. 1-6
Tool
It’s control of external memory card for erase, delete, format, and card information.
Fig. 1-7
Down load
You can download the pictures from your PC to Digi/i as explained in the “way to use your Digi/i”.
And, you may need to down load the upgraded software of Digi-Link from the internet.
For this download function, please connect the Digi/i to your PC and execute the download program
of Digi-Link.
When you finish to download the pictures or upgraded software from your PC, Digi/i start to
operated in accordance with new setup, automatically.In case you press the "cancel" button, during
the stand-by mode for downloading, Digi/i goes back to previous operation.
Slide Effect
Scroll Left, Scroll Right, Scroll Down, Scroll Up, Vertical Wipe out, Vertical Wipe in
Horizontal Wipe Out, Horizontal Wipe In, Fade Out & Fade In, Mozaic

14
///////////////////////////////////// Digi/i manual //////////////
Tips & Tricks
How to optimize your pictures for display on Digital-Frame
The screen resolution of the Digital-Frame is 800 x 480 pixels. Displaying images larger than this
will not increase detail or resolution when displayed on the Digi/i.
Shooting pictures at 800 x 480 or adjusting the resolution in image manipulation software
down to this size will increase the number of pictures that can be stored on a Memory Storage Card.
It will also speed decompression of the pictures, improving slideshow performance.
Your Digi/i will automatically reduce the size of large image files to fit on the screen.
It is possible that the Memory Card is not in a standard format :
Occasionally, memory cards included with digital cameras are factory formatted in some
non-standard way.
A badly formatted card can cause a variety of problems in a Digi/i.
If an individual card is having problems in the Digi/i, try reformatting the card from tool function.
Formatting erases the contents of the card, so be sure to save any images to another storage media or
device before reformatting!
Digi-Link PC software
Digi-Link software runs on your desktop computer.
It simply and easily downloads images to your Digi/i. Digi-Link also allows you to upgrade
the software in your Digi/i as new features and enhancements become available
(see Upgrading Your Digi/i’sSoftware).
We recommend connecting the Digi/i to the computer before running the Digi-Link Software.
Running Digi-Link Software :
Place the Digi-Link CD that comes with the Digi/i in your PC’s CD-ROM drive.
The program is executed with automatically and it installs a software in the your PC.
It executes the Digi-Link from “start menu" in window menu.
Read the “Read Me”file.
To Download Pictures to the Digi/i :
Connect one end of the Digi-Link serial cable to the serial port on your PC; then connect the other
end to the Digi-Link port on your Digi/i. Run Digi-Link software.
In the Images To send window, Find the Add... button.
Click on the Add... button. locate the JPEG image that you want to down-load to the Digi/i.
Select the Image.
Click the Open button.
Digi-Link also supports “drag and drop.”
Find the icon for the JPEG image that you want to include in the Slideshow.
Drag the icon from the desk-top or any explorer window to the “Images To Send”window.
The original file will remain in the directory where it was.
Repeat this process until you have selected all of the JPEG images that you wish to download.

15
///////////////////////////////////// Digi/i manual //////////////
Removing images from the Images To Transfer list :
Click on the name of the file to Selecte the JPEG file that you wish to remove.
Once it is highlighted, click on the Remove button to remove the JPEG Image from the list of
images to transfer to the Digi/i.
Sending pictures to the Digi/i :
Once all of the JPEG images are listed in the Images to Transfer window; click the Send button to
transfer the images to the Digi/i.
IMPORTANT:Be sure to transfer all of the images that you want to transfer before quitting
Digi-Link. Digi-Link does not save the list of items in the “Images to transfer”box.
The JPEG files on your PC will be left untouched.
Upgrade Digi/i Firmware
Software Updates May Be Available:
From time to time Digi/i will make improvements to its internal software (firmware) to add features
or enhancements. Check www.dipf.co.kr or www.navi-trade.com for updates to your Digi/i software.
Visit www.dipf.co.kr or www.navi-trade.com and follow the links to the software update page.
Read the instructions carefully and download the update that is appropriate for your model of Digi/i.
The file you download will contain detailed, step-by-step instructions for installing the update.
Enjoy the new firmware.

16
///////////////////////////////////// Digi/i manual //////////////
Q: What is the total memory capacity for digital photo in your digi-i
A: 1Mbyte has 12photos then each 32Mbyte extended memory (CompactFlash and SmartMedia)
and possible if internal memory increase at 8Mbyte.
The approximately 850photos now, and will be upgrade memory capacity very soon.
Q: Digi/i displays no picture, It makes sounds when turned on, but the screen remains either black
or white.
A:The screen contrast may not be adjusted properly. Rotate the contrast wheel fully, from one stop
position to the other. This should correct the problem.
Q: Digi/i doesn’t display any pictures, even though I know there are pictures on the storage card I
inserted.
A: Your camera may be storing images in a non-standard format. Digi/i only supports standard
JPEG/JFIF (.JPG) files. Consult your camera documentation to learn if your camera can be con-
figured to store pictures in JPEG (.JPG) format.
Q: Picture display seems to be slow.
A: Your picture files may be very high-resolution. Large picture files take longer to display. Many
cameras allow you to choose between different picture storage resolutions. To maximize Digi/i’s
responsiveness, take your pictures with the camera on its lowest resolution setting.
Q: Digi/i reports “Bad card”or “Empty card”when I insert a card containing pictures.
A:Your camera may not be storing pictures in standard MS-DOS compatible format. Please contact
Digital-Frame customer support to see if there is a software upgrade available to support your
camera’s storage format.
Some cards shipped with digital cameras have unusual formats. These cards may cause all sorts of
problems in a Digi/i.
If you are having difficulty displaying pictures, you should try formatting the card. This can be done
in most Digital Cameras and will erase the contents of the card. If there are pictures on the card that
you wish to keep, be sure to copy them to a storage device before reformatting the card.
Q: Are Digi/i products compatible with Sony's Memory Stick ™?
A: The DPF-700 do not accept Memory Stick ™directly, but Memory Stick ™can transfer their
pictures from Memory Stick ™to a CompactFlash ™or SmartMedia ™card for use in these
products. This can be done by transferring images directly from the camera to a computer via the
camera's built-in USB connection your computer.

17
///////////////////////////////////// Digi/i manual //////////////
Q: I am using a Macintosh computer to put pictures onto a card. When I finish loading up the card
and put it in the Digi/i, I am told "NO PICTURES FOUND".
A: Digi/i, like digital cameras, uses a DOS file system . It has to infer what is inside a file from the
last three letters of the filename. If you are saving your pictures from a Macintosh, remember to
add ".JPG" to the end of every picture's filename, otherwise Digi/i will not know the are pictures.
Q: I’m using a SmartMedia card with JPEG images, and it’s inserted correctly, but it still doesn’t
work.
A: Check the size and capacity of your SmartMedia card. The card has been different size with
memory capacity
The Digi/i external memory capacity are below,
It’s useful of either SmartMedia and Compact flash card of each 32Mbyte now.
But will be increase external memory capacity very soon for Advertize business.
Q: I have a 32Mb, 64Mb, 128Mb of smart media card. But could not be appear of photes.
A:Now, Digi/i can be displayed under 32Mbyte SmartMedia card. You can download form own
Digi/i web site for upgrade very soon.

18
///////////////////////////////////// Digi/i manual //////////////
FCC Compliance Statement
Caution : Any changes or modifications in construction of this device which are not expressly
approved by the party responsible for compliance could void the user’s authority to operate the
equipment.
Note : This equipment has been tested and found to comply with the limits for a Class B digital
device, pursuant to part 15 of the FCC Rules. These limits are designed to provide reasonable
protection against frequency energy and, if not installed and used in accordance with the
instructions, may cause harmful interference to radio communications, However, there is no
guarantee that interference will not occur in a particular installation. If this equipment does cause
harmful interference to radio or television reception, which can be determined by turning the
equipment off and on, the user is encouraged to try to correct the interference by one or more of the
following measures:
-Reorient or relocate the receiving antenna.
-Increase the separation between the equipment and receiver.
-Connect the equipment into an outlet on a circuit different from to which the
receiver is connected.
-Consult the dealer or an experienced radio/TV technician for help.
Table of contents


