DIGIVISION DVR User manual

DVR Server Manual
I
Digivision DVR system
User’s Guide

DVR Server Manual
II
Contents
Chapter1 Start up and Main Interface......................11
1.1 Preparation & Uninstallation .................................................. 11
1.1.1 Installation.................................................................................... 11
1.1.2 Uninstallation ............................................................................... 11
1.2 Disk management................................................................... 11
1.3 Start up .................................................................................. 14
1.4 Main Interface........................................................................ 15
1.4.1 Show tips.......................................................................................15
1.4.2 Screen menu.................................................................................. 15
1.4.3 Interface description ..................................................................... 21
1.4.4 System Menu ................................................................................. 23
1.4.5 PTZ Control panel......................................................................... 33
1.4.6 Color and Audio adjustment..........................................................36
1.4.7 Matrix & display...........................................................................37
1.4.8 DI/DO Control .............................................................................. 37
Chapter2 Local setup ..................................................... 40
2.1 System setup .......................................................................... 40
2.1.1 System setup.................................................................................. 41
2.1.2 Network setup ............................................................................... 42
2.1.3 Boot setup ..................................................................................... 44

DVR Server Manual
III
2.2 Camera setup ......................................................................... 45
2.2.1 Camera setup ................................................................................45
2.2.2 Group setup................................................................................... 49
2.3 Sensor setup........................................................................... 51
2.3.1 Sensor setup.................................................................................. 51
2.3.2 Group setup................................................................................... 51
2.4 PTZ & Linkage setup ............................................................. 53
2.4.1 PTZ protocol setup........................................................................53
2.4.2 Motion detection relay & remote client alert .................................54
2.5 E-mail & SMS setup .............................................................. 55
2.5.1 EMAIL setup ................................................................................. 58
2.5.2 SMS setup .....................................................................................58
2.6 Display setup ......................................................................... 59
2.7 Password setup....................................................................... 60
2.7.1 User information...........................................................................60
2.7.2 User right setup.............................................................................61
Chapter3 IP Camera Setup ............................................ 63
3.1 Functional buttons.................................................................. 63
3.2 Server setup ........................................................................... 64
3.3 Channel setup......................................................................... 65
3.4 PTZ control............................................................................ 67

DVR Server Manual
IV
3.5 Sensor setup ........................................................................... 70
3.6 Alarm setup............................................................................ 71
Chapter4 Playback.......................................................... 73
4.1 Main interface ........................................................................ 73
4.2 Select playback channel.......................................................... 74
4.2.1 Select date..................................................................................... 74
4.2.2 Select Record Type ........................................................................ 74
4.2.3 Select camera................................................................................ 75
4.2.4 Select file....................................................................................... 77
4.3 Play file and related operations............................................... 78
4.4 Capture picture....................................................................... 79
4.5 Backup................................................................................... 79
4.5.1 Create file clip............................................................................... 80
4.5.2 Backup by time:.............................................................................81
4.5.3 View Backup file............................................................................ 83
4.5.4 Burn video file to DVD/CD ...........................................................83
4.6 Search captured picture .......................................................... 84
4.7 POS Playback ........................................................................ 85
4.8 ACU Playback........................................................................ 86
4.9 ICON Playback ...................................................................... 88
Chapter5 IE client ........................................................... 89

DVR Server Manual
V
5.1 Functions of IE Client ............................................................ 89
5.2 Main interface ........................................................................ 89
5.2.1 Connection operations .................................................................. 90
5.2.2 Connection/Record status..............................................................90
5.2.3 Partition mode ..............................................................................90
5.2.4 PTZ Control ..................................................................................90
5.2.5 Quit program ................................................................................91
5.3 Local search ........................................................................... 91
5.3.1 Display setup and data information...............................................91
5.3.2 Playing operation area.................................................................. 92
5.4 Remote search........................................................................ 92
5.4.1 Fast download record data............................................................93
Chapter6 Mobile Client................................................... 95
6.1 Recommended Mobile Phone Requirements ........................... 95
6.2 Download software ................................................................ 95
6.3 Install and connect.................................................................. 96
6.3.1 Installation.................................................................................... 96
6.3.2 Connection.................................................................................... 96
6.4 Login Interface....................................................................... 96
6.5 Camera List............................................................................ 97
6.6 PTZ control............................................................................ 97

DVR Server Manual
VI
Chapter7 Appendixes..................................................... 99
7.1 Appendix A: Fast key reference .............................................. 99
7.2 Appendix B: Audio preview.................................................. 101
7.3 Appendix C: Update drivers of compressed card ................... 102
7.4 Appendix D: How to use “Copy File” folder. ........................ 103
7.5 Appendix E: Frequent Asked Questions................................ 103
7.6 Appendix F: Dual Monitor ................................................... 104
7.7 Appendix G: Sony Camera Setup ......................................... 105

DVR Server Manual
7
Introductions
Thank you for purchasing DVR System. This operation manual is to
introduce how to set DVR system and explain each function for you to use the
system effectively and stably.
Users should read this manual thoroughly before you install or utilize the
DVR system.

DVR Server Manual
8
System features
-Support multi-brand of mobile client
-Support 64bit OS installation
-Support multi-brand of IP cameras, such as Mobotix, Sony, Acti,
Arecontvision etc.
-Support H.264 compression and low HDD cost
-Access web through LAN or WAN
-Real time full-motion video-capture & display (Up to 64 channel video
input)
-Real time high-speed recording (Up to 30 fps per channel)
-Synchronous audio recording (optional)
-Motion detection (Whole area or up to 12 detection zones per channel)
-Normal recording (continuous) and event recording (Motion detection or
external sensor)
-Electron Map pop-up when alarm happen
-System operating and alarm logging
-Alarm before recording
-Remote recording
-Send alarm message automatically.
-Send alarm image to email box as attachment automatically
-Matrix display and group display
-Duplex mode (Recording while playback)
-Network support (Remote access via LAN, Ethernet, PSTN, ISDN,
ADSL)
-P/T/Z & speed demo control on keyboard
-Search/playback by date/time directory (random-access)
-Backup & burn CD directly
-Remote talking between server and client or server and server
-Support six types of resolution (1024*768 pixels, 1440*900 pixels,
1280*1024 pixels, 1280*768 pixels, 1680*1050 pixels and 1920*1080 pixels)

DVR Server Manual
9
Important Information:
For optimal performance of your system, it is important to follow these
recommendations.
1) Recommend that divide your hard disk into two partitions at
least (e.g.: C and D). The first partition is used to install
Windows OS and system software, the others for storing
record files.
2) Please use appropriate motherboard and display card. Contact
your dealers or our support engineers if you have any
questions.

DVR Server Manual
10
Recommend System Environment
Chipset: Intel 875PE, 915P, 945P, 965P
Motherboard: Intel: D915/945PCY, D865PERL
Asus: P4P800SE, P5P800 MSI: 865PE Neo2-F, 915/925/945;
Gigabit: GA-865GME, GA-945PL-G etc
Video Card: ATI Rodeon 9250 128MB, ATI Radeon 9550 128MB, ATI
X500, X550, X700 etc;
Processor: Intel Pentium 4 2.4GHz or better
Memory: 512MB minimum

DVR Server Manual
11
Chapter1 Start up and Main
Interface
1.1 Preparation & Uninstallation
1.1.1 Installation
Before you run DVR system, please be sure following issues:
1. All connectors are firmly connected;
2. Install the driver of compression cards correctly. For detailed
information, please refer to Appendix C: Update drivers of
compression card;
3. Set the resolution of monitor equal to or bigger than 1024*768 pixels.
1.1.2 Uninstallation
When you want to change this version to another one, you should uninstall
it. Click “StartAll programsDVR serverUninstall DVR” to uninstall DVR.
1.2 Disk management
After installed DVR Server, you should assign space for recording,
otherwise, software can’t record. Actually, system will run disk management
automatically after you installed DVR Server. Also, you can run disk
management to assign space when you want.
However, you should input correct user name and password to get access
to Disk management when manger disables the disk manage right of some
operators in Password setup.

DVR Server Manual
12
【Disk Drives】:Display the disk and its format.
【Total Size(M)】:Display the total size of the disk.
【Free Space(M)】:Display the total free space of the disk, which is the
maximum space can be assigned for recording.
【Allotted Data Package】: Display the number of data package, which
has been assigned for recording before.
【Residual Data Package】: Display the number of data package that can
be assigned for recording.
【
Residual Data Package
】
=
【
Free Space(M)
】
/256
【New Data Package】:Select the number of the data package that user
want to create for recording.
【
New Data Package
】
≤
【
Residual Data Package
】

DVR Server Manual
13
User can select the number of data package for each disk in the
drop-down list. Then user can press button to create
data package and index for recording. After that, software could calculate the
rest space automatically.
Note:
1) Please format the whole disk thoroughly before using it to be
recorded.
2) Each package for recording (Recdata****.mp4) is 256MB, and it is
associated with its index file (RecIndex****.inx). They must work
together, or user can’t playback recording data correctly. Also, user
can’t modify them unless deleting them together manually.
3) By default, disk C and Disk D are used for system application, so our
software will not use it (default: 【New Data Package】= 0) unless you
change it.
4) Since windows will pop up information to warn when the disk has low
space, by default, our software will leave 3 packages (about
256*3=768 MB) for disks (except C and D) to avoid that information.
That is to say, the default value of disks (except C and D):
【
New Data Package
】
=
【
Residual Data Package
】
-3
5) Software will cost much more time to create data package and index
for FAT32 system than that for NTSC.
6) After the data package created, user can’t delete the data package
through disk manager, user just can delete them manually, and it is

DVR Server Manual
14
better to delete the whole folder “_RECORD_DATA_” under each disk.
After that, the space of the disk will be released; user can assign them
for recording again.
1.3 Start up
Double click shortcut icon to run DVR Server. The main interface
is as below:
Note:
1) When user run the DVR Server without a valid license for
compression cards or IP products, system will pop up a dialog box to
inform you. System will work under trial version; if you want to use full
version, please contact your supplier or us directly to get it.
2) DVR Server supports several different size of main interface:
1024*768, 1280*768, 1440*900, 1280*1024, 1680*1050 and
1920*1080. System will adjust it automatically according to the current
monitor resolution.

DVR Server Manual
15
1.4 Main Interface
1.4.1 Show tips
1. When the mouse moves closely or stops above a button, a text tip will
be shown to interpret the function of it immediately.
2. Zoom in/out video image: Left-Double-Click a camera window to zoom
in/out video image (or press F11 on the keyboard).
3. System will detect cards and read the total channel automatically, and
the corresponding number will be displayed dynamically.
4. Recording status:
a. This icon means the system is recording normally.
b. This icon means the system is recording manually.
c. This icon means the system is recording in motion detection.
d. This icon means the system is recording in sensor detection.
1.4.2 Screen menu
After user enable keyboard shortcut, you can press TAB key or Page
Down (select next camera window) and Page UP (select previous camera
window) key on keyboard to select a window.
Users can Single-Right-Click image area (compression card camera
windows, IP product camera windows and unused windows) to popup the
screen menu as below:
1. Full screen
User can Single-Right-Click image area to popup the screen menu, then
select “Full Screen Display” to view image area in full screen (or press F12 on
the keyboard). When you want to restore, you should Single-Right-Click image
area and select “Restore Display”.

DVR Server Manual
16
Besides, user can Double-Left-Click a selected window to enlarge i t. You
can restore it by the same way. You can also press F11 on the keyboard to do
the same operations.
2. Instant playback
Single-Right-Click desired camera window and select Instant playback
(IP cameras included). After that, choose a time from the submenu, and then
system will play back video data of current camera in current window
according to your selection (E.g.: you select 10 seconds, system will play back
previous 10 seconds video data of current camera in current window).
Also, you can play back video data of one current live camera in a window
that is not used by any cameras (always black background with no “Video
Loss” information): Select a window, and then Single-Right-Click it to select
“Instant playback”. Finally, choose a time and the camera you want to playback,
and then system will play back video data in current window according to your
selection.

DVR Server Manual
17
The window that is playing back video data will indicate a yellow border to
be different from the live windows.
In the course of the instant playback, you can press Space key to switch
the play/pause status or direction key →and ←to play next and previous
frame.
Single-Right-Click the playing back window and select End playback to
stop instant playback.
While instant playback is in processing, if you want to play it again, select
Review playback function. Press Space key to switch the play/pause status or
direction. In pause status, you can press key →and ←to play next and
previous frame. when the screen plays, you can press ↑and ↓to control the
speed of playing, also, in play status you can press →and ←to play in
normal speed and play it again.
3. Alarm popup
Single-Right-Click video image area in main interface and select “Start
alarm popup” after you set “Alarm camera popup interval” in system setup,
otherwise, it can’t be selected with gray. After that when there is a motion
detection alarm (set in PTZ & Linkage setup and Motion detection setup) or an
alarm triggered by sensor (set in Sensor setup), system will display alarm
cameras in sequence.When you want to end this function, you can
Single-Right-Click video image area and select “Pause alarm popup”.

DVR Server Manual
18
4. Auto Tracking for PTZ
This function is only available to intelligence PTZ.
5. OSD Adjustment
Single-Right-Click video image area in main interface and select “OSD
Adjustment” to adjust the position of OSD (IP Camera does not have this
function; you can set the OSD position in IP Camera setup remotely).
OSD includes time and channel name. You can drag time or channel

DVR Server Manual
19
name to where you want directly in screen, then press button to
save it or press button to resume time and channel name to default
position.
6. IP Camera setup
For this function, it is only available when you Right-single-Click image of
IP camera. It will describe in IP Camera Setup.
7. Audio chat to IP Cam
Press this tool bar, you can select the “Audio Chat to IP Cam “function to
chat with the IP Cam as bellow:
8. IP Video Zoom in
If you press this tool bar, you select the image zoom out function. Single
click the left mouse in the image and draw an area, and then it will zoom-out as
bellow:

DVR Server Manual
20
If you want to display the normal image, you should single-right-click again
and select Image Restore.
9. About IP Register
Select this option to get your register information as below:
Table of contents
Popular Server manuals by other brands
Nortel
Nortel NN10265-111 Specification sheet
HP
HP 2533t - Compaq Mobile Thin Client Administrator's reference guide
Dell
Dell PowerEdge T710 Getting started with

NEC
NEC N8100-1575F user guide
Grandstream Networks
Grandstream Networks GXV3504 quick start guide
Supermicro
Supermicro SuperServer 5019C-M4L user manual
Dell
Dell PowerEdge C410X Hardware owner's manual
Gigabyte
Gigabyte R183-Z91 user manual
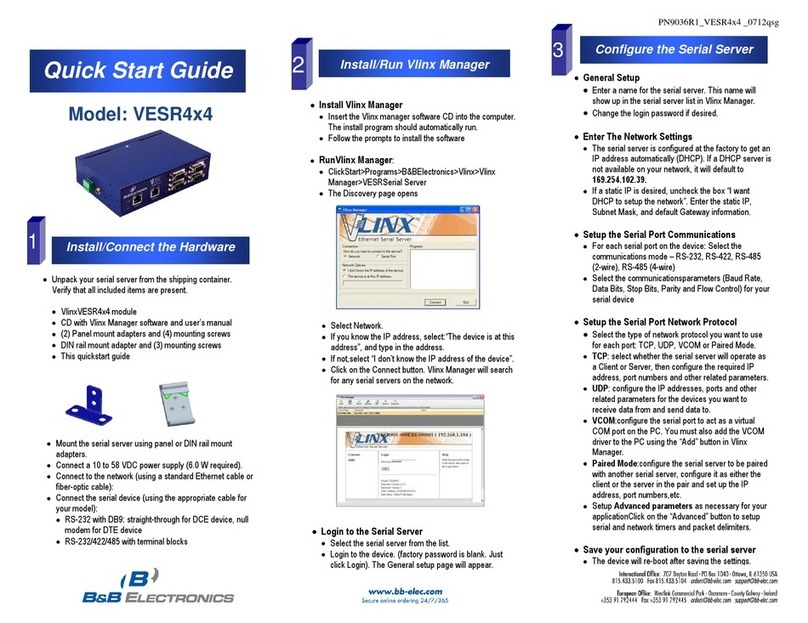
B&B Electronics
B&B Electronics VESR4x4 quick start guide
Intel
Intel SR1500 - AXXMINIDIMM DDR-2 RAID Controller Cache... manual
NEC
NEC UNIVERGE NEAX 2000 IPS reference guide
Dell
Dell PowerVault DL2300 Getting started guide
