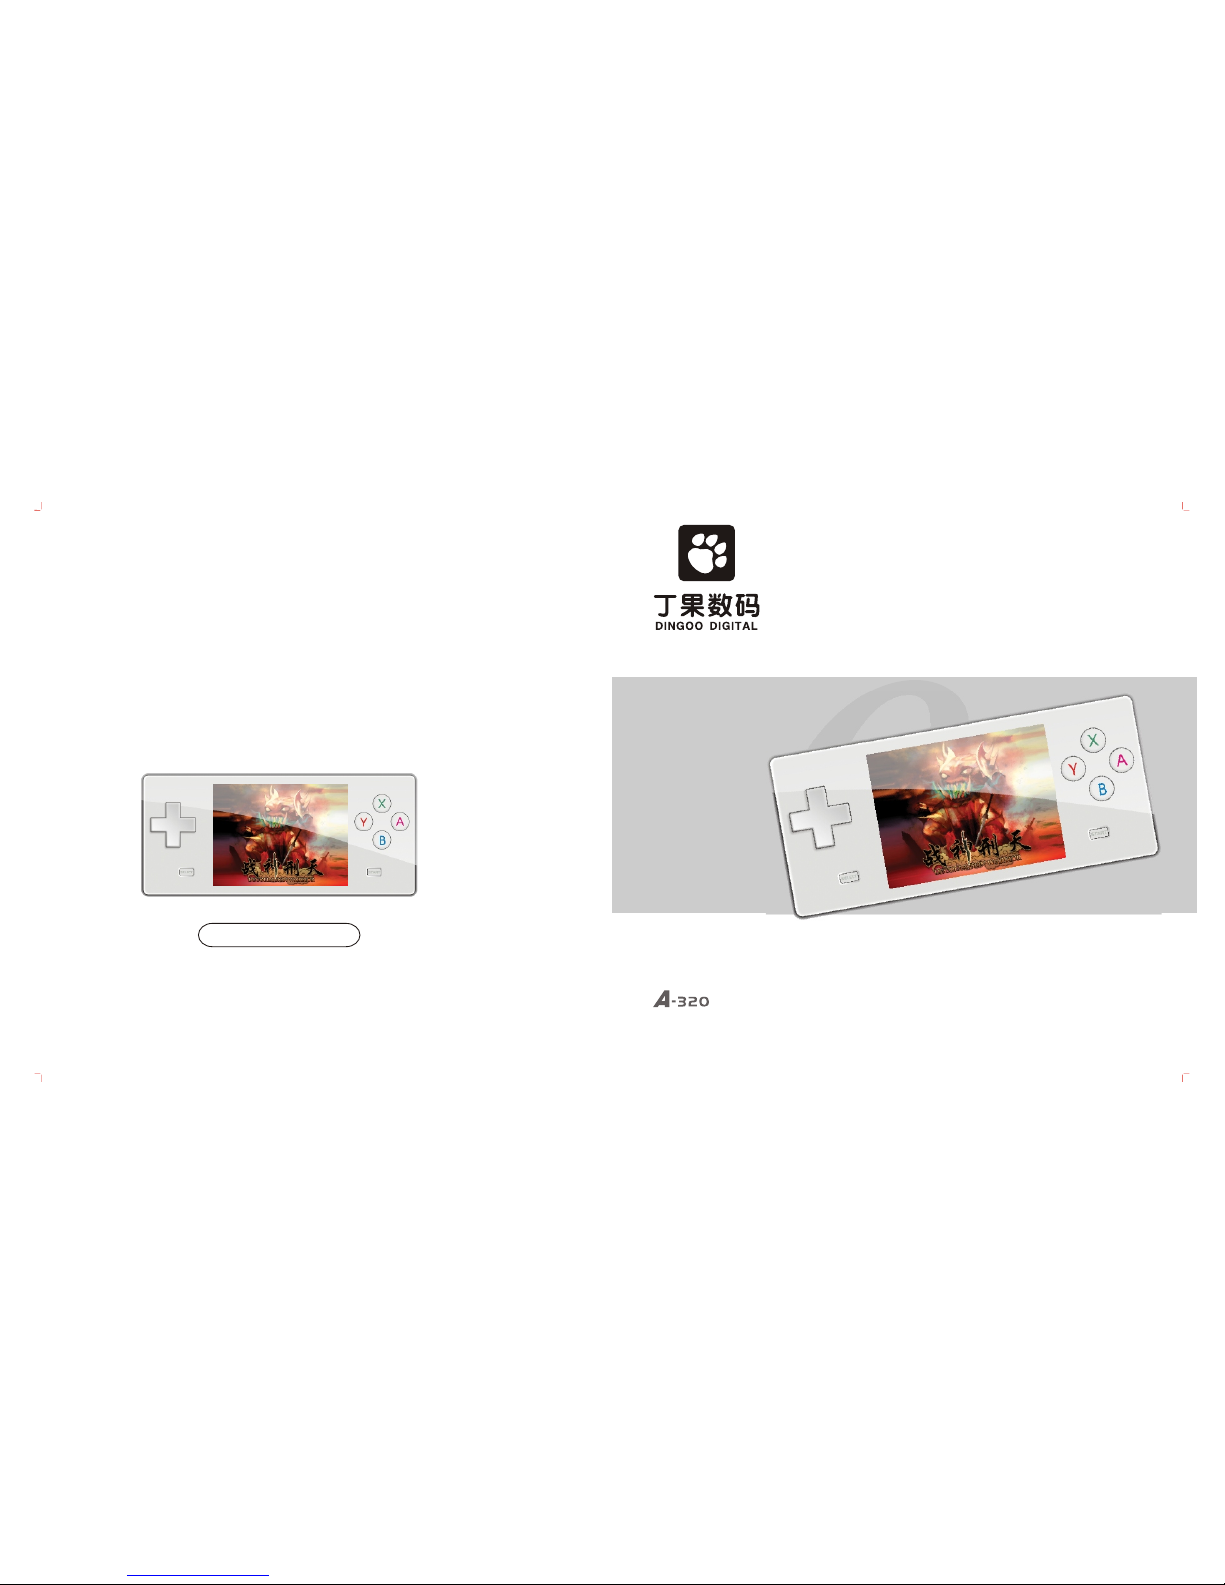
DINGOO DIGITAL A-320 User manual
Http://www.dingoo888.com
User Manual
Digital Multimedia Player
Tel: (86)755-88309090 Fax: (86)755-88309080
DINGOO DIGITAL PRODUCTS CO.,LTD
Room 1109, Tower A Xinian Center, No. 6021, Shennan Rd,
Futian District, ShenZhen, PR, China.

Safety
Safety & usage
Earphone usage
Battery & power usage
1
1
1
Console Main Function
Console main functio n
2
Accessories Package
4
Accessorie s Package
Main Console Key and Function Layout
Front/back
Side /b ott om side
Quick Key & Functio n Guide
5
Basic Function
Music Player
Music Pla yer fu nctio ns
Synchroniz e lyrics dis play
.....................................
....... .... ................. .... ...
.............................
.............................
.............................
........................................
..............................
................
....... .... ................. .... ....
10-12
.......................
3
..................................
Display indicatio n
Power recharge
Turn on /off
Key lock functio n
7
7
....... .... .............. 1 2
Game functio ns
9
..................................
Game Function
Image functio n
Image
17
..................................
FM radio fu nctio n
14-15
.............................
FM Radio
Record fu nctio n
Recorder
16
..............................
E-book fu nctio n
18 - 19
E-book
...........................
Browse all file s
Delete file s
Browse all files
21
...............................
.................................... 21
About the player
Theme selectio n
Display
Screen power saving tim e
Auto shut down
Language
Speaker on/o ff
Hard driv e anti- virus fu nction
Reset to fa ctory setting
22
Setting
.................................
22
.................................
22
...........................................
22
.......................
23
...................................
23
........................................
23
...................................
23
....................
23
....... .... ...............
Connect to TV
Connect to TV operatio n
20
....... .... ................. ....
Movie pla yer fu nctio ns
Movie Player
13
....... .... ................. .
....... .... ................. .... .........
8
....... .... ................. .... ... 8
6
Dear Customers
Thank you for choosing Dingoo Digital's Product.
This is the product user manual, to ensure you can use
our product efficiently please read this manual carefully.
Product standard: Q/GM 2
Detailed instruction (A-320) is also available on the website below:
http://www.dingoo888.com
Contents

Formatting Player
Formatt ing fo lder / disk
26 - 27
......................
Product details
Product deta ils
28
Frequent Ask Questio ns
29-30
Frequent Ask Questions
....... .... ...........
...................................
Connect to computer & Hardware upgrade
Connect to computer
24
.............................
Hardware upgrade
24
...............................
Use of MINI SD card
25
.................
MINI SD card plu g in and unplug
Use of MINI SD card
25
.............................
Safety & Usage
Please do not store and use this console in high humid, high temperature and high magnetic area.
Please be aware when using in swimming pool, bathroom, kitchen etc.. area and environment.
Please secure and store your console properly, especially when you are running or doing any exercises.
Any dropping of console might damage the console and/or affect the console sound quality. Any
dropping damage is not included in warranty.
When using the USB Cable please make sure the connection with computer is correct. If the connection
is incorrect, it might cause error or damage to the console and/or computer.
When the console and the computer are connected and transferring the data, please do not disconnect
it. Otherwise it may cause data error or losing, also might cause console system error.
Please turn off the console before unpluging any SD/ MMC card in order to prevent damaging the card.
Before disconnect the console and the computer or unpluging the USB Cable from the computer and/or
console, please make sure you clicked the USB icon, which located on your right bottom coner of the
desktop, to disconnect the console link to your computer system, in order to prevent any error or damage
to the console/computer system.
Usage
Please do not use this console when you are driving or doing any work that needs high concentration.
When you are walking or in a danger place (such as highway or construction site etc..) please be aware
and turn off your console and/or your earphone.
Please does not turn the Audio/sound volume to the highest all the time, to prevent any damage to your
hearing.
Battery & Power Usage
If the console is not in use, please unplug the power.
When unplug the power adapter please make sure you are not unplug by pulling the power cable, in
order to prevent any damage on power cable, which also might cause electronic shock.
If your hand is wet, please do not touch the power adapter, in order to prevent electronic shock.
1
Contents Safety

Console Main Function
Games: Play games in (8 bit /16 bit /32 bit) GBA/3D formats and play more by upgrading the
software.
Outlook: Premium design fashionable, slim and portable size with comfortable hand grip.
AV-OUT: AV-OUT technology ensure you enjoy a lot of hit-film as well as playing games.
Video Player: Video function supports various formats such as RMVB, RM, AVI, WMV, FLV,
MPEG, DAT, MP4, ASF and helps users encode video files in an easy and convenient way.
MP3 player: Audio function supports MP3, WMA , APE, FLAC audio format, synchronous
lyrics display function, multi equalizer options , surround sound effect and play mode
options. Music can keep playing while using other application.
FM Radio: Wide channel ranges from 76.0MHz ~ 108.0 MHz, support manual/auto channel
scanning, FM recording and can keep playing while using other application. User can save
up to 40 channels.
Digital Recorder: Voice recording and supports MP3/WAV formats.
Image Browser: Image browsing format includes JPG, BMP, GIF, PNG, with zoom, rotate
and image slide show function.
E-book: feature function includes bookmark, auto browsing, font sizing, TTS oral reading
etc.
U-Disk virus protection: built-in anti-virus software protect and keep the system at its best
performance.
USB 2.0 Transmission Interface
Support WIN2000/XP/VISTA/MAC Operation System.
2
Accessories Package
As all of the accessories are included as free items, so no warranty is included. All accessories
cannot be exchange and refund. Any changes are subject to individual product package,
and will not be informed individually.
3
Earphone USB Cable AV Cable
Warranty card
(for console only)
User Manual
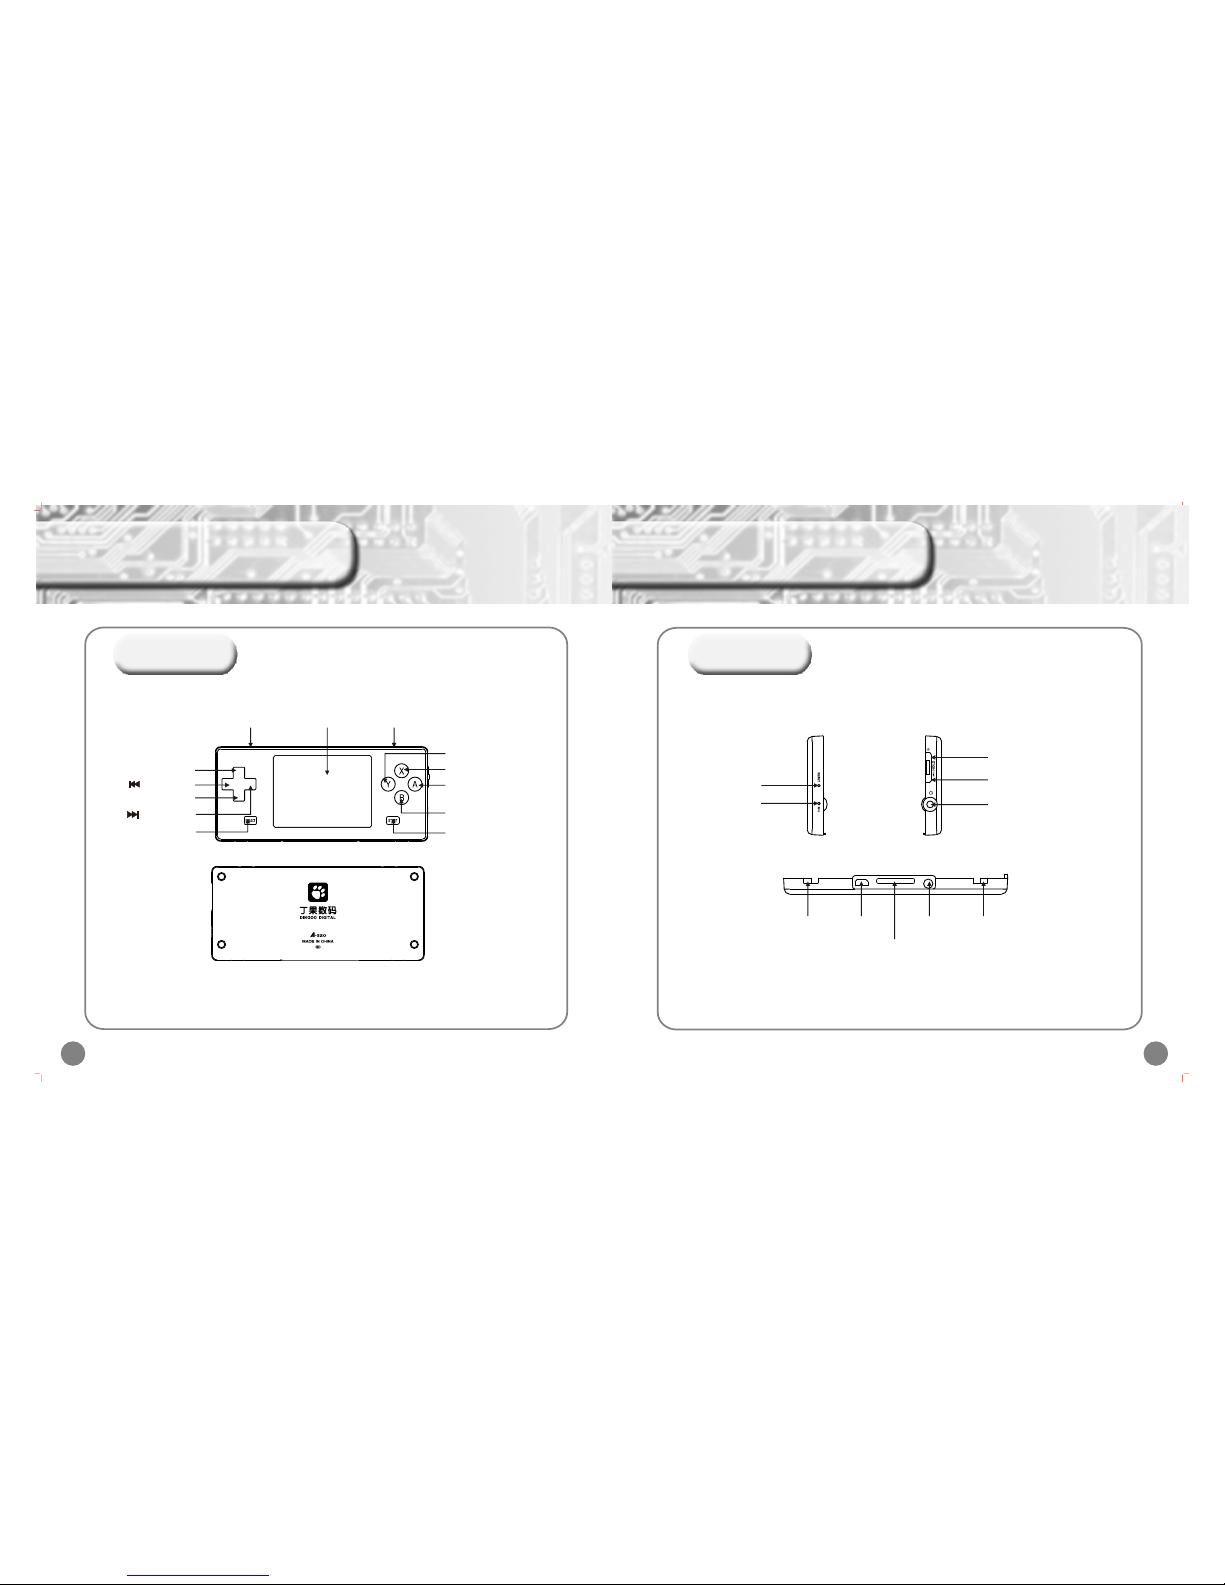
Main Console key and function layout
4
Front/ Back
5
Side /bottom
/Arrow right
VO L+ /
Arrow up
VOL-/Arrow down
Return/Game key 2
Confirm/Enter/
Game key 1
Game key 4
Game key 3
Game Start key
Game Select
key
Game key 6 /
Pause button[R]
Game key[L]
Reset
Mic
Power on/off
USB port
Keylock
Display
/Arrow Left
Built-in
speaker (L)
MINI SD card
AV-output
Built-in
speaker (R)
Earphone output
Main Console key and function layout
Side /bottom

6
7
L+ START press together: Press when you are playing games, video player will convert to
TV-OUTmode.
SELECT + START press together: press when you are playing the game, game main menu
display.
POWER + [up] key press together: press when you are playing the game, increase the audio
volume.
POWER + [down] key press together: press when you are playing the game, decrease the
audio volume.
POWER + [Left] key press together: press when you are playing the game, save the file.
POWER + [Right] key press together: press when you are playing the game, loading the file.
[R] key: Press this key to pause when MP3 is playing in any mode except game mode.
POWER key: When playing game press [power] key exit from main menu. For TV-OUT mode,
press [power] key to exit TV-OUT mode.
START key: In music menu press this key to save file into the folder: In browser menu press this
key to enter the main menu. For TV-OUT mode, press this key to exit from TV-OUT mode.
SELECT key: In E-book mode, press this start to enter e-book main menu.
START + SELECT key: When playing game, press this key can return to game function menu.
[Up]/[down] key: When listening to MP3 and FM radio, press this key to increase/ decrease
the audio volume.
X key:
Except the game mode, for all other modes, holding this key can back to turn the main menu
display.
In Music mode press this key to AB repeated playing function.
When browsing *.jpg image file, press [X] key to enlarge the image, press [B] key to return
the image to the original size.
A key: In movie mode, press this key to adjust the screen display size.
Quick Key Function
This USB cable not only can be used to connect with computer for transferring data, but also
can be used to recharge the console. Please be aware that the console will be over-heated
when recharging.
Please make sure you disconnect the USB link between the console and the computer
system after charging.
Adaptor: You can use adaptor to recharge the console battery. It can be speed up by using
both USB cable and adaptor.
When recharging the console with USB cable, you can charge it while working after safely
exit from the desktop.
Basic Function
Sound effectSong playing total time
Playing time
Audio/Sound
volume range
Battery is full of power. When the battery being used for a while, power indication
will drop.
Battery is out of power/ nearly no power. You will see the power indication is in white
color (empty), at that time please recharge the battery.
Play / Stop
Repetition play
Message
Power Recharge
Display Indication
Song playing number /
total song number
Power indication
Playing process
Main Console key and function layout
Playing status
Song name

8
Turn on /off
To turn on the console, push the Power on/off key up and hold for a few seconds until the
main menu appears on the display.
To turn off the console, push the power on/off key up and hold for a few seconds ,then it will
turn off automatically.
If you set the timer after you turn on the console, such as (10/30/1 hour), the console will turn
off automatically when reaches the set time. Set up the “turn on/turn off” means automatic
turn on/off function / Timer is on.
Basic Function
Key lock function
When the “key lock” function is on, all keys cannot be functioned.
To turn off the “key lock” function, hold “HOLD” key down for a few seconds.
To turn on the “key lock” function, hold “HOLD” key up for a few seconds.
Game Function
Push the Power on/off up and hold for a few seconds until the main menu appears on the display.
On the main menu, press[ ] or [ ] to select 3D game; then Press [A] to enter the sub menu,
as shown in the “Game menu” diagram below.
Press [ ] or [ ] menu to select the classical game, press [A] to confirm selection. Select GBA
game, show up “cart car”, “devil city” , “Street fighter” etc. Press [A] again to enter Game option.
Game Menu: During the game, press [ ] will pop up game menu for your option.
Start/ Return to the Game: When you exit from the Game Menu, your game will stay in Pause
mode, Press “Start” or “Return” to continue.
Press[Y]
If you want to go back to saved game, press “Return” in the Game menu.
Save Game: Select “Instant Save” in the game menu. Game can be saved at that moment.
All game can save its progress.
Audio On/Off: Select ON/OFF in the Audio on/off under Game Menu
Playing the game: Press A, B button as main function key in Game. Navigate with Up, Down,
Left, Right keys.
Exit: Press “Exit Game” in Game menu to exit from game mode.
Please be patient when you are opening same games with more data volume.
Press[A]
9

On music main menu select “play list”, Press [A] key to enter the music selection menu
display, press [ ] or [ ] key to enter folder selection menu, select folder then press [A] key
to enter the music selection menu.
On music main menu select “folder”, Press [A] key to enter the music selection menu display,
press [ ] or [ ] key to enter folder selection menu, then press [A] key to play or delete
selected song.
In “music set up” select “ play mode” , then press [A] key to enter menu to select: Repeat all,
normal, shuffle mode, repeat track, play track 5 selections in total, press [ ] or [ ] key to
select menu, press [A]) key to save the set up.
In “music set up” select “3D sound effect”, press [A] key to enter select menu, then press [ ]
or [ ] key to select “Audio input set up”, this menu includes: normal earphone, Real
earphone, normal Hi-Fi, large Hi-Fi, press [ ] or [ ] key to enter selection menu, press [A]
save selected set up.
In “music set up” select “3D sound effect”, press [A] key to enter select menu, then press [ ]
or [ ] key to select “3D effect”, this menu includes: turn off, normal, middle, strong, press [ ]
or [ ] key to enter selection menu, press [A] save selected set up.
In “music set up” select “3D sound effect”, press [A] key to enter select menu, then press [ ]
or [ ] key to select “automatic audio balance”, press [A] to turn on or turn off.
In “music set up” select “3D sound effect”, press [A] key to enter select menu, then press [ ]
or [ ] key to select “bass”, this menu includes: turn off, normal, middle, strong, press [A] to
save selection.
In “music set up” select “3D sound effect”, press [A] key to enter select menu, then press [ ]
or [ ] key to select “High frequency”, this menu includes: turn off, normal, middle, strong,
press [A] to save selection.
In “music set up” select “equal lizer”, press [A] key to enter select menu, then press [ ] or [ ]
key to select “High frequency”, this menu includes 9 options: normal, Jazz, Prevail, Rock,
Classic, Human voice, Vocal, bass , customize set up. Then press (up) or (down) key to select
“automatic audio balance”, press [A] to save selection.
In "music set up" select "virtual sound field",and press [A] to enter. This menu includes 6
options: turn off, music, small house, big house, scene and stadium. Then press [▲] or [ ▼]
key to select options in the list, and press [A] to save your selection.
10
Music Player Function
Push the Power on/off up and hold for a few seconds until the main menu appears on the
display. Press [ ] or [ ] to choose Music, press(+) or (-) key to select playing music, song
search, all song library, play list, folder, collection, artiest, song title, music set up, renew song
list 10 functions in total on the music main menu.
On the music main menu select “music playing” , press [A] key to enter to music selection
menu, Press (A) key again to enter music/song playing display.
On the music main menu select “all songs” , press [A] key to enter to music selection menu,
Press [ ] or [ ] to select songs and press [A] to confirm selected song.
Press [ ] or [ ] to jump to the previous or next sounds.
Press [ ] or [ ] to select songs.
Press and hold [ ] or [ ] to REW (rewind) or FF (fast forward).
Press [R] to pause or resume playing.
Press [ ] or [ ] to increase or decrease the volume.
Press [Y] to switch speaker On/Off, hold and press [X] to resume AB repeated function .
Press [B] to return to music menu, hold and press [X] go back to main menu.
On music main menu select “collection”, Press [A] key to enter the music selection menu
display, press [ ] or [ ] key to select the song, press [A] key to play the selected music/song.
On music main menu select “artists”, Press [A] key to enter the music selection menu display,
press [ ] or [ ] key to select the song, press [A] key to play the selected music/song.
On music main menu select “title”, Press [A] key to enter the music selection menu display,
press [ ] or [ ] key to select the song, press [A] key to play the selected music/song.
Press[A]
11
Music Player Function

In “music set up” select “Background music playing mode”, press [A] key to turn on or off the
background music function. Music player can function with other applications such as e-book
and image browser. While playing MP3 or listening radio as background application, press
and hold [ ] or [ ] keys to adjust volume.
Operate: While music is playing, press [A] key for a few seconds to back to main menu, press
[ ] or [ ] key to select “animation” or ”e-book” then press [A] key to confirm.
In Music main menu select “ Renew song message”, press [A] key to renew the song message,
this function is to update/renew all songs to ' all song folder' menu.
Synchron ize lyrics disp lay
This console supports “x.LRC” lyrics file (User can go to “My favorite songs” to download),
after adding those lyrics, you can enjoy music and lyrics at the same time.
How to use lyrics file?
Name the lyrics file the same as the music /song file.
For example:
Music / song file name is: Jacket-song.mp3
Lyrics file name is: Jacket-song.lrc
If both music and lyrics file names are the same, the console will automatically display the
lyrics when the music with the same name is playing.
12
Movie Player Function
In the main menu select “Movie Player”, this menu includes 3 options: video, play by chapter
and video set up. this display screen is the same as this photo below:
when you play a file, you can press [◄]or [ ►] key to select confirm/cancel function.
When the Video is playing, press and hold [ ] or [ ] to REW (rewind) or FF (fast forward).
When the Video is playing, press [R] to pause or resume playing.
When the Video is playing, press [ ] or [ ] to increase or decrease the volume.
When the Video is playing, press [L+START] key to switch to TV-OUT function.
In video menu, Press [ ] key back to menu, press [ ] key to go to next menu.
In video set up select “Video Time”, press [A] key to turn on or off the video time display. If
“Video Time” function is on, you will see video playing time on the right of the display which has
playing time and total playing time. If “Video Time” function is off, you will not see the video
playing time or the total playing time on the display.
In video set up select “playing video by chapter”, press [A] key to turn on or off this function.
When “playing video by chapter” function is on, the “playing video by chapter” menu will pop-up
when you play a file, you can press [ ] or [ ] key to select confirm/cancel , please select your
option and confirm, press [A] key to exit then the video will play at the beginning of that chapter.
If this function is off, the video will play from the very beginning.
In video set up select “display mode” press [A] key to enter display mode set up, press [ ] or
[ ] key to select display mode, which includes normal, partial, full screen, press [A] key to
confirm to your selection.
Press and hold [X] to go back to main menu.
13
Music Player Function
14
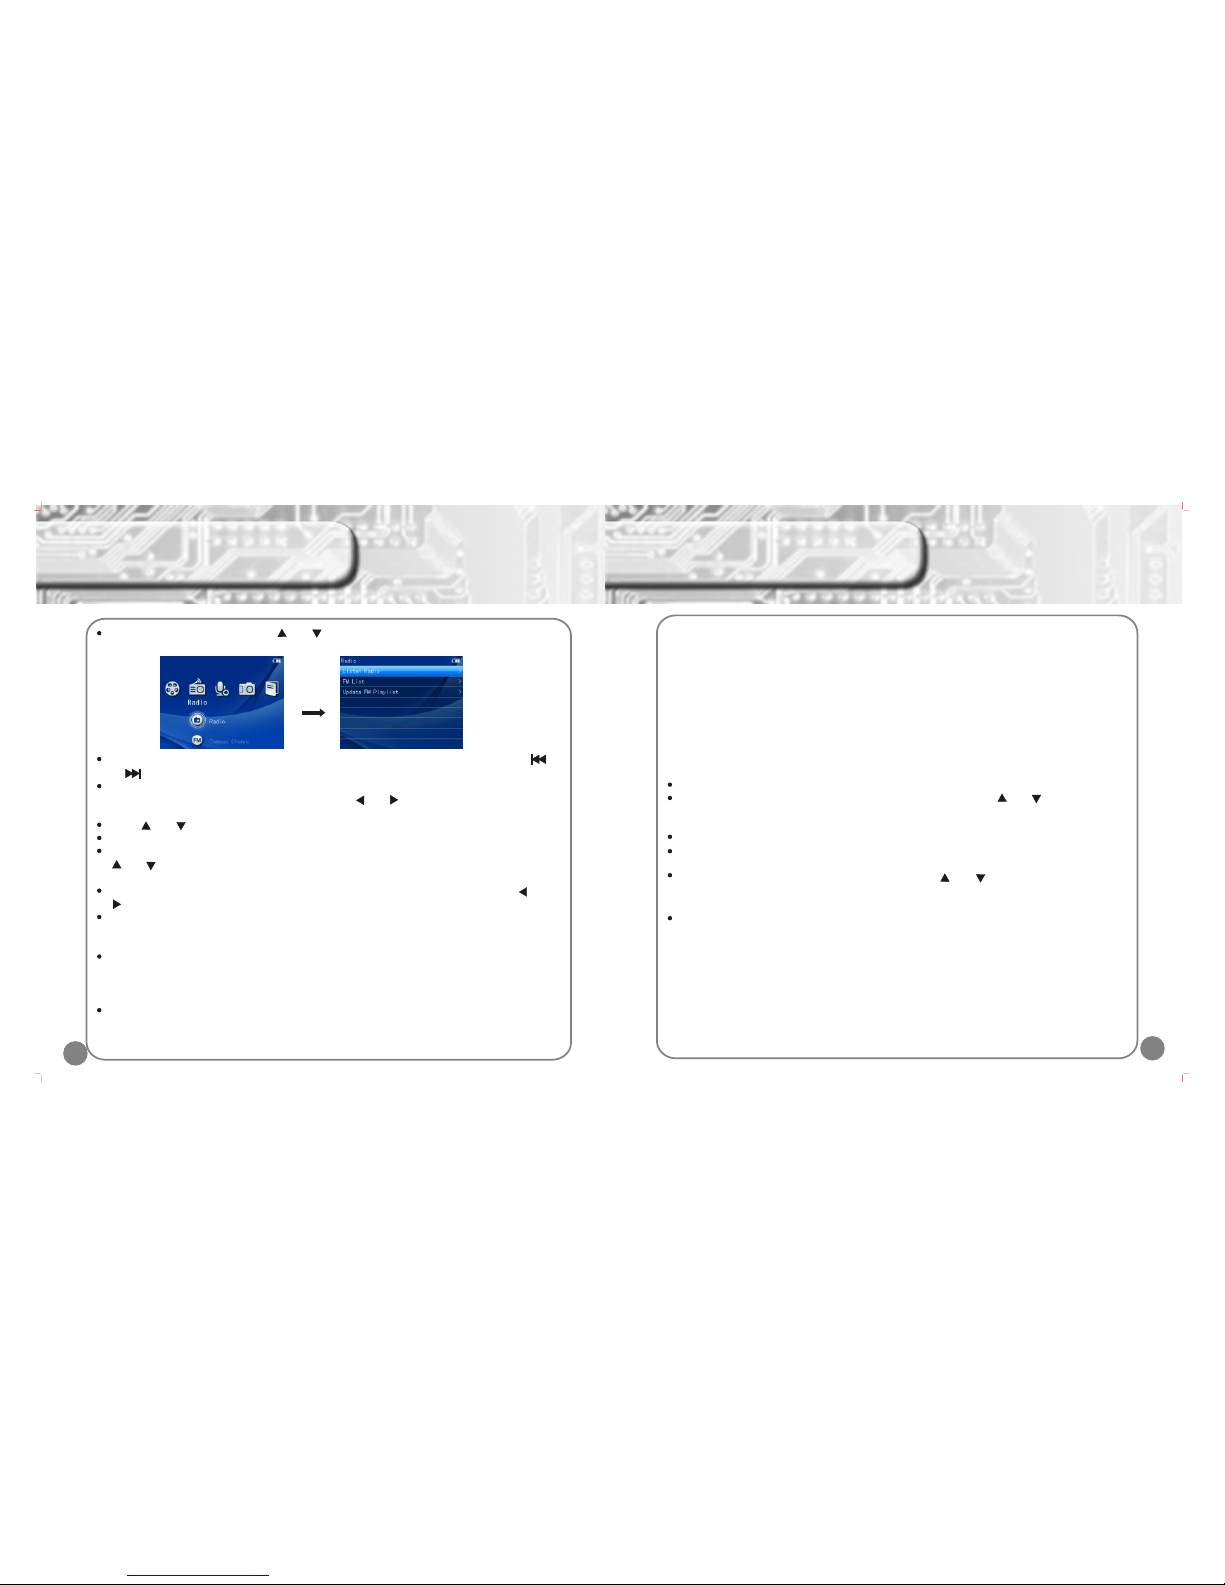
FM Radio Function
In main menu select “radio”, press [ ] or [ ] to select “radio” on the menu, which includes 4
options: radio, school channel, record channel, radio set up, as photo below:
Select “Listen to Radio” in the Menu. The list of channels will show on the display, press [ ]
or [ ] key to switch to previous or next channel.
Select “Channel list” in the menu, press [A] to listen to the selected channel, press [A] again to
enter “manual tuner” menu. To tune channel, press [ ] or [ ], press [A] again to save channel
setting.
Press [ ] or [ ] to adjust the volume, when the radio is on,
Press and hold [X] to return to Main Menu, when the radio is on.
Select “channel menu” , press [A] to display all saved channel number, channel frequency, press
[ ] or [ ] to select the channel you want from the menu, then press [A] key to confirm selected
channel then you will listen to your selected radio channel.
Select “Renew channel menu”, press [A] key to search radio channel manually, press [ ] or
[ ] key to adjust the channel frequency.
Select “Renew channel menu” press [A] key to do channel auto search, then the searched
channel will be saved in the “channel menu” automatically. The renew/updated channel
frequency will be stored in “internal listing”.
Select “Background music playing mode”, press [A] key to turn on or off the background music
function. When “Background music playing mode” function is on, the console can apply a few
different functions at the same time. Radio player can function with other application such as e-
book and image browser
Select “channel selection menu”, Press [A] to switch to “internal listing” or “external listing”.
“Internal listing” means the list is automatically updated by “renew channel menu” function.
external listing' means the users can edit and match Fm.ini channel file with the pre-set local
FM radio frequency.
Press[A]
Fm.ini file is compliable for in windows “Notepad” function and can be edited in window,
format as below:
[FM]
CH01=0087600 Beijing culture radio channel
CH02=088000, Guangzhou flying 88 channel
Indication: [FM]: this mark must save as it is cannot make any changes.
CH01: CH add number
= : must save with this mark
087600 : means 87.6MHz
, : must save as ascii's “,”, cannot use Chinese “,”
Others: radio channel file name must be within 16 English Letters or 8 Chinese characters
Select “signal strong / weak set up” , press (A) key to adjust the signal strength.
Select “radio searching area” press [A] key to enter set up , press [ ] or [ ] key to select
China, Europe, America, Japan total 4 radio searching areas. This console per-set “China” as
“radio searching area”.
Fm.ini file need to copy to radio player main menu.
To ensure you a better effect, we suggest you to use earphone when listening to radio, it is
because the earphone could be used as a receiver .
Press and hold [X] to return to Main Menu, then press [ ] or [ ] key to select “record
channel” now, press [A] key to enter recorder main menu, then press [A] key again to enter
record menu display.
When you exit, the file will be saved automatically.
15
FM Radio Function

16
Recorder Function
In main menu select “Recorder”, press (A) key to enter the sub-menu display, as photo below:
Select “Record” in the main menu, press [A] to enter the recorder menu, press [A] again to start
recording. If you exit from the recorder, the recording / recorded file will be saved automatically.
Select “Play recording” to enter the recorded track list by pressing [A]. Press [A] again to play
the selected track, as photo below:
For the instruction of the playing recorded track please refer to play mode in the music player
instruction user manual.
Select “recording setting” press [A] to enter the recording setting menu, then press [A] again to
enter recording quality menu. Press [ ] or [ ] to adjust low, medium, high 3 different types of
recording quality.
in
Press[A]
In main menu select “image”, this menu includes 2 options: image browser, flash player.
Image
In the thumbnail image, press [ ][ ][ ] or [ ] to select image, press [A] to browse image.
When browsing image, press [◄]or [ ►] to switch to previous/ next file.
In the Browsing mode, press [A] and select “Start slideshow” option to start playing slideshow.
In the Browsing mode, press [A] and select “time interval of each slide” to choose the play time
between each image.
Time setting interface: time setting includes 2, 3, 5, 8, 15 seconds.
In the Browsing mode, press [A] then press [ ] or [ ] to select the image as background image
for music player, radio, recorder, e-book mode. Press [A] again to save setting.
In the Browsing mode, press [A] then press [ ] or [ ] to select the image as background image
for Main Menu. Press [A] again to save setting.
In the Browsing mode, press and hold [X] to go back to Main Menu.
Flash Player
In the flash file list, press [ ] or [ ] to select flash file and press [A] to play. Press [B] to go back
to previous menu.
When playing flash file, press[ ] or [ ] to play previous or next file.
When playing flash file, press [R] to pause and press again to resume playing.
When playing flash file, press [ ] or [ ] to adjust the volume.
Image Function
17
Press[A]
18
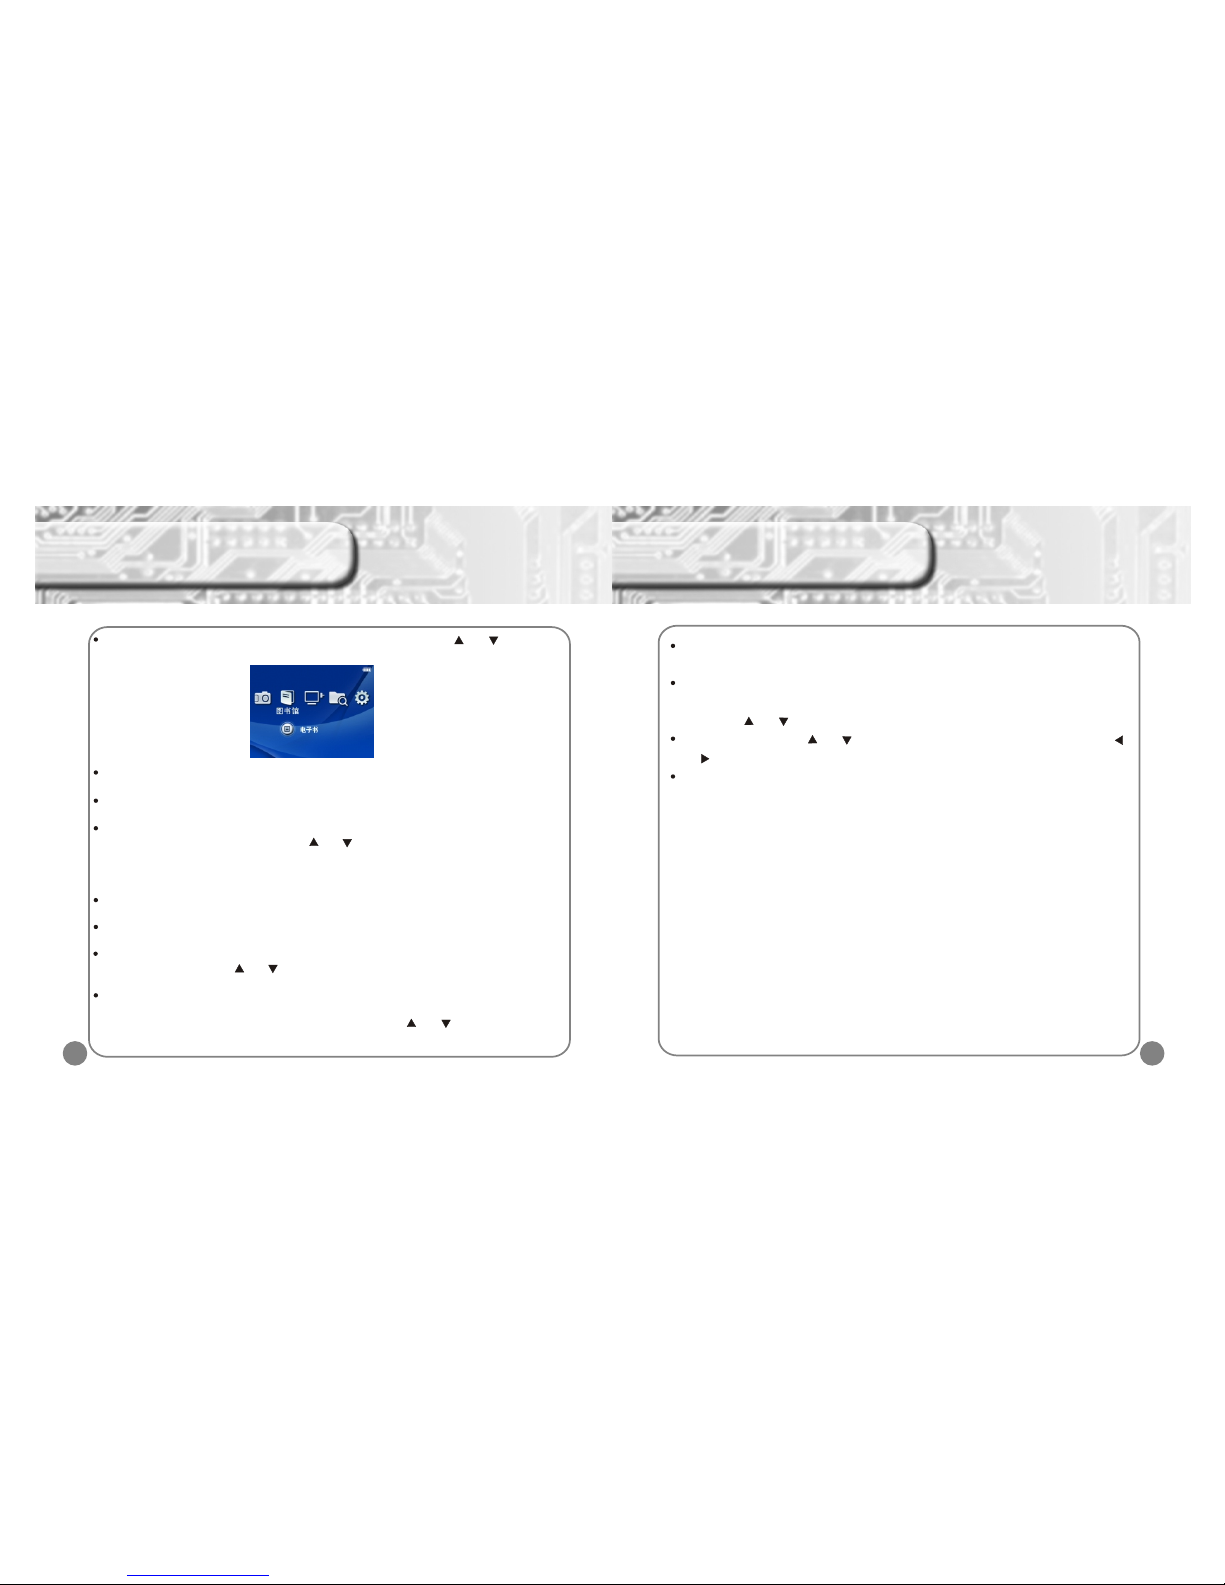
E-book Function
In main menu select “e-book”, press [A] key to enter e-book menu, press [ ] or [ ] key to select
e-book file, then press [A] key again to enter e-book selection menu, as below:
In e-book selection menu, press [A] key to enter set up menu, select oral reading, and then press
[A] key again to either turn on or off this function.
In e-book selection menu, press [A] key to enter, select page reading, then press [A] key again,
then input page number and you can read that page.
In e-book selection menu, press [A] key to enter set up menu, select book mark, then press [A]
key again to enter book mark menu, press [ ] or [ ] key to book mark choice , press [A] to
confirm, and it can save 4 book marks in maximum.
Note: Book mark function only available for reading file, if you exit from the file, the book mark
must be re-set.
In e-book selection menu, press [A] key to enter set up menu, select “automatic browsing,” , then
press [A] to set the automatic browsing, time, then press [A] again to start auto browsing function.
In e-book selection menu, press [A] key to enter set up menu, select “automatic page change”,
then press [A] again to set the automatic page change time.
In e-book selection menu, press [A] key to enter set up menu, select e-book fonts, then press [A]
to enter menu., then press [ ] or [ ] to select the options , and press [A] key to confirm / save
setting.
In e-book selection menu, press [A] key to enter set up menu, select fonts color, then press [A] to
select 15 options in total: black , blue, green, white, red, purple, gray, light blue, dark red, dark
purple, dark yellow, Navy, dark green, blue white colors. Press [ ] or [ ] to select your option
and press [A] to confirm or save your option.
19
In e-book reading, press [STRAT] to start oral reading function, and press [SELECT] to read
according to your option.
In e-book selection menu, press [A] key to enter set up menu, select background color, then
press [A] to select 7 options in total from menu, green, yellow, purple, gray, black, white and
blue. Press [ ] or [ ] to select setting , press [A] to save your options.
In e-book browser, press [ ] or [ ] to select the reading upper line or bottom line, press [ ]
or [ ] to read pervious page /next page.
In e-book browser, hold [X] key for a while to go back to main menu.
E-book Function

20
Connect to TV
Select “TV mode” in the main menu.
In the TV main menu, press [ ] or [ ] to enter the TV setting, press [A] to enter TV signal
system selection menu, press [A] again then switch [PAL] or [NTSC]
In TV sub menu, press [up] or [down] to select “TV screen setting”, press [A] to switch between
“16:9” and “4:3”.
The following diagram shows the connection between the player and TV. After connected, press
[ ] or [ ] in the TV menu and select “connect to TV” and press [A] again to view the clips on
TV.
21
Browse all files
In main menu select “Browser”, press [A] key to select folder (U disk / MINI SD Card), press [A]
to see all saved file , select the file then press [A] to play, as below:
Delete file: In the Folder, press [ ] or [ ] to select the file you would like to delete, press [A]
key to enter “play/delete” file, press [ ] or [ ] to select “delete”, then press [A] key to confirm
the deletion.
Press [A] to copy and paste and it comes the menu options, and then press SELECT button
to paste the file.
Note: To easier view in the browser, please copy the selected file in Folder.
Press[A]
Attention: Audio output cable
White cable head: plugs into the “L” as left audio in
Red cable head: plugs into the “R” as right audio in
Video output
cable (Yel lo w)
udi o tpA ou ut
(W tR )cab le hi e/ ed
Connect audio and video output (Please refer to the
TV instruction for the connection of TV).
Turn on the TV and set input mode properly (set the
AV mode or refer to TV user manual).
TV

Shut down
To select automatic shut down in the setting menu. Press [A] to enter option menu, press [ ] or
[ ] to select time in the menu (10min, 30min, 1 hour, shut down), press [A] to save setting. The
timer will start the countdown when no function is operating and no key is pressed. The player
will shut down automatically when the countdown is finished. This function is specially designed
for listening to music before sleep or using recording option.
Language
To select “language” in the option menu, press [A] to enter the menu, press [ ] or [ ] to select
language from the menu ( Simplify Chinese, Traditional Chinese and English), press [A] to save
setting.
Speaker on/off
To select " U-disk anti-virus function" in the menu, press [A] to turn on/off.
U-disk anti-virus function
To select “Hard drive anti virus function” in the menu, press [a] to turn on/off
Reset to factory setting
To select “Reset to factory setting” in the menu, press [A] to exit from the selection menu, press
[ ] or [ ] to confirm or cancel then press [A] again to confirm and save setting.
22
Setting
In main menu select “System set”, press [A] key to enter system menu, then press [A] key
again to enter system setup selection menu, as below:
About the player
To select “About Player” in the setting option menu, press [A] to enter option menu and see the
hard disc capacity, available capacity and version information.
Theme selection
To select “Theme” in the option menu, press [A] to enter the option menu, press [ ] or [ ] to
select option setting and press [A] again to save the option setting.
Display
There are 3 options under this sub menu: Background light contrast, Font color and Reset to
preset background. Press [ ] or [ ] to enter setting menu, press [A] to enter the sub menu.
Inside each menu press [ ] or [ ] to selection setting and press [A] to save your selection.
Background light contrast: Grade 01-05, the higher the grade. the brighter the contrast is.
Font color: White, Red, Deep red, Green, Deep green, Blue, Navy, Light blue, Violet, Purple,
Deep purple, Yellow, Deep Yellow, grey and Black (15 colors).
Reset to preset background: reset all background to preset image/color.
Screen power saving time
To select “screen power saving time” under setting menu, press [A] to enter menu list, press
[ ] or [ ] to select time in the menu (5s, 10s, 15s, 20s, 30s or keep turning on), press [A] to
save setting.
Press[A]
22
23
Setting
24
Connect to computer & Hardware upgrade
The console supports Windows 98 (need to install driver), Windows 2000 or above (do not
need to install driver), Mac OS 10.3 or above, Linux Redhat 8.0 and above.
To connect the console and computer, use the USB cable provided in the box.
After you connect the console and computer by using the USB Cable, a new icon will come out
which shows your player.
On Windows desktop double click “my computer”, you will see a new driver /hardware which is
your player.
To copy the file from the computer to the console, you can simply copy the file and paste the file
on the console hard disk.
Note: when exchanging date between MP3 and computer , please do not disconnected the
USB cable, otherwise system error or file damage will occur.
Connect to computer
Hardware upgrade
Please ensure the battery has enough power when upgrading. (Require more 2/3 of battery),
otherwise upgrade might not be successful.
Please download the upgraded pack from the Dingoo website.
Copy the upgraded file A320.HXF in the player, and unplug USB safely.
Un-plug USB cable, turn off player firstly, then hold [HOLD] key up as well as the [VOL-] key until the
screen shows “Fureware Upgraded…… Do not power off” then release the [vol-] and [HLOD] keys,
player will upgrade automatically.
Please make sure safely disconnected with computer by click the icon at the right bottom of your
computer before you unplug the USB cable from computer, otherwise it might cause system error or
locked.
After the firmware upgrade, it‘s better to reset it to ensure it works well. 25
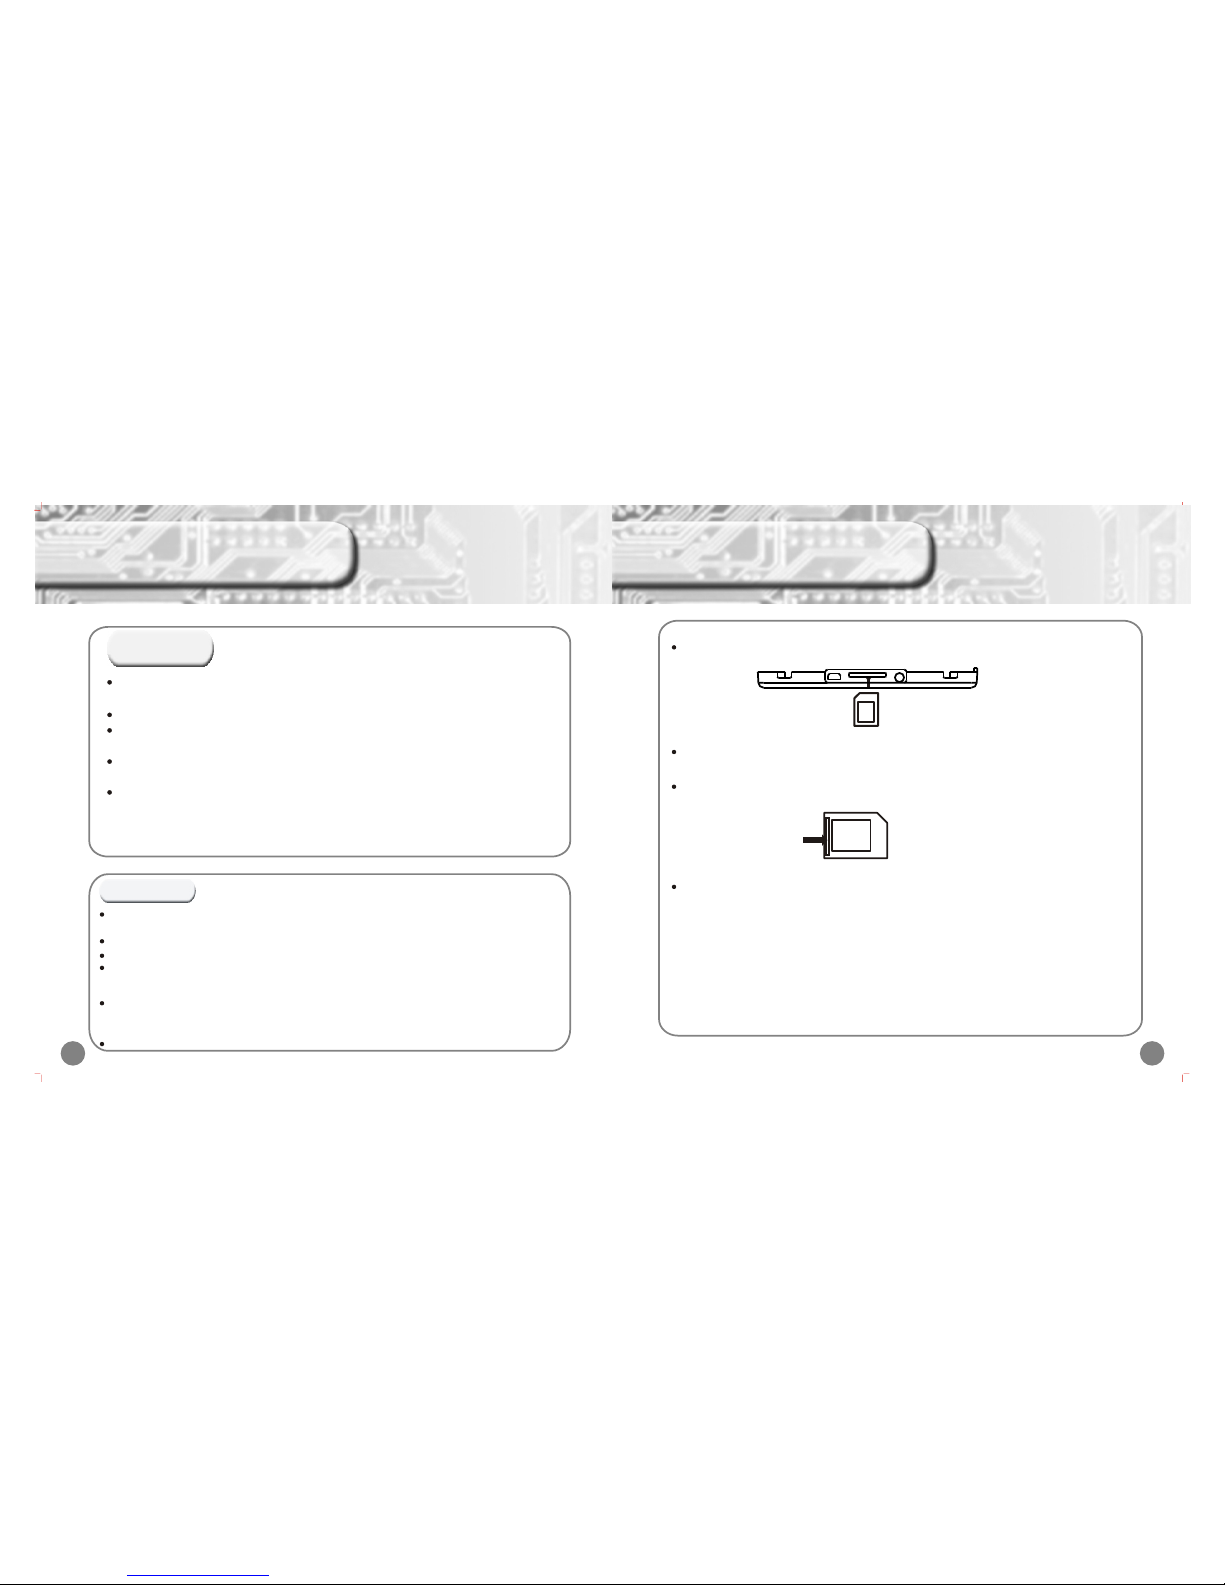
Use of MINI SD card
Put the MINI SD card into the machine
If you want to pull out the MINI SD card, please make sure the card is not loading/using. Then
use your finger to press the MINI SD card once, then the it will slide out automatically.
If the card does not slide out, hold the gap on the card as photo shows below and pull out from
the MINI SD card port directly.
Formatting: Please use this machine to format the MINI SD card, so that all files are in FAT32
format, which this system fully supports.
Note: please turn off your machine before pulling out the MINI SD card, in order to prevent files
damage, data loss or any system error .

26
Formatting Player
Formatting folder / disk
Start formatting
1) Install supporting software.
2) Connect the console to the computer.
Step
Connect the console to computer, and then go to my
computer.
1
Select the console drive/ disk, then click and select
[Formatting].
2
27
Then click [Start]. Then “Warning” pop up window appears, please click
[Confirm] to start formatting.
3 4
When formatting complete, please click [confirm]. The Click [Close] to exit from formatting function.
5 6
If the player cannot read or write, please use Windows formatting tools to format the disk,
then the console should be able to read or write the files. Usually choosing quick format
functions will just deletes all files in the folder /disk.
Formatting Player
my computer
The operation to format the player is the same as that of to the WINDOWS's disk.
Please backup the important information. It is not available once formatted.
Cannot turn on the machine
(a) Battery may be out of power. Please recharge the battery and it will turned on.
(b) If it is a program error, press “RESET” button.
Turn off suddenly when using
(a) Battery may be short for power. See the power indicator on the screen.
(b) Once you set the Turn off timer in a short time, if you do not run the player or press any
key, the console will be off automatically.
Screen turning dark in a short period of time
Please check if the power saving mode is “ON” for a short timing setting. You can extend the
power saving time to prevent screen turning dark suddenly.
Why my computer cannot identify the console?
Please check if the console is on yet, is display on main menu or any error with the computer
USB plug (any error or short for battery.)
It might cause by the computer operation system error, so please reset the computer and the
console or there might be a failure in the drive.
Why my computer cannot connect to the console?
This might because the USB cable is not fully connected, or the USB cable is not within 4,5V-
-5V electronic circuit. What's more, the length of the interface is different between power
cable and data cable, as a result, data between computer and player can not be exchanged.
Why my computer cannot connect to the console?
This might because the USB cable is not connected well, or the USB cable is not within 4,5V-
-5V electronic circuit. What's more, the length of the interface is different between power
cable and data cable, as a result, data between computer and player can not be exchanged.
Product details
28 29
Frequent Ask Questions
File Uplo ad , Downlo ad Questions
Functional Questions
Ite ms
Voice Form at
Sound system
Broadcast
mode
Deta il s
Norm al / Jazz/ Pre vail / Rock / Classic / Vocal / Bass
Multi broadcast model : Shuffle , Shuffle Repeat/ Normal/
Repeat track / Repeat all
Max output
fre quency
LCD
Recorder
Remove storing
function
3 inch color LCD, 1600 million color ( 320 x 240 pixels)
MP3 re cord functi on
Removable hard disc s.
TH D
PC connection
Supported
soft ware syste m
Soft ware
US B 2 . 0(H i gh spe e d)
Windows 98 / 2000 / XP (Win2000/X P or above)
≤3%
≥10 m W×2
Quick and convenient player management soft ware.
Music Format Support MP3 / WMA / APE / FLAC/RA etc..fo rmat
Support RM / RMVB / MP4 / 3GP / AVI / ASF / MOV / MPE / DAT / FLV /
MPEG/ MPG format
Picture Format Support JPG/G IF/PNG/BMP etc..fo rmat
Any changes in specifications or technology will not be informed.

Question about music playing
30
Frequent Ask Questions
Why the nomimal memory space is differernt from that shown on the screen?
The nominal memory space is 128M, however according to the difference between 1000 and 1024
caculation method, after formating the memory space should be 125M.( Just like formatted
software in 1.44M will turn to 1.38M) . The difference in memory space between PC and MP3 is that
this space is used to store player software and GB Character Base.
Cannot find saved files?
a)Data is saved in MINI SD card , and can be read by SD card firstly.
b)Date is not saved. Data transmission must be cutdown.
The computer unable to identity the console hard disk after connection?
If you are using Windows 98 or lower Windows version, please install the driver and connect the
console to computer again.
Please check if the USB cable and plug are connected probably.
Why the console is locked?
While the data is transferring and formatting, if the connection is disconnected, it will cause console
system error or locked. The transferring data speed should follow the console display speed, when
the data display stop, which means data transmission completed. Notes: Please make sure safely
disconnected with the computer before you unplug the USB cable connection from the
computer. Otherwise it might cause system error or locked.
Note: Please do not disconnect the connection between the console and the computer, while the
data is transferring or formatting.
Why downloaded WMA file cannot play?
Download WMA format file cannot play in this machine, because WMA file is copyright protected file
You can make WMA by yourself. Please be aware not to choose copy right protection when you use
WMP to make WMA.
Why the movie player, music player cannot play?
Please check on the menu to make sure your selection is correct.
Popular Media Player manuals by other brands


Hyundai
Hyundai H-F2010 instruction manual

ADS Technologies
ADS Technologies Instant Music RDX-150 user manual

Sony
Sony Walkman NW-ZX2 manual

Winmate
Winmate OMIW-OPS PC Module user manual

Panasonic
Panasonic CQC1401U - AUTO RADIO/CD DECK installation instructions

American Audio
American Audio VMS2 User guide and reference manual


