T195SV Vapor Recovery Vent
Instruction & Maintenance Manual
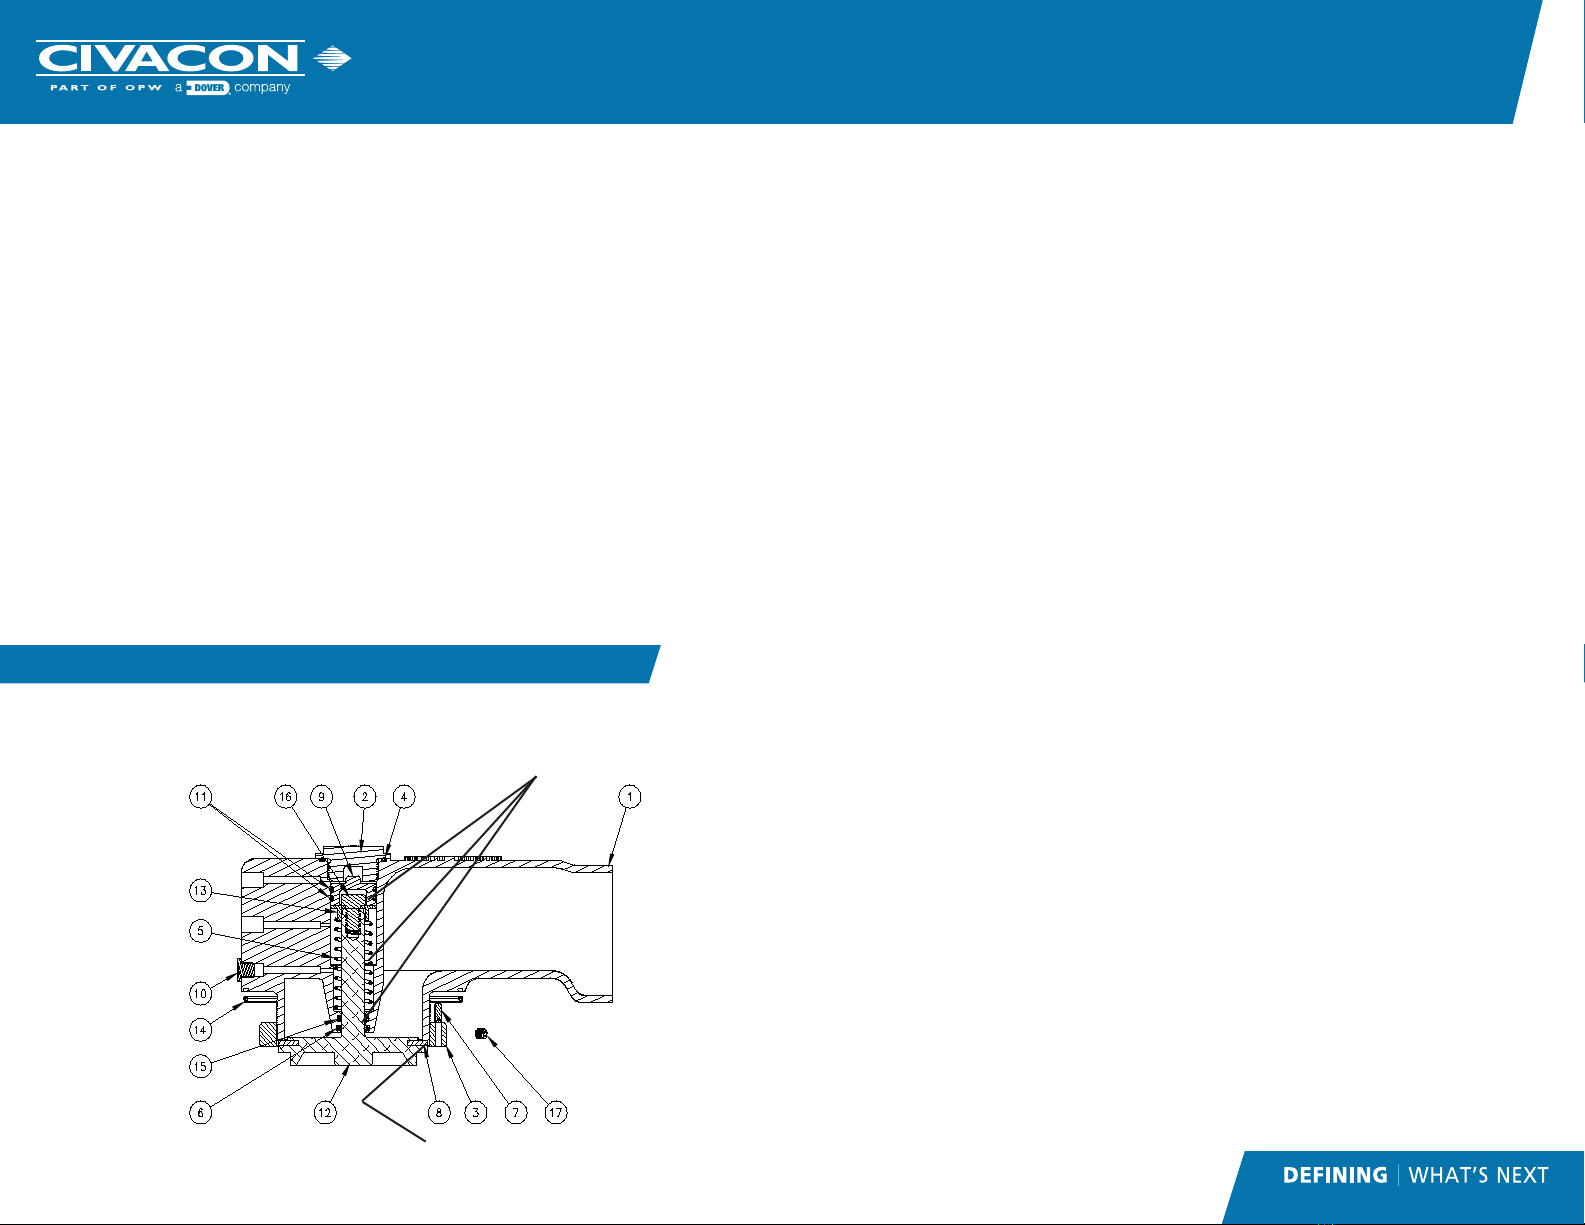
Product Description
Civacon’s T195SV sequential vapor recovery vent design increases flow while
loading and unloading. This vent is designed to work on a 20” Manhole
cover with or without mounting bolt holes. The o-ring will seal on the outside
diameter of a bolt pattern. The T195SV conforms to API 1004 and EN13083
regulations.Civacon’s T195SV is a direct replacement for the 1985SV and all
competitors’ vapor recovery vents. Compatible with diesel, biodiesel, gasoline,
ethanol and methanol
WARRANTY
All parts and products are thoroughly inspected and tested from the time raw
material is received at our plant, until the product is completed. We guarantee
that all products are free from defects in materials and workmanship for a
period of one year from the date of shipment. Any product that may prove
defective within said one year period will, at our discretion, be promptly
repaired, replaced or credit given for future orders. This warranty shall not apply
to any products which has been altered in any way, which has been repaired by
any party other than an authorized service representative, or when such a failure
is due to misuse or condition of use. We shall have no liability for labor costs,
freight costs or any other costs or charges in excess of the amount of invoice
for the products.
THIS WARRANTY IS IN LIEU OF ALL OTHER WARRANTIES, EXPRESS OR
IMPLIED AND SPECIFICALLY THE WARRANTIES OF MERCHANTABILITY
AND FITNESS FOR A PARTICULAR PURPOSE.
WARNING!!
CIVACON products should be used in compliance with the applicable federal,
state and local laws and regulations. Product selection should be based on
physical specifications and limitations, compatibility with the environment,
and the material being handled.
CIVACON MAKES NO WARRANTIES OF
FITNESS FOR A PARTICULAR PURPOSE.
TECHNICAL ASSISTANCE
If at any time during the installation a question arises that is not covered in this
manual or with any other applicable documents feel free to call the Customer
Service Department or visit our website at www.civacon.com.
In the U.S., call 1-888-526-5657
In all other countries, call your local agent.
Manual
This manual contains the inspection, maintenance schedule and instructions for
repairing and replacing parts for the T195SV vapor recovery vent. The following
schedule, based on the environmental conditions in the northern United
States, is only a recommendation: Inspection and maintenance intervals must
be adjusted according to use and operating conditions.vents. Compatible with
diesel, biodiesel, gasoline, ethanol and methanol
NOTE: All information subject to engineering and/or other changes. All trade names are copyrighted. Patents Pending. ©2018 Civacon. ©2018 Delaware Capital Formation, Inc.
All Rights Reserved. DOVER and the DOVER logo are registered trademarks of Delaware Capital Formation, Inc., a wholly-owned subsidiary of Dover Corporation.
www.civacon.com 9393 Princeton-Glendale Road Hamilton, Ohio, USA 45011
Phone: (800) 422-2525 Fax: (800) 421-3297
Actuating Port
Sequential
Out Port
Exhaust
Port
01-10-002PA Apr 2018