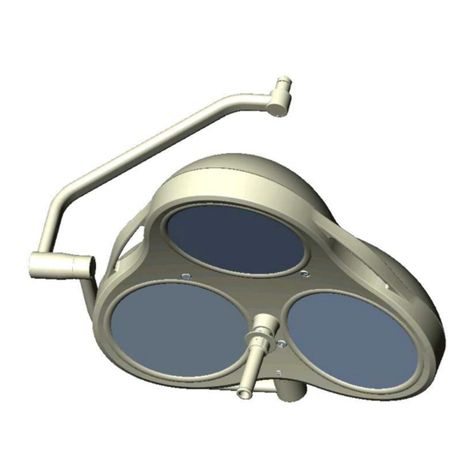
Dr. Mach Mach 380 User manual

Mach 380 / Mach M3 Stand model Dr. Mach
Lamps and Engineering
59520001 Edition 10 11.08.2004 / Bak Page 1/14
M
Mo
ou
un
nt
ti
in
ng
g
i
in
ns
st
tr
ru
uc
ct
ti
io
on
ns
s
M
MA
AC
CH
H
3
38
80
0
/
/
M
MA
AC
CH
H
M
M3
3
S
ST
TA
AN
ND
D
M
MO
OD
DE
EL
L
Mach 380F stand lamp_______________________________________Order No. 380 530 1200
Mach 380DF stand lamp _____________________________________Order No. 380 630 1200
Mach M3 F stand lamp_______________________________________Order No. 390 530 1200
Mach M3 DF stand lamp _____________________________________Order No. 390 630 1200
Accessories
Mach INTCON, light intensity control at additional
bar on cardanic bow of the lamp ______________________________Order No. 9005 0100 03
Mach SWITCH, mechanic
ON/OFF switch at cardanic bow _______________________________Order No. 9009 0000 01
Clamp rail _________________________________________________Order No. 74961002
Table _____________________________________________________Order No. 74961004
Plug strip__________________________________________________Order No. 74961005

Mach 380 / Mach M3 Stand model Dr. Mach
Lamps and Engineering
59520001 Edition 10 11.08.2004 / Bak Page 2/14
List of contents
1. Mounting the stand tube to the stand foot.........................................................page 3
2. Mounting the central spring arm to the stand tube............................................page 5
3. Mounting the lamp to the central spring arm.....................................................page 6
4. Cleaning............................................................................................................page 7
5. Adjusting the spring arm...................................................................................page 7
6. Electrical connection.........................................................................................page 9
7. Changing the fuses...........................................................................................page 10
8. Technical data...................................................................................................page 11
9. CE-mark............................................................................................................page 12
10. Disposal............................................................................................................page 12
11. Dimensions.......................................................................................................page 13
12. Spare parts .......................................................................................................page 14

Mach 380 / Mach M3 Stand model Dr. Mach
Lamps and Engineering
59520001 Edition 10 11.08.2004 / Bak Page 3/14
Extent of supply:
•Allan key/ DIN 911-5, -3 and screws
•Central spring arm
•Lamp Mach 380 / Mach M3
•Stand tube pre-mounted with transformer housing and rollers
1. Mounting the stand tube to the stand foot
Loosen two screws 1 before mounting each foot.
Then insert the four feet and fix them with the
screws (do not tighten!)
For mounting the stand foot proceed as described
in the enclosed figures and drawings.
L = long feet
S = short feet
Attention!
After fixing the feet, tighten all sixteen screws
uniformly!
Push together both tubes as shown in the photog-
raphy.
Connect the two cables (see plug-in-connection S
in the left photography).
L L
K
K
1
S

Mach 380 / Mach M3 Stand model Dr. Mach
Lamps and Engineering
59520001 Edition 10 11.08.2004 / Bak Page 4/14
Slightly tighten the two parts of the stand tube at the
intersecting point by using the two braces.
Preview of the covers and parts to be mounted
Each mounting is described separately below.
Remark:
The number of covers can be different depending
on the design of the stand.
Optionally the stand can be ordered with a table.
Fix the table above the plugs using the four screws
included in the scope of supply.
Then attach the open cover A1 (included in the
scope of supply) above the plugs.
Slip the enclosed handle over the stand tube and fix
it with the screws (2 pcs.) and lock washer (1 piece)
included in the scope of supply (see photography).
braces
intersecting
point
A4
A3
A2
A1

Mach 380 / Mach M3 Stand model Dr. Mach
Lamps and Engineering
59520001 Edition 10 11.08.2004 / Bak Page 5/14
Put the lower protective cover A2 on the stand tube
and fix it.
If necessary, loosen the screws at the two braces in
order to arrange the handle in horizontal position.
Attention:
Then tighten all six screws.
Now put the upper protective cover A3 on the stand
tube and fix it.
Mount the open cover A4 included in the scope of
supply.
The stand can be ordered optionally with a clamp
rail.
This clamp rail is fixed with the enclosed two
screws above cover A3.
A2
A3
2. Mounting the central spring arm to the stand tube
For mounting the central spring arm to the stand
tube proceed as follows:
•Insert journal 1of the spring arm into stand
head 2. The electrical connection is ensured by
a cable with plug inside the stand head.
•Make sure, that stop pin 3at the spring arm lies
in countersinking 4at the stand head as shown
in the figure.
1
View of the spring arm from below
3 4 2

Mach 380 / Mach M3 Stand model Dr. Mach
Lamps and Engineering
59520001 Edition 10 11.08.2004 / Bak Page 6/14
3. Mounting the lamp to the central spring arm
Preparatory work
Attention!
Power off the on-site power supply and protect
it from being switched on again.
Attention!
Danger of injury: The spring arm, when it is
pressed down, can jump up suddenly and cause
injury.
During the installation of the end device, do not
allow anyone to be within the swiveling range of
the spring arm.
•Turn mounting hole 5in the sleeve 1down-
wards.
•Remove the brake screw 4at the bottom side of
sleeve 1.
•Turn sleeve 1by 90 degrees and remove the
end device securing screw 2.
•Turn sleeve 1by 180 degrees and remove the
second end device securing screw 2.
•Remove the protective cap 3.
Mounting
Note: Maximum lamp / device weight: The lamps
/ devices must not exceed the weight of the
mounted spring system. For details about the
spring system please refer to the type plate of
your ACROBAT 2000.
Spring version: 10,0 – 15,0 kg
•Insert the end device 6into the mounting of the
spring arm.
Attention!
Danger of injury: Hold the end device to avoid
its falling down.
•Tighten the first end device securing screw 2.
•Turn sleeve 1by 180 degrees and tighten the
second end device securing screw 2.
•Turn sleeve 1by 90 degrees and tighten the
brake screw 4.
•Adjust the brake force so the lamp / the end
device always keeps its set position.
•Check the firm seating of the end device.
•Adjust the spring force as described in chapter
8.2.3.
•Adjust the verrtical limit as described in chapter
8.3.3.
1
2
2
4 3
5
1
2
10
2
64
5

Mach 380 / Mach M3 Stand model Dr. Mach
Lamps and Engineering
59520001 Edition 10 11.08.2004 / Bak Page 7/14
DANGER OF INJURY!
During the transport of the stand with lamp
tip the stand for maximum 5° to avoid dan-
ger of injury!
Each delivered stand has a sticker with this
warning.
In case the stand is moved when positioning
the OT-lamp, please make sure, that all roll-
ers are moveable (brakes are loosened, no
cables in the movement range of the stand)!
4. Cleaning
The stand has a high-quality surface, which can be
cleaned with conventional cleaning agents.
Pay attention to the following during cleaning:
- Never wipe over the stand with a dry cloth.
- Only use disinfectant with less than 20% alco-
hol.
Alc. ≤20 %
5. Adjusting the spring arm
Height adjustment
At delivery the spring arm is set in the horizontal
position.
The vertical movement of the spring arm can be
enlarged up to 45 degrees upwards.
Attention!
Power off the on-site power supply and protect
it from being switched on again.
•Power off the pendant system / pull out the
power plug and protect the pendant system
from being switched on again.
•Remove the two Philips screws 4and take off
the covers 3.
•At the position marked Xyou can see the ad-
justing nut 5.
•Adjust the nut 5with the enclosed metal pin.
•Mount the two covers 3and fix them with the
two Philips screws 4.
•Check the firm seating of the covers 3.
X 3
4
5

Mach 380 / Mach M3 Stand model Dr. Mach
Lamps and Engineering
59520001 Edition 10 11.08.2004 / Bak Page 8/14
Adjusting the spring force
To adjust the spring force make sure that the spring
arm with the lamp / device can come to rest in any
desired position.
•Insert the Allan key width 5 in the hole 6.
If the spring arm drops, the spring force is too
low:
- Rotate the adjustment screw to the left (counter
clockwise) in the +direction.
If the spring arm rises, the spring force is too
high:
- Rotate the adjustment screw to the right
(clockwise) in the -direction.
If the spring arm with the lamp / device cannot
come to rest in any desired position after the
spring force has been adjusted, the springs
must be replaced by a service technician.
Hole 6
3
+
SW5
-

Mach 380 / Mach M3 Stand model Dr. Mach
Lamps and Engineering
59520001 Edition 10 11.08.2004 / Bak Page 9/14
6. Electrical connection
Caution:
Always draw plug from mains before doing any work at the lamp, stand or power supply.
The electrical connection between stand tube, spring arm and lamp is ensured by sliding con-
tacts.
Connect the mains supply.
Check the function of the lamp.
Threre can be connected three additional de-
vices to the plug strip of the stand.
Attention: We recommend to consult an
electrician before connecting additional
devices in order to avoid electrical overload
of the stand.
Leakage current
When several devices are connected to one
main plug, the sum of the leakage currents
may exceed the maximum limit.
DANGER
Additional devices
In case the device is used in the patient
area together with other devices, these de-
vices must be supplied by a isolation trans-
former, or connected to the earth protection
system, if the additional devices do not
comply with standards IEC 601-1 and IEC
601-1-1.
For safety reasons the safety plugs are cov-
ered with the cover 15.
For connecting additional devices proceed as
follows:
•Turn off the lamp.
•Loosen the four screws 16 with an Allen key
width 5 and remove the cover 15.
•Connect the additional devices.
•Fix the cover 15 with the four screws 16.
16
15
!
16

Mach 380 / Mach M3 Stand model Dr. Mach
Lamps and Engineering
59520001 Edition 10 11.08.2004 / Bak Page 10/14
7. Changing the fuses
Changing the fuses on the transformer
housing
The fuses 17 at the transformer housing pre-
vent the transformer burning through in the
event of a short circuit.
Visible type 5x20/2,5A/250V/T 250 V
•Turn off the lamp.
•Turn the black fuse holder 18 ¼ of a rota-
tion anticlockwise with a screwdriver.
•Change the fuses.
•Insert the fuse holder 18 under slight pres-
sure and rotate in a clockwise direction
(bayonet catch).
17,18
Changing the fuses inside the trans-
former housing
The fuse 19 inside the transformer housing
protects the secondary side of the transformer.
Visible type 5x20/10A/250V/T 250 V
•Turn off the lamp.
•Remove the cover of the transformer hous-
ing. For removing the cover loosen the four
plastic quick-lock fasteners with an appro-
priate screw driver.
•Remove the black fuse holder 20 with an
appropriate tool.
•Exchange the fuse.
•Mount the fuse holder 20 under slight pres-
sure.
•Mount the cover of the transformer housing.
19,20

Mach 380 / Mach M3 Stand model Dr. Mach
Lamps and Engineering
59520001 Edition 10 11.08.2004 / Bak Page 11/14
8. Technical data
Each mounted lamp, that leaves our factory,
has the model type applied on the lamp hous-
ing and all technical data mentioned on the
nameplate.
Nameplate
~ Wechselstrom Alternating current
Pr Primärseitig 230V / 0,75A Primary side
Sek Sekundärseitig 22,8V AC / 7,1A Secondary side
Hz Hertz – Frequenz 50 / 60Hz Frequency Hertz
Sicherung 5x20 / T2,5A / 250V Fuse
Schutzgrad Type „B“ Class of protection
Symbols and their meaning
Symbol IEC-publication Description
~ IEC 417-5032 Alternating current
IEC 417-5031 Direct current
IEC 417-5019 Protective conductor
IEC 348 Attention, observe enclosed documents
IEC 417-5008 Off (Supply, disconnected from mains)
IEC 417-5007 On (Supply, connected with mains)
IEC 417-...
IEC 878-02-02 Class of protection type B
!

Mach 380 / Mach M3 Stand model Dr. Mach
Lamps and Engineering
59520001 Edition 10 11.08.2004 / Bak Page 12/14
Environmental conditions
Function
Min. Max.
Temperature -10°C +40°C
Relative athmospheric humidity 30 % 75 %
Air pressure 700 hPa 1060 hPa
Transport / storage
Min. Max.
Temperature -10°C +40°C
Relative athmospheric humidity 20 % 90 %
Air pressure 700 hPa 1060 hPa
9. CE-mark
The product “stand ITD” complies with the standards 93/42/EEC for medical prod-
ucts of the European Community’s Council.
10. Disposal
The OT-lamp doesn’t contain any danger goods.
The components of the OT-lamp should be properly disposed at the end of its shelf-life.
Make sure, that the materials are carefully separated.
The electrical conducting boards should be submitted to an appropriate recycling proceeding.
The rest of the components should be disposed according to the contained materials.

Mach 380 / Mach M3 Stand model Dr. Mach
Lamps and Engineering
59520001 Edition 10 11.08.2004 / Bak Page 13/14
11. Dimensions
Example: lamp Mach M3
Swivelling range of the spring arm
upwards 520mm
downwards 630mm
total 1150mm

Mach 380 / Mach M3 Stand model Dr. Mach
Lamps and Engineering
59520001 Edition 10 11.08.2004 / Bak Page 14/14
12. Spare parts
5
4 9
2
11
10
12
3
6 8
1
Item Qty. Name EDVNO Remark
1 1 Stand for OT-light 74961001
2 1 Handle 74961003
3 1 Block transformer 300VA 67010208 Not shown
4 1 Central spring arm AC2000 12,0 – 18,0kg 74803005
5 1 Sliding contact plug 67330002 Not shown
6 2 Fuse T2,5A 67370006
7 1 Fuse T10A 67370013 Not shown
8 1 Rocker switch ON/OFF 67340012
9 1 Clamp rail 74961002 Option
10 1 Table 74961004 Option
11 1 Plug strip 74961005 Option
12 1 Device switch 67340006 Option
Dr. Mach GmbH u. Co., Flossmannstrasse 28, D-85560 Ebersberg
Tel.: +49 (0)8092 2093 0, Fax +49 (0)8092 2093 50
This manual suits for next models
1
Table of contents
Other Dr. Mach Outdoor Light manuals