E-matic SportsCam EVW535W User manual
1
EVW535W

2
Thank you for buying our SportsCam with Wi-Fi. Before starting to use
this product, please read this manual carefully to maximize its performance
and extend the life of the product.
Appearanceand Buttons
1. Shutter button 8. Micro USB port
2. Microphone 9. Micro HDMI port
3. LCD display 10. Micro SD card slot
4. Lens 11. External microphone
5. Wi-Fi switch and status indicator (red) 12. Battery cover push switch
6. Power / Mode button 13. LED light
7. Infrared signal reception light

3
LCD Display Illustration
Turn on the Wi-Fi DV, the LCD will display the following status and
settings:
1. Camera mode
2. Video recording mode (default)
3. Wi-Fi icon (display when enabled)
4. SD card icon (display when loaded)
5. Resolution icon:
In camera mode, HI stands for 8 Mega Pixels (3264x2448), and in video
recording mode, it stands for FHD (1920x1080, 30fps);
In camera mode, LO stands for 5 Mega Pixels (2592x1920), and in video
recording mode, it stands for 720P (1280x720, 30fps);
HILO only displays in video recording mode, standing for 720P
(1280x720, 60fps).
6. Mute mode, displays when enabled, and disabled by default.
7. Counter, displays up to 999.
8. Timer, displays hours and minutes.
9. Battery icon: current battery level of the camera.
Note: The above icons may vary according to the status of the DV.
4
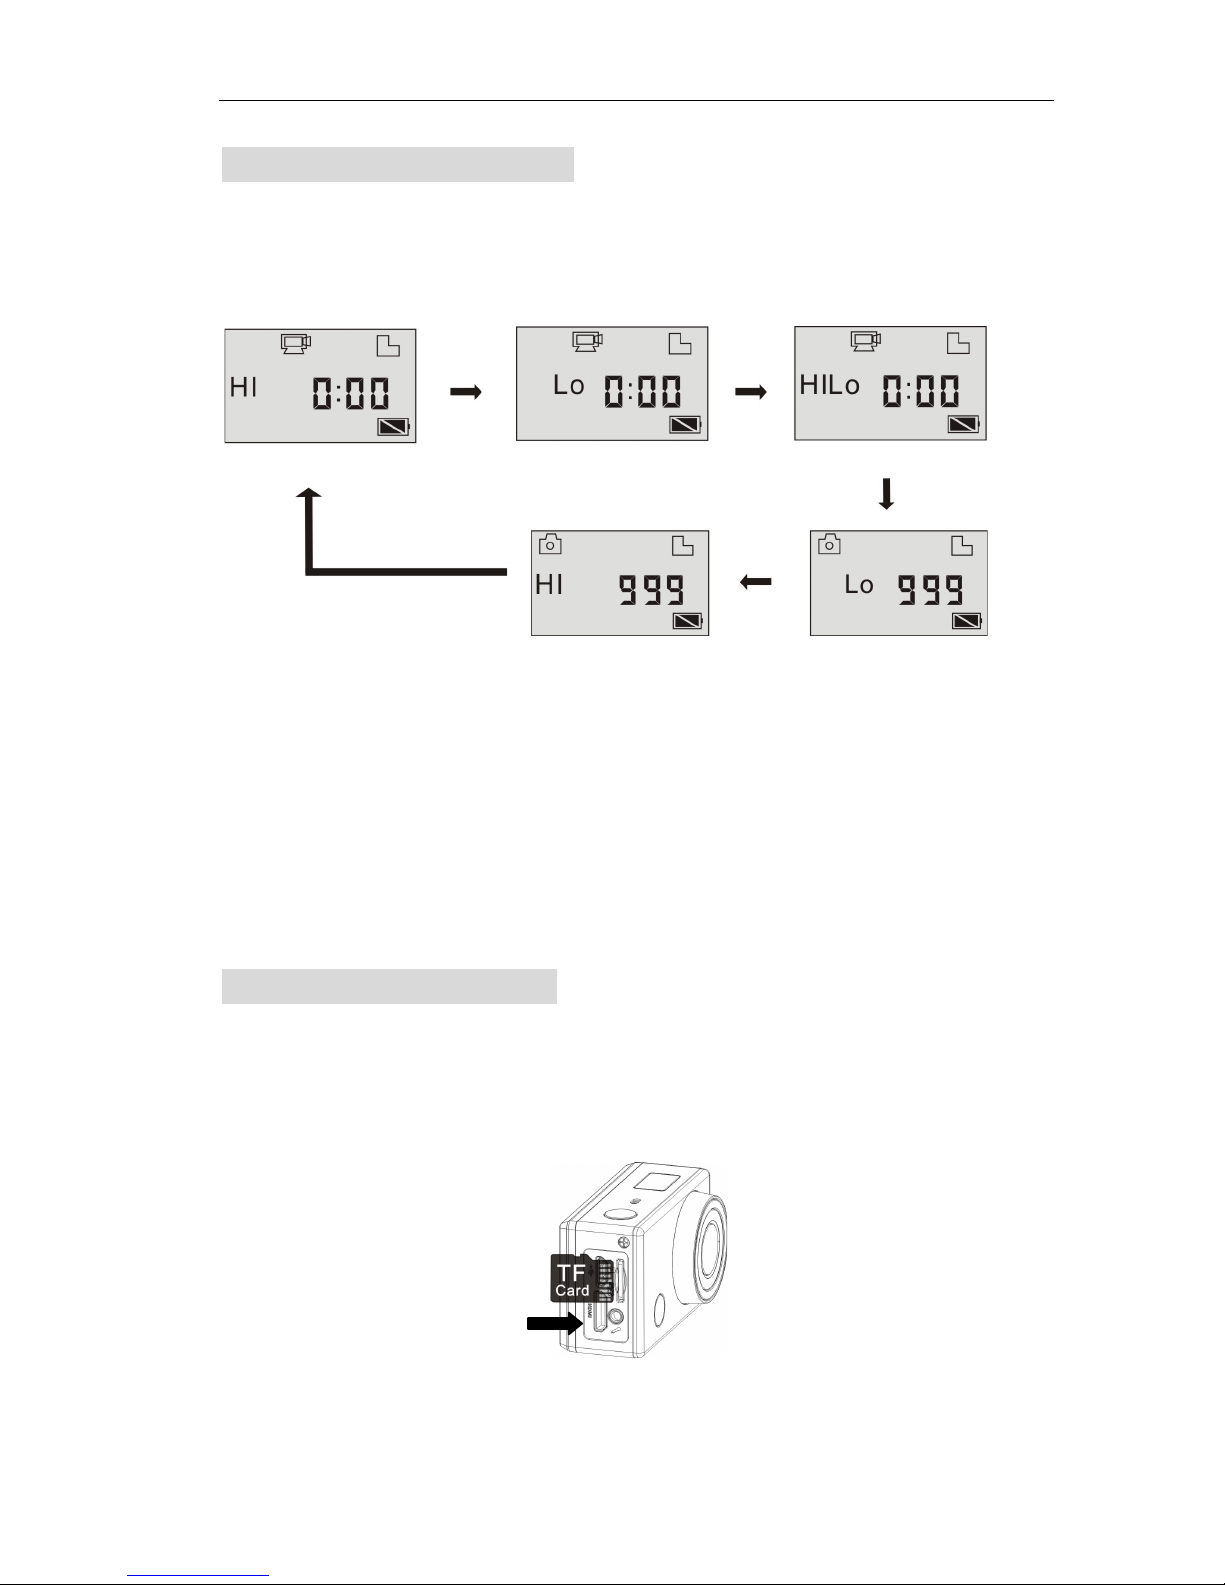
Working Mode Flow Chart
After turning on the DV, you can press the Power/Mode button to
switch the following modes in turn:
In video mode, press the Shutter button to start recording, and press it
again to stop;
In camera mode, press the Shutter button to take a photo.
Using your Wi-Fi Camera
When you use the camera for the first time:
1. Insert a microSD or microSDHC card, as shown in the following
picture.
A high speed card of at least Class 4 is recommended. When using time delay
Camera mode (8MP)
Camera mode (5MP)
Video mode (720P, 60fps)
Video mode (720P, 30fps)
Video preview mode (1080P default)

5
or recording a video in professional mode, the card of Class 10 is required.
Turn off the camera before inserting or removing the card.
2. Use the battery
2.1 Install the battery.
Please install the lithium battery correctly as shown in the following graphic.
!
!
Figure 1 Figure 2Figure 3Figure4
Step 1. Push the battery cover switch to the lock position ( ), and remove
the battery cover. As shown in figure 1.
Step 2. Put the lithium battery into the battery slot. Make sure the electrodes of
the battery are corresponding to the symbols of the DV shell ( ). As shown
in figure 2 and figure 3.
Step 3. Install the battery cover back in place, and lock the switch to the lock
position ( ) to fix the battery. As shown in figure 4.
2.2 Charging the battery.
The camera uses a removable rechargeable lithium battery. When the camera
is off, connect it to aPC via USB cable to charge the battery. During
charging, the status indicator (blue) will light on, and will turn off when
the charging is complete.
Note: Connecting to a PC will not charge the camera if the camera is ON.
6
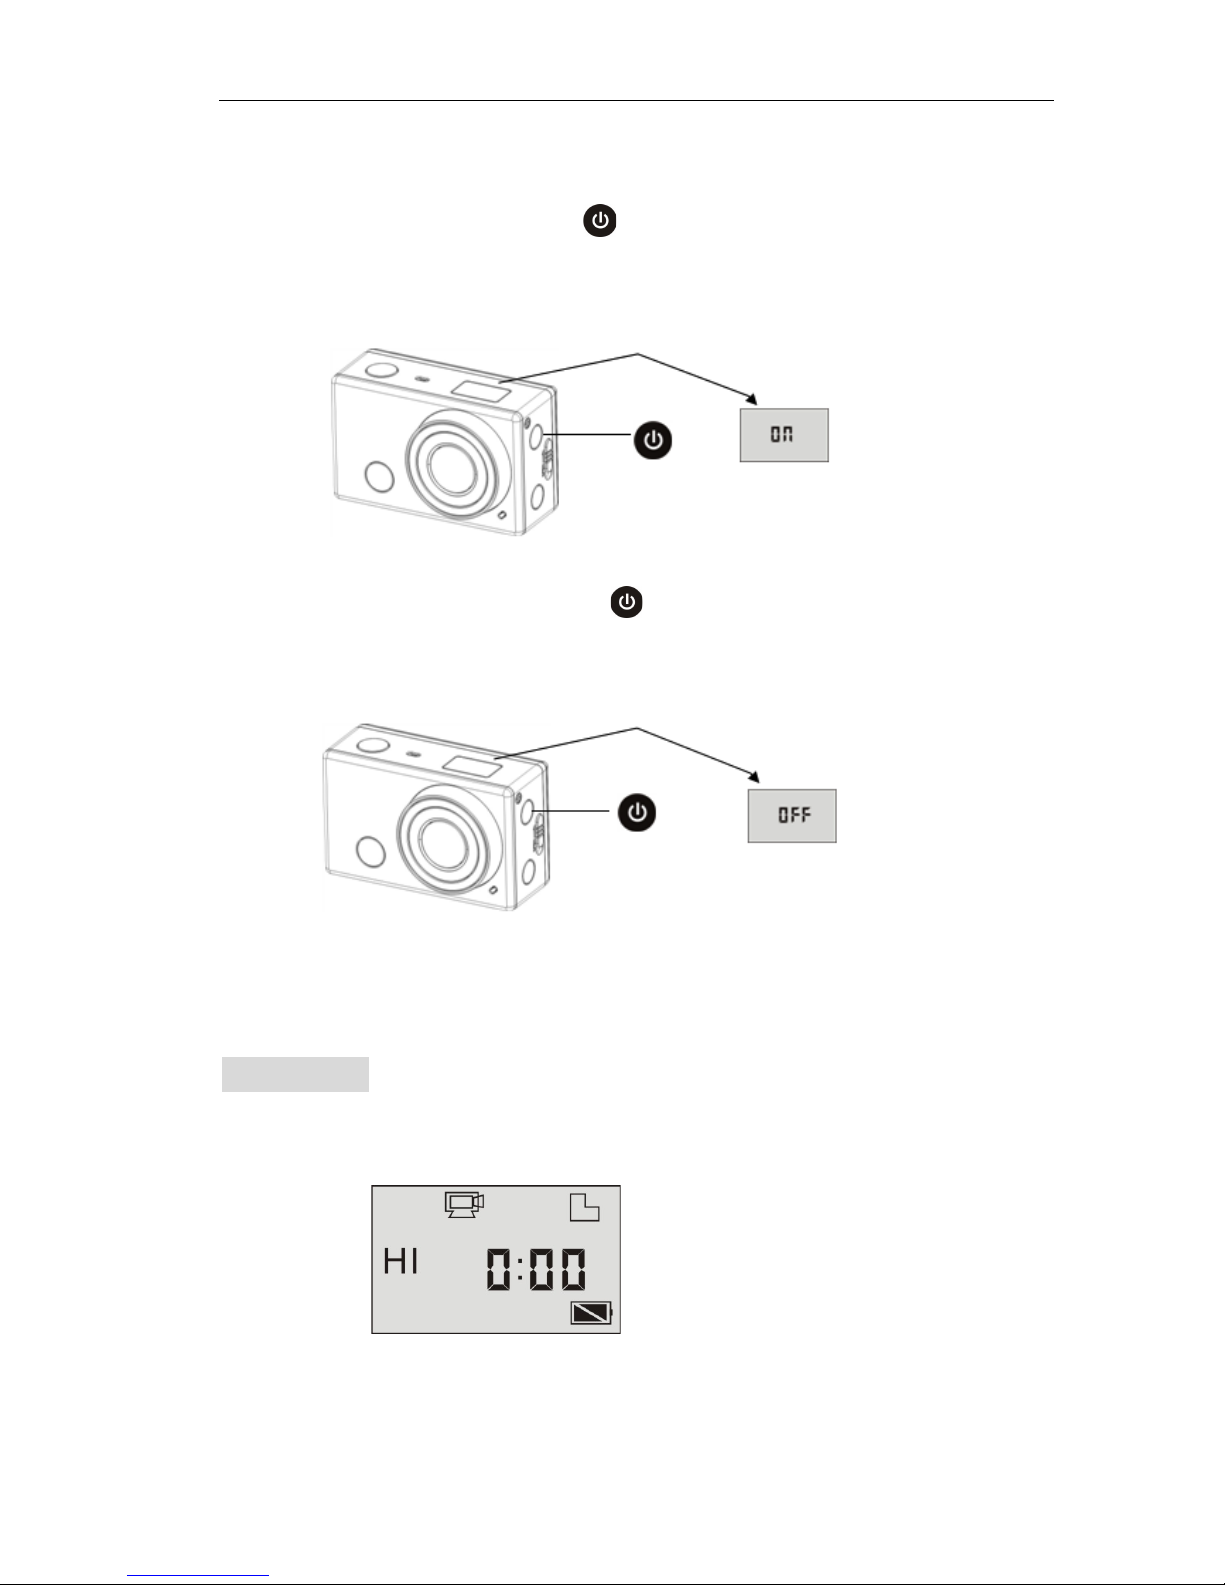
Turn on/off
1. Turn on: press and hold the button for about 3 seconds, the LCD
displays “ON” and a beep can be heard.
2. Turn off: press and hold the button for about 3 seconds, LCD
displays “OFF” and a beep can be heard.
Note: The camera will turn off automatically if it is idle for 5 minutes.
Start to use
Default setting: After turn on the DV, the default setting is as below:
7
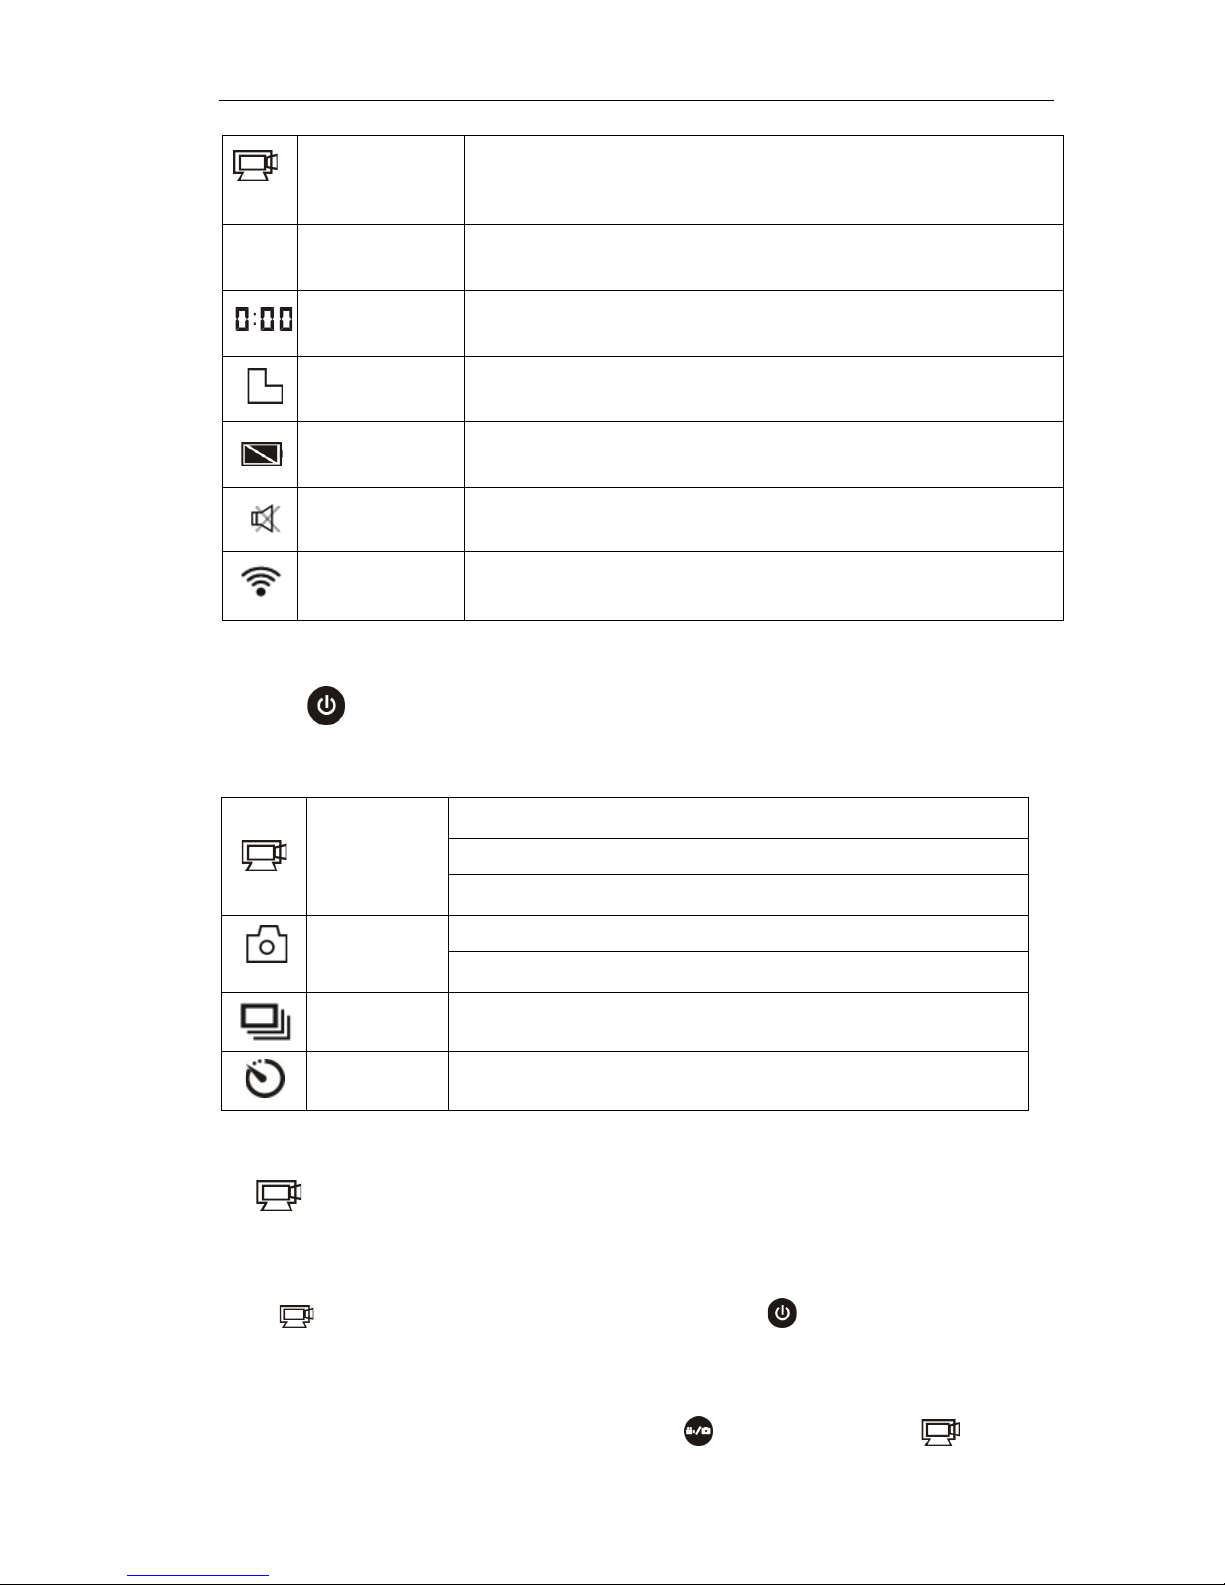
Video
recording mode
icon
The DV is in video recording mode.
HI
Video
resolution
FHD: 1080p@30fps
Recording time
Stands for 0 hour and 00 minute.
SD card icon
Display when a SD card is inserted, otherwise no display.
Battery level
Battery is full
Mute icon
The DV is in Mute mode, no Beep will be heard when pressing
the buttons. It displays only when Mute mode is activated.
Wi-Fi icon
Display when activated.
Shooting modes. The DV provides different shooting modes. Press the
button repeatedly, the following first two modes will be shown on
the DV screen, and other models display on the APP operation.
HI stands for FHD (1920x1080,30 fps) video
Lo stands for 720P (1280x720,30 fps) video
Video
HILO stands for 720P (1280x720,60 fps) video
HI stands for 8M (3264 x 2448) resolution
Photo
Lo stands for 5M (2592 x 1920) resolution
Continuous
shot
The DV supports taking 3 photos continuously (only via App)
Self-timer
In self-timer mode , you can set 0s, 2s or 10s (only via App)
1. Video
To record a video, please check whether the camera is in Video mode. If the
icon isnotdisplayedonthescreen,pressthe button repeatedly until
it appears.
Start recording: Press and release the button, the icon and [:]

8
displayed in LCD will flash. At the same time the red indicator will flash too,
meaning the recording is in process.
Stop recording: Press and release the button, the icon and [:]
displayed in LCD will stop flashing. At the same time the red indicator will
stop flashing, meaning the recording is stopped.
When the SD card is full, or the battery runs out, the recording will stop
automatically, and the recorded video will be saved before the DV turns off.
2. Photo
To take a photo, please check whether the DV is under Camera mode. If the
icon is not displayed on the screen, press the buttonrepeatedlyuntilit
appears.
Press and release the button, a beep will be heard and the red indicator
will flash, meaning a photo is taken. (If you take photos more than 999 copies,
the LCD screen display only 999)
3. Enable/disable Wi-Fi
The Wi-Fi is disabled by default. Press the Wi-Fi button on the side of the DV
to enable it. When you start connecting to Wi-Fi network, the indicator will
flash, and when a Wi-Fi network is connected, the indicator will remain on,
and the Wi-Fi icon will displayed on the LCD screen. (In order to save power,
Wi-Fi will be automatically disabled if no terminal is connected after 30
seconds)

9
4. Enable/disable Mute mode
The buzzer is enabled by default. Under the Video or Photo mode, press and
hold the Shutter button to disable the buzzer and indicator to enter Mute mode.
Under Mute mode, the icon willdisplayonthescreen;pressandholdthe
Shutter button again to exit Mute mode.
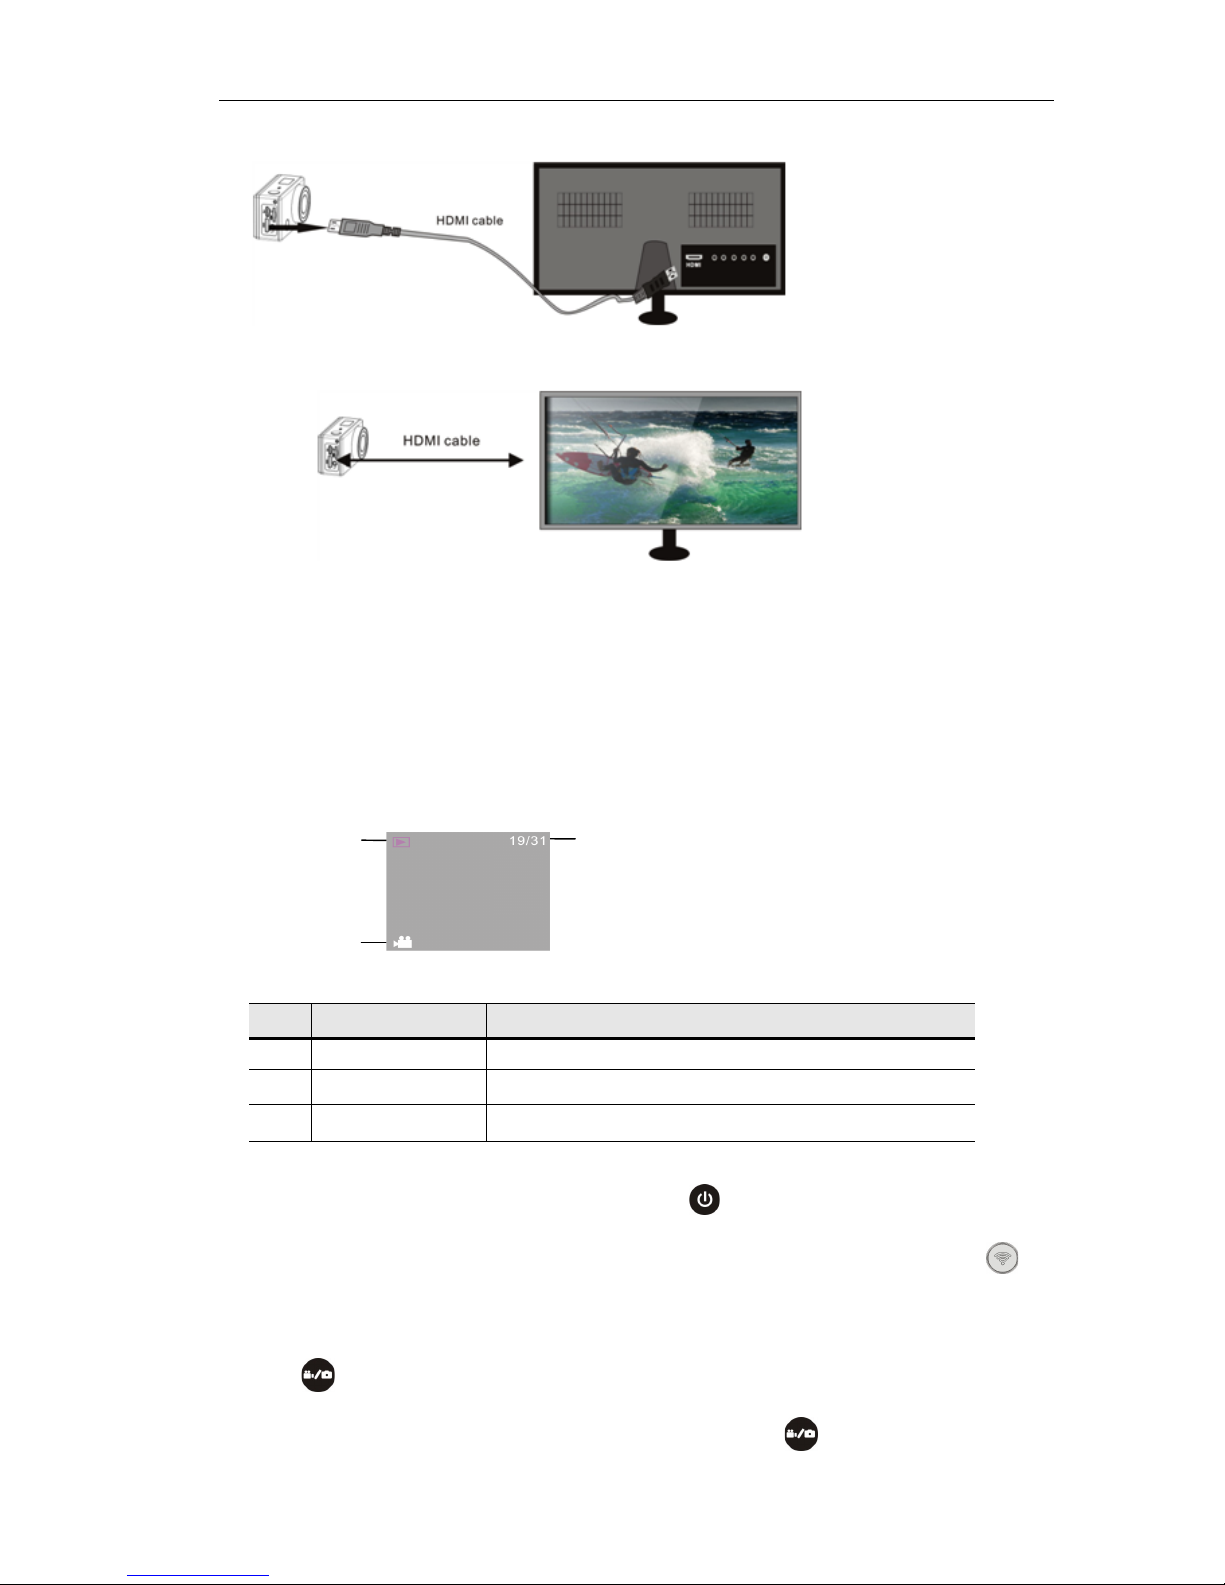
5. Connecting to HDTV
5.1 Connect the camera to and HDTV via HDMI cable (optional)
If you need to transfer the image and audio to an HDTV for playback, insert
the one end of the HDMI cable to the DV, and the other end (output) to the
HD input of the HDTV, as shown in the following figure:
Wi-Fi is disabled by default When Wi-Fi is enabled, the
Wi-Fi icon will display on LCD
Buzzer is enabled by default When Mute mode is enabled,
the Mute icon will display on LCD
10
Note: Before connecting or removing the HDMI cable, stop video
recording, playback and disconnect Wi-Fi.
5.2 When HDTV is connected, it enters Playback mode, the LCD displays as
below:
In Playback mode, press the Power button toswitchbetweenphotosand
videos. When there are several photos or videos, press the Wi-Fi button to
select the photo or video. When a video file is selected, press the Shutter
button to play it, and press the Shutter button again to stop playing.
In Playback mode, press and hold the Shutter button , a prompt of deleting
S/N
Icon name
Description
1
Playback mode
Under Playback mode currently.
2
File number
There are 31 files and you are viewing the 19th one.
3
Video icon
The file is a video.
1
2
3

11
the file or formatting will appear. Press the Wi-Fi button to switch
between deleting or formatting, then Press the Power button to select Yes
or No, and press the Shutter button to confirm and exit.
6. Connecting to PC
6.1 Turn on the camera and connect it to the USB port of the PC via the
attached USB cable. The camera will enter U-disk mode and the LCD will
display as below after connection:
Now you can view the photos or videos taken by camera on PC.
Note: After the camera connecting to PC to enter U-disk mode, you will
see two removable disks displayed in My computer of Windows, one is
the SD card, storing all the photos taken and video recorded by users; the
other one stores the system file information, including a file named
SSID_PW.CFG, containing the AP ID of the camera and the password
for AP login. Users can view this information but cannot modify, delete or
format them.
6.2 In U-disk mode (PCU mode), press the Shutter button toswitchto
web cam mode (PCC mode), and the LCD will display as below:
12
Now you can start using the camera as a web cam through an application. To
return to U-disk mode (PCU mode), press the Shutter button again.
Note: Driver is not required for web cam mode (PCC mode) on Windows
XP (SP3) version or above.
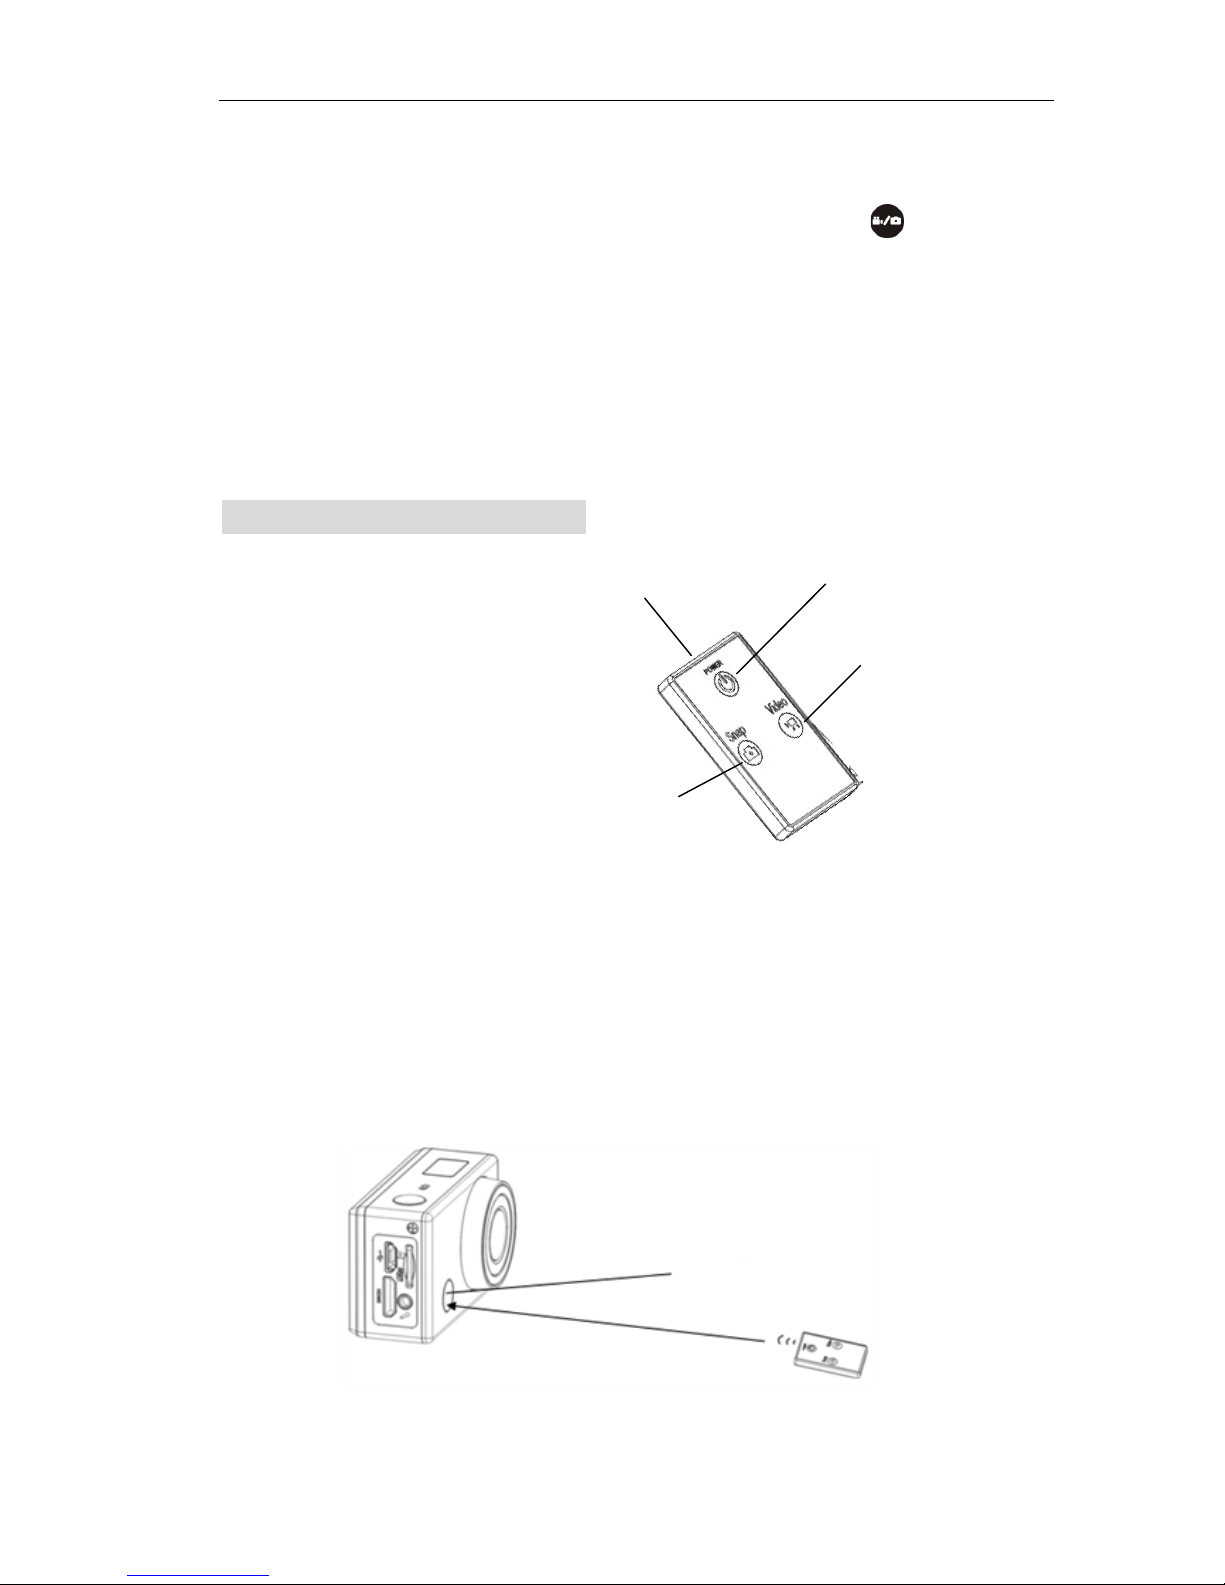
Remote Control Application
Buttons
Instruction
You can use the remote controller to record videos, take photos and shut down
the DV. When using the remote controller, aim the signal emission port to the
infrared signal reception light of the DV, and press the video button, photo
button or power off button.
Signal emission port
Power off button
Video button
Photo button
Infrared signal reception light
13
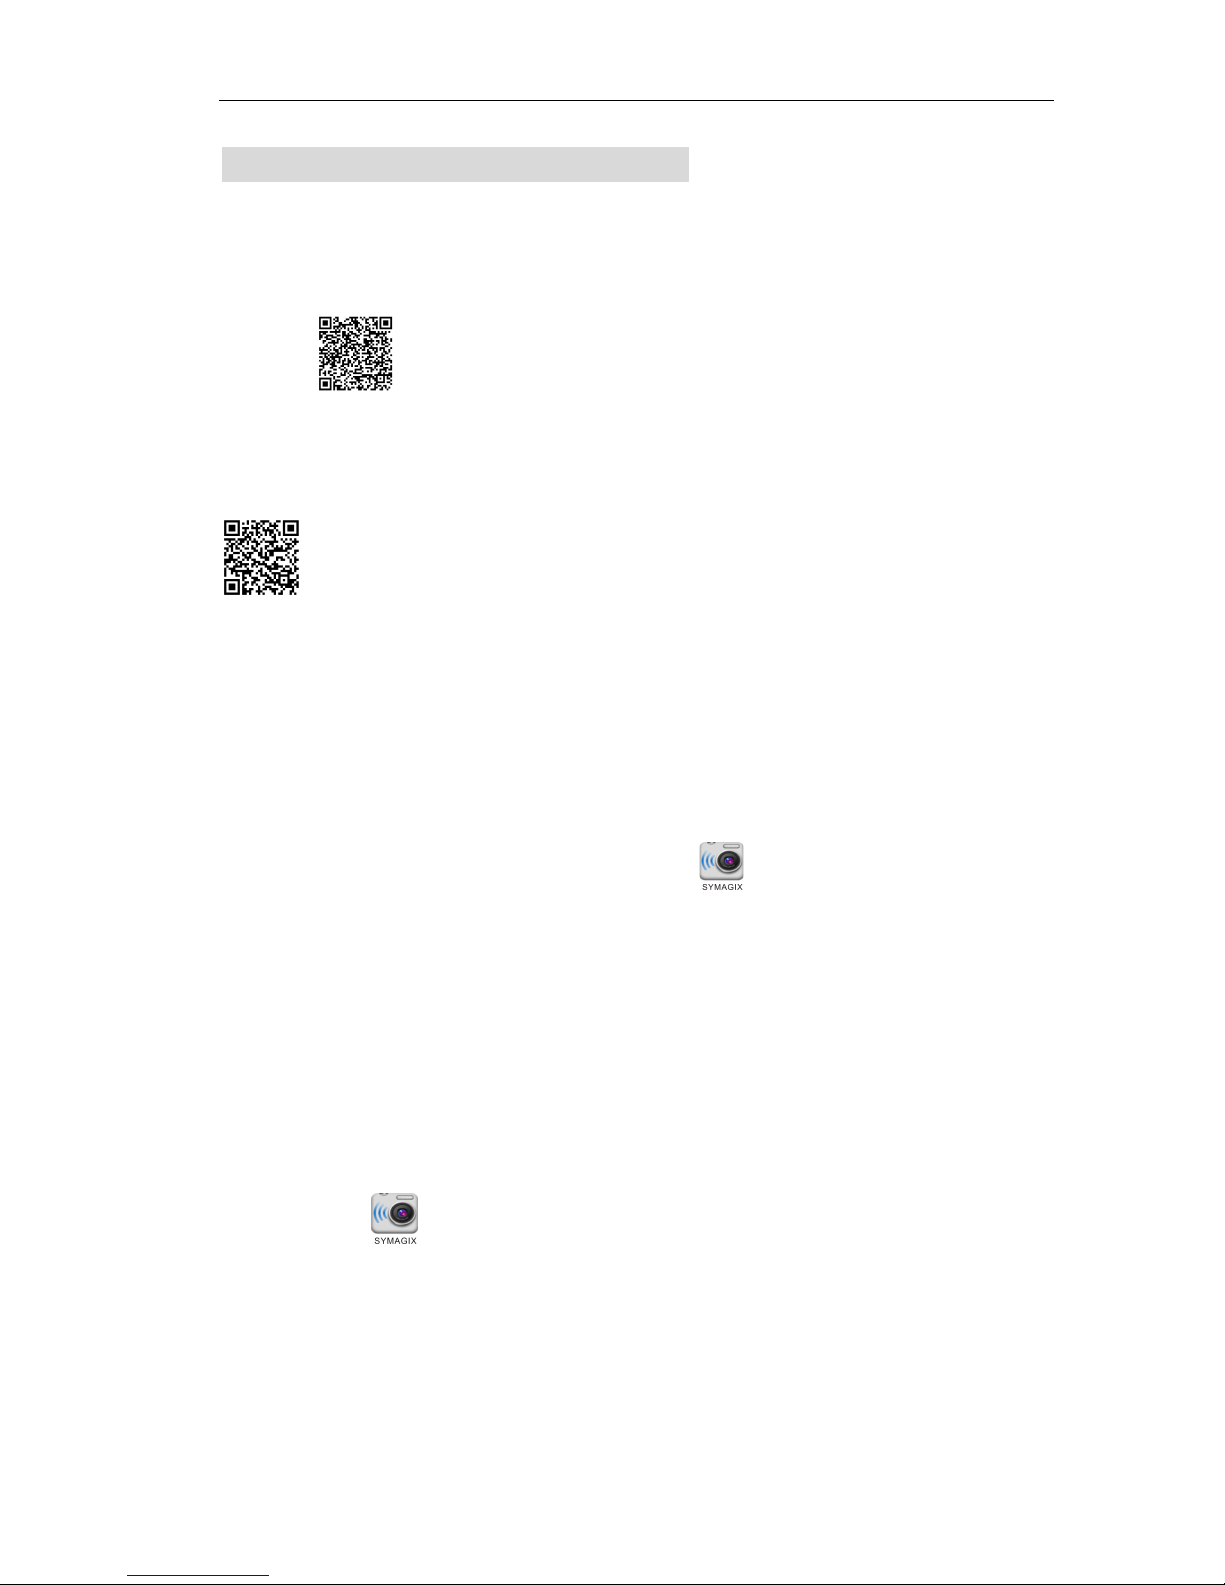
APP (support Android™ and iOS®)
1. How to install an APP
1.1 Search for “SYMAGIX” in Google Play™(for Android OS), or scan the
QR code printed on the gift box to find the APP and install it according
to the instruction.
1.2 Search for “SYMAGIX” in APP Store (for iOS) or scan the QR code
printed on the gift box to find the APP and install it according to the
instruction.
2. Android APP
2.1 Install SYMAGIX APP on your Android phone or tablet. When
installation completes, the LCD will display icon.
2.2 Insert the SD card and turn on the camera, then press the Wi-Fi button to
enable it. You will see the Wi-Fi icon on the LCD.
2.3Enable the Wi-Fi on Android phone or tablet and search for wireless AP
signal SY5000_WIFI, then connect it to DV, until the system displays
“Connected successfully”.
2.4 Click the icon in the App list of the Android phone or tablet to open
it. Now you can preview the image sent by the DV on the phone or tablet and
start operating. The interface is shown in the following figure.
!
!

14
!!!!!!!!!!!!!!!!!!!!!!!!!!!!!!!!!!!!!!!!!!
!!!!!!!!!!!!!!!!!!!!!!!!!!!!!!!!!!!!!!! 1. Video resolution
2. White balance
3. Setup (enter setup menu)
4. Enter Playback mode
5. Shutter button
6. Photo mode
7. Video mode
8. Wi-Fi signal icon
9. Battery icon
!!!!!!!!!!!!!!!!!
3. iOS APP
3.1 Install SYMAGIX APP on your iPhone® or iPad®. When the installation
completes, the LCD will display icon.
3.2 Insert the SD card and turn on the camera, then press the Wi-Fi button to
enable it. You will see the Wi-Fi icon on the LCD.
3.3 Enable the Wi-Fi on iPhone or iPad and search for wireless AP signal
SY5000_WIFI, then connect it to camera, until the system displays
“Connected successfully”.
3.4 Click the icon in the App list of your iPhone or iPad to open it. Now
you can preview the image sent by the DV on the phone or tablet and start
operating. The interface is shown in the following figure.
!!!!!!!!!!!!!!!!!!!!!!!!!!!!!!!!!!!!!!!!!!!1. DV battery icon
2. Video resolution
3. White balance
4. Setup (enter setup menu)
5. Enter Playback mode
6. Shutter button
7. Photo mode
8. Video mode
Note:

15
1. SD card must be inserted if you need to take a photo, record a
video, or download files on the terminal;
2. The Wi-Fi indicator will remain ON when the terminal is
connected to the camera.
Limitations of Liability Statement
The Ematic User Manual may contain or reference links to third-party sites,
however, please be aware that Ematic is not responsible for and cannot control these
other sites. Ematic makes no representations or warranties whatsoever about any
other website which you may access as a result of reading this user manual, or
otherwise. When you access a website that is not owned or operated by Ematic (a
“non-Ematic website”), even one that may contain an Ematic logo, please
understand that it is independent from Ematic, and that Ematic has no direct control
over the content on such website(s). In addition, a link to any such non-Ematic
website does not mean Ematic endorses or accepts any responsibility for the content,
or of any functionalities or services, of such website(s). Furthermore, Ematic makes
no promise, representation or warranty that any non-Ematic website you navigate to
will be free of viruses, worms, Trojan horses and other items of a destructive nature.
The Ematic User Manual is for your exclusive benefit and you assume all risks,
losses and/or damages of whatever nature that may result arising out of your use of
the Ematic User Manual.
Limitation of Liability and Indemnity
To the maximum extent permitted by applicable law, Ematic shall not be liable for
any damages suffered as a result of using, modifying, contributing, copying,
distributing, or downloading the materials, use of the Ematic User Manual or use of
any Ematic product and/or software. In no event shall Ematic be liable for any
indirect, extraordinary, exemplary, punitive, special, incidental, or consequential
damages (including, without limitation, loss of data, revenue, profits, use or other
economic advantage) however arising, whether for breach of contract or in tort,
even if Ematic has been previously advised of the possibility of such damage. You
agree that you have sole responsibility for adequate protection and backup of data
and/or equipment used in connection with the product and software and will not
make a claim of any nature against Ematic for lost data, inaccurate output, work
delays or lost profits resulting from the use of the materials. You agree to indemnify,
hold harmless and defend Ematic, together with its affiliates, parent and subsidiary
entities, successors, assigns, partners, managers, members, employees, officers,
directors and shareholders, from and against any and all damages, liens, liabilities,

16
losses, demands, actions, causes of action, claims, costs and expenses (including,
without limitation, reasonable attorneys’ fees, charges and disbursements, as well as
the cost of in-house counsel and appeals) arising from or related to Ematic, the use
of The Ematic User Manual or any Ematic product and/or software. Some
jurisdictions do not allow the exclusion or limitation of incidental or consequential
damages, so the above limitation or exclusion may not apply to you.
Windows™ is a registered trademark of Microsoft Corp. in the United States and
other countries; iOS®, iPhone®, and iPad® are registered trademarksof Apple Inc.;
Linux™ is a registered trademark of Linus Torvalds. Android is a trademark of
Google Inc. ©2012 Google Inc. Wi-Fi®, the Wi-Fi CERTIFIED logo, and the Wi-Fi
logo are registered trademarks of the Wi-Fi Alliance.
Ematic is not affiliated with Microsoft, Apple, Inc., Linux, or Google, Inc.,
(including Android).
This device complies with Part 15 of the FCC Rules. Operation is subject to the
following two conditions: (1) this device may not cause harmful interference, and
(2) this device must accept any interference received, including interference that
may cause undesired operation.
The Ematic brand and products are owned by Shaghal, Ltd.
Table of contents
Other E-matic Action Camera manuals


